Elektralite LED Pro Line Pancake - USER MANUAL (Version 2) - ElektraLED (a division of Group One)
←
→
Page content transcription
If your browser does not render page correctly, please read the page content below
Elektralite LED Pro Line
        Pancake
   USER MANUAL (Version 2)

       ElektraLED (a division of Group One),
   70, Sea Lane, Farmingdale, NY11735, U.S.A.
    T. +1 (516)-249-3662. F. +1 (516)-249-8870
             WWW.ELEKTRALED.COM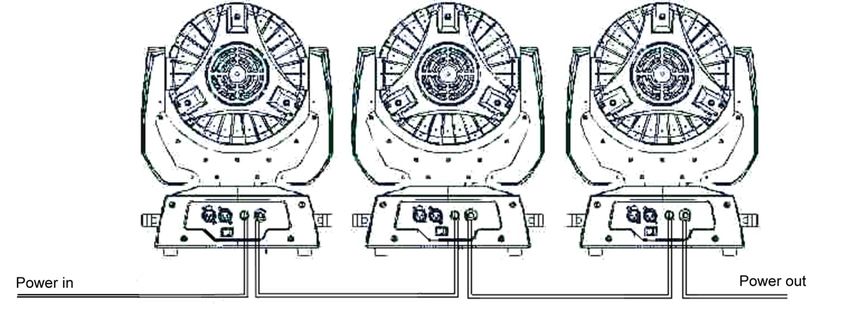
1. Unpacking
Thank you for choosing the Elektralite LED Pro Line Pancake fixture. For your own safety, please read
this manual before installing the device. This manual covers important information on installation and
applications. Please keep this manual for future reference.
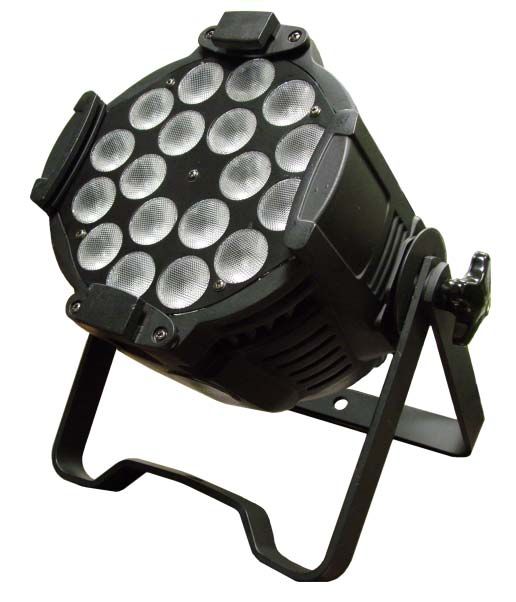
Elektralite LED Pro Line Pancake moving wash uses 108 high powered 3 watt LEDs in a balanced
arrangement giving you incredible output. Please unpack it carefully and check whether it was damaged
in shipping.
The following items should be in the box with the fixture:-
20 feet of Powercon extension cable
DMX 5 pin male to 5 pin female cable
The bracket to mount the fixture to a “c” clamp
2. Safety Instructions.
This device has left the factory in perfect condition. In order to maintain this condition and to ensure a
safe operation, it is absolutely necessary for the user to follow the safety instructions and warning notes
written in this user manual. Elektralite LED Pro Line Pancake is a high voltage fixture. Be careful when
dealing with high voltages.
Please read this manual. If you do not read this manual and damages occur to Elektralite LED Pro
Line Pancake, then it could void the warranty.
During shipping, Elektralite LED Pro Line Pancake may have been exposed to high temperature
changes or humidity changes. So, as a precaution, do not switch Elektralite LED Pro Line Pancake on
immediately. Condensation can damage Elektralite LED Pro Line Pancake so leave Elektralite LED
Pro Line Pancake switched off until it has reached room temperature.
The electric connection must carry out by a qualified person and it is absolutely essential that Elektralite
LED Pro Line Pancake be grounded.
Always disconnect Elektralite LED Pro Line Pancake from the power source, when the device is not in
use or before cleaning it. Only unplug Elektralite LED Pro Line Pancake from the power cord. Never pull
out the plug out by pulling on the power cord.
Please keep Elektralite LED Pro Line Pancake away from children and the general public. Please be
intelligent and use common sense when operating Elektralite LED Pro Line Pancake.
3. General Guidelines.
Elektralite LED Pro Line Pancake is a lighting fixture for professional use on stages, in clubs, theatres,
etc.
Elektralite LED Pro Line Pancake should only be operated at between 120 to 240 volts and only
indoors.
Elektralite LED Pro Line Pancake should not be operated 24/7 (24 hours a day; 7 days a week).
Elektralite LED Pro Line Pancake needs operation breaks to ensure that it will work for a long time
without problems. Please do not shake Elektralite LED Pro Line Pancake and avoid using brute force
when installing or operating it.
When choosing the location to install Elektralite LED Pro Line Pancake, please make sure that it is not
exposed to extreme heat, moisture or dust. The minimum distance between Elektralite LED Pro Line
Pancake and the illuminated surface must be more than 3 feet.
Always mount Elektralite LED Pro Line Pancake with an appropriate safety cable. If you use the quick
lock cam to hang Elektralite LED Pro Line Pancake, please make sure the 4 quick lock fasteners are
locked into position correctly.
Operate Elektralite LED Pro Line Pancake only when you are familiar with the features on the fixture.
Do not permit operation by persons not qualified for operating it.
All modifications to Elektralite LED Pro Line Pancake will invalidate the warranty. There are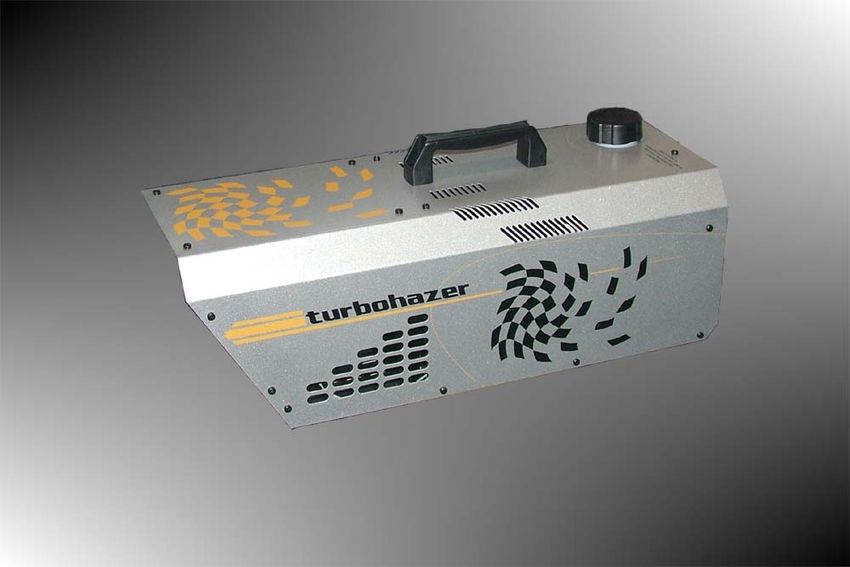
absolutely no exceptions.
If Elektralite LED Pro Line Pancake is operated in any way different to the one described in this manual,
Elektralite LED Pro Line Pancake maybe damaged and the guarantee will be void.

4. Installation
Please refer to the picture below:-

Screw the half cheeseboro or “C” clamp (not provided with the fixture) onto the U bracket supplied with
Elektralite LED Pro Line Pancake.

Insert the quick-lock fasteners of the U bracket into the respective holes on the bottom of Elektralite LED
Pro Line Pancake. Tighten the Camloc fasteners fully clockwise. Please do not use pliers, crest
wrenches and the like to turn the Camlocs. If you do, there is very real likelihood that you will break them.
(These can be replaced at a substantial cost to your boss!)

Pull the safety cable through the bracket on the bottom of the base and over the trussing or any
secondary fixing point. Do not clamp the cable to the U bracket or clamp. That is not a secondary safety
point.

A secondary safety point is any point that will adequately hold Elektralite LED Pro Line Pancake if the U
brackets, cheesboro or the fixtures base breaks or fails. Then the safety cable would be the backup and
stop the fixture from falling to the ground.
5. DMX-512 Control Connection
Connect the provided XLR cable to the female 5-pin XLR output of your Elektralite CP 20 or other DMX
controller. The other end should be connected to the male 5-pin XLR input of the Elektralite LED Pro
Line Pancake. Then daisy-chain out of the first Elektralite LED Pro Line Pancake and into the next
Elektralite LED Pro Line Pancake or other dmx device. Never “Y” split the DMX connection.
If you need more cable, then it should be two core, screened cable fitted with a 5 pin XLR input and
output connector. Please refer to the diagram below.

                                                             5       1
                                                             4       2
                                                                 3

DMX-512 connection with DMX terminator
For installations where the DMX cable has to run a long distance or is in an electrically “noisy”
environment, it is recommended that a DMX terminator is used. This helps prevent corruption of the
digital control signal. The DMX terminator is simply a 5 pin XLR plug (male) with a 120 Ω resistor
connected between pins 2 and 3. It is then plugged into the output XLR socket of the last Elektralite LED
Pro Line Pancake or other dmx device in the chain. Please see illustration below.

                                      5               1
                                          4       2
                                              3
                                                                     120   Ω

DMX line

                Address 025       Address 013             Address 001
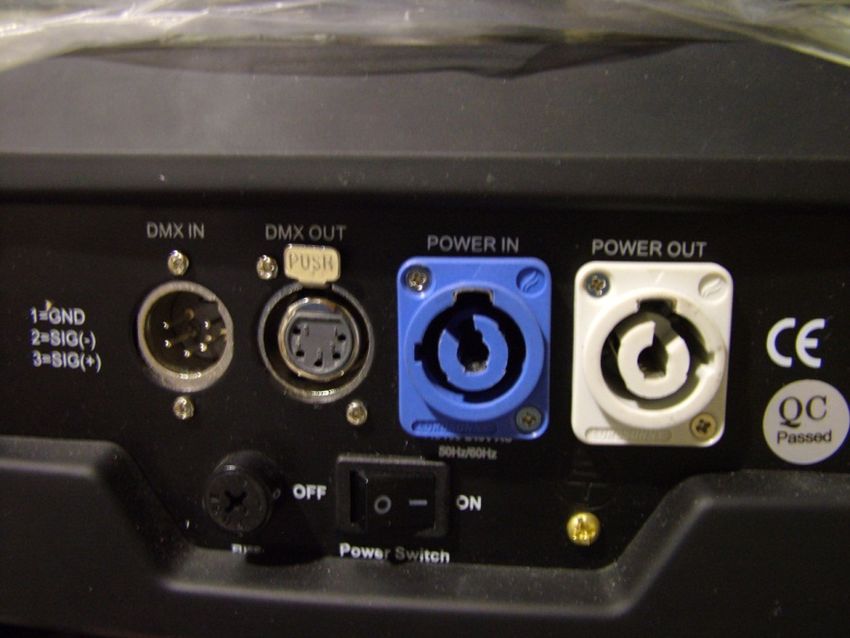
6. Powercon Connectors.

The Elektralite LED Pro Line Pancake is fitted with two Powercon connectors. The blue one is input
while the white one is the output. In the box with the fixture is a 20 feet long Powercon male to female
extension cable.
If this is the first fixture in the "line" then remove the white Powercon connector and fit a 120 volt Edison
plug (not supplied).
From then on the Powercon extension cables are used for subsequent fixtures.
Warning :- The Powercon is a connector without breaking capacity. In other words the Powercon
should not be connected or disconnected under load or live.
The above warning was publish on Powercon's own website.
Please only disconnect the Powercon connector after the on/off switch is turned OFF.

There can be up to 7 Elektralite LED Pro Line Pancake in the daisy chained line. The line is fused
protection against more than this quantity being daisy chained. So do NOT exceed this number of
fixtures.

7. LCD Display Operations
The display screen will turn off after 30 seconds if no button is pressed on the display.
8. Cleaning and maintenance.
Now ignoring maintenance and cleaning is very good way of creating problems "down the road" and
many companies and installations do just that. However the net result is, no matter what the fixture,
premature failure!
Changing the oil in a car most people do on a regular basis.
So with the fixtures regular maintenance it an excellent practice, if you want the fixtures to last.
So what is the maintenance for the fixture?

                                   Clean the fans! That’s really it!
Use a small vacuum cleaner and suck the dust and “fur balls” out.
Do not use a can of co². That will just blast the dust and dirt everywhere!
The fans keep the LEDs cool and keep the electronics cool too.
Without the fans working efficiently and dust free, the fixture will fail and that will be a lot more costly than
having someone vacuum the fixture on a regular basis.
How often should the fans be cleaned? It depends on where the fixture is located; in a very dusty
atmosphere once a week. So check the fans on a regular basis, it may not need cleaned every week but
a quick “visual inspection” should be done to see.
There are fans in the base and one in the head of the fixture. Clean all of them!
9. DMX Channel Assignments.
Channel Function Value Description
1 Pan 0-540 Pan movement
2 Tilt 0-280 Tilt movement
3 Dimmer 0-100 Master dimmer 0-100%
4* Strobe 000-006 No function
007-065 Slow to fast strobe
066-069 No function
070-128 Pulse strobe from slow to fast
129-132 No function
133-191 Strobe fading in from slow to fast
192-195 No function
196-255 Strobe fading out from slow to fast
5 Red 0-100% Intensity 0-100%
6 Green 0-100% Intensity 0-100%
7 Blue 0-100% Intensity 0-100%
8 White 0-100% Intensity 0-100%
9 Speed 0-255 From fast to slow
(use it in conjunction with
dimming)
10 X axis speed from fast to slow
11 Y axis speed from fast to slowRGB 000-004 No function
12** Macros
Red at max output then Green fading up and Red fading
005-044 down. Then Green fades down as Blue fades up. All are
out at 036 DMX. Then at 040 DMX Red & Blue at max
output. Both fade out by 044 DMX.
045-049 No function
Chases through all 4 colors RGBW. The speed of chase
050-094 050 DMX VERY slow to 094 DMX VERY fast.
095-099 No function
8 colors fading in and out. 100 DMX is the beginning
100-149 of a slow fade rate with 149 DMX ending at a fast fade
rate.
150-154 No function
Red at 155 DMX, immediately at max output; followed
155-166 by Green fading up to max output which is reach at 166
DMX
Green at 167 DMX, is at max output; followed by Red
167-178 fading down to off at 178 DMX.
Green at 179 DMX, is at max output; followed by Blue
179-190 fading up to max output which is reached at 190 DMX.
Blue at 191 DMX is at max output; followed by Green
191-202 fading down to off at 202 DMX.
Blue at 203 DMX, is at max output; followed by Red
203-214 fading up to max output which is reached at 214 DMX
Red at 215 DMX, is at max output; followed by Blue
215-226 fading down to off at 226 DMX
Red at 227 DMXis at max output; followed by Blue &
227-238 Green fading up to max output for all at 238DMX.
Red at 239 DXM is off instantly at 239 DMX then Red
239-250 fades in from 240 DMX to 250 DMX. Green fades out
from 240 DMX to 250 DMX.
Red, Green and Blue at max output.
251-255
13*** 000-127 No function
128-255 Random Auto***
000-250251-255 No function Reset (after 3 seconds)
14
*When operating the strobe may sure the master dimmer (channel 3) is set to 75% (190
DMX value). This is imperative in order that the strobe to work correctly.
**Make sure, before operating channel 12, that all colors [so channels 5 (red), 6 (green), 7
(blue) and 8 (white)] are at zero. Make sure channel 3, the master dimmer, is "on"
(maximum, for example). Failure to do this will result in colors being combined and this
will result in differences in the colors across fixtures. It could also result in strobing and
resetting of fixtures as they will work in a random fashion.
***This means that the automatic program is random and is not the same from fixture to
fixture. Each fixture has its own random program.10. Technical Specifications 108PCS 3W high power LEDs 50,000 hours lifespan and low power consumption Smooth and precise resolution for PAN/TILT movement 540°/630° pan and 265° tilt movement Scan position memory, auto reposition after unexpected movement RGB color mixing system LED shutter LED dimming LED rainbow effect Macros effect Strobe effect with 18 flashes per second and pulse effect General dimming and blackout for all four colors 14 DMX channels DMX512, master-slave and sound activated controllable or auto operation Blue background LCD display Input Voltage: AC90-260V 50-60Hz LED Quantities: 24 red/28 green/28 blue/28 white Edison LEDs (3W) Control Signal: DMX512, master-slave, sound activated or auto operation Control Channel: 14 DMX Channels Power Consumption: 344 VI Dimensions: Metric 350x260x350mm. Imperial 13.78" x 10.24" x 13.78" Packing Dimensions: 445x310x435mm Imperial 17.52" x 12.20" x 17.13" Net Weight: Metric 9kgs. Imperial 20 pounds Gross Weight: Metric 11kgs Imperial 25 pounds ElektraLED is a division of Group One. Group One and its divisions are constantly improving their product range and we reserve the right to make changes without prior notice.
Other Products.
ElektraLED has other great products that are manufactured under the Elektralite product line.
Go check out the website at www.myelektralite.com
A preview of the products include:-

Elektralite LED Pro Line. 1018. 18 of QUAD leds producing a perfect homogeneous color mixing.
Each LED has in-built ALL 4 colors (red, green, blue and white). The white is perfectly chosen to be
the warm white, not normally associated with white in an led. The colors mix evenly across the entire
light beam with no hot spots.

The Elektralite TurboFog (check out the ElektraFog too!)

A professional fog machine which comes with remote, 0 to 10 volts analog input and DMX input.
It is simple to maintain and has a tremendous output.
The Elektralite TurboHazer (check out the ElektraHazer too!)
We were tired of expensive difficult to use Hazers! Meet the TurboHazer.
Comes with remote and an optional DMX input
Simple to use, maintain and in-expensive. Enough said!!
You can also read