Installation Guide (version 5) - VideoCleaner
←
→
Page content transcription
If your browser does not render page correctly, please read the page content below
Installation Guide (version 5)

VideoCleaner is forensic video enhancement and authentication software created for, and relied upon
by, law enforcement agencies worldwide. This is FOSS (free open source software) available to
everyone under the belief that clear evidence is a public right. VideoCleaner utilizes industry best
practices, peer reviewed science, automatic reporting, open-source code for transparency, and has
been field proven through nearly a million cases. Everything is free, including lifetime support and
updates. We welcome and invite everyone to distribute and contribute to its success.

You can use any Windows computer to process digital images and videos, including some proprietary
formats, and we include a screen capture tool for everything else. Adjusting a few real-time sliders
will brighten poorly lit scenes, improve facial clarity, recover license plates, change viewing
perspective, reverse lens distortion, eliminate inaccurate frames, stabilize camera motion, and so
much more. Faint movements (e.g. weapon or person), distant color changes (e.g. fire origin or traffic
signal), and small details become obvious. You can annotate on-screen with text and highlighting,
correct playback speed, provide sweeping or adjacent before-after views, and extract stills. Workflow
and file metadata are automatically documented, and new capabilities are constantly added.

  VideoCleaner installation requires three configuration steps,
  detailed in this guide. You must perform these steps or
  VideoCleaner will not function. If you forget to perform these
  steps, you can uninstall and reinstall VideoCleaner to try again.

PRIVACY STATEMENT:
The VideoCleaner software does NOT collect any personal information, does NOT include any
advertising, does NOT ask for any money, and does NOT require network access.

The official website is VideoCleaner.com
                                                                                            Page 1 of 5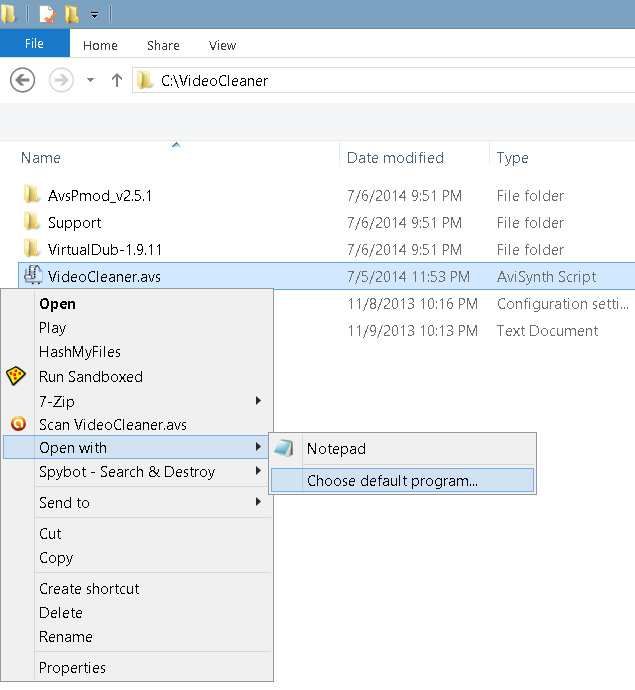
INSTALLATION:
Right-click the VideoCleaner installation program to "Run as administrator". Accept the agreement
and select "Install", which will also automatically install AviSynth (scripting tool) and FFDshow (video
Codec support). If this is your first time installing VideoClenaer, then you MUST allow these other
two programs to install as VideoCleaner relies upon them for functionality.

This installation document will now appear in a new window. If, at any stage during the
installation process, Window's asks for administrative permission or to re-install using recommended
settings, you should allow that to occur. VideoCleaner, and its support programs (AVIsynth and
FFDshow) can always be uninstalled, if so desired, normally through the Window's program manager.

IF YOU SEE THIS ERROR DURING INSTALLATION:
                                         Hold the CTRL key while you press the letter
                                         "F" (or use START then SEARCH in earlier
                                         Windows versions) to locate and open the
                                         Windows Action Center (also found in the
                                         "System and Security" section of the Window's
                                         Control Panel). Select "Change User Account
                                         Control Settings". Move the slider to its lowest
                                         setting and select OK. Reboot your computer
                                         and retry installing VideoCleaner. You can
                                         revert User Account Settings after installation.

If you are using Internet Explorer to download and then automatically "Run" the installation, the
browser's built-in SmartScreen Filter can prevent VideoCleaner from installing. If this occurs, launch
Internet Explorer, click the "Safety" button, select "SmartScreen Filter", choose "Turn Off
SmartScreen Filter" and click OK in the dialog box. Now try the installation again.

REQUIREMENTS:
  • PC (or MAC with emulator) with any version of Windows released in this century
  • 100MB of free hard drive space
  • 1GB of RAM

                                                                                                Page 2 of 5
CONFIGURATION:
STEP #1. Once VideoCleaner, AviSynth and FFDshow
complete their installation, a program called AvsP will appear.
AvsP serves as the VideoCleaner interface. Go into the
"Options" menu and choose "Associate .avs files with
AvsP". Window's will ask for administrator privileges and
confirmation. When this process is complete, close the
VideoCleaner program for changes to go into effect.
STEP #2. Go to your programs shortcuts (located below your
desktop icons in Windows-8/8.1/10 -or- within "All Programs"
of your START icon in earlier Window's versions). Locate the
folder called "ffdshow" and select "Video decoder
configuration". When the configuration window opens, scroll down the left hand column and check
the box next to "AviSynth". Select "OK" to save your settings.
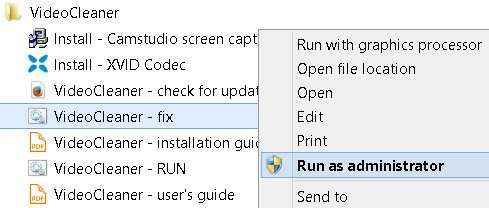
STEP #3. The "Tools" section has two special enhancements "Denoise" and "Deblur Lens". In
most installations, these features are not automatically enabled and attempted usage will cause a
"Feature not available" message. To fix this,
go to the VideoCleaner program shortcut folder
and RIGHT click your mouse on the option for
"VideoCleaner fix". Choose "Run as
administrator" to allow this solution (copies
two files into Windows), which is fast and never
needs to be repeated. "VideoCleaner fix" also
resets the VideoCleaner script when needed.
Page 3 of 5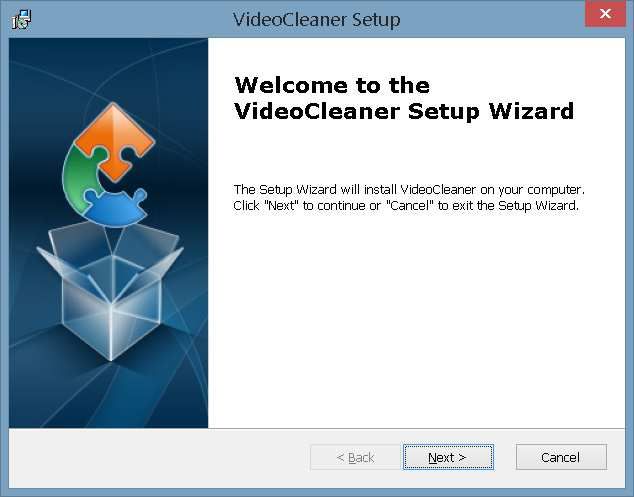
VERIFICATION:
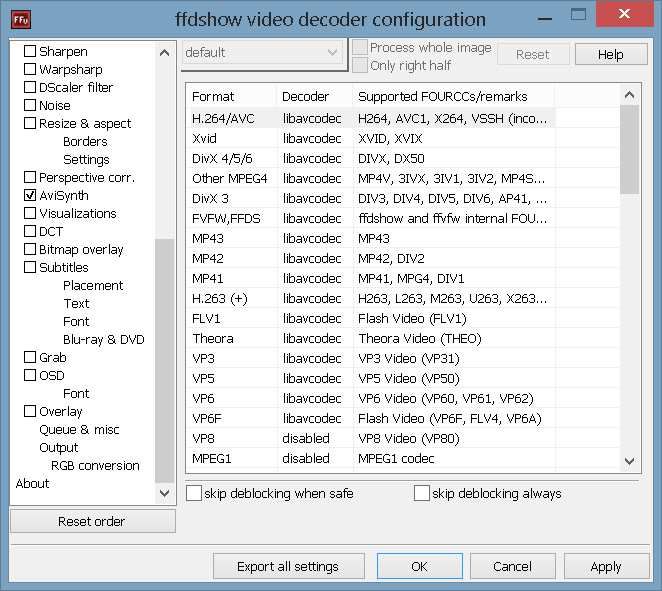
Double mouse click on the desktop VideoCleaner icon. If you see the word "AvsPmod" and the line
numbers (SEE THE ARROWS BELOW), then everything is correct and you can SKIP THIS PAGE.
---------------------------- SKIP THE REST OF THIS PAGE IF YOU SEE "AvsPmod" -----------------------
If, instead, the word located in the title bar is "Notepad" (see above) then hold down the computer
keyboard key that looks like the Windows logo (usually left of the space bar) and touch the letter "E"
to launch Window's File Explorer. Navigate to the "VideoCleaner" folder on your "C" drive and right
click on the file named "VideoCleaner.avs". If you are unable to determine which file has the ".avs"
extension, then reference the icon picture located leftward of each file's name.
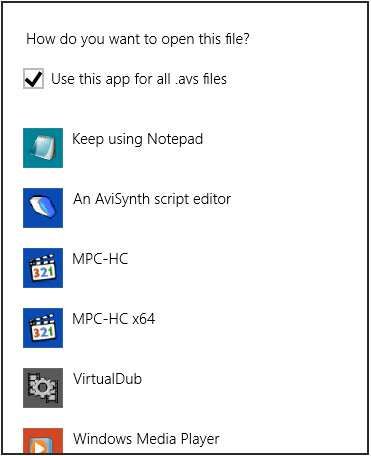
While holding down your keyboard's "Shift" key, use your
mouse to RIGHT click on the "VideoCleaner.avs" file, to
open a sub-menu. Move your mouse over "Open with"
and then left mouse click on "Choose default program".
This will open a new menu.
Check the box "Use this app for
all .avs files" so your computer
will remember the preference you
are about to set. This may
require administrator user rights.
Left mouse click on select "An
Avisynth script editor" from the
list of options. If you don't see
that choice, scroll to the bottom of
the list and select "More options" and then select
"Avisynth" from the list that appears. If you still do not see
the choice "Avisynth", you will need to locate the program file on your computer. Further down this
same list, left mouse click on "Look for another App on this PC". Now browse to (single or double
left mouse click to select) your "C:" drive, then double click on the "VideoCleaner" sub-folder, then
double click on the "AvsPmod_v2.5.1" sub-folder (located within the VideoCleaner folder), then
double click the "AvsPmod" sub-folder, and then left mouse click on "AvsPmod.exe" (your computer
might show it as just "AvsPmod") to select the program. Finally, left mouse click on the "open"
button to confirm your selection, which will be retained.
Page 4 of 5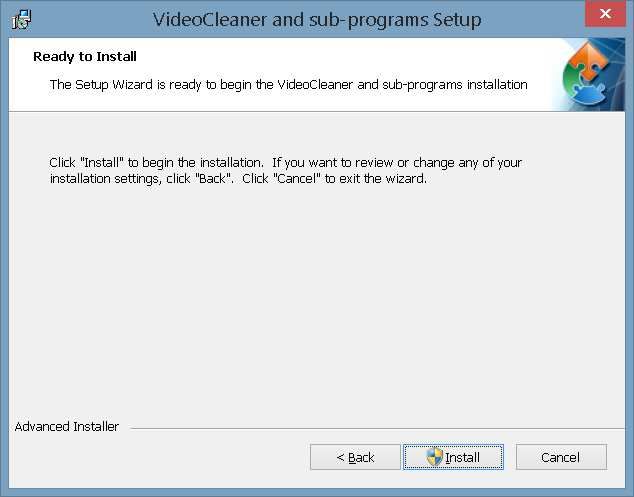
OPTION - ADD CODECS:
XVID (Divx spelled backwards) is the open-source equivalent to Divx compression. Saving your
videos in XVID (chosen with the CTRL-P option within VirtualDub, or through the "Video Options" of
the Options menu in CamStudio) will significantly reduce the final file size (up to 95% smaller) with
minimal impact on the perceptible visual details. Just go to the VideoCleaner shortcut folder and
select "Install - XVID Codec". This is a very quick installation that does not create any on-screen
messages or desktop icons. Once installed, you can open and save files in the XVID Codec.
Similarly, the VideoCleaner shortcut "Install - Lagarith Codec" does just that, and this Codec allows
100% retention of video details at a compressed file size (compared to the uncompressed version).
If you need more options, additional Codecs are available for download at http://codecguide.com/
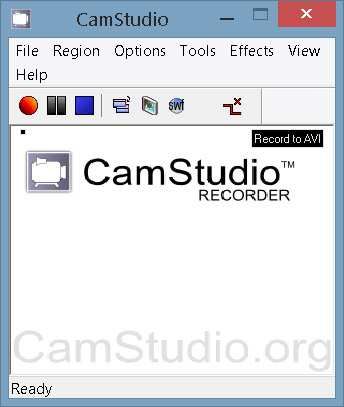
OPTION - ADD SCREEN CAPTURE CAPABILITIES:
CamStudio 2.7 is a fast and simple screen capture program that
can create a lossless copy of proprietary recordings that cannot
be opened directly by VideoCleaner. Select the VideoCleaner
shortcut named "Install - CamStudio screen capture". This
installation if extremely fast and does not create any on-screen
messages or desktop icons.
To run CamStudio, use the CamStudio 2.7 program shortcut
folder (created after installation). CamStudio usage is explained
in the VideoCleaner user Guide. To avoid installing any
advertising software, it is strongly recommended that you do NOT
update to the newest version of CamStudio. If you wish to
sponsor CamStudio, or any of the developers referenced within
VideoCleaner, consider donating on their development webpage.
USAGE:
Launch VideoCleaner using the desktop icon. When it loads, press your computer's "F5" key ctrl-O
(hold the ctrl key while touching the letter O) to open a video or image file (samples are included in
the "Samples" folder located under the "VideoCleaner" folder of your "C" drive).
If the configuration of your computer prevents a specific VideoCleaner feature from working, an on-
screen message will alert you to this fact, and all other features should work as expected.
For additional guidance, read the VideoCleaner user guide (shortcut is on your computer desktop).
SUPPORT:
Having an issue or feature request not covered by this guide or the user's manual? Simply post your
question at http://www.linkedin.com/groups?gid=2461639 or type the words "forensic video
solutions" into the Linkedin search box to find the AVIs group. Similar to all other aspects of
VideoCleaner, the support is free.
Document revision: March, 2018
Page 5 of 5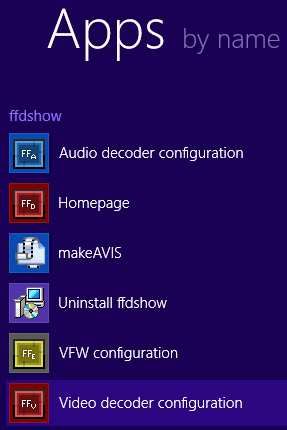

You can also read