INSTRUCTION MANUAL HWC2405U - THOR Kitchen
←
→
Page content transcription
If your browser does not render page correctly, please read the page content below
INSTRUCTION MANUAL
    HWC2405U

        1
TABLE OF CONTENTS
Contents Page#
● wine Cooler package Contents 3
● Important Safety Instructions 3
l Main structure of Product 4
l Installation 5
l Temperature setting 6
l Points of intentions 7
l Product parameters 7
l Layout and storage 7
l Care and maintenance 8
l Troubleshooting guide 10
l Wa r r anty 11
2● Wine Cooler package Contents
l Instruction Manual
l 6 Standard Shelves
● Important Safety Instructions
WARNING: To reduce the risk of fire, electric shock or personal injury , unplug or
disconnect the appliance from the power supply before servicing.
l Read all instructions before using the wine cooler.
l DANGER: Risk of child becoming trapped in new wine cooler, old wine
cooler/refrigeration unit, or large boxes. Junked or abandoned appliances, boxes and
other containers are still dangerous, even if they will just in the garage for a few days.
l Before you throw away your old wine cooler:1.take off the door. 2.Leave the shelves in
place so that children cannot climb inside.
l Never allow children to operate, play with, crawl inside the appliance.
l Never clean appliance parts with flammable fluids. The fumes can create a fire hazard
or explosion.
l Do not store in the vicinity of any other appliance. Do not store near gasoline or any
other flammable vapors. The fumes can create a fire hazard or explosion.
Before Using Your Wine Cooler
l Remove the exterior and interior packaging.
l Before connecting the wine cooler to power source, let it stand upright for
approximately 2 hours. This will reduce the possibility of a malfunction in the cooling
system from handling during transportation.
l Clean the interior surface with lukewarm water using a soft cloth.
Save These Instructions
l Check the Troubleshooting Guide at the back of this manual. List of will occur
problems that you can fix it yourself.
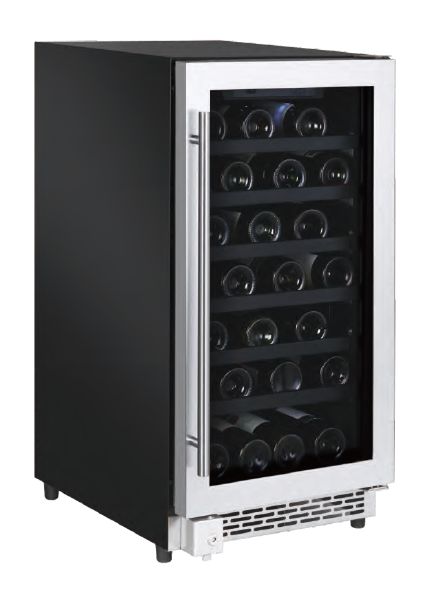
3l Main Structure Of Product
① Cabinet
② Tempered glass door
③ Stainless steel handle
④ Ventilator
⑤ Leveling leg
⑥ Control panel
⑦ Fan
⑧ Return-airway
⑨ Shelves
⑩ Lock
4l Installation
Install handle
1. Remove the door gasket on the side you wish to install the handle – you can see two
designated holes for handle installation.
2. Install the handle tightly as shown above with two screws, lock washers and flat
washers provided.
3. Replace the door gasket.
Install the wine cooler:
Your product has been designed built-in or free standing installation.
Cutout Dimensions
Dimensions of the recess
Height of housing mm 860
Depth of housing mm 600
Width of housing mm 460
5Attention: The ventilator should not be covered, or it will cause unpredictable breakdown;
the fan and the return-airway should not be covered, too, or it will cause the temperature
of the wine cooler couldn’t reach the setting temperature, and the temperature of the
cabinet is uneven.
6l Temperature Setting
The setting should be operate in the control panel.
(1)Functions of each keys in the control panel.
①Up
Used to raise (warm)the set temperature by 1℃ or 1℉. When number “3” is flashing, press
it once, the temperature setting is up by 1℃ or 1℉, the highest setting temperature is
10℃(50F).
②Down
Used to lower (cool) the set temperature by 1℃ or 1℉. When number “3” is flashing, press
it once, the temperature setting is down by 1℃ or 1℉, the highest setting temperature is
-2℃(28F).
③Temperature Display for lower chamber.
The LED display will show the setting temperature when “flash”; Display will show the
temperature for the actual temperature of the cabinet when normal.
④℃/℉ Display
⑤Setting temperature
Press this button, the number in the window will flash, then press to set
temperature. Stop to press any button for 5 seconds, then the number stop flashing to
show the actual temperature of the cabinet.
⑥℉/℃ Selector
Select the temperature display setting in Fahrenheit or Celsius degree.
⑦Power
To control the appliance turn on/off. To turn off the appliance, touch the mark and
hold for at least 5 seconds. Press again, turn on the appliance. The LED readout
will show the original temperature set previously when restart the appliance or reconnect
after power cuts .
7(2)There is automatic storage memory when power off in this wine cooler, that means
the setting temperature is memories automatically even in power off, so the setting
temperature is the same as last setting when the wine cooler is running again.
(3)Defrosting
The unit defrosts automatically.
The evaporator behind the rear wall of the unit defrosts automatically. The condensate
collects in the drainage channel behind the rear wall of the unit, and flows through the
drainage hole into the drip tray by the compressor where it evaporates. When the wine
cooler run for some time, the wine cooler will enter to defrosting, the compressor stop
running and the fan will keep running. The temperature will up to about 5℃ when
defrosting, then keep on running normally; It takes more time for the temperature to come
up to 5℃ when the setting temperature is low(for example the setting temperature is -2℃),
and there are full of wines in the cabinet, and this is not a breakdown.
l Points Of Intentions
1, The vent grill outside the cabinet is the heat dissipation way of cooling system in wine
cooler, please prevent anything from covering or blocking, or it will make the wine cooler
overheating and cause accidents;
2, Please prevent the cooling and cold air circulating windows blocking, or it will make the
temperature too high or uneven in the cabinet;
3, Please close the door tightly, it will cause the refrigerating efficiency down, overflow in
the cabinet, or unnormal temperature once the door is not closed tightly for a long time.
4, Please shut off the power, and open the door to let the cabinet dry enough if you don’t
use the wine cooler for a long time.
●Product Parameters
1, Voltage: according to local voltage
2, Rated power: 100W
3, Climate type: ST
4, Temperature range in cabinet: 5-18℃
●Layout And Storage
Your cabinet was designed to store a maximum number of bottles securely. We
recommend that you observe the below tips to optimize loading.
l Remove tape from shelves once unit is stable and ready for storage.
l Disperse the bottles evenly to avoid concentrating weight in one place. Bottles must
not touch either the back of the cabinet.
l Make sure that the bottles are not all grouped together either at the top or bottom of
the cabinet.
l Only pull out one shelf at a time. Never attempt to pull more than one.
l Maximum weight capacity per shelf is 55lbs
8l You can crease your wine cooler storage capacity by removing shelves and stacking
bottles on top of one another. Do not stack more than 3 rows of bottles per shelf.
●Care Maintenance
Cleaning your wine cooler
l Turn off the power, unplug the appliance, and remove all items including shelves and
rack.
l Wash the inside surfaces with a warm water and baking soda solution. The solution
should be about 2 tablespoons of baking soda to a pint of water.
l Wash the shelves with a mild detergent solution.
l Wring excess water out of the sponge or cloth when cleaning any area of the controls.
l Wash the outside cabinet with warm water and mild liquid detergent. Rinse well and
wipe dry with a clean soft cloth.
l
Power Failure
l Most power failures are corrected within a few hours should not affect the temperature
of your appliance if you minimize the number of times the door is opened. If the power
is going to be off for a longer period of time, you need to take to take other measures
to protect your contents.
l If the unit is unplugged, loses power,or is turned off you must wait 3to 5 minutes
before restarting. Attempting to restart the wine cooler before this time has elapsed
may prevent the wine cooler from starting..
Vacation Time
l Short holidays: You may leave the Wine Cooler powered on and unattended for
absences of less than three weeks.
l Long absences: If the appliance will not be used for several months, remove all items,
turn off the appliance and unplug. Clean and dry the interior thoroughly. To prevent
odour and mold growth, leave the door open slightly : blocking it open if necessary.
Moving Your Wine Cooler
l Remove all items.
l Securely tape down all loose items ( shelves) inside your appliance.
l Turn the adjustable leg up to the base to avoid damage.
l Tape the door shut.
l Be sure the appliance stays secure in the upright position during transportation. Also
protect outside of appliance with a blanket, or similar item.
Energy Saving Tips
9l The Wine Cooler should be located in the coolest area of the room, away from heat
producing appliances, and out of the direct sunlight.
l Ensure that the unit is adequately ventilated. Never cover air vents.
l Only open the door for as long as necessary.
●Troubleshooting Guide
Problems with Your Wine Cooler
Many common issues with your wine cooler can be solved very easily. Try the
troubleshooting tips below should you experience any problems.
PROBLEM POSSIBLE CAUSE
Wine Cooler does not operate. Not plugged in.
The appliance is turned off.
The circuit breaker tripped or a blown fuse.
Wine Cooler is not cold enough. Check the temperature control setting.
External environment may require a higher setting.
The door is opened too often.
The door is not closed completely.
The door gasket does not seal properly
Turns on and off frequently The room temperature is hotter than normal.
A large amount of contents has been added to the
Wine Cooler.
The door is open too often
The door is not closed completely.
The temperature control is not set correctly.
The door gasket does not seal properly.
The light does not work. Not plugged in.
The circuit breaker tripped or a blown fuse.
The light switch is “OFF”.
Vibrations Check to assure that the Wine Cooler is level.
The door will not close properly. The Wine Cooler is not level.
The door was reversed and not properly installed.
The gasket is dirty.
The shelves are out of position.
The Wine Cooler seems to make The rattling noise may come from the flow of the
too much noise refrigerant, which is normal. As each cycle ends, you
may hear gurgling sounds caused by the flow of
refrigerant in your Wine Cooler.
Contraction and expansion of the inside walls may
cause popping and crackling noises.
The Wine Cooler is not level.
10●Warranty
This product has been manufactured by Thor Group, 13831 Oaks Ave, Chino, California
91710.
Thor Group disclaims all express warranties except for the following:
This warranty applies to products purchased and located in the United States. Products
purchased or located outside this area are excluded.
The warranty does not apply to damage resulting from abuse, accident, natural disaster,
loss of electrical power to the product for any reason, alteration, outdoor use, improper
installation, and improper operation, repair or service of the product by anyone other than
an authorized Thor Group, service agency or representative.
Warranties and Duration
Full warranty for Parts and Labor: first year parts and labor, second year only parts.
Implied warranties terminate upon expiration of the limited warranty. Some states do not
allow limitations on how long implied warranty lasts, so the above limitation may not apply
to your implied warranty.
Thor Group will pay for:
All repair labor and cost of replacement parts found to be defective due to material and
workmanship. Service must be provided by a Thor Group Authorized Service Agency
during normal working hours.For a Service Agency nearest you, please call
877-288-8099.
Thor Group will not pay for:
This limited warranty does not cover:
1. Service to instruct you on how to use your wine cooler to correct house wiring, replace
or repair house fuses, service to correct the installation of your wine cooler.
2. Repairs when your wine cooler is used for other than normal, single-family household
use or when it is used in a manner that is contrary to published user or operator
instructions and/or installation instructions.
3. Cosmetic damage, including chips, dents, scratches or other damage to the finish of
your wine cooler, unless such damage results from defects in materials or workmanship
and is reported to Thor Group within 30 days from the date of purchase.
4. Costs associated with the removal from your home of your wine cooler for repairs. This
wine cooler is designed to be repaired in the home and only in-home service is covered by
this warranty.
115. Damage resulting from misuse, alteration, accident, abuse, fire, flood, acts of God,
improper installation, installation not in accordance with electrical, or use of consumables
or cleaning products not approved by Thor Group.
6. Service to repair or replace consumable parts. Consumable parts are not included in
the warranty coverage.
7. The removal and reinstallation of your wine cooler if it is installed in an inaccessible
location or is not installed in accordance with published installation instructions.
8. This warranty is void if the factory applied serial number has been altered or removed
from your wine cooler.
9. Repairs to parts or systems resulting from unauthorized modifications made to the
appliance.
10. Expenses for travel and transportation for product service if your wine cooler is located
in a remote area where service by an authorized Thor Group servicer is not available.
The warranty applies to appliances purchased and used for personal, family or household
purposes only. It does not cover appliances used for commercial applications.
Should the appliance be sold by the original purchaser during the warranty period,
warranty shall extend to the new owner until the expiration date of the original purchaser
warranty period.
Warranty and Product Registration
Thor Group is not responsible for incidental or consequential damages. Under no
circumstances will Thor Kitchen’s liability exceed the cost that you paid for the product.
Some states do not allow the exclusion or limitation of incidental or consequential
damages, so the above limitations or exclusion may not apply to you.
This warranty gives you specific legal rights, and you may also have other rights that vary
from state to state. Whenever you call our customer service at 877-288-8099
(THORKITCHEN WINE COOLER) for technical information and parts sales in the United
States or to request service for your appliance, please have your complete model number
and serial number ready. The model and serial number can be found on the product data
plate. Please enter the information requested in the spaces provided.
Model No.___________________ Serial No._____________________
Date of Purchase_____________ Purchaser_____________________
Dealer______________________ Suburb________________________
Town_______________________ Country_______________________
Note: You must provide proof of purchase and installation date for in-warranty service.
12You can also read