Instructions of BADA AM-1210 Robotic Lawn Mower
←
→
Page content transcription
If your browser does not render page correctly, please read the page content below
Instructions of BADA AM—1210 Robotic Lawn Mower

Content
1. Overview
1.1. Warnings and Signs
1.2. List of Parts
1.3. Preparation
1.3.1. Manually Cleaning the Lawn
1.3.2. Assembly of Recharging Dock
1.3.3. Arrangement of Boundary Wire
2. Function Set and Explanation
2.1. Operation Panel and Marks
2.2. Function Setting up
2.2.1. Time Setup
2.2.2. Date Setup
2.2.3. Preset Tasks Setup
2.2.4. Model Setup
2.2.5. Password Setup
2.2.6. Factory Setting
2.3. Indicators of the Recharging Dock
2.4. Remote Controller
3. Appropriate Use and Maintenance
3.1. Handling
3.2. Mowing Height
3.3. Manual Activation
3.4. Preset Task Starting
3.5. Stopping the Work and Charging
3.6. Considerations
3.7. Cleaning
3.8. Replacing Blades
3.9. Storage and Maintenance
4. Common Faults and Failure Elimination
5. Technical Parameters

1. Overview
Welcome to buy BADA Robotic Lawn Mower. For the purpose of efficient use, it is
necessary for you to know about the properties and usage of the machine first. The book
includes important information of the machine, which helps you acquire correct methods
of operation. Please do read the book in depth and run the mower as required; otherwise,
inappropriate operation may fail the mowing or even cause accidents and property losses.
1.1 Warnings and Signs
Please read the book in depth before using the mower.
Please pay more attention to warnings and signs and
safety guides in the book to avoid dangers and
injuries.
Please keep children and animals especially away from
blades rotating and bottom of the running mower.
Forbidden to ride on the mower.
The product is in line with the relevant restrictions of
the European Committee.
Left-off machines shall be taken over by special
recycle bins.
Please do not touch the running mower, and keep children and animals away from it.
Watch your steps on lawns and bypass boundary wires.
Please do not dismantle or repair the mower without permission, which may cause faults.
Please turn off the machine before moving, clearing up or trouble shooting.
1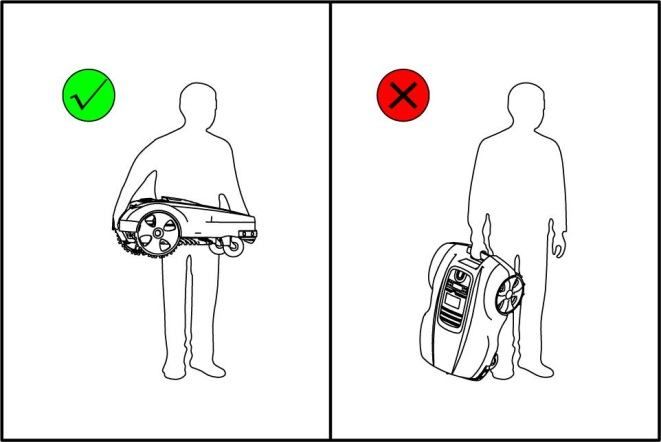
Please place the mower inside the work area to prevent machinery breakdown and dangers.
Please switch off the machine before charging manually.
Do not connect both ends of recharge plates of the charging station, which, otherwise, will be burnt out.
Forbidden to apply or place the mower near, or even in, high-temperature objects (such as fire),
corrosive chemicals and water.
1.2 List of Parts
1. Power switch 9. Charger
2. Ruler 10. Blade
3. Conditioner 11. Cutter deck
4. Top Cap 12. Remote Controller
5. Infrared-transmitting Cover 13. Boundary wire
6. Charging Connection 14. Connector
7. Guide Wheel 15. Fastening Nail for boundary wires
8. Recharging Dock 16. Fastening Nail for Recharging Dock
2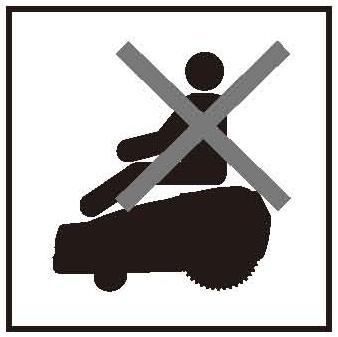
1.3 Preparation
1.3.1 Manually Cleaning the Lawn
Preparations before employing BADA Robotic Lawn
Mower are as followed,
a. Fill up and make even pits on lawns to avoid accidental
sinking of wheels.
b. Clear whatever may fail blades of the mower or cause
other faults and injuries, such as stones and boughs.
c. Please trim the lawn to its reasonably lowest level
(3-5cm) by traditional mower so that boundary wires
can be embedded in the grass as lower as possible.
1.3.2 Assembly of Recharging Dock
Please employ the dock body, bottom plate, screws and
Gaskets to assemble the recharging dock as the picture
shows.
1.3.3 Arrangement of Boundary Wire
1. The recharging dock shall be settled down(not fixed first) in a flat and side place within the working area.
There are some priorities as following,
Ventilated place out of the rain and the sun;
Corner within the working area.
Note: While the mower finds its recharging dock clockwise by following the boundary wire, the
recharge plate of the dock shall face the coming direction of the machine.
2. The circuit of the boundary wire shall comply with the following rules,
3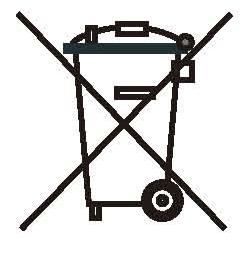
4

a. Leave one end of the boundary wire in the dock site;
   the partial longer wire before the dock shall be
   straightened with a length of 2 meter;
b. Lead the other end of the wire around the working
   area. Try to bypass blocks, slopes more than 30° and
    pits in the course of wiring.

c. Fix fastening nails (small-bore)as the distance required
   in the diagram above while taking the distance
   between the wire and the lawn boundary, blocks into
   account, on the basis of all internal angles more than
   110°; in addition, arrange those wires around the
    recharging dock according to the diagram.

d. Cut off excessive wires and lead the boundary wire to
   the connection of the dock as showed to form a closed
   loop; then, connect the charger with the recharging
   dock.

e. Place the mower in the working area of the lawn and
   put the button Charge to check if the machine can find
   the recharging dock by itself, otherwise, adjust the
   incompatible part of the wire; do press on the dock
   when the mower near it and check if the machine can
   align itself to the recharging plate, if so, fix the dock in
   the position by special fastening nails; if not, move the
   dock or level the ground and then repeat the checking
   till the mower can make it.

                                                                  5
2. Function Set and Explanation
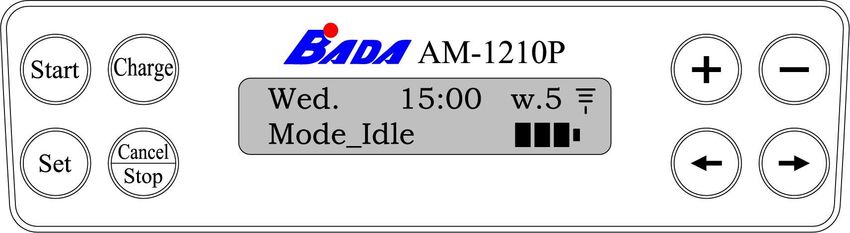
2.1 Operation Panel and Marks
Buttons
Start: Switch on the mower Charge: Find the recharging dock for charging
+: Adding —: Minus
Set: Set the function or confirm it Cancel / Stop: Cancel the setup or stop the machine
←: Cursor moving left or Up →: Cursor moving right or Down
Marks in the display
Wed. : Current systematic day 15:00: Current systematic time
W.5: Friday is the next work day Mode_Idle: Running mode of the machine
: IR sensor : Electric quantity
If the mower worked by month, the display would be like the right picture,
May.15: The current date is the 15th of May.
17: The next task will be on the 17th of May.
2.2 Function Setting up
2.2.1 Time Setup
a. Press the Set on the operation panel and change settings by ← and →.
b. Press Set in Time setup to set the time.
c. Choose to set the time or the day by ← or → and set them by + or – (on 24-hour basis).
d. Push down Set to confirm and quit the setting; or push down Cancel to cancel previous settings and quit.
2.2.2 Date Setup
a. Press Set and choose Date setup by ← and →; and Set again.
b. Choose Date, Month and Year by ← and → and set up the value by + and –.
c. Push down Set to confirm and quit the setting; or push down Cancel to cancel previous settings and quit.
2.2.3 Preset Task
There are two modes of working, by week and by month,
1. Preset Tasks in a Week
a. Press Set to find Work schedule by ← or → and Set again to choose Week, then Set for further setting
up;
b. 1 refers to having a task to be done; 0 refers to having no tasks; choose days by ← or → and decide
working times by + or -.
The right picture means there are tasks on Monday
and Friday.
c. Set to define the specific working time and Set to quit.
6
2. Preset Tasks in a Month
a. Press Set to find Work schedule by ← or → and Set again to choose Month, then Set for further setting
   up;
b. No. refers to the serial number of every task; Date refers to the date when the mower works; move the
   cursor by ← or → and define numbers by + or -.
   The right picture means, the first task of every month is on the 2nd day
                              the second task of every month is on the 7th day
                              the third task of every month is on 12th day.
                                    ……

c. Set to define the specific working time and Set to quit.
Note: Please define the mowing time on the basis of common sense of law care.
2.2.4 Mode Setup
     There are two modes of working, C referring to working
in involute route and L to working in straight line, one of
which can be set as default.
     Under the C mode, the mower will walk in involute
route once it begins to mow, otherwise, it will go forward in
straight line till starting another mowing

     Under the L mode, the machine will work in straight
line always and by random route. We strongly recommend
you to set the L mode as default for sloping lawns, to the
benefit of improve the work efficiency.

    Set the route as the following steps,
a. Set first to find Mode setup by ← or → and Set to the interface of setting the default;
b. Choose the desired mode by ← or →;
c. Set to quit.
2.2.5 Password Setup
    The initial password of the lawn mower is 1111; you could change it as followed,
a. Set first to find Change password by ← or → and Set; input the old password as prompt and Set. (Set to
   skip the input if there is no password).
b. Move the cursor by ← or → and set a new password by + or -; turn the password function ON since OFF
   refers to turn the function off.

                                                                                                      7
c. Set to quit.
2.2.6 Factory Settings
Restore to the factory settings as the following steps,
a. Set first to find Factory Settings by ← or → and Set;
b. Set on Yes to input the password as prompt and Set again(skip the input if there is no password);
c. Set to quit.
2.3 Indicators of the Recharging Dock
Power Indicator, the green one is light always in normal condition; the green twinkling in charging
condition; a dark green indicator or a twinkling red one means abnormality.
Indicator of the boundary wire, the green on is light always in normal condition; a dark green indicator or
a twinkling red one means abnormality.
2.4 Remote Controller
Pause Key Indicator
Turn Left Turn Right
Change Mode
Charge Open/Close the IR
The remote controller can be adopted to control the running mower.
Note
Do make sure the mower running in sight while employing the remote controller.
Please leave the idle controller indoors.
83. Appropriate Use and Maintenance
3.1 Handling
Turn off the mower first and hold the rear handle and
the front bulging part to lift it up in balance and move it.
Note: do not allow the blades facing to your body.
3.2 Mowing Height
Turn off the mower before adjusting the mowing
height; open the top cap and rotate the conditioner by
looking at the ruler at the same level till getting the desired
height.
Note: the grass height of the lawn to be mowed
shall be less than 10cm; the machine can mow
grasses of 4cm high; please trim the lawn at the
height of more than 10cm by traditional mower
first and then employ our product.
3.3 Manual Activation
If you need to start the machine manually, you should push down Start and Set and keep yourself away
from it at the same time it will sound a warning and then start working; if the mower is standby before
manual activation, it will work along the boundary wire first and then inside the wire range.
3.4 Preset Task Starting
In power-on status, the mower will give a prompt at the time preset and then start working.
3.5 Stopping the Work and Charging
The mower will stop working to find the recharging dock for charging in the following conditions,
Finishing the preset task;
Low battery;
Raining detected;
Dockward button pushed down manually.
The mower, expect charged by automatic return, also
supports manual charging, i.e., connecting the joint of
charger with the charging connection on the mower.
Note: Turn the mower off at the time of charging.
3.6 Considerations
If you want to stop the working machine, push down
the Pause on the remoter controller or the Power
Switch on the mower body.
Please supervise the mower outside the working area
at the first three times in case of unreasonable wiring
or any other problems.
Pay more attention to foreign matters on lawn, such
as stones and boughs, and remove them out.
9 Trim residual grasses by manual work.
Keep the charging connection and the
infrared-transmitting cover clean.
3.7 Cleaning
Turn off the machine before cleaning. Please wipe the shell surface by wet towel and clean the bottom
by wet long brush and gloves. Use of high-pressure water is forbidden.
3.8 Replacing Blades
Turn the mower off and raise it to check the blades; if
they are dull, wear thick gloves and replace them as
showed.
Note
Turning over the machine is not allowed.
Do tighten screws fastening blades.
3.9 Storage and Maintenance
When the mower will be not used in a long term or in winter, please turn it off and clean it down, wipe
oil over dry blades and charge it completely, and finally keep the machine out of the reach of children;
moreover, the mower shall be manually charged every one or two months.
104. Common Faults and Failure Elimination
Fault Code Causes Method of Elimination
Error 1 Battery voltage below level Charge the mower by connecting it with the
charger
Mowing too deeply at a time Adjust the mowing height to reduce the mowing
Error 2 depth.
Mowing Motor failure Contact the distributor
Running into blocks Restart the machine
Wheel and axle wound with foreign Move those foreign matters away
Error 3
matters
Walking motor failure Contact the distributor
Error 4 Guide wheel sinking into pits Fill and level up the lawn and restart the
machine
Error 5 Lawn with a big slope, more than 30° Level the partial lawn or arrange the boundary
wire to bypass the slope
Power failure Restart the machine later
Inefficient Separate the charger and the recharging dock
Dark indicator of the connection and reconnect them
recharging dock between charger
and recharging
dock
Normal power The boundary Connect the boundary wire by waterproof
Error 6
indicator (green)of wire cut off jacket.
recharging dock but Inefficient Reconnect them
a dark green connection
indicator of between the
boundary wire or a boundary wire
twinkling red one and the
recharging dock
Too many blocks on lawn Move away or bypass blocks
Error 7
Failure of IR sensor or crash sensor Contact the distributor
Error 8 Unstable power voltage Detect the external power voltage
Error 9 Lawn with a big slope, more than 30° Level the partial lawn or arrange the boundary
wire to bypass the slope
Error 10 The mower overheated Move the machine for ventilation and cooling
Warning 1 The signal of the boundary wire Continue the work after cooling
disturbed by the mowing motor
Warning 2 Blocks on the dockward way Move blocks or rearrange the boundary wire
Failure of power switch Check if the fuse blows out; if so, replace the
fuse
Others Loud working noise Check if the motor axle is wound; if so, move
foreign matters away
Worse and worse working capacity Contact the distributor to change the battery
Note: Please switch off the mower and cut off the power supply before eliminating faults.
115. Technical Parameters
Host Parameters
Parameter Model AM—1210P Model AM—1210L
Working ambient temperature -10~55℃ -10~55℃
Working ambient humidity 0~90% 0~90%
Working voltage 24V DC 24V DC
Average output power 120W 120W
2
Max. working area 3500m 3500m2
Working area suggested ≤600m2 ≤600m2
Mowing height 2~6cm 2~6cm
Mowing width 245mm 245mm
Gradient of climbing ≤30° ≤30°
Battery capacity 12V 10Ah×2 24V 10Ah
Average working duration in 3-5hrs 3-5hrs
full charging
Average charging time 12hrs 8hrs
Noise level ≤75dB ≤75dB
Net wt. About 21.5Kgs About 14.0Kgs
External Dimension 680mm(L)X485mm(W)X290mm(H) 680mm(L)X485mm(W)X290mm(H)
Length of the boundary wire 120m 120m
Parameters of the recharging dock
Parameter Model AM—1210P Model AM—1210L
Supply converter 110-240V AC 50/60Hz to 24V DC 110-240V AC 50/60Hz to 24V DC
Output voltage/current 24V DC/1600mA 24V DC/2000mA
Net wt. About 1.7Kgs About 1.7Kgs
External Dimension 520mm(L)X390mm(W)X275mm(H) 520mm(L)X390mm(W)X275mm(H)
12You can also read