LabArt C51 MANUAL HANDLEIDING MODE D'EMPLOI ANLEITUNG - Rev. 03/2021 - Consort bvba
←
→
Page content transcription
If your browser does not render page correctly, please read the page content below
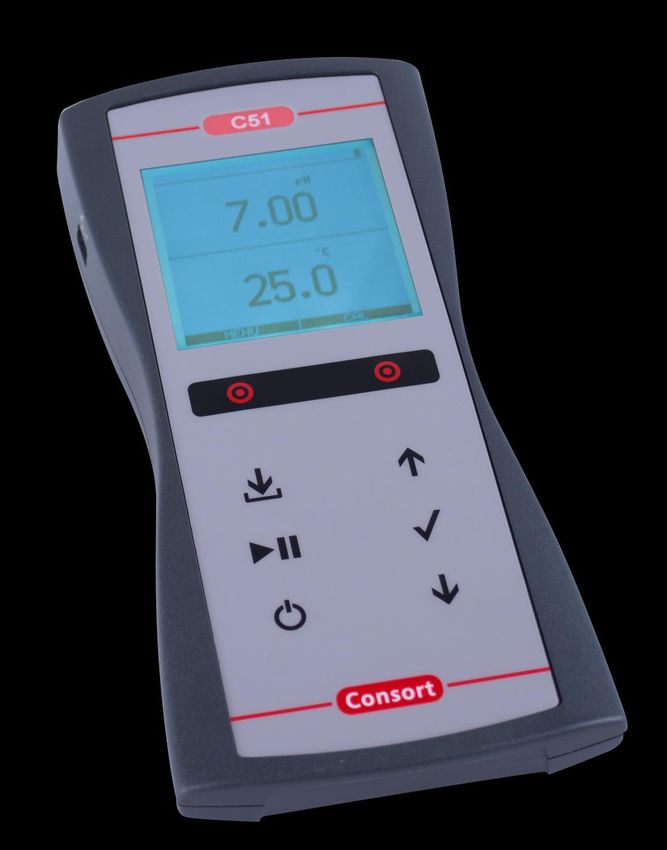
LabArt C51

      MANUAL
 HANDLEIDING
MODE D’EMPLOI
   ANLEITUNG
     Rev. 03/2021
C51
Input CH1: Conductivity, TDS, SAL
Input CH2: pH, mV, Dissolved Oxygen
Input °C: Temperature (Pt1000)

     F1                               F2

STORE
                                      OK
Index General information 1 Set-up 2 Measurement 2 Calibration 2 Good Laboratory Practice 3 Data Storage in the internal memory 3 Algemene informatie 4 Instellen 5 Metingen 5 Kalibreren 5 Goede Laboratorium Praktijk 6 Data-opslag in het intern geheugen 6 Information générales 7 Configure 8 Mesure 8 Calibration 8 Bonnes Pratiques de Laboratoire 9 Collection de données dans la mémoire interne 9 Allgemeine Information 10 Einstellen 11 Messung 11 Kalibrierung 11 Gute Laborpraxis 12 Datenspeicherung im internen Speicher 12 Specifications 13 NIST pH buffers 14 Standard pH buffers 14 Conductivity standards 14 Redox standards 14
General Information
Introduction
This instrument is manufactured with the latest technology and needs no particular maintenance. Consort
certifies that this instrument was thoroughly inspected and tested at the factory prior to shipment and found to
meet all requirements defined by contract under which it is furnished. However, dimensions and other physical
characteristics may differ.
The normal operating temperature should be between 0° and 40°C. Never use the instrument in a room with
high humidity (>95 %) or at very low temperatures (condensation water!).
Manufacturer
Consort bvba
Parklaan 36 Tel (+32)(14)41 12 79
B2300 Turnhout Fax (+32)(14)42 91 79
Belgium E-mail: info@consort.be
Warranty
This instrument (excluding all accessories) is warranted against defective material and workmanship for a
period of thirty-six (36) months from the date of shipment ex factory. Consort will repair all defective
equipment returned to it during the warranty period without charge, provided the equipment has been used
under normal laboratory conditions and in accordance with the operating limitations and maintenance
procedures in this instruction manual and when not having been subject to accident, alteration, misuse or
abuse. A return authorisation must be obtained from Consort before returning any product for warranty repair
on a freight prepaid basis!
Consort is not liable for consequential damages arising out of the use or handling of its products.
Servicing
In the event of this instrument being returned for servicing, the owner is requested NOT to send the following
items unless they are suspect:
Manual
Cables
Accessories
If serious malfunctioning occurs, stop using the unit immediately and consult your local Consort dealer.
Batteries
The batteries can be replaced by opening the bottom compartment of the cabinet. Only use NiMH batteries!
AC adaptor
Connect the mains adapter to the DC socket.
Keyboard
F1, F2 = Variable function, selects the function displayed on the screen
OK = Validate
STORE = Store measurement
= Button for entering a value or for selecting a function.
ON/OFF = Switches the instrument on or off.
1Set-up
1. Select [SETTINGS] by pressing MENU (F2).
2. Follow the instructions on the screen to adjust language, contrast and automatic power-off timer or to
erase the memory. Press OK or SELECT (F2) to confirm or CANCEL (F1) to exit.
Measurement
1. Connect the electrodes to the corresponding BNC inputs. Automatic temperature compensation and
temperature measurements are possible with a Pt1000 temperature probe.
2. Press MENU (F2), select the desired mode with and press OK or SELECT (F2).
Never immerse a pH electrode and a dissolved oxygen electrode together in the same solution!
A blinking decimal point warns you for unstable measurements. Wait to read the display! Stirring the solution
during the measurements promotes the homogeneity and is obligatory!
Calibration
Press CALIBRATE (F1) to go to the calibration menu
The instrument will refuse automatic calibration when the electrode is unstable. Insufficient stirring or a worn
electrode may be the cause.
pH
1. The instrument permits to choose between the buffers in memory (1.68, 2.00, 4.00, 4.01, 6.87, 7.00,
9.18, 9.21, 9.95, 10.01, 12.00, 12.45). Select the proper values and press OK.
2. Rinse the electrodes with distilled water and immerse them in the first buffer solution. Select
[CALIBRATE], press OK or or SELECT (F2) and follow the instructions on the screen until the
calibration is finished.
3. After rinsing the electrodes with distilled water, immerse them in the samples and read the display.
4. Rinse the electrodes always with distilled water after use and store them in a 3...4 M KCl solution.
mV
1. Immerse the electrodes in a standard solution of known potential. Select [CALIBRATE] and press OK or
SELECT (F2). Adjust to the proper value and press OK or SELECT (F2).
• Select [RESET] and press OK or SELECT (F2) to reset the calibration.
Temperature
1. Immerse the Pt1000 in a solution of known temperature. Adjust to the proper value and press OK.
• Select [RESET] and press OK to reset the calibration.
• Without Pt1000, press OK, adjust the manual temperature compensation and proceed by pressing OK.
Conductivity
1. The instrument permits to choose between the standards in memory (0.01, 0.1, 1 M KCl). Select the
proper values and press OK or SELECT (F2)
2. After rinsing the electrode several times with the first standard solution, immerse it in that standard. The
solution temperature is not so critical but should lie between 0°C and 40°C. When no Pt1000 is used, do
not forget to compensate manually first! Select [CALIBRATE], press OK or SELECT (F2) and follow the
instructions on the screen until the calibration is finished.
3. Rinse the electrode several times with the sample, immerse it in that solution and read the display.
4. Rinse the electrode always after use and store it in distilled water.
Dissolved oxygen
1. The display shows the air pressure correction and the salinity correction. Select the proper values and
press OK or SELECT (F2). Leave salinity correction to zero unless you are going to measure in heavily
salted solutions such as e.g. sea-water (35 g/l). Select [CALIBRATE], press OK or SELECT (F2) and
follow the instructions on the screen until the calibration is finished.
22. The electrode exposed to the air reaches an equilibrium corresponding to the partial pressure of oxygen
and thus to saturation in water at the given temperature. The instrument shows the measured saturation,
current, temperature, and will calibrate automatically when readings are stable.
3. After rinsing the electrodes with distilled water, immerse them in the samples and read the display.
Stirring the solution during the measurements promotes the homogeneity and is obligatory! The
advection rate must be at least 10 cm/s.
4. Rinse the electrode always after use and store it in distilled water.
Good Laboratory Practice
1. Press CALIBRATE (F1) to go to the calibration menu
2. Select GLP and press OK or SELECT (F2) to display a complete calibration report.
Data Storage in the internal memory
Storing data
1. Press STORE to store the displayed value in memory. The display shows a next storage address.
2. Select the desired address and press OK or SELECT (F2) to enter the measured value in memory.
Recalling data
1. Press to recall the stored data. The display shows a list of stored values.
2. Select the desired address to read the stored values.
3. Press OK to return to the normal measurements.
3Inleiding
Dit toestel is gebouwd volgens de modernste technologie en hoeft niet speciaal te worden onderhouden. Consort
bevestigt dat dit toestel grondig werd nagekeken en getest alvorens te worden verstuurd, en beantwoordt aan alle
vereisten van het aankoopkontrakt. Er kunnen echter wel afwijkingen optreden in de afmetingen en andere
fysische eigenschappen. De normale werktemperatuur moet tussen 0° en 40°C liggen. Gebruik het toestel nooit
in een ruimte met hoge vochtigheidsgraad (>95 %) of bij zeer lage temperaturen (condenswater!).
Fabrikant
Consort bvba
Parklaan 36 Tel (+32)(14)41 12 79
B2300 Turnhout Fax (+32)(14)42 91 79
Belgium E-mail: info@consort.be
Waarborg
Dit toestel (uitgezonderd alle toebehoren) is gewaarborgd tegen defect materiaal of constructiefouten voor een
periode van zesendertig (36) maanden vanaf de verzenddatum af fabriek. Consort zal elk toestel gratis
herstellen, binnen de waarborgperiode, voor zover het werd gebruikt onder normale laboratorium
omstandigheden volgens de werkvoorschriften en onderhoudsprocedures uit deze gebruiksaanwijzing en
wanneer de oorzaak van het defect niet een ongeluk, een aanpassing, verkeerd gebruik of misbruik is. Er moet
eerst een toelating van Consort verkregen worden vooraleer eender welk toestel franco terug te sturen voor
herstelling onder waarborg!
Consort kan niet aansprakelijk worden gesteld voor eventuele schadelijke gevolgen van het gebruik of
behandeling van zijn producten.
Onderhoud
Mocht dit toestel worden teruggestuurd voor onderhoud, gelieve volgende toebehoren NIET mee te sturen, tenzij
ze verdacht zijn:
Handleiding
Kabels
Toebehoren
In geval van ernstige storing, stop onmiddellijk het gebruik van het toestel en raadpleeg uw plaatselijke Consort
verdeler.
Batterijen
De batterijen kunnen vervangen worden na het deksel in de bodem van de kast te hebben geopend. Gebruik
uitsluitend NiMH batterijen!
Netadapter
Verbind de netadapter met de DC-bus.
Toetsenbord
F1, F2 = Variable functie, voert functie uit die op het scherm staat
OK = Validatie
STORE = Log meetwaarde
= Toetsen voor het instellen van een waarde of voor het kiezen van een functie.
ON/OFF = Aan- en uitschakelen van het toestel.
4Instellen
1. Kies [INSTELLINGEN] met MENU (F2).
2. Volg de instructies op het scherm om taal, contrast en het automatisch uitschakelen van het toestel in te
stellen of het geheugen te wissen.
Metingen
1. Sluit de elektrode aan met de overeenkomstige BNC ingang. Automatische temperatuur-compensatie en
-meting zijn mogelijk wanneer een Pt1000.
2. Druk op MENU (F2) en kies de gewenste meting met and druk op OK
Dompel een pH-elektrode en een opgeloste-zuurstof-elektrode nooit gelijktijdig in de oplossingen!
Een knipperende komma waarschuwt voor onstabiele metingen. Wacht nog even met aflezen! Tijdens het meten
is het aangeraden de oplossing te roeren om de homogeniteit te bevorderen.
Kalibratie
Druk op KALIBREREN (F1) om naar het kalibratiemenu te gaan.
Het apparaat weigert automatisch te ijken wanneer de elektrode onstabiel is. Onvoldoende roeren of een
versleten elektrode kan hier de oorzaak van zijn.
pH
1. Kies de gewenste buffers (1.68, 2.00, 4.00, 4.01, 6.87, 7.00, 9.18, 9.21, 9.95, 10.01, 12.00, 12.45) en
druk op OK.
2. Reinig de elektroden met gedistilleerd water, dompel ze in de eerste bufferoplossing. Kies [IJKEN], druk
vervolgens op OK en volg de instructies op het scherm.
3. Reinig de elektroden met gedistilleerd water, dompel ze in de meetoplossing en lees de meter af.
4. Na gebruik de elektroden steeds met gedistilleerd water reinigen en vervolgens in een 3...4 M KCl
oplossing bewaren.
mV
1. Dompel de elektroden in een ijkoplossing van gekend potentiaal. Kies [IJKEN], druk vervolgens op OK,
stel de juiste waarde in, en druk op OK.
• Kies [RESET] en druk op OK om de ijking te annuleren.
Temperatuur
1. Dompel de Pt1000 in een oplossing van gekende temperatuur. Kies [IJKEN], druk vervolgens op OK,
stel de juiste waarde in, en druk op OK.
• Kies [RESET] en druk op OK om de ijking te annuleren.
• Zonder Pt1000, druk op OK, stel de manuele temperatuur-compensatie in en druk op OK.
Geleidbaarheid
1. Kies de gewenste standaardoplossingen (0.01, 0.1, 1 M KCl) en druk op OK.
2. Spoel de cel enkele malen met de standaardoplossing en dompel ze in deze standaard. De temperatuur
van de oplossing is niet zo belangrijk maar moet wel tussen 0°C en 40°C liggen. Vergeet niet eerst
manueel te compenseren wanneer geen Pt1000 wordt gebruikt! Kies [IJKEN], druk op OK en volg de
instructies op het scherm.
3. Spoel de cel enkele malen met de meetoplossing, dompel haar dan in deze oplossing en lees de meter
af.
4. Spoel de cel steeds schoon na gebruik en bewaar ze dan in gedistilleerd water.
Opgeloste-zuurstof
1. De aflezing toont de saliniteitscorrectie. Kies de gewenste waarde en druk op OK. Stel de saliniteit in op
nul tenzij u gaat meten in oplossingen met een hoog zoutgehalte zoals b.v. zeewater (35 g/l). Kies
[IJKEN], druk op OK en volg de instructies op het scherm.
52. De elektrode blootgesteld aan de lucht, bereikt een evenwichtstoestand die overeen komt met de
partiële zuurstofdruk zoals in een waterige oplossing verzadigd met lucht. Het toestel toont de mg/l,
stroom, temperatuur van de elektrode, en ijkt automatisch wanneer de metingen stabiel zijn.
3. Reinig de elektroden met gedistilleerd water, dompel ze in de meetoplossing en lees de meter af.
Tijdens het meten is het verplicht de oplossing te roeren om de homogeniteit te bevorderen! De
stroomsnelheid moet hierbij minstens 10 cm/s bedragen.
4. Spoel de elektrode steeds schoon na gebruik en bewaar ze dan in gedistilleerd water.
Goede Laboratorium Praktijk
1. Druk op KALIBREREN (F1) om naar het kalibratiemenu te gaan.
2. Kies GLP en druk op OK om een volledig calibratierapport te tonen.
Data-opslag in het intern geheugen
Gegevens opslaan
1. Druk op STORE om de getoonde meting op te slaan in het geheugen. Op de aflezing verschijnt een
volgend opslagadres getoond wordt.
2. Kies het gewenste adres en druk op OK om de gemeten waarde in het geheugen te plaatsen.
Gegevens oproepen
1. Druk op om de opgeslagen metingen op te roepen. Op de aflezing verschijnt een tabel van de
opgeslagen waarden.
2. Kies het gewenste adres om de opgeslagen metingen af te lezen.
3. Druk op OK om terug te keren naar de normale metingen.
6Information générales
Préface
Cet appareil est construit selon les dernières technologies et ne nécessite aucun entretien particulier. Consort
certifie que cet appareil a été contrôlé et vérifié sévèrement à l'usine avant livraison afin de convenir aux
exigences définies par le contrat d'achat. Néanmoins, il peut y avoir des différences dans les dimensions ou
autres caractéristiques physiques.
La température d'utilisation normale doit être entre 0° et 40°C. N'utilisez jamais l'appareil dans un lieu humide
(>95 %) ou à une température très basse (condensation d'eau!).
Fabricant
Consort bvba
Parklaan 36 Tel (+32)(14)41 12 79
B2300 Turnhout Fax (+32)(14)42 91 79
Belgium E-mail: info@consort.be
Garantie
Cet appareil (sauf tous les accessoires) est garanti pendant trente-six (36) mois, à partir de la date d'expédition
départ usine, contre toute faute du matériel et main d’œuvre. Consort réparera gratuitement chaque appareil
défectueux, qui lui est retourné, à condition que l'appareil a été utilisé dans des conditions normales de
laboratoire selon les limitations opérationnelles et les procédés d'entretien de ce mode d'emploi et que le défaut
n'est pas dû à un accident, une adaptation, un mal-traitement ou un abus. Avant de retourner, aux frais de
l'utilisateur, tout appareil pour réparation sous garantie, il faut d'abord obtenir l'approbation de Consort!
Consort décline toute responsabilité pour des dommages éventuels causés par l'usage ou la manipulation de ses
produits.
Service
En cas de retour de cet appareil pour service après vente, NE PAS renvoyer les accessoires suivants, sauf s'ils
sont suspects:
Mode d'emploi
Câbles
Accessoires
En cas de mauvais fonctionnement sérieux, arrêtez d'utiliser l'appareil immédiatement et consultez votre agent
Consort local.
Batteries
Les batteries peuvent être remplacées en ouvrant le couvercle dans le fond du boîtier. N'utilisez que des batteries
NiMH!
Adaptateur secteur
Raccordez l’adaptateur secteur à l’entrée DC.
Le clavier
F1, F2 = Fonction variable, sélectionne la fonction affichée à l'écran
OK = Validate
STORE = Mémoriser des données
= Boutons pour entrer manuellement une valeur ou pour choisir une fonction.
ON/OFF = Allumer ou éteindre l’appareil.
7Configurer
1. Sélectionnez le menu de configuration en appuyant sur MENU(F2).
2. Suivez les instructions sur l'écran pour ajuster la langue, le contraste et l'arrêt automatique de l'appareil
ou pour effacer les données du collecteur.
Mesure
1. Raccordez les électrodes de mesure aux prises BNC. Afin de pouvoir faire une compensation
automatique ainsi que des mesures de la température, branchez une sonde de température Pt1000.
2. Sélectionnez le mode désiré en appuyant sur MENU (F2).
Ne plongez jamais une électrode de pH et une électrode d’oxygène dissous en même temps dans les solutions!
Des mesures instables sont indiquées par une virgule clignotante. Attendez encore un peu avant de lire
l'affichage! Il est recommandé d'agiter la solution pendant les mesures pour favoriser son homogénéité.
Calibration
Appuyez sur CALIBRATION (F1).
L'instrument refuse l'étalonnage automatique quand l'électrode est instable. Une agitation insuffisante ou une
électrode usée peut en être la cause.
pH
1. L'appareil permet maintenant de choisir entre les tampons en mémoire (1.68, 2.00, 4.00, 4.01, 6.87,
7.00, 9.18, 9.21, 10.01, 12.00, 12.45). Choisissez les valeurs désirées et appuyez sur OK.
2. Rincez les électrodes avec de l'eau distillée et immergez les dans le premier tampon. Choisissez
[ETALONNER], appuyez sur OK et suivez les instructions sur l'écran.
3. Rincez les électrodes avec de l'eau distillée et immergez les dans la solution à mesurer. Lisez la valeur
donnée.
4. Après usage, rincez toujours les électrodes avec de l'eau distillée et immergez les dans une solution de
3...4 M KCl.
mV
1. Plongez les électrodes dans une solution de référence. Choisissez [ETALONNER] et appuyez sur OK.
2. Ajustez sur la valeur désirée et appuyez sur OK
• Sélectionnez [RESET] et appuyez sur OK pour annuler l'étalonnage.
Température
1. Plongez le Pt1000 dans une solution de température connue. Choisissez [ETALONNER] et appuyez sur
OK.
2. Ajustez sur la valeur désirée et appuyez sur OK.
• Sélectionnez [RESET] et appuyez sur OK pour annuler l'étalonnage.
• Quand aucun Pt1000 n'est branché, appuyez sur OK, corriger la compensation manuelle de la
température et continuer en appuyant sur OK.
Conductivité
1. Choisissez les valeurs désirées (0.01, 0.1, 1 M KCl) et appuyez sur OK.
2. Après l'avoir rincée avec la solution étalon, plongez la cellule dans cette solution. La température de la
solution n'est pas importante mais elle doit être entre 0°C et 40°C. N'oubliez jamais de compenser
manuellement la température, si vous n'utilisez pas le Pt1000! Choisissez [ETALONNER], appuyez sur
OK et suivez les instructions sur l'écran.
3. Après avoir rincé plusieurs fois la cellule avec la solution à mesurer, plongez la dans cette solution et
lisez la valeur donnée par l'appareil.
4. Après usage, toujours rincez la cellule et immergez la dans de l'eau distillée.
Oxygène dissous (uniquement
1. Sélectionnez le mode désiré (ppm) ou (%O2) en appuyant sur MODE. L'affichage indique
immédiatement la valeur mesurée selon l'étalonnage précédent. Pour étalonner, appuyez sur CAL.
82. L'affichage indique la correction de la salinité. Choisissez la valeur désirée et appuyez sur CAL.
Maintenez la salinité à zéro à moins que vous fassiez des mesures dans des solutions très salées
comme p.e. l'eau de mer (35 g/l). Choisissez [ETALONNER], appuyez sur CAL et suivez les instructions
sur l'écran.
3. L'électrode se trouvant ainsi dans l'air atmosphérique, entre dans des conditions d'équilibre qui
correspondent à la pression partielle d'oxygène et donc à la saturation d'oxygène dans l'eau. L'appareil
montre les mg/l, le courant de l'électrode, la température et s'étalonne automatiquement quand
l'affichage est stable.
4. Rincez l'électrode avec de l'eau distillée et immergez la dans la solution à mesurer. Lisez la valeur
donnée. Il est obligatoire d'agiter la solution pendant les mesures pour favoriser son homogénéité! La
vitesse de courant doit être au moins 10 cm/s.
5. Après usage, rincez toujours l'électrode et immerger la dans de l'eau distillée.
Bonnes Pratiques de Laboratoire
1. Appuyez sur CALIBRATION (F1).
2. Choisissez BPL et appuyez sur OK pour voir un rapport d’étalonnage.
Collection de données dans la mémoire interne
Mémoriser des données
1. Appuyez sur STORE pour la mise en mémoire des données. L’affichage montre une adresse suivante.
2. Choisissez l’adresse désirée et appuyez sur OK pour mémoriser la valeur mesurée.
Afficher des données
1. Appuyez sur pour rappeler les données en mémoire. L’affichage montre les mesures mémorisées
en forme de table.
2. Choisissez l’adresse désirée pour lire la mesure mémorisée.
3. Appuyez sur OK pour retourner aux mesures normales.
9Allgemeine Information
Einführung
Dieses Gerät wurde mit der neuesten Technologie hergestellt und benötigt keine besondere Wartung. Consort
bescheinigt, dass dieses Gerät vor dem Versand gründlich geprüft wurde und allen Anforderungen des
Kaufvertrags entspricht. Dennoch können bezüglich der Abmessungen und anderer physikalischer Eigenschaften
geringwertige Abweichungen auftreten. Die normale Arbeitstemperatur soll zwischen 0° und 40°C liegen. Das
Gerät nie bei hoher Luftfeuchtigkeit (>95 %) oder bei sehr niedrige Temperaturen (Kondensation!) betreiben.
Hersteller
Consort bvba
Parklaan 36 Tel (+32)(14)41 12 79
B2300 Turnhout Fax (+32)(14)42 91 79
Belgium E-mail: info@consort.be
Garantie
Dieses Gerät (Zubehör ausgenommen) besitzt eine Garantie gegen fehlerhaftes Material und Konstruktionsfehler
von sechsunddreißig (36) Monaten ab dem Lieferdatum bei Versand ab Werk. Consort verpflichtet sich zu
kostenloser Reparatur aller fehlerhaften Geräte, die in der Garantiezeit beanstandet wurden, unter der
Bedingung, dass das Gerät unter normalen Laboratoriumskonditionen und der Gebrauchsanleitung gemäß
verwendet wurde, nicht jedoch bei einem Unfall, falscher Behandlung und Handhabung oder Modifikation des
Gerätes. Bevor ein Gerät während der Garantiezeit zur Reparatur frei Haus an Consort zurückgeschickt wird, ist
eine Genehmigung einzuholen. Consort haftet nicht für Schäden, die aus dem Gebrauch oder der Handhabung
seiner Produkte entstehen.
Service
Sollte dieses Gerät zur Reparatur eingeschickt werden, so wird der Kunde gebeten folgende Artikel NICHT
mitzuschicken, außer bei vermuteten Defekten:
Bedienungsanleitung
Kabel
Zubehör
Bei auftretenden ernsthaften Fehlfunktionen das Gerät sofort abschalten, und einen Consort Fachhändler
aufsuchen.
Batterien
Die Batterien können durch Öffnung des Deckels an der Unterseite des Gehäuses ausgewechselt werden.
Verwenden Sie nur NiMH Batterien!
Netzadapter
Verbinden Sie den Netzadapter an der DC-Buchse. Dabei sollte darauf geachtet werden, mit trockenen Händen
zu arbeiten.
Bedienungsfeld
F1, F2 = Variable Funktion, wählt die auf dem Bildschirm angezeigte Funktion aus
OK = Validate
STORE = Datenspeicherung
= Taste, um einen bestimmten Wert einzustellen oder um einen Funktion zu wählen.
ON/OFF = Gerät einschalten oder ausschalten.
10Einstellen
1. Wählen Sie [EINSTELLEN] mit MENU (F2) die Einstellungsfunktion.
2. Verfolgen Sie die Anweisungen auf dem Schirm um die Sprache, den Kontrast und das automatische
Abschalten des Gerätes einzustellen.
Messung
1. Verbinden die Elektroden mit dem entsprechenden Eingang. Automatische Temperaturkompensation
und -messung werden durch den Anschluss eines Pt1000 ermöglicht.
2. Wählen Sie den gewünschten Bereich mit MENU (F2).
Tauchen Sie niemals eine pH-Elektrode und eine Gelöster-Sauerstoff-Elektrode gleichzeitig in die Lösungen!
Ein blinkendes Komma warnt vor instabilen Messungen. Warten Sie noch mit der Ablesung! Das Rühren der
Lösung während der Messung wird zur Förderung der Homogenität empfohlen.
Kalibrieren
Drücken Sie KALIBRIER (F1).
Das Gerät verweigert jede automatische Kalibrierung, wenn die Elektrode nicht stabil ist. Ungenügendes Rühren
oder eine abgenutzte Elektrode können die Ursache sein.
pH
1. Die geeigneten Puffer (1.68, 2.00, 4.00, 4.01, 6.87, 7.00, 9.18, 9.21, 9.95, 10.01, 12.00, 12.45) wählen
und CAL drücken.
2. Nach Spülung der Elektroden mit destilliertem Wasser, werden diese in die erste Pufferlösung
eingetaucht. Wählen Sie [KALIBRIER], drücken Sie OK und verfolgen Sie die Anweisungen auf dem
Schirm.
3. Nach Spülung der Elektroden mit destilliertem Wasser, werden diese in die Probenlösung eingetaucht
und der Meßwert kann abgelesen werden.
4. Nach jedem Gebrauch die Elektroden mit destilliertem Wasser spülen und in einer 3...5 M KCl-Lösung
aufbewahren.
mV
1. Die Elektroden in eine Standardlösung eintauchen, den angezeigten Wert korrigieren und OK drücken.
• Wählen Sie [RESET] und drücken Sie OK um die Kalibrierung zu annullieren.
Temperatur
1. Der Temperaturfühler in eine Lösung von bekannter Temperatur eintauchen. Den angezeigten Wert
korrigieren und OK drücken.
• Wählen Sie [RESET] und drücken Sie OK um die Kalibrierung zu annullieren.
• Ohne Verwendung eines Pt1000, drücken Sie OK, der manuell eingegebene Wert einstellen und OK
drücken.
Leitfähigkeit
1. Das Gerät ermöglicht jetzt die Wahl zwischen den gespeicherten Standardlösungen (0.01, 0.1, 1 M KCl).
Die geeignete Standardlösung wählen und OK drücken. Den nicht verwendeten Standardlösungen
ausschalten.
2. Nach mehrmaligem Spülen der Messzelle mit der Standardlösung, tauchen Sie sie in diesen Standard
ein. Die Temperatur der Lösung ist nicht von Bedeutung, sie sollte aber zwischen 0°C und 40°C liegen.
Nicht vergessen manuell zu kompensieren, wenn kein Pt1000 verwendet wird! Wählen Sie [KALIBRIER],
drücken Sie OK und verfolgen Sie die Anweisungen auf dem Schirm.
3. Spülen Sie die Zelle mit der Probenlösung, tauchen Sie sie hinein und lesen Sie die Anzeige ab.
4. Spülen Sie die Zelle nach jedem Gebrauch und bewahren Sie sie in destilliertem Wasser auf.
11Gelöster-Sauerstoff
1. Die in atmosphärischer Luft befindliche Elektrode tritt in den Gleichgewichtszustand, der dem
Sauerstoffpartialdruck und damit der Sauerstoffsättigung in Wasser entspricht. Das Gerät zeigt die
Sättigung, Strom der Elektrode, Temperatur an, und standardisiert automatisch, wenn der angezeigte
Wert stabil ist.
2. Nach Spülung der Elektroden mit destilliertem Wasser, werden diese in die Probenlösung eingetaucht
und der Messwert kann abgelesen werden. Das Rühren der Lösung während der Messung wird zur
Förderung der Homogenität verpflichtet. Dabei sollte die Anströmgeschwindigkeit mindestens 10 cm/s
betragen.
3. Spülen Sie die Elektrode nach jedem Gebrauch und bewahren Sie sie in destilliertem Wasser auf.
Gute Laborpraxis
1. Drücken Sie KALIBRIER (F1).
2. Wählen Sie GLP und Drücken Sie OK um einen kompletten Bericht der Kalibrierergebnissen
vorzuzeigen.
Datenspeicherung im internen Speicher
Daten speichern
1. Die STORE-Taste drücken, wenn Sie Daten speichern möchten. Die Anzeige zeigt die nächste
Speicheradresse.
2. Wählen Sie die gewünschte Adresse und drücken Sie OK, um den Messwert zu speichern.
Daten auflisten
1. Die -Taste drücken, wenn Sie gespeicherte Daten ablesen möchten. Die Anzeige zeigt eine Liste.
2. Wählen Sie die gewünschte Adresse, um den Messwert anzuzeigen.
3. Drücken Sie OK zur Beendigung.
12Specifications LabArt C51
pH Range 0...14 pH
Resolution 0.01 pH
Accuracy 0.2% ± 1 digit
Calibration 1...3 points
Buffers 12 pre-programmed
Temperature Compensation 0...100°C
ISO-pH 6...8 pH
Slope 80...120%
mV Range ±2000 mV
Resolution 1 mV
Accuracy 0.2% ± 1 digit
Calibration 1 point
CONDUCTIVITY Range 0...1000 mS/cm
Resolution 0.01 µS/cm
Accuracy 1% f.s. of range
Calibration 1 point
Standards 0.01/0.1/1M KCl
Cell Constant 0.1/1/10 cm-1 ± 30%
Temperature Compensation 0...100°C
Reference Temperature 20° or 25°C
Temperature Coefficient natural waters (EN27888)
SALINITY Range 0...70 ppt
Resolution 0.1 ppt
TDS Range 0...100 g/l
Resolution 0.1 mg/l
DISSOLVED OXYGEN Range 0...20 mg/l (0...200%)
Resolution 0.05 mg/l (0.5%)
Accuracy 1% ± 1 digit
Calibration 1 point
Temperature Compensation 0...50°C
Salinity Compensation 0...40 ppt
Air Pressure Compensation 800...1200 hPa
TEMPERATURE Range -5...100°C
Resolution 0.1°C
Accuracy 0.5°C
Calibration 1 point
INPUTS pH/mV BNC, 1012 Ω
Conductivity/Dissolved Oxygen BNC
Temperature 2 banana, for Pt1000
STORAGE MEMORY Data sets 50
DISPLAY LCD 160x160 pixels
White Backlight ✓
Languages EN, NL, FR, DE
POWER SUPPLY Low Voltage 9...15 VDC
Batteries 4x1.2 V, NiMH
DIMENSIONS WxDxH 10x20x4 cm
WEIGHT Meter 350 g
13NIST pH buffers
Temp. 1.68 4.01 6.87 9.18 12.45
0°C 1.666 4.003 6.984 9.464 13.423
5°C 1.668 3.999 6.951 9.395 13.207
10°C 1.670 3.998 6.923 9.332 13.003
15°C 1.672 3.999 6.900 9.276 12.810
20°C 1.675 4.002 6.881 9.225 12.627
25°C 1.679 4.008 6.865 9.180 12.454
30°C 1.683 4.015 6.853 9.139 12.289
40°C 1.694 4.035 6.838 9.068 11.984
50°C 1.707 4.060 6.833 9.011 11.705
60°C 1.723 4.091 6.836 8.962 11.449
70°C 1.743 4.126 6.845 8.921
80°C 1.766 4.164 6.859 8.885
Standard pH buffers
Temp. 2.00 4.00 7.00 9.21 10.01 12.00
5°C 1.85 3.99 7.08 9.45 10.24 12.56
10°C 1.89 3.99 7.06 9.38 10.18 12.35
20°C 1.96 3.99 7.02 9.26 10.06 12.14
25°C 2.00 4.00 7.00 9.21 10.01 12.00
30°C 2.03 4.01 6.99 9.16 9.87 11.89
40°C 2.08 4.03 6.98 9.06 9.89 11.71
50°C 2.12 4.06 6.97 8.99 9.83 11.52
60°C 2.14 4.09 6.98 8.93 9.79 11.33
Conductivity standards
Temp. 0.01 M 0.1 M 1M (mS/cm)
0°C 0.776 7.15 65.4
5°C 0.896 8.22 74.1
10°C 1.020 9.33 83.2
15°C 1.147 10.48 92.5
20°C 1.278 11.67 102.1
25°C 1.413 12.88 111.8
30°C 1.552 14.12 121.7
35°C 1.694 15.38 131.7
40°C 1.839 16.67 142.1
Redox standards
Temp. 124 358 (mV)
0°C 156 388
5°C 148 381
10°C 141 376
15°C 135 370
20°C 130 364
25°C 124 358
30°C 122 352
35°C 116 346
40°C 99 340
14DECLARATION OF CONFORMITY
We declare under our sole responsibility that the product
Multi-channel analysers
content of the type numbers
LabArt C51
to which this declaration relates is in conformity
with the following standards
LOW VOLTAGE DIRECTIVE 2006/95/EC
EN61010-1
EMC DIRECTIVE 2004/108/EC
EN61326-1
Consort bvba
Parklaan 36, B-2300 Turnhout, Belgium
Tel: (+32) (0)14 41 12 79
Fax: (+32) (0)14 42 91 79
Sales: sales@consort.be
The electro-magnetic susceptibility has been chosen at a level that gains proper operation in residential areas, on
business and light industrial premises and on small-scale enterprises, inside as well as outside of buildings. All
places of operation are characterised by their connection to the public low voltage power supply system.
15WARRANTY CERTIFICATE
This instrument (excluding all accessories) is warranted against defective material and workmanship for a period
of thirty-six (36) months from the date of shipment ex factory.
Accessories and breakable items such as electrodes are not warranted unless proven to be defective before
shipment.
The original purchase order numbers, Consort invoice numbers and serial numbers of the products must be
provided.
CONSORT will repair all defective equipment returned to it during the warranty period without charge (CIF
Turnhout prepaid by sender), provided the equipment has been used under normal laboratory conditions and in
accordance with the operating limitations and maintenance procedures described in the instruction manual and
when not having been subject to accident, alteration, misuse or abuse.
If the products have been used with or have come into contact with fluids, an MSDS (material safety data sheet)
must be supplied prior to issuing a return authorisation.
A return authorisation must be obtained from CONSORT before returning any product for warranty repair on a
freight prepaid basis!
Consort bv
Hertenstraat 56/9
B-2300 Turnhout • Belgium
Tel : (+32) (0)14 41 12 79
Fax : (+32) (0)14 42 91 79
Sales : sales@consort.be
Support : support@consort.be
Information : info@consort.be
16You can also read