Lenovo ThinkBook 13s-IWL/14s-IWL User Guide - Coolblue
←
→
Page content transcription
If your browser does not render page correctly, please read the page content below

Lenovo ThinkBook 13s-IWL/14s-IWL User Guide
Read this first

Before using this documentation and the product it supports, ensure that you read and understand the
following:
• Appendix A “Important safety information” on page 29
• Safety and Warranty Guide
• Setup Guide

First Edition (April 2019)

© Copyright Lenovo 2019.
LIMITED AND RESTRICTED RIGHTS NOTICE: If data or software is delivered pursuant to a General Services
Administration “GSA” contract, use, reproduction, or disclosure is subject to restrictions set forth in Contract No. GS-
35F-05925.
Contents

About this documentation . . . . . . . . iii                                   Enable power-on password . . . . . .              .   .   18
                                                                               Set hard disk password . . . . . . . .            .   .   18
Chapter 1. Meet your computer . . . . . 1                                      Change or remove hard disk password . .           .   .   19
Front . . . . . . . . . . . . .           .   .   .   .   .   .   .    1   Use the fingerprint reader (for selected models)      .   .   19
Base . . . . . . . . . . . . .            .   .   .   .   .   .   .    2   Use firewalls and antivirus programs. . . . .         .   .   19
Left . . . . . . . . . . . . .            .   .   .   .   .   .   .    3
Right . . . . . . . . . . . . .           .   .   .   .   .   .   .    4   Chapter 5. Configure advanced
Features and specifications . . . .       .   .   .   .   .   .   .    5   settings. . . . . . . . . . . . . . . . . 21
    Statement on USB transfer rate .      .   .   .   .   .   .   .    6   UEFI/BIOS . . . . . . . . . . . . .           .   .   .   .   21
                                                                              What is UEFI/BIOS setup utility . . .      .   .   .   .   21
Chapter 2. Get started with your                                              Start the UEFI/BIOS setup utility . .      .   .   .   .   21
computer . . . . . . . . . . . . . . . . . 7                                  Navigate in the UEFI/BIOS interface .      .   .   .   .   21
Get started with Windows 10 . .       .   .   .   .   .   .   .   .    7      Change the startup sequence . . .          .   .   .   .   21
     Windows account . . . . .        .   .   .   .   .   .   .   .    7      Set the system date and time. . . .        .   .   .   .   22
     Windows user interface . . .     .   .   .   .   .   .   .   .    8      Change hotkey mode . . . . . . .           .   .   .   .   22
     Windows label . . . . . .        .   .   .   .   .   .   .   .    9      Enable/Disable always-on . . . . .         .   .   .   .   22
Connect to Wi-Fi networks . . .       .   .   .   .   .   .   .   .    9      Update UEFI/BIOS . . . . . . . .           .   .   .   .   22
Use Lenovo Vantage . . . . . .        .   .   .   .   .   .   .       10   Recovery information . . . . . . . .          .   .   .   .   23
Interact with your computer . . .     .   .   .   .   .   .   .       11      Reset your computer . . . . . . .          .   .   .   .   23
     Hotkeys . . . . . . . . .        .   .   .   .   .   .   .       11      Use advanced options . . . . . .           .   .   .   .   23
Use multimedia . . . . . . . .        .   .   .   .   .   .   .       12      Windows automatic recovery. . . .          .   .   .   .   23
     Use audio . . . . . . . .        .   .   .   .   .   .   .       12      Create and use a recovery USB device       .   .   .   .   23
     Use the camera . . . . . .       .   .   .   .   .   .   .       12
     Connect to an external display   .   .   .   .   .   .   .       12   Chapter 6. Help and support . . . . . 25
                                                                           Frequently asked questions . . . . .      .   .   .   .   .   25
Chapter 3. Explore your computer . . 15                                    Self-help resources . . . . . . . .       .   .   .   .   .   26
Manage power . . . . . . . . .            .   .   .   .   .   .       15   Call Lenovo . . . . . . . . . . .         .   .   .   .   .   27
     Check the battery status . . .       .   .   .   .   .   .       15        Before you contact Lenovo . . .      .   .   .   .   .   27
     Charge the battery . . . . . .       .   .   .   .   .   .       15        Lenovo Customer Support Center .     .   .   .   .   .   27
     Check the battery temperature .      .   .   .   .   .   .       15   Purchase additional services. . . . .     .   .   .   .   .   28
     Maximize the battery life . . .      .   .   .   .   .   .       15
     Set power button behaviors . .       .   .   .   .   .   .       15   Appendix A. Important safety
     Set the power plan . . . . . .       .   .   .   .   .   .       16   information . . . . . . . . . . . . . . . 29
Connect a Bluetooth-enabled device        .   .   .   .   .   .       16
Airplane mode . . . . . . . . .           .   .   .   .   .   .       16   Appendix B. Accessibility and
                                                                           ergonomic information . . . . . . . . 43
Chapter 4. Secure your computer
and information . . . . . . . . . . . . 17                                 Appendix C. Compliance
Use passwords . . . . . . . . . . . . .                   .   .       17   information . . . . . . . . . . . . . . . 47
    Password types . . . . . . . . . . .                  .   .       17
                                                                           Appendix D. Notices and
    Set administrator password . . . . . .                .   .       17
                                                                           trademarks . . . . . . . . . . . . . . . 59
    Change or remove administrator password               .   .       17
    Set user password . . . . . . . . . .                 .   .       18

© Copyright Lenovo 2019                                                                                                                   i
ii Lenovo ThinkBook 13s-IWL/14s-IWL User Guide
About this documentation
• Illustrations in this documentation might look different from your product.
• Depending on the model, some optional accessories, features, and software programs might not be
  available on your computer.
• Depending on the version of operating systems, some user interface instructions might not be applicable
  to your computer.
• Documentation content is subject to change without notice. Lenovo makes constant improvements on the
  documentation of your computer, including this User Guide. To get the latest documentation, go to https://
  support.lenovo.com.
• Microsoft® makes periodic feature changes to the Windows® operating system through Windows Update.
  As a result, some information in this documentation might become outdated. Refer to Microsoft resources
  for the latest information.

© Copyright Lenovo 2019                                                                                   iii

iv Lenovo ThinkBook 13s-IWL/14s-IWL User Guide
Chapter 1. Meet your computer

Front

                                                              3
                                                  1       2       41

                                                                                    5

                                                                                    6

 1. Microphones             Capture or record sound and voice.

                            Take pictures or record videos by clicking Camera from the Start menu.

 2. Camera                  If you use other apps that support photographing, video chatting, and video
                            conference, the camera starts automatically when you enable the camera-required
                            feature from the app.

                            Move the slider to cover or uncover the camera lens. It is designed to protect your
 3. Camera cover slider     privacy.

 4. Camera light            If the light is on, the camera is in use.

 5. Screen                  Display text, graphics, and videos.

                            Send and receive radio waves for the wireless LAN/Bluetooth module.
 6.Wireless LAN/Bluetooth
 antennas                   Note: The antennas are not visible from the outside of the computer.

© Copyright Lenovo 2019                                                                                           1
Base
1
2
3
To turn on the computer, press the power button.
To turn off the computer, open the Start menu, click Power, and then selected Shut
1. Power button/Fingerprint
down.
reader*
Note: Selected models include a fingerprint reader on the power button. see “Use the
fingerprint reader (for selected models)” on page 19.
The light shows power status of the computer. If the computer includes a fingerprint
reader, it can also show the status of the reader.
• Solid white: The computer is on.
2. Power/Fingerprint reader* • Blinking slowly in white: The computer is in sleep mode.
light
• Off: The computer is off or in hibernation mode.
• Blinking green: The fingerprint reader is starting.
• Solid green: The fingerprint reader is waiting for you to scan your fingerprints.
3. Touchpad Perform finger touch and all the functions of a traditional mouse.
* for selected models
2 Lenovo ThinkBook 13s-IWL/14s-IWL User GuideLeft
1 2 3 4 5 6
1. Power connector Connect to ac power.
2. Battery/Charging light This light shows whether the computer is connected to ac power.
• White: connected to ac power (battery power 91% -100%)
• Amber: connected to ac power (battery power 0% -90%)
• Off: not connected to ac power
3. HDMI™ connector Connect to a compatible digital audio device or video monitor, such as an HDTV.
4. USB-C™ connector (USB
• Charge USB-C compatible devices with the output voltage and current of 5 V and 3
3.1 Gen 2)
A.
• Transfer data at USB 3.1 speed, up to 10 Gbps.
• Connect to an external display:
– USB-C to VGA: 1900 X 1200 pixels, 60 Hz
– USB-C to DP: 3840 X 2160 pixels, 60 Hz
• Connect to USB-C accessories to expand the computer's functionality. To purchase
USB-C accessories, go to https://www.lenovo.com/accessories.
Note: When the battery power is below 10%, the connected USB-C accessories
might not work correctly.
5. Audio connector To enhance your listening experience, connect speakers, headphones, or a headset
with a 3.5-mm (0.14- inch) and 4-pole plug to the audio connector.
Note: The conventional microphone is not supported.
6. Speaker Produce sound.
Chapter 1. Meet your computer 3Right
1 2 3
1. Speaker Produce sound.
2. USB Type-A connector Connect USB-compatible devices, such as a USB keyboard, USB mouse, USB
(USB 3.1 Gen 1) storage device, or USB printer.
3. USB Type-A connector Connect USB-compatible devices, such as a USB keyboard, USB mouse, USB
(always-on) storage device, or USB printer.
Charge the USB-compatible devices when your computer is off, in sleep mode, or in
hibernation mode. The always-on function can be enabled and disabled in the UEFI/
BIOS setup utility.
4 Lenovo ThinkBook 13s-IWL/14s-IWL User GuideFeatures and specifications
• Lenovo ThinkBook 13s-IWL
– Width: 307.6 mm (12.11 inches)
– Depth: 216.4 mm (8.52 inches)
– Thickness: 15.9 mm (0.63 inches)
Dimensions
• Lenovo ThinkBook 14s-IWL
– Width: 322.5 mm (12.70 inches)
– Depth: 222.8 mm (8.77 inches)
– Thickness: 16.5 mm (0.65 inches)
ac power adapter 100 V to 240 V ac, 50 Hz to 60 Hz
Battery pack • 45 Wh
• 4 cells
To view the microprocessor information of your computer, right-click the Start button
Microprocessor
and then click System.
Memory Double data rate 4 (DDR4) SDRAM
• Type: Solid-state drive
Storage device • Form factor: M.2 (2242)
• Bus: SATA/PCI Express
• Display size:
Display – Lenovo ThinkBook 13s-IWL: 337.82 mm (13.3 inches)
– Lenovo ThinkBook 14s-IWL: 355.6 mm (14.0 inches)
• Display resolution: 1920 x 1080 pixels
• Hotkeys
Keyboard
• Keyboard backlight
• ac power connector
• Audio connector
Connectors and slots • USB Type-A connector (USB 3.1 Gen 1) x 2
• HDMI connector
• USB-C connector (USB 3.1 Gen 2)
Security features • Fingerprint reader*
• Password
• Bluetooth
Wireless features
• Wireless LAN
• Camera
Others • Microphones
• Speakers
Chapter 1. Meet your computer 5* for selected models Note: The battery capacity is the typical or average capacity as measured in a specific test environment. Capacities measured in other environments may differ but are no lower than the rated capacity (see product label). Statement on USB transfer rate Depending on many factors such as the processing capability of the host and peripheral devices, file attributes, and other factors related to system configuration and operating environments, the actual transfer rate using the various USB connectors on this device will vary and will be slower than the data rate listed below for each corresponding device. USB device Data rate (Gbit/s) 3.1 Gen 1 5 3.1 Gen 2 10 3.2 20 6 Lenovo ThinkBook 13s-IWL/14s-IWL User Guide
Chapter 2. Get started with your computer

Get started with Windows 10
Learn the basics of Windows 10 and start working with it right away. For more information about Windows
10, see the Windows help information.

Windows account
To use the Windows operating system, a user account is required. It can be either a Windows user account,
or a Microsoft account.

Windows user account
When you start Windows for the first time, you are prompted to create a Windows user account. This first
account you created is of the “Administrator” type. With an Administrator account, you can create additional
user accounts or change account types by doing the following:
 1. Open the Start menu and select Settings ➙ Accounts ➙ Family & other people.
 2. Follow the on-screen instructions.

Microsoft account
You can also sign in to the Windows operating system with a Microsoft account.

To create a Microsoft account, go to the Microsoft sign-up page at https://signup.live.com and follow the on-
screen instructions.

With a Microsoft account, you can:
• Enjoy one-time signing in if you are using other Microsoft services, such as OneDrive, Skype, and Outlook.
  com.
• Sync personalized settings across other Windows-based devices.

© Copyright Lenovo 2019                                                                                         7
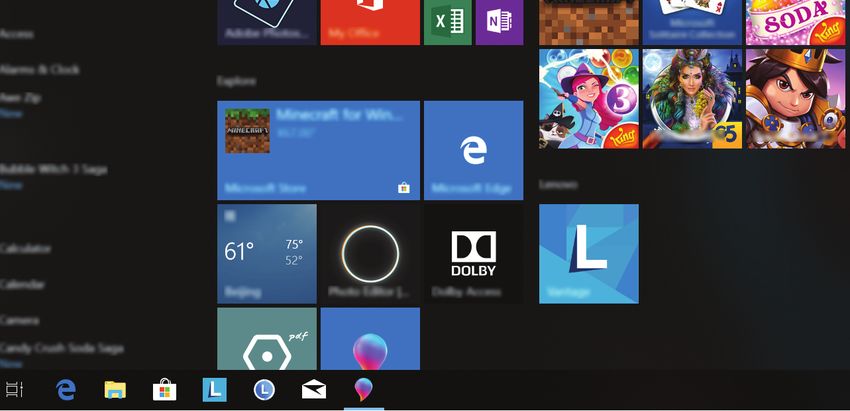
Windows user interface

    1

    2

    3

            4      5     6                                                                 7 8    9                   10

                                           Change account settings, lock the computer, or sign out from the current
 1. Account                                account.

 2. Settings                               Launch Settings.

 3. Power                                  Shut down, restart, or put the computer into sleep.

 4. Start button                           Open the Start menu.

                                           Type what you are looking for in the search box and get search results from
 5. Windows Search                         your computer and the Web.

 6. Task View                              Display all opened apps and switch among them.

 7. Windows notification area              Display notifications and status of some features.

                                           Display power status and change battery or power settings. When your
 8. Battery status icon
                                           computer is not connected to ac power, the icon changes to .

 9. Network icon                           Connect to an available wireless network and display the network status.

                                           Display the latest notifications from apps and provide quick access to some
 10. Action center                         features.

Open the Start menu
• Click the Start button.
• Press the Windows logo key on the keyboard.

8       Lenovo ThinkBook 13s-IWL/14s-IWL User Guide
Access Control Panel
• Open the Start menu and click Windows System ➙ Control Panel.
• Use Windows Search.
Launch an app
• Open the Start menu and select the app you want to launch.
• Use Windows Search.
Windows label
Your computer might have a Windows 10 Genuine Microsoft label affixed to its cover depending on the
following factors:
• Your geographic location
• Edition of Windows 10 that is preinstalled
Go to https://www.microsoft.com/en-us/howtotell/Hardware.aspx for illustrations of the various types of
Genuine Microsoft labels.
• In the People’s Republic of China, the Genuine Microsoft label is required on all computer models
preinstalled with any version of Windows 10.
• In other countries and regions, the Genuine Microsoft label is required only on computer models licensed
for Windows 10 Pro.
The absence of a Genuine Microsoft label does not indicate that the preinstalled Windows version is not
genuine. For details on how to tell whether your preinstalled Windows product is genuine, refer to the
information provided by Microsoft at: https://www.microsoft.com/en-us/howtotell/default.aspx.
There are no external, visual indicators of the Product ID or Windows version for which the computer is
licensed. Instead, the Product ID is recorded in the computer firmware. Whenever a Windows 10 product is
installed, the installation program checks the computer firmware for a valid, matching Product ID to complete
the activation.
In some cases, an earlier Windows version might be preinstalled under the terms of the Windows 10 Pro
license downgrade rights.
Connect to Wi-Fi networks
Your computer helps you connect to the world through a wireless network.
1. Click the network icon in the Windows notification area. A list of available wireless networks is displayed.
2. Select a network to connect to. Provide required information if needed.
Chapter 2. Get started with your computer 9Use Lenovo Vantage
The preinstalled Lenovo Vantage is a customized one-stop solution to help you maintain your computer with
automated updates and fixes, configure hardware settings, and get personalized support.
Access Lenovo Vantage
Open the Start menu and click Lenovo Vantage. You also can type Lenovo Vantage in the search box.
To download the latest version of Lenovo Vantage, go to Microsoft Store and search by the app name.
Key features
Lenovo Vantage makes periodic updates of the features to keep improving your experience with your
computer.
Note: The available features vary depending on the computer model.
• System Update
Download and install firmware and driver updates to keep your computer up-to-date. You can configure
the options to install updates automatically when available.
• Hardware Settings
Configure intelligent settings of the following hardware to make your computer smarter to use:
– Power
– Camera
– Computer display
– Keyboard
– Microphones
– Speakers
– Touchpad
• Health & Support
Monitor your computer health and get personalized support of your computer. You can:
– Scan the computer hardware.
– Look up computer warranty status (online)
– Access User Guide.
– Read tips and tricks articles customized for your computer.
• Lenovo Wi-Fi Security
Protect your computer from malicious Wi-Fi networks.
10 Lenovo ThinkBook 13s-IWL/14s-IWL User GuideInteract with your computer
Your computer provides you various ways to navigate the screen.
Hotkeys
Some keys on the keyboard are printed with icons. These keys are called hotkeys and can be pressed alone
or in combination with the Fn key to access certain Windows functions or settings quickly. The functions of
hotkeys are symbolized by the icons printed on them.
Hotkey Function
Mute/Unmute the computer.
If you mute the computer and turn off your computer, the speakers remain muted when
you turn on your computer.
Decrease/Increase volume.
/
Enable/Disable the microphones.
Refresh the current window.
Enable/Disable the touchpad.
Turn on/off airplane mode.
Enable/Disable the camera.
Lock the current user account.
Manage external displays.
Decrease/Increase display brightness.
/
Answer a Skype call.
End a Skype call.
Note: Skype for Business must be installed to use the two hotkeys. To print screen or
change text-entering mode, use the Fn key.
Turn on/off the keyboard backlight.
Note: You can also press Fn and this hotkey to adjust the brightness levels of backlight.
Hotkey mode
Some hotkeys share keys with functions keys (F1 to F12). The hotkey mode is a UEFI/BIOS setting that
changes how hotkeys (or function keys) are used.
Hotkey mode setting How to use hotkeys How to use function keys
Disabled Hold down the Fn key and press one Press the function keys directly.
of the hotkeys.
Enabled Press the hotkeys directly. Hold down the Fn key and press one
of the function keys.
Chapter 2. Get started with your computer 11Note: Hotkeys that do not share keys with function keys are not affected by the hotkey mode setting. They
should always be used with the Fn key.
Use multimedia
Use your computer for business or entertainment with the built-in components (camera, speakers, and audio
features) or connected external devices (an external projector, monitor, and HDTV).
Use audio
To enhance your listening experience, connect speakers, headphones, or a headset with a 3.5-mm (0.14-
inch) and 4-pole plug to the audio connector.
Change the sound settings
1. Go to Control Panel and view by category.
2. Click Hardware and Sound ➙ Sound.
3. Change the settings as you prefer.
Use the camera
You can use the built-in camera to take photos or record videos. The light next to the camera is on when the
camera is in use.
To take photos or record a video:
1. Open the Start menu and click Camera.
2. To take a photo, click the camera icon . If you want to record video, click the video icon to switch
to video mode.
If you use other apps that support photographing, video chatting, and video conference, the camera starts
automatically when you enable the camera-required feature from the app.
To configure the camera settings, open the Start menu and then click Lenovo Vantage ➙ Hardware
Settings ➙ Audio/Visual. Locate the Camera section and then follow the on-screen instructions to
configure the camera settings.
Connect to an external display
Connect your computer to a projector or a monitor to give presentations or expand your workspace.
Connect a wired display
1. Connect the external display to an appropriate video connector on your computer, such as the HDMI
connector.
2. Connect the external display to an electrical outlet.
3. Turn on the external display.
If your computer cannot detect the external display, right-click a blank area on the desktop, and then click
Display settings ➙ Detect.
Supported resolution
Your computer supports the following video resolution, if the external display also supports that resolution.
12 Lenovo ThinkBook 13s-IWL/14s-IWL User GuideConnect the external display to Supported resolution
the USB-C connector Up to 3840 x 2160 pixels / 60 Hz
the HDMI connector Up to 3840 x 2160 pixels / 30 Hz
Connect a wireless display (for computers and external displays supporting Miracast®)
• Open the Start menu, and then click Settings ➙ Devices ➙ Bluetooth & other devices ➙ Add
Bluetooth or other device ➙ Wireless display or dock.
• Click the action center icon in the Windows notification area and click Connect. Select the wireless
display and follow the on-screen instructions.
Set the display mode
Press and then select a display mode as you prefer.
• PC screen only: Displays the video output only on your computer screen.
Note: Depending on the situation, you might see Disconnect, PC screen only, Computer only, or
Disconnect projector.
• Duplicate: Displays the same video output on both your computer screen and an external display.
• Extend: Extends the video output from your computer display to an external display. You can drag and
move items between the two displays.
• Second screen only: Displays the video output only on an external display.
Note: Depending on the situation, you might see Projector only or Second screen only.
If you show programs using DirectDraw or Direct3D® in full-screen mode, only the main display shows the
video output.
Change display settings
1. Right-click a blank area on the desktop and select Display settings.
2. Select the display that you want to configure.
3. Change display settings as you prefer.
You can change the settings for both the computer display and the external display. For example, you can
define which one is the main display and which one is the secondary display. You also can change the
resolution and orientation.
Note: If you set a higher resolution for the computer display than the external display, only part of the screen
can be displayed on the external display.
Chapter 2. Get started with your computer 1314 Lenovo ThinkBook 13s-IWL/14s-IWL User Guide
Chapter 3. Explore your computer

Manage power
Use the information in this section to achieve the best balance between performance and power efficiency.

Check the battery status
The battery status icon   or   is in the Windows notification area. You can check the battery status, view
the current power plan, and access battery settings quickly.

Click the battery status icon to display the percentage of battery power remaining and change the power
mode. A warning message is displayed when the battery is low.

Charge the battery
When the battery power is low, charge your battery by connecting your computer to ac power.

The battery is fully charged in about four to eight hours. The actual charging time depends on the battery
size, the physical environment, and whether you are using the computer.

Battery charging is also affected by its temperature. The recommended battery temperature range for
charging the battery is between 10°C (50°F) and 35°C (95°F).

Notes:
• To maximize the life of the battery, the computer does not start recharging the battery if the remaining
  power is greater than 95%.
• If power adapter (65 W) shipped with your computer supports the rapid charge function, the battery is
  80% charged in about one hour.

Check the battery temperature
 1. Open the Start menu and click Lenovo Vantage.
 2. Click Hardware Settings ➙ Power.
 3. Locate the Power Status section and then click Show Details to view the battery temperature.

Maximize the battery life
• Lower the brightness of the computer display.
• Turn off the wireless features when not in use.
• Use the battery until the charge is depleted.
• Recharge the battery completely before using it.

Set power button behaviors
You can define what the power button does according to your preference. For example, by pressing the
power button, you can turn off the computer or put the computer to sleep or hibernation mode.

To change what the power button does:
 1. Right-click the battery status icon in the Windows notification area.

© Copyright Lenovo 2019                                                                                      15
2. Click Power Options ➙ Choose what the power button does.
 3. Change the settings as you prefer.

Set the power plan
For ENERGY STAR® compliant computers, the following power plan takes effect when your computers have
been idle for a specified duration:

Table 1. Default power plan (when plugged into ac power)

 • Turn off the display: After 10 minutes
 • Put the computer to sleep: After 30 minutes

To reset the power plan to achieve the best balance between performance and power saving:
 1. Right-click the battery status icon and select Power Options.
 2. Choose or customize a power plan as you prefer.

Connect a Bluetooth-enabled device
You can connect all types of Bluetooth device to your computer, such as a keyboard, a mouse, a
smartphone, or speakers. The devices must be within a short distance, usually 10 meters (33 feet), from the
computer.

 1. Open the Start menu, and then click Settings ➙ Devices ➙ Bluetooth & other devices. Turn on the
    Bluetooth switch.
 2. Click Add Bluetooth or other device ➙ Bluetooth.
 3. Select a Bluetooth device, and then follow the on-screen instructions.

Your Bluetooth-enabled device and computer will automatically connect the next time if the two devices are
in range of each other with Bluetooth turned on. You can use Bluetooth for data transfer or remote control
and communication.

Airplane mode
When the Airplane mode is enabled, all wireless features are disabled.

To enable or disable the Airplane mode:
 1. Open the Start menu.
 2. Click Settings ➙ Network & Internet ➙ Airplane mode.
 3. Turn on or turn off the Airplane mode switch.

16   Lenovo ThinkBook 13s-IWL/14s-IWL User Guide
Chapter 4. Secure your computer and information
Use passwords
This section introduces types of passwords in UEFI (Unified Extensible Firmware Interface) or BIOS (Basic
Input/Output System) and how to set, change, and remove a password.
Password types
You can set various passwords in the UEFI/BIOS setup utility.
Password type Pre-requisite When set
Administrator password No You must enter it to start the setup
utility.
User password The administrator password must be You can use the user password to
set. start the setup utility.
Master hard disk password No You must enter it to start the
operating system.
User hard disk password The master hard disk password must You can use the user hard disk
be set. password to start the operating
system.
Notes:
• All passwords set in the setup utility consist of alphanumeric characters only.
• If you start the setup utility using the user password, you can only change a few settings.
Set administrator password
You set the administrator password to prevent unauthorized access to the UEFI/BIOS setup utility.
Attention: If you forget the administrator password, a Lenovo authorized service personnel cannot reset
your password. You must take your computer to a Lenovo authorized service personnel or a marketing
representative to have the system board replaced. Proof of purchase is required and a fee will be charged for
parts and service.
Step 1. Start the UEFI/BIOS setup utility.
Step 2. Select Security ➙ Set Administrator Password and press Enter.
Step 3. Enter a password string that contains only letters and numbers. Then, press Enter.
Step 4. Enter the password again and press Enter.
Step 5. Select Exit ➙ Exit Saving Changes.
Next time you start the computer, you must enter the administrator password to start the setup utility. If
Power on Password is enabled, you must enter the administrator password or the user password to start
the computer.
Change or remove administrator password
Only the administrator can change or remove the administrator password. If you remove the administrator
password, the user password will also be removed.
© Copyright Lenovo 2019 17Step 1. Start the UEFI/BIOS setup utility using the administrator password.
Step 2. Select Security ➙ Set Administrator Password and press Enter.
Step 3. Enter the current password.
Step 4. In the Enter New Password text box, enter the new password.
Step 5. In the Confirm New Password text box, enter the new password again.
Note: If you want to remove the password, press Enter in both text boxes and do not enter any
character.
Step 6. Select Exit ➙ Exit Saving Changes.
Set user password
Before you can set up user password, the administrator password must be set.
The administrator of the setup utility might need to set up a user password for others to use.
Step 1. Start the UEFI/BIOS setup utility using the administrator password.
Step 2. Select Security ➙ Set User Password and press Enter.
Step 3. Enter a password string that contains only letters and numbers. Then, press Enter.
Note: The user password must be different from the administrator password.
Step 4. Enter the password again and press Enter.
Step 5. Select Exit ➙ Exit Saving Changes.
Enable power-on password
If the administrator password has been set, you can enable power-on password to enforce greater security.
Step 1. Start the UEFI/BIOS setup utility.
Step 2. Select Security ➙ Power on Password and press Enter.
Note: The administrator password must be set in advance.
Step 3. Change the setting to Enabled.
Step 4. Select Exit ➙ Exit Saving Changes.
If power-on password is enabled, a prompt appears on the screen every time you turn on the computer. You
must enter the administrator or user password to start the computer.
Set hard disk password
You can set a hard disk password in the setup utility to prevent unauthorized access to your data.
Attention: Be extremely careful when setting a hard disk password. If you forget the hard disk password, a
Lenovo authorized service personnel cannot reset your password or recover data from the hard disk. You
must take your computer to a Lenovo authorized service personnel or a marketing representative to have the
hard disk drive replaced. Proof of purchase is required and a fee will be charged for parts and service.
Step 1. Start the UEFI/BIOS setup utility.
Step 2. Select Security ➙ Set Hard Disk Password and press Enter.
Note: If you start the setup utility using the user password, you cannot set hard disk password.
18 Lenovo ThinkBook 13s-IWL/14s-IWL User GuideStep 3. Follow on-screen instructions to set both the master and the user passwords.
Note: The master and user hard disk passwords must be set at the same time.
Step 4. Select Exit ➙ Exit Saving Changes.
If the hard disk password is set, you must enter the correct password to start the operating system.
Change or remove hard disk password
Step 1. Start the UEFI/BIOS setup utility.
Step 2. Select Security.
Step 3. Change or remove the hard disk password.
To change or remove master password, select Change Master Password and press Enter.
Note: If you remove the master hard disk password, the user hard disk password will also be
removed.
To change user password, select Change User Password and press Enter.
Note: The user hard disk password cannot be removed separately.
Step 4. Select Exit ➙ Exit Saving Changes.
Use the fingerprint reader (for selected models)
If your computer includes a fingerprint reader, you can use it to enroll your fingerprints. After enrollment, you
can tap your finger on the fingerprint reader to sign in to Windows.
Enroll your fingerprints
Open the Start menu and then click Settings ➙ Accounts ➙ Sign-in options. Then, follow the on-screen
instructions to finish the enrollment.
During the enrollment, the fingerprints are associated with the Windows password automatically. It is
recommended that you enroll more than one fingerprint in case of any injuries to your fingers.
Maintain the fingerprint reader
To ensure that the fingerprint reader works correctly, do not:
• Scratch the surface of the reader with anything hard.
• Use or touch the reader with a wet, dirty, wrinkled, or injured finger.
Use firewalls and antivirus programs
Your computer might be preinstalled with a firewall program. The firewall protects against computer Internet
security threats, unauthorized access, intrusions, and Internet attacks. It also protects your privacy.
A full version of antivirus program is provided with a free 30-day subscription. After 30 days, you must renew
the license to continue receiving the antivirus program updates.
For more information, see the help system of the program.
Chapter 4. Secure your computer and information 1920 Lenovo ThinkBook 13s-IWL/14s-IWL User Guide
Chapter 5. Configure advanced settings
This chapter provides information about UEFI/BIOS and system management.

UEFI/BIOS
This section introduces what is UEFI/BIOS and the operations you can perform in UEFI/BIOS.

What is UEFI/BIOS setup utility
UEFI/BIOS is the first program that the computer runs when the computer is turned on. UEFI/BIOS initializes
the hardware components and loads the operating system and other programs. Your computer may include
a setup program (setup utility) with which you can change UEFI/BIOS settings.

Start the UEFI/BIOS setup utility
Step 1.    Turn on or restart the computer.
Step 2.    When the Lenovo logo appears on the screen, press F2 immediately.

           Notes:
           • For computers with hotkey mode enabled, press Fn + F2.
           • In Windows, you can also select Advanced options ➙ UEFI Firmware Settings ➙ Restart. To
             enter Advanced options, see “Use advanced options” on page 23.

Navigate in the UEFI/BIOS interface
You can navigate in the UEFI/BIOS interface by pressing the following keys:

 F1                 Display the General Help screen.

 F9                 Restore to the default settings.

 F10                Save your configuration and exits.

 F5                 Change to a lower value.

 F6                 Change to a higher value.

 ↑↓                 Locate an item.
 ←→                 Select a tab.
 Esc                Exit the submenu and return to the parent menu.

 Enter              Enter the selected tab or submenu.

Change the startup sequence
 1. Start the UEFI/BIOS setup utility.
 2. Select Boot. The default device order list is displayed.

       Note: The Boot menu is displayed if the computer cannot start from any devices or the operating
       system cannot be found.
 3. Set the startup sequence as desired.

© Copyright Lenovo 2019                                                                                  21
4. Press F10 to save the changes and restart the computer.
To change the startup sequence temporarily:
1. Restart the computer. When the logo screen is displayed, press F12 immediately.
Note: For computers with Hotkey mode enabled, press Fn + F12.
2. Select the device that you want the computer to start from and press Enter.
Set the system date and time
1. Start the UEFI/BIOS setup utility.
2. Select Configuration ➙ System Time/System Date and set the system date and time as desired.
3. Press F10 to save changes and exit.
Change hotkey mode
Step 1. Start the UEFI/BIOS setup utility.
Step 2. Select Configuration ➙ Hotkey Mode and press Enter. Change the setting to Disabled or
Enabled.
Step 3. Select Exit ➙ Exit Saving Changes.
Enable/Disable always-on
For some Lenovo computers with always-on connectors, the always-on function can be enabled/disabled in
the UEFI/BIOS setup utility.
Step 1. Start the UEFI/BIOS setup utility.
Step 2. Select Configuration ➙ Always On USB and press Enter. Change the setting to Disabled or
Enabled.
Step 3. Select Exit ➙ Exit Saving Changes.
Update UEFI/BIOS
When you install a new program, device driver, or hardware component, you might need to update UEFI/
BIOS.
Download and install the latest UEFI/BIOS update package by one of the following methods:
• From Lenovo Vantage:
1. Open the Start menu and click Lenovo Vantage.
2. Click System Update. In the Lenovo System Update section, click Check for updates. The
available update packages are displayed and categorized by critical, recommended, or optional.
3. If the latest UEFI/BIOS update package is available, select the package and click Install selected.
Then, the update package will be downloaded and installed automatically.
• From the Lenovo Support Web site:
Go to https://support.lenovo.com and select the entry for your computer. Then, follow the on-screen
instructions to download and install the latest UEFI/BIOS update package.
22 Lenovo ThinkBook 13s-IWL/14s-IWL User GuideRecovery information
This section introduces the recovery information of the Windows 10 operating system. Ensure that you read
and follow the on-screen recovery instructions. The data on your computer might be deleted during the
recovery process. To avoid data loss, make a backup copy of all the data that you want to keep.
Reset your computer
In the resetting process, you can choose to keep your files or remove them when you reinstall the operating
system.
Note: The items in the graphical user interface (GUI) might change without notice.
1. Open the Start menu, and then click Settings ➙ Update & Security ➙ Recovery.
2. In the Reset this PC section, click Get started.
3. Follow the on-screen instructions to reset your computer.
Use advanced options
Note: The items in the graphical user interface (GUI) might change without notice.
1. Open the Start menu, and then click Settings ➙ Update & security ➙ Recovery.
2. In the Advanced startup section, click Restart now ➙ Troubleshoot ➙ Advanced options.
3. Select a preferred option from the following list, and then follow the on-screen instructions.
• System Restore: Use a restore point recorded on your PC to restore Windows.
• Go back to the previous version
• System Image Recovery: Recover Windows using a specific system image file.
• Startup Repair: Fix problems that keep Windows from loading.
• Command Prompt: Use the Command Prompt for advanced troubleshooting.
• UEFI Firmware Settings: Change settings in your PC’s UEFI firmware.
• Startup Settings: Change Windows startup behavior.
Windows automatic recovery
Note: Ensure that your computer is connected to ac power during the recovery process.
The Windows recovery environment on your computer operates independently from the Windows 10
operating system. It enables you to recover or repair the operating system even if the Windows 10 operating
system fails to start.
After two consecutive failed boot attempts, the Windows recovery environment starts automatically. Then
you can choose repair and recovery options by following the on-screen instructions.
Create and use a recovery USB device
It is recommended that you create a recovery USB drive as early as possible as a backup for the Windows
recovery programs. With the recovery USB drive, you can troubleshoot and fix the problems even if the
preinstalled Windows recovery programs are damaged. If you did not create a recovery USB drive as a
precautionary measure, you can contact Lenovo Customer Support Center and purchase one from Lenovo.
For a list of the Lenovo Support phone numbers for your country or region, go to:
https://pcsupport.lenovo.com/supportphonelist
Chapter 5. Configure advanced settings 23Create a recovery USB drive
Attention: The creation process deletes anything stored on the USB drive. To avoid data loss, make a
backup copy of all the data that you want to keep.
1. Ensure that your computer is connected to ac power.
2. Prepare a USB drive with at least 16 GB of storage capacity. The actual USB capacity required depends
on the size of the recovery image.
3. Connect the prepared USB drive to the computer.
4. Type recovery in the search box. Then click Create a recovery drive.
5. Click Yes in the User Account Control window to allow the Recovery Media Creator program to start.
6. In the Recovery Drive window, follow the on-screen instructions to create a recovery USB drive.
Use the recovery USB drive
1. Ensure that your computer is connected to ac power.
2. Connect the recovery USB drive to the computer.
3. Turn on or restart the computer. Press and hold Fn+F12 until the logo screen displays. Then the Boot
Menu window opens.
4. Select the recovery USB drive as the boot device.
5. Click Troubleshoot to display optional recovery solutions.
6. Select a recovery solution as desired. Then follow the on-screen instructions to complete the process.
24 Lenovo ThinkBook 13s-IWL/14s-IWL User GuideChapter 6. Help and support
Frequently asked questions
• Open the Start menu and click Windows System ➙ Control Panel.
How do I access Control Panel?
• Use Windows Search.
How do I turn off my computer? Open the Start menu and click Power. Then click Shut down.
How do I partition my storage https://support.lenovo.com/solutions/ht503851
drive?
What do I do if my computer stops Press and hold the power button until the computer turns off. Then restart the
responding. computer.
1. Carefully unplug the ac power adapter and turn off the computer
immediately. The more quickly you stop the current from passing through
the computer the more likely you will reduce damage from short circuits.
Attention: Although you might lose some data or work by turning off the
What do I do if I spill liquid on the computer immediately, leaving the computer on might make your computer
computer? unusable.
2. Do not try to drain out the liquid by turning over the computer. If your
computer has keyboard drainage holes on the bottom, the liquid will be
drained out through the holes.
3. Wait until you are certain that all the liquid is dry before turning on your
computer.
Where can I get the latest device • From Lenovo Vantage. See “Update UEFI/BIOS” on page 22.
drivers and UEFI/BIOS? • Download from Lenovo Support Web site at https://support.lenovo.com.
© Copyright Lenovo 2019 25Self-help resources
Use the following self-help resources to learn more about the computer and troubleshoot problems.
Resources How to access?
Use Lenovo Vantage to:
• Download and install the latest drivers and firmware.
• Configure hardware settings. • Open the Start menu and click Lenovo Vantage.
• Diagnose computer hardware problems. • Use Windows Search.
• Check the computer warranty status.
• Protect you computer from malicious Wi-Fi networks.
Product documentation:
1. Go to https://support.lenovo.com.
• Safety and Warranty Guide
2. Detect your computer or select computer model
• Setup Guide manually.
• This User Guide 3. Select Documentation and filter out the
• Regulatory Notice documentation you want.
Lenovo Support Web site with the latest support
information of the following:
• Drivers and software
• Diagnostic solutions https://support.lenovo.com
• Product and service warranty
• Product and parts details
• Knowledge base and frequently asked questions
• Open the Start menu and click Get Help or Tips.
• Use Windows Search or the Cortana® personal
Windows help information assistant.
• Microsoft support Web site: https://
support.microsoft.com
26 Lenovo ThinkBook 13s-IWL/14s-IWL User GuideCall Lenovo
If you have tried to correct the problem yourself and still need help, you can call Lenovo Customer Support
Center.
Before you contact Lenovo
Prepare the following before you contact Lenovo:
1. Record the problem symptoms and details:
• What is the problem? Is it continuous or intermittent?
• Any error message or error code?
• What operating system are you using? Which version?
• Which software applications were running at the time of the problem?
• Can the problem be reproduced? If so, how?
2. Record the system information:
• Product name
• Machine type and serial number
The following illustration shows where to find the machine type and serial number of your computer.
Lenovo Customer Support Center
During the warranty period, you can call Lenovo Customer Support Center for help.
Telephone numbers
For a list of the Lenovo Support phone numbers for your country or region:
• Go to https://pcsupport.lenovo.com/supportphonelist for the latest phone numbers.
• Refer to the Safety and Warranty Guide that comes with your computer.
Note: Phone numbers are subject to change without notice. If the number for your country or region is not
provided, contact your Lenovo reseller or Lenovo marketing representative.
Services available during the warranty period
• Problem determination - Trained personnel are available to assist you with determining if you have a
hardware problem and deciding what action is necessary to fix the problem.
Chapter 6. Help and support 27• Lenovo hardware repair - If the problem is determined to be caused by Lenovo hardware under warranty, trained service personnel are available to provide the applicable level of service. • Engineering change management - Occasionally, there might be changes that are required after a product has been sold. Lenovo or your reseller, if authorized by Lenovo, will make selected Engineering Changes (ECs) that apply to your hardware available. Services not covered • Replacement or use of parts not manufactured for or by Lenovo or nonwarranted parts • Identification of software problem sources • Configuration of UEFI/BIOS as part of an installation or upgrade • Changes, modifications, or upgrades to device drivers • Installation and maintenance of network operating systems (NOS) • Installation and maintenance of programs For the terms and conditions of the Lenovo Limited Warranty that apply to your Lenovo hardware product, see “Warranty information” in the Safety and Warranty Guide that comes with your computer. Purchase additional services During and after the warranty period, you can purchase additional services from Lenovo at https:// www.lenovo.com/services. Service availability and service name might vary by country or region. 28 Lenovo ThinkBook 13s-IWL/14s-IWL User Guide
Appendix A. Important safety information

Safety notices
This information can help you safely use your computer. Follow and retain all information included with your
computer. The information in this document does not alter the terms of your purchase agreement or the
Limited Warranty. For more information, see "Warranty Information" in the Safety and Warranty Guide that
comes with your computer.

Customer safety is important. Our products are developed to be safe and effective. However, personal
computers are electronic devices. Power cords, power adapters, and other features can create potential
safety risks that can result in physical injury or property damage, especially if misused. To reduce these risks,
follow the instructions included with your product, observe all warnings on the product and in the operating
instructions, and review the information included in this document carefully. By carefully following the
information contained in this document and provided with your product, you can help protect yourself from
hazards and create a safer computer work environment.

Note: This information includes references to power adapters and batteries. In addition, some products
(such as speakers and monitors) ship with external power adapters. If you have such a product, this
information applies to your product. In addition, computer products contain a coin-sized internal battery that
provides power to the system clock even when the computer is unplugged, so the battery safety information
applies to all computer products.

Important information about using your computer
Ensure that you follow the important tips given here to get the most use and enjoyment out of your computer.
Failure to do so might lead to discomfort or injury, or cause the computer to fail.

Protect yourself from the heat that your computer generates.
                                     When your computer is turned on or the battery is charging, the base, the palm
                                     rest, and some other parts may become hot. The temperature they reach
                                     depends on the amount of system activity and the level of charge in the
                                     battery.

                                     Extended contact with your body, even through clothing, could cause
                                     discomfort or even a skin burn.
                                     • Avoid keeping your hands, your lap, or any other part of your body in
                                       contact with a hot section of the computer for any extended time.
                                     • Periodically take hands from using the keyboard by lifting your hands from
                                       the palm rest.

© Copyright Lenovo 2019                                                                                             29
Protect yourself from the heat generated by the ac power adapter.
When the ac power adapter is connected to an electrical outlet and your
computer, it generates heat.
Extended contact with your body, even through clothing, may cause a skin
burn.
• Do not place the ac power adapter in contact with any part of your body
while it is in use.
• Never use it to warm your body.
• Do not wrap the cords around the ac power adapter while in use.
Prevent your computer from getting wet.
To avoid spills and the danger of electrical shock, keep liquids away from your
computer.
Protect the cables from being damaged.
Applying strong force to cables may damage or break them.
Route communication lines, or the cables of an ac power adapter, a mouse, a
keyboard, a printer, or any other electronic device, so that they cannot be
walked on, tripped over, pinched by your computer or other objects, or in any
way subject to treatment that could interfere with the operation of your
computer.
Protect your computer and data when moving it.
Before moving a computer equipped with a hard disk drive, do one of the
following:
• Turn it off.
• Put it in sleep mode.
• Put it in hibernation mode.
This helps to prevent damage to the computer, and possible loss of data.
30 Lenovo ThinkBook 13s-IWL/14s-IWL User GuideHandle your computer gently.
Do not drop, bump, scratch, twist, hit, vibrate, push, or place heavy objects on
your computer, display, or external devices.
Carry your computer carefully.
• Use a quality carrying case that provides adequate cushioning and protection.
• Do not pack your computer in a tightly packed suitcase or bag.
• Before putting your computer in a carrying case, make sure that it is off, in sleep
mode, or in hibernation mode. Do not put a computer in a carrying case while it is
turned on.
Conditions that require immediate action
Products can become damaged due to misuse or neglect. Some product damage is serious enough
that the product should not be used again until it has been inspected and, if necessary, repaired by an
authorized servicer.
As with any electronic device, pay close attention to the product when it is turned on.
On very rare occasions, you might notice an odor or see a puff of smoke or sparks vent from your
product. Or you might hear sounds like popping, cracking, or hissing. These might merely mean that
an internal electronic component has failed in a safe and controlled manner. Or, they might indicate a
potential safety issue. Do not take risks or attempt to diagnose the situation yourself. Contact the
Customer Support Center for further guidance. For a list of Service and Support phone numbers, see
the following Web site:
https://pcsupport.lenovo.com/supportphonelist
Frequently inspect your computer and its components for damage or wear or signs of danger. If you
have any question about the condition of a component, do not use the product. Contact the Customer
Support Center or the product manufacturer for instructions on how to inspect the product and have it
repaired, if necessary.
In the unlikely event that you notice any of the following conditions, or if you have any safety concerns
with your product, stop using the product and unplug it from the power source and
telecommunication lines until you can speak to the Customer Support Center for further guidance.
Appendix A. Important safety information 31• Power cords, plugs, power adapters, extension cords, surge protectors, or power supplies that are cracked, broken, or damaged. • Signs of overheating, smoke, sparks, or fire. • Damage to a battery (such as cracks, dents, or creases), discharge from a battery, or a buildup of foreign substances on the battery. • A cracking, hissing, or popping sound, or strong odor that comes from the product. • Signs that liquid has been spilled or an object has fallen onto the computer product, the power cord, or power adapter. • The computer product, power cord, or power adapter has been exposed to water. • The product has been dropped or damaged in any way. • The product does not operate normally when you follow the operating instructions. Note: If you notice these conditions with a product (such as an extension cord) that is not manufactured for or by Lenovo, stop using that product until you can contact the product manufacturer for further instructions, or until you get a suitable replacement. Service and upgrades Do not attempt to service a product yourself unless instructed to do so by the Customer Support Center or your documentation. Only use a Service Provider who is approved to repair your particular product. Note: Some computer parts can be upgraded or replaced by the customer. Upgrades typically are referred to as options. Replacement parts approved for customer installation are referred to as Customer Replaceable Units, or CRUs. Lenovo provides documentation with instructions when it is appropriate for customers to install options or replace CRUs. You must closely follow all instructions when installing or replacing parts. The Off state of a power indicator does not necessarily mean that voltage levels inside a product are zero. Before you remove the covers from a product equipped with a power cord, always ensure that the power is turned off and that the product is unplugged from any power source. If you have any questions or concerns, contact the Customer Support Center. Although there are no moving parts in your computer after the power cord has been disconnected, the following warnings are required for your safety. Keep fingers and other parts of your body away from hazardous, moving parts. If you suffer an injury, seek medical care immediately. Avoid contact with hot components inside the computer. During operation, some components become hot enough to burn the skin. Before you open the computer cover, turn off the computer, disconnect power, and wait approximately 10 minutes for the components to cool. After replacing a CRU, reinstall all protective covers, including the computer cover, before connecting power and operating the computer. This action is important to help prevent unexpected electrical shock and help ensure the containment of an unexpected fire that could happen under extremely rare conditions. 32 Lenovo ThinkBook 13s-IWL/14s-IWL User Guide
When replacing CRUs, be cautious of sharp edges or corners that might cause injury. If you suffer an injury,
seek medical care immediately.

Power cords and power adapters

    DANGER

 Use only the power cords and power adapters supplied by the product manufacturer.

 The power cords shall be safety approved. For Germany, it shall be H03VV-F, 3G, 0.75 mm2, or
 better. For other countries, the suitable types shall be used accordingly.

 Never wrap a power cord around a power adapter or other object. Doing so can stress the cord in
 ways that can cause the cord to fray, crack, or crimp. This can present a safety hazard.

 Always route power cords so that they will not be walked on, tripped over, or pinched by objects.

 Protect power cords and power adapters from liquids. For instance, do not leave your power cord
 or power adapter near sinks, tubs, toilets, or on floors that are cleaned with liquid cleansers. Liquids
 can cause a short circuit, particularly if the power cord or power adapter has been stressed by
 misuse. Liquids also can cause gradual corrosion of power cord terminals and/or the connector
 terminals on a power adapter, which can eventually result in overheating.

 Ensure that all power cord connectors are securely and completely plugged into receptacles.

 Do not use any power adapter that shows corrosion at the ac input pins or shows signs of
 overheating (such as deformed plastic) at the ac input pins or anywhere on the power adapter.

 Do not use any power cords where the electrical contacts on either end show signs of corrosion or
 overheating or where the power cord appears to have been damaged in any way.

 To prevent possible overheating, do not cover the power adapter with clothing or other objects
 when the power adapter is plugged into an electrical outlet.

Extension cords and related devices
Ensure that extension cords, surge protectors, uninterruptible power supplies, and power strips that you use
are rated to handle the electrical requirements of the product. Never overload these devices. If power strips
are used, the load should not exceed the power strip input rating. Consult an electrician for more information
if you have questions about power loads, power requirements, and input ratings.

                                                                       Appendix A. Important safety information   33
Plugs and outlets
DANGER
If a receptacle (power outlet) that you intend to use with your computer equipment appears to be
damaged or corroded, do not use the outlet until it is replaced by a qualified electrician.
Do not bend or modify the plug. If the plug is damaged, contact the manufacturer to obtain a
replacement.
Do not share an electrical outlet with other home or commercial appliances that draw large
amounts of electricity; otherwise, unstable voltage might damage your computer, data, or attached
devices.
Some products are equipped with a three-pronged plug. This plug fits only into a grounded
electrical outlet. This is a safety feature. Do not defeat this safety feature by trying to insert it into a
non-grounded outlet. If you cannot insert the plug into the outlet, contact an electrician for an
approved outlet adapter or to replace the outlet with one that enables this safety feature. Never
overload an electrical outlet. The overall system load should not exceed 80 percent of the branch
circuit rating. Consult an electrician for more information if you have questions about power loads
and branch circuit ratings.
Be sure that the power outlet you are using is properly wired, easily accessible, and located close to
the equipment. Do not fully extend power cords in a way that will stress the cords.
Be sure that the power outlet provides the correct voltage and current for the product you are
installing.
Carefully connect and disconnect the equipment from the electrical outlet.
Power supply statement
Never remove the cover on a power supply or any part that has the following label attached.
Hazardous voltage, current, and energy levels are present inside any component that has this label attached.
There are no serviceable parts inside these components. If you suspect a problem with one of these parts,
contact a service technician.
External devices
CAUTION:
Do not connect or disconnect any external device cables other than Universal Serial Bus (USB) and
1394 cables while the computer power is on; otherwise, you might damage your computer. To avoid
possible damage to attached devices, wait at least five seconds after the computer is shut down to
disconnect external devices.
34 Lenovo ThinkBook 13s-IWL/14s-IWL User GuideYou can also read