Lesson 2: Setting up Pymakr - by Pycom
←
→
Page content transcription
If your browser does not render page correctly, please read the page content below
Lesson 2: Setting up Pymakr
          by Pycom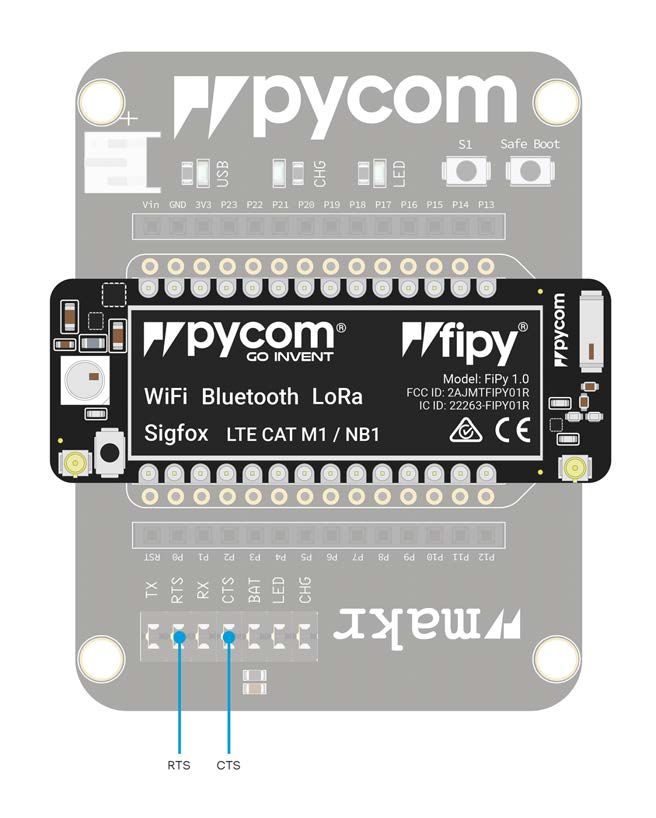
Lesson objectives
1. To join the pieces of hardware together

2. To download the Pymakr plug-in on Atom or VSCode

3. To introduce MicroPython to students
Firmware updated? Then on to the next thing…
  Let’s get that FiPy on that Expansion Board
Before you start…

• Check that the CTS and RTS jumpers
  have been removed

• Find the reset button (it’s next to the
  LED)

• Find the USB connector on the
  Expansion Board
Attaching the Lorawan and sigfox antenna

You must connect the LoRaWAN and Sigfox Antenna if you want to use the
LoRa/SigFox networks (otherwise you can damage your device)

       Quick note: the FiPy only supports LoRa on the
      868MHz or 915 MHz bands. It doesn't support the
    433MHz band (if you want to use this band, you'll have
                      to grab a LoPy4)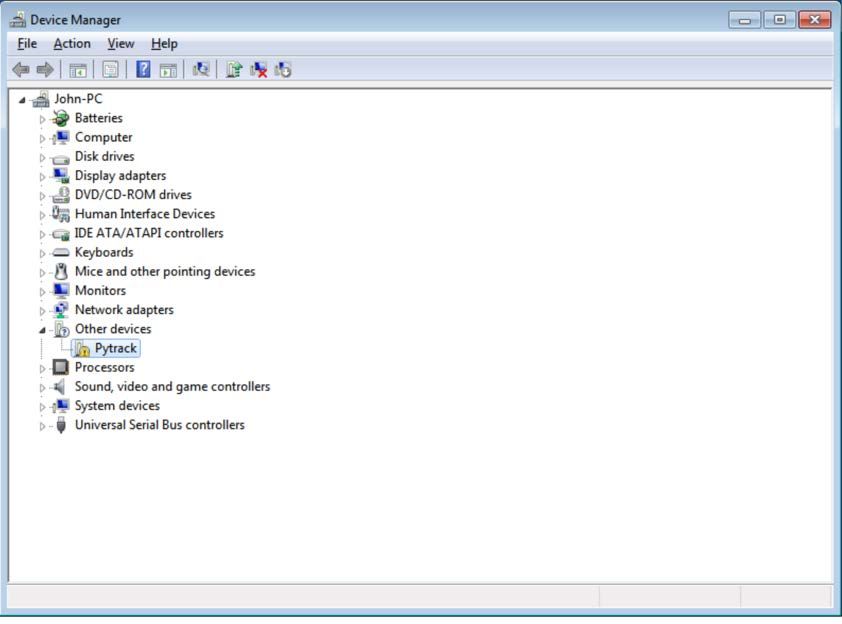
Attaching the Lorawan and sigfox antenna
1.   You'll need to connect the U.FL
     to SMA pig tail to the FiPy using
     the U.FL connector which is on
     the same side of the FiPy as the
     LED
     • You have to align the flat edge
       correctly, and screw down the
       connector using the nut provided

2.   You will need to screw on the
     antenna to the SMA connector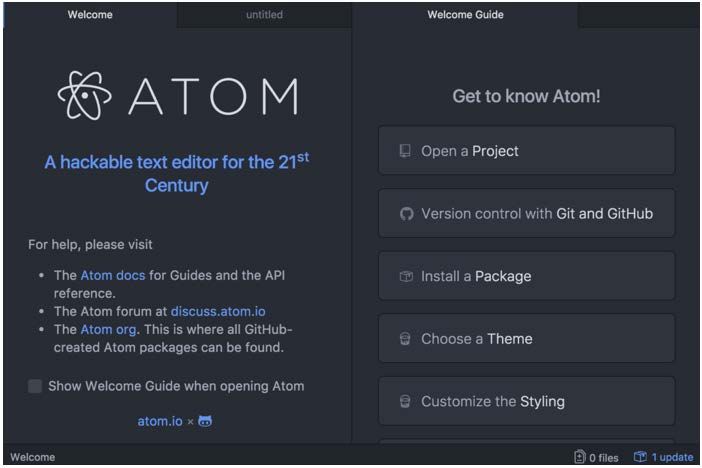
Attaching the WiFi Antenna

• There is a U.FL connector for an
  external antenna
    • This is optional – only required if
      better performance is needed

• Switching between the antennas is
  done via software
Attaching the LTE Cat-M1/NB-IoT Antenna

        You must connect the LTE Cat-M1/ NB-IoT
        Antenna if you want to use the LoRa/SigFox
        networks (otherwise you can damage your
        device).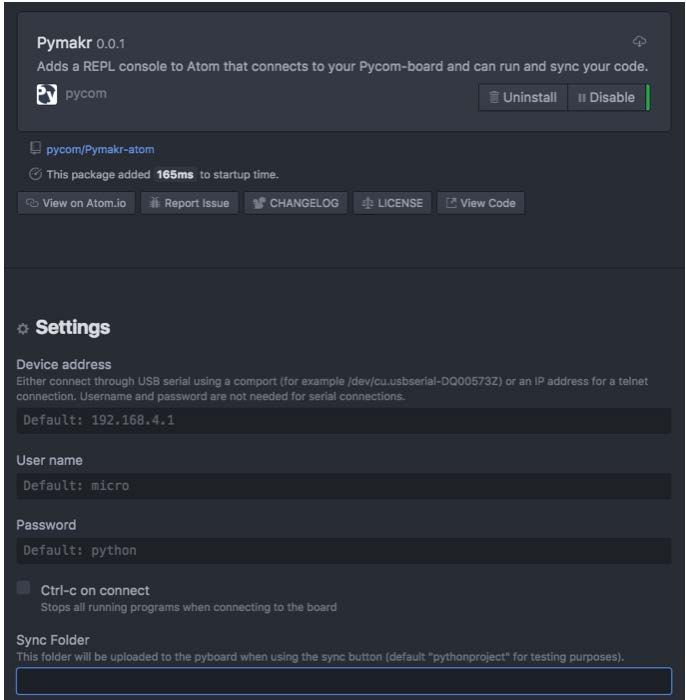
Attaching the LTE Cat-M1/NB-IoT Antenna
1. You will need to connect the antenna   2. If you want to use the LTE Cat-
of the FiPy using the U.FL connector      M1/NB-IoT connectivity to the FiPy,
on the underside of the FiPy              you'll need to insert a SIM card into the
                                          FiPy.
Hardware done!
Software Set-Up – The Tools You Need

Drivers

If you are using Microsoft Windows, you might need to install drivers from our
products so that they function correctly
Software Set-Up – The Tools You Need

Pycom firmware update utility:

• This automates the process of upgrading the firmware on your Pycom device

• You should use this tool before you use your device
Software Set-Up – The Tools You Need
Development environment:

   • Pymakr is a plug-in for Atom and Visual Studio created by Pycom to make
    development for Pycom modules super easy
Software Set-Up – The Tools You Need
Drivers:
• Windows 8/10/+
• All of our products will work out of the box for Windows 8/10/+
• Windows 7
• drivers to support the Expansion Board will need to be installed
• Click here (please save the file to your computer)
If you don’t need the Windows 7 driver
Please click hereSoftware Set-Up – Windows 7
Drivers:
1. Navigate to the Windows start
menu and search for Device
Manager
2. Expansion Board 3.1 will be in
the dropdown menu under
other devices (a Pytrack is
used in the example)Software Set-up – Windows 7 Drivers: 3. Right-click the device and select 4. Right-click the device and select Update Driver Software Update Driver Software
Software Set-Up – Windows 7
Drivers:
5. Need to navigate to where you   6. Specify the folder in which the
downloaded the driver to (e.g.     drivers are contained
Downloads Folder)
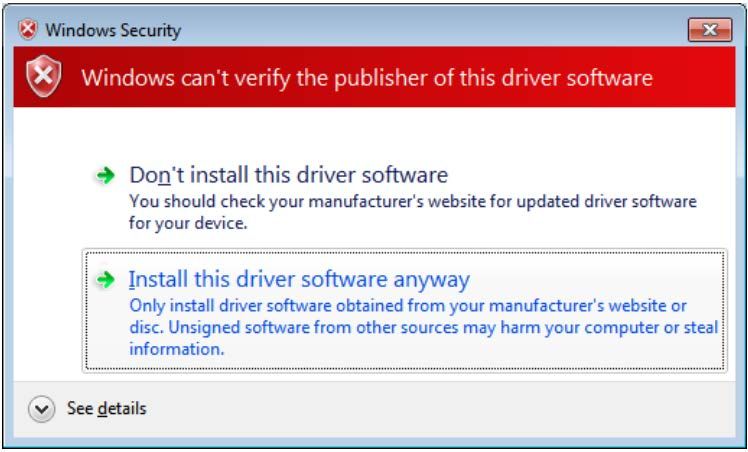
Software Set-Up – Windows 7
Drivers:
• You may receive a warning,
  suggesting that Windows can't
  verify the publisher of this driver.

• Click Install this driver software
  anyway as this link points towards
  our official driver
Software Set-Up – Windows 7
Drivers:                                     8. To confirm that the installation was
                                             correct, navigate back to the Device
7. If the installation was successful, you
                                             Manager and click the dropdown for
should now see a window specifying
                                             other devices
that the driver was correctly installed

                                                                            The
                                                                            warning
                                                                            label should
                                                                            now be
                                                                            gone and
                                                                            (in this
                                                                            example)
                                                                            Pytrack/
                                                                            Pysense
                                                                            should be
                                                                            installed
Software Set-Up – Updating Firmware We strongly recommend you upgrade your firmware to the latest version as we are constantly making improvements and adding new features to the devices The download links to the update tool are listed below: • Windows • MacOS (10.11 or higher) • Linux (requires dialog and python-serial package)
Software Set-Up – Updating Firmware
1.   Check that you have updated the
     firmware on the Expansion Board
     3.1 (should have been done earlier
     in the lecture)
2.   Disconnect the device from the
     computer
3.   Insert module into expansion
     board
4.   Reconnect the board via USB to
     your computer
5.   Run the Firmware Upgrade tool
6.   Disconnect the USB cable from
     the board and reconnect it, your
     device is now ready to use
An Introduction to Pymakr
• To make it as easy as possible, Pycom
has developed a plugin for two popular
text editors, called Pymakr
• These plugins are built for and available
in:
• ATOM
• Visual Studio Code
The following slides will describe how to install Pymakr for Atom, click for Visual Studio CodePlug-in for Atom
1. Install Atom and open it 2. Navigate to the install
pagePlug-in for Atom 3. Search for Pymakr and select the • 4. You should now see 'Pymakr' and official Pycom Pymakr plugin click the install button
And ATOM IS installed!
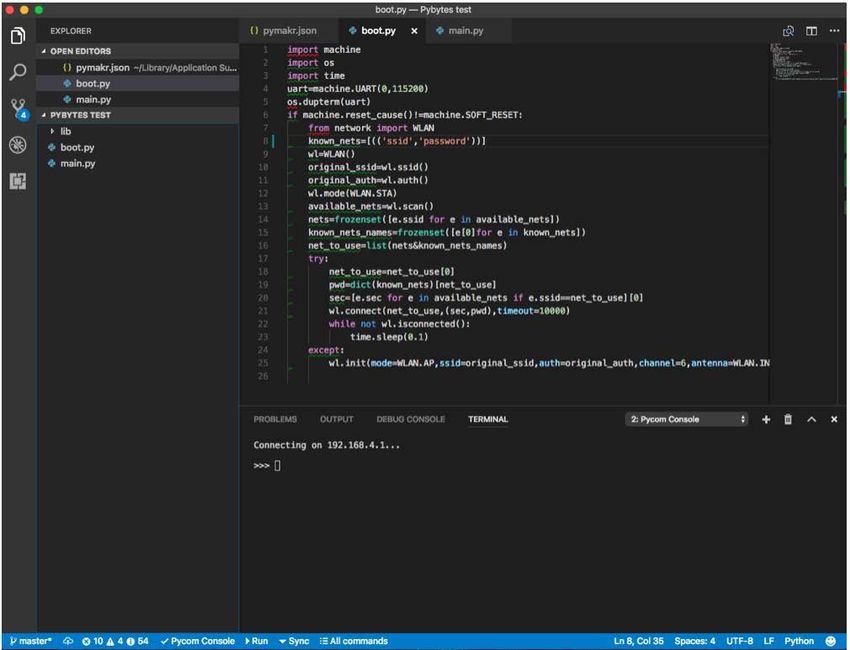
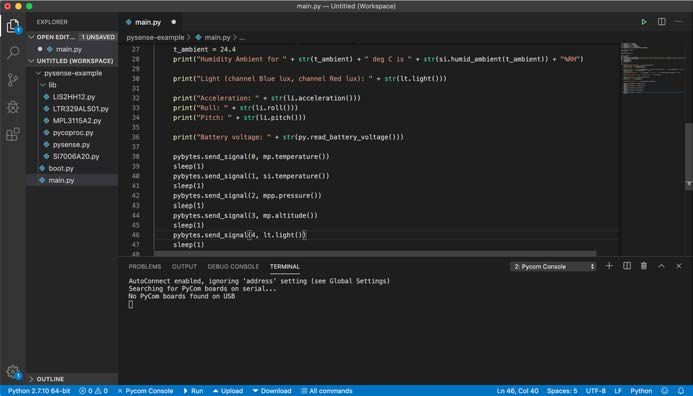
Connecting via serial USB
1.   Connect your device to your computer via USB.
2.   Open Atom and ensure that the Pymakr Plugin has correctly installed

3.   Open the Pymakr console by clicking on Connect Device
Connecting via serial usb

4. Pymakr's autoconnect feature will have found your plugged-in device!
Plugin for visual studio code
To download Visual Studio Code, click VS Code

You will also need NodeJS installed on your PC
   • Please download the latest LTS version available from the NodeJS website
Plugin for visual studio code
1.   Open VSCode            2. Navigate to the Extensions page,
                            using the 5th button in the left hand-
                            side navigation bar
Plugin for visual studio code
3. Search for Pymakr and click the 4. Within a few minutes, a reload
install button next to it button should appear – press it to
reload VSCodeAnd VSCODE installed!
Connecting via Serial USB - VSCode
After installing the Pymakr Plugin, you'll need to configure it for first time:
1.   Connect your device to your computer via USB.
2.   Open VSCode and ensure that the Pymakr Plugin has correctly installed

3.   Click All Commands
Connecting via Serial USB - VSCode
4. In the list that appears, click   5. All available serial ports will be listed.
Pymakr>Extra>List Serial Ports
Connecting via Serial USB - VSCode
6. Click All Commands, then                7. Close the JSON file and click All
Pymakr>Global Settings                     Commands, then Pymakr>Connect to
    • This will open a JSON file           connect your device

                Click here if you don’t need to connect via telenet
Connecting via Telnet for both Atom and VSCode
if an IP address was provided
1. Ensure the Pycom device is turned on
2. Connect the host computer to the WiFi
Access Point named after your board
(the SSID will be as follows e.g. lopy-
wlan-xxx, wipy-wlan-xxxx etc)
• The password is www.pycom.io and
enter 192.168.4.1 as the address
3. The default username and password
are micro and python, respectively
4. Click connect in the Pymakr pane and
Pymakr will now connect via telnetRemember!
After writing or pasting any indented code,
like a function or a while loop, you will have to
press Enter up to three times to tell
MicroPython the code is to be closed
Code written into the REPL is not saved after
the device is switched off/on againMicropython 101 • MicroPython is a lean version of Python 3 • Faster and a simpler development process than C • MicroPython aims to be as compatible with normal Python as possible so that you can transfer code easily
Micropython 101
• It does not support the entire Python standard library (which can be found on
 GitHub)

• It has dedicated modules to access hardware

• Pycom uses the ESP32 chipset - it has incredible raw power and a large flash
 size
Tips and tricks

• MicroPython shares a large part of the syntax of Python 3.5

   • Code written for MicroPython should work in a similar manner in Python 3.5

   • A few minor variations – view them as implementation differences

                  Pycom docs page: https://docs.pycom.io/gettingstarted/programming/micropython/
Don't forget your lines!
MicroPython uses line indention to denote a block of code. No braces { }
here!
The number of spaces in the indentation is variable but all statements
within a block must be the same amount
Pycom docs page: https://docs.pycom.io/gettingstarted/programming/micropython/Still not sure on Micropython? Check out this video for an overview
When booting into micropython
• Two files are executed automatically:

   • boot.py

   • main.py

 Pycom docs page: https://docs.pycom.io/gettingstarted/programming/micropython/
Where to write your code
 In Atom:                   In VSCode:

Write your code here!            Write your code here!
Examples of MicroPython
Variable Assignment
Like Python 3.5, variables can be assigned to and referenced

                                 Setting a variable equal to a string and then
                                           printing it to the console

Conditional Statements
These allow control over which elements of code run, depending on specific
cases.
                                   How a temperature sensor might be
                                           implemented in code
Examples of MicroPython
Loops
Loops allow for you to cycle and repeat
your code and functions, assignments
etc
• For – these allow you to control how
many times a block of code runs
within a range
In this example,
the loop checks if
x is less than 9
• While – these allow you to run a loop each time it
until a specific conditional is passes
true/falseExamples of MicroPython
Functions
• Functions are blocks of code that are referred to by name.
Example A Example B
This function takes two This function takes an input name
numbers and adds them and returns a string containing a
together, outputting the welcome phase - 'Hello Alex'
resultExamples of MicroPython Lists • A data structure that holds an ordered collection (sequence) of items Dictionaries • A dictionary is like an address book • Keys (names) are associated with values (details)
Examples of MicroPython
Tuples
• Tuples are immutable - they cannot be modified once you’ve started

                                Still stuck?
                        More in-depth tutorials here
Repl versus scripts
Please be aware that the examples that are
given expect to be executed using
Micropython REPL (read-evaluate-print loop)Repl versus scripts Basic Arithmetic
REPL Versus scripts
Calling Methods

     In order to use these functions, but make sure that they don’t print out any functions, you’ll
            need to either wrap them in a print() statement or assign them to a variable
You are now Iot-ready!
You can also read