Nice Office Quick Start Guide
←
→
Page content transcription
If your browser does not render page correctly, please read the page content below
Nice Office                               ®

             Quick Start Guide
Introduction
Welcome to Nice Office, the web and wireless business solution. This Quick Start Guide will help minimize
your startup time so you can quickly benefit from its unique capabilities.
Attention BlackBerry App Store users: Nice Office uses the native Contact, Calendar, and Tasks
functions of your device. Nice Office installs Journal and Accounts functions that load in your Downloads
folder. To upload your data go to your Contacts, Tasks, and Calendar, press the menu button and select
Upload. Now that all of your data is connected to Nice Office, please read on to get more familiar with our
product.

Nice Office Icons
Once Nice Office is installed on your BlackBerry device, you’ll find the application files in the Downloads
folder.

  1 Journals - Click here to view your recent device activity.
  2 Accounts - Click here to access your workflows and accounts.
  3 Nice Office Tutorial - Click here for help topics.

                                   1            2            3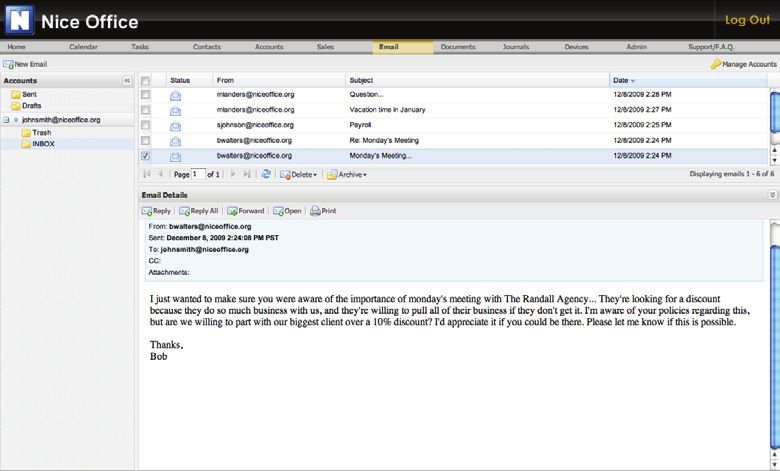
Home
The Home screen provides access to the key features of Nice Office. On the left, there’s a place to insert
your favorite links and perform Google searches. The upper main body of the screen contains messages,
both from the system and from managers if used in a company setting. The lower portion of the screen is
the Dashboard with “at-a-glance” view of the most recent activities involving your account.
  1 Resources contains the My Links and Edit Links sections that allows the user to create a selection of
    links of various services and information that are used on a daily basis.
  2 Message Center entries are either comments from Managers/Supervisors when used in a company
    hierarchy, or system messages from eAgency.
  3 Dashboard topics contain the most recent activities entered for Activities, Tasks, Contacts, Journals,
    Work Flow Statuses, and Sales.

     1
                             2

                         3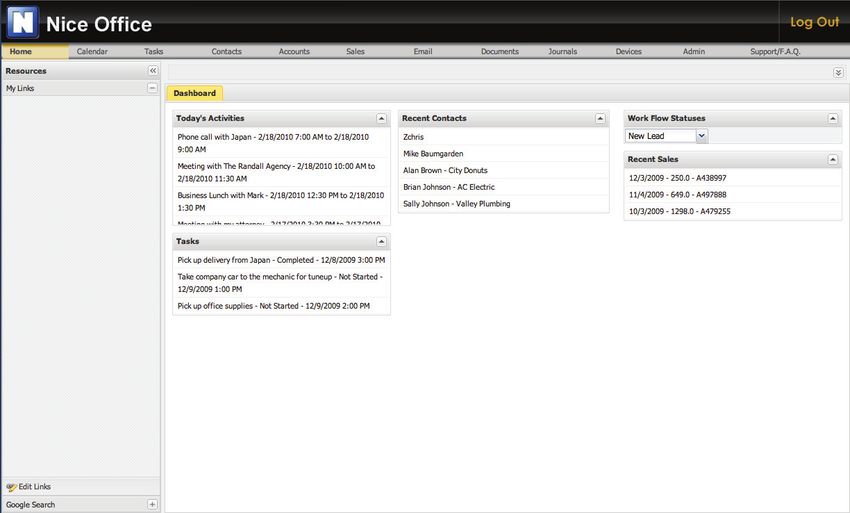
Calendar
The Calendar page has three views, Day, Week, Month, the default is daily view. You can access the
different calendar views by clicking the tabs at the bottom of the screen.
1 New Activity is used to set up new calendar appointments. Click New Activity and enter a Subject,
Status, and Priority. Next set the date, start time, and duration of the appointment.
2 iCalendar allows you to
invite contacts to appoint
1
-ments by email, much in
the same manner as other
calendaring tools. Click
Attendees and an
invitation box will appear
on the screen.
3
3 Recurrence allows you to
schedule meetings and
appointments for daily, 2
weekly, monthly and
yearly recurrences
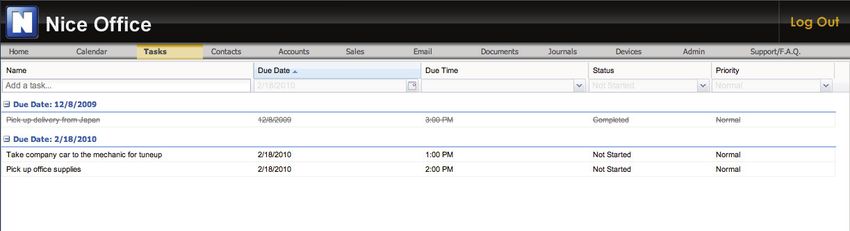
Tasks
The Tasks page is an editable form that allows you to cross reference your tasks in several different ways.
• Task Name allows you to compose a descriptive name for your task.
• Due Date listings can be compressed or expanded for easier viewing. Click the “plus” sign to open a
task date, or click the “minus” sign to compress a task date.
• Status indicates the progress of the tasks. Completed tasks appear in light gray with a line drawn
through them. Delinquent task appear in red.
• Priority selections are High, Moderate, or Low. This is a sortable column allowing you to list your tasks
in either High to Low order or Low to High.
Contacts
The Contact page is split into two sections; the left portion is a condensed view of contacts, while on the right
the Contact Details are shown. From the Contact Details portion of the screen, Journals, Activities, Account,
and Sales information can be viewed for the specific contact by selecting the appropriate tab.
  1 New Contact brings up a screen in which you can enter expanded contact information. Enter as much
    information as you wish. Only those fields with red asterisks are required. Be sure to click Save each
    time you are finished entering data. Contact Details can be viewed by selecting a contact.
  2 Send Email opens a New Email Message with the contact’s address pre-populated. The user is given
    the choice to send to Work, Home, Other, and finally Send to All.
  3 New Activities can be scheduled with the contact by clicking New Activity. The option is given to
    schedule the activity at the Contact’s Home, Work, your Work, Home, or Other Location.
  4 Maps gives the options to Map Contact’s Work, Direction to Contact’s Work from Work, Directions to
    Contact’s Work from Home, Map Contact’s Home, Directions to Contact’s Home from Work, Directions
    to Contact’s Home from Home.
  5 Journal entries for the contact can be entered by clicking New Journal.
  6 Print will print the Contact’s Detail information.

                                             1

                                                 2       3       4      5       6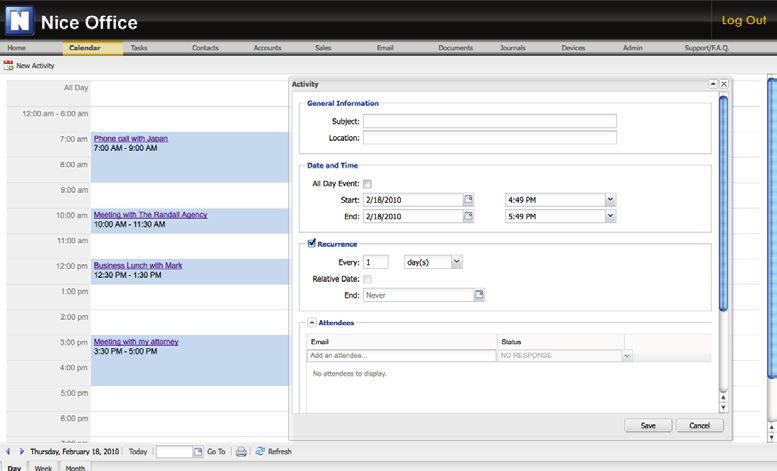
Accounts
The Accounts page displays your business opportunities, from leads through sales. The Accounts page,
like Contacts is split in a two part view, the left portion of the screen is a condensed listing of the Accounts
you have created, and the right portion is the Accounts Details. The Accounts view can be sorted by
Work Flows, and then Statuses of the accounts. A Work Flow is a step used to complete a sale, while a
Status is the progress of a particular Work Flow. A Status falls into three categories, Pending, In Progress,
Completed. New leads are shown by the lowest default Workflow and Status Level. Account, Journal,
Sale, Task, and Activity information can be viewed in the Account Detail portion of the screen. Work Flows,
Status levels, and Custom fields can only be created on the website, not the device.
For those using Nice Office in a corporate environment, supervisors can view Account and Sales
information of employee’s beneath them in the company’s hierarchy.
  1 New Journal allows you to create a Journal entry for the Account.
  2 New Sale allows you to enter a new sale for the chosen Account.
  3 Print will print the details for the chosen Account

                                               1          2    3
Sales
The Sales page shows all sale entered by the user. Selecting a Sale will display the details on the right
portion of the screen. The Journal tab shows all journal entries recorded for the sale.
  1 New Journal creates a new journal entry associated with the sale.
  2 Print will print the detail information of the sale.

                                                1          2
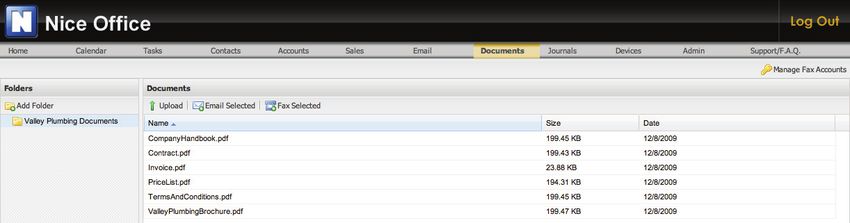
Email
The Email page allows you to
create and read email from
all of your email accounts.
Manage Accounts is where
you enter the necessary
information to connect the
email address of your choice
to Nice Office.
*Nice Office Premium users
are automatically set up with a
niceoffice.com email address.

Documents
The Documents page displays all of the documents you have stored in Nice Office. These same documents
can be emailed from your device while on the road. To do this, simply go to your Contacts, press the Menu
button and select Send Document.
*Nice Office Free users have a limit of 22/MB of storage, Nice Office Premium users have a limit of 80/MB

Clicking Manage Fax Accounts allows you to configure a Fax account that can be used to Fax your
documents to customers, or vendors, either from the website or your device.
Journals
Journals are past
activities done within
Nice Office or from
your mobile device.
Journals allow you
to see a record of
every time you have
contacted a customer
or other contact, via
email, phone call, or text
message. All Journals
can be viewed from
the Journals tab within
your web browser or
the Journals icon on
your mobile device.
More focused views
can be done for specific
Contacts, Accounts, and Sales by going to the appropriate page and selecting View Journals. The creation
of Journals can be disabled by going to Nice Office Options on your mobile device and de-selecting the
“Auto Journal” option. Notes can be added to existing Journal entries either from the web or the mobile
device. Journal entries cannot be deleted.

Devices
The Devices page is where you would go if you have upgraded, or bought a new phone. From here devices
and be added or removed. Nice Office Free users have a limit of 1 device, while Nice Office Premium can
connect up to 4 devices; including our Nice Office Outlook Plug-in which allows you to synchronize all your
Contacts, Calendar events, and Tasks, with Nice Office and your Mobile Device.
The current supported device list is:

  •   BlackBerry (OS 4.1 and above)

  •   Windows Mobile Professional (Pocket PC/Touchscreen, OS 5.0 and above)

  •   Windows Mobile Standard (Smartphone/Non-Touchscreen, OS 5.0 and above)

  •   Microsoft Outlook (Office 2003 and 2007)
  *Outlook Plug-in available only to Nice Office Premium users
Admin
The Admin page is used to manage your account. From here, you have three main options Account,
Downline Management and Services.
    1 Account
      From the Account section, you can change your password, update security and billing information,
      and unsubscribe from Nice Office.
    2 Downline Management
      From the Downline Management section you can manage employees in your downline (Company
      hierarchy). You also have the ability to purchase additional licenses of Nice Office, linking multiple
      Nice Office accounts together as your sales force increases.
      *Only Nice Office Premium users can create a Downline

    3 Services
      From the Services section you can connect Nice Office to your company’s Web page to automatically
      have sales lead information entered into your account.
      *Only Nice Office Premium users can connect with our Web Services

1

2
3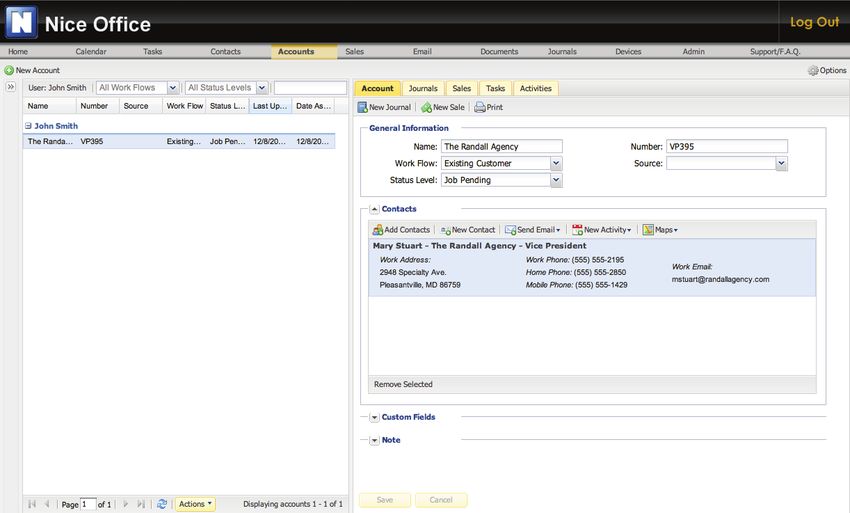
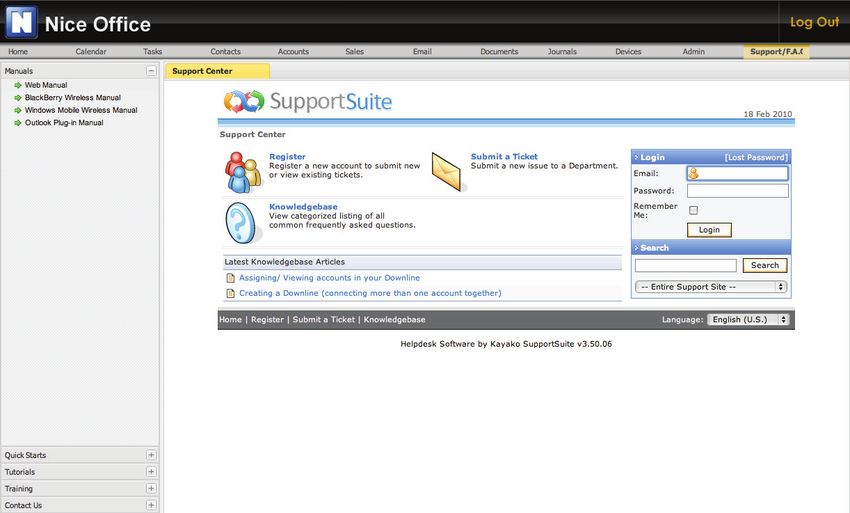
Support
The Support page is your first stop for additional information about Nice Office. On the left side of the
screen you can see our Web Manual, BlackBerry Manual, Outlook Plug-in Manual, Windows Mobile
Manual, and Quick Starts. The right side of the screen is where you can access our Knowledge Base, How-
To’s and our FAQ’s (Frequently Asked Questions). This is also where you can create a support ticket if you
have any questions or require assistance with your account.
*Nice Office Premium users get unlimited Live support from the Nice Office support staff
Why should you upgrade to Nice Office PREMIUM?
The FREE version of Nice Office is a fully-operational version of the award-winning mobile business
application for BlackBerry users, however there is a more powerful version available to you. Nice Office
Premium offers more features and expands the existing options to better handle your business needs.
Compare the list below to find out what upgrading to Nice Office Premium will give you.

Nice Office FREE                                               Nice Office PREMIUM
     Auto Journaling of all activities                           Auto Journaling of all activities

     File and Document Storage                                   File and Document Storage

     Calendar/Task Scheduling and Alerts                         Calendar/Task Scheduling and Alerts

     Centralize multiple email accounts with IMAP                Centralize multiple email accounts with IMAP

     Automatic synchronization of contacts,                      Automatic synchronization of contacts,
     calendar and tasks between your wireless                    calendar and tasks between your wireless
     device and the website                                      device and the website

     Remotely back up or wipe data on your device                Remotely back up or wipe data on your device
     from the website                                            from the website

     Wireless Client Data Encryption                             Wireless Client Data Encryption

     Live Telephone Support                                      Live Telephone Support

     Web Services Interface (for external lead                   Web Services Interface (for external lead
     sources)                                                    sources)

     Custom Email Domain Name                                    Custom Email Domain Name

     Microsoft Outlook Plug-In                                   Microsoft Outlook Plug-In

     Banner Advertising                                          Banner Advertising

     Unlimited Hierarchy of Managers/Employees                   Unlimited Hierarchy of Managers/Employees

     220 MB of Additional Storage Space                          220 MB of Additional Storage Space

                 FREE                                                        $
                                                                               9.99             mo.
   To download Nice Office FREE, launch the AppWorld            Visit www.NiceOffice.com to sign up for Nice
 application on your BlackBerry and search for Nice Office.     Office Premium or upgrade your Nice Office
 For more information, visit http://appworld.blackberry.com/
                   webstore/content/2230                                      FREE account.
You can also read