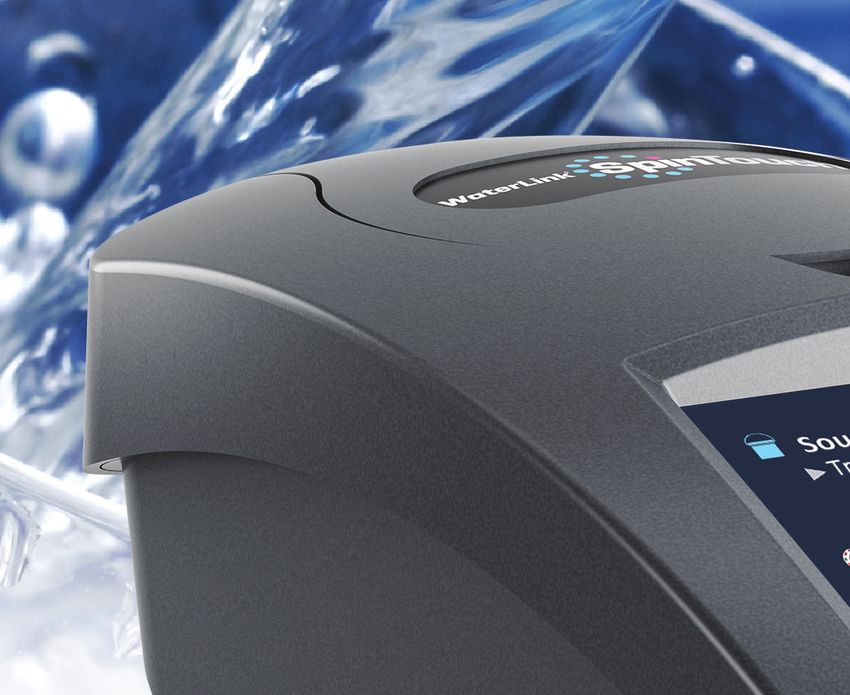
N - The Future of Water Testing El futuro del análisis del agua L'avenir de l'analyse de l'eau - WaterLink Spin Touch
←
→
Page content transcription
If your browser does not render page correctly, please read the page content below
The Future of Water Testing
 El futuro del análisis del agua
  L’avenir de l’analyse de l’eau

                   n           ®

Centrifugal
Fluidics
Photometry    TM

                       Code / Código 3585
2

SETUP
 BEFORE FIRST USE

                                                                                            SETUP
    ¬ Fully charge battery using the Spin Touch USB cable and adapter plug in AC
      outlet.
    ¬ Ensure your Spin Touch has latest firmware
           1. Download and install WaterLink® Connect Application for Windows at
              http://softwarecenter.lamotte.com/. Select WaterLink® Connect Software
              for Windows FREE Download.
           2. Plug meter into the computer with the provided USB cable and launch
              WaterLink Connect Application from the Start Menu.
           3. Any firmware updates will automatically be applied to the meter.

METER
 1. The meter can be powered from an AC outlet, a computer or the internal battery.
 2. Use the USB cable and the adapter to plug the meter into an AC outlet.
 3. Use the USB cable to connect the meter to the USB port of a computer.
CHARGE THE BATTERY
 1. Use the USB cable and the adapter to plug the meter into an AC outlet or use the
    USB cable (included) with a car charger (not included) to charge the battery. (Anker
    PowerDrive 2, DC 12/24V, 5V = 4.8A, Part Number A2310 recommended.)
 2. The battery icon on the screen will show the battery status. Charge the battery until
    the battery indicator is full.
FIRMWARE UPDATES
Occasionally, the firmware in the Spin Touch will require updates. To do so:
 1. Visit http://softwarecenter.lamotte.com/ and download the WaterLink® Connect
     application for Windows.
 2. Plug the Spin Touch into the computer using the included USB cable.
                                                                                            PC CONNECTION

 3. Open the WaterLink® Connect desktop application and wait for the update to
     complete.
Once the update is complete, it is safe to close WaterLink® Connect and unplug the lab.
After updating firmware it is recommended that the LED and Calibration Procedure on
page 17 be performed.
NOTE: When a prompt to update the firmware is received, the options Update Now or
Remind Me Later will be displayed. If Remind Me Later is chosen, the update prompt will
be displayed again in 23 hours. Or, to update the firmware at any time, open WaterLink
Connect, go to Settings>Service Settings>Get Updates.
                                                                                            DEVICE CONNECTION

PC CONNECTION
When the WaterLink® Spin Touch® is connected to a computer via USB, the onboard
touchscreen becomes disabled and operation of the lab is performed using the WaterLink®
Connect application for Windows®. This application is available for free at http://
softwarecenter.lamotte.com/. Via the WaterLink® Connect desktop application, results
from the Spin Touch can be transferred to a water analysis program such as WaterLink®
Solutions™.

                                             3
DEVICE CONNECTION
                    The WaterLink® Spin Touch® supports connections to a Windows® based PC (over USB) and
DEVICE CONNECTION

                    to Android and iOS mobile devices (via Bluetooth).

                    CONNECTING VIA USB
                    Using the provided USB cable, the WaterLink® Spin Touch® can be connected to a Windows®
                    based PC. Before connecting a meter via USB, download and install the free WaterLink®
                    Connect Windows® application from http://softwarecenter.lamotte.com. When the
                    WaterLink® Spin Touch® is connected to the PC via USB, the onboard touch screen controls
                    will be disabled and operation of the meter is performed using the WaterLink® Connect
                    application. LaMotte offers robust water analysis programs as well, such as WaterLink®
                    Solutions™, to collect test results and offer detailed treatment recommendations. Learn
                    more about LaMotte software products at http://softwarecenter.lamotte.com.

                    CONNECTING VIA BLUETOOTH
                    The WaterLink® Spin Touch® is capable of connecting to a Bluetooth enabled device, such
                    as a phone or tablet. The Spin Touch is also compatible with a LaMotte Bluetooth Printer
                    [Code 5-0066]. Other Bluetooth printers are not supported.
                    Transferring results over Bluetooth to a mobile device requires that a mobile app is
                    installed on the device and an active account for the associated software program. For
                    example, with an active WaterLink® Solutions™ account and the WaterLink® Solutions™
                    mobile app on a phone or tablet, results can be transferred from the meter into the
                    application. Mobile apps for LaMotte software products are available from iTunes (for
                    iOS devices) and Google Play (for Android devices). Learn more about LaMotte software
                    products at http://softwarecenter.lamotte.com.
                    To transfer results from the WaterLink® Spin Touch® to a LaMotte software product mobile
                    app:
                     1. Log into the LaMotte software product mobile app.
                     2. Search for a customer or Site record. You may need to create one before you can
                         begin testing.
                     3. Start a Water Test in the mobile app.
                     4. Perform a water test from the Spin Touch onboard touchscreen normally. The Spin
                         Touch and the Bluetooth enabled mobile device will connect automatically.
                     5. When the connection is available the     will light on the touch screen. When the is
                         dim, the meter and device are not connected. Tap the       to transfer results to the
                         mobile app.
                    Whenever the      appears on the touch screen the Spin Touch is capable of connecting
                    to the Mobile Bluetooth Printer (Code 5-0066). The      button will be highlighted when
                    connected and dim when not connected.
                    The Spin Touch cannot connect to both mobile device and the printer at one time. (See the
                    Save, Print And Send Test Results, page 8)

                    USING BLUETOOTH LOW ENERGY
                    The WaterLink® Spin Touch® will automatically connect to the nearest Bluetooth enabled
                    phone or tablet or printer. It is not necessary to pair the Spin Touch to the Bluetooth
                    enabled device. Barriers to wireless signals can reduce the range of wireless devices.
                    The WaterLink Spin Touch will work best if there are no walls between it and the receiving
                    devices.

                                                                  4
FILLING
When the syringe is placed in the water sample, and the plunger is

                                                                                                       FILLING
pulled all the way up, the syringe will hold more than enough water
sample to adequately fill the disk. Hold the syringe vertically and
insert the tip into the fill hole in the disk. Press the plunger slowly
and smoothly to fill the disk.

  1. Fill the disk using slow, even pressure. The
     sample water will fill the spaces between
     the baffles in a counterclockwise order.
     Each space will fill from the bottom to the
     top. Sample water should be added until the
     sample water in the fourth chamber fills to the
     top of the chamber slightly past the embossed            Correct Fill
     fill line. It is OK to fill slightly past the fill line.     (Fill line)

  2. Do not overfill the disk. If the disk is overfilled,
     sample water will flow out of the overflow
     hole in the center of the disk. The disk is not
     leaking. Dry the disk and run the test.

                                                              Overfilled
                                                                  (Dry disk before placing in meter)

  3. Do not under fill the disk. If the disk is under
     filled, the reagent chambers will not fill entirely
     and results will be inaccurate.

                                                             Underfilled

  4. Do not introduce air bubbles into the disk.                   Air
     The reagent chambers will not fill entirely                  Bubble
     and results will be inaccurate. As soon as a
     bubble starts to form, pull back on the plunger
     to draw the bubble out of the disk. Begin the
     filling process again.

  5. Wet disks should be dried thoroughly with a
     lint free wipe. The disk should be handled by
     the edges.

  6. Disks should be filled and used within 10 minutes. They cannot be filled ahead of
     time.
For filling and troubleshooting tips go to: www.lamotte.com/spin_support/

                                                 5
GENERAL OPERATING PROCEDURES
GENERAL OPERATING PROCEDURES

                               METER
                               When a filled disk is placed in the chamber and the lid is closed, the meter spins at high
                               speed to distribute the sample to the test wells. Next the meter slows to maximize the
                               pumping action of the stainless steel mixing beads as the reagents mix with the sample
                               water. Each reaction is then read at the proper time and wavelength for that reagent
                               system.

                                                  The button located in the lower center of the top of the meter turns the
                                                  instrument on and off.

                               The Blue indicator light of the on/off button indicates the status of the instrument.
                               Steady blue light – the blue LED will remain steady to indicate that the meter is on and
                               ready to run a test.
                               Blinking blue light (three blinks/second) – a test is in progress and the disk is spinning. Do
                               not open the lid when the disk is spinning.
                               Care should be taken when closing the lid. Do not slam the lid. Wiring between the lid and
                               the body of the photometer passes through the hinge. The meter will not run with the lid
                               open.

                               TOUCHSCREEN DISPLAY
                               When the button is pressed to turn the meter on, the Test Screen will be displayed.

                                                         Water Source                    Start
                                                          Selection                      Test

                                                                   Source
                                                                    Treated Water      Tap to
                                                  Disk                               Start Test
                                                  Type
                                                                    Disk Series
                                                                     DW13
                                                  Power/
                                                  Battery
                                                                  16-Apr-20
                                                  Status
                                                                  12:14 PM

                                                                   Date &               Test Settings
                                                                    Time               History

                               The display screen is touch-activated. To make a selection, tap the icon or word on the
                               screen with a fingertip, fingernail, pencil eraser, or stylus.
                                  ¬ Gently wipe smudges from the screen with the Cloth Wipe (3580-WIPE).
                                  ¬ Do not touch the screen with a sharp object.

                                                                              6
¬ Do not place objects on the screen that will scratch or damage it.

                                                                                                       GENERAL OPERATING PROCEDURES
   ¬ Avoid touching the screen with wet fingers.

TESTING

                               Source
                                Treated Water          Tap to
                                                     Start Test
                               Disk Series
                                DW13

                             16-Apr-20
                             12:14 PM

 1. Press      and hold until the meter turnss o
                                               on.
 2. Tap . Select a Water Source type. Tap to confirm.
 3. Tap . Select a disk series (found on disk packaging). Tap to confirm.
    NOTE: Disk Series are limited by Water Source Type selection.
 4. Remove a disk from the packaging.
 5. Use the syringe (1189) to fill the disk with the water sample.
 6. Insert the disk. Cover the disk with the Universal Disk Cover (1719). Close the lid.
 7. Tap      to start test. Tap    to cancel the test. If the test is cancelled discard the
    disk.
 8. The results will be displayed.
 9. Choose an option.
          ¬ Tap       to add a tag.
          ¬ Tap the highlighted        to save the test results to the test log if Auto Save is
            not enabled.
          ¬ Tap the hightlighted        to send the results to the enabled Mobile Bluetooth
            Printer.
          ¬ Tap the highlighted        to send the results to a Bluetooth enabled device.
          ¬ Tap      to return to the Test Screen.

 10. Press and hold      for 2 seconds to turn the meter off.

NOTE: For water samples over 100 °F (38 °C) subtract 0.3 from pH result or, for the most accurate
result, wait until water sample is below 90 °F (32 °C) to test.
Remove residue daily. Residue will damage the meter and cause inaccurate results. See Cleaning, page
19.

                                                 7
SAVE, PRINT AND SEND TEST RESULTS
GENERAL OPERATING PROCEDURES

                               Test results can be saved, transferred to the WaterLink Connect mobile app via Bluetooth
                               and sent to the Mobile Bluetooth Printer (Code 5-0066).

                                                                                 Test Results
                                                                          Test Time 05:30:06 16-Apr-2020

                                                                     FCL 1.98                  ALK 98
                                                                     TCL 1.98                  HARDgpg 38.0
                                                                     CCL 0.00                  T IRON 1.1
                                                                     pH 7.5                    COPPER 2.2

                                                                  Tagging        Save        Print   Transfer Return
                                                                                Results     Results  Results      to Test
                                                                                                        via      Screen
                                                                                                    Bluetooth
                                                                                                  (Not Available)

                               Test History Settings
                               The WaterLink Spin Touch can log test results for 250 water samples in the Test History.
                               The results for the most recent sample will be located at the top of the list. All results can
                               be logged automatically or results for an individual sample can be logged after the sample
                               has been tested.
                               To turn on automatic
                                           utto     logging, tap    on the Test Screen. Tap . Select Auto-Save Tests.
                               Tap     and to return to the test screen. When Auto Save is selected    will not be
                               highlighted on the Test Results screen.
                               To manually log results for one sample at a time, Auto-Save Tests must be disabled. If
                               Auto-Save Tests is disabled      will be highlighted on the Test Results screen. After the test
                               has been run, tap     to save the results for that water sample to the Test History.
                               A user defined identification tag can be assigned to an individual sample result.
                                                                                                            suult To enable
                               tagging, tap      on the Test Screen. Tap . Select Enable tags. Tap      and       to return
                               to the test screen. The tag can be up to 4 hexadecimal characters. It cannot begin with
                               a zero. To tag a test result, tap   on the bottom of the Test Results screen and use the
                               buttons to enter up to four characters. Tap     to erase a character. Tap     to save the tag
                               and return to the Test Results screen. Tap     to return to the Test Results screen without
                               saving the tag. The tagged result will appear on the Test Results screen and the Test
                               History screen. The tag will be preceded by “T-“.

                                                                      Test History
                                                                                                                     Go to Top
                                                              00.35 16-Apr Treated DW13
                                                              00.22 16-Apr Treated DW13                              Scroll up
                                                              21.44 16-Apr T-4650 Treated DW13                       or down
                                                                                                                     the test
                                                              21.43 16-Apr Treated DW13                              list by 5
                                                              20.41 16-Apr T-ABC7 Treated DW13                       entries
                                                              20.36 16-Apr Treated DW13
                                                                                                                     Go to Bottom

                                                        Select All/    View       Delete     History Home
                                                       De-Select All Selected    Selected    Settings
                                                                      Results    Results      Select
                                                                                            Auto Save

                                                                                              8
Logged results are viewed in Test History. Controls for viewing and managing single or
multiple test records are located on the Test History screen. Tap the checkbox next to a

                                                                                                    GENERAL OPERATING PROCEDURES
test record to select it, then tap one of the buttons along the bottom to perform an action
with the selected records.

Print or Send Results to a Bluetooth Phone or Tablet
The WaterLink Spin Touch can print to the Mobile Bluetooth Printer or send test results to a
Bluetooth-enabled device such as a phone or a tablet. The highlighted     or     will show
which function is active. The Spin Touch cannot connect to the printer and connect to a
phone or tablet at the same time.
There are two modes of operation for connecting to the printer and a phone or tablet – Fast
Printer Connect ON and Fast Printer Connect OFF. The default mode is Fast Printer Connect
ON. Fast Printer Connect can be turned on or off from the Bluetooth Menu that is located in
the Settings Menu.
If Fast Printer Connect is ON, the meter will connect immediately to the printer upon
recognizing it. It will also connect to a phone or tablet but priority is given to the printer
connection. The printer will start printing immediately when         is tapped. The      will dim
in intensity while the printer is printing. Fast Printer Connect should be ON if results will
be printed more frequently than results will be sent to a phone or tablet. It can remain
selected if results will only be sent to a phone or tablet. If Fast Print Connect is ON, and the
printer is on, the printer will have to be turned off before results can be sent to a phone or
tablet.
If Fast Printer Connect is OFF, the meter has the opportunity to connect to a phone or
tablet at all times other than when the printer is actually printing a test. The meter will
connect to the printer only after      has been tapped so printing will be delayed a few
seconds while the connection to the printer is being established. The         will dim in
intensity while the printer is printing. After printing, the meter will automatically reconnect
to the phone or tablet. Fast Printer Connect should be OFF if results will be sent to a phone
or tablet most frequently and printed less often.

SYRINGE
                   A plastic 3 mL syringe (Code 1189) is used to fill the disks. A
                   precision tip on the syringe fits into the fill hole on the disk. The
                   syringe tip should not be removed from the syringe. Syringes should
                   be cleaned between water samples. Pump air in and out of the
                   syringe a few times to clear the previous sample or rinse the syringe
                   with a small amount of the next water sample before filling it with
                   the next sample.

REAGENT DISK
                   The WaterLink® Spin Touch® uses a disk reagent system. The dried
                   reagents are packaged in single test amounts in a sealed, polystyrene
                   disk. Stainless steel mixing beads in the reaction chambers mix the
                   sample water and the dried reagents. Tests for all factors in the series
                   are performed at one time. It is not possible to isolate the well for a
                   single factor and perform a test for one test factor only. Single-use
                   disks contain reagents for a single series. Disks should not be filled in
                   the meter chamber.

                                                9
DISK HANDLING
GENERAL OPERATING PROCEDURES

                               The disk should be handled only by the edges. Avoid touching the
                               top or bottom of the disk. The light passes through the non-frosted
                               areas of the disk so these areas must be kept free of smudges and
                               fingerprints. Wet disks should never be placed in the meter. Wet
                               disks should be dried with a lint free cloth before placing them into
                               the chamber.
                               The disk is positioned in the chamber by aligning the D-shaped hole in the center of the
                               disk over the D-shaped hub in the photometer chamber. The disk should be placed gently
                               on the hub. There is no need to firmly press the disk down onto the hub.

                               DISK STORAGE
                               Disks are sensitive to moisture. Avoid opening more packs
                               than are needed. Disks have a limited shelf life and should not
                               be exposed to the humidity in the air more than necessary.
                               Store disks at 70-80 °F/21-27 °C. Do not transport the
                               meter with a disk in the chamber.

                               DISK COVER
                               The black disk cover is placed over the disk in the photometer
                               chamber to reduce interference from stray light. The disk cover
                               is positioned over the disk by aligning the D-shaped hole in the
                               center of the disk over the D-shaped hub in the photometer
                               chamber. The disk cover should be placed gently on the hub.
                               There is no need to firmly press the disk cover down onto the hub.
                               The test will be aborted if the disk cover is not used.

                               METER CHECK DISK
                               The Meter Check Disk (1705) serves two purposes:
                                  ¬ When the Meter Check Disk (MCD) is run as an option from the Disk Series menu, the
                                    values on the display are compared to the values on the chart on the Meter Check
                                    Disk package to determine whether the meter is reporting results in the expected
                                    ranges.
                                  ¬ If the Meter Check Disk is inserted in the meter and Rotary Calibration is chosen from
                                    the Settings Menu, the alignment of the hub and disk is evaluated. The results are
                                    analyzed and reported as Pass or Fail.
                               For use of the Meter Check Disk see page 17.

                               USB CABLE
                               A USB cable connects the WaterLink® Spin Touch® to a Windows®-based PC. When used
                               with the AC Power Adapter, it connects the meter to an AC outlet.
                               WARNING: only use the USB cable and wall adapter that are supplied with the kit. Make no
                               substitutions.

                               BATTERY
                               A fully charged battery will last for approximately 150 tests under average conditions. The

                                                                            10
battery life will vary based on usage patterns. The meter should be turned off after testing
to prolong the battery life. The standard life cycle of a lithium ion battery is 500 cycles.
GENERAL OPERATING PROCEDURES
The battery will fully charge in approximately 10-12 hours. The battery is designed to be
charged overnight and should be charged indoors only. The battery is rated at 12 V and 8.1
AH capacity. Power the meter from the battery pack or from AC power. The USB cable and
AC adapter are used to plug the meter into an AC outlet. WARNING: only use the AC adapter
supplied with this equipment. Do not substitute.
The battery charge status is indicated by the battery icon on the display. The battery icon
will indicate when the battery charge is full, partial, low, empty or charging. The empty
battery icon will flash to indicate that meter should be connected to AC power source. If the
meter continues to be used at low battery power without connecting it an AC power source,
the meter will go into an auto-shutdown mode. In this mode the meter will be locked until
meter is connected to an AC source and the battery is charged to a sufficient voltage. While
charging, the charging battery icon will be displayed. The meter should
remain plugged in until the battery is fully charged. When the battery is
completely charged, the charging icon will change to the full battery
icon.
SETTINGS
Tap to enter the SETTINGS menu. Tap to return to the test screen at any time.
Brightness The brightness level of the display can be adjusted from 00 to 10. Tap
and to adjust the brightness. Tap to exit to the Settings
menu.
Date/Time The Year, Month, Day, Format, Hour, Minute, AM/PM can be set. Tap
or to adjust the displayed value. Tap to move to the next
value. After the last value has been chosen (minutes for 24 hour
format, AM/PM for 12 hour format) tap to return to the Settings
menu. Tap to exit to the Settings menu at any time.
Set Language There are ten language options – English, French, Spanish, German,
Dutch, Swedish, Portuguese, Italian, Turkish, Chinese. Tap selection.
Tap to exit to the Settings menu.
Calibration Tap to run an angle calibration to evaluate the alignment of the hub
and disk. Tap to exit to the Settings menu.
Power There are three power options: Auto Dim Time, Auto Off Time, and
Options Power. Tap the options then tap a selection. Tap selection. Tap to
exit to the Settings menu.
Bluetooth There are two Bluetooth options: Bluetooth Enabled and Fast Printer
Connect that are used to print test results. Tap to exit to the
Settings menu.
Market Type Tap to select the market type. Select Drinking Water. Tap to exit to
the Settings menu.
11Other Settings Units allows the selection of units for the Hardness test results to be
GENERAL OPERATING PROCEDURES
reported as gpg or ppm for the Drinking Water market. It also allows
the selection of the Nitrate test results to be reported as ppm Nitrate
(NO3) or ppm Nitrate Nitrogen (NO3-N). When results are reported as
ppm Nitrate (NO3) the nitrite results will be reported as ppm Nitrite
(NO2). When results are reported as nitrate nitrogen NO3-N) the
nitrite results will be reported as ppm Nitrite Nitrogen (NO2-N).
About… lists the Serial Number, Firmware Version, Bluetooth MAC
address, Bluetooth Version and Test Count. The Test Count shows
the number of complete tests that have been performed over the
lifetime of the meter. Tap to return to the Settings menu.
Ranges Enabled allows the option of having test results that are
out of the range of the reagent system displayed in red. The default
setting is on.
When Show Market Type is selected, the market type will be displayed
on the Testing Screen. The default setting is OFF. Tap to return to
the Settings menu.
Select Disk Detection to display an error message and abort the
test when improper testing conditions, such as No Disk, No Disk
Cover, Used Disk or Meter Check Disk, are present that would result
in inaccurate or no test results. The default setting is OFF. Tap to
return to the Settings menu.
RANGES
Test Factor Range Display Abbreviation
Alkalinity, Total 0–250 ppm ALK
Chlorine, Free 0.00–15.00 ppm FCL
Chlorine, Total 0.00–15.00 ppm TCL
Combined Chlorine 0.00–15.00 ppm CCL
Copper 0.0-6.0 ppm COPPER
Hardness, Total 0–70 gpg/0-1200 ppm Hardgpg/T HARD
Iron, Ferrous, soluble 0.0–6.0 ppm FERROUS
Iron, Ferric, soluble 0.0–6.0 ppm FERRIC
Iron, Total, soluble 0.0-6.0 ppm T IRON
Nitrate 0-45 ppm/0-11 ppm NITRATE/NITRATE-N
Nitrite 0.0-2.0 ppm/0.0-0.6 ppm NITRITE/NITRITE-N
pH (4336) 6.4-10.0 pH
pH (4337) 4.5-8.6 pH
Go to SETTINGS>Other Settings to select hardness and nitrate units.
Copper concentrations over 4 ppm will result in low total hardness results.
Test results that are out of range of the reagent system wil be RED. RED test results may
not be accurate. Go SETTINGS>Other Settings to turn the Ranges Enabled feature OFF.
Not intended for testing ultra-pure samples such as samples from reverse osmosis
systems.
12DISK DESCRIPTIONS
Treated Water Disk DW13 Low Range
Total
(Code 4336-H) Iron Total Hardness
Total
Chlorine
Total
Combined Chlorine Total Chlorine Alkalinity
High
Copper Total Hardness Range High Range
pH Total Hardness
Free Chlorine Total Iron
Free
Total Alkalinity pH Chlorine Empty
Copper
pH
Blank
Well Water Disk DW21 Total
Iron
Low Range
Total Hardness
(Code 4337-H) Nitrate
Total
Alkalinity
Total Alkalinity Total Iron Ferrous
Iron
pH Copper Copper
Total Hardness Nitrate Low High Range
Range Total Hardness
Ferrous Iron Nitrite pH
Ferric Iron pH Nitrite
Blank
NOTE: Colored reagents may be visible in the disk before adding sample water.
Not intended for testing ultra-pure samples such as samples from reverse osmosis
systems.
ACCESSORIES AND REPLACEMENT PARTS
Description Code
® ®
WaterLink Spin Touch DW Meter
Water Sample Bottle (30 mL) 0689
Syringe with tips (3) 1189-3
Syringe tips (3) 1189-TIP
Cleaning Tissues 0669
Meter Check Disk (North American) 1705
Meter Check Disk (Europe) 1705-EU
Universal Disk Cover 1719
USB Cable 1712
AC Adapter (North America) 1713
13Cloth Wipe 3580-WIPE
Mobile Bluetooth Printer 5-0066
® ®
WaterLink Spin Touch DW Manual 3585-MN
WaterLink® Spin Touch® DW Quick Guide 3585-QG
For available WaterLink® Spin Touch® DW reagent disks, see page 13.
WARNING: only use the USB cable and wall adapter that are supplied with the kit. Make no
substitutions.
SPECIFICATIONS
Instrument Type Centrifugal Fluidics Photometer
Wavelengths 390 nm, 428 nm, 470 nm, 525 nm, 568 nm, 635 nm
(interference filters)
Display Color Capacitive Touchscreen, 3.5 in, 320 x 240 pixel resolution
Wavelength Accuracy ±2 nm
Wavelength Bandwidth 10 typical
Photometric Range -2 to 2 AU
Photometric Precision ±0.01 AU at 1.0 AU
Photometric Accuracy ±0.01 AU at 1.0 AU
Sample Chamber Accepts prefilled disk
Light Source 6 LEDS
Detectors 6 silicon photodiodes
Pre-Programmed Tests Yes, with automatic wavelength selection
Languages English, French, Spanish, German, Dutch, Swedish, Portuguese,
Italian, Chinese, Turkish
Temperature Operation: 0-50 °C; storage – 40-60 °C
Operation Humidity Range 0- 90 % RH, non-condensing
Communication USB-C, Bluetooth low energy technology (BLE)
Calibration Factory set, field calibration via internet connection
Firmware Internet updateable (New Test, New Test Calibrations, etc.)
Software Android & iOS Apps, WaterLink® Solutions, WaterLink® Connect
Power Requirements USB wall adapter, USB computer connection or internal lithium
ion rechargeable battery
Battery Type Lithium ion
Minimum Capacity 12 V/2.6 AH
Charge Life Approximately 150 tests
Battery Life Approximately 500 charges
Full Charge 10-12 hours
Water Resistance Rubber over-molded base, rubber USB Port Plug, gasketed
display and hinge.
Electrical Rating Rated voltage (5V), Rated power of input current (1.6 A) at USB C
14Auto Off Yes, default 15 (only with battery power)
Power Save Yes, default OFF
Data Logger 250 test results stored for download to PC or transfer by
Bluetooth
Certifications EZ-BLE™ PRoC™ FCC (USA): FCC ID:
Module, WAP2001
CYBLE-022001-00 Industry
RF Radio: Canada (IC)
Certification: License IC:
7922A-2001
CE (Europe): Complies with
Directive
1999/5/EC
MIC (Japan): 005-101007
KC (Korea): MSIP-CRM-
Cyp-2001
EMC: EU: ETSI EN 301489-1
US: FCC PART 15 B
CAN ICES-3 (B)/NMB-3(B)
AS/NZS: CSPR 22
Safety: EU: EN61010-1:2010
AS/NZS: national differences
Dimensions 21.6 X 12.4 X 10.4 cm (L X W X H)
8.5 X 4.9 X 4.2 in
Weight 0.79 Kg, 1.74 lb
TROUBLESHOOTING
TROUBLESHOOTING GUIDE
Problem Reason Solution
“No Disk, Test Aborted” No disk in chamber Place filled disk in chamber. Cover
with disk cover. Select OK. Start
Empty chamber test.
Insert filled disk. Cover with disk
cover. Select OK. Start test.
“No Disk Cover, Test Disk cover was not used Use disk cover. Select OK. Start
Aborted” test.
“Lid Open, Test Aborted” Lid opened Close lid. Select OK. Start test.
“Used Disk” Reacted disk in chamber Select “Continue” to go to Test
Results screen. Select “Abort” to
go to Testing screen and run test
with new disk.
15Meter Check Disk Meter Check Disk in chamber Select “Continue” to go to Test
instead of reagent disk Results screen. Select “Abort” to
go to Testing screen and run test
with reagent disk.
“Sanitizer” appears on Wrong Market Type was chosen Go to Settings. Change Market
test screen instead of Type to Drinking Water
“Source”
Meter is using the default blank Solution: Fill disk correctly (see
! on Test History due to under filled disk or air FILLING)
screen bubble.
Range Error Raw data out of range Contact Support
Output Error Decreased light intensity. Clean lens (see CLEANING).
Possibly dirty lens Follow Range Check Procedure. If
error message persists, contact
Support.
Consistently unexpected Metals may actually be present Repeat test with distilled water. If
high results for metals the results still show that metals
are present, contact Support.
Alkalinity result of 0 ppm Usually due to an underfilled disk. Review the disk filling procedures
and test again. If problem persists,
contact Support.
Unexpected results Dirty disk cover Gently clean disk cover apertures
with pipe cleaner or lint free cloth.
Disk type is not an option Software or meter firmware is Update WaterLink Connect at
in Disk Series out of date. softwarecenter.lamotte.com
High pH results Water sample temperature above For water samples over 100 °F (38
100 °F (38 °C) interferes with pH °C) subtract 0.3 from pH result or,
reagent for the most accurate result, wait
until water sample is below 90 °F
(32 °C) to test
Disk not spinning Lid open, meter not powered on, Close lid, power on meter, charge
low battery, disk or disk cover the battery or plug meter into a
pressed down too tightly on hub stable power source, remove the
disk/disk cover and place back in
the meter more gently
Fast electrical transients may Restart the test to resume normal
disrupt operation of the Spin operation
Touch™ meter
Test result value on the Results are out of range of Dilute sample. Retest for out of
display is red reagent system range test factor. (All factors
except pH.)
Unexpected low Chlorine High chlorine concentrations Check sample with chlorine test
results will bleach chlorine, and other strips (Code 2987)
reagents
Trouble connecting to Bluetooth not enabled Enable Bluetooth
Bluetooth device Too many Bluetooth devices near Have only one device near the
the meter meter
Printer power is ON and Fast Turn printer power OFF. Or turn
Printer Connection is ON Past Printer Connection OFF.
16Trouble connecting to Broken connection Press and hold power button for
computer by USB 1 second.
Results not printing Printer not on Turn printer on
The Spin Touch™ will only print Connect to Mobile Bluetooth
to the Mobile Bluetooth Printer Printer (Code 5-0066)
(Code 5-0066)
TROUBLESHOOTING WITH THE METER CHECK DISK
Do not attempt to separate the components of the Meter Check Disk (Code 1705/1705-
EU). The Meter Check Disk consists of a disk with a permanently attached cover.
Do not fill the Meter Check Disk with water. Water is not used during the meter check
procedure.
Range Check Procedure
The Meter Check Disk is used to verify the performance of a meter. It is not used to
recalibrate the meter. Meters are calibrated at the time of manufacture. The meter is
performing satisfactorily if readings using the Meter Check Disk are within the ranges
provided on the Meter Check Disk pouch. Range specifications are specific to the disk
identified by the serial number on the pouch. The range specifications will vary from disk to
disk. The exact readings from a specific disk may vary from meter to meter.
1. Follow the Cleaning procedure on page 19 to clean the light chamber and optic lenses.
2. Tap select Disk Series.
3. Tap MC
MCD to select Meter Check Disk.
M
4. Tap to return to the test screen.
5. Remove the Meter Check Disk (1705/1705-EU) from the foil pouch. DO NOT remove
the black cover from the disk.
6. Insert the Meter Check Disk. Close the lid.
7. Tap to start test.
8. Results will be displayed.
9. Compare the results on the display to the values on the chart shown on the pouch. If
the results are not within the range shown on the pouch, contact Support.
10. Replace the Meter Check Disk in the foil pouch for storage.
LED Calibration
The LED Calibration is performed to set the brightness of the individual LEDs.
1. Follow the Cleaning procedure on page 19 to clean the light chamber and optic lenses.
2. Tap to go to settings.
3. Tab Calibration.
4. Tap LED Cals.
5. Remove the Meter Check Disk (Code 1705/1705-EU) from the foil pouch. DO NOT
remove the black cover from the disk.
6. Insert the Meter Check Disk. Close the lid.
7. Tap Start to begin the meter check procedure.
8. When the calibration is complete the message “LED Calibration Complete” will appear.
9. Tap to return to the Testing Menu and resume testing.
17Angle Calibration
Angle Calibration checks the alignment of the hub and disk. The results are analyzed and
reported as pass or fail. If the measurements pass the settings will be saved. If the analysis
fails, contact Support.
If performing the LED Calibration and the Angle Calibration, the LED Calibration should be
performed before the Angle Calibration.
1. Follow the Cleaning procedure on page 19 to clean the light chamber and optic lenses.
2. Tap to go to settings.
3. Tab Calibration.
4. Tap Angle Cals.
5. Remove the Meter Check Disk (Code 1705/1705-EU) from the foil pouch. DO NOT
remove the black cover from the disk.
6. Insert the Meter Check Disk. Close the lid.
7. Tap Start to begin the meter check procedure.
8. If the meter is performing satisfactorily, “Angle Calibration Successful” will be
displayed and the settings will be saved. If the meter is not performing satisfactorily,
“Angle
g Calibration Unsuccessful. Contact Support” will be displayed.
9. Tap to return to the Testing Menu and resume testing.
email: softwaresupport@lamotte.com
phone: 800-344-3100 option 3 | Mon-Fri 9am-5pm EST
HELPFUL HINTS
¬ Do not touch top or bottom of disk. Handle disk by the edge.
¬ Do not fill disk while in the meter. Fill disk on clean, dry surface.
¬ Fill the disk on a dark surface to more easily see the sample water.
¬ The disk should not contain any large air bubbles. Air bubbles will result in erroneous
results.
¬ Always use the disk cover.
¬ Only the Universal Disk Cover (Code 1719) can be used with the WaterLink® Spin
Touch®.
¬ Empty syringe of old sample before filling with next sample.
¬ Remove filled disk from meter after testing. Do not travel with filled disks in meter.
They may leak.
¬ Keep the chamber clean and dry. Gently swab LED and photodiode lenses located
around the hub with a cotton swab dampened with streak-free window cleaner. Do
not use alcohol. It will leave a thin film over the lenses when dry.
MAINTENANCE
CLEANING
The optical system of the WaterLink® Spin Touch® must be kept clean and dry for optimal
performance. Dry the disk with a lint-free wipe before placing it into the chamber to avoid
introducing moisture. For best results, store the instrument in an area that is dry and free
from aggressive chemical vapors. Clean the exterior housing with a damp, lint-free cloth.
Do not allow water to enter the light chamber or any other parts of the meter. To clean the
light chamber and optic lenses, point a can of compressed air into the light chamber and
18the lid and blow the pressurized air into the light chamber and lid. Focus the pressurized
air around the LEDs which are the small round lenses positioned at 2:00, 4:00, 6:00, 8:00,
10:00 and 12:00 in the lid. The photodiodes are located on the bottom of the chamber
around the hub. This area must be kept clean and dry. Use a cotton swab dampened with
streak-free window cleaner to gently swab the LED and photodiode lenses. Do not use
alcohol; it will leave a thin residue over the optics when dry.
Remove smudges due to routine use from the touchscreen with the Cloth Wipe (Code
3580-WIPE). Use a cloth dampened with alcohol for more thorough cleaning when
necessary. Do not use Windex® window cleaner, or similar cleaners, on the touchscreen.
REPAIRS
Should it be necessary to return the meter for repair or servicing, pack the meter carefully
in a suitable container with adequate packing material. A return authorization number
must be obtained from LaMotte Company by calling 800- 344-3100, ext. 3 (US only) or
410-778-3100, ext. 3, faxing 410-778-6394, or emailing softwaresupport@lamotte.
com. Often a problem can be resolved over the phone or by email. If a return of the meter
is necessary, attach a letter with the return authorization number, meter serial number, a
brief description of problem and contact information including phone and FAX numbers
to the shipping carton. This information will enable the service department to make the
required repairs more efficiently.
METER DISPOSAL
Waste Electrical and Electronic Equipment (WEEE)
Natural resources were used in the production of this equipment. This equipment may
contain materials that are hazardous to health and the environment. To avoid harm to
the environment and natural resources, the use of appropriate take-back systems is
recommended. The crossed out wheeled bin symbol on the meter encourages the use of
these systems when disposing of this equipment.
Take-back systems will allow the materials to be reused or recycled in a
way that will not harm the environment. For more information on approved
collection, reuse, and recycling systems contact local or regional waste
administration or recycling services. Do not incinerate the equipment.
DISK DISPOSAL
The disks cannot be reused. Over time, the water in reacted disks will evaporate. Disks
can be recycled. Warning: Recyclers should check with the local authorities. Some states
may require that no chemical residue remains on the plastic or may not be able to accept
plastic waste with stainless steel mixing beads. Used disks may be returned, at the
customer’s expense, to LaMotte for recycling.
GENERAL INFORMATION
PACKAGING AND RETURNS
Experienced packaging personnel at LaMotte Company assure adequate protection against
normal hazards encountered in transportation of shipments. After the product leaves
the manufacturer, all responsibility for its safe delivery is assured by the transportation
company. Damage claims must be filed immediately with the transportation company to
receive compensation for damaged goods. Should it be necessary to return the instrument
for repair or servicing, pack the instrument carefully in a suitable container with adequate
packing material. A return authorization number must be obtained from LaMotte Company
by calling 1-800-344-3100 or 1-410-778-3100, ext. 3 or emailing softwaresupport@
lamotte. com. Attach a letter with the authorization number to the shipping carton which
19describes the kind of trouble experienced. This valuable information will enable the service
department to make the required repairs more efficiently.
GENERAL PRECAUTIONS
Read the instruction manual before attempting to set up or use the instrument. Failure to
do so could result in personal injury or damage to the meter. The WaterLink® Spin Touch®
should not be stored or used in a damp or excessively corrosive environment. Care should
be taken to prevent water or reagents from entering the photometer chamber. Wet disks
should never be put into the photometer chamber.
SAFETY PRECAUTIONS
Read the safety precautions on the labels of all reagent containers and packaging prior to
use. Safety Data Sheets (SDS) can be found at www.lamotte.com. Additional emergency
information for all LaMotte reagents is available 24 hours a day from the National Poison
Control Center at 1-800-222-1222 or by contacting the 24 hour emergency line for
ChemTel at 1-800-255-3924 (USA, Canada, Puerto Rico). For locations outside of the
North American continent call 813-248-0585 collect.
Ensure that the protection provided by this equipment is not impaired. Do not install or use
this equipment in a manner that is not indicated in this manual.
LIMITS OF LIABILITY
Under no circumstances shall LaMotte Company be liable for loss of life, property, profits,
or other damages incurred through the use or misuse of its products.
CE MARK
The WaterLink® Spin Touch® meter has been independently tested and has earned the
European CE Mark of compliance for electromagnetic compatibility and safety. To view
certificates, go to the LaMotte website at www.lamotte.com.
This device complies with Part 15 of the FCC rules. Operation is subject to the following
two conditions (1) This device may not cause harmful interference, and (2) this device
must accept any interference received, including interference that may cause undesired
operation.
Note: This equipment has been tested and found to comply with the limits for a Class B
digital device, pursuant to Part 15 of the FCC Rules. These limits are designed to provide
reasonable protection against harmful interference when the equipment is operated in a
residential environment. This equipment generates, uses, and can radiate radio frequency
energy and, if not installed and used in accordance with the instruction manual, may
cause harmful interference to radio communications. However, there is no guarantee that
interference will not occur in a particular installation. If this equipment does cause harmful
interference to radio or television reception, which can be determined by turning the
equipment off and on, the user is encouraged to try to correct the interference by one or
more of the following measures:
¬ Reorient or relocate the receiving antenna.
¬ Increase the separation between the equipment and receiver.
¬ Connect the equipment into an outlet on a circuit different from that to which the
receiver is connected.
¬ Consult the dealer or an experienced radio/TV technician for help.
WARRANTY
LaMotte Company warrants this instrument to be free of defects in parts and workmanship
20for 2 years from the date of shipment. If it should become necessary to return the
instrument for service during or beyond the warranty period, contact our Technical Service
Department at 1-800-344-3100 or 1-410-778-3100, ext. 3 or softwaresupport@
lamotte.com for a return authorization number or visit www.lamotte.com for
troubleshooting help. The sender is responsible for shipping charges, freight, insurance
and proper packaging to prevent damage in transit. This warranty does not apply to defects
resulting from action of the user such as misuse, improper wiring, operation outside of
specification, improper maintenance or repair, or unauthorized modification. LaMotte
Company specifically disclaims any implied warranties or merchantability or fitness for a
specific purpose and will not be liable for any direct, indirect, incidental or consequential
damages. LaMotte Company’s total liability is limited to repair or replacement of the
product. The warranty set forth above is inclusive and no other warranty, whether written or
oral, is expressed or implied.
To register your meter with the LaMotte Service Department, go to www.lamotte.com and
choose SUPPORT on the top navigation bar.
Serial Number ______________________________________________________
21Traducción de las instrucciones originales.
CONFIGURACIÓN
CONFIGURACIÓN
ANTES DEL PRIMER USO
¬ Cargue completamente la batería utilizando el cable USB Spin Touch y el
adaptador y conectándolo a una toma de corriente AC.
¬ Asegúrese de que su Spin Touch contiene la versión más actualizada
1. Descargue e instale la Aplicación WaterLink para Windows en http://
softwarecenter.lamotte.com/. A continuación, seleccione “Productos” >
“Aplicación WaterLink Connect ” > “Descargar”.
2. Conecte el medidor al ordenador con el cable USB incluido y lance la
aplicación de escritorio WaterLink Connect desde el Menú de Inicio.
3. Todas las actualizaciones se realizarán automáticamente en el medidor.
MEDIDOR
1. El medidor se puede alimentar con una toma de corriente, un ordenador o la batería
interna.
2. Utilice el cable USB y el adaptador para conectar el medidor a una toma de corriente.
3. Utilice el cable USB para conectar el medidor al puerto USB de un ordenador.
CARGA DE LA BATERÍA
1. Use el cable USB y el adaptador para conectar el medidor a una toma de CA o use el
cable USB (incluido) con un cargador de coche (no incluido) para cargar la batería.
(Anker PowerDrive 2, DC 12/24V, 5V = 4.8A, n.o pieza A2310 recomendado.)
2. El icono de la batería de la pantalla indicará el estado de la batería. Cárguela hasta que
el indicador señale que está llena.
ACTUALIZACIONES DE FIRMWARE
De vez en cuando hay que actualizar el firmware del Spin Touch. Para hacerlo:
1. Visite http://softwarecenter.lamotte.com/ y descargue la aplicación para Windows
WaterLink® Connect.
2. Conecte el Spin Touch al ordenador usando el cable USB suministrado.
3. Abra la aplicación de escritorio WaterLink® Connect y espere a que finalice la
actualización.
Una vez finalizada, es seguro cerrar WaterLink® Connect y desconectar el laboratorio. Tras
actualizar el firmware se recomienda ejecutar el Calibración LED nad Angle de la página 37.
NOTA: cuando se recibe un aviso para actualizar el firmware, se muestran las opciones
Actualizar ahora o Recordar más tarde. Si selecciona Recordar más tarde, el aviso
de actualización se mostrará de nuevo transcurridas 23 horas. O, para actualizar el
firmware en cualquier momento, abra WaterLink Connect, vaya a Ajustes>Ajustes de
servicio>Obtener actualizaciones.
CONEXIÓN AL PC
CONEXIÓN AL PC
Cuando se conecta el WaterLink® Spin Touch® a un ordenador a través de USB, la pantalla
táctil del dispositivo se desactiva y el laboratorio se maneja a través de la aplicación
WaterLink® Connect para Windows®. Esta aplicación está disponible de forma gratuita
en http:// softwarecenter.lamotte.com/. Mediante la aplicación de escritorio WaterLink®
Connect, se pueden transferir los resultados del Spin Touch a un programa de análisis del
agua como WaterLink® Solutions™.
22CONEXIÓN A DISPOSITIVO
CONEXIÓN A DISPOSITIVO
El WaterLink® Spin Touch® es compatible con conexiones a un PC con Windows® (a través
de USB) y a dispositivos móviles Android e iOS (a través de Bluetooth).
CONEXIÓN A TRAVÉS DE USB
Mediante el uso del cable USB suministrado, puede conectarse el WaterLink® Spin Touch® a
un PC con sistema Windows®. Antes de conectar un fotómetro a través de USB, descargue
e instale de forma gratuita la aplicación para Windows® WaterLink® Connect desde
http://softwarecenter.lamotte.com. Cuando se conecta el WaterLink® Spin Touch® al PC a
través de USB, los controles de la pantalla táctil del dispositivo se desactivan y el fotómetro
se maneja a través de la aplicación WaterLink® Connect. LaMotte también ofrece sólidos
programas de análisis del agua, como WaterLink® Solutions™, para recoger los resultados
de los análisis y ofrecer recomendaciones detalladas de tratamiento. Obtenga más
información acerca de los productos de software de LaMotte en http://softwarecenter.
lamotte.com.
CONEXIÓN A TRAVÉS DE BLUETOOTH
El WaterLink® Spin Touch® puede conectarse a un dispositivo con Bluetooth habilitado,
como un teléfono o una tablet. El Spin Touch también es compatible con la impresora
Bluetooth de LaMotte [Código 5-0066]. No es compatible con otras impresoras Bluetooth.
La transferencia de resultados a través de Bluetooth a un dispositivo móvil requiere que
se instale una aplicación móvil en el dispositivo y una cuenta activa para el programa
de software asociado. Por ejemplo, con una cuenta activa de WaterLink® Solutions™ y
la aplicación móvil WaterLink® Solutions™ instalada en un teléfono o una tablet, pueden
transferirse los resultados del fotómetro a la aplicación. Las aplicaciones móviles para los
productos de software de LaMotte están disponibles en iTunes (para dispositivos iOS) y
Google Play (para dispositivos Android). Obtenga más información acerca de los productos
de software de LaMotte en http://softwarecenter.lamotte.com.
Para transferir los resultados del WaterLink® Spin Touch® a la aplicación móvil para
productos de software de LaMotte:
1. Acceda a la aplicación móvil del producto de software LaMotte.
2. Busque un registro de un cliente o de un Sitio. Es posible que tenga que crear uno
antes de comenzar a realizar análisis.
3. Inicie un análisis del agua en la aplicación móvil.
4. Realice un análisis del agua desde la pantalla táctil del Spin Touch del dispositivo
como de costumbre. El Spin Touch y el dispositivo móvil con Bluetooth habilitado se
conectarán automáticamente.
5. Cuando la conexión esté disponible, se iluminará en la pantalla táctil. Cuando
sea tenue, el fotómetro y el dispositivo no estarán conectados. Pulse para
transferir los resultados a la aplicación móvil.
Cuando aparezca en la pantalla táctil, el Spin Touch podrá conectarse a la impresora
móvil Bluetooth (Código 5-0066). El botón será brillante cuando esté conectado y
tenue cuando no lo esté.
El Spin Touch no puede conectarse a ambos dispositivos móviles y a la impresora al mismo
tiempo. (Consulte el apartado Guarde, Imprima Y Envíe Los Resultados De La Prueba,
página 27)
USO DE BLUETOOTH DE BAJA ENERGÍA
El WaterLink® Spin Touch® se conectará automáticamente al teléfono, la tablet o la
impresora con Bluetooth habilitado más cercano. No es necesario conectar el Spin Touch
a su dispositivo con Bluetooth habilitado. Las barreras de las señales inalámbricas pueden
23reducir el rango de los dispositivos inalámbricos. El WaterLink Spin Touch funcionará mejor
si no hay paredes entre el fotómetro y los dispositivos receptores.
LLENADO
LLENADO
Cuando se introduce la jeringa en la muestra de agua y el émbolo
está arriba del todo, la jeringa contiene muestra de agua más
que suficiente para rellenar bien el disco. Sostenga la jeringa
verticalmente e inserte la punta en el orificio de llenado del disco.
Presione el émbolo lenta y suavemente para llenar el disco.
6. Llene el disco ejerciendo lentamente una
ligera presión. La muestra de agua llenará los
espacios entre los separadores en el sentido
contrario a las agujas del reloj. Cada espacio
se llenará de abajo hacia arriba. Añada más
agua de muestra hasta que la cuarta cámara
se llene de agua hasta arriba superando (Linea de
ligeramente la línea de llenado marcada en llenado)
Llenado correcto
relieve. No pasa nada si se llena sobrepasando
un poco la línea.
7. No llene excesivamente el disco. Si llena el
disco en exceso, la muestra de agua saldrá
por el orificio de desbordamiento situado en
el centro del disco. El disco no gotea. Seque el
disco y ejecute el test.
Llenado
excesivo
(Seque el disco antes de ponerlo en el medidor.)
8. No llene el disco por debajo del nivel indicado.
Si llena el disco por debajo del nivel adecuado,
las cámaras de reactivos no se llenarán por
completo y los resultados no serán precisos.
Llenado
insuficiente
9. No llene el disco por debajo del nivel indicado. Burbuja
Si llena el disco por debajo del nivel adecuado, de aire
la cámara vacía no se llenará. Tan pronto
como una burbuja comienza a formarse, tire
hacia atrás del émbolo para sacar la burbuja
del disco. Inicie de nuevo el proceso de
llenado.
10. Seque bien los discos húmedos con un trapo
sin pelusas. Agarre el disco por los bordes.
11. Llene el disco y úselo en los próximos 10 minutos. No llene discos con antelación.
24Si quiere obtener consejos sobre llenado y resolución de problemas, visite:
PROCEDIMIENTOS DE FUNCIONAMIENTO GENERAL
www.lamotte.com/spin_support/
PROCEDIMIENTOS DE FUNCIONAMIENTO GENERAL
MEDIDOR
Cuando se coloca un disco lleno en la cámara y se cierra la tapa, el medidor gira a alta
velocidad para distribuir la muestra a los depósitos de prueba. A continuación, el medidor
maximiza la acción de bombeo de las perlas de acero inoxidable al mismo tiempo que los
reactivos se mezclan con el agua de la muestra. Entonces se lee cada reacción a su debido
momento y en la longitud de onda oportuna para ese sistema de reactivos.
El botón situado en la parte central inferior de la parte superior del
medidor enciende y apaga el instrumento.
El indicador luminoso azul del botón de encendido/apagado señala el estado del
instrumento.
Luz azul fija: la LED azul permanecerá fija para indicar que el medidor está encendido y
listo para realizar un análisis.
Luz azul intermitente (tres parpadeos/segundo): hay un análisis en marcha y el disco está
girando. No abra la tapa cuando el disco esté girando.
Tenga cuidado al cerrar la tapa. No la cierre de golpe. Los cables que conectan la tapa con
el cuerpo del fotómetro pasan por la bisagra. El medidor no funcionará con la tapa abierta.
PANTALLA TÁCTIL
Al pulsar el botón para encender el medidor, se muestra la pantalla Test.
Selección de Iniciar
fuente de agua el test
Fuente
Tratada Pulse para
Tipo de
Iniciar análisis
disco
Disco
Encendido- DW13
apagado/
Estado de
la batería 16-Abr-20
12:14 PM
Fecha y Historial Ajustes
hora de tests
La pantalla se activa al tocarla. Para hacer una selección, pulse el icono o la palabra en
pantalla con la punta de un dedo, una uña, una goma de un lápiz o un lápiz óptico.
¬ Limpie suavemente las manchas de la pantalla con la toallita (3580-WIPE).
¬ No limpie la pantalla con un objeto afilado.
25¬ No coloque sobre la pantalla objetos que la puedan rayar o dañar.
PROCEDIMIENTOS DE FUNCIONAMIENTO GENERAL
¬ Evite tocar la pantalla con los dedos mojados.
ANÁLISIS
Fuente
Tratada Pulse para
iniciar análisis
Disco
DW13
16-Abr-20
12:14 AM
1. Mantengag pulsado hasta que se encienda el medidor.
2. Pulse . Seleccione un tipo de Fuente de agua. Pulse para confirmar.
3. Pulse . Seleccione una serie de discos (la encontrará en el embalaje del disco).
Pulse para confirmar.
NOTA: las series de discos están limitadas por la selección del tipo de Fuente de agua.
4. Extraiga un disco del embalaje.
5. Use la jeringa (1189) para llenar el disco con una muestra de agua.
6. Inserte el disco. Cubra el disco con la Cubierta de disco universal (1719). Cierre la
tapa.
7. Pulse para iniciar el análisis. Pulse para cancelar test. Si el análisis se
cancela, deseche el disco.
8. Aparecerán los resultados en pantalla.
9. Elija una opción.
¬ Pulse para añadir una etiqueta.
¬ Pulse resaltado para guardar los resultados del análisis en el registro cuando
no esté habilitada la opción de Guardado automático.
¬ Pulse resaltado para enviar los resultados a la impresora móvil Bluetooth.
¬ Pulse resaltado para enviar los resultados al dispositivo con Bluetooth
habilitado.
¬ Pulse para regresar a la pantalla Test.
10. Mantenga pulsado durante 2 segundos para apagar el medidor.
NOTA: para muestras de agua de más de 100 °F (38 °C) restar 0,3 al resultado del pH o, para un
resultado más preciso, esperar hasta que la muestra de agua esté por debajo de 90 °F (32 °C) para
realizar la prueba.
Eliminar los residuos diariamente. Los residuos dañarán el medidor y causarán resultados inexactos.
Vea Limpieza, página 37.
26GUARDE, IMPRIMA Y ENVÍE LOS RESULTADOS DE LA PRUEBA
PROCEDIMIENTOS DE FUNCIONAMIENTO GENERAL
Los resultados de la prueba se pueden guardar, transferir a la aplicación móvil WaterLink
Connect a través de Bluetooth y enviar a la impresora móvil Bluetooth (código 5-0066).
Resultados
Tiempo de prueba 05:30:06 30-Ene-2018
FCL 1.98 ALK 98
TCL 1.98 HARDgpg 38.0
CCL 0.00 T IRON 1.1
pH 7.5 COPPER 2.2
Etiquetas Guardar Imprimir Transferir Volver
los resultados los a la
resultados esultados a pantalla
través de Test
Bluetooth
(No disponible)
Ajustes del historial de análisis
El WaterLink® Spin Touch® puede guardar resultados de test de 250 muestras de agua
en el Historial de tests. Los resultados de la muestra más reciente se situarán en la parte
alta de la lista. Pueden guardarse automáticamente todos los resultados o guardarse los
resultados de una sola muestra después de haberla analizado.
Para activar el guardado automático, pulse e la pantalla de tests. Pulse . Seleccione
en
Guardar tests automáticamente. Pulse y para regresar a la pantalla de test. Cuando
está seleccionado el guardado automático, no brillará en la pantalla de resultados del
test.
Para guardar manualmente los resultados de una sola muestra cada vez, la función
Guardar análisis automáticamente debe estar desactivada. Si la opción Guardar test
automáticamente está desactivada, el icono de brillará en la pantalla de resultados del
test. Después de haber realizado el test, pulse para guardar los resultados para dicha
muestra de agua en el Historial de tests.
Se puede asignar una etiqueta de identificación definida por el usuario al resultado de
una sola muestra. La etiqueta puede tener hasta 4 caracteres hexadecimales. No puede
comenzar con un cero. Para etiquetar el resultado de un análisis, pulse en la parte
inferior de la pantalla Resultados del análisis y utilice los botones para introducir hasta
cuatro caracteres. Toque para borrar un carácter. Pulse para guardar la etiqueta y
volver a la pantalla Resultados del análisis. Pulse para volver a la pantalla Resultados
del análisis sin guardar la etiqueta. El resultado etiquetado aparecerá en la pantalla
Resultados del análisis y en la pantalla Historial de análisis. La etiqueta irá precedida por
«T-».
27You can also read