NHS Education for Scotland ePortfolio: User guide for Foundation programme trainees - 2012 Curriculum Updated for 2012-2013 training year - NHS ...
←
→
Page content transcription
If your browser does not render page correctly, please read the page content below
NHS Education for Scotland
ePortfolio: User guide for Foundation
programme trainees – 2012 Curriculum
Updated for 2012-2013 training year

                                   Author: Joel Smith,
                                         01/08/2012

                                                    1
User guide for Foundation Programme
                                                 trainees
                                                                                                                              Version 5.0

1 Introduction .............................................................................5
  1.1       Why has this guide been updated for the 2012-13 training year?............................5
2 Using the ePortfolio System ......................................................6
  2.1       Getting Started...........................................................................................................6
    2.1.1       Receiving your ePortfolio account details .......................................................................6
    2.1.2       Logging in .........................................................................................................................6
    2.1.3       Glossary of terms .............................................................................................................7
  2.2       The Header bar ..........................................................................................................7
  2.3       The Home Page ..........................................................................................................7
    2.3.1       Alerts ................................................................................................................................8
    2.3.2       Courses and Seminars ......................................................................................................8
    2.3.3       Show my recent Activity ..................................................................................................8
    2.3.4       Last Login..........................................................................................................................8
    2.3.5       Your current post .............................................................................................................8
    2.3.6       Recent messages..............................................................................................................8
    2.3.7       Form Status ......................................................................................................................9
    2.3.8       All posts in current training programme..........................................................................9
    2.3.9       Quick links ........................................................................................................................9
  2.4       The Navigation Menu.................................................................................................9
  2.5       The Home Menu ......................................................................................................12
    2.5.1       Summary Overview ........................................................................................................12
    2.5.2       Personal Details..............................................................................................................12
    2.5.3       Post / Supervisor Details ................................................................................................12
    2.5.4       Declarations and Agreements........................................................................................12
    2.5.5       Download Portfolio ........................................................................................................13
    2.5.6       Courses and Seminars ....................................................................................................14
    2.5.7       My Filled Forms..............................................................................................................14
    2.5.8       Absences ........................................................................................................................14
  2.6       The Curriculum and PDP Menu................................................................................15
    2.6.1       Linking evidence.............................................................................................................15
    2.6.2       Trainee ratings and comments ......................................................................................16

                                                                                                                                                      2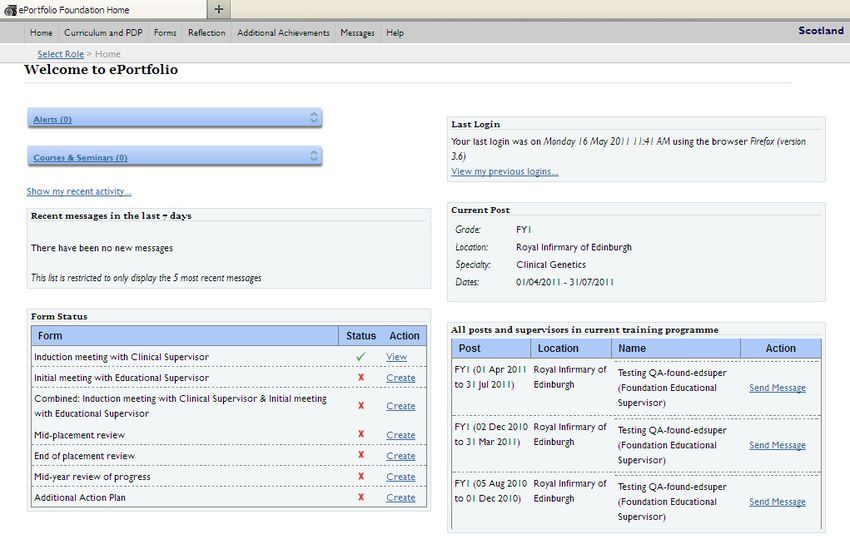
2.6.3       The curriculum overview ‘traffic light’ status overview.................................................17
  2.6.4       Requirements of competency sign-off...........................................................................18
  2.6.5       The e-LFH and UKFPO curriculum toolkit curriculum link icons ....................................18
  2.6.6       Personal Development Plan...........................................................................................19
2.7       The Forms Menu ......................................................................................................21
  2.7.1       Assessments (TAB) .........................................................................................................21
  2.7.2       Assessments (Core Procedures).....................................................................................23
  2.7.3       SLEs.................................................................................................................................24
  2.7.4       Clinical Supervisor Forms ...............................................................................................25
  2.7.5       Educational Supervisor Forms........................................................................................26
  2.7.6       Progression/Foundation ARCP.......................................................................................27
  2.7.7       Target Timeline ..............................................................................................................27
  2.7.8       Ticket Requests ..............................................................................................................28
2.8       The Reflection Menu................................................................................................32
  2.8.1       Reflective Practice..........................................................................................................32
  2.8.2       Self Appraisals ................................................................................................................33
  2.8.3       Careers Management.....................................................................................................33
2.9       The additional achievements menu ........................................................................35
  2.9.1       Certificates and Exams ...................................................................................................35
  2.9.2       Other achievements.......................................................................................................35
  2.9.3       Research.........................................................................................................................35
  2.9.4       Presentations .................................................................................................................37
  2.9.5       Tasters............................................................................................................................37
  2.9.6       Audit...............................................................................................................................37
  2.9.7       Teaching .........................................................................................................................37
  2.9.8       Non-academic achievements.........................................................................................37
  2.9.9       Personal Library..............................................................................................................38
  2.9.10      Courses and seminars attended.....................................................................................38
  2.9.11      Additional Procedures....................................................................................................38
2.10      The messages menu.................................................................................................40
2.11      The Help Menu.........................................................................................................43
  2.11.1      Information ....................................................................................................................43
  2.11.2      Access Rights ..................................................................................................................43
  2.11.3      Frequently Asked Questions ..........................................................................................43
  2.11.4      Support...........................................................................................................................43
  2.11.5      User Guides ....................................................................................................................44
  2.11.6      Blank forms ....................................................................................................................44
  2.11.7      About ePortfolio.............................................................................................................44

                                                                                                                                                   3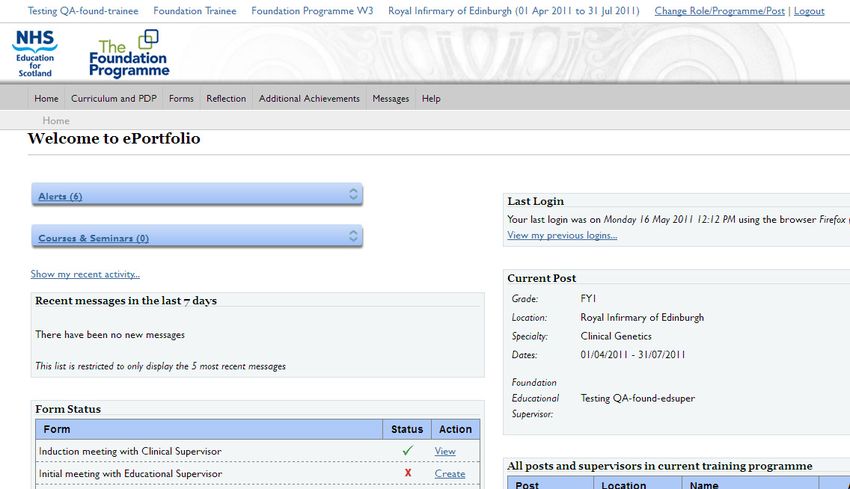
2.11.8      Release Notes.................................................................................................................44
  2.12      Logging Out ..............................................................................................................44
3 Completing your ePortfolio .....................................................45
  3.1       What is the Foundation ePortfolio? ........................................................................45
    3.1.1       Further Reading..............................................................................................................45
  3.2       What to include in your ePortfolio ..........................................................................46
    3.2.1       Overview of meetings in each placement......................................................................46
    3.2.2       Programme Timetable and documents .........................................................................48
    3.2.3       Assessment and SLE numbers during the Foundation Programme...............................50
    3.2.4       Supervised learning events during the Foundation Programme ...................................50

4 Document History and Acknowledgments ...............................51

                                                                                                                                              4
1 Introduction
This user guide explains the step-by-step process to correctly completing your electronic portfolio
(ePortfolio), which is required to demonstrate your progress though your Foundation Training
Programme.

This user guide will offer you advice on:

    •   How to use the ePortfolio system
    •   How to complete your ePortfolio

It will also mention useful topics, such as:

    •   What is to be completed by you and your Supervisor(s)
    •   What to include as evidence in your ePortfolio
    •   Who can support you with ePortfolio queries

You need to regularly add relevant evidence to your ePortfolio and use it not just as a record of
progress but also as a learning tool to encourage the development of good practice.

Note: Not all Deaneries have the same processes and the names and types of forms used can vary
between Deaneries. Please bear this in mind when reading through the User Guide, as it has been
designed for generic use.

        1.1 Why has this guide been updated for the 2012-13 training
            year?
This Guide has been updated to reflect the changes to the Foundation Programme ePortfolio being
released for the 2012-13 training year.

The UK Foundation Programme Office (UKFPO) Foundation Programme (FP) Curriculum Delivery
Group required these changes to the ePortoflio to represent and support the new 2012 Foundation
Training Programme Curriculum.

                                                                                                      5
2 Using the ePortfolio System
2.1 Getting Started
2.1.1 Receiving your ePortfolio account details
In order to log on to the Foundation ePortfolio you will need your username and password.
In the first instance this will be provided by your Deanery or Foundation School administration staff.
You will receive a user name and password directly from the administrator either via email or on
paper.
If you have not received your username and password please contact your Deanery, Foundation
School or local Postgraduate Centre office. The ePortfolio technical provider is not able to give out
log ons.
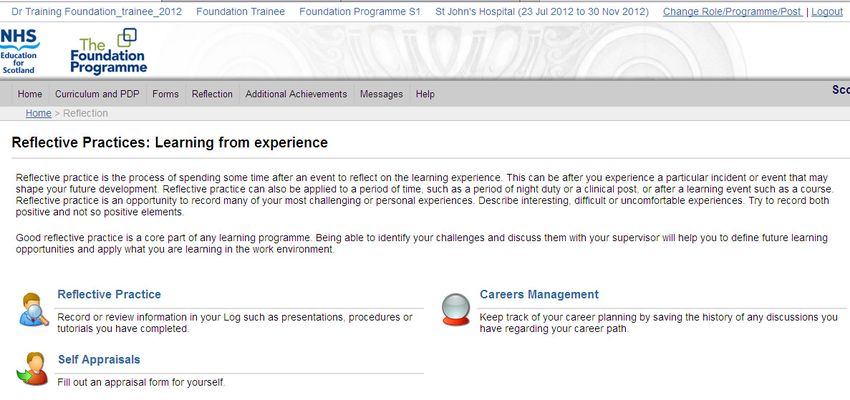
2.1.2 Logging in
Open your internet browser i.e. Internet Explorer, Firefox etc. and enter www.nhseportfolios.org in
the address bar. On the right side of the screen a user login box is displayed - enter your username
and password in the appropriate fields and click on the Log In button.
When you log in to ePortfolio for the first time you will be prompted to change your password (you
will also be prompted to verify that your e-mail address is valid).
If you want to change your password again at a later date, you can do this by clicking on the Profile
drop down menu and selecting Personal Details. Enter your old password and then enter your new,
memorable, password twice in the appropriate fields.
6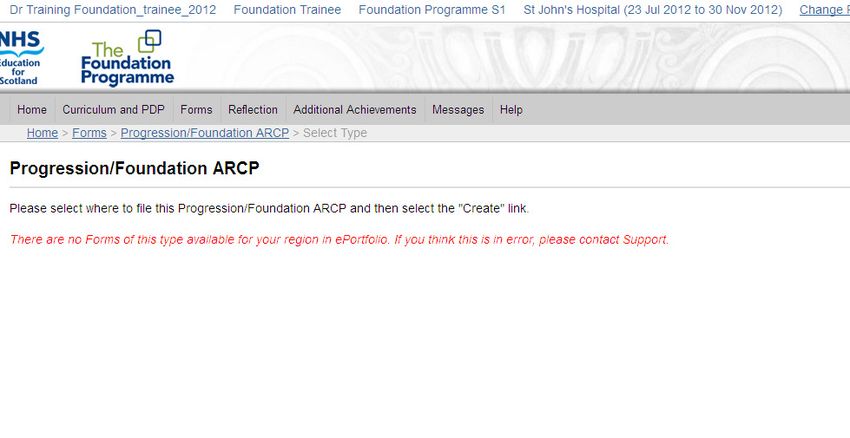
2.1.3 Glossary of terms
Trainee - The primary user of the ePortfolio. In this case a Foundation trainee.

Roles - There are three principal roles on the Foundation ePortfolio, that of the Trainee, Supervisor
and Administrator. Each role views the ePortfolio system differently and can perform different
functions dependent on their role.

Sites - These are the main ePortfolio types currently; Foundation, Physician, CEM, Pharmacy, RCR,
RCPCH, Nursing and RCOG.

Locations - These refer to physical (i.e. real) locations, most commonly hospitals, or may also refer to
administrative offices or schools, for example, an NHS trust.

Training Programme - This represents the overall programme of training for a trainee. For the
Foundation Site the programme will almost always be ‘Foundation Training’. Programmes also have
a location associated with them.

Post/Placement - A post fits into a Training Programme and represents a particular period of
training and is used as the object to save forms and other information against. The post has a
grade/designation defined, as well as a location. The new approved term for a post is a placement.
The ePortfolio will be moving towards this new terminology over the next few months, so you may
see both terms used.

Grade/designation - This refers to a trainee’s stage of training, such as FY1, FY2, ST1, FTSTA1, etc.

        2.2 The Header bar
Each ePortfolio user has a unique ‘header bar’ seen at the top of the page.

It contains a summary of information about your account. Included in the header (left to right) are:
     • Name of logged in user
     • Selected Role
     • Current Programme
     • Current Post

As well as this there are two action links:
    • Change Role/Programme/Post – In future this will allow you to restrict the information you
        view on your ePortfolio to a particular post or programme (I.e. You will not see data for
        previous post if you want). However this is still in development and at present this feature
        will not change anything on the Foundation Site.
    • Logout – Enables you to log out of your ePortfolio account.

        2.3 The Home Page
Below is the Home Page - it is the first screen you will see after the Information Broadcast page
(used by the ePortfolio team to communicate with users).

The home page acts as a ‘dashboard’ for the ePortfolio and many other parts are either summarised
here or can be accessed from it.
                                                                                                        7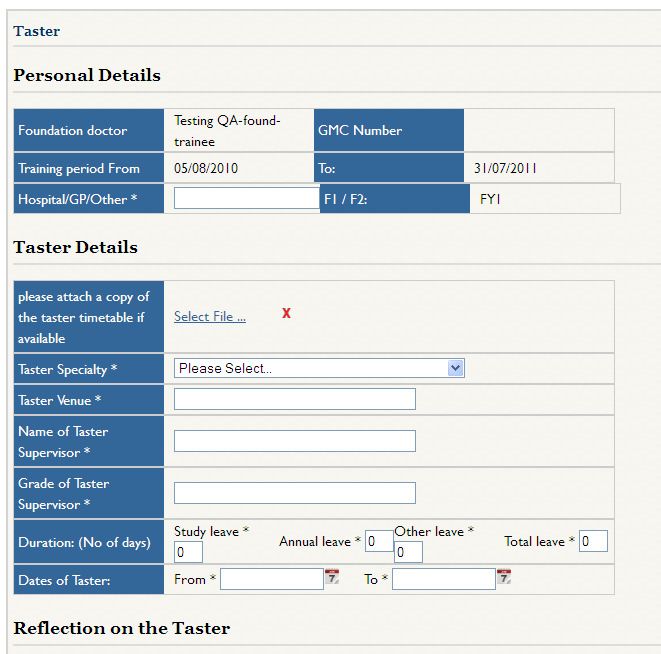
1.                                               4.
 2.
 3.
                                                  5.
 6.

 7.
                                                       8.

      2.3.1 Alerts
This is a facility for Deanery or local administrators to enter alerts on any
information/news/announcements they have.

      2.3.2 Courses and Seminars
This is a facility for administrators to enter information on courses and seminars.

      2.3.3 Show my recent Activity
Click this link to indicate recent activity that relates to a trainee’s ePortfolio account, and includes
recently added, updated, signed, or commented forms, PDPs, and logs. The top ten recent activities
in your account will be displayed.

      2.3.4 Last Login
As a security feature the date you last logged in on and the browser you used will be displayed on
your home page. If the date or browser are not what you expected please contact ePortfolio
support (see section 2.11.4 for details of how to do this).

      2.3.5 Your current post
This provides details of your current post including dates of service and details of any specialties.

      2.3.6 Recent messages
Your home page is linked to the ePortfolio messaging system (see section 2.10). Recent messages
form the last seven days will be displayed here so that it is easier for you to see when there are new
messages. This list is restricted to showing the five most recent messages so you should always
check your messages section as well.
                                                                                                        8
2.3.7 Form Status
The key forms to be completed for each post are now displayed on the home page so that you can
keep track of them and access them more conveniently. The status shows a tick if one or more form
exists on the current post. Each form will have a variety of actions available depending on the
status of that particular form.
Actions available:
View – If the form has been completed for the current post it will be available to view by clicking this
link.
Create – if the form is not present then the option to create the form will be presented. Note: see
sections 2.7.2.1 and 2.7.3 for details on the appropriateness of self entered forms).
Ticket – If the trainee does not have rights to create a form but can issue a ticket for it (see section
2.7.5 for details) you can move directly to the ticket request page.
(Please note: The list of key forms is as defined by the UK Foundation Programme Office. Your
specific requirements for each post may differ by deanery. See section 3.2 for more details on what
is necessary to include in your ePortfolio.)
2.3.8 All posts in current training programme
This area displays all posts and supervisors in your current training programme, displaying post
dates, locations and supervisors. It also provides a quick way to directly message a supervisor. Click
the ‘Send message’ link next to each supervisor to take you to a message pre-populated with that
person’s name.
2.3.9 Quick links
This provides quick, direct links to areas you may need to access on a regular basis. (Not shown on
screen shot above).
2.4 The Navigation Menu
The site is divided into seven sections and there is a drop down menu for each one. If you click on
the menu header e.g. Reflection, you will be taken to that section where you can see all items within
it and a description of what each one is used for.
9Alternatively, you can simply choose the item directly from the drop down menu.
The seven sections are;
• Home – you can view and make changes to your personal details, view your declarations and
agreements, and access the ‘download portfolio’ page
• Curriculum and PDP – you can view your curriculum and link evidence forms to specific
outcomes
• Forms – you can view the various electronic forms that are stored in your ePortfolio
• Reflection – you can record or review reflective information such as Educational Logs or
identify further learning needs
• Additional Achievements – you can use this section to record additional achievements not
dictated by the core curriculum
10• Messages – you can send/receive internal messages regarding ePortfolio
• Help – you can access help and support information on ePortfolio
We will look at each of the seven sections in more detail later…
112.5 The Home Menu
There are eight pages found in the Home Menu. Let’s take a look at what each menu item is used
for:
2.5.1 Summary Overview
This is a summary of all the electronic forms available for your current and previous posts. You can
view forms that have been submitted or create new forms, where appropriate.
2.5.2 Personal Details
You can view and edit your personal details here, for example your name, e-mail address, and you
can upload a photo too (the photo will be visible to those users who can view your portfolio and
those using the ticketing facility). You can also change your password and username here.
2.5.3 Post / Supervisor Details
You can review your current Post or Supervisor details. These are set up by your Deanery, Local
Trust or Hospital Administrators depending on the common practice in your region. Please note that
the central ePortfolio team do not conduct these activities; if your details are incorrect please
contact your local support network.
2.5.4 Declarations and Agreements
Here you can view and sign your educational agreements and health and Probity declarations that
are required by your training year programme.
12These forms should be signed by the trainee with the first three weeks of starting their training year
programme. To sign a form click on the blue form name to open, check the Sign as… box and click
save.
You will need to sign three forms for each of your Foundation Training Years. The three forms are;
• Conditions of taking up a training post / Educational agreement
• Probity Declaration
• Health Declaration
At the start of each training year you will be required to sign all your educational agreements and
health and probity declarations for that period before you continue with your ePortfolio. If you have
not signed these forms, you will be redirected to this page every time you log in.
2.5.5 Download Portfolio
You can download and save a PDF containing a snapshot of any ePortfolio information you select, at
the time you create it. You could then use this as evidence for interviews/assessment, for example.
You can select which parts of your ePortfolio you wish to download from a list of available items
(you will have to select your current post or training period from the drop-down menu to view
items). To select an item check the tick box next to the item and click the Add Item arrow between
the two boxes to add it to the right hand box. You can also click the Select All link to move all the
items at once.
Once all the items that you want to include in your PDF are in the left hand box, click the Make PDF
button to generate the PDF.
Once generated the PDF will be added to your list of PDFs Available for Download (see below). The
list will include details such as the date that the PDF was created. From this list you have three
further options; you can Delete or Edit the PDF by selecting the relevant link. You can also select to
View the PDF, this will download and open the PDF in a new window using your computer’s
standard PDF viewer.
132.5.5.1 Printing your ePortfolio
Downloading your ePortfolio to a PDF format is the only reliable way of formatting the contents of
your ePortfolio in a manner that will enable you to print without error. For data security reasons
only the trainee can download and print out the contents of their ePortfolio.
2.5.6 Courses and Seminars
This section is linked to the Course and Seminar notification bar on the home page. When an
administrator enters details of a course or seminar in your region an outline will appear on the home
page in the blue Courses and Seminars bar. If you click the View All Courses & Seminars link on the
home page, more details about course and seminar information that would not fit in the short
notification will appear on the Courses and Seminars page.
It is not unusual for this page to display no information.
Please note: This page is not editable by a trainee, if you wish to record attendance at teaching or
reflect on teaching content this can be done in the Courses and Seminars Attended page of the
Additional Achievement menu or in the Reflective Practice section of the Reflection menu.
2.5.7 My Filled Forms
In this section of your ePortfolio you can view a list of all the forms that you have filled in across the
entire ePortfolio system.
Any forms that you have completed will be listed as its own entry. You can modify the way in which
your list of forms is displayed (10, 25 or 50 forms viewed per page) and sort by various different
criteria selected from the sort by drop-down menu.
2.5.8 Absences
Some training programmes require you to document time taken away from your programme so here
you can record any absences that have taken.
142.6 The Curriculum and PDP Menu
The Curriculum Menu of the ePortfolio is where you can view the Foundation Curriculum and
associate items from within your ePortfolio to progress towards achieving the competencies
outlined in the curriculum. You can also add comments and ratings here.
2.6.1 Linking evidence
To link evidence to a competency, click on the Link Evidence icon. This is the blue icon found on the
right hand side of each listed competency.
Link Icon
You can link Assessments, Logs, PDPs, Self Appraisals, supervision/meeting form, certificate or file in
your personal library.
Each competency can have any number of links, and each evidence item can be linked to any
number of competences.
15Once generated links can be displayed by clicking on the link icon for a second time. Links can be
deleted from a competency by clicking on the delete button adjacent to the link (circled above).
Note that this just deletes the link; the saved form itself is unaffected.
2.6.2 Trainee ratings and comments
The Curriculum outcomes (1-16) presented here can be expanded, either one at a time using the +
symbols. Expanding the categories reveals the outcome subheadings, each which is represented by
a blue text subheading link.
By clicking on the competency link, for example, 1.1 Behaviour in the workplace, you can view the
following information:
• The outcome of successfully achieving the competency
• The knowledge and attitudes/behaviours that need to be demonstrated in order to
successfully achieve the competency
16• The core skills required in order to successfully achieve the competency at both F1 and F2
levels
You can add a rating (Not achieved, Some Experience, F1 Level Competent, F2 level Competent)
and any comments. Your comments and ratings will appear under the subheading and will be
labelled as being trainee generated.
Your Supervisors/Programme Directors can also do this – they will be labelled as entered by that
individual.
If evidence has already been linked to a competency (as circled above), you can view this by clicking
on the magnifying glass icon next to it.
2.6.3 The curriculum overview ‘traffic light’ status overview
The curriculum overview contains a number of indicators that track your progress through the
curriculum that translate the outcome sub heading ratings to a red-amber-green coloured indicator.
The indicators will indicate the number of ratings made and give coloured icons to summarise the
ratings made by both the trainee and the Educational Supervisor.
There is also a ‘manual’ Overall Educational Supervisor Rating that can be set from their account.
What each indicator means is presented in the table below:
17Status type Consideration Status
Evidence Number of evidence items Number
Trainee rating No Trainee rating Grey
Trainee has self-rated some items ‘not met’ Red
Trainee has self-rated some items ‘some Amber
experience’
Trainee has self-rated some items ‘F1/F2 level Green
competent’
Educational supervisor No supervisor rating Grey
assessment of individual
competencies
Supervisor has self-rated some items ‘not met’ Red
Supervisor has self-rated some items ‘some Amber
experience’
Supervisor has self-rated some items ‘F1/F2 Green
level competent’
Educational supervisor This should be manually set based upon the
assessment of trainees supervisors judgment of the overall evidence
achievement of the desired presented
outcome (Overall Ed Sup Rating)
No selection made Grey
Manual selection of ‘Not been met’ Red
Manual selection of ‘Partially met’ Amber
Manual selection of ‘Fully met’ Green
Important: The lowest rating (Red being lowest) of any sub heading will be displayed as the overview
i.e. if 19 sub items are green and 1 is red, red gets displayed.
The Supervisor rating column statuses are not dependent on Clinical Supervisor Ratings (though they
can rate on the curriculum). They are dependent on Educational Supervisor ratings and it is
envisaged that these will make up almost all of the valid ratings. However any rating left by your
Foundation Programme Director will also count towards the ratings.
2.6.4 Requirements of competency sign-off
Although all trainees and all Educational Supervisors have the ability to sign off curriculum outcome
sub headings and the overview shows the numbers of ratings made on the status indicators, the
requirements to use these tools depend on local Deaneries and Training Programme guidelines.
Different programmes may or may not require these sign-offs each year. Therefore you and are your
supervisor may not be required to sign of curriculum outcome sub-headings at all.
If in doubt speak to your Educational Supervisor, Training Programme Director, Foundation School or
Deanery contact to be certain what their requirements are.
2.6.5 The e-LFH and UKFPO curriculum toolkit curriculum link icons
The ability to access associated training eLearning modules from within the curriculum has been
added.
18Where there is an available e-Learning for Heath training module for a given curriculum outcome
sub-heading you will see the following icon:
For example Outcome 11 has an icon for all four sub-headings.
Clicking on the icon will take you an information box as demonstrated below.
There is a link to access the e-LHF training website. The link will navigate you away from the
ePortfolio and take you to the entirely distinct e-LHF website. You will have to create and log into
an account for this website separately.
There is also a list of appropriate topic codes for the e-learning module that pertain to the particular
curriculum item that you use as reference to find the relevant module.
At the top of the curriculum page is a link to take you to the Foundation Programme Curriculum
Resource Kit PDF document. This additional resource aims to primarily assist foundation doctors in
improving their knowledge and understanding of the generic and clinical topics as set out in the
Foundation Programme Curriculum 2012. Clicking the link on your ePortfolio will automatically open
the PDF for you to read.
2.6.6 Personal Development Plan
This can be used at the start of a placement to set out when and how you will demonstrate
proficiency in this competency as required by the 2012 Foundation Programme Curriculum.
The Personal Development Plan (PDP) is your chance to identify learning objectives for a particular
time period. It should be developed in conjunction with your supervisors and can be referred to
during your training.
19The PDP should be reviewed at the initial meeting. You should identify your learning objectives,
outline the plan for the objectives to be met, and give an indication of the timescale for the
objectives and an idea of how evidence for the completion of the objective will be achieved. These
should be agreed with your Supervisor. Once objectives have been achieved, they can be ticked off.
They will remain on the PDP to reflect your achievements throughout training.
To access an existing PDP, click on the Curriculum and PDP menu and then select Personal
Development Plan.
Click on the title to view a PDP entry, or place a tick in the Show Details checkbox to get an
overview. You can also edit or delete the entries. You can add a comment or signature to it by
clicking on Links - the comments will be displayed at the bottom of the entry and they are visible to
all who you choose to have access to it.
If you want your Supervisor(s) to be able to view your entries, then you can choose to share them. If
not, you can choose to keep them in your private area and no other ePortfolio user has access to
your private entries. Your Supervisor can sign the PDP entry and add a comment, if required;
however you must share an entry first so that they can view it.
To add a new entry in your PDP, click on the Add New Entry button. Then complete the free text
boxes for your PDP entry and click on the Save button. Remember to select Place in the shared
area of my ePortfolio from the drop down box (see below) if you wish your supervisor to be able to
see this entry.
202.7 The Forms Menu
You can access the Forms section by clicking on the Forms menu header. You can access the various
electronic forms that are stored in your ePortfolio here.
When completing a form, you have unlimited time to complete the form as long as you are actively
typing. Once you stop typing, you will be logged out after 60 minutes (you will see a pop-up
message informing you of this). If at any point during the 60 minute window you resume typing the
60 minutes clock will be reset.
Depending on your Deanery you may have a different selection of menu items available. Let’s take a
look at what each menu item is used for:
2.7.1 Assessments (TAB)
This page is used to manage your Team Assessment of Behaviour (TAB).
TAB is a screening tool to help identify foundation doctors who may need additional help. It is used
early in your foundation training so steps can be taken to reduce the risk of any concerns about your
professional practice developing into chronic problems. However, in the great majority of cases, no
concerns are identified and TAB confirms good professional behaviour.
You will be told when in your training you are to complete the TAB assessment by your Foundation
School. You may have to complete more than one TAB in a year if your School requires this.
To start the TAB process you will have to begin by selecting the post that you wish to save the TAB
against. You do this using the Select a post drop down menu on the Assessments (TAB) page (circled
in pink below)
21The next step is to complete your ‘self TAB’, a self assessment form that you must complete before
you are allowed to proceed with the rest of the TAB process. To do this click the Create link as
indicated above in green. You will be given the self TAB form to complete, do this and then click
Save.
Now you need to gather TAB assessment forms from a pool of colleges that you work with via the
ePortfolio ticketing system. A ticket request for an assessor can be created using the 'Create a ticket
for your TAB' section at the bottom of this page or via the 'Forms -> Ticket Requests' page.
22To use the 'Create a ticket for your TAB' area first select an Assessor Role from the dropdown
menu, then fill in the Assessor Name and Assessor Email fields. If you wish to include a comment for
the assessor you can ad on in, but it is not mandatory.
See section 2.7.8 below for details of how to use the 'Forms -> Ticket Requests' page.
Your assessors must include:
• At least 2 doctors (including your designated clinical supervisor) but none may be other
foundation doctors
• At least 2 nurses (band 5 or senior)
• 2 or more allied health professionals (physiotherapists, OTs, etc); and
• At least 2 others (e.g. ward clerks, postgraduate programme administrators, secretaries,
auxiliary staff).
The colour coded table on this page will help you keep track of the tickets you have issued and the
assessor mix that you have.
A green category indicates that you have fulfilled the requirements for that type of assessor. In the
example above two Doctors have returned the forms so the category has changed to green.
An amber category indicates that ticket requests have been made, but some are pending.
Red indicates that no tickets or forms have been created by that group of assessors.
The individual TAB returns will not be viewable by a trainee. You will see that the form has been
entered into your account, but rather than showing as a blue link, the details will appear as normal
text. This is intended as trainees do not have permission to. Once you have the requisite number of
TAB returns (normally 10) your supervisor will be able to release a summary of the TAB forms which
will appear at the bottom of the TAB page.
2.7.2 Assessments (Core Procedures)
You can view the Core Procedure assessments that have been submitted for your current and
previous posts in this page.
A list of the completed forms will appear in a table in the bottom of the page. To open a form and
view its details click on the blue link after the magnifying glass icon (highlighted below).
23When a core procedure form is completed it is automatically linked against the relevant curriculum
outcome sub-heading.
2.7.2.1 Self entered assessment forms
You can also create forms in this section. It is generally accepted that most forms will be entered
into your account via the ticketing system or directly from your Supervisor’s ePortfolio, however you
are also able to create a form yourself on an assessor’s behalf in the unusual circumstance that an
assessor is unable to do so themselves. You should not use this facility to allow others to fill in forms
from your own access. This will log those forms as ‘self entered’ and they may therefore not count
towards your necessary numbers of assessments.
To self create forms in this manner select the ‘Add new core procedure’ button and click the ‘create’
link (as indicated on the screenshot below). This will bring up the empty form that can then be
completed.
2.7.3 SLEs
A SLE is an interaction between a foundation doctor and a trainer which leads to immediate
feedback and reflective learning. They are designed to help foundation doctors develop and improve
their clinical and professional practice and to set targets for future achievements.
Completed SLEs are collected in a summary page in the ePortfolio. To open a form and view its
details click on the blue link after the magnifying glass icon (highlighted below).
24It is generally accepted that most SLE forms will be entered into your account via the ticketing
system or directly from your Supervisor’s ePortfolio, however you are also able to create a form
yourself on an assessor’s behalf in the unusual circumstance that an assessor is unable to do so
themselves.
To self create forms in this manner select the ‘Add new SLE button and click the ‘create’ link (as
indicated on the screenshot below). This will bring up the empty form that can then be completed.
Some foundation Schools or deaneries will not accept SLEs that have been self-entered as counting
towards any evidence collection requirements. Check your local guidelines before entering forms in
this manner.
To request an SLE from an external party click the Ticket Request button on the SLE page. This will
take you to the ticket requests page that is covered in section 2.7.8.
2.7.4 Clinical Supervisor Forms
In this section you will find the forms that record the meetings that you have with your clinical
supervisor.
25You can view or create forms by clicking the blue link or ‘Add new meeting’ button in the same way
as for assessment forms detailed above in section 2.7.2.
Meeting or Supervision forms are generally entered by a supervisor directly from their log in.
Some supervisors may require you to self enter these forms on their behalf, but this should be the
exception rather than the rule.
2.7.5 Educational Supervisor Forms
In this section you will find the forms that record the meetings that you have with your educational
supervisor.
You can view or create forms by clicking the blue link or ‘Add new meeting’ button in the same way
as for assessment forms detailed above in section 2.7.2.
Meeting or Supervision forms are generally entered by a supervisor directly from their log in.
Some supervisors may require you to self enter these forms on their behalf, but this should be the
exception rather than the rule.
262.7.6 Progression/Foundation ARCP
This page is another forms page that will contain progression and ARCP related forms. It will work in
a similar manner to the forms pages detailed in the last few sections.
At the time of writing there are no forms available in this page. It is envisaged that the form will be
made available later in 2012.
2.7.7 Target Timeline
In this section you will find a target timeline set up to help you monitor the forms required for your
ePortfolio. The requirements are grouped either by post or by training period. There is a drop-
down menu to select the post that you wish to view the requirements for.
You will see displayed by how many months you have to complete the requirement from the start of
the post/training period not the current date. You will see how many forms are required, and also
a running total of the forms completed so far.
There is also a status column that displays a red cross when the number completed is lower than the
number required. When the required number is reached the cross changes to a green tick.
27Each timeline is defined by the Postgraduate Deanery and implemented by the ePortfolio team. If
your Deanery has yet to contact the ePortfolio team or chosen not to have a timeline set up you will
see a message saying “A Timeline has not been defined for your region yet”.
2.7.8 Ticket Requests
You can request an external assessor (from all the ‘forms’ sections above) by clicking on the Request
External Assessment button in each forms page. Requesting an external assessment starts a
procedure know as a ‘ticket request’.
For example if you wanted to start the process from the ‘SLEs section you would click the button as
indicated on the screenshot below. The button is in a similar place on the other ‘forms’ pages.
Clicking the Request External Assessment button takes you to the Ticket Requests page as shown
below.
28You can also access the ticket request page directly from the Forms menu.
By performing a ‘ticket request’ you are creating a unique code so that an external assessor, who
may not have an ePortfolio account, can access the system allowing them to complete assessment
forms for you in your programme
You can also view previously generated codes by inputting a date range on this page. Note: If you
delete a code and the assessor then tries to use it, they will not be able to. You will need to create a
new code.
After clicking on the Request New Assessment button, you will need to complete various forms and
click on next after each section. Note: You are responsible for inputting all of the correct details on
the form (however, the assessor will have the opportunity to review and amend any mistakes if
necessary).
Firstly you will have to confirm the post that you are currently participating in before hitting next;
Next you need to select which electronic form you wish the external assessor to complete from the
list that will appear (as shown below), before clicking Next again.
29You must complete a self TAB before requesting a TAB. If you have not filled one in for a given post,
you will not be able to request a ticket for a TAB for that post.
If you request a Core Procedure you will be asked to specify which procedure from the list you wish
the assessor to sign you off for. Again click Next to continue.
The next step is filling out the assessor’s details. Start by inputting their e-mail address, if this
address has been used before the other fields will automatically complete. If the email address is
new then you will need to fill in the other fields yourself before hitting Finish.
You will then be given a unique login code for your assessor to use (see example below). They need
to go to www.nhsePortfolios.org and enter their code in the Assessors box to submit their
assessment.
30If you opted to send an e-mail to them, the e-mail contains a direct link (circled) which they can click
on. This automatically enters the 10 digit code, taking them straight into the assessment. You
alternatively may choose to print this page and give it to your assessor in person.
You can send a repeat e-mail request (if an e-mail was sent initially) if the assessment has not been
completed within seven days. The Send Reminder link automatically appears next to any tickets that
have not been completed within this timeframe. The link will reappear in another seven days if the
ticket has still not been completed, enabling you to send a second reminder e-mail.
When the assessor has completed the form they will receive an email to confirm that the form has
been saved.
Note: The unique login code will have an expiry date, to ensure assessments are not submitted too
long after the actual event.
312.8 The Reflection Menu
You access the Reflection section by clicking on the Reflection menu header. You can record or
review reflective information such as learning opportunities or identify further learning needs.
There are three pages in this menu. Let’s take a look at what each menu item is used for:
2.8.1 Reflective Practice
Reflective practice material can be recorded in your portfolio and used as an example of learning
development. You can decide if a reflective record is to remain private or you can share it with your
supervisors.
Be mindful of the need to ensure confidentiality of individuals involved in the experience: PATIENT
IDENTIFIABLE DATA MUST NOT BE ENTERED INTO YOUR EPORTFOLIO.
Shared entries are available for supervisors to review and, if they wish, add comments or signatures
to.
You can view previous reflection records from this page by selecting the appropriate entry from the
list of logs. You can either click on the record’s name to open it and view it in a new page or you can
check the show details box to view a condensed version of the reflection on this page.
To add a new log click on the Add New Log button. You will see a list of log types to choose from.
To select a log, click on the blue name. For example the link to open a Reflection on Procedure is
highlighted below.
32After selecting a form you will be presented with a form the fill in. After filling in the details of the
reflection please note the Private or Shared? drop-down box, if you want your supervisor(s) to be
able to view your entries then you can choose to share them, or you can keep them private. Your
Supervisor can sign the reflection and add a comment, if required; however you must share an entry
first so that they can view it.
2.8.2 Self Appraisals
In this section you will find the Self Appraisal forms that some Deaneries require their trainees to
complete.
Again you can view or create forms by clicking the blue link or ‘Add new Self Appraisal form’ button
in the same way as for the Assessment forms detailed above in section 2.7.2.
Note: Not all deaneries use self assessments forms, so this section may not have as many forms
available if you are located in an area that does not require them.
2.8.3 Careers Management
This page allows you to keep a record of any career development activity you undergo. This sort of
activity can take place in many varied formats, ranging from discussions with supervisors to large
events or fairs.
33The history of any careers discussions you have should be saved here, including dates and names of
Supervisors who have contributed to the discussion as well as relevant points discussed.
To save a careers discussion or record of an event start by clicking the Add New Career
Management button.
This will give a form for you to complete with details of the careers discussion or event.
Once you have filled in the details of the careers discussion, you should click the Save button. You
can also discard your entry with the Cancel button.
Once saved entries will be displayed in a list on the careers management page. You can Edit or
Delete entries using the appropriate links in the right hand action column.
342.9 The additional achievements menu
This is a new section of the ePortfolio that has been to allow a better organisation of additional
achievements not dictated by the core curriculum and to allow the trainee to showcase these as
appropriate.
The new pages will allow activities to be recorded and shared, and also linked to curriculum if useful.
As well as a number of pages, two sections have been relocated here from the old ‘profile’ menu.
These two sections are ‘Certificates and Exams’ and ‘Personal Library’.
2.9.1 Certificates and Exams
You can add completed certificates here (such as Life Support Certificates). To complete the process,
these need to be verified by a Supervisor on their log-in. You can also upload an electronic version of
your certificate if you have one. Note: The expiration date refers to the date that the certificate
expires.
If you are filling in details of an exam you can also include the Expected Exam Date and Exam Passed
Date if relevant.
2.9.2 Other achievements
This is a section for recording any other achievements that do not fit into any of the other categories
in this menu. It works the same way as demonstrated in the ‘Research’ section below.
2.9.3 Research
This section can be used to record any research-related achievements.
You can view previous additional achievements from this page by selecting the appropriate entry
from the list of achievements. You can either click on the record’s name to open it and view it in a
35new page or you can check the show details box to view a condensed version of the reflection on
this page.
To add a new entry click on the Add New Additional Achievement button. You will see a list of
types to choose from. To select one, click on the blue name. For example the link to open a
Research log is highlighted below.
After selecting a form you will be presented with a form the fill in. After filling in the details of the
achievement please note the Private or Shared? drop-down box (circled below), if you want your
supervisor(s) to be able to view your entries, then you can choose to share them, or you can keep
them private. Your Supervisor can sign the reflection and add a comment, if required; however you
must share an entry first so that they can view it.
362.9.4 Presentations
This is a section for recording any presentations that you give. It works the same way as
demonstrated in the ‘Research’ section above.
2.9.5 Tasters
This is a section for recording any Taster sessions that you attend.
It works the same way as demonstrated in the ‘Research’ section above, though there has been a
special form developed for this area (shown below).
2.9.6 Audit
This section can be used to record any audits you complete. It works the same way as
demonstrated in the ‘Research’ section above.
2.9.7 Teaching
This section can be used to record any teaching you deliver. It works the same way as
demonstrated in the ‘Research’ section above.
2.9.8 Non-academic achievements
This section can be used to record any non-academic achievements that don’t fit into any of the
other additional achievement categories. It works the same way as demonstrated in the ‘Research’
section above.
372.9.9 Personal Library
You can upload items to your Personal Library - these can be scanned paper documents, PDFs,
images or other items to include in your ePortfolio. You can choose to share the documents in your
Personal Library or keep them private. The maximum upload limit per user is 40MB so try to
optimize or shrink large files by zipping them, compressing the size of images etc. There are guides
to doing this optimization in the FAQ section in the Help menu.
Certificates uploaded in the Certificate section and PDFs generated in the Download Portfolio
section also count towards your storage limit.
2.9.10 Courses and seminars attended
This section can be used to record any face-to-face courses and seminars that you have attended. It
works the same way as demonstrated in the ‘Research’ section above.
This section can also be used to record any e-learning modules that you have completed. Any
certificates of completion can be uploaded when the ‘Courses and Seminars attended’ form is
entered. Forms can then be used to demonstrate competence by linking them to the relevant
curriculum outcome.
2.9.11 Additional Procedures
You can use this section to record any additional practical procedures that you undertake. You may
wish to do this to build up an accurate record of all the procedures you undertake in your
Foundation Training. This information can be very important for entry into Speciality Training and it
is highly recommended that you keep a log of your procedures in this way.
This ‘additional procedure’ found on this page should not be confused with the core procedures
found in the
To add a new log click on the Add New Procedure button (see above). This will open a form to fill in
which can then be saved by clicking the Save button.
38These procedures can be marked as private or they can be shared with your Supervisors. Shared or
unshared it is important that you are mindful that you must ensure confidentiality of any individuals
involved in the procedure and should not under any circumstances record any patient data in the
ePortfolio.
392.10 The messages menu
You access the Messages section by clicking on the Messages menu header. You can send/receive
internal messages regarding ePortfolio.
The folders within the Messages section are displayed down the left side of the screen. As standard,
they consist of Deleted Items, Drafts, Inbox and Sent Items. There are three functions available
which allow you to manage your Personal Folders:
• New Folder – this enables you to add a new Personal Folder.
• Rename – select the new folder you have created and give it an appropriate name.
• Delete – select a folder you have created to delete it.
The functions available in the top bar (as shown above) relate to messages:
• New – compose a new message to another ePortfolio trainee or Supervisor.
You can use the Cc (send a copy of the message to someone other than the main recipient)
and Bcc (send a copy of the message to someone else, however it doesn’t indicate to the
recipient that you sent this copy) functions and various formatting options within your
message. It is also possible to upload attachments, if required, by clicking on the
Attachments tab.
Note: All of these functions are also available when replying to or forwarding a message.
Click on the To link to add a recipient (the Cc and Bcc functions work in the same way).
40Select your location from the drop down box and click on the Find Users button. Supervisors
and trainees within your location will be displayed. Select those who you want to send the
message to and click on the Add Recipients button and then Finished. Alternatively you can
click on the User Search tab to manually search for a specific ePortfolio user.
41Finally, compose your message and click on the Send button.
• Delete – select the appropriate message(s) to delete. To delete one message, highlight it and
click on the Delete button. To delete multiple messages, place a tick in the checkbox next to
them and click on the Delete button.
• Reply - select the appropriate message that you want to reply to and click on the Reply
button. This will reply to the sender only.
• Reply to All - select the appropriate message that you want to reply to and click on the
Reply to All button. This will reply to everyone that the message was sent to.
• Forward – select the appropriate message that you want to forward on to other
trainees/Supervisors within your location and click on the Forward button.
• Move to Folder - select the appropriate message(s) that you want to move to another folder
within your Messages section.
422.11 The Help Menu
You can access the Help section by clicking on the Help menu header. You can get help and support
information on ePortfolio here.
Let’s take a look at what each menu item is used for:
2.11.1 Information
The information page is where ePortfolio team, National, Deanery and Local administrators can
upload documentation and resources relating to the Foundation Programme and using the
Foundation Programme ePortfolio.
2.11.2 Access Rights
You can view the access that different roles have within ePortfolio, with regards to viewing trainee
information.
2.11.3 Frequently Asked Questions
You can browse through the FAQs to see if other people have asked a similar question to you in the
past and find out what the answer is. If these do not answer your question, then there is the option
to complete and send a form to ePortfolio Support to assist you further.
2.11.4 Support
You can submit enquiries to ePortfolio Support if you are having technical problems with your
ePortfolio.
Please note, the ePortfolio support page is for technical problems only, such as page errors or
missing data. If you have a problem with your Personal details, Post or Supervisor allocation, please
43You can also read