Owner's Manual Model No. 16005606510 EV651 Treadmill - Dyaco Canada Inc.
←
→
Page content transcription
If your browser does not render page correctly, please read the page content below
Owner’s Manual

  Model No.
 16005606510
EV651 Treadmill

 - Assembly
 - Operation
 - Adjustments
 - Parts
 - Warranty

     CAUTION:
 You must read and
 understand this
 owner’s manual
 before operating
 unit.
 Keep this manual for
 future reference.
 Serial number

 Write the serial
 number in the space
 above for reference.
 Serial number can be
 found at the front
 bottom section of the
 Treadmill.
TABLE OF CONTENTS
     Important Safety Instructions                                   2

     Important Electrical Information                                4

     Assembly Instructions                                           5

     Folding/Transport Instructions                             11

     Treadmill Operation                                        13

     Programmable Features                                      16

     Parts List                                                 21

     Parts Diagram                                              23

     General Maintenance                                        24

     Service Checklist - Diagnosis Guide                        28

     Troubleshooting                                            29

     Training Guidelines                                        30

     Manufacturer's Limited Warranty                            36

Customer Service 1-888-707-1880         1   Dyaco Canada Inc. 2021
Email: customerservice@dyaco.ca
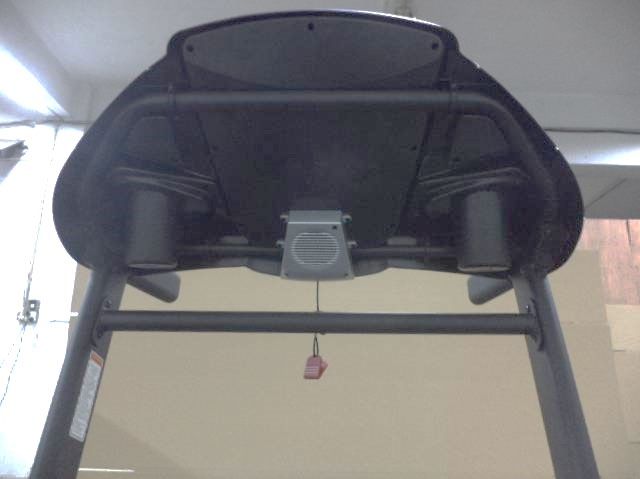
IMPORTANT SAFETY INSTRUCTIONS
                 THIS UNIT IS INTENDED FOR HOUSEHOLD USE ONLY
               READ ALL INSTRUCTIONS BEFORE USING THIS TREADMILL

CAUTION: Before starting any exercise program, it is recommended that you consult your
physician.
WARNING: Connect this unit to a properly grounded outlet only.
DANGER: To reduce the risk of electric shock, always unplug the treadmill from the
electrical outlet immediately after using and before cleaning.
WARNING:
TO REDUCE THE RISH OF BURNS, FIRE, ELECTRIC SHOCK, OR INJURY TO PERSONS:

                                  Grounding Instructions
This product must be grounded. If it should malfunction or break down, grounding provides
a path of least resistance for electric current to reduce the risk of electric shock. This
product is equipped with a cord having an equipment-grounding conductor and a grounding
plug. The plug must be plugged into an appropriate outlet that is properly installed and
grounded in accordance with all local codes and ordinances. See the diagram below for
grounding methods.

1.   Use 110-volt a.c. household current on a dedicated circuit.
2.   It is the owner's responsibility to ensure that all users of this treadmill are adequately
     informed of all warnings and precautions.
3.   The use of an extension cord with this product is not recommended. If an extension
     cord is needed, use a short (less than 10 feet) heavy gauge (14 gauge or better)
     extension cord with a three-prong (grounded) plug and receptacle.
4.   Never leave the treadmill unattended when plugged in. Remove the safety key and
     unplug the unit from the outlet when not in use and before removing or replacing parts.
5.   Never operate the treadmill if it has a damaged cord or plug if it is not working properly,
     if it has been dropped, damaged, or exposed to water. Never move the treadmill belt
     while the power is turned off.
6.   Do not pull the treadmill by the power supply cord or use the cord as a handle. Keep
     the cord away from heated surfaces and open flames.
7.   Fitness equipment must always be installed and used on a flat surface. Do not use
     outdoors or near water. Do not place the unit on a loose rug or uneven surface. It is
     recommended to use an equipment mat to prevent the unit from moving while it is
     being used, which could possibly scratch or damage the surface of your floor. It is
     recommended to have a minimum of 3 meters of safe clearance on all sides of the
     treadmill while in use.
8.   Keep the treadmill indoors, away from moisture and dust. Do not put the treadmill in a
     garage, covered patio or near water.
9.   Do not operate the treadmill where aerosol products are used or where oxygen is
     being administered.

Customer Service 1-888-707-1880               2                         Dyaco Canada Inc. 2021
Email: customerservice@dyaco.ca
10. Read, understand, and test the emergency stop procedure before using the treadmill.
    Do not insert any objects into any openings.
11. Inspect and properly tighten all parts of the treadmill regularly.
12. Keep children and pets away from this equipment at all times while exercising.
13. Individuals with a disability should have medical approval and close supervision when
    using this treadmill.
14. Do not place hands or feet under the treadmill. Always keep hands and legs off of the
    treadmill when others are using it.
15. Never turn on the treadmill while standing on the tread-belt. Always hold the handrails
    while using the treadmill. Always return the treadmill to the slowest speed to provide for
    safe dismount and low-speed restart.
16. To disconnect, turn all controls to the off position, then remove the plug from the outlet.
17. Do not attempt to raise, lower or move the treadmill until it is properly assembled. See
    assembly instructions in this manual to fold and move the treadmill. Care must be
    taken when lifting or moving the equipment so as not to cause injury. Always use
    proper lifting techniques.
18. Use the treadmill only for its intended use as described in this manual. Do not use any
    attachments that the manufacturer does not recommend.
19. User weight should not exceed 330 lbs (150 kg).
20. Never allow more than one person on the treadmill at once.
21. Warm-up 5 to 10 minutes before each workout and cool down 5 to 10 minutes
    afterward. This allows your heart rate to increase and decrease gradually and will help
    prevent straining muscles.
22. Never hold your breath while exercising. Breathing should remain at a normal rate in
    conjunction with the level of exercise being performed. IF DIZZINESS, NAUSEA,
    CHEST PAINS, OR ANY OTHER ABNORMAL SYMPTOMS ARE EXPERIENCED
    WHILE USING THIS EQUIPMENT, STOP THE WORKOUT AT ONCE, CONSULT A
    PHYSICIAN IMMEDIATELY.
23. Start your program slowly and very gradually, increase your speed and distance.
24. Always wear suitable clothing and footwear while exercising. Do not wear loose-fitting
    clothing that could become entangled with the moving parts of your treadmill. Do not
    walk or jog barefoot, in stocking feet or loose-fitting shoes or slippers.
25. This treadmill is intended for in-home use only. Do not use the treadmill in any
    commercial, rental or institutional setting.

WARNING: Before beginning any exercise program, consult your physician. This is
especially important for individuals over the age of 35 or persons with preexisting health
problems. Read all instructions before using any fitness equipment. We assume no
responsibility from personal injury or property damage sustained by or through the use of
this product.

                SAVE THESE INSTRUCTIONS

Customer Service 1-888-707-1880              3                          Dyaco Canada Inc. 2021
Email: customerservice@dyaco.ca
IMPORTANT ELECTRICAL INFORMATION
WARNING!
●NEVER use a ground fault circuit interrupt (GFCI) wall outlet with this treadmill. Route
the power cord away from any moving part of the treadmill, including the elevation
mechanism and transport wheels.
●NEVER remove any cover without first disconnecting AC power.
●If voltage varies by ten percent (10%) or more, the performance of your treadmill may be
affected. Such conditions are not covered under your warranty. If you suspect the
voltage is low, contact your local power company or a licensed electrician for proper
testing. See the Diagnosis Guide in this manual.
●NEVER expose this treadmill to rain or moisture. This product is NOT designed for use
outdoors, near a pool or spa, or in any other high humidity environment.
This product must be grounded. If the treadmill should malfunction or break down,
grounding provides a path of least resistance for electric current, reducing the risk of
electric shock. This product is equipped with a cord having an equipment-grounding plug.
The plug must be plugged into an appropriate outlet that is properly installed and
grounded in accordance with all local codes and ordinances.
DANGER - Improper connection of the equipment-grounding conductor can
result in a risk of electric shock. Check with a qualified electrician if you are in
doubt as to whether the product is properly grounded. Do not modify the plug
provided with the product if it will not fit the outlet; have a proper outlet installed by
a qualified electrician.
●NEVER operate this treadmill without reading and thoroughly understanding the results of
any operational change you request from the computer.
●Understand that changes in speed and incline do not occur immediately. Set your desired
work level on the computer console and release the adjustment key. The computer will
obey the command gradually.
●NEVER use your treadmill during an electrical storm. Surges may occur in your household
power supply that could damage treadmill components.
●Use caution while participating in other activities while walking on your treadmill, such as
watching television, reading, etc. These distractions may cause you to lose balance or stray
from walking in the center of the belt, which may result in serious injury.
●NEVER mount or dismount the treadmill while the belt is moving. Our treadmills start at a
low speed, and it is unnecessary to straddle the belt during startup. Simply standing on the
belt during slow acceleration is proper after you have learned to operate the unit.
●Always hold on to a handrail or hand bar while making control changes (incline, speed,
etc.).Do not use excessive pressure on console control keys. They are precision set to
function properly with little finger pressure. Pushing harder is not going to make the unit go
faster or slower. If you feel the buttons are not functioning properly with normal pressure,
contact your dealer.
Customer Service 1-888-707-1880 4 Dyaco Canada Inc. 2021
Email: customerservice@dyaco.caASSEMBLY INSTRUCTIONS
!!ATTENTION: IMPORTANT UNPACKING INSTRUCTIONS.
PLEASE READ BEFORE UNPACKING YOUR FOLDING TREADMILL!!
Serious injury could occur if this folding treadmill is not unpacked properly. The Velcro strap
installed around the treadmill base prevents the treadmill from unfolding accidentally during
shipping. If this strap is not removed correctly, the treadmill could spring open unexpectedly
and cause injury if someone is standing near the treadmill when the strap is removed.
To ensure your personal safety during the removal of the shipping strap, please make sure
the treadmill is positioned flat on the ground, in the orientation it would be in if you were
using the treadmill. Do not turn the treadmill up on its side while removing the shipping
strap. This could cause the treadmill's folding mechanism to spring open. If the end of the
Velcro strap (that you need to grab to remove it) happens to be under the treadmill deck,
reach under the deck to grab it, but do not tilt the treadmill up to gain access to the strap
end.
Unpack the treadmill and locate the hardware pack. The hardware pack is separated into
five sections; one section containing tools and four sections labelled steps 1-4 which
contain the hardware needed for assembly of each step. The assembly steps below are
numbered one through four and correspond to the hardware in the numbered sections of
the hardware pack. Remove only the hardware for the step you are currently assembling to
avoid confusion and mix-ups.
Serial Number Decal
The decals shown have been placed on the treadmill. If a decal is missing or illegible,
please call our Customer Service Department, to order a free replacement decal
(see ORDERING REPLACEMENT PARTS). Apply the decal in the location shown.
Note: The decal shown at the right is 50% of actual size.
Customer Service 1-888-707-1880 5 Dyaco Canada Inc. 2021
Email: customerservice@dyaco.caBEFORE YOU BEGIN
Thank you for purchasing our product. Even though we go to great efforts to ensure the
quality of each product we produce, occasional errors and/or omissions do occur. In any
event, should you find this product to have either a defective or a missing part, please
contact us for a replacement.
This product has been designed for home use only. Product liability and guarantee
conditions will not be applicable to products being subjected to professional use or products
being used in a gym center. This exercise equipment was designed and built for optimum
safety. However, certain precautions apply whenever you operate a piece of exercise
equipment. Be sure to read the entire manual before the assembly and operation of this
machine.
Before reading further, please familiarize yourself with the parts that are labelled in the
drawing below.
Console
Safety Key
Incline Adjustment Switch
Speed Adjustment Switch
Upright
Running Belt
Foot Rail
Wheels
On/Off Switch
Adjusting Circuit Breaker
Bolt Power Cord
Main Frame
MAX. USER WEIGHT LIMIT 150 KGS (330 LBS)
Customer Service 1-888-707-1880 6 Dyaco Canada Inc. 2021
Email: customerservice@dyaco.caHARDWARE PACKING
#80. Ø8 × 1.5T #100. Ø8 × Ø18 ×1.5T #99. 5/16" × UNC18 × 1/2"
Split Washer (4pcs) Flat Washer (8pcs) Hex Head Bolt (8pcs)
#125. 5/16" × UNC18 × 3/4"
Button Head Socket Bolt (8pcs)
#44. Safety Key (1pcs) #104. Lubricant (1pcs)
#103. M6 (66 × 86) #102. Combination M5 Allen Wrench
L Allen Wrench (1pcs) & Phillips Head Screwdriver (1pcs)
#90. 13L
Wrench (1pcs)
Customer Service 1-888-707-1880 7 Dyaco Canada Inc. 2021
Email: customerservice@dyaco.caASSEMBLY INSTRUCTIONS
Step 1.
Take out the treadmill from the carton and lay it aside on the smooth ground.
Step2.
Connect Computer Cable (Middle) (54) with Computer Cable (Lower) (55) then insert
Right and Left Uprights (4) and (5) into the Frame Base (2) and use 13m/m Wrench
(90) to tighten 8 pcs of 5/16" × UNC18 × 1/2"_Hex Head Bolts (99) and 8pcs of Ø8 ×
Ø18 × 1.5T Flat Washers (100).
4
100
99
99
90 99
55 100 100
99
5
54 100
99 99
100
100 100
100
99 2
99
Customer Service 1-888-707-1880 8 Dyaco Canada Inc. 2021
Email: customerservice@dyaco.caStep 3
1. Connect the Computer Cable (Middle) (54) and Computer Cable (Upper) (53).
2. Connect the Speed Adjustment Switch W/Cable (Upper) (114) and Speed/Hand
Pulse Complex (28).
3. Connect the Incline Adjustment Switch W/Cable (Upper) (115) and Incline/Hand
Pulse Complex (29).
4. Insert Console Assembly (21) into right and left Uprights (4) and (5) and secure with 4
pcs of 5/16" × UNC18 × 3/4" Button Head Socket Bolts (125) with 4 pcs of Ø8 ×1.5T
_Split Washers (80) by using Combination M5 Allen Wrench & Phillips Head
Screwdriver (102).
21
28
54
114
53
80
29
115
102
125
80
4
125
5
Step 4.
Install Handrail Support (9) between left and right Uprights (5) and (4) and use
Combination M5 Allen Wrench & Phillips Head Screwdriver (102) to tighten 4 pcs of
5/16" × UNC18 × 3/4" Button Head Socket Bolts (125).
125
9
125 102
NOTE: Please Tighten All Screws After All Components Assembly Complete.
Customer Service 1-888-707-1880 9 Dyaco Canada Inc. 2021
Email: customerservice@dyaco.caMAINTENANCE INSTRUCTIONS
1. If the running belt slips while walking on it, users can adjust the tension of the
running belt by turning screws on rear rollers of both sides with M6 L Allen
Wrench(103), which is included in the hardware kit.
During adjustment, while turning rear rollers' screws, be sure to keep running belt
tension balanced on both sides; otherwise, the belt shifts from the higher tension end
to the other.
2. Use Lubricant (104) to lubricate the running deck beneath the running belt after
using for 2 to 3 months. Only a few droplets are sufficient for lubrication. Avoid
applying too much Lubricant as this may catch dirt and affect the electronic control
system.
104
Customer Service 1-888-707-1880 10 Dyaco Canada Inc. 2021
Email: customerservice@dyaco.caFOLDING INSTRUCTIONS Do not attempt to move the unit unless it is in the folded and locked position. Be sure the power cord is secured to avoid possible damage. Use both handrails to maneuver the unit to the desired position. ■ TO FOLD THE TREADMILL Lift the deck until the latch clicks in place. ■ TO UNFOLD THE TREADMILL Press the tube with your foot at the yellow sticker To release the latch, see the picture above. Transportation The treadmill includes four transportation wheels. After folding, roll the treadmill away. Customer Service 1-888-707-1880 11 Dyaco Canada Inc. 2021 Email: customerservice@dyaco.ca
TREADMILL OPERATION
Your treadmill features a walking belt coated with a lubricant. IMPORTANT: Never apply
silicone spray or other substances to the walking belt or walking board. Such substances
will deteriorate the walking belt and cause excessive wear.

HOW TO PLUG IN THE POWER CORD.
GROUNDING INSTRUCTIONS.
This product must be grounded. Plug adapters should NOT be used with this product.

WARNING:
Improper connection of the equipment-grounding
conductor can result in a risk of an electric shock.
Check with a qualified electrician if you are in
doubt as to whether the product is properly
grounded. Do not modify the plug provided with
the product if it will not fit the outlet; have a proper
outlet installed by a qualified electrician. The use
of an extension cord with this product is not
recommended. If an extension cord is needed, use
a short (less than 10 feet) heavy gauge (14 gauge
or better) extension cord with a three-prong
(grounded) plug and receptacle. IMPORTANT: If
the power cord is damaged, it must be replaced
with a manufacturer-recommended power cord.

1 Plug the indicated end of the power cord into
  the socket of the treadmill.
2 Plug the power cord into an appropriate outlet
  that is properly installed and grounded.
  Important: The treadmill is not compatible with
  GFCI-equipped outlets.

Note: Your power cord and outlet may appear different

Customer Service 1-888-707-1880                 12                  Dyaco Canada Inc. 2021
Email: customerservice@dyaco.ca
OPERATION OF YOUR TREADMILL

GETTING STARTED:
        CAUTION: Before operating the console, read the following precautions:
       Do not stand on the walking belt when turning on the treadmill. Always wear the
       safety key. Pulling the safety key will stop tread-belt movement.
       Adjust the speed in small increments to avoid sudden jumps in speed
       To reduce the possibility of electric shock, keep the console dry. Avoid spilling liquids
       on the console and place only sealed water bottles in the water bottle holders.
        Do not use excessive pressure on console control keys. They are precision set to
       function correctly with slight finger pressure. Pushing harder is not going to make the
       unit go faster or slower. Understand that changes in speed and incline do not occur
       immediately. Set your desired speed on the computer console and release the
       adjustment key. The computer will obey the command gradually.

HOW TO USE THE SAFETY KEY
    1. Place the safety key into position on the metal portion of the console control head.
       Your treadmill will not start and operate without this. Removing the safety key also
       secures the treadmill from unauthorized use.
    2. Fasten the plastic clip onto your clothing securely to ensure good holding power.
       Note: The safety key has strong enough power to minimize accidental, unexpected
       stopping. The clip should be attached securely to make sure it does not come off.
       The treadmill will stop, depending on speed, with a one to two-step coast anytime
       the magnet is pulled off the console. Use the red Stop/Pause switch in normal
       operation.

Customer Service 1-888-707-1880              13                         Dyaco Canada Inc. 2021
Email: customerservice@dyaco.ca
TO OPERATE TREADMILL
CAUTION: To avoid injury, hold onto the handrails while mounting and dismounting
the treadmill. Hold onto the handrails and place feet on side rails before starting. Step onto
the walking belt only at the slowest speed. Always hold on to a handrail or hand bar while
making control changes (incline, speed, etc.). Before operating the console, make sure that
the power cord is properly plugged in and the on/off button is on. Attach the magnet end of
the safety key onto the monitor and attach the clip end of the safety key to your clothing
(i.e., waistband). If you should slip or fall while exercising, the safety key will pull out of the
console, shutting off the treadmill.
Getting started
Power the treadmill on by plugging it into an appropriate wall outlet, then turn on the power
switch located at the front of the treadmill below the motor hood.
WINDOW DISPLAY
Speed: Displays the current speed from starting at 0.5 mph to 10 mph.
(Display shows M, MI, ML means MPH)
Time: Displays your elapsed workout time in minutes up to 99:59.
Counts down from your preset target time to 0:00 during your workout.
Distance: Displays the distance travelled in miles.
Calories: Displays the cumulative calories burned at any given time during your workout.
Note: This is an approximate guide used to compare different exercise sessions,
which cannot be used for medical purposes.
Pulse: Displays the user's current heart rate in beats per minute during the workout. To
display your heart rate, you must hold both handrails.
Note: This is an approximate guide used to compare different exercise sessions,
which cannot be used for medical purposes.
Incline: Displays the incline level during your workout from 0 to 12.
Program: Displays the program selected.
Audio System: There is an Audio Input Jack on the front of the console and built-in
speakers. You may plug any low-level audio source signal into this port.
Audio sources include MP3 player, iPod, portable radio, CD player or even
a TV or computer.
Customer Service 1-888-707-1880 14 Dyaco Canada Inc. 2021
Email: customerservice@dyaco.caBUTTON FUNCTION:
A > SPEED ▲ (FAST): Pressing this button increases the speed by 0.1(mph/km). Press
and hold this button for 3 seconds to increase speed rapidly. Press this button during
setting the program to adjust the value (to increase).
B > SPEED ▼ (SLOW):Pressing this button decreases the speed by 0.1(mph/km). Press
and hold this button for 3 seconds to decrease speed rapidly. Press this button during
setting the program to adjust the value (to decrease).
C > INCLINE ▲ (UP): Pressing this button increases the incline level by 1. Press and
hold this button for 3 seconds to increase the incline level rapidly. Press this button
during setting the program to adjust the value (to increase).
D > INCLINE ▼ (DOWN) : Pressing this button decreases the incline level by 1. Press
and hold this button for 3 seconds to decrease the incline level rapidly. Press this button
during setting the program to adjust the value (to decrease).
E > ENTER: for program setting: Press this button to set Time, Distance, Calorie and other
functions.
F > PROGRAM: Press to select desired training programs P1 ~ P24, HRC.
G > START: Press to select treadmill speed starting from 0.5/1.0 (mph / km)
H > STOP: Press once during operation to pause, twice to return to ready mode.
Pressing STOP button in the mode returns to ready mode.
I > Speed shortcut key:3、6、9 (mph/km) To set the speed rapidly.
J > incline shortcut key:3、6、9 To set the incline rapidly.
Customer Service 1-888-707-1880 15 Dyaco Canada Inc. 2021
Email: customerservice@dyaco.caPROGRAMMABLE FEATURES
Once you install the safety key after turning on the power, the treadmill enters the ready
mode. Press the START button to start the treadmill or press the PROGRAM button to
select the training mode, normal or manual mode, preset programs (P1~P24) or heart rate
control mode.
MANUAL/NORMAL MODE
Press START button to start the treadmill or press PROGRAM to choose programs
(P1~P24) or heart rate control mode, in the ready mode or press ENTER to set the count-
down parameters (time, distance and calorie). Please consolidate SPEED▲ and ▼ to
adjust time, distance, and calories, then press ENTER to confirm. The system can only
accept the last parameter entered. For instance, if the last entered parameter is distance,
then parameters entered previously will be void. Only distance is accepted. Distance will be
counted down, and others will be counted up.
Preset time value: 30:00 (5:00~99:00) with an increment of 1:00.
Preset distance value: 5.00 km/mile (1.00~9.00) with an increment of 1.00.
Preset calorie value: 500 (10~9990) with an increment of 10.
The starting speed is 0.5/1.0 (mile/km) with an incline level 0.
PRESET PROGRAM
There are 24 built-in programs (P-1~P-24). Press PROGRAM button to choose program P-
1~P-24 or press START button to start. The preset time is (30:00), or press ENTER button
to enter the time parameter setting. 30:00 (5:00~99:00) with an increment of 1:00
HRC:This program controls Heart Rate. Please consult a doctor or professional training
guide before training. Press PROGRAM to choose H-1. Press START button to
start the training or press ENTER button for setting (time and target heart rate). Use
SPEED▲▼ and INCLINE▲▼ to adjust.
a > Time preset value: 30:00 (5:00~99:00) with increment value of 1:00.
b > When the target heart rate is not set, the default setting will be 116 (60 to 220).
Value can be increased or decrease at intervals of 1.
Once started, heart rate detection will control incline to allow the heart rate to reach and
maintain a set target heart rate.
For example:
When the heart rate is lower than the target, the incline will increase to increase the level of
workout raising the heart rate. When heart rate reaches the target, no changes will be
made. When the heart rate is higher than the target, the incline will decrease to lower heart
rate. If the heart rate does not lower, and the incline is not able to lower any further, the
machine will stop to protect the user.
Customer Service 1-888-707-1880 16 Dyaco Canada Inc. 2021
Email: customerservice@dyaco.caMETRIC TABLE Customer Service 1-888-707-1880 17 Dyaco Canada Inc. 2021 Email: customerservice@dyaco.ca
ENGLISH TABLE

Customer Service 1-888-707-1880   18   Dyaco Canada Inc. 2021
Email: customerservice@dyaco.ca
HEART RATE PROGRAMS
The old motto, "no pain, no gain," is a myth that has been overpowered by the benefits of
exercising comfortably. A great deal of this success has been promoted by the use of heart
rate monitors. With the proper use of a heart rate monitor, many people find that their usual
choice of exercise intensity was either too high or too low, and exercise is much more
enjoyable by maintaining their heart rate in the desired benefit range.
To determine the benefits range you wish to train, you must first determine your Maximum
Heart Rate. This can be accomplished by using the following formula: 220 minus your age.
This will give you the Maximum Heart Rate (MHR) for someone of your age. To determine
the effective heart rate range for specific goals, you simply calculate a percentage of your
MHR. Your Heart rate training zone is 50% to 90% of your maximum heart rate. 60% of
your MHR is the zone that burns fat, while 80% is for strengthening the cardiovascular
system. This 60% to 80% is the zone to stay in for maximum benefit.

For someone who is 40 years old, their target
heart rate zone is calculated:

220 – 40 = 180 (maximum heart rate)
180 x 0.6 = 108 beats per minute
           (60% of maximum)
180 x 0.8 = 144 beats per minute
           (80% of maximum)
                                                            90

So for a person who is 40, the training zone would
be 108 to 144 beats per minute.

If you enter your age during programming, the console will perform this calculation
automatically. After calculating your MHR you can decide upon which goal you would like to
pursue.
The two most popular reasons for, or goals, of exercise, are cardiovascular fitness (training
for the heart and lungs) and weight control. The black columns on the chart above represent
the MHR for a person whose age is listed at the bottom of each column. The training heart
rate, for either cardiovascular fitness or weight loss, is represented by two different lines that
cut diagonally through the chart. A definition of the lines' goal is in the bottom left-hand
corner of the chart. If your goal is cardiovascular fitness or if it is weight loss, it can be
achieved by training at 80% or 60%, respectively, of your MHR on a schedule approved by
your physician. Consult your physician before participating in any exercise program.

Customer Service 1-888-707-1880               19                         Dyaco Canada Inc. 2021
Email: customerservice@dyaco.ca
RATE OF PERCEIVED EXERTION Heart rate is important but listening to your body also has a lot of advantages. There are more variables involved in how hard you should workout than just heart rate. Your stress level, physical health, emotional health, temperature, humidity, the time of day, the last time you ate and what you ate all contribute to the intensity at which you should workout. If you listen to your body, it will tell you all of these things. The rate of perceived exertion (RPE), also known as the Borg scale, was developed by Swedish physiologist G.A.V. Borg. This scale rates exercise intensity from 6 to 20 depending upon how you feel or the perception of your effort. The scale is as follows: Rating Perception of Effort 6 Minimal 7 Very, very light 8 Very, very light + 9 Very light 10 Very light + 11 Fairly light 12 Comfortable 13 Somewhat hard 14 Somewhat hard + 15 Hard 16 Hard + 17 Very hard 18 Very hard + 19 Very, very hard 20 Maximal You can get an approximate heart rate level for each rating by simply adding a zero to each rating. For example, a rating of 12 will result in an approximate heart rate of 120 beats per minute. Your RPE will vary depending on the factors discussed earlier. That is the major benefit of this type of training. If your body is strong and rested, you will feel strong, and your pace will feel easier. When your body is in this condition, you are able to train harder, and the RPE will support this. If you are feeling tired and sluggish, it is because your body needs a break. In this condition, your pace will feel harder. Again, this will show up in your RPE, and you will train at the proper level for that day. Customer Service 1-888-707-1880 20 Dyaco Canada Inc. 2021 Email: customerservice@dyaco.ca
PARTS LIST
      KEY NO.       PART NO.                           DESCRIPTION                        Q'TY
           1         6065101      Main Frame                                                 1
           2         6065102      Frame Base                                                 1
           3         6065103      Incline Bracket                                            1
           4         6065104      Right Upright                                              1
           5         6065105      Left Upright                                               1
           6         6065106      Console Support                                            1
           7         6065107      Outer Slide                                                1
           8         6065108      Inner Slide-□21.4×21.4×1.5T×395L                           1
           9         6065109      Handrail Support                                           1
          10         6065110      Incline Motor-JS15-A,30128L,AT90-110V                      1
          11         6065111      Drive Belt-8J240                                           1
          12         6065112      Motor Bracket-170×100×30×3T,R50,15H                        1
          13         6065113      Drive Motor                                                1
          14         6065114      Running Belt-510×2970×1.6T                                 1
          15         6065115      Running Deck-1330×695×18T                                  1
          16         6065116      Front Roller W/Pulley-Ø60×610mm                            1
          17         6065117      Rear Roller-Ø46×550mm                                      1
          18         6065118      Deck Cross Brace                                           1
          19         6065119      Sliding Tube Spring-15×59.5×1.0T                           1
          20         6065120      Console Assembly                                           1
          22         6065122      Anti-Colliding Plug-38×38mm                                1
          23         6065123      Metal Tube End Cap-30×60mm                                 4
          25         6065125      Motor Top Cover                                            1
          26         6065126      Adjustment Base (L)                                        1
          27         6065127      Adjustment Base (R)                                        1
          28         6065128      300m/m_Speed/Hand Pulse Complex                            1
          29         6065129      300m/m_Incline/Hand Pulse Complex                          1
          30         6065130      Breaker-W150-1,15A                                         1
          31         6065131      On/Off Switch                                              1
          32         6065132      Transportation Wheel-Ø48×18L                               4
          33         6065133      Handgrip End Cap-Ø40×80L                                   2
          35         6065135      Cushion-M8×Ø30×35mm                                        6
          36         6065136      PVC Handgrip-Ø46×86×3.0T×305mm                             2
          37         6065137      Foot Rail-1310mm                                           2
          40         6065140      Motor Cover Anchor(D)                                      5
          43         6065143      30 × 60m/m_Square End Cap                                  2
          44         6065144      Square Safety Key                                          1
          45         6065145      Power Socket                                               1
          46         6065146      3/8" × UNC16 × 7T_Nyloc Nut                                3
          47         6065147      Sensor Rack                                                1
          48         6065148      Power Cord                                                 1
          49         6065149      300m/m_Connecting Wire (White)                             1
          50         6065150      300m/m_Connecting Wire (Black)                             1
          51         6065151      100m/m_Connecting Wire (Black)                             1
          52         6065152      Motor Controller-B507120-B0                                1
          53         6065153      1200m/m_Computer Cable (Upper)                             1
          54         6065154      1250m/m_Computer Cable (Middle)                            1
          55         6065155      1200m/m_Computer Cable (Lower)                             1
          56         6065156      1000m/m_Sensor W/Cable                                     1
          58         6065158      1/2" × UNC12 × 1"_Hex Head Bolt                            2
          59         6065159      3/8" × UNC16 × 3-1/4"_ Hex Head Bolt                       1
          61         6065161      3/8" × UNC16 × 1-1/2"_Hex Head Bolt                        1

Customer Service 1-888-707-1880                   21                      Dyaco Canada Inc. 2021
Email: customerservice@dyaco.ca
KEY NO. PART NO. DESCRIPTION Q'TY
62 6065162 3/8" × UNC16 × 3/4"_Hex Head Bolt 4
63 6065163 M8 × P1.25 × 60L_Hex Head Bolt 1
64 6065164 M8 × P1.25 × 12L_Hex Head Bolt 2
65 6065165 5/16" × UNC18 × 3"_Button Head Socket Bolt 2
66 6065166 3/8" × UNC16 × 1-3/4"_Hex Head Bolt 1
67 6065167 5/16" × UNC18 × 1-1/2"_Flat Head Socket Bolt 4
68 6065168 M10 × P1.5 × 25L_Socket Head Cap Bolt 2
69 6065169 M8 × P1.25 × 80L_Socket Head Cap Bolt 2
70 6065170 M8 × P1.25 × 25L_Flat Head Countersink Bolt 6
71 6065171 Motor Bottom Cover-537×715×1.2T 1
73 6065173 Ø5 × 16L_Tapping Screw 5
74 6065174 Ø3.5 × 12L_Sheet Metal Screw 2
75 6065175 1/2" × UNC12 × 8.0T_Nyloc Nut 2
76 6065176 3/8" × UNC16 × 7.0T_Nyloc Nut 2
77 6065177 5/16" × UNC18 × 7.0T_Nyloc Nut 4
78 6065178 M8 × P1.25 × 7.0T_Nyloc Nut 1
79 6065179 Ø10 × 2.0T_Split Washer 4
80 6065180 Ø8 × 1.5T_Split Washer 8
81 6065181 Ø5 × 1.5T_Split Washer 4
82 6065182 Ø19 × Ø10 × 1.5T_Flat Washer 6
83 6065183 Ø10 × Ø25 × 2.0T_Flat Washer 4
84 6065184 Ø8 × Ø18 × 1.5T_Flat Washer 4
85 6065185 Ø50 × Ø13 × 3T_Nylon Washer (B) 2
86 6065186 Ø24 × Ø10 × 3T_Nylon Washer (A) 2
87 6065187 Ø25 × Ø20 × Ø16 × Ø5 × 4.5H × 1.1T_Concave Washer 8
88 6065188 M5_Star Washer 4
89 6065189 Ø5 × 32L_Tapping Screw 2
90 6065190 13L_Wrench 1
91 6065191 Ø4 × 12L_Sheet Metal Screw 12
92 6065192 Belt Guide-115×25×55H×1.5T 2
93 6065193 Ø5 × 16L_Tapping Screw 23
94 6065194 Nylon Washer-Ø10×Ø25×0.8T 2
95 6065195 Cylinder-GU22Z-700-500N-25 1
96 6065196 M8 × P1.25 × 50L_Flat Head Countersink Bolt 2
99 6065199 5/16" × UNC18 × 1/2"_Hex Head Bolt 8
100 60651100 Ø8 × Ø18 × 1.5T_Flat Washer 8
102 60651102 Combination M5 Allen Wrench & Phillips Head Screw Driver 1
103 60651103 M6 (66 × 86)_L Allen Wrench 1
104 60651104 Lubricant 1
105 60651105 Adjustment Foot Pad-37mm×3/8 2
111 60651111 Ø3.5 × 16L_Tapping Screw 5
112 60651112 Wire Tie Mount 5
113 60651113 Top Motor Cover Plate 1
114 60651114 1000m/m_Speed Adjustment Switch W/Cable(Upper) 1
115 60651115 1000m/m_Incline Adjustment Switch W/Cable(Upper) 1
116 60651116 Ø3 × 10L_Sheet Metal Screw 2
117 60651117 400m/m_Console Ground Wire 1
125 60651125 5/16" × UNC18 × 3/4"_Button Head Socket Bolt 8
127 60651127 M10 × P1.5 × 8.0T_Nyloc Nut 2
128 60651128 M5 × P0.8 × 10L_Phillips Head Screw 4
135 60651135 Ø3 × 75L_Sheet Metal Screw 2
140 60651140 Ø4 × 19L_Sheet Metal Screw 4
151 60651151 400m/m_Audio Cable 1
154 60651154 1000m/m_Ground Wire 1
162 60651162 Controller Back Plate-130×110×25×1.5T 1
163 60651163 Ø3 × 8L_Sheet Metal Screw 2
186 60651186 Ø40 × 3T_Nylon Washer 2
Customer Service 1-888-707-1880 22 Dyaco Canada Inc. 2021
Email: customerservice@dyaco.caPARTS DIAGRAM Customer Service 1-888-707-1880 23 Dyaco Canada Inc. 2021 Email: customerservice@dyaco.ca
GENERAL MAINTENANCE
BELT ADJUSTMENTS:
Tread-belt Tension Adjustment - Belt tension is not critical for most users. It is very important for
joggers and runners in order to provide a smooth, steady running surface. Adjustments must be
made from the right side of the rear roller in order to adjust tension with the 6 mm Allen wrench
provided in the parts package. The adjustment bolt is located at the end of the right side rail, as
noted in the diagram below.

      Tracking /                                                                  Tracking / Tension
        Tension                                                                   Adjustment
     Adjustment
                          Note: Adjustment is through small hole in end cap.
Tighten the rear roller only enough to prevent slippage at the front roller. Turn the tread-belt tension
adjusting bolt in increments of 1/4 turn and inspect for proper tension.
When an adjustment is made to the belt tension, you must also make a tracking adjustment to
compensate for the change in belt tension. This is accomplished by turning both the tension and
tracking Allen bolts an equal amount. This adjustment should be made by turning both bolts
clockwise by no more than a 1/4 turn at a time.
DO NOT OVERTIGHTEN – Over tightening will cause belt damage and premature bearing failure.
TREADBELT TRACKING ADJUSTMENT:
The performance of your treadmill is dependent on the frame running on a reasonably level
surface. If the frame is not level, the front and back roller cannot run parallel, and constant belt
adjustment may be necessary.
The treadmill is designed to keep the tread-belt reasonably centred while in use. It is normal for
some belts to drift near one side while the belt is running with no one on it. After a few minutes of
use, the tread-belt should have a tendency to center itself. If during use, the belt continues to
move toward one side, adjustments are necessary.
TO SET TREADBELT TRACKING:
A 6 mm Allen wrench is provided to adjust the rear roller. Make tracking adjustments from the left
and the right side. Set belt speed at
approximately 2 to 3 mph. A slight
adjustment can make a dramatic difference.
Turn the bolt only a 1/4 turn and wait a few
minutes for the belt to adjust itself.
Continue to make 1/4 turns until the belt
stabilizes in the center of the running deck.
The belt may require periodic tracking
adjustment depending on use and
walking/running characteristics. Some
users will affect tracking differently. Expect
to make adjustments as needed to center the tread belt. Adjustments will become less of a
maintenance concern as the belt is used. Proper belt tracking is an owner responsibility common
with all treadmills.
ATTENTION: DAMAGE TO THE RUNNING BELT RESULTING FROM IMPROPER TRACKING /
TENSION ADJUSTMENTS IS NOT COVERED UNDER THE WARRANTY.

Customer Service 1-888-707-1880                    24                          Dyaco Canada Inc. 2021
Email: customerservice@dyaco.ca
BELT / DECK LUBRICATION: Do not lubricate with anything other than DYACO CANADA INC approved Lubricant. Your treadmill comes with one tube of Lubricant, and extra tubes can be ordered directly from DYACO CANADA INC. There are commercially available lube kits, but the only one currently approved by DYACO CANADA INC is Lube-N-Walk. These kits come with an application wand that makes applying lubrication easier. Keeping the deck lubricated at the recommended intervals ensures the longest life possible for your treadmill. If the Lubricant dries out, the friction between the belt and deck rises and places undue stress on the drive motor, drive belt and electronic motor control board, which could result in catastrophic failure of these expensive components. Failure to lubricate the deck at regular intervals may void the warranty. The deck comes pre-lubricated, and subsequent lubrication should be performed every 180 hours of use. To lubricate the deck with the tube of Lubricant supplied it will be necessary to loosen the walking belt. Using the 6 mm Allen wrench supplied, loosen the two rear roller adjustment bolts -- located in the rear end caps – enough to get your hand under the belt (5 –10 turns). Make sure to loosen both bolts the same amount of turns and also remember how many turns, because when finished, you will need to tighten the bolts back to the point they were before. Once the belt is loose, wipe the deck with a clean, lint-free cloth to remove any dirt. Apply the whole tube of Lubricant onto the deck surface about 18 inches from the motor cover. Squeeze out the contents of the tube across the deck (parallel to the motor cover) in about a one-foot long line, like toothpaste on a toothbrush. The one-foot line should be in the middle of the deck at approximately equal distance from both side edges of the belt. You want the Lubricant to be applied about the spot that your feet would hit the belt as you are walking. This should be about 18 inches from the motor cover, but you may want to walk on the treadmill before loosening the belt to note where your feet land on the belt. If you mostly run on the treadmill, the spot where your feet land may be different from walking. Once the Lubricant is applied, tighten the rear roller bolts the same amount of turns as when you loosened them. Run the treadmill at about 6 mph without walking on it for about a minute or two to make sure the belt stays in the middle of the deck. If the belt tracks to one side, then follow the belt tracking instructions to remedy. Now the deck is lubricated and you should walk, not run, on the treadmill immediately for at least 5 minutes to ensure the Lubricant is evenly distributed. If you purchase a Lube-N-Walk kit, follow the instructions that come with it to apply the lubrication. Customer Service 1-888-707-1880 25 Dyaco Canada Inc. 2021 Email: customerservice@dyaco.ca
GENERAL MAINTENANCE
        WARNING: Always unplug your treadmill prior to cleaning in order to avoid
        electrical hazard or shock.

BELT AND DECK
Your treadmill uses a very high-efficient low-friction deck. Performance is maximized when
the deck is kept as clean as possible. Use a soft, damp cloth or paper towel to wipe the
edge of the belt and the area between the belt edge and frame. Also, reach as far as
practical directly under the belt edge. This should be done once a month to extend belt and
bed life. Use water only - no cleaners or abrasives. A mild soap and water solution along
with a nylon scrub brush will clean the top of the textured belt. Allow drying before using.

BELT DUST
This occurs during normal break-in or until the belt stabilizes. Wiping excess off with a
damp cloth will minimize buildup.

GENERAL CLEANING
Dirt, dust, and pet hair can block air inlets and accumulate on the
running belt. On a monthly basis, vacuum underneath your treadmill to prevent buildup.
Once a year, you should remove the black motor hood and vacuum out dirt that may
accumulate. UNPLUG POWER CORD BEFORE THIS TASK.
Cleaning metal surfaces may be accomplished by using a soft cotton or terry cloth rag with
a light application of car wax. Do not use aerosol sprays or pump bottles as they may
deposit wax upon the walking or computer surface. Under no circumstances are you to use
ammonia, oils, silicones, or any other compounds on the rubberized walking surface. The
use of such materials may cause serious injury to the body and deteriorate the performance
of the walking surface. Only clean the rubberized walking surface with a damp cloth (water
only). From time to time, the computer surface may collect dust or fingerprints. The use of
harsh chemicals will destroy the protective coating and cause a static buildup that will
damage the components. This surface may be cleaned with specially prepared chemicals
found in most computer supply stores especially made for anti-static surfaces. It is strongly
recommended that you purchase such a cleaning compound.

TREADMILL LUBRICATION
Your treadmill should require little maintenance other than periodically applying Lubricant.
Lubricating under the tread belt will ensure superior performance and extend its life
expectancy.

HOW TO CHECK IF THE TREADBOARD REQUIRES LUBRICATION
Lift one side of the tread-belt and feel the top surface of the tread board. If the surface is
(slick) to the touch, then no further lubrication is required. If the surface is dry to the touch,
apply one packet of Lubricant or half of the bottle of Lubricant.

Customer Service 1-888-707-1880                26                          Dyaco Canada Inc. 2021
Email: customerservice@dyaco.ca
RESET SWITCH RESETTING
If your treadmill loses power or will not start, check the reset switch located on the front of
the motor cover. If the white tab of the reset switch is not showing, then the reset switch
has not been tripped. If the white tab of the reset switch is showing, the reset switch has
tripped. To reset the reset switch: Remove the safety clip on the console. Press the white
tab of the reset switch until it snaps back into place. If the reset switch continues to trip -
see tread-belt adjustment and tread-belt lubrication
SPEED SENSOR ADJUSTMENT
If the monitor does not display speed or distance, the speed sensor and magnet could be
misaligned.
Note: Always unplug treadmill before cleaning to avoid electrical hazard or shock.
Follow these steps to check and realign.
1. Remove the motor cover
2. Check the spacing and alignment between the magnet on the right side of the front
roller and the speed sensor on the frame. The spacing must be 1/8".
3. Loosen screw and slide speed sensor in or out of the clamp.
4. Retighten the screw and replace the motor cover.
Customer Service 1-888-707-1880 27 Dyaco Canada Inc. 2021
Email: customerservice@dyaco.caSERVICE CHECKLIST-DIAGNOSIS GUIDE
Before contacting your dealer for aid, please review the following information. It may save
you both time and expense. This list includes common problems that may not be covered
under the treadmill's warranty.
PROBLEM SOLUTION/CAUSE
Display does not light. 1. Tether cord not in position.
2. Circuit breaker on front grill
tripped. Push circuit breaker in
until it locks.
3. Plug is disconnected. Make sure plug is firmly
pushed into AC household wall outlet.
4. Household circuit breaker may be tripped.
5. Treadmill defect. Contact your dealer.
The user may be walking while favoring or putting
Tread-belt does not stay centered Treadmill
more weight on either the left or right foot. If this
belt hesitates when walk or run on. walking pattern is natural, track the belt slightly off-
center to the side opposite from the belt
movement. See General Maintenance section on
Tread-belt Tension. Adjust as necessary.
Motor is not responsive after pressing Contact the service department
start.
This indicates motor should be receiving power to
Treadmill will only achieve
operate. Low AC voltage to treadmill. Do not use an
approximately 12 kph (7 mph) but extension cord. If an extension cord is required it
shows higher speed on display. should be as short as possible and heavy duty
14 gauge minimum. Low household voltage.
Contact an electrician or your dealer.
A minimum of 110 volt AC current is required.
Tread-belt stops quickly/ suddenly when High belt/deck friction. See General Maintenance
tether cord is pulled. section on lubrication.
Treadmill trips on board 15 amp circuit. High belt/deck friction. See General Maintenance.
Computer shuts off when console is Treadmill may not be grounded. Static electricity is
touched (on a cold day) while “crashing” the computer. Refer to Grounding
walking/running. Instructions.
House circuit breaker trips, but not the Check that the treadmill is the only object in the circuit.
treadmill circuit breaker. See “Important Electrical Information” in the front of this
manual for more details.
Customer Service 1-888-707-1880 28 Dyaco Canada Inc. 2021
Email: customerservice@dyaco.caTROUBLESHOOTING
I. ENGINEERING MODE
Remove the safety key and reinsert it after pressing the ENTER button to enter the
engineer mode. Press the ENTER button once to select roller diameter (60), km or miles,
speed (0.5mph to 10mph) and incline (12). Press FAST button and SLOW button to
change the value. Press the START button to finish. The treadmill begins to calibrate itself
and will leave the engineering mode when the operation is completed.
II. WHAT TO DO WHEN AN ERROR OCCURS
1. E0: Safety key is not inserted
2. E1: Missing speed signal
To clear: Check and make sure that speed signal connector is properly connected.
3. E2: Overloaded
To clear: Press the power switch to the OFF position and then back ON to clear the
error message.
4. E3: Incline motor error(in the incline window)
To clear: Check and make sure that the incline motor cable is properly connected
and resume power to clear the error message. Or press the power switch to the OFF
position and then back ON to clear the error message.
5. E4: Motor error
To clear: Check and make sure that the motor cable is well connected and the power
is stable. Resume power to clear error message.
6. E5: communication disconnection
To clear: Check and make sure that cable connections are proper.
7. E6: Insufficient power
To clear: Check if voltage is too low or if the controller has been damaged. Replace
the controller if necessary.
Customer Service 1-888-707-1880 29 Dyaco Canada Inc. 2021
Email: customerservice@dyaco.caTRAINING GUIDELINES EXERCISE Exercise is one of the most important factors in the overall health of an individual. Listed among its benefits are: Increased capacity for physical work (strength endurance) Increased cardiovascular (heart and arteries/veins) and respiratory efficiency Decreased risk of coronary heart disease Changes in body metabolism, e.g. losing weight Delaying the physiological effects of age Physiological effects, e.g. reduction in stress, increase in self-confidence, etc. BASIC COMPONENTS OF PHYSICAL FITNESS There are four encompassing components of physical fitness, and we need to briefly define each and clarify its role. Strength is the capacity of a muscle to exert a force against resistance. Strength contributes to power and speed and is of great importance to a majority of athletes. Muscular Endurance is the capacity to exert a force repeatedly over a period of time, e.g. it is the capacity of your legs to carry you 10 Km without stopping. Flexibility is the range of motion about a joint. Improving flexibility involves the stretching of muscles and tendons to maintain or increase suppleness and provides increased resistance to muscle injury or soreness. Cardio-Respiratory Endurance is an essential component of physical fitness. It is the efficient functioning of the heart and lungs AEROBIC FITNESS The largest amount of oxygen that you can use per minute during exercise is called your maximum oxygen uptake (MVo2). This is often referred to as your aerobic capacity. The effort that you can exert over a prolonged period of time is limited by your ability to deliver oxygen to the working muscles. Regular vigorous exercise produces a training effect that can increase your aerobic capacity by as much as 20 to 30%. An increased MVO2 indicates an increased ability of the heart to pump blood, of the lungs to ventilate oxygen and of the muscles to take up oxygen. ANAEROBIC TRAINING This means "without oxygen" and is the output of energy when the oxygen supply is insufficient to meet the body's long-term energy demands. (For example, 100-meter sprint). The Training Threshold is the minimum level of exercise required to produce significant improvements in any physical fitness parameter. Progression: As your become fitter, a higher intensity of exercise is required to create an overload and therefore provide continued improvement Customer Service 1-888-707-1880 30 Dyaco Canada Inc. 2021 Email: customerservice@dyaco.ca
Overload is where you exercise at a level above that which can be carried out comfortably.
The intensity, duration and frequency of exercise should be above the training threshold
and should be gradually increased as the body adapts to the increasing demands. As your
fitness level improves, so the training threshold should be raised. Working through your
program and gradually increasing the overload factor is essential.
Specificity: Different forms of exercise produce different results. The type of exercise that
is carried out is specific both to the muscle groups being used and to the energy source
involved.
There is little transfer of the effects of exercise, i.e. from strength training to cardiovascular
fitness. That is why it is vital to have an exercise program tailored to your specific needs.
Reversibility: If you stop exercising or do not do your program often enough, you will lose
the benefits you have gained. Regular workouts are the key to success.

                                         WARM-UP
Every exercise program should start with a warm-up where the body is prepared for the
effort to come. It should be gentle and preferably use the muscles to be involved later.
Stretching should be included in both your warm-up and cool down and should be
performed after 3-5 minutes of low-intensity aerobic activity or callisthenic type exercise.
WARM-UP OR COOL-DOWN
This involves a gradual decrease in the intensity of the exercise session. Following
exercise, a large supply of blood remains in the working muscles. If it is not returned
promptly o the central circulation, pooling of blood may occur in the muscles
HEART RATE
As you exercise, so the rate at which your heartbeat also increases. This is often used as a
measure of the required intensity of exercise. You need to exercise hard enough to
condition your circulatory system and increase your pulse rate, but not enough to strain
your heart.
Your initial level of fitness is important in developing an exercise program for you. If you are
starting off, you can get a good training effect with a heart rate of 110-120 beats per minute
(BPM). If you are fitter, you will need a higher threshold of stimulation.
To begin with, you should exercise at a level that elevates your heart rate to about 65 to
70% of your maximum. If you find this is too easy, you may want to increase it, but it is
better to lean on the conservative side.
As a rule of thumb, the maximum heart rate is 220 minus your age. As you increase in age,
so your heart, like other muscles, loses some of its efficiency. Some of its natural loss is
won back as fitness improves.
The following table is a guide to those who are "starting fitness."

Age                     25        30    35    40         45    50    55    60     65

Target heart Rate
10 Second Count         23        22    22    21         20    19    19    18     18

Beats per Minute       138        132   132   126        120   114   114   108   108

Customer Service 1-888-707-1880                     31                      Dyaco Canada Inc. 2021
Email: customerservice@dyaco.ca
PULSE COUNT The pulse count (on your wrist or carotid artery in the neck, taken with two index fingers) is done for ten seconds, taken a few seconds after you stop exercising. This is for two reasons: (a) 10 seconds is long enough for accuracy, (b) the pulse count is to approximate your BPM rate at the time you are exercising. Since heart rate slows as you recover, a longer count isn't as accurate. The target is not a magic number but a general guide. If you're above average fitness, you may work quite comfortably, a little above that suggested for your age group. The following table is a guide for those who are keeping fit. Here we are working at about 80% of maximum. Age 25 30 35 40 45 50 55 60 65 Target heart Rate 10 Second Count 26 26 25 24 23 22 22 21 20 Beats per Minute 156 156 150 144 138 132 132 126 120 Don't push yourself too hard to reach the figures on this table. It can be very uncomfortable if you overdo it. Let it happen naturally as you work through your program. Remember, the target is a guide, not a rule. A little above or below is just fine. Two final comments:(1) don't be concerned with day-to-day variations in your pulse rate. Being under pressure or not enough sleep can affect it;(2) your pulse rate is a guide, don't become a slave to it. ENDURANCE CIRCUIT TRAINING Cardiovascular Endurance, muscle, strength, flexibility and coordination are all necessary for maximum fitness. The principle behind circuit training is to give a person all the essentials at one time by going through your exercise program moving as fast as possible between each exercise. This increases the heart rate and sustains it, which improves the fitness level. Do not introduce this circuit training effect until you have reached an advanced program stage. Body Building is often used synonymously with strength training. The fundamental principle here is OVERLOAD. Here, the muscle works against greater loads than usual. This can be done by increasing the load you are working against. PATRONIZATION This is the term used to vary your exercise program for both physiological and psychological benefits. In your overall program, you should vary the workload, frequency and intensity. The body responds better to variety, and so do you. In addition, when you feel yourself getting "stale', bring in periods of lighter exercise to allow the body to recuperate and restore its reserves. You will enjoy your program more and feel better for it. MUSCLE SORENESS For the first week or so, this may be the only indication you have that you are on an exercise program. This, of course, does depend on your overall fitness level. A confirmation that you are on the correct program is a very slight soreness in most major muscle groups. This is quite normal and will disappear in a matter of days. If you experience major discomfort, you may be on a program that is too advanced, or you have increased your program too rapidly. If you experience PAIN during or after exercise, your body is telling you something. Stop exercising and consult your doctor. Customer Service 1-888-707-1880 32 Dyaco Canada Inc. 2021 Email: customerservice@dyaco.ca
WHAT TO WEAR
Wear clothing that will not restrict your movement in any way while exercising. Clothes
should be light enough to allow the body to cool. Excessive clothing that causes you to
perspire more than you normally would while exercising gives you no advantage. The extra
weight you lose is body fluid and will be replaced with the next glass of water you drink. It is
advisable to wear a pair of gym or running shoes or "sneakers."
BREATHING DURING EXERCISE
Do not hold your breath while exercising. Breathe normally as much as possible.
Remember, breathing involves the intake and distribution of oxygen, which feeds the
working muscles.
REST PERIODS
Once you start your exercise program, you should continue through to the end. Do not
break off halfway through and then restart at the same place later on without going through
the warm-up stage again.
The rest period required between strength training exercises may vary from person to
person. This will depend mostly on your level of fitness and the program you have chosen.
Rest between exercises by all means, but do not allow this to exceed two minutes. Most
people manage with half-minute to one-minute rest periods.

Customer Service 1-888-707-1880               33                        Dyaco Canada Inc. 2021
Email: customerservice@dyaco.ca
You can also read