Programming the Raspberry Pi - Dr Eben Upton Raspberry Pi Foundation
←
→
Page content transcription
If your browser does not render page correctly, please read the page content below
Programming the Raspberry Pi
Dr Eben Upton
Raspberry Pi Foundation
contents
• introduction
• unboxing and setup
• flashing an SD card
• logging in for the first time
• the JOE text editor
• running the “hello world” program
• a (slightly) more complex example
• an OpenGL ES graphics program in C
• the configuration file
• wrap up
introduction
• Raspberry Pi is a small, cheap Feature Specification
ARM-based PC for education CPU 700MHz ARM1176-JZFS
and hobbyists GPU Broadcom VideoCore IV
• Runs Debian GNU/Linux from Memory 256MB LPDDR2-800
an SD card
Video HDMI, composite
– Standard image available from
Audio HDMI, stereo analog
http://www.element14.com
USB 2 x USB2.0 (model B)
– Includes a broad range of tools and
examples Storage SD card
• General-purpose IO connector Networking 10/100 Ethernet
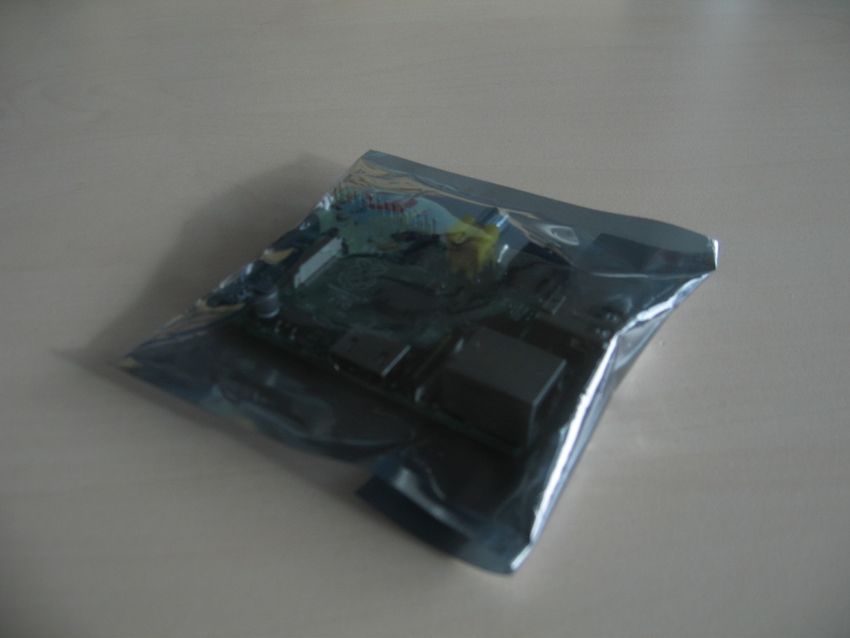
allows simple interfacing Power 5V micro USBunboxing
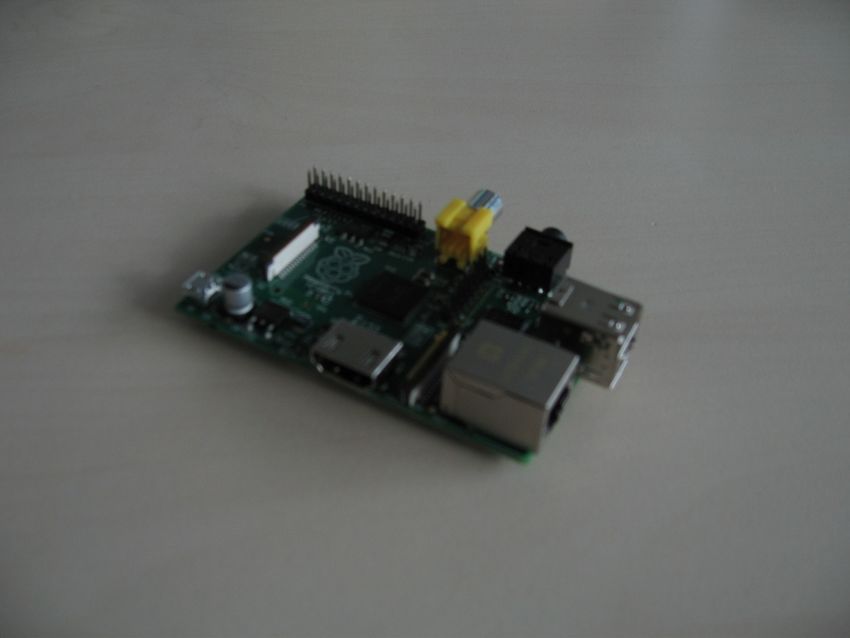
a quick tour
a quick tour

           Power
a quick tour
Power
HDMIa quick tour
Power
HDMI
Etherneta quick tour
Power
USB
HDMI
Etherneta quick tour
Audio
Power
USB
HDMI
Etherneta quick tour
Video
Audio
Power
USB
HDMI
Etherneta quick tour
GPIO Video
Audio
Power
USB
HDMI
Etherneta quick tour
GPIO Video
SD Audio
Power
USB
HDMI
Ethernetcables and accessories
putting it all together
putting it all together
flashing an SD card
• You may have purchased a pre-
  installed card
• Otherwise, you will need to
    – Download an image and a copy of
      the tool dd-removable from
      www.element14.com/raspberrypi
    – Flash the image onto a 2GB SD
      card from a Windows PC
• Insert the card into a card reader
• At a command prompt, type
    – dd-removable --list
    – dd-removable bs=1M if=sd.img of= \\?\Device\Harddisk\Partition0 -progress
    – Substituting the appropriate number for
flashing an SD card
flashing an SD card
• You may have purchased a pre-
  installed card
• Otherwise, you will need to
    – Download an image and a copy of
      the tool dd-removable from
      www.element14.com/raspberrypi
    – Flash the image onto a 2GB SD
      card from a Windows PC
• Insert the card into a card reader
• At a command prompt, type
    – dd-removable --list
    – dd-removable bs=1M if=sd.img of= \\?\Device\Harddisk\Partition0 -progress
    – Substituting the appropriate number for
logging in for the first time
• Insert a card
• Apply power to the device
• Red LED should come on
• After 5 seconds
– Green LED should begin to flicker
– Text should appear on the screen
• At the login prompt
enter the username pi, and
password raspberry
• You may want to set the clock!logging in for the first time
logging in for the first time
                           • Insert a card
                           • Apply power to the device
                           • Red LED should come on
                           • After 5 seconds
                                – Green LED should begin to flicker
                                – Text should appear on the screen
                           • At the login prompt

                                enter the username pi, and
                                password raspberry
• You may want to set the clock!the JOE text editor
• Standard image bundles JOE
– Simple programmer’s text editor
– Syntax highlighting for Python and C
• At the command line, type
joe helloworld.py
• When the editor appears, type
print “hello world”
• Now type Ctrl+K and then X to
save and exit
• More documentation available at
http://joe-editor.sourceforce.netthe JOE text editor
the JOE text editor
• Standard image bundles JOE
   – Simple programmer’s text editor
   – Syntax highlighting for Python and C
• At the command line, type
       joe helloworld.py
• When the editor appears, type
       print “hello world”
• Now type Ctrl+K and then X to
  save and exit
• More documentation available at
http://joe-editor.sourceforce.netrunning the “hello world” program
• We just wrote our first program!
• We can run it using the bundled
Python interpreter
• At the command line, type
python helloworld.py
• The text “hello world” will appear
• You can also run Python in
“interactive mode” by just typing
python
• A great way to experiment with
the languagerunning the “hello world” program
running the “hello world” program
                       • We just wrote our first program!
                       • We can run it using the bundled
                         Python interpreter
                       • At the command line, type
                               python helloworld.py
                       • The text “hello world” will appear
                       • You can also run Python in
                         “interactive mode” by just typing
                               python
                       • A great way to experiment with
the languagea (slightly) more complex program
• A series of examples, building up to a simple game of Snake, can be
downloaded and unpacked by typing
wget http://www.raspberrypi.org/game.tar.gz
tar xvfz game.tar.gza (slightly) more complex program
a (slightly) more complex program
a (slightly) more complex program

• A series of examples, building up to a simple game of Snake, can be
  downloaded and unpacked by typing
             wget http://www.raspberrypi.org/game.tar.gz
tar xvfz game.tar.gzan OpenGL ES graphics program in C
• Raspberry Pi incorporates a
powerful graphics accelerator
• We bundle a simple example
– Written in C, using OpenGL ES
– Source can be found in
/opt/vc/src/hello_pi/hello_triangle
• To run the example
– Change directory using cd
– Build it using make
– Run it by typing ./hello_triangle.bin
• Try editing the source and the
makefile using JOEan OpenGL ES graphics program in C
an OpenGL ES graphics program in C
• Raspberry Pi incorporates a
  powerful graphics accelerator
• We bundle a simple example
   – Written in C, using OpenGL ES
   – Source can be found in
     /opt/vc/src/hello_pi/hello_triangle
• To run the example
   – Change directory using cd
   – Build it using make
   – Run it by typing ./hello_triangle.bin
• Try editing the source and the
  makefile using JOE
an OpenGL ES graphics program in C
• More complicated examples available online, including Quake 3 at
https://github.com/raspberrypi/quake3an OpenGL ES graphics program in C
an OpenGL ES graphics program in C
an OpenGL ES graphics program in C

• More complicated examples available online, including Quake 3 at
https://github.com/raspberrypi/quake3the configuration file (advanced users)
• At startup, Raspberry Pi reads • A typical configuration file
config.txt from the SD card
– Controls display and overclocking # select 16:9 PAL
– Edit from a PC or on device using sdtv_mode=2
joe /boot/config.txt sdtv_aspect=3
• Common options include
– arm_freq set ARM clock speed # medium size borders
– gpu_freq set GPU clock speed overscan_left=28
overscan_right=28
– sdtv_mode select PAL/NTSC
overscan_top=16
– hdmi_mode force HDMI resolution
overscan_bottom=16
– overscan_* set screen border
• Very easy to break your installwrap up
• We’ve seen how to
– Set up, boot and configure your Raspberry Pi
– Create and edit text files using the JOE editor
– Run a simple Python script
– Download and unpack more examples
– Build and run one of the bundled C programs
• Remember Raspberry Pi is just a GNU/Linux box
– Many books and online tutorials available
• Don’t be afraid to play around with software
– At worst you’ll have to reflash your SD cardYou can also read