QUICK GUIDE TO USING ELECTRIC NAIL FILES AND TOOLS
←
→
Page content transcription
If your browser does not render page correctly, please read the page content below
QU IC K GU I DE T O US IN G
E LE CTRI C N A I L F I L E S
AN D T O O L S
I N TROD U CT ION
Electric Files, commonly called e-files, make the perfect salon-style manicure or pedicure easy to achieve and keep your feet and hands in perfect
condition.

With a wide range of profiling, shaping and polishing tools your e-file has many uses including nail shortening, quickly buffing nails, preparing natural nails
for extensions, removing gel nail enhancements, removing hard skin from feet and performing professional infills. In fact e-files can be used for most of the
procedures you would use a hand file for.

PLEASE NOTE: This guide shows specifically how and when to use your e-file instead of other tools such as hand files or buffers. As such this guide is
intended to be used in conjunction with the instructions for the other processes you may be following.

As with most new skills electric filing takes time to master and it is vital to know what you are doing to prevent damaging the nail plate. So, be patient, and
allow yourself time to learn and develop your technique. There are many ways in which to practice techniques from buying ‘practice hands’ from beauty
supply companies to sticking false tips onto dowel rods. Whichever way you choose make sure you practice all speeds and different tools so you are
completely confident with your technique before working on real nails.

                                                          G E TT ING S T ART ED
HOLDING THE HANDPIECE                                                               BALANCE FINGER
For almost all applications hold the handpiece as you would a pencil                When using your file ALWAYS rest your little finger of the hand holding the
but keeping the shaft of the tool horizontal. Manipulate the finger nail            handpiece against your other hand. This acts as a steadier for controlling
to present the correct angle to the tool.                                           the action of the file and allows far greater control of the pressure applied
                                                                                    to the drill tool.
(Occasionally you may change from this position, for instance when
cutting a smile line or when performing a pedicure.

                                                                              2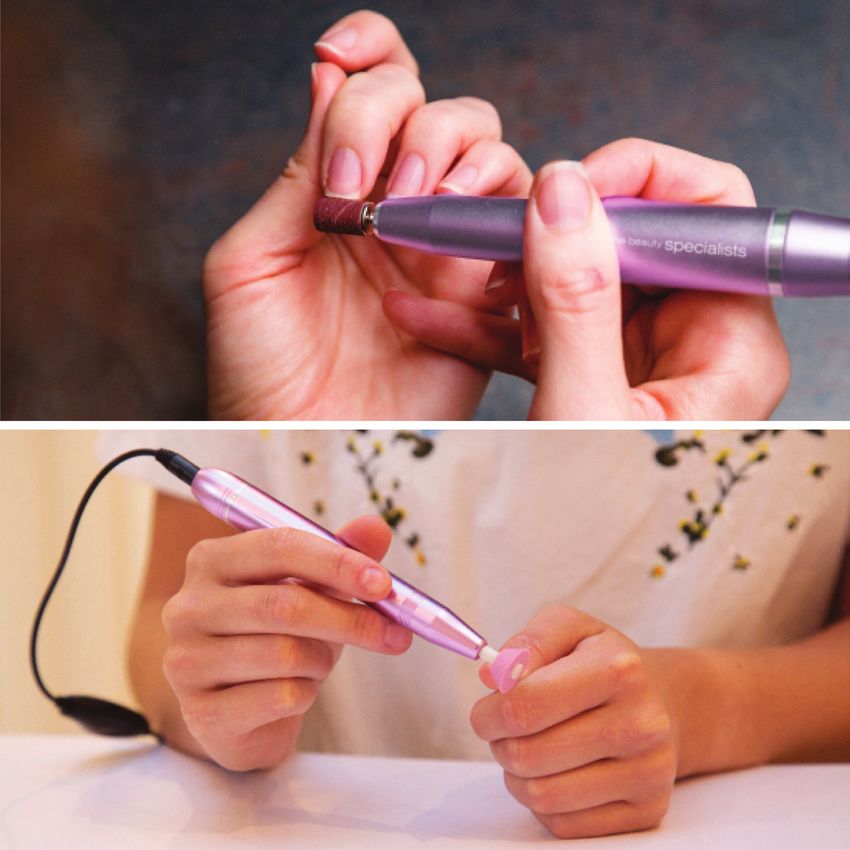
K N O W YOU R E-F IL E T OOL S
    ANGLING THE NAILS AND TOOLS                                                        TOOLS
    Correct use of the e-file (when working on the nail) is best achieved              Your file is supplied with a selection of tools. Many tools are interchangeable
    by keeping the tool horizontal.                                                    and the use of them is, in part, down to personal preference.

    Try to follow this rule as much as possible as it maintains the control            Always check the tools you are using are not damaged or bent. If the
    of the handpiece. However, during use, some movement will be required              tools wobble or vibrate during use they may be bent. this can damage
    to achieve a smooth finish.                                                        the nail and, if extreme, can damage the machine.

                                                                                       Most tools are available in coarse, medium or fine grades - for almost all
                         The illustrations show a guide to the angles for each         applications only medium and fine grades of tools are used.
                         zone of the nail.
                                                                                       Acrylic nails are the hardest and can withstand all tool styles. UV gel nails
                         Cuticle - use the top of the barrel tool, take care           are too soft for use with carbide tools, these respond best to the diamond
                         to keep the angle flattish so you do not file into the        tools.
                         natural nail.
6        CUTICLE

                         Centre - use the centre third of the tool here, rolling       DIAMOND TOOLS                       DIAMOND BARREL   DIAMOND FOOTBALL   DIAMOND CONE

                         slightly with strokes to create a natural curve.              Suitable for use on:
                         The angle determines which part of the tool is in             Natural nails
                         contact with the nail. To check you are connecting
                         with the correct part watch for which area of the tool        UV gel nails
          CENTRE         goes white with dust.
                                                                                       Acrylic nails

                                                                                       Resin wrapped nails (silk or fibreglass)
                         Tip and free edge - use the top third of the tool
                         to create a smooth curve to the tip of the nail.              Made of diamond fragments adhered to a metal barrel, these are available
                                                                                       in fine, medium and course grade. The ones supplied with your e-file are
                                                                                       medium and are the most versatile of all your electric file tools.

     TIP AND FREE EDGE

                                                                                   3
K N O W YOU R E-F IL E T OOL S
CARBIDE TOOLS CARBIDE BARREL SANDING BANDS 180 GRIT BAND 240 GRIT BAND MANDREL
Suitable for use on: AND MANDREL
Suitable for use on:
Acrylic nails
Acrylic nails
UV gel nails - ONLY for removal
UV gel nails
Carbide tools have small flutes cut into the surface, these
shave, rather than grind, a minute layer away. Traditional carbide tools Hard skin
have flutes going in just one direction, these can be difficult to use. A more
The sanding bands are used for shortening nail extensions and can be
versatile type of carbide has cross cut flutes for use with clockwise or anti-
used for filing the top surface of hardened products such as acrylic or UV
clockwise rotations.
gel. They are available in various grit grades, the most commonly used
The deeper the flutes the more coarse the drill tool, the carbide tool grades are 180 and 240 grit.
supplied with your e-file is a medium, cross-cut barrel.
The lower the grit number the coarser the grade. As with hand files you
Carbide tools are ideal for use on acrylic nails. need to progress from coarser to finer grades to achieve a good finish.
NEVER use carbide tools on the natural nail. Not only are they too harsh, The sanding bands are used with the mandrel which is a metal barrel
but, also, the shaving action can lead to peeling of layers. tool. The sanding bands simply push on and pull off the mandrel. The
sanding bands are disposable and should not be used on more than
Carbide tools are available in different shapes, the most commonly used
is the barrel - a straight sided cylindrical tool for use filing the surface of one person.
nail enhancements. The top edge of the barrel can also be used to ‘cut’ Sanding bands are not suitable for high speed use as they are susceptible
a line behind lifted product. Take care with this to avoid cutting right
to heat build up.
through the product into the nail as these tools are sharp, especially
when new.
STONE ABRADER STONE ABRADER
Some alternative shaped tools are ‘backfill’ - a shorter version of the
barrel tool, ‘inverted backfill’ - a shortened barrel with the taper extending Suitable for use on: Natural nails, Hard skin
away from the tip and ‘tapered barrel’. The stone abrader can be used to prepare the natural
nail prior to the application of nail enhancements. As with
all tools used on the natural nail care must be taken as
damage can occur if over used. The stone abrader can also
be used to remove hardened skin from around the toes and file down
thickened toe nails.
4K N O W YOU R E-F IL E T OOL S
BUFFING TOOLS LONG HAIR BUFFER FELT CONE BUFFER CLEANING YOUR E-FILE TOOLS
Suitable for use on: Metal tools
Natural Nails If you are using your metal nail tools on more than one person it is vital
to disinfect them between people.
All types of extensions
Remove the dust and debris with a small wire brush or tweezers.
There are many types of buffing tools. They
are all used in a similar way. Soak the tools in acetone to remove any remaining acrylic or nail product.
NOTE: UV Gel will not dissolve in acetone so any gel residue needs to be
To achieve a high shine massage a small amount of buffing paste onto
removed completely with a wire brush.
the nail surface.
NOTE: Acetone DOES NOT disinfect the tools.
Hold the buffing tool parallel to the work surface and work the buffing
cream all over the surface of the nail in small circular movements, keep Scrub the surface with warm soapy water and a small brush such
the pressure light and remove the tool very frequently to avoid heat build as a toothbrush.
up.
Finally disinfect the tool by submerging completely in a suitable solution
If using a long hair buffer, such as a goats hair buffer, switch to a felt such as baby bottle sterilising solution (follow the manufacturers
or cotton style buffing cone to finish. instructions).
Always use buffers on a low to medium speed, this is very important as Remove from the solution and dry well with kitchen towel. Do not leave
the insulating properties of a buffer means the heat can build up very wet as this may cause rust.
quickly especially on a high speed.
Sanding Bands
Sanding bands cannot be cleaned and should be discarded between
EMERY STONE CONE EMERY STONE CONE
uses on different people.
Suitable for use on:
Hard skin
The emery stone cone is ideal for use on thick, hardened
skin on the foot. Move in circular motions to remove any
dead skin from around the soles and balls of feet.
5CHOOSING THE CORRECT SPEED
Choosing the correct speed is something which takes practice and
it is important to get to know how to tell if you need to increase
or decrease the speed.
A general rule is to use a slower speed for natural, UV gel or resin
wrapped nails and a higher speed for acrylic nails.
If you feel you need to increase the pressure on the tool, this usually
means you need to increase the speed of the rpm.
If, on the other hand, you are removing too much product even with very
light pressure this means the rpm is too fast and you should decrease
the speed.
Also decrease the speed if you are finding it hard to control the tool, especially
if you are near the cuticle area.
Your exact preferred speed will depend on your technical expertise, the
hardness of the surface you are filing and the process, for example, filing
the back edge for an infill requires a slower speed than smoothing the
top surface. Ideally you should maintain a visible result with light pressure
on the surface.
6N AT U RA L NAIL S
E-files can be used on the natural nails but it is essential to take great REDUCING THE LENGTH 240 GRIT BAND
care and ensure you are completely familiar with the procedures, speeds Use the 240 grit sanding band and mandrel to reduce
and pressures required. the length.
NEVER use carbide or swiss carbide tools with the natural nail.
NEVER use any coarse tools with the natural nail.
The natural nail is most susceptible to damage from heat build up so ensure
you remove the tool for at least as much time as it is in contact with the
surface.
DIAMOND BARREL STONE ABRADER
1 For this do not keep the tool parallel to the work
surface, instead hold and keep vertical, try not to
REMOVING NAIL RIDGES
angle the tool or your nail edge will be uneven.
If you suffer from ridges you can use the e-file
to lightly remove them. Use a fine diamond
tool or stone abrader.
1 On a slow speed move the tool gently over the ridged 2 Do NOT attempt to shape the nails with the e-file,
area, lift and repeat. always shape using a hand file...
Work on a slow speed and do not remove any more
of the surface than is absolutely necessary.
TIP: Do not rely on visible results instead feel the As a guideline, looking at the nails straight on - the three centre finger
surface. Often the line of the ridge can still be seen nails should all be the same length with the little finger nail and thumb nail
when it has actually gone. in proportion to these.
Do not make the mistake of comparing the free edges - these will rarely
all be the same. Instead concentrate on the total length of the nail, cuticle
to tip.
7N AT U RA L NAIL S
BUFFING LONG HAIR BUFFER FELT CONE BUFFER BUFFING PASTE BUFFING WITH CUTICLE OIL FELT CONE BUFFER CUTICLE OIL
Use buffers on a low speed, as After buffing with buffing paste to achieve
the insulating properties of a a high shine you can buff again with cuticle
NAIL
buffer allows heat to build up very BUFFING
PASTE
oil. However, apply the oil sparingly or you will CUTICLE
OIL
quickly on a high speed. ruin the buffing tool. Never allow the cuticle oil
to run down the tip shank into the machine as
this can cause damage.
1 Massage a small amount of buffing cream into 3 Simply apply a tiny amount of cuticle oil to the
each nail. surface of each nail and buff over in small circular
movements, keep the pressure light and remove the
tool very frequently to avoid heat build up.
2 Work the buffing cream all over the surface of the nail CLEANING UNDER THE FREE EDGE DIAMOND FOOTBALL DIAMOND CONE
in small circular movements, keep the pressure light Using a diamond football or diamond cone you
and remove the tool very frequently to avoid heat can effectively clean under the natural nail.
build up.
This can be useful at removing some staining
under the nail, but be careful not to overdo
this and weaken the nail.
3 If using a ‘loose’ buffer such as the goats hair ones 1 On a slow to medium speed file underneath the free
switch to a felt or cotton style buffing cone to finish. edge of the nail lightly.
8N A I L EXT ENSIONS
PRE-BLENDING YOUR 240 GRIT BAND DIAMOND BARREL
2 cuticle
EXTENSION TIP
On a slow to medium speed move the tool gently
Pre-blending your extension tips gives a more over the nail surface right to left, lifting off the nail
professional result. It also reduces the amount between strokes. Do not tilt the file or nail too much
of blending once the tips have been applied and avoid filing into the nail.
to the nails surface reducing the chances of
damaging the nail surface.
1 Pre blend the edge with a 240 grit sanding band 3 middle
or diamond barrel tool. Keep the handpiece flat to
the surface of the extension tip so that the well area
gradually tapers to the end.
Repeat procedure for each extension tip.
PREPARING THE NAILS DIAMOND BARREL STONE ABRADER 4 tip and free edge
To prepare the nail surface before applying an
enhancement use a diamond tool or a stone
abrader.
The precision of the electric file is perfect
for ensuring all dead skin cells are removed.
Skin/cuticle cells left on the nail plate contain oils and If necessary use a diamond cone to get into the
1 5
moisture which is the most common cause of nail sidewall area of the nail surface.
extensions lifting. After this stage remember to brush away all dust
Gently push back the cuticles with the hoof stick before proceeding.
before using your e-file. Do NOT touch the nail surface after this stage
Work on the three zones methodically, to avoid going as your fingers will transfer natural oils from the skin
over one area repeatedly: onto the nail.
9N A I L EXT ENSIONS
BLENDING THE SEAM DIAMOND BARREL REDUCING THE LENGTH 180 GRIT BAND
To blend the seams of extension tips use a diamond After the product has been applied you can use your e-file
barrel tool. to reduce the length of the extensions, if necessary, so they
are even.
Keep the pressure very light. If you feel the need to apply
more pressure increase the speed of the e-file instead.
1 On a slow speed, move across the seam of the 1 For all types of extensions use 180 grit sanding
extension in one direction, lift the tool and repeat. band.
Angle the nail slightly to taper into the natural nail
Position your thumb on the top of the enhancement
without actually filing the natural nail at all.
to provide support to the stress area and hold the
Remember to lift the tool off the nail very frequently finger in steady.
to avoid heat build up.
Take care NOT to angle the tool too much to Hold and keep the tool vertical, try not to angle the
6 minimise the chances of filing the natural nail.
2
tool or your nail edge will be uneven.
With firm, but not hard, pressure move the drill
across the end of the nail in a straight line.
Do NOT attempt to shape the nails with the electric file. Always use
2 Using a diamond barrel or diamond football angle the
a hand file to shape the nails.
file towards the side of the nail and carefully blend
the corners of the extension near the side wall. As a guideline, looking at the nails straight on - the three centre finger
nails should all be the same length with the little finger nail and thumb nail
NOTE: Do NOT use the e-file to reduce the length
in proportion to these.
of the extensions at this stage, as it will weaken
the bond. Compare the total length of the nail, cuticle to tip. Do NOT make the
mistake of comparing the free edges - these will rarely all be the same.
10N A I L EXT ENSIONS
Finishing the top surface 240 GRIT BAND CARBIDE BARREL DIAMOND BARREL
3 Regularly view the nail from the side to check for any
bumps left at the edge of the product. It is important
For acrylic nails use either a 240 to taper the product fully to avoid a ‘step’ as the
grit sanding band or a medium product grows out. At the same time avoid filing into
cross-cut carbide barrel. the natural nail.
For UV gel nails or wrapped nails
use either a 240 grit sanding ACRYLIC UV GEL ACRYLIC UV GEL WRAPPED
band or a medium diamond
barrel.
4 Centre
When filing some people prefer to complete each nail before moving
onto the next, others prefer to complete each stage on all the nails, File over the whole surface thinning the product if
thereby working all the nails together. Familiarise yourself with each step it is too thick and smoothing any bumps. Keep the
thoroughly and follow a methodical route. nail and tool moving to avoid working in one spot
for too long.
Hold the finger firmly, pinching the sidewalls down away from the nail
plate.
1 Mentally separate the nail into three zones: 5 Tip and free edge
1 - cuticle Angle the nail slightly to form a smooth dome to the
1 2 3 2 - centre tip of the free edge.
3 - tip and free edge
File each zone with the correct part of the tool.
Cuticle
2 6 On both the centre and tip zones you can move the
On a slow speed taper the product overlay towards file side to side in contact with the nail, taking care to
the cuticle area using the top section of the tool. lift regularly to avoid heat build up.
To avoid ‘rings of fire’ keep the handpiece parallel to
the work surface and angle the finger as you need.
Work slowly, moving from one side to the other then
LIFT OFF and repeat - do not move left to right
6 in contact with the nail.
11N A I L EXT ENSIONS
Each nail must be checked from several angles to ensure a smooth Check for bumps, flat spots and surface DIAMOND FOOTBALL DIAMOND CONE
surface. If the surface is uneven at all, simply file over the area to remedy. blemishes.
On all areas check the product is not too thick or clumsy, and the surface
is smooth without bumps or steps.
THE UNDERSIDE
When filing under the nail use a diamond
Check the product is not too thin at the stress line where the free edge football or cone as part of the underside is the
starts. If this occurs more product will need to be applied and the filing natural nail.
re-done.
Side View 1 Do NOT use a carbide tool.
Look from both sides. There should be a smooth On a slow to medium speed file underneath the free
dome, with the highest point centred on the nail, edge of each nail lightly to remove any stray product
tapering towards the cuticle and without any stepped and neaten the shape.
areas.
Straight down the nail Check the undersides are straight and even. Feel the free edge and
underside to check for sharp edges or ‘unfinished’ patches. Check the
Looking end on at the nail check the ‘C’ curve is
underside of the nail is clean and free from product and glue residue.
even with the highest point in the centre.
Once you have checked each nail compare all the nails to ensure they
Tip the nail up and down checking for bumps on the
are all even.
top profile of the nail.
Flat, Top View 1 FINISHING
Looking straight onto the nail surface roll the nails Once you are happy with the shape of the nail always
to show any imperfections which will show up in the rub each nail vigorously with a white block to smooth
light. before progressing to the buffing stage.
12N A I L EXT ENSIONS
BUFFING LONG HAIR BUFFER FELT CONE BUFFER BUFFING PASTE REMOVING LIFTED PRODUCT CARBIDE BARREL DIAMOND BARREL
Buffing is the finishing stage of For acrylic nails use the top ‘cutting’ edge of
applying nail extensions. Use either a medium diamond barrel or a medium
fine grade diamond barrels and/ NAIL
BUFFING cross-cut carbide barrel.
PASTE
or sanding bands over the nail
surface before moving onto For UV gel nails or resin wrapped nails use
buffing files. the top ‘cutting’ edge of a medium diamond ACRYLIC ACRYLIC UV GEL
barrel. WRAPPED
There are many types of buffing materials available, they all have the
same purpose, to shine the nail, so it is worth trying different types to 1 After applying nail extensions there can be areas
find one that suits you Always use buffers on a low speed, the insulating of lifting which show as opaque areas. This must
properties of a buffer means the heat can build up very quickly especially be removed to prevent water becoming trapped
on a high speed. underneath which can lead to watermould on the
If using a ‘long hair’ buffer use this for the first part of buffing before nail plate.
moving to a felt or cotton buffer. Otherwise just use a felt or cotton buffer
for the whole process.
1 Rub a small amount to buffing cream into each nail. 2 Angle the handpiece and with the edge of the tool
cut a line just behind the lifted area. The lifted area
Work the buffing cream all over the surface of the nail will usually flick off.
in small circular movements, keep the pressure light
and remove the tool very frequently to avoid heat
build up.
2 Change to a felt or cotton style buffing cone. Buff 3 Continue until all loose product has been removed.
over the whole nail. Also buff under and around the Do NOT file directly onto the lifted area as the
free edge to create a smooth feel. movement can force more product to detach from
the nail plate.
NOTE: If after buffing there are scratches in the
surface, repeat the surface filing with the the very fine NOTE: Regularly wipe away dust, sometimes this
grade sanding band or diamond barrel and re-buff. can cling to the edge of the product and appears
as lifting.
13N A I L EXT ENSIONS
INFILLING 240 GRIT BAND CARBIDE BARREL DIAMOND BARREL
4 With the nail at a slight angle and the hand piece
(BACKFILLING) parallel to the work surface, file towards the cuticle
area tapering the product down to the natural nail.
For acrylic nails use either a 240
grit sanding band or a medium Use your balance finger to maintain firm control and
cross-cut carbide barrel. remember to lift the file off the nail very frequently.
For UV gel nails or resin wrapped Do NOT file into or on the natural nail at all.
nails use either a 240 grit sanding band or a medium diamond barrel.
1 As the natural nail grows it is necessary for you to in- 5 Once back edge is tapered into the nail remove about
fill as a gap will appear between the cuticle and the half the thickness of the remaining old product over
seam. The enhancement may also begin to lift. This the nail to allow for the new product to be applied
is usually required about two weeks after your first over the top.
application and every 2-3 weeks thereafter. Prep the
nails as usual for the type of product in question.
2 Using the 180 grit sanding band reduce the length 6 Regularly remove the dust and view the nail from the
if necessary. side to check the taper and remove any bumps left
at the edge of the product.
Refer to ‘REDUCING THE LENGTH’ section
Apply the product for whichever nail enhancement
Do NOT attempt to shape the nails with your e-file.
you have used, acrylic, gel or nail wrap, following your
usual instruction for the application of the product.
3 Examine the cuticle area for loose/lifted product, 7 Once the product is completely hard, file over the
air pockets or bubbles. These show as cloudy areas. whole surface to finish. Refer to ‘FINISHING THE
Refer to the section ‘REMOVING LIFTED/LOOSE TOP SURFACE’ section.
PRODUCT’ to remove these.
Finally buff until you have the required shine. Refer to
‘BUFFING’ section.
14N A I L EXT ENSIONS
CUTTING A SMILE LINE CARBIDE BARREL DIAMOND BARREL
4 Using the top of the carbide barrel cut the smile line
The electric file is perfect for cutting a crisp into the tip of the nail product. This is one of the few
smile line when backfilling ‘pink and whites’. occasions when you angle the drill tool into the nail to
For acrylic nails use the top ‘cutting’ edge cut a neat line. Hold the tool at about a 45º angle. Use
of a carbide barrel your balance finger to maintain control. Do not rush.
For UV gel nails use the top ‘cutting’ edge ACRYLIC UV GEL
of a medium diamond barrel.
1 Wash and dry the hands and prep the nails as usual 5 You may find it easier to initially cut the shape in
for the type of product in question. three stages, right edge in, left edge in and finally
the centre. Once this initial guide is there you can
2
3
Using the 180 grit sanding band reduce the length 1
refine the curve.
if necessary.
Refer to ‘REDUCING THE LENGTH’ section
2 Thin the product over the whole surface of all the 6 Once you are happy with the smile line, hold the drill
nails. Aim to remove about a quarter of the product parallel to the surface and remove three quarters
at this stage. of the product thickness on the tip.
If necessary refine the smile line using a small
diamond barrel at a slow speed to get a finer finish.
3 Using a pencil draw a smile line on each nail at the Repeat this on each nail. When all ten nails have had the tip product
new position. thinned, remove any dust compare them together for evenness.
TIP: You can use a template such as an acrylic nail You are now ready to continue your backfill with pink and white gel
form to achieve a good, even curve. or acrylic as you wish.
Check the smile lines on all the nails together look
even and well positioned.
15N A I L EXT ENSIONS
REMOVING UV GEL NAILS 180 GRIT BAND CARBIDE BARREL DIAMOND BARREL AFTERCARE ADVICE, HINTS AND TIPS FOR
UV Gel nails cannot be soaked NAIL EXTENSIONS
off, the professional way to • To maintain your nail extensions, use your e-file periodically between
remove them is to file away infills to file the back edge lightly to remove any fragments of lifting.
leaving a very thin gel layer on
This helps prevent more serious lifted areas.
the nail. The precision of the
e-file makes this process quick, • Always remove lifted areas as soon as possible and do not allow water
easy and less harmful to the natural nails. to become trapped under the nail. Always dry your nails thoroughly
Cut the nails to the desired length. after washing. Trapped water can lead to water mould, which requires
1 medical treatment.
• Do NOT use detergents, such as washing powders or washing-up
liquid, or bleach without wearing rubber gloves, these will damage
your extensions.
• Remember the most common cause of all nail extensions nails lifting
is poor nail preparation. Try to meticulously remove all cuticle cells
from the nail plate during the nail preparation stage. Use a diamond
2 Using a medium speed, carefully file the gel overlay,
cone tool to get into the sidewall areas if necessary.
leaving a very thin layer of product.
• Also do NOT touch the nail plate after the preparation stage to
Take great care NOT to file into the natural nail prevent contamination with skin oils. If you accidently touch the plate,
plate. wipe over again with finishing wipe to remove any oils you may
have transferred.
• Apply cuticle oil to the nails nightly, massaging into the cuticle. Apply
hand moisturiser at least once a day.
3 Shape with a hand file. Wash hands and nails well
remove all traces of gel dust which can irritate the
skin. Condition the skin and nails with cuticle oil
and moisturiser.
NOTE: Carbide tools are not generally used with gel
nails, however for removal they can be used.
16C O M P L ET E P ED ICU RE
COMPLETE PEDICURE STONE ABRADER EMERY STONE CONE 240 GRIT BAND
3 Massage your exfoliating scrub all over the foot for
Assemble all products before a minute or two, gently on the top and more thoroughly
starting so you don’t have to on the soles and around hard skin areas.
retrieve tools with wet feet!
You will need; polish remover,
cotton pads or cotton wool, LONG HAIR BUFFER FELT CONE BUFFER BUFFING PASTE
bowl of hot water with a foot
soak product, exfoliating scrub,
nail brush, nail file, moisturiser, 4 Replace the foot in the foot soak to rinse off
NAIL
cuticle remover product, cuticle BUFFING
PASTE
the exfoliating scrub and repeat steps 1 to 3 on the
stick, e-file tools and your e-file. other foot.
Before starting remove nail polish
and if you need to shorten nail length either clip them or use your e-file
with the sanding band on medium speed. Finish by filing across with a
hand file.
1 Soak feet for 5-10 minutes in foot soak and relax. 5 Dry both feet well.
Lift one foot from the soak and dry. Apply cuticle NOTE: All pedicure tools work best when they are
remover and leave for 3-5 minutes while you check dry and used on dry skin, so remove all traces of
the foot for hard skin. creams or water before using the e-file.
2 Push the cuticles back and remove any excess 6 Using your Stone Abrader or Emery Stone Cone
cuticle skin. remove any hard skin. Use short strokes or small
circles on a slow to medium speed and remember
to lift the tool off the skin regularly to prevent a build
up of heat.
Do not remove the hard skin completely or the area
will be sore.
17C O M P L ET E P ED ICU RE
7 Check the nails. REMOVING CALLOUSES EMERY STONE CONE 180 GRIT BAND
With the Stone Abrader remover any hard skin If you have to remove callouses as part of
around the big toe nail. a pedicure use a specialist callous removing
cream or lotion. Follow the instructions taking
Use the Stone Abrader or 240 grit sanding band care not to leave the product on the skin any
to remove any ridges on the toe nails. longer than stated. Dry the area before using
your e-file.
8 If you have removed ridges with the Stone Abrader 1 Using a 180 grit sanding band on medium speed
or 240 grit sanding band, use a white sanding block remove the top layer of the callous.
over each nail to smooth the surface before buffing.
Lift the tool off the callous very frequently to avoid
heat build up.
9 Massage a small amount of buffing paste into each 2 Graduate to a 240 grit Sanding Band or Emery Stone
nail and buff to a shine. Cone to finish removing the hardened area.
NAIL
See the ‘NATURAL NAILS - BUFFING’ section. Do not remove the callous completely as this will
BUFFING expose raw skin which will be sore.
PASTE
10 Finally moisturise the feet and legs. 3 Moisturise the area.
NOTE: If you wish to apply nail polish to the toenails Moisturising the area regularly should help avoid the
remove any residual buffing paste and moisturiser callous building up again.
first with an acetone-free remover.
NOTE: Clean the tools thoroughly after use and
discard the sanding bands.
18Y O U R Q U EST IONS ANS W ERED
Is it true that e-files damage the nail? • ‘Picking’ - if there is a small area of lifting do not pick. Simply file away
before it has a chance to spread.
If used correctly e-files are very safe. The tools are smaller and more
precise than traditional files so they can be used more accurately and
can be safer than hand filing. Why are my nails always dull even after buffing?
If used incorrectly the e-file can damage the nail, most commonly by This is usually caused by not graduating properly from coarser grits to
people filing into the natural nail, or by not lifting the tool off the nail finer ones. Always use a white sanding block between filing the surface
regularly and building up heat. and buffing.
The drill tools get hot when in use, how do I stop this? The use of a buffing cream at the first stage of buffing will also help
achieve a high gloss shine.
This is from the friction on the nail plate and it is vital to prevent the tool
getting so hot it causes damage. Since using an e-file my nail enhancements become brittle after the
Follow these rules to avoid the problem: first few infills. Why?
• Get into the habit of lifting the tool off the nail every second or so. Caused by microshattering this typically happens after a couple of infills. This
can be due to using drill tools which are too coarse or being too aggressive
• Don’t go back and forth when in contact with the nail plate, instead when filing. This has the effect of vibrating the enhancements and over time
move in one direction then lift off the nail and repeat. the product bonds become more and more brittle with each infill.
• Do NOT apply too much pressure. All your strokes should be short
and light. Why do I keep catching the skin at the sides of the nail?
This is known as ‘grabbing’ and occurs when the positioning is not quite
Why do my nail enhancements lift at the back?
right. Try to keep the handpiece parallel to the work surface and manipulate
This is usually caused by incomplete nail preparation leaving skin cells or the finger rather than moving the drill tool. Also hold the finger by pinching
oils on the nail plate before applying the extension and product. To avoid down the sidewalls of the nail to keep the skin out of the way.
this remove the shine from the natural nail surface thoroughly using a
diamond tool before applying extensions. I keep snagging the tool on the nail and losing control. What am
Other causes can be: I doing wrong?
• Touching the nail plate after preparation which transfers oils onto the Usually this is from using too fast an rpm or applying too much pressure.
surface. Try slowing the speed first. If that does not work, increase the speed but
use less pressure.
• Exposing the hands and nails to detergents, such as washing up
without gloves, will damage almost all nail extensions and cause Occasionally it could be that the tool is very sharp. In which case apply
lifting. very little pressure.
19YOU R Q UE S T I O N S A N S W E R ED CU S T OM ER CARE
“Rings of Fire” - what are they and how do I avoid them? If you have any questions please email us at: online@riobeauty.com
These are the red lines which only show up as the nail grows. Created by For further information, visit: www.riobeauty.com
filing into the natural nail as you taper the cuticle edge, they are thinned
areas of natural nail.
These are often caused when a sanding band is used on the cuticle area,
the narrower circumference of a diamond barrel tools makes it easier to
control. So if you regularly have “rings of fire” and use a sanding band,
try switching to a diamond tool for cuticle work.
To avoid these:
• Take great care to prevent filing into the natural nail. Keeping your
handpiece parallel to the work surface and angling the nail helps
this.
• Use very light pressure and only slightly angle the nail to create the
taper to the cuticle.
• If necessary reduce the speed of the tool to allow greater control.
If ‘rings of fire’ appear regularly you must refine your filing technique,
however, these can be caused by the most experienced of nail technicians
on occasion and are not usually painful or permanently damaging to the
growth of the nail.
If you have painful “rings of fire’ that is serious misuse of the electric nail
file and can be a sign of severe damage the nail plate.
What are “Hot Spots”?
Similar to “rings of fire” but on a smaller scale these are simply red marks
where the file has gone into the natural nail because of filing in one area
for too long. Hot Spots are more likely to be created with hand filing as
the files are larger and less precise than an electric file. Correct use of
electric files will almost never result in hot spots.
They are usually not serious. However it is a sign of damage to the nail
plate and something which should be avoided.
20www.riobeauty.com
© The Dezac Group Ltd 2021
PO Box 17, Cheltenham, England GL53 7ET
1-IN-NAEF-GUIDE/1.0You can also read