REBEL TREADMILL 1000 OWNERS MANUAL - It is a good idea to retain this Owners Manual for future reference. But if you are not very good at ...
←
→
Page content transcription
If your browser does not render page correctly, please read the page content below
REBEL TREADMILL 1000 OWNERS MANUAL

It is a good idea to retain this Owners Manual for future reference.
But if you are not very good at retaining things, you can find a copy at www.rebeldesk.com

Congratulations! You are about to join the rebellion. The rebellion against the sitting culture.

Between computers, cars, and television, we are sitting more than ever – on average more than nine
hours a day. And, as you well know, sitting sucks. All this time on our rear ends has terrible effects
on, well, our rear ends, and also our energy level, ability to concentrate, and long-term health.

But you have made a decision to stand up against the sitting culture with your Rebel Treadmill
1000. By walking while you work, you will increase your metabolism, reduce your risk of chronic
disease, and avoid that unintentional post-lunch nap.

Before you begin using your Rebel Treadmill 1000, please read the entire Owners Manual. It has a
lot of valuable information to help you assemble, maintain, and get the most out of your Rebel
Treadmill 1000.

Don’t forget that the Rebel Treadmill 1000 is intended for use with a standing-height desk. Whether
you also purchased a desk from Rebel Desk or have another standing-desk, this Owners Manual
will explain how the Rebel Treadmill 1000 works with a desk.

If you have any questions, concerns, or just want someone to celebrate with, give us a call at
1-855-REBEL UP or send us a message at www.rebeldesk.com
Table of Contents

UNPACKING                                1

REVIEW OF THE WARNINGS                   2

IMPORTANT SAFETY INSTRUCTIONS           3~4

POSITIONING THE REBEL TREADMILL 1000     5

ATTACHING THE CONTROL PANEL              6

PLUGGING IN THE REBEL TREADMILL 1000     7

CARE AND LONG-TERM MAINTENANCE           8

BELT ADJUSTMENT                         9~10

CONTROL PANEL OPERATION                  11

EASING INTO YOUR REBEL TREADMILL 1000    12

TROUBLE SHOOTING GUIDE                   13

WARRANTY                                 14

PARTS LIST                               15

EXPLODED DRAWING                         16
UNPACKING

WARNING!       Use caution when assembling the Rebel Treadmill 1000.
                Failure to do so could result in injury.
                Read and understand all of the instructions before assembly or use.

The following items should be in your Rebel Treadmill 1000 package. If any of the following
items are missing, contact Rebel Desk prior to assembly or use.

            Console                                    Allen wrench            Safety key

                 Main body

        Lubricant for
        running deck                          Power cord                        Manual

                                                   1
REVIEW OF THE WARNINGS
Review all of the warnings and labels on the Rebel Treadmill 1000. Refer to the illustration below
for the location of the warnings and labels.
25
110V~
2IMPORTANT SAFETY INSTRUCTIONS
Neither Rebel Desk nor its representatives can assume any responsibility for personal injury
damage sustained as a result of information presented in this manual.
Prior to use of the Rebel Treadmill 1000, do the following:
• Consult your physician.
• Read the entire Owner's Manual.
• Read all warnings posted on the machine and in this Owner's Manual.
• Connect to a properly grounded outlet only (See Grounding Instructions.)
• Clip the SAFETY KEY onto your clothing and carefully test it.
• Set up the machine on a solid, level surface.
DO NOT operate the Rebel Treadmill 1000 uader any of the following conditions:
• With a damaged cord or plug.
• If it is not working properly.
• If it has been dropped or damaged, or dropped into water.
• Near aerosol (spray) products that are being used.
• Where oxygen is being administered.
• In damp or wet conditions.
• Outdoors.
• In recessed areas or on plush carpet.
• In conditions that create excessive heat, as excessive heat can cause fire, electric shock or injury.
• With attachments not recommended by Rebel Desk.
3When operating your Rebel Treadmill 1000, observe the following:
• Keep the air openings free of lint, hair and dirt.
• Do not drop or insert any object into any opening on the Rebel Treadmill 1000.
• Do not wear loose or dangling clothing.
• Wear proper footwear.
• Closely supervise and exercise extreme caution when operating near children, disabled
persons, or animals.
• If you feel faint, dizzy, or experience chest or other pains, stop use and consult a physician.
• Do not lean or climb on the standing-height desk.
Exercise caution with the supply cord by observing the following:
• Do not carry the Rebel Treadmill 1000 by the supply cord.
• Do not use the supply cord as a handle.
• Keep the supply cord away from heated surfaces.
Other precautions:
• The Rebel Treadmill 1000 is for consumer use only.
• Do not modify it in any way.
• Use the Rebel Treadmill 1000 for its intended use as described in this manual only.
• Disconnect from all power sources before servicing the Rebel Treadmill 1000 by first
turning all controls to the OFF position and then removing the plug from the outlet.
• Keep the Rebel Treadmill 1000 unplugged when not in use to reduce the risk of electric
shock.
4POSITIONING THE REBEL TREADMILL 1000
WARNING!Use caution when lifting and moving the Rebel Treadmill 1000.
Obtain assistance if needed.
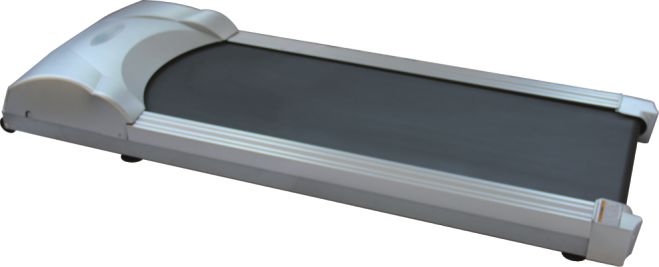
The Rebel Treadmill 1000 is for use with a standing-height desk only. Do not operate the machine
unless it is positioned at a desk.
The Rebel Treadmill 1000 is equipped with wheels for easy mobility. To position the machine, first
ensure that the master power switch is in the OFF position and the power cord is unplugged from the
machine. Grasp each side of the rear of the machine and lift. Roll the machine forward on the front
wheels.
Place the Rebel Treadmill 1000 underneath a standing-height desk at a location that is comfortable
for you. An example is illustrated below.
5Stand on the treadmill to make sure it is level. If it is on a level surface but does not feel
level, adjust the feet. The feet are located underneath the treadmill. Use caution and slightly
lift the side of the treadmill to adjust the feet. To raise the feet, turn them clockwise. To
lower the feet, turn them counterclockwise
Place the control panel on top of the desk.
Place the safety key on the circular
opening on the control panel.
6PLUGGING IN THE REBEL TREADMILL 1000
To operate the Rebel Treadmill 1000, it must be plugged into a grounded electrical outlet.
Once the Rebel Treadmill 1000 is properly plugged in, you may turn the switch at the front of
the machine to the ON position.
IMPORTANT INFORMATION ABOUT ELECTRIC VOLTAGE
The Rebel Treadmill 1000 is for use on a nominal 120-V circuit. It should be plugged
into a grounded outlet as shown below.
Use of a grounded outlet reduces the risk of electric shock. Use of the wrong voltage will
damage the machine. The plug must be plugged into an appropriate outlet that is properly
installed and grounded in accordance with local codes and ordinances. Before plugging the
power cord into an electrical outlet, verify that the voltage requirements for the electrical
outlet that you plan to use match the voltage of the Rebel Treadmill 1000.
The power requirements for this machine include a grounded, dedicated circuit, rated for
115VAC +- 5%, 60Hz and 20amps.
WARNING!Do not use the Rebel Treadmill 1000 with a voltage adapter.
Do not use the Rebel Treadmill 1000 with an extension cord.
Do not modify the plug provided with the Rebel Treadmill 1000. If the plug will
not fit the outlet, have a proper outlet installed by a qualified electrician.
DANGER! Improper connection can result in a risk of electric shock.
Check with a qualified electrician or service provider if you are in doubt as to
whether the Rebel Treadmill 1000 is properly connected.
7CARE AND LONG-TERM MAINTENANCE
Prior to use of your Rebel Treadmill 1000, it is recommended that you check the belt for
proper lubrication, alignment and tension.
Please be aware that the first time you walk on the Rebel Treadmill 1000, the belt may sound
louder than it will after a few minutes of use.
WARNING!Before cleaning or maintenance of the Rebel Treadmill 100, make sure that the
machine is turned OFF and unplugged.
BELT AND DECK LUBRICATION
Routine lubrication of the treadmill deck is recommended to ensure the maximum life of your
machine.
The deck was lubricated by the manufacturer, but the lubricant may have dried between the
time of manufacture and the time of purchase. It is recommended that you lift the treadmill
belt and inspect for sufficient lubrication prior to the first use.
WARNING!STOP the machine, unplug the machine, and remove the safety key before
checking for lubrication or lubricating the deck.
Going forward, it is recommended that you lubricate the treadmill deck a minimum of once
EVERY THREE MONTHS, even if the machine is not in use. If the machine is used heavily,
then you should lubricate it more frequently.
To lubricate the treadmill deck, follow these steps:
A. Locate the silicone bottle in the hardware kit package. Use the silicone that is supplied by
Rebel Desk. You should use only 100% silicone and not an aerosol spray.
B. Apply the silicone evenly on the treadmill deck, as the drawing shows.
Do not put too much silicone on the deck. Excessive lubricant may cause slippage of the belt
on the rollers. Wipe any excessive silicone off of the machine once you are finished.
HOW TO SPRAY SILICONE ON DECK
A B
SPRAY AREA
Silicone bottle
8BELT ADJUSTMENT
You may need to adjust the treadmill belt by increasing or decreasing the belt tension or
centering the belt. The treadmill belt can be adjusted by turning the adjustment bolts. Turning
the adjustment bolts to the right tightens the belt and turning it to the left loosens the bolt.
Centering the treadmill belt
The belt is adjusted at the factory. With transport and time, however, it may become off
center. You can center the treadmill belt manually by following these steps:
A. Start the treadmill without anyone on the belt, increase the speed until it reaches 1 mph.
B. Observe whether the belt is positioned more toward the right or left side of the deck.
1. If toward the left side of the deck, then use the provided 8MM wrench to turn the left
adjustment bolt clockwise 1/4, or turn the right adjustment bolt counterclockwise 1/4.
2. If toward the right side of the deck, then use the wrench to turn the right adjustment bolt
clockwise 1/4, or turn the left adjustment bolt counterclockwise 1/4.
C. If the belt still is not centered, then repeat the above steps until the running belt is centered.
D. After the belt is centered, then increase the speed to 2 mph and verify that it is running
smoothly. Repeat the above steps if necessary.
If the above procedure is unsuccessful in resolving the centering issue, then you may need to
increase the belt tension.
Increasing the tension of the treadmill belt
If the treadmill belt is not centering or if it feels as though it is slipping or hesitating when you
plant your foot on it, then the tension on the belt may need to be increased.
A. Place the wrench on the left belt tension bolt. Turn the wrench clockwise 1/4 turn to draw
the rear roller and increase the belt tension.
B. Repeat STEP A for the right belt tension bolt. Be sure to turn both bolts the same number of
turns, so that the rear roller stays square relative to the frame.
C. Repeat STEP A and STEP B until the issue is eliminated.
D. Be careful not to tighten the treadmill belt too much as you can create excessive pressure
on the front and rear roller bearings. An excessively tightened belt may damage the roller
bearings and result in noise from the front and rear rollers.
9Decreasing the tension of the treadmill belt
A.Follow the steps listed above, except turn both bolts counter-clockwise. Again, remember to turn
both bolts the same number of turns.
CLEANING
It is recommended that you wipe down your Rebel Treadmill 1000 at least once per week.
To clean the machine, use a soft cloth, slightly dampened with water. Be careful not get
excessive moisture on the display panel as this might cause an electrical hazard or
electronics to fail.
WARNING! Before cleaning of the Rebel Treadmill 1000, make sure that the machine is
turned OFF and unplugged.
10CONTROL PANEL OPERATION
The overlay of the control panel
Instructions for Operating the Control Panel
START Starts the treadmill belt moving.
The machine automatically will go to 0.5 mph.
STOP Stops the treadmill belt from moving.
VIEW Allows you to change the display to show Time, Speed, or
Distance.
Allows you to turn the sound on or off.
To adjust the sound, press and hold the VIEW button for two
seconds before you press START.
SPEED Indicates miles per hour that you are walking.
TIME Indicates the time that you have walked.
Time is displayed in hours and minutes.
DISTANCE Indicates the distance in miles that you have travelled.
SPEED (-) Adjusts the speed lower in 0.1 mph increments.
The minimum speed at which the machine can operate is 0.5 mph.
SPEED (+) Adjusts the speed faster in 0.1 mph increments.
The maximum speed at which the machine can operate is 2.0 mph.
EMERGENCY Stops the treadmill immediately.
STOP Clip the emergency stop cord to your clothing for activation in the
event of an emergency.
Other notes about the control panel operation:
• After you press STOP, you can return to the speed at which you were walking
immediately prior to stopping. To do so, you must press the START button within
twenty (20) minutes of pressing STOP.
• After twenty minutes, the control panel will beep (if the sound is actived) and reset.
When you press START again, the machine will go to 0.5 mph. The time and distance
will start over as well.
11EASING INTO YOUR REBEL TREADMILL 1000
Okay, now your Rebel Treadmill 1000 is plugged in and ready to be used safely. We know
that you are excited to get walking. To maximize your experience, it is best to ease into a
walking routine.
Regardless of your fitness level, walking on your Rebel Treadmill 1000 involves using
your muscles in new ways.
It is recommended that on the first day you walk for 15-minute intervals twice during the
day. Try to space out the 15-minute intervals by a few hours. So on the first day, you would
walk for a total of 30 minutes.
On the next day, it is recommended that you add 5 minutes to each interval of walking. So
you would walk for 20 minutes twice during the day for a total of 40 minutes.
You may continue to add 5-minute intervals each day. You also may add more or less time
depending on your fitness and comfort level. At some point you will hit your peak usage
and that time varies for each person.
Most people walk between 0.8 and 1.5 mph. It is a good idea to vary the speed at which
you walk to give your muscles more variation in movement.
If your muscles feel tight after walking, you may want to establish a stretching routine or
use a foam or stick roller to help loosen the muscles.
Finally, to avoid repetitive motion and other muscle strains, make sure that you have
proper ergonomic alignment at your treadmill desk.
For more tips on easing into and using your Rebel Treadmill 1000, visit
www.rebeldesk.com
12TROUBLE SHOOTING GUIDE
Your Rebel Treadmill 1000 was tested extensively to ensure proper and safe functioning. In
the event that you experience a problem with the machine, refer to these possible solutions.
If the display on the control panel will not illuminate:
• The machine's power sources could be compromised.
o Check the master power switch at the front of the machine to ensure it is in the
ON position.
o Inspect the supply cord to ensure that it is fully connected to the outlet and the
machine.
o Inspect the wire from the control panel to ensure it is fully connected to the back
of the control panel.
• The machine's electrical overload protection could have been activated.
o Turn the machine OFF. Wait five seconds. Turn the machine ON and press
START.
If the display shows “E1”:
• The machine's electrical overload protection could have been activated.
o Turn the machine OFF. Wait five seconds. Turn the machine ON and press
START.
• There may be too much friction between the treadmill belt and deck. See the
instructions on lubricating the treadmill belt and adjusting the belt.
• The machine may have a problem that requires servicing by a professional.
Contact Rebel Desk to obtain assistance with servicing.
If the digits on the control panel display are scrambled:
• The control panel may be damaged and require service by a professional.
Contact Rebel Desk to obtain assistance with servicing.
13WARRANTY
Rebel Desk warrants that the Rebel Treadmill 1000 is free from defects and ready for normal
operation and use as described in this Owners Manual.
Rebel Desk provides the following warranties:
• 1 year parts, labor, and electronics
• 2 years for the motor
• 20 years for the frame
The time frames are calculated based on the date of purchase.
In the event you need to exercise your warranty, contact Rebel Desk directly.
The above warranties do not include defects caused by negligence, misuse, improper user assembly,
accident, or random acts of mother nature.
The warranty cannot be transferred to a person other than the original owner.
14PARTS LIST
Parts list Bolts
ITEM DESCRIPTION QTY ITEM DESCRIPTION QTY
AB1 ST86-AB1 Main frame 1 AGE Nylon M8
B21 ST08-B21 Rubber cushion 6 Mobile wheel 2
B21B ST06-B21 Rubber cushion 2 AH Washer M8
B22 ST28-B22 Running belt 2 Motor 1
B23 ST28-B23 Side rein 2 AI Nut M4
B24 ST70-B24 Upper motor cover 1 Upper motor cover 4
B26 ST08-B26 Roller cover,left 1 AJ Self tapping screw 4X15mm
B27 ST86-B27 Mobile wheel 2 Upper & lower console case 6
B29 ST86-B29 Foot pad 4 AO Self tapping ψ3X10mm
B33 ST08-B33 Roller cover,right 1 Socket 2
B39 ST08-B39 Running deck 1 AR Self tapping screw 4X15mm
H01 ST86-H01 Upper console case 1 Roller cover 2
H02 ST86-H02 Lower console case 1 AS Bolt M8X15mm
H04 ST86-H04 Overlay , console 1 Motor 4
Z02 ST01-Z02 Safety key set 1 AX Screw ψ3x10mm
H08 ST86-H08 Monitor 1 Sensor wire,Frame 2
H09 ST03-H09 Sensor wire , monitor 1 Sensor wire,Monitor 1
H20 ST86-H20 Anti-slip pad 1 AX Screw ψ3x6mm
J01 ST86-J01 Motor 1 Monitor 6
J03 ST86-J03 Controller 1 AY Washer M6
J08 ST01-J08 Wire,montor sensor 1 Rear roller 2
J09 EL01010BA Power cord 1 AY Washer M8
J15 ST86-J15 Lower console wire 1 Front roller 1
J16 ST06-J16 Socket 1 BBE Self tapping screw 4X15mm
J17 ST06-J17 On/off switch 1 Upper motor cover 4
J18 ST06-J18 Breaker 1 CO Bolt M6X65mm
K01 ST86-K01 Front roller 1 Rear roller 2
K02 ST37-K02 Rear roller 1 CP Bolt ψ6X25mm w/washer
K03 ST06-K03 Drive belt 1 Running deck 8
DF Screw ψ4x10mm
Contronller 2
Gronud 2
EF Bolt M8X70mm
Motor 1
EK Bolt M8X35mm
Wheel,Main frame 2
SA1 Bolt M8X65mm
Front roller 1
15B22
J15 AY
H02 SA1
AJ K01
H08 AS
AX J01
H20 K03
H01
Z02 AO
H09 J17 J16
EXPLODED DRAWING
J18 AI
J09
EF
H04 AGE CO
B27 AY
EK K02
16
B21B
AX B21
J08
B23 B29
B39 AB1
B24 B33
BBE
B26
AR DF
CP J03You can also read