SECONDARY CTE REPORTING APPLICATION DIRECTIONS
←
→
Page content transcription
If your browser does not render page correctly, please read the page content below
1 REVISED – MARCH 2021
SECONDARY CTE REPORTING APPLICATION DIRECTIONS
Iowa Department of Education
Division of Community College and Workforce Preparation
Bureau of Career and Technical Education
Contact: cte@iowa.gov ; 515-242-5034
Have you submitted your SRI File? If you have not done so, please stop and:
1. Begin collection in Cedar Connect
2. Fix all errors in Cedar Connect
3. Click submit to move the data over to SRI
Log in to the Department of Education A&A Account (i.e., Portal)
IDE recommends using the Firefox web browser
Access to the Secondary CTE Reporting Application (SCTERA) is through the Iowa Education
Portal: https://portal.ed.iowa.gov.
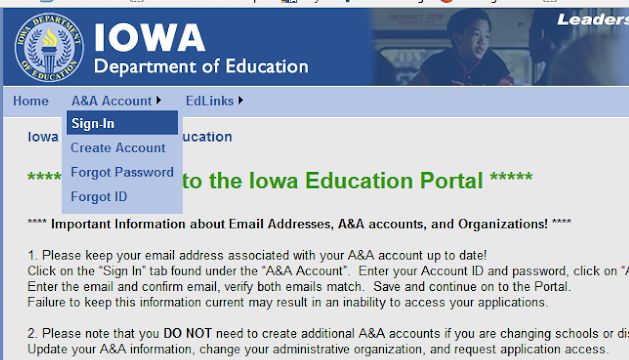
Under A&A Account, select “Sign-In” - Enter your e-mail and the password on the sign-in
screen.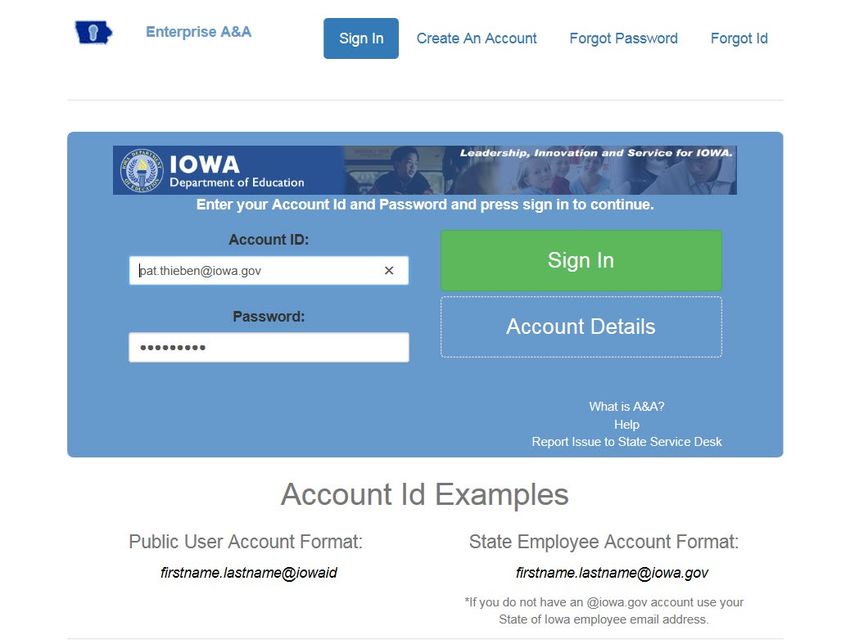
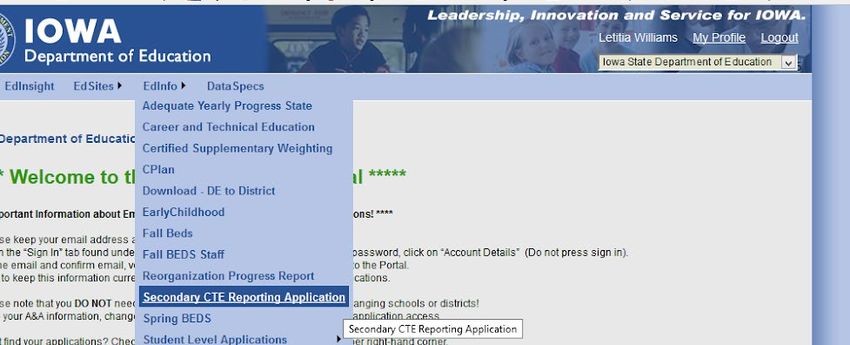
2                             REVISED – MARCH 2021
Note:
You can reset your password by clicking the Forgot Password button at the top of the page on
the log in page.

If you do not have an A&A account, click on Create an Account at the top. Your district A&A
Administrator will give you permission to the CTE application.

Open the Secondary CTE Reporting Application

Click on EdInfo, then choose Secondary CTE Reporting Application.
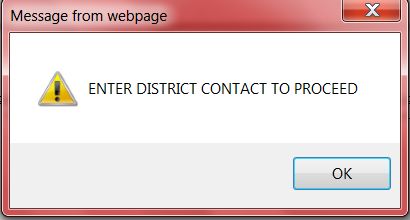
3                                REVISED – MARCH 2021
Viewing the Program Screen

After logging in, the Program screen will appear. You may receive a pop-up warning to enter
district contacts if there are none on record. If you receive the error message, click on OK to
close the message box. Click the DISTRICT CONTACTS link and enter in the contact
information.

Please note that you cannot continue until at least (1) district contact is on record within the
application.

If you have been in the system previously, please update your contacts. Click on the DISTRICT
CONTACTS link at the top right side of the page. Review and UPDATE all contact
information.
4                               REVISED – MARCH 2021
Entering District Contacts

On the District Contact screen, click Add/Update District Contact.

Enter your contact information in the Contact Profile, then click on appropriate access areas in
the Application Selection List. Be sure the e-mail is correct, so system e-mails are received.
Click on Save, and it will take you back to the contact listing. You should now see the contact
added. (Refresh the screen if not listed) Repeat this process to add, delete, or modify additional
contacts. Note: All contacts listed will receive system e-mails

Click on Programs to return to the Program Screen.
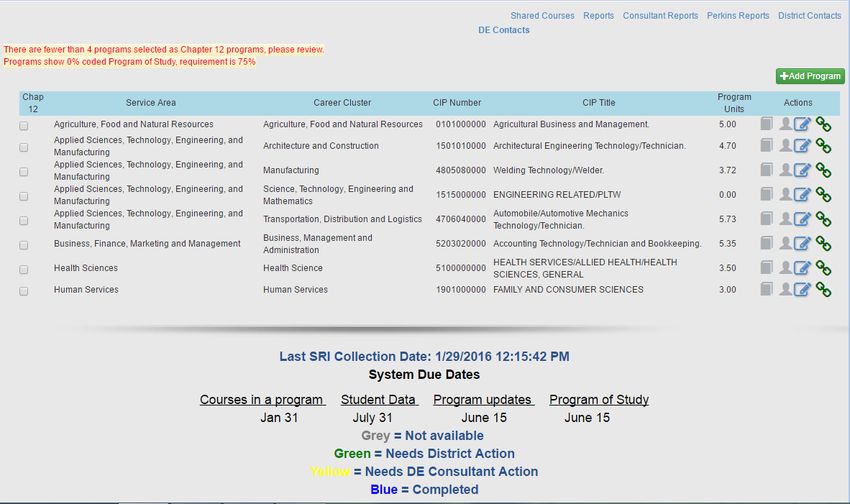
5                               REVISED – MARCH 2021
Viewing the Program Screen
The Program screen is the starting page for all actions. It provides links to other screens, shows
ICONs indicating system status and other CTE system information.
To access a list of DE Contacts by program area, click on DE Contacts.

Due Dates are listed at the bottom of each screen and the last Student Reporting in Iowa (SRI)
submission date. (Note that the Winter SRI file must be submitted before Courses in a Program
can be entered.)

The Program screen shows all active programs (operational, anticipated, and discontinued) with
associated ICONs on the right. A DE consultant will change anticipated programs to operational
and move discontinued programs to non-operational to remove them from the list before
SCTERA reporting in January. For questions about programs needing to be changed, please
contact a DE consultant. Each ICON represents a process step or task and changes colors as
actions are taken and coded in the system.
6                                  REVISED – MARCH 2021

A color status index is shown on the bottom of the program screen for easy reference. GREY
indicates they are not available; GREEN indicates district action is needed. YELLOW indicates
the DE Consultant action is needed, and BLUE indicates the action is complete.

If needed, a DE Consultant can reset the process for each step.

                      Courses in                     Edit         Program
                                       Students
                      a program                   Programs        of Study

Program Screen - Completing Chapter 12 Requirements
At the top left side of the Program screen, – you may find two RED warning statements. The first
statement regarding Chapter 12 will require coding before you can proceed. The second
warning is regarding coding the Program of Study, which can be updated at any time.

    There are fewer than 4 programs selected as Chapter 12 programs, please review.
    Programs show 0% coded Program of Study, requirement is 100%
7 REVISED – MARCH 2021 You must indicate the (4) programs meeting your CTE Offer and Teach requirements by checking the box under Chap 12. Once the Chap 12 boxes are checked, the warning disappears, and the book icon changes from GREY to Green, allowing you to enter courses. CHECK NO MORE THAN FOUR. If you need to see what programs were checked the previous year, change the year in the upper left-hand corner to the previous year. Make sure you enter courses for the current academic year. E.g., 2020-2021 = 2021 Any programs over the four required are eligible for Supplemental Weighting. Districts must offer four programs out of the six service areas: Agriculture, Food and Natural Resources; Arts, Communication and Information Systems; Applied Science, Technology, Engineering, and Manufacturing; Health Science; Human Services; and Business, Finance, Marketing, and Management. Any courses over the 3 units required are also eligible for Supplemental Weighting in the designated Offer and Teach Programs. Click on the Green book ICON to add courses for a specific program.
8                                REVISED – MARCH 2021
Adding Courses in a Program

The Courses in a Program Screen will not show any courses. You will need to click on “Add
Course” and use the dropdown menu to add courses from your SRI file. Only courses that
have students in them for the current year are available for selection. Add all courses that are a
part of this program of study (you may need to check with the educator and/or drawing board to
be sure all of the courses are accurate). Reminder, 1.0 units may be shared across service
areas. There is a minimum of 3 units in a program, but not a maximum number. You will
want to count all students taking CTE coursework, so do not just enter 3 units and stop.

Once a course has been added, click on save. The course will disappear from the program’s
dropdown list but will be available for selection in other programs.

If an active course is not shown in the dropdown list, verify that it has been correctly
coded in the SRI file. All CTE courses should have an accreditation code of “9” if a course
is incorrectly coded, you will need to correct it in the SRI file before continuing. You will need to
re-submit the SRI file. If a course is not currently active in SRI (because of zero student
enrollment) but is required to meet Offer and Teach, you must manually add it; contact a
SCTERA Consultant to assist you. Courses without enrollment can only be added on rare
occasions.

Once added, ICONs to the right of each course allow deletions or edits to add comments
regarding a course.
9                             REVISED – MARCH 2021
Each course shows the units provided, the number of students enrolled, and the location. Each
course has an associated ICON to indicate if the course is offered in a district or, shared
with another district     or at a community college.

Hovering over the icon shows the course location.

Completing Courses in a Program
If the program was coded as Chapter 12, a red warning will show at the top of the “Courses in a
Program screen”, and boxes by each course will be available to indicate the 3 required Offer
and Teach units. (If the Program is not being used for Chapter 12, there will be no warning, and
the boxes will not be functional/available for selection).

After all courses are added, and if the program is designated as 1-of-4 “offer and teach” programs,
check the associated boxes that make up the 3.0-unit requirement. The RED warning will
disappear. Note: If supplemental weighted courses are checked for the offer and teach
requirement, the supplemental weighting is lost. Try to check local courses if possible. You will
not be able to mark courses in programs not being used for Ch. 12 “Offer and Teach”
accreditation. A reminder that if the program is not marked for Offer and Teach, all Community
Courses in that program are eligible for supplemental weighting. If you need to mark Community
College courses to meet your offer and teach requirements, choose courses with the lowest
enrollments.
10                              REVISED – MARCH 2021
A warning will pop-up if more than 3 units are selected. Click OK to proceed.

Click “Program” at the top of the screen to return to the Program page.

As courses are entered, the total units for the program update/refresh on the Program screen.
After the program's courses have been added, the student ICON will turn Green, allowing you to
view student information for that program.

Clicking on the Student ICON will open a pop-up window showing the “Program Student
Breakdown”.
11                              REVISED – MARCH 2021
The “Program Enrolled Student List” screen shows all students enrolled in the courses selected
for this program. Use this view-only screen to verify that no students or courses are missing or
added to this program incorrectly.

Select the “Request Course Review” button to submit the courses to the DE for review. The
review button will change to Yellow, which indicates the program is under DE Review.

Program screen where the book ICON is now also Yellow.
12                               REVISED – MARCH 2021
Shared Courses
Once all programs are completed, click on the “Shared Courses” link at the top of the Program
screen.

Shared courses are courses that are offered in more than one program within a service area –
or – across service areas. A total of (1.0) units may be shared across service areas.

Use this screen to identify the course(s) to be included in a particular program by checking the
“include” box. Including (i.e., checking a box under the 'include' column) for a shared course in a
program means students in that course will be calculated towards participant and concentrator
counts for that program.
13                              REVISED – MARCH 2021
Completing Courses in a Program
When the DE completes the program review, the book ICON will change to BLUE and
generates an e-mail to the district. If the review is conditional with no further action needed, a
BLUE comment ICON will appear. If District action is required, the comment ICON will be
GREEN. The district should communicate with the designated DE consultant to resolve any
identified issues. Once resolved, the DE will change the comment ICON to BLUE. Any comment
changes generate a district e-mail notification.

To see the comments regarding conditional review, click on the Comment ICON, which opens
the Program Review Comment pop-up box.

Please note that comments that were entered last year will remain for review to make certain
changes can be made to this year’s programs.

To see the comments regarding conditional review, click on the comment “ICON,” which opens
the Program Review Comments pop up box.
14                               REVISED – MARCH 2021
Completing Student Data – SPRING COLLECTION - Due June 15
Work to be completed April - June annually
After the DE has approved a program, the student data for that program can be entered by
clicking on the GREEN student ICON. You do not need to have all programs approved before
updating the student information. Reminder, the deadline to enter student information is
June 15.

The “Program Student Breakdown” screen will open, showing the student totals for the selected
program. Review “Student is Single Parent Column” Column and “WBL” Column student lists
for each CIP/Program. The list is downloadable to Excel. Please note that it will not download
if using Safari. Must use Chrome or Firefox and must use a PC, not Apple, to print
student list(s) for your instructors.

Checking/selecting a box in either column (orange box) will update the totals in the red-box.

Concentrator (Column) = Student has accumulated >2.0 units in a CIP/CTE Program.
  • This column is programmed to calculate accumulated units within a CIP/CTE program
     based coursework enrollment (CareerED and SRI Databases).

Single parent (Column) = Student is a single-parent, or is pregnant, not that they live in a single-
parent household.
   • Indicate that the student is a single parent by clicking in the appropriate check box (District
       Deports).

WBL (Column) = If a student is currently enrolled and participating in a course that offers
embedded workplace experience but is not part of a work-based learning class using one of these
SCED Codes, check this box. Examples include and are limited to: Registered Apprenticeships,
Pre-Apprenticeship, Health Science CNA, Early Childhood Education CDA, Agriculture SAE* (120
hours) and ProStart. (District Reports).
15 REVISED – MARCH 2021 When completed, click on the red Return box at the top or bottom of the screen. If you have an extended list, a scroll bar will show on the right. After all student updates (single parent reporting; non-unit WBL) are completed, click on the green Submit Student Data button The submit button will turn yellow indicating the students are submitted and under final review by the DE Consultant. An e-mail will be sent to the district contact with this information. Click on red return to get back to the Program screen. The Student ICON on the Program screen will also turn yellow. Once the DE Consultant reviews the Student Data, the Student ICON will turn blue. If there are questions, the DE consultant will contact the district either by phone or e-mail.
16                             REVISED – MARCH 2021
Completing the Program of Study/Linkage Information

This must be completed for all programs regardless if a Program of Study has been completed.
The Program Screen shows a red warning as long as less than 100% of the programs are not
coded for POS. As POS screens are updated, the warning percentage will change. Perkins V
and the program approval process now requires 100% of the programs to be programs of study.

Click the Chain Link ICON on the Program screen to open the Program of Study screen. This
screen needs to be completed for all programs and can be completed at any time. If completed
previously, please review it for accuracy.

Select the college(s) that the program is linked to and enter the college program name (not the
department, but the PROGRAM) that the district program is linked to. If none, choose “No
College Selected.” The district can also enter any comments regarding the POS. Click the green
“Save” button when completed. Programs of Study (POS) are reviewed during the Perkins
Monitoring Process and through the Perkins Grant.
17                              REVISED – MARCH 2021
Deleting Programs for the next Fiscal Year/Academic Year
Select the BLUE pencil ICON on the Program screen to open the Program Update screen. The
district can use this screen to indicate a current program that is going to be “discontinued” for
the next fiscal year/academic year.

Only the DE Consultant can make a program operational or non-operational. Once a program is
made non-operational, it is no longer shown on the Program screen.

The Program Approval Status field indicates the current system status for the program and
student process. (See status description at the bottom of the screen.)
18                              REVISED – MARCH 2021
Adding Programs for the Next Fiscal Year
To add a new program to the system, select the green “Add Program” link at the top of the
Program screen. Before completing this step, be sure to complete the CTE New Program
Notification Form submission form.

When adding a new program, the district should work with the appropriate subject area DE
Consultant to get the correct CIP Code (Classification of Instructional Programs).
On the Program Add/Edit screen, enter the appropriate CIP. Anticipated should be the default
entry in the Operational Status field. Indicate the beginning year of the program in the Program
Open Year field.
19                               REVISED – MARCH 2021

REPORTS
To view system reports, click on the REPORTS link at the top right of the Program screen.
Once on the Reports screen, use the Reports dropdown field to select the desired report.

After the specific report loads, select available parameters if needed (i.e., Service Area), then
click on      to generate the report.

Note there are navigation buttons to move from page to page if the report has multiple pages.

You may also export the displayed report to Excel, PDF, or Word using the export selection.
20                              REVISED – MARCH 2021

Reports – DISTRICT COURSES REPORT

DISTRICT COURSES REPORT provides a listing of all district courses in operational programs
by the Service Area.

The Service Area selection defaults to “ALL” but can be changed to a specific service area.

Use the “Unknown” Service Area selection to check for current programs note tied to a service
area.

Remember to click on    to generate the report.
21                              REVISED – MARCH 2021
Reports – PROGRAMS REPORT
PROGRAM REPORT provides a listing of all programs per service area for the identified district.

The report defaults to “operational” programs, however, non-operation, anticipated, or
discontinued programs can also be selected and viewed.

Use the Service Area selection to view Programs in a specific service area

Remember to click on     to generate the report.
22                                REVISED – MARCH 2021

Reports – STATUS REPORT

STATUS REPORT provides a listing of operational programs sortable by their current status in
the program courses and student process. This listing will assist districts and Consultants to
ensure all steps to add courses to the program and updated student CTE indicators are processed
on time.

Filters include selection by specific process status or all status for a service area.

Remember to click on     to generate the report.
23                               REVISED – MARCH 2021
Reports – PROGRAMS OF STUDY
PROGRAMS OF STUDY REPORT provide a listing of all operational programs and the linked
Institution name coded on the Program of Study (POS) screen.

If the Institution Name field shows blank, the district still needs to update the POS screen.

Any blanks in the Institution Name field requires District action to update the POS Screen.

Remember to click on     to generate the report.

Reports – PERKINS

Choose the “Perkins Report” Link to see your consortium-wide and individual district Perkins
reports. Be aware that the report takes sometimes minutes to load.
You can also read


