Shokunin netbox INSTRUCTION MANUAL - PerfectPro
←
→
Page content transcription
If your browser does not render page correctly, please read the page content below
shokunin
         ●   INSTRUCTION MANUAL
netbox

                              UK
                              NL
                              DE
                              FR
The UNDOK App enables remote control of the Audisse Netbox running on your iPhone, iPod touch, iPad or Android smartphone. The UNDOK™
    App is available for Android and iOS. You can easily control every SmartLink device from your Smartphone or tablet with our full function UNDOK™
    App to stream your favourite music or station. Download and install free UNDOK™ App simply from the Apple iTunes App store or Android Google
    Play store to control your music now.

    The Bluetooth® word mark and logos are registered trademarks owned by Bluetooth SIG, Inc. and any use of such marks by Audisse is under
    license.

    WARNING!
    WARRANTY BECOMES VOID ONCE THE DEVICE CABINET HAS BEEN OPENED OR ANY MODIFICATIONS OR ALTERATIONS TO THE
    ORIGINAL DEVICE HAVE BEEN MADE.
    NEVER OPEN THE DEVICE CASING. THE MANUFACTURER WILL NOT ACCEPT ANY LIABILITY FOR DAMAGE RESULTING FROM
    IMPROPER HANDLING. THE TYPE PLATE IS LOCATED ON THE BACK OF THE DEVICE.
1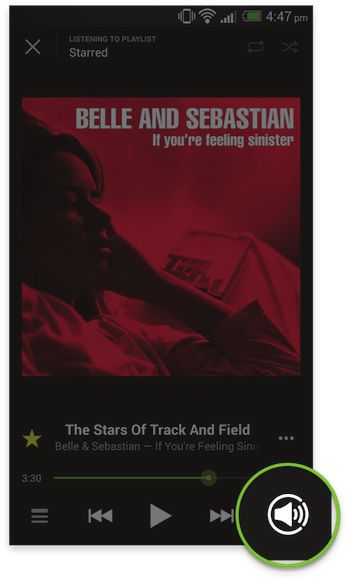
Contents
Introduction .................................................................................... 3-11           Selecting a DAB radio station ......................................................... 53
  Important Safety Instructions ............................................................. 3                  Display modes ................................................................................ 54
  Before you can use this product ........................................................ 4                     Finding new DAB radio stations ...................................................... 55
  Controls and connections ................................................................ 5-6                  Manual Tuning ................................................................................. 55
  Powering the radio .......................................................................... 7-8              Dynamic Range Control Settings .................................................... 56
  Charging the batteries ........................................................................ 8              Station order setup .......................................................................... 57
                                                                                                                 Prune stations ................................................................................. 58        GB
  Important information on charging and using rechargeable
  batteries ............................................................................................. 9   FM mode ....................................................................................... 59-62
  Battery charging indicator ................................................................. 10                Operating your radio in FM mode .................................................... 59
  Navigation controls ........................................................................... 11             Manual tuning .................................................................................. 59
Network configuration ................................................................. 12-23                    Display modes ................................................................................. 60
   Connecting your radio to your computer network ........................ 12-19                                 Scan setting ..................................................................................... 61
   Network remote control options ....................................................... 20                     Presetting stations in DAB and FM modes ..................................... 62
   Keep network connected ................................................................. 20                Listening to Spotify ...................................................................... 63-67
   Using the UNDOK app ................................................................ 21-22                 Listening to music via Bluetooth streaming .............................. 68-70
   UNDOK display options ................................................................... 23               Clock and Alarms ......................................................................... 71-78
                                                                                                                 Automatically updating the clock ...................................................... 71
   UNDOK Settings .............................................................................. 23
                                                                                                                 Manually setting the clock .......................................................... 72-73
Internet Radio mode ..................................................................... 24-37
                                                                                                                 Setting the alarm clock ............................................................... 74-76
   Internet Radio-the basics ................................................................ 24                 Disabling alarms .............................................................................. 77
   Selecting a radio station by location and genre ......................... 25-27                               Snooze timer ................................................................................... 77
   Searching for a radio station by name ............................................ 28                         Sleep timer ...................................................................................... 78
   Searching a new or popular station ................................................ 29                        Inactive standby ............................................................................... 78
   Selecting a podcast / BBC Listen Again ........................................... 30                      Display and Audio ........................................................................ 79-81
   Presetting stations ...................................................................... 31-32              Brightness control ............................................................................ 79
   Display modes ................................................................................ 33             Loudness ......................................................................................... 79
   Customizing your radio ................................................................... 34                 Tone control ..................................................................................... 80
   Selecting favourite stations ........................................................ 35-37                   Language selection ......................................................................... 80
Music Player mode ....................................................................... 38-51                  Auxiliary input socket ...................................................................... 81
   Use with Windows, Apple Mac and Linux ....................................... 38                              Charging with USB socket .............................................................. 81
   Accessing your files via UPnP ................................................... 38-39                    Information .................................................................................... 82-90
   Locating and playing media files using UPnP ................................. 40                              Factory reset .................................................................................... 82
   Media selection ............................................................................... 41            Software update .............................................................................. 83
   Controlling playback ................................................................... 42-43                Network profiles ............................................................................... 84
   Display modes ................................................................................ 44             Clear network settings ..................................................................... 85
   Playlists ...................................................................................... 45-47        Software version display and Audio FAQ ................................... 85-86
   Wake On LAN ................................................................................. 48              Accessing your audio files via a UPnP server using Windows Vista
   Prune servers .................................................................................. 48           and XP ........................................................................................ 86-87
   Windows 7 ‘Play to’ function (UPnP renderer) ................................. 49                             Audio codecs ................................................................................... 88
   Using USB memory devices ....................................................... 50-51                        Warranty .......................................................................................... 89
DAB mode .................................................................................... 52-58              Specifications .................................................................................. 90
                                                                                                                                                                                                                        2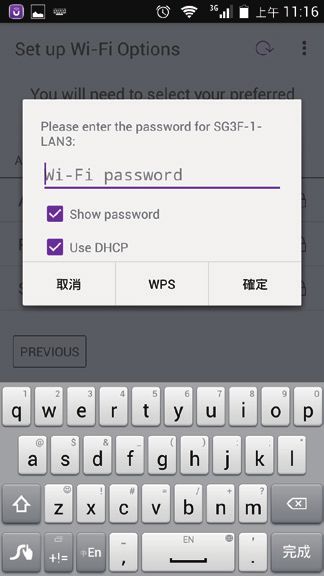
Important Safety Instructions

    1. Read these instructions.                                                  14.	To reduce the risk of fire or electric shock, do not expose this
    2. Keep these instructions.                                                       appliance to Rain or Moisture. For outdoors use, to avoid electric
    3. Heed all warnings.                                                             shock, only use batteries power during a raining day or the weather
    4. Follow all instructions.                                                       is wet. This apparatus is provided with protection against splashing
    5. Do not use this apparatus near water.                                          water and dust ingress (IP64).
    6. Clean only with dry cloth.                                                15.	The Shock Hazard Marking and Associated Graphical Symbol is
    7.	Do not block any ventilation openings. Install in accordance with the         provided on the back of unit.
         instructions.                                                           16.	Apparatus shall not be exposed to dripping or splashing and no
    8.	Do not install near any heat sources such as radiators, heat                  objects filled with liquids, shall be placed on the apparatus.
         registers, stoves or other apparatus (including amplifiers) that        17.	T he power plug should be close to the radio, and easy to be
         produce heat.                                                                approached that during the emergency, to disconnect the power
    9.	Protect the power cord from being walked on or pinched particularly           from the radio, just unplug the power plug from the AC power slot.
         at plug, convenience receptacles, and the point where they exit         18.	Notice: The changes or modifications not expressly approved by
         from the apparatus.                                                          the party responsible for compliance could void the user’s authority
    10. Only use attachments/accessories specified by the manufacturer.              to operate the equipment.
    11. Use only with the cart, stand, tripod, bracket, or table specified by   19.	Where the MAINS plug or an appliance coupler is used as the disconnect
         the manufacturer, or sold with the apparatus. When a cart is used,           device, the disconnect device shall remain readily operable.
         use caution when moving the cart/apparatus combination to avoid         20.	A warning that batteries (battery pack or batteries installed) shall
         injury from tip-over.                                                        not be exposed to excessive heat such as sunshine, fire or the like.
    12.	Unplug this apparatus during lightning storms or when unused for        21.	To prevent possible hearing damage, do not listen at high
         long periods of time.                                                        volume levels for long periods.
    13.	R efer all servicing to qualified service personnel. Servicing is
         required when the apparatus has been damaged in any way, such
         as power supply cord or plug is damaged, liquid has been spilled
         or objects have fallen into the apparatus, the apparatus has been
         exposed to rain or moisture, does not operate normally, or has been
         dropped.

3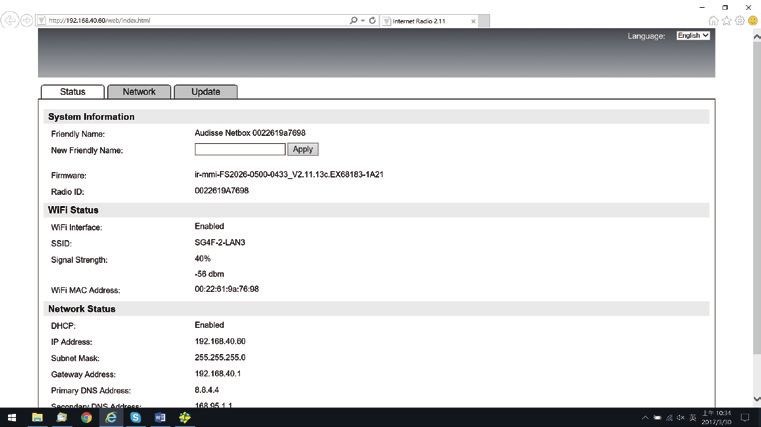
Before you can use this product

Before you can use your internet radio, you must have the following:        IMPORTANT:
● A broadband Internet connection (not required for DAB, FM,               Before you continue, make sure that your wireless access point or router is
   Bluetooth, AUX-IN or Music Player functions).                            powered up and working with your broadband Internet service (use your
● A wireless access point (WiFi) connection connected to your              computer to verify this). To get this part of the system working you must
                                                                                                                                                          GB
   broadband Internet Service Provider, preferably via a router. In many    read the instructions supplied with the wireless access point or router.
   cases the broadband modem, router and wireless access point will
   be a single combined unit supplied by your Internet Service Provider
   or bought from a computer store.
● If your wireless network is configured to use Wired Equivalent Privacy
   (WEP) or WiFi Protected Access (WPA/WPA2) data encryption then
   you either need to know the WEP, WPA or WPA2 key used for
   encryption so you can get the internet radio to communicate with the
   network, or your router needs to offer WiFi Protected Setup (WPS).
● Spotify Connect requires a Spotify Premium subscription.
If connecting using WiFi, the internet radio will typically work within a
10-20 metre radio from your wireless access point. The actual range
achieved will depend upon the building type, other nearby wireless
network, and possible interference sources. DAB and FM radio
functions can operate wherever the internet radio is able to receive a
suitable broadcast signal.

                                                                                                                                                      4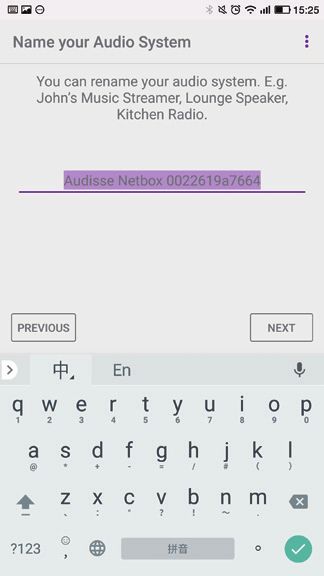
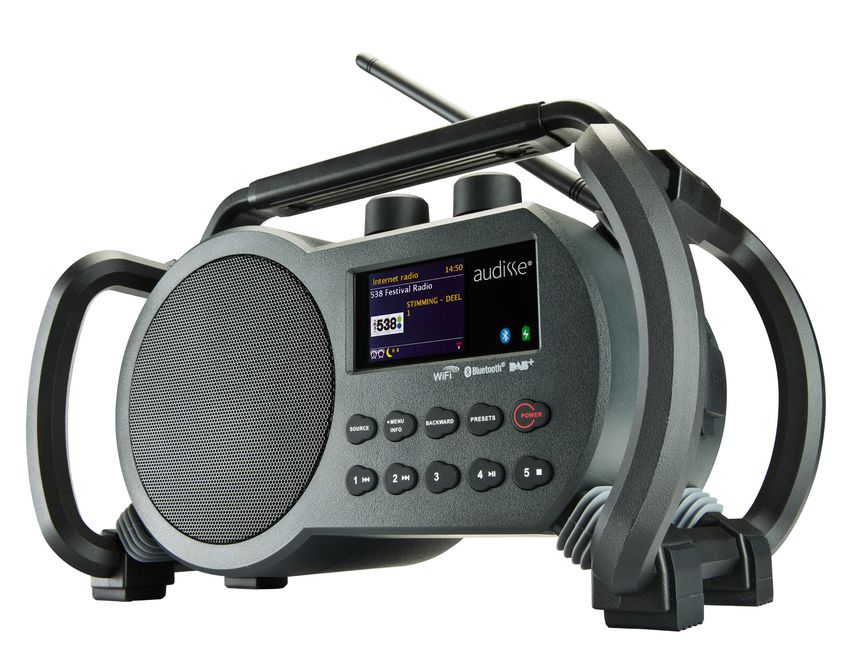
Controls and connections

             1. Volume control/Loudness button/Tone control            9. Preset 4/Play/Pause button
             2. Tuning Control Rotary/Select button/Seek button/   10. Presets button
                Bluetooth pairing button                              11. Preset 3
             3. Speaker                                               12. Backward button
             4. LCD display                                           13. Preset 2/Fast-forward button
             5. Bluetooth status indicator                            14. Info/Menu button
             6. Battery charging indicator                            15. Preset 1/Rewind button
             7. Power button                                          16. Source button
             8. Preset 5/Stop button

5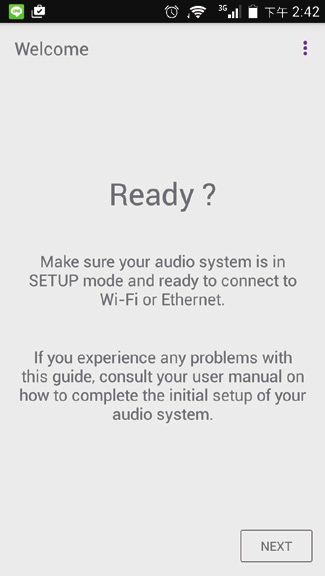
Controls and connections

                                                                                         GB

                           17. Aux In socket    21. Battery compartment
                           18. USB socket       22. Power cord storage
                           19. FM/DAB antenna   23. NiMH/Alkaline batteries switch
                           20. AC power cord

                                                                                     6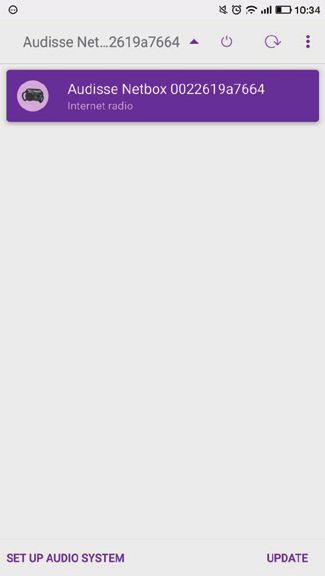
Powering the radio

    1. Battery operation
      1. Installing the batteries, first turn battery cover fixture anti-clockwise
          to loosen and open the battery cover.
          Note:
      	Before you insert the batteries, if you use non-rechargeable
         batteries, make sure the NiMH/Alkaline switch which located inside
         the battery compartment is switched to Alkaline position. If you use
         rechargeable batteries, make sure to switch NiMH/Alkaline switch
         to NiMH position.
      2.	Insert 6 x C size (UM-2) battery into the compartment. Ensure
         the batteries are inserted in accordance with the diagram shown.
         Close the battery cover and fasten the fixture by turning clockwise.
         If the radio is not to be used for any extended period of time, it
         is recommended that the batteries are removed from the radio.
         Reduced power, distortion, a stuttering sound or low battery sign
         ( ) showing on the display and low battery red LED indicator
         lighting are all signs that the batteries need replacing or recharging.
         (see below information on “charging the batteries”).
      	When playing on (rechargeable) batteries the output power is less
         compared to the output power when playing on AC mains power.
         Because of this the sound can be somewhat distorted at the
         highest volume settings.

7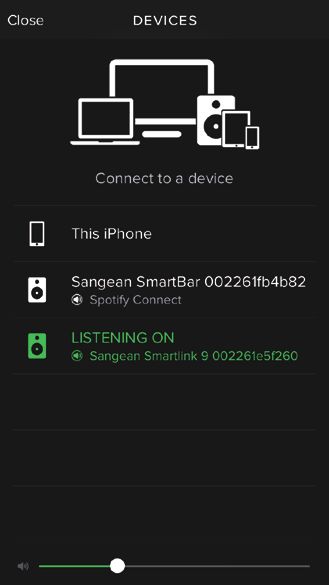
BATTERY SAVE MODE                                                            Note:
When the Audisse Netbox is operated on battery power and put into            Duration for charging your batteries fully can vary according to the mAh
Standby mode, after about 30 seconds the Audisse Netbox will be              capacity of the batteries. Higher mAh batteries require longer charging
turned off completely. This is normal in order prevent the batteries from    time.
                                                                                                                                                            GB
draining fully in Standby mode.
When the radio is powered on again by pushing the power button it will       Important:
have to start up fully again as well as reconnect to the WiFi network. It    Under some conditions the charging LED indicator may switch off after
will first try to reconnect with the last used WiFi network. This may take   flashing briefly. This may happen if the batteries are already freshly
up to one minute.                                                            charged, or if the radio detects that you may be attempting to recharge
When the Audisse Netbox is operated on AC power and put into                 alkaline batteries or mixed different types or capacity of rechargeable
Standby mode it will remain in Standby mode (date and clock display)         battery. In these cases the charging will be stopped.
and can remain connected to the WiFi network.
                                                                             INSTALL ONLY PRE-CHARGED (TO THE SAME VOLTAGE LEVEL) NIMH
2. AC operation                                                              BATTERIES WITH “LOW SELF-DISCHARGE” CHARACTERISTICS.
  Before you plug the AC cord into the AC socket, make sure the
  voltage is correct. If you have batteries in the radio and use the AC      NOTE ON PLAYING TIME ON BATTERY POWER: The achieved playing
  power cord, the batteries will automatically be disconnected.              time on battery power depends on many factors such as: selected volume
  Power cord storage is designed to store the cord when the radio is         level, music type (bass heavy music consumes more energy), selected
  not in use.                                                                music source, selected EQ setting, ambient temperature, the capacity
                                                                             and age of the batteries. Depending on these variables a playing time
Charging the batteries                                                       of approximately 8-10 hours on a medium set volume level can be
                                                                             achieved.
Make sure the radio is switched off and connected to the AC mains
socket.                                                                      NOTE: When playing on battery power and the energy level of the
When the battery charge indicator LED flashes green, this indicates the      batteries is very low, the sound may distort on higher volume and the
batteries are charging. Batteries will be fully charged in around 7 hours.   WiFi-connection may become unstable.
The battery charge indicator LED shows steady green light when the
battery charging process is complete.
                                                                                                                                                        8
IMPORTANT INFORMATION ON CHARGING AND
USING RECHARGEABLE BATTERIES
1. Recharge the batteries in any case at least every 2 months. 11. Do not use a mix of old and new rechargeable batteries.
2. Make sure the Battery Select switch inside the battery compartment 12. Do not use a mix of rechargeable and non-rechargeable batteries.
is set to the “NiMH CHARGE” position. 13. Do not use a mix of full and empty rechargeable batteries.
3. Put the batteries in the compartment whilst paying attention to the 14. Do not use batteries that have a different mAh capacity.
correct polarity of the batteries (+ and -). 15. Do not use damaged, deformed or leaking batteries.
4. First use: Charge new batteries in one continuous, uninterrupted, 16. Battery level indication is an approximate indication only and can
charge until they are full. This first charge may take longer than vary with battery type used.
normal. For longer battery life it is advised to always recharge in 17. Batteries can become hot during charging.
one continuous, uninterrupted charge until batteries are full and to 18. In cold conditions the capacity of batteries will be much lower than
not recharge again whilst the batteries are still full. when used at normal room temperature.
5. New batteries will only reach their full capacity after some time of 19. B atteries (even when supplied with the radio), as being
use (several charge – discharge cycles). consumables, do not fall under the warranty conditions of the radio.
6. Leave the complete group of batteries in place inside the radio and 20. B atteries should not be disposed of by incineration and with
do not use these batteries or a few of them for other purposes. This household waste.
will result in a mix of (fully) charged and (partly) empty batteries. 21. Disposable batteries should be taken to a suitable recycling centre
This can seriously damage the batteries and radio when recharged. if possible.
7. It is advised to only charge batteries at room temperatures between
5 degrees C – 35 degrees C. In lower or higher temperatures full
charge cannot be achieved.
8. Depending on the capacity of the batteries, charging from “empty”
to “”full” can take several hours, even up to 7 hours or more.
9. Do not charge batteries when the radio is hot or exposed to heat or
heat sources.
10. It is advised to clean the metal contacts of the batteries and of the
charger inside the radio e.g. with a contact-spray from time to time.
9Battery charging indicator
Please note that the battery charging status detection can only be activated when the radio is in charging mode (i.e. the radio is switched off, the
battery switch slides to the NiHM position and it is connected to the AC mains socket).
When charging is in progress, the following display is shown (6 battery icons animate) and the GB
09 / 03 / 2017
charging indicator LED flashes green.
14:59
Battery: 1 2 3 4 5 6
Charging
When the charging process is completed, the following display is shown (6 battery icons are full and
09 / 03 / 2017
stop animation) and the charging indicator LED lights in steady green.
15:14
Battery: 1 2 3 4 5 6
Charging
When there is no battery/missing batteries in the compartment or some of batteries are inserted with
10 / 03 / 2017
the incorrect polarity, no battery charging status is shown on the display (see picture on the right).
11:54
Note: If a battery is removed while charging, the charging indicator LED flashes red.
During the charging process, if a battery is detected as faulty/damaged, the battery indicator will be
05 / 04 / 2017
shown with a cross under the corresponding battery number (see picture on the right) and the charging
11:04
indicator LED flashes red.
Battery: 1 2 3 4 5 6
Charging
10Navigation controls
This page describes the basic means of controlling your internet radio. 5. If an error is made when navigating the menus, it is generally poss
Instructions for each operating mode are given in the later section of ble to go back to a higher level menu by pressing the Backward
this book. button.
1. Pressing the Power button brings your radio out of Standby mode.
Pressing Power button while the radio is in use will cause it to return
to the Standby mode with the clock display.
2. Press the Source button to choose each of the operating modes:
Internet Radio, Spotify, Music player, DAB radio, FM radio, Bluetooth
Audio and Auxiliary Input.
3. Pressing and holding the Info/Menu button will access the menu
system, whereas pressing and releasing the Info/Menu button allows
the display of information relating to the radio station or music file
being played.
4. Many operations require the user to make a selection from the menu.
Highlight the menu item using the Tuning Control Rotary on the
radio. Press the Tuning Control Rotary to select that item. If there
are more than five items in a menu, then the display will automatically
scroll up or down so that the additional items become visible. If there
are many items in a menu, then the radio allows the menu to “wrap
around” in either direction. This can make it easier to reach items at
the end of a long menu, such as a list of countries or Internet radio
stations.
11Configuration
Connecting your radio to your computer network
1. Place your radio on a flat surface and straighten up the antenna.
2. Plug the AC power cord into an AC socket.
IMPORTANT: The mains plug is used as the means of connecting the radio to the mains
GB
supply. The mains socket used for the radio must remain accessible during normal use. In
Setup wizard
order to disconnect the radio from the mains completely, the mains plug should be removed
Start now?
from the mains socket outlet completely.
3. When you apply power, the display on the radio will light up and say: ‘netbox audisse’. The first
time that you use your radio (or after Factory Reset) the display will show ‘Setup wizard’ and
‘YES’ will be highlighted on the screen. Press the Tuning Control Rotary to start the setup
wizard. The screen will ask if you wish to run the setup wizard again at the next start up. This
Time auto update
will lead to the main menu.
Update from DAB
4. A menu allowing you to specify the time auto update option for the clock will appear on the di Update from FM
play. The default of ‘Update from Network’ will be the best option for most users. Update from Network *
No update
5. Rotate the Tuning Control Rotary to choose a time auto-update option for the clock. This can
be updated from DAB or FM radio, from the Network, or not updated. The default is to auto
u date from the network. If you choose any other option, go to step 8. Otherwise you will first
need to select the correct time zone and daylight savings setting, see steps 6 and 7. If you Set timezone
UTC+00:00:Dublin,Lon
choose “No update” you will need to set the clock manually later (see the section of ‘Manually UTC+00:30:
setting the clock’). Press the Tuning Control Rotary to confirm your choice. UTC+01:00:Madrid,Arr
6. Rotate the Tuning Control Rotary to highlight the time zone which is applicable to your UTC+01:30:
UTC+02:00:Athens,Ca...
location. Press the Tuning Control Rotary to enter the setting.
7. You will then need to set the Daylight Savings option according to your location (Daylight
Savings is also known as Summer/Winter time). Rotate the Tuning Control Rotary to Daylight savings
highlight “ON” to turn on daylight savings if required or “OFF” if you do not wish to use daylight
Daylight savings
savings then press the Tuning Control Rotary to confirm the setting.
128. You will then need to set ‘Keep network connected’. If you need to be able to remotely control Network settings
the radio even when it has been put into standby, rotate the Tuning Control Rotary to high- Keep network connected?
light ‘YES’ to activate this function or ‘NO’ to deactivate this function. You can also choose
to keep the network connected by using the ‘Keep network connected’ option in the network
setting menu. In the standby mode display either the WiFi signal indicator is shown with or
without a cross through it according to the chosen network settings.
9. The display will then show a list of WiFi regional options for the network set up. Rotate the Wlan region
Tuning Control Rotary to highlight the required region and then press the Tuning Control Europe
Rotary to select it. Your radio will then scan for available WiFi networks. Australia
10. The radio will enter the Network Settings Wizard and will display ‘Scanning…’. After a short
while the display will show a list of the available WiFi networks.
11. You will first need to identify your network in the list of network names presented by the
Network Wizard. If no networks are found then you may have to get your wireless router
Network settings
working (please see the instructions supplied with it) or you may be too far from the router.
When the radio finds your wireless network, it displays the Network Name (SSID) for the Network wizard
wireless access point on the screen. This is a name that is allocated to the access point in Scanning...
your router by the person who set up the network – for example: ‘Jones family’ or ‘Paul’s
network’. If the router supports WiFi Protected Setup, then ‘[WPS]’ will be shown in front of
the SSID. It is possible, and in some locations highly likely, that your radio will find more than
SSID
one wireless network, in which case you should choose which one you need to connect to.
Jones family
12. Rotate the Tuning Control Rotary to see the SSID for each wireless network that has been [WPS]Paul’s network
found. If your network is shown proceed to step 14. If it is not shown then proceed to step Smith
[Rescan]
13. If you make a mistake at any point, use the Backward button to go back to the previous
screen.
13. If your network is not found, it may be because the router is configured not to broadcast the
SSID. You should then use the Tuning Control Rotary to highlight and select the ‘[Manual SSID
config]’ option in order to enter the network details manually. This is described in ‘Manual [WPS]Paul’s network
Smith
Network Configuration”. If your network name is being broadcast, and it was not found, then [Rescan]
try re-scanning press the Backward button), and if necessary try moving your radio to a [Manual config]
location closer to your access point/router.
1314. When the SSID for the wireless network you wish to connect to is highlighted on the screen, WPS Menu
press the Tuning Control Rotary. If WiFi Protected Setup (WPS) was indicated, you will see WPS Button >
an additional menu at this point, otherwise proceed to step 14. choose one of the WPS menu WPS PIN >
Skip WPS >
o tions as required for your router (WPS may be via WPS button, or using an identification
number).
‘WPS Button’ – the display prompts you to press the WPS button on your router and then the
GB
Select button on the radio. The two devices should then connect with the encryption key sent
automatically to the radio.
‘WPS PIN’ – the display shows an identification number which you must enter into your rout-
er using a web browser (refer to your router’s user documentation). You should then press
the Select button on the radio.
‘Skip WPS’ – if you wish to enter the encryption key yourself (or if it was previously Entered).
If you choose Push Button or PIN the screen will then show ‘Connecting…’ and then ‘Setup
wizard completed’. Press the Tuning Control Rotary to exit setup wizard.
15. If your network is configured without an encryption key, the screen should say ‘Connecting…’,
and then ‘Setup wizard completed’. Press the Tuning Control Rotary to exit the setup
wizard and show the main menu. If this is the case then you have successfully connected
your radio to your network.
16. If the screen displays ‘Key’ , it is because the network is using one of the encryption systems:
Wired Equivalent Privacy (WEP) or WiFi Protected Access (WPA). You will need to enter
the correct WEP or WPA key into the radio to allow it to communicate with your wireless
network. If you do not have the WEP or WPA key, then you should obtain it from the person
who set up your network. Some wireless routers may come with an encryption key already
set up by the supplier, in which case you should refer to the documentation provided with it.
WPA is used here to also include WPA2. WEP keys are 10 or 26 characters long (using 0 –
9, and A – F). Some wireless Routers can also use pass-phrases for WEP but these are not
supported.
WPA keys are usually set up using a pass-phrase of between 8 and 63 characters. Your
radio accepts pass-phrases for WPA keys.
1417. To enter the WEP or WPA key, characters are selected and entered using the Tuning Key:
Control Rotary. The highlight scrolls through the available characters as well as the three
controls on the right. The character currently highlighted will be entered when you press
the Tuning Control Rotary. Do this as needed until the complete key has been entered.
Remember, WEP keys only use the numbers 0-9 and letters A-F. WPA keys are sensitive to
upper and lower case characters. You must enter the key exactly or the radio will not connect
to the network. The three controls on the right-hand side of the screen have special functions.
You can quickly access these by pressing the Info button and then use the Tuning Control Network settings
Rotary and Select button as needed:
select ‘ ’ to erase a character just entered Please wait
select ‘ ’ when the complete key has been entered Connecting. _
select ‘ ’ to cancel an re-run the Network Wizard
If a WEP or WPA key has previously been entered for the selected SSID then the display
will show ‘Key: [Set]’. If you have previously entered a different key, you must clear this by
selecting the ‘ ’ symbol. This will remove the ‘[Set]’ indication.
Setup wizard
After the final character of the WEP or WPA key has been entered, highlight the ‘ ’ symbol
and press the Tuning Control Rotary. Then screen will show ‘Connecting…’ and then ‘Setup Setup wizard
wizard completed’. Press the Tuning Control Rotary to exit setup wizard. The radio should completed
now be able to connect to the network.
18. Once you have connected your radio to the network (and therefore also to the Internet) it will
Press SELECT to exit
display the main menu. Press the Power button to put the radio in Standby mode.
It should then display the time as obtained from the Internet. If the time display is not correct
Main menu
for any reason, it can easily be adjusted later, see ‘Manually setting the clock’. The clock
Internet radio
display will switch off after about 30 seconds if the radio is running on batteries.
Spotify Connect
If you have followed the steps on the preceding pages successfully, your radio will have Music player
connected to your router, and then made a connection to the Internet and set its clock. If this DAB radio
is the case, then you can try listening to radio stations via the Internet. FM radio
Note: The clock display in Standby mode is only maintained when the radio is powered
from the mains. If you are powering the radio from batteries, then the clock display will be
switched off after about 30 seconds and the radio will shut down completely in order to 16/02/2017
minimize battery usage. The clock will be set to the current time the next time that you switch
on the radio, depending upon the clock update settings.
Important note: In Standby mode the alarm function can only be used when the radio is 14:35
operated on AC power. In Standby mode on battery power the radio will turn off fully after 30
seconds (battery power save mode) and will not be turned on by the alarm function/settings.
15Changing the network connection
In the sections above, you chose how your radio would be connected to your network, using a
WiFi connection. From time to time, you may find that you need to connect to different computer
networks. The Internet setup menu allows you to change your radio’s network settings, scan for
an alternative wireless network, or to manually configure the network parameters.
GB
The steps outlined below describe how you can do this –see also the section ‘Network Profiles’.
Configuring the radio to use an alternative WiFi connection
From the Network settings menu select ‘Network wizard’. This will present you with details of any Internet radio
WiFi networks that are found. Scroll down the list using the Tuning Control Rotary to the desired Last listened
network name. Press Tuning Control Rotary to select this network. The radio will then use its Station list >
System settings >
WiFi system to communicate with the network. Depending on the settings for the new network Main menu >
you may need to enter an encryption key. By default the radio will then acquire an IP address
and other network settings from your router using DHCP.
System settings
Network >
Time/Date >
Backlight >
lnactive Standby
Language >
16Manual network configuration
If you do not wish to use DHCP for automatic configuration, or if your network is configured with Network settings
a hidden SSID, then you will need to enter some network settings manually. (Note – a hidden Network wizard
PBC Wlan setup
SSID may prevent casual observers from detecting your network, but is not recommended as a View settings
means of network security.) Wlan region >
Manual settings
1. From the radio Network settings menu, select ‘Manual settings’. You must then choose to
connect using ‘Wireless’ connections. Entering this option, there are as many as nine settings
screens, shown by the ‘1 of 9’ progress marker in the top right corner of the display. Connection type 1/9
Wireless >
2. The next menu asks whether you wish to use DHCP to configure your network parameters (IP
address, subnet mask, gateway address, etc). Unless you are familiar with networking and
related terminology, we recommend that you allow the use of DHCP. Choose ‘DHCP enable’
unless you need to specify the network details manually.
If you chose ‘DHCP enable’, please skip to step 6 in order to set up the wireless connection details.
DHCP 2/9
If you chose ‘DHCP disable’ for either connection method, the next step is to set up the IP address.
DHCP enable
3. The manually specified IP address should be chosen to be compatible with the settings in DHCP disable
your router and must be a unique address on your network. If you are using DHCP for some
devices and static (manually configured) IP addresses for others, the IP address used should
fall outside the range that the router may allocate using DHCP. Typically, the first three groups
of digits will be the same for all devices on your network. To enter the IP address, rotate the
IP settings 3/9
Tuning Control Rotary to set the value for each group of digits and then press the Tuning IP address
Control Rotary to enter the value and to move on to the next group. When the IP address has 192 168 1 25
Subnet mask
been entered, the subnet mask should be entered. The subnet mask defines which parts of
255 255 255 0
the IP address are common across your network. For most small networks the subnet mask
will be 255.255.255.0 and this is entered in the same way.
4. T he Gateway address is normally the IP address of the router through which the radio Gateway address 4/9
connects to the internet and is entered in the same way as the previous addresses. Gateway address
192 168 1 1
175. In most installations the DNS settings (DNS = Domain Name Server) will be set to the same IP DNS 5/9
address as your router. In this case the secondary DNS may be left at zero. To enter the DNS IP address
address, rotate the Tuning Control Rotary to set the value for each group of digits and then 192 168 1 1
press the Tuning Control Rotary to enter the value and to move on to the next group. Repeat Subnet mask
this until all eight groups of digits have been entered. 0 0 0 0 GB
6. The next step is to set up the WiFi connection, starting with the name of the wireless network
(SSID) followed by the encryption options and password. To enter the SSID, characters are
selected and entered using the Tuning Control Rotary The radio scrolls through the available
SSID 6/9
characters as well as the three controls on the right. The character currently highlighted will
be entered when you press the Tuning Control Rotary. Do this as needed until the complete BKSP
network name has been entered. The SSID setting is sensitive to upper and lower case OK
characters and symbols. CANCEL
You must enter it exactly as set up in your router. The three controls on the right-hand side of
the screen have special functions:
select ‘ ’ to erase a character just entered
select ‘ ’ when the complete SSID has been entered Authentication 7/9
select ‘ ’ to cancel and go back to the DNS settings screen Open
WEP
7. Having entered the SSID, you must enter details of the encryption system used on your WPA/WPA2
wireless network. This should be the same as specified in your router settings. If your network
does not use encryption, then select the ‘Open’ option. Your radio should then connect to the
network, so skip to step 11. If your network uses WEP (Wired Equivalent Privacy) select the
‘WEP’ option then go to step 8. The remaining options are for WPA or WPA2 (WiFi Protected
Access) – see step 9. Encryption type 8/9
8. If you chose ‘WEP’ in step 7, you will then enter the ‘PreSharedKey’ option. The key should be PreSharedkey
entered using only the numbers 0-9 and the letters A-F. The key will be 10 characters long for
64-bit encryption and 26 characters long for 128-bit encryption. The radio will accept lowercase
letters a-f as equivalent to upper-case A-F. Spaces or special symbols are not permitted in
WEP keys.
The three controls on the right-hand side of the screen have special functions:
select ‘ ’ to erase a character just entered (long press to clear); Info again to continue
select ‘ ’ when the complete encryption key has been entered
select ‘ ’ to cancel and go back to the SSID settings screen Once the key is entered the
radio should connect to your network. Please skip to step 11.
189. WPA and WPA2 are similar, although WPA2 offers a higher level of security. Whichever Authentication 7/9
you selected in step 7, you then have to specify the variant used. They are TKIP (Temporal Open
WEP
Key Integrity Protocol) and AES (Advanced Encryption Standard). As previously, the setting WPA/WPA2
should match that used by your router. Some routers allow both to be specified, and the
router will use whichever variant is supported by the connected device. AES is regarded as
the more secure option if it is available.
10. The radio will then require you to enter the encryption key. This must be a string of between Encryption type 8/9
8 and 63 characters and must be identical to the key which has been entered into your PSK AES/TKIP
router. Note – the encryption key is sensitive to the use of upper and lower case letters and
symbols. Take care to enter the key exactly, or the radio will not be able to connect to your
router. The three controls on the right-hand side of the screen have special functions. You
can access these by rotating the Tuning Control Rotary and then press the Tuning Control
Rotary to select as you needed: Key: 9/9
select ‘ ’ to erase a character just entered (long press to clear ); Info again to continue
BKSP
select ‘ ’ when the complete encryption key has been entered OK
select ‘ ’ to cancel and go back to the TKIP / AES options screen CANCEL
Once the key is entered the radio should connect to the network.
11. W hile the radio is trying to connect to the network, it will display ‘Processing…’ when
checking the encryption key and then ‘Connecting…’. If the connection is made successfully, Network settings
the radio will return to the Network settings menu. If the unit cannot connect, then it will
Please wait
display a ‘Failed to connect’ message and will return to the SSID entry screen (step 6). Once Connecting.
connected, the network settings are stored in the radio. The settings are retained when the
radio is disconnected from the mains. You may now use the Backward and Source buttons to
access the functions of your radio.
Network settings
Network wizard
PBC Wlan setup
View settings
Wlan region >
Manual settings
19Network remote control options
Network Pin setup (Pin number)
Your radio has the option of being controlled by an application installed on an Apple iPhone, iPod Network settings
touch, iPad or equivalent Android device. The PIN number facility allows you to ensure that your PBC Wlan setup
View settings
radio can only be controlled by your own device rather than someone else’s. Wlan region > GB
The remote control application is called UNDOK, by Frontier Silicon Limited, and is available Manual settings
NetRemote PIN Setup
from the Apple App Store and Google Play Store for your device. UNDOK will try to use the
default PIN of ‘1234’ to control your radio.
You may change the PIN if desired using the ‘NetRemote PIN Setup’ option in the Network
settings menu. The updated PIN should then be used in the UNDOK app to allow the app to
reconnect to the radio. The app will prompt you for the PIN as needed.
Keep network connected
To ensure you can use UNDOK app when your radio is in all modes especially in non-internet Network settings
modes, you need to select “Yes” in ‘Keep Network Connected’ menu. This also allows you to Manual settings
NetRemote PIN Setup
wake the radio from standby using your UNDOK app. Network profile >
Note: If unattended to use radio for long periods of time, e.g. overnight, while on holiday or while Clear network settings >
Keep network connected
out of the house, select “NO” to save power is recommended.
20Using the UNDOK app
1. Download the UNDOK app
Download and install the UNDOK app to your Android or iOS device from the Android Google
Play store or Apple iTunes App store.
● Make sure the UNDOK app installed on your device has the latest version.
● The app may update a new version on the internet from time to time, so this app may have
been changed slightly since these instructions were written.
Note: The images used below extract from Android device. If your device uses iOS Apple or
different UNDOK version, the display may be slightly different.
2. Open the UNDOK app and turn on the radio, making sure your radio and smartphone are
connected to the same WiFi network.
3. The device will be listed on the screen of the smart phone. Select your radio, for example
“Audisse Netbox xxxxxxxxxxxx” (the 12 digit alphanumeric code is the MAC address of your
radio) to establish a connection between UNDOK and your radio.
4. If using the radio for the first time or after performing a factory reset, turn on the radio and open
the UNDOK app, you can also select the ‘SET UP AUDIO SYSTEM’ or ‘AUDIO SYSTEMS
TO BE SET UP’ on your smartphone. The UNDOK app has a setup wizard to help configure
suitable audio device to connect to your WiFi network.
215. G o to WiFi settings of smart phone to choose for example 'UNDOK AUDISSE
xx:xx:xx:xx:xx:xx'. Go back to UNDOK app, the app will show a list of suggested audio systems
to setup. Your radio will normally appear in this list as “UNDOK AUDISSE xx:xx:xx:xx:xx:xx”.
Select the audio system to be setup.
GB
6. Use the app to complete the audio system setup, including giving the audio system a name if
needed.
7. Select the preferred method to connect your audio system to the network (e.g WiFi).
8. For a WiFi connection the app will ask you to choose a WiFi network and enter the appropriate
password. Your audio system will connect to your network.
Note:
If when setting up your audio system your Android device complains that it cannot connect to
the internet this is because it is temporarily connected directly to your audio system. You should
ignore this warning message.
Cancel OK
Done
22UNDOK display options
1. Source: Select the desired source mode.
2. Now Playing& Browse : Select ‘Now Playing’ or ‘Browse’ as needed to access content for the
selected source.
UNDOK Settings
Equaliser function
You may set the bass, mid-range and treble levels to your own preferences.
1. Select the ‘Settings’ screen and then select ‘Equalizer’ in UNDOK.
2. Select the ‘Tone control’ to adjust the Bass, Mid and Treble setting.
Sleep timer
Your radio can be set to turn off after a preset time has elapsed. The sleep setting can be
adjusted as follows.
1. Set the ‘Sleep timer’ using the UNDOK app.
2. Your radio will switch off after the preset sleep timer has elapsed.
Friendly name
Your audio system is identified within the UNDOK app using its Friendly Name.
By default, your audio system’s name will be shown as “Audisse Netbox” followed by a 12 digit
alphanumeric code which is the network MAC address that is unique to your audio system. Tap
‘RENAME’ on the screen to change its friendly name.
23Internet Radio
Internet Radio – the basics
Before you can use your radio to listen to broadcasts via the Internet, it The Audisse Nerbox radio connects to a radio station database which
is necessary to have connected it to your computer network using the serves many users in many countries. This means that there is a
wireless (WiFi) connection. very wide range of program content available. You can also search
GB
There are literally many thousands of radio broadcasts available via the for stations which have been recently added to those available (new
internet as well ‘Podcasts’. stations) or you can search for the most popular.
Your radio provides several ways of searching for broadcasts in order
to make finding and choosing them easier. Once you have found radio
stations which you like, you may either store them as presets within the
radio, or add them to a list of your favourite stations which your radio
can access. The number of presets is limited (there are five presets in
the radio), but you can store as many favourites as you like.
You may search for an internet radio station by Location. If you
know the name of the station and the country from which a station is
broadcast this may be the easiest method to find a station. It is also a
great way to experience radio from other parts of the world.
You may also search for an internet radio station by Genre. If you prefer
a particular type of music, Blues for example, you may search for a
radio station that broadcasts that type of music, and you can choose
from a list of Blues radio stations regardless of location, or taking
location into account.
If you know part of the name of an internet radio station, you can enter
it into the radio and it will search for stations that match that name. This
can be helpful if you are unsure of the location or genre of a particular
station.
24Selecting a radio station by location Internet radio
Last listened
Station list >
1. Press the Power button to switch the radio on. Then press the Source button to select the System settings >
Main menu >
internet radio mode.
2. Press and hold the Info/Menu button to enter the main Internet radio menu. Rotate the Tuning
Control Rotary until ‘Station list’ is highlighted on the display and then press the Tuning Internet radio
Control Rotary to select the option. My Favourites >
Local United Kingdom >
3. Rotate the Tuning Control Rotary until ‘Stations’ is highlighted on the display and then press BBC >
Stations >
the Tuning Control Rotary. Note that the menu may offer one or more local selections based Podcasts >
upon the country in which the unit is being used, according to your internet IP address (‘United
Kingdom’ and ‘BBC’ stations, for example). Stations
4. Rotate the Tuning Control Rotary until ‘Location’ is highlighted on the display and then press Location >
Genre >
the Tuning Control Rotary to select. Search stations
Popular stations >
5. Rotate the Tuning Control Rotary to scroll through the list of continents. When the desired New stations >
continent is highlighted press the Tuning Control Rotary to enter your selection.
6. The display will show a list of countries within the chosen continent. If there are many countries
Location
shown you can scroll through the list continually in either direction. For example, if the chosen Africa >
Asia >
continent was Europe, then to find the United Kingdom scroll up from the top of the list to the Caribbean >
bottom by rotating the Tuning Control Rotary. Press the Tuning Control Rotary to choose Central America >
Europe >
the desired country.
Europs
Switzerland >
Turkey >
Ukraine >
United Kingdom >
Vatican >
United Kingdom
All stations >
Highlighted stations >
Alternative >
Ambient >
Celtic >
257. You will typically find that you then have the option to select either ‘All Stations’ or one of a All Stations
Asian sound radio
number of categories. The lists are always sorted alphabetically, and long lists will wrap around Aston FM
from top to bottom or bottom to top. Atlantic FM
Audio Book Radio
8. Rotate the Tuning Control Rotary to highlight your chosen radio station and then press the BBC Radio 1
Tuning Control Rotary to enter your selection. The display will show ‘Connecting…’ while the
radio connects to the new station. The station should then start playing. Adjust the volume as BBC Radio 1
GB
needed. BBC Radio 1
Podcasts >
9. If the station has on-demand content, that is, it gives the option of listening to programs which
have already been broadcast or to Podcasts, there will be an additional screen showing the
radio station name as well as a ‘Podcasts’ option. These are selected using additional menus,
determined by the radio station and the content. There may simply be a list of programs, BBC Radio 1
or there may also be options to choose from broadcasts on particular dates or days of the BBC Radio 1
Podcasts >
week. The examples shown here are typical. Podcasts and Listen Again content can also be
accessed separately from the main Internet Radio menu.
Podcasts
Dick and Dom >
Eddie Halliwell >
If your radio cannot connect to a radio station Edith Bowman >
Fearne and Reggies >
Gilles Peterson >
Note:
If your radio is unable to connect to an internet radio station it will generally either display ‘Network
Edith Bowman
Error’ or ‘Stopped’. This can be for many reasons, but typically will be due to one of the following: 28/08/2009 - August 28
● The radio station may not be broadcasting at the present time. 27/08/2009 - August 27
26/08/2009 - August 26
● The radio station may not be able to accommodate any more connections from internet 25/08/2009 - August 25
listeners.
● The broadcaster may limit listening to specific countries or regions.
Internet radio 12:34
● There may be network congestion (either locally or at a distance) which is affecting the Edith Bowman
reliability of the connection. Show description
Edith Kickstarts your
If your radio can connect, but the audio is not continuous and the radio keeps having to afternoon with music,
reconnect, this may be due to the radio station only having limited connection capacity.
26Selecting a radio station by genre
1. Press and hold the Info/Menu button to enter the main Internet radio menu. Rotate the Tuning Internet radio
Control Rotary until ‘Station list’ is highlighted on the display and press the Tuning Control My Favourites >
Local United Kingdom >
Rotary. BBC >
Stations >
2. Rotate the Tuning Control Rotary until ‘Stations’ is highlighted on the display and then press Podcasts >
the Tuning Control Rotary to select.
3. Rotate the Tuning Control Rotary until ‘Genre’ is highlighted on the display and then press Stations
the Tuning Control Rotary. Location >
Genre >
4. Rotate the Tuning Control Rotary to scroll through the list of content types. This menu is Search stations
normally cyclic – you can scroll the list continually in either direction. When the chosen genre Popular stations >
New stations >
is highlighted, press the Tuning Control Rotary.
5. You then have the choice of ‘All Stations’ of the chosen genre, or a list of countries. Note if
Genre
a country is not shown then the station may still appear in the ‘All Stations’ list. Rotate the Altemative >
Ambient >
Tuning Control Rotary and press the Tuning Control Rotary to choose as needed. Big Band >
6. A list of radio stations is then shown. Rotate the Tuning Control Rotary until the desired Bluegrass >
Blues >
station name is highlighted on the display.
7. Press the Tuning Control Rotary to select the station. The display will show ‘Connecting…’
Blues
while it finds the new station. If the radio is unable to connect this may be for one of the All stations >
reasons explained previously. Highlighted stations >
Belgium >
8. Adjust the Volume as needed to set the listening level. France >
Germany >
All Stations
Asian sound radio
Aston FM
Atlantic FM
Audio Book Radio
BBC Radio 1
27Searching for a radio station by name
There may be occasions when you know the name of a radio station but you do not know the Internet radio
location or genre. This facility allows you to search for the station using a part (or parts) of the Last listened
Station list >
radio station name. System settings >
Main menu >
1. Press and hold the Info/Menu button to enter the main Internet radio menu. Rotate the Tuning
GB
Control Rotary until ‘Station list’ is highlighted on the display and then press the Tuning
Control Rotary. Internet radio
2. Rotate the Tuning Control Rotary until ‘Stations’ is highlighted on the display and then press My Favourites >
Local United Kingdom >
the Tuning Control Rotary. BBC >
3. Rotate the Tuning Control Rotary until ‘Search stations’ is highlighted on the display and then Stations >
Podcasts >
press the Tuning Control Rotary.
4. To enter the search word(s) rotate the Tuning Control Rotary to highlight each character
Stations
for the search in turn, and press the Tuning Control Rotary to enter. If you make an error Location >
Genre >
press the Info button to access the delete character ‘ ’ on the screen and the character Search stations
selection. After the final character of the search has been entered, use the Info button and Popular stations >
New stations >
then the Tuning Control Rotary to highlight the ‘ ’ symbol on the screen and then press the
Tuning Control Rotary to finish.
Stations
5. The radio will search for radio stations that match your search data. If you include a space
between two search items the radio will look for station names which include both items. Thus BKSP
OK
a search for ‘ROCK 100’ could find a station called ‘100 Classic Rock Hits’ as well as a station CANCEL
called ‘100.FM Rocks’.
6. Rotate the Tuning Control Rotary to highlight the station that you wish to listen to and press
Search stations
the Tuning Control Rotary to confirm your choice. The display will show ‘Connecting…’ while
Radio10 - Top 100 Classic
it finds a new station. Rock 100 DIZ
28You can also read