Jan 2018 - Site guide for CS Cavity Sliders and related products - CS for Doors
←
→
Page content transcription
If your browser does not render page correctly, please read the page content below

CS Pocket Guide
Jan 2018

Site guide for CS Cavity Sliders and related products
2 Disclaimer
               This guide is designed to be used as a reference only and is not intended
               to replace installation instructions. All our products are supplied with
               complete written instructions and we strongly advise you read these
               thoroughly before beginning any installation.

               Visit our website to see our latest products and information or to use the
               door size calculator:

                     www.csfordoors.co.nz                                          www.cavitysliders.com.au
Introduction

                                                                                                                                                 60854/2 10.2017

               All copyright and other property in this document is reserved by Cavity Sliders Limited. Details and specifications are
               subject to change without notice. Whilst all care is taken to ensure the accuracy of all information, no responsibility will be
               accepted for any errors or omissions. ® CS FOR DOORS and CS Cavity Sliders are Registered Trademarks.
               New Zealand Patents: 216994, 236444. Australia Patent: 2005 202818
               60854 - 10.2017 / ZNI200
Contents                                                                                                   3

                  Introduction

                   Why Choose CS Cavity Sliders?..................................................... 4

                   About CS Group.............................................................................. 5

                  Product Information

                   Cavity Slider Components.............................................................. 6

                   Common Dimensions Required...................................................... 7

                   Finding the Serial Number.............................................................. 8

                   Carriages & Mounting Plates.......................................................... 8

                   Handing Information........................................................................ 9

                   CS Product Range.......................................................................... 10

                   Door Information.............................................................................12

                   Special Requirements.....................................................................13

                  Installation

                    Critical Installation Procedures.................................................... 15

                    Installation..................................................................................... 16

                    Fitting Mounting Plates to Door.................................................. 18

                    Removing or Adjusting the Door................................................. 19

                    Installing and setting SofStop Mechanism ............................... 20
                                                                                                                           Introduction

                  Jamb Details.....................................................................................21

                  Trouble Shooting............................................................................ 28
60854/3 10.2017

                  Useful Formula & Trim Sizes ......................................................... 36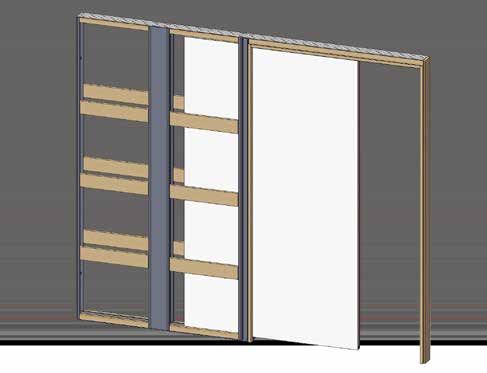
4 Why Choose CS Cavity Sliders?

               1   Consult the Experts

               Contact us on 0800 SLIDER (754 337) within NZ or 1300 9 SLIDE (975 433) in
               Australia to discuss the right product, size and detail for your project - or just to
               check on a trim size.

               2   Get the Details Right

               We can usually come to site to discuss and measure your requirements. Let us
               help you get it right! After quoting, all dimensions will be confirmed in the quote
               with a drawing. If required, custom shop drawings can be produced.

               3   Complete Package

               We can manage supply of the complete package for you: Cavity + Door + Handle
               - making it quick, easy & convenient.

               4   We Pride Ourselves on our Service

               Before, during and after the manufacturing process. We do everything we can
               to get it right first time, but if the unexpected happens, we will be there to see it
               through.
Introduction

                                                                                                       60854/4 10.2017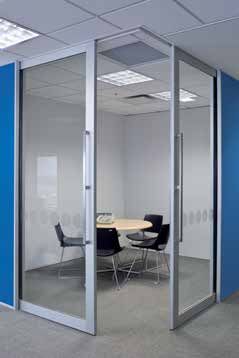
About CS GROUP                                                                              5

                  Who we are
                  CS GROUP is Australasia’s premier manufacturer of
                  innovative door solutions, represented by CS FOR DOORS
                  in New Zealand and CS Cavity Sliders in Australia. We are
                  a family business with over 30 years in the cavity slider
                  market.
                  CS Cavity Sliders are the original cavity sliders - designed
                  locally for the exacting standards of the Australasian market.
                  We engineer all our components and materials are sourced
                  from local manufacturers.                                           CS FramelessGlass

                  What we offer
                      Australasia’s premier cavity sliding system - smoother
                      running, easier to install and longer lasting.
                      A full 10 year written guarantee with all our cavity sliders.
                      Products made from purpose designed and built components
                      - components made specifically for cavity sliders.
                      A comprehensive on-site measure and consultation.               CS AutoPivot with
                                                                                      CS AluTec door
                      Full CAD service from measure confirmation to 3D concepts
                      to help your customer visualise design options.
                      Full after sales service.
                      Service and experience from a dedicated team in 5 branches
                      across Australasia.
                      50 specialist product lines from               cavity sliders
                      to

                                                                                      CS TimberFormed
                  Our Guarantee
                                                                                                            Introduction
60854/5 10.2017

                                                                                      CornerMeeting
                  *Guarantee conditions apply.
                                                                                      cavity sliders with
                   Contact CS for details.                                            CS NewYorker doors
6 CS Cavity Sliders - The Main Components

                                                              1
                                                                             2
                                                                                         3         4

                                      6

                                                  7
                                                                                                          5

                                                                   8

                                           9

                                          10
                                                              11

                                                                                                  12

                      1   Track
                          Heavy duty, one piece
                          extruded aluminium
                      2   Pelmet blocks                                8    Split jambs
                                                                            Timber jamb fixed to aluminium split
                      3   Carriages                                         jamb
                          mounted on top of door, hidden
                          inside track                                 9    Nogs
                                                                            Fitted on both sides and offset for
                      4   Head jambs                                        adjacent wall fixing. Extra nogs are
Product Information

                          Unique design of the head jambs                   available or can be replaced with a
                          eliminates the need for unsightly                 full sheet of ply
                          pelmets
                                                                       10   Bottom plate
                      5   Closing jamb                                      Heavy duty, one piece extruded
                          MDF/Timber. Always quoted as                      aluminium
                          standard. Will not be supplied if
                          NoClosingJamb detail is required             11   Skirting blocks
                                                                            Fitted on either side of the bottom
                      6   Back stud                                         plate to fix both linings and skirting.
                          Heavy duty, one piece extruded
                                                                            No visible floor track or guide
                                                                                                                      60854/6 10.2017

                          aluminium                                    12

                                                                            Hidden T-guide at the base of the
                      7   Intermediate stud                                 cavity guides the door through the
                          Over 920mm door width                             opening
Common Dimensions Required                                                                                                    7

                  Standard Head Detail                                      Full Height Detail
                                           90                                                           90

                    Trim   40
                    height                                                                                                36
                                                                             10/13mm
                                                             31
                          20
                                                                                                                  Floor to top
                                                           Floor to               Floor to                            of track
                                                        top of head            underside                                          Trim
                    Floor to     Floor to                                      of ceiling /             50                       height
                    top of      underside                                            track
                    head        of head          Floor to top of track

                  AluSealed Head Detail                                     Frameless Glass Head Detail
                                            90                                                          90

                                                                               Trim
                                                                               height

                                                                                                                           Floor to
                    Trim height                                                                                         top of track
                                                                                   140 59
                                                      Hi-Impact
                        31     AluSealed               option     31
                                 90/13                   90/26

                      Floor to         Floor to           Floor to
                      top of head      underside of       top of track        Floor to                                     Floor to
                                       head                                   top of head          Floor to          top of head
                                                                                                   underside of head

                  Single Unit (Standard)                                                                     Bottom Plate                   Product Information
                                                       Trim width
                                                    Cavity frame width
                                                                  Over grooved Jambs                                     38
                                                                                              31

                                                                                                                                       42
                                                                                                             25
                                                                                        48
                                     Door thickness _______ mm                               20
                                                                                                                         90

                                                                                                              Standard under
60854/7 10.2017

                                                                                              33              door clearance is
                                     Cavity depth                 Between the Jambs
                                                                                                              25mm
                                                                      Over flat Jambs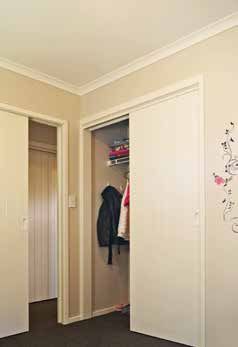
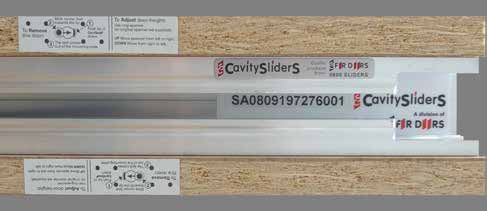
8 Finding the Serial Number

                      Serial numbers are affixed to the majority of our products. On CS CavitySliders
                      and CS WardrobeSliders these are visible through the slot in the underside of the
                      track as shown below. On CS DoorLeaves the serial number is affixed to the rear
                      or top edge of the door. CS TrackSystems have the serial number fixed to the side
                      or underside of the track.

                                                                  Date             Item No.

                                                                          Job No.

                      Carriages & Mounting Plates
Product Information

                                                                                                           60854/8 10.2017

                        M6 Carriage and mounting        M8 Carriage and mounting          Mounting plate
                      plate (suits doors up to 90kg   plate (suits doors 90-240kg or   with stop
                      or up to 1500mm wide).          more than 1500mm wide).
Handing 9
Hardware
Inside
Inside
RoomRoom Inside
Inside RoomRoom
LHLH
(EF) (EF) RHRH
(EF) (EF)
Handing of OvertakingDoors Units:
OvertakingDoors units are available as either left or right handed. Stand looking into the If locking snib is on your
Handing of OvertakingDoors Units: pocket. IfOutside
Outside
locking Room
Room snib is on right hand
Outside
Outside
Room
sideRoom
then
To determine the handing, stand in the opening and look into the cavity/pocket. your left hand side then LaviLock is a Right Hand
Lead door on the left is considered left handed and lead door on the
OvertakingDoors units are available as either left or right handed. right is considered
LaviLock right
is a handed.
Left Hand lock. lock.
The same rules
To determine apply
the to all stand
handing, OvertakingDoors units
in the opening andregardless
look into of
thewhether thereEF
cavity/pocket. = 2,
are Exit
3, 4Free
or 5 -doors
Evenbeing
whenused.
in locked position the
See below.
handle on
Lead door on the left is considered left handed and lead door on the right is considered inside remains unlocked.
thehanded.
right
The same rules apply to all OvertakingDoors units regardless Lead
of whether there are 2, 3, 4 or 5 doors being used. See below.
door on right hand side of cavity - Right Handed
Right side of cavity
Right side of cavity Lead door on on
Lead door right hand
right hand sideside of- Right
of cavity cavity - Right Handed
Handed
Lead Door
Stand here and
look inside cavity
Lead Door
Stand here and
look inside cavity
Left side of cavity
Left side of cavity
Right side of cavity Lead door on left hand side of cavity - Left Handed
Right side of cavity
Stand here and
look inside cavity
Lead Door
Stand here and
look inside cavity
Lead Door
Left side of cavity
Lead door on left hand side of cavity - Left Handed
Left side of cavity
View looking up at various CornerMeeting
Product Information
track configurations
Lead door on left hand side of cavity - Left Handed
In all cases, one door (the leading
door) will overlap the other door (the
trailing door).
Trailing
60854/9 10.2017
door
Leading door
10 Product Range

                      Whether you require an ‘off the shelf’ solution or you want to make a
                      statement with a soft closing, oversized or highly customised automated
                      cavity slider, we can deliver.
                      You can supply your own door leaf and hardware to match your existing
                      joinery, or talk to us about our range of glazed or aluminium
                      CS DoorLeaves and CaviLock sliding door hardware.

                      Core                   Specialised             Detail Options

                                                           *

                                                                     Patented track and
                                                                     carriage systems for
                                                                     surface sliding doors
                                                                     - based on the high
                                                                     quality extrusions used
Product Information

                                                                     in our cavity sliders. CS Barn Door track
                                                                                                                 60854/10 10.2017

                                                                     Corner meeting CS NewYorker doors on
                      CS SpaceMaker with CS MirrorLite door          CS Partition-TopMount track

                      *Some products not available all areas. Contact your nearest branch for more info.
Product Range 11
A range of double and triple top track
sliding door systems for doors up
to 40mm thick with no visible floor
guides. Match wardrobes to your other
internal doors.
Wall lining 90
Lintel
Track
Carriage
Clip-in pelmet
Architrave
Doors
Carpet
50mm floor guide
& packer (if required) © Cavity Sliders Limited
CS TopFix 2T-90 (Architrave jamb option) CS TopFix 2T-90 two door wardrobe slider
Our hardware division manufactures
classic high quality handles and locks
for sliding doors, as well as offering
a selection of architectural door
hardware from third party suppliers.
Product Information
Save time and hassle by having us CL400 Magnetic range CL400 ADA
factory-fit the hardware to your door.
60854/11 10.2017
Aluminium Edge Pull
CL200 Magnetic CL100 Flush Turn CL100 LaviLock + Louey Side Handle12 Special Requirements - Doors
CS has over 30 years experience in providing customised opening solutions to
the residential and commercial sector. For all your highly customised opening
requirements, call us and our engineers will work with you to appraise, refine and
create your vision. We have a solution for all of the following situations.
Consult a CS representative for more info.
Temperature/moisture differences either side of opening:
This is a common cause for doors bowing. Common situations where bowed
doors may occur include:
• Internal access garages (insulated and heated house/ cold garage)
• Heat pump/heat source on one side of door
• Direct sunshine /window to one face of door
• Larger doors - especially over 2400 x 1500mm
• Stairwells /door closing off heated area to non-heated areas
• Doors not being sealed properly
• Doors painted in dark colours
• Cavity pocket installed against fire enclosure
Steel reinforcement helps in smaller doors. CS recommends the use of reinforced
doors for all standard cavity slider applications. Treat your reinforced door with
a full and proper paint job. Ask your painter to remove the door from the pocket
and paint/seal all six faces of the door. This will reduce the chance of moisture
absorption.
For even greater protection against bowed doors, or when an oversized door is
required, specify an aluminium door from the CS DoorLeaves range.
These aluminium framed and skinned architectural doors can be made to over-
height and over-width sizes and have been designed to reduce the risk of bow,
warp, rust or rot. They arrive pre-finished (hardware can also be pre-fitted),
ensuring time and money is saved.
Product Information
• Designed specifically • The framing can be
to work with the CS finished in a range
track and carriage of colours (either
system. anodised or powder
• Clad in a 2mm coated).
thick aluminium • A choice of glazing
skin which can be options and lighting
powder coated in a configurations are
variety of standard colours. available.
60854/12 10.2017
• For an on site paint finish, specify this door • Can be specified
with Matt Titania powder coated undercoat as a feature door
and let your painter do the rest. or used in a more understated fashion in
commercial fit-outs or architectural homes.Special Requirements 13
Thicker/Heavier Doors More Stability
For doors thicker than 40mm or doors Where additional split jamb (front
over 2600mm high/1500mm wide, stay) support is required, ask for a
specify the CS Ultimate Cavity Slider. 3-cell split jamb (Timberformed only).
140mm (NZ)
120mm (AU)
3-cell
Optional split
steel bars jamb
Max.
88mm
thick
(140 Where additional
stud)
stability is
required on one
side of the cavity Ply
pocket (i.e. for panel
fixing of rails etc.)
a ply panel can be
added.
Disabled Access
Use the CS EasyOpen Cavity System complete with CL100
LaviLock handle fitted to meet disabled access compliance.
Required Clear Minimum Door Minimum
Opening Leaf Width Trim Width
Product Information
New Zealand 760mm 910mm 1750mm
Australia 850mm 1050mm 1960mm
CL100 LaviLock
Bracing Walls (NZ only)
For installation into a wall where bracing is required, use
the CS BraceWall* cavity slider. Talk to a CS Representative
to discuss your specific requirements and to establish how
60854/13 10.2017
many bracing units you can achieve.
(Minimum door width 710mm.)
CS BraceWall
*Some products not available all areas. Contact your nearest branch for more info.14 Special Requirements
Wet Areas
All CS Cavity Sliders are suitable for installation into
bathroom and internal wet areas if correct installation and
waterproofing procedures are followed. For additional peace
of mind, H3.1 tanalised jambs and nogs can be provided.
Tiling
All CS Cavity Sliders are suitable for tiling onto. Ensure
CS SpaceMaker with
correct installation procedure is followed and a suitable tile
CS MirrorLite door
substrate is fixed to the cavity pocket. Care should be taken
to ensure the cavity wall is correctly waterproofed.
Once set, the tiles will strengthen the wall of the cavity
pocket so it is important to ensure that the jambs are well
clear of the door (use the jamb spreader supplied) before
tiling.
For especially heavy tiles or if the cavity pocket is to form
part of the shower enclosure it is recommended that the
cavity pocket is manufactured with a 17mm H3.1 sheet
of plywood in the frame. Double lining the cavity pocket
with suitable wall board and tile substrate will also provide CS SpaceMaker in
additional protection. tiled bathroom.
In all cases it is critical to ensure that all clearances are
checked prior to fixing of tiles.
Sound Rating
The CS SoundStop system provides a complete acoustic
solution tested to STC43. We can also offer advice on how
to improve the acoustic properties of other cavity sliders
where STC43 may not be required.
Product Information
CS SoundStop
BiParting cavity slider
Soft Closing
CS SofStop cavity sliders close smoothly and quietly.
Options are now available for doors up to 100kg.
Choose from Single or Twin action (soft open and soft
close).
Self Closing
60854/14 10.2017
A CS Raking head cavity slider will provide a gravity fed
self closing system with a soft close action.
CS RakingHead with
The CS AutoCav is a fully automated electronic solution. 4-lite CS NewYorkerCritical Installation Procedures 15
Full instructions attached to the side of the cavity slider or on our website
1. Fixing Cavity Slider to the Floor
Installing the cavity slider 100% plumb and level will NOT guarantee a correctly
sliding door.
If any of the wall, lintel, floor and door are not plumb and straight this can cause
the door to slide incorrectly into the pocket.
It is for this reason that the skirting block fixing (found at the base of the pocket
frame behind the split jambs) is only secured once you have ensured the door is
running parallel to the cavity pocket.
Fix track, back stud and closing jamb as per the HowTO Installation Instructions, then:
Fix the skirting block fixing to the floor only when the cavity pocket has been adjusted
so that the door closes neatly into the closing jamb and slides parallel to the bottom
plate of the cavity slider.
Skirting Block Fixing
Adjustment
Parallel
Door Equal
Parallel
© Cavity Sliders Limited Skirting Block Fixing
2. The Jamb Spreader 3. Gap Between Door and Jambs
The supplied ‘jamb spreader’ must The cavity slider comes with split
be inserted into the cavity slider jambs intentionally ‘rounded out’ as
opening prior to fixing wall linings and shown below. This round out is to
architraves. accommodate any slight bowing of the
door leaf and to allow door hardware
to clear the jambs.
The standard clearance is approximately
5-7mm between door and split jamb.
5+ 5+ This is
desired
and
Door normal
Installation
Jamb
7+ 7+
38
60854/15 10.2017
© Cavity Sliders Limited 5+ 5+ © Cavity Sliders Limited16 Installation - 8 Easy Steps
8 5
1
4
3
6
7
Full instructions attached to the side of the
cavity slider or on our website:
www.csfordoors.co.nz
www.cavitysliders.com.au
Installation
To see a full installation video, visit the
60854/16 10.2017
CS FOR DOORS channel on YouTube:
www.youtube.com/csfordoorsInstallation - 8 Easy Steps 17
1 Fit the closing jamb 5 Level and fix the track through the
side fins if required. Do not pack.
2 Stand unit in framed opening 6 Plumb and fix the closing jamb
3 Plumb up the split jambs 7 Ensure door runs parallel in the wall
and fix off the skirting block to the floor
4 Fix the back stud whilst keeping the 8 Adjust door height.
split jambs plumb
Installation
60854/17 10.2017
HOT TIP! Always install the cavity with the door fitted. Slide the door in and out of
the pocket to check for smooth running before fixing and lining the pocket.18 Fitting Mounting Plates to Door LC CL
Drill two x ø25mm holes in the positions as shown to a depth of 13mm.
Screw both mounting plates to the door with the mounting plates placed exactly
Fitting
inTimber
ld always face
Mounting
Doors:
the centre of the door
Mounting
Plates
thickness.
Mounting
Plate
- Timber
'Plunger'
Plate 'Plunger'
Doors
should always
shouldface
always face
Timber away from
away
centre
fromofcentre
door. of door.
ld always faceIf doorDoor M6/M8
width is greaterMounting
than 2500mm, move mounting
Plate 'Plunger' plates
should always in an additional 150mm
face
away from centre of door.
Timber
Timber Doors:
Door
Mounting plate
Mounting plunger
Plate ‘Plunger’
Timber facing should
awayalways
from facecentre
away
Single - Door
M6/M8M6/M8
Mounting Plate of door
from centre of door
85 85
Timber
FRONT Doors: TOP OF REAR
EDGE DOOR EDGE
Timber Door M6/M8
85
85 Ø25mm hole Ø25mm hole 85
85
13mm deep 13mm deep
Timber Door M6/M8 with Stop
Bi-Parting -CLM6/M8 Mounting Plate with Stop CL CL
85 CL CL 85
FRONT TOP OF REAR
Timber
EDGE Door
Timber M6/M8 with Stop
Doors: DOOR :srooD reEDGE
bmiT
125
Timber Door
125 M6/M8 Ø25mm hole Ø25mm hole 85
8M/6M roo D rebmiT
85
13mm deep 13mm deep
Timber Door M6/M8 with Stop
NoClosingJamb or CornerMeeting Detail - M6/M8 Mounting Plate with Stop
125 85
FRONT 85 TOP OF 58 REAR
EDGE DOOR EDGE
150
150
125 Ø25mm hole Ø25mm hole 85
85
13mm deep 13mm deep
Timber Door M6/M8 with Stop potS htiw 8M/6M rooD rebmiT
Track Systems
85 - M6/M8
85 Mounting Plate with
85 Double Stops 85 8
FRONT TOP OF REAR
EDGE DOOR EDGE
85 85 85 85 8
150
150
125 Ø25mm hole Ø25mm hole 150
150
521
13mm deep 13mm deep
TimberTimber
Doors: Doors:
Timber Timber
Door
Timber Doors:
M6/M8
OvertakingDoor M6/M8Doors
- Timber
85 85 85 85 8
Mounting plate
Mounting plunger
Plate ‘Plunger’
Timber Door M6/M8 facing should
awayalways
fromface away
centre
Lead Door - M6/M8 Mounting Plate of door
from centre of door
125 85 85 85
FRONT TOP OF REAR
EDGE DOOR
85 85 85 EDGE
85
85 Ø25mm hole Ø25mm hole 85
85
125 85 13mm deep 85 13mm deep 85
58 85 58 85 8
Installation
Timber Door
Timber
M6/M8
Door with
M6/M8Stop
with Stop
Trailing Door(s)
125 - M6/M8 Mounting
with Stop Plate with Stop
85 85 85
Timber Door M6/M8
60854/18 10.2017
FRONT TOP OF REAR
EDGE DOOR EDGE
60584/1 10.2016
155 155
125 85
85 125 Ø25mm hole Ø25mm hole 85
85
13mm deep 13mm deep
125 85
58 125 155 155 521 85Removing or Adjusting the Door 19
1 To adjust the door height (drawing A).
Use the small end of the spanner supplied to
rotate the hexagonal nut at the bottom of the C REMOVING
carriage hanger shaft. CARRIAGES
To raise door: Rotate spanner left to right.
To lower door: Rotate spanner right to left.
A ADJUST DOOR HEIGHT Plunger pin
Black plastic stop Hanger
(Bi-Parting units) shaft
(threaded)
To raise Tap this way
door to remove
To lower
door Club
end of
spanner
© Cavity Sliders Limited
© Cavity Sliders Limited
2 To remove the door. 2 Fit the club end of the adjusting spanner
The head jamb must first be removed so that over the hexagonal nut at the bottom of the
access may be gained to the carriages. hanger pin (drawing C).
Choose the best side to remove the door Use the extended part of the spanner to
from and remove head jamb by first press down the plunger pin that protrudes
removing any architraves (drawing B). up from the mounting plate. Once this
Remove the wooden plugs covering the screw plunger is fully depressed, slide the spanner
heads. Remove the screws holding the head sideways towards the plunger pin.
jamb in place, then gently tap jamb to remove. The whole carriage (including the shaft) will
now disengage from the mounting plate.
HOT TIP! Make a thin knife cut where Do the same with the second carriage.
any paint joins two components so as You can now remove the door (drawing D).
not to tear existing paint work.
HOT TIP! It is not always easy to slide
the spanner sideways. Relieve the
B TRACK CROSS SECTION weight of the door by putting a thin
wedge between door and floor.
Architraved option Grooved option
Wall D DOOR REMOVAL
lining
Pelmet
block Closing jamb
Architrave
Knife
Installation
cut
Door leaf Cavity
© Cavity Sliders Limited
3 Bi-Parting units.
60854/19 10.2017
Head Door Follow instructions above, then remove the
jamb Head black plastic stop that is tightly fitted into the
(architraved type) jamb
Wooden (grooved mounting plate at the front of each door leaf
cover plug type) by tapping it out in the direction shown, using
© Cavity Sliders Limited
a hammer and drift (drawing C).20 Installing the CS SofStop Mechanism
Open the d
The SofStop single mechanism fits together as shown:
SETTING THE ACTIVATOR
Activator
With the door open, loosen the all four Activator grub screws until the activator slides freely in the track.
Open the d
Place the '
Roughly position the Activator in the centre of the door opening and tighten
Front Pickup one of the four grub screws to fix it in position.
carriage mechanism Rear carriage
CL Pocket
Gently close the door, it should stop before hitting the closing jamb. Open the door, the Sofstop Mechanism is now activated.
Tow bar receiver Remove
SofStop Dolly
Without
Tow bar
Opening
M5 pan head machine cassette wheel
screw
SINGLE SOFSTOP
Install mechanism in the following order: HOT TIP! The activator setting
block makes it easy to position
a) Rear carriage.
the activator in the track so the
b) Cassette (dolly wheel first, with pickup door stops in the correct position
mechanism facing up).
c) Front carriage (with tow bar facing into TWIN SOFSTOP (Soft Open & Close)
pocket). IMPORTANT: Cassette has been supplied
d) Secure carriage to cassette with set by the manufacturer. Do not tamper
machine screw. Tighten with #2 Phillips. with prior to installation.
e) Attach door leaf. Pickup
mechanism
f) Open door and insert activator into
track. Slide it to centre
IMPORTANT:of door
the Sofstop opening.
Cassette has been supplied set by the manufacturer, it is important that it is not tampered with prior to installation.
Tighten one grub screw. Install twin mechanism in the following
g) Slowly close order:
door until pickup a) First activator - slide to end of cavity
mechanism goes Activator pocket. Do not tighten screws.
past activator. You
will hear a click. b) Rear carriage, cassette, front carriage.
CAVITY POCKET
Cassette is now c) Secure carriage to cassette.
charged. Open Grub
screws d) Attach door leaf.
door and loosen
grub screw. Set activator positions.
a) With door closed, move first activator
h) Position activator setting block inside
into centre of the pocket. Do not tighten
closing jamb and gently close door onto
screws.
it. Activator will slide along track into
correct position. b) Position activator setting block inside
back stud and gently open door.
Activator will slide along track.
c) Close door and remove activator setting
Activator block. Tighten all four grub screws.
setting
3. Insert the casette into the notched end
Door of the track.
block d) Open door and insert second activator,
Installation
slide to centre of door opening.
e) Position activator setting block inside
closing jamb and gently close door onto it.
i) Open door and remove activator setting
block. Without moving activator, tighten f) Open door and remove activator setting
60854/20 10.2017
all four grub screws. Activator is now block. Tighten all four grub screws.
positioned. The activators are now positioned.
Full instructions supplied with the cavity slider or on our websiteJamb Details - Architrave 21
STD -20
Plan Elevation
STD - 32
Standard jamb Door STD -20
VARIABLESTD - 32
Door
Extra wide Standard
Door
VARIABLE jamb jamb
Door
© Cavity Sliders Limited
Extra wide jamb
© Cavity Sliders Limited
Drawings are not to scale. All dimensions in mm.
All flat jamb options are supplied to suit
the finished wall thickness - ready for
architraves by others.
Jamb Details
60854/21 10.201722 Jamb Details - Grooved
STD - 31
Plan Elevation
STD - 42
STD - 31
Standard jamb
Door
VARIABLE
STD - 42
Door
VARIABLE
Extra wide Standard
Door jamb jamb
VARIABLE
Door
VARIABLE
© Cavity Sliders Limited
Extra wide jamb
© Cavity Sliders Limited
Drawings are not to scale. All dimensions in mm.
Grooved jamb liners arrive fitted ready for
fixing of wall linings after installation.
Jamb Details
60854/22 10.2017Jamb Details - Full-Height 23
Full-Height Fixing Detail Close up of Fixing Detail
25mm
Plaster as
3mm Underside of track and required
MDF 13mm J-Mould should finish
packer lining at same level Underside
of ceiling
© Cavity Sliders Limited
J-Mould J-Mould
10mm Track slot
lining
Door
Door
© Cavity Sliders Limited
Drawings are not to scale. All dimensions in mm.
Jamb Details
60854/23 10.201724 Jamb Details - AluSealed 13mm
31
45
Plan Elevation
11
To work with 13mm
wall linings only
31 in this configuration
45
11
To work with 13mm
Door wall linings only
in this configuration
Door Door
Door
© Cavity Sliders Limited © Cavity Sliders Limited
Drawings are not to scale. All dimensions in mm.
AluSealed jambs are a pre-finished (powder
coated or anodised) jamb liner to suit 90/13,
94/10 or 90/26 wall lining configurations.
Jamb Details
60854/24 10.2017Jamb Details - FramelessGlass 25
Plan Elevation
Grooved jamb
Std - 20 for 10mm glass
Std - 20 for 10mm glass
Extra pelmet
Extra pelmet
block added to
block
hideadded to
(optional)
hide (optional)
glass carriage
glass carriage
140
Glass door system
140
Glass door system
Brush seals to
59
Brush seals to panel
59
guide glass
guide glass panel
45
45
8
8
Architrave jamb Glass door
Glass door
Suggested detail only © Cavity Sliders Limited Suggested detail only © Cavity Sliders Limited
Drawings are not to scale. All dimensions in mm.
Elevation - Full-Height Detail
Jamb Details
59
60854/25 10.2017
Exposed clamp view GLASS DOOR
when Full-Height detail
Suggested detail only © Cavity Sliders Limited
required26 Jamb Details - SquareStop
Plan Elevation
See Stopping Detail 25mm
3mm MDF
Nog SquareStop packer 13mm
split jamb (for 10mm lining
lining)
Door
Stopping
bead
10mm lining
Door Door
Door Hanger bolt
© Cavity Sliders Limited
Alternate
detail Stopping Detail for Split Jamb
Use tapered
edge of wall SquareStop
lining Split Jamb
© Cavity Sliders Limited
Mesh
Alternative Detail - 3-Cell
Split Jamb Plaster
Plasterboard
The timber jambs are moved so that the
plasterboard may be wrapped around the
face of the jamb.
STD - 20
Lining wrap around STD - 20 © Cavity Sliders Limited
Door
Door
Jamb Details
Door
Lining
across
face
60854/26 10.2017
3-Cell split jamb
© Cavity Sliders Limited
Drawings are not to scale. All dimensions in mm.Jamb Details - ShadowLine (Negative Detail) 27
Plan Elevation
variable 13mm lining 10/13mm
13mm 10mm
Std 20 lining
lining 10 lining
‘Z’
Architrave Mould ‘Z’
jamb Mould
ShadowLine split jamb AluSealed Door Architrave
jamb Door jamb
option option
10mm
lining variable Std 31
Grooved © Cavity Sliders Limited
jamb
3-cell split jamb
‘Z’ Mould
10mm 13mm
lining 31
lining
AluSealed
45 jamb
© Cavity Sliders Limited
Drawings are not to scale. All dimensions in mm.
Jamb Details
60854/27 10.201728 Trouble Shooting Guide
This guide is to help you to ascertain whether the problem that you are
experiencing is caused by a fault in the cavity slider, door or the installation.
Find your problem and possible causes below, then turn to the relevant page for
instructions on how to remedy the problem.
Problem and possible causes Turn to page:
Door stuck in pocket / Door stuck in closed position
• Bowed door................................................................................................................ 29
• Bowed jambs............................................................................................................. 31
• T-Guide groove off centre or swollen...................................................................... 32
• Check for nail and/or screw penetrations through architrave, linings and nogs.
Door or handle is scratched
• Bowed door................................................................................................................ 29
• Bowed jambs............................................................................................................. 31
• Check for nail and/or screw penetrations through architrave, linings and nogs.
Door not running straight
• Bottom plate not fixed in correct position............................................................... 30
• Closing jamb not installed plumb............................................................................ 30
Jamb clearances do not appear uniform on both sides of the door
• Bowed door................................................................................................................ 29
• Bowed jambs............................................................................................................. 31
Door rubs during normal operation
• Cavity installed incorrectly........................................................................................ 15
• Bowed door................................................................................................................ 29
Carriages not running smoothly in track
• Track is contaminated, pinched, or carriage has a flat spot................................... 33
Door not flush when in pocket
• Door adjusted incorrectly or obstruction in cavity pocket..................................... 33
• Cavity pocket installed out of square....................................................................... 33
Door rolls open or closed by itself
• Track not level............................................................................................................ 34
Troubleshooting
Carriage disconnects from mounting plate
• Hanger pin not engaged, door wound down past thread lock
or mounting plate has come loose from door........................................................ 34
Doors in OvertakingDoors unit stick
• Bowed door................................................................................................................ 29
• Door adjusted incorrectly.......................................................................................... 35
• U-Guide rubbing........................................................................................................ 35
60854/28 10.2017
Hanger bolt rubs on the track in a Full Height Detail unit
• Remove wheel from track and cut bolt down to create extra clearance. Take care
not to damage the start of the hanger thread when shortening the bolt.Trouble Shooting Solutions 29
Bowed door / twist in door
Using a straight edge check the door for straightness in the positions shown below:
Leading Edge (A1) and Trailing Edge (A2), Top & Bottom (B).
A1
A2
Split
jambs
Straight
edge
B Straight
edge
Straight edge
Troubleshooting
Timber doors installed in a situation where there are temperature differentials
either side of the door will bow. The only way to eliminate this is to even up the
temperatures or change the door to one not affected by temperature issues.
• CS recommends the use of doors with steel inserts.
• Ensure door is fully painted/sealed on all four edges and two sides.
• If door is oversized, consider an aluminium door leaf from the CS DoorLeaves
range. Refer to page 12 for more information.
60854/29 10.2017
If door is badly bowed, replace with a non-bowing alternative - see page 1230 Trouble Shooting Solutions
Twist in cavity slider unit (door not running straight)
Use the same method as for bowed
HOT TIP! If door is straight and
door (page 29) to check the cavity slider
cavity installed correctly, T-Guide
unit for twist. Place a level on the wall
next to the split jamb and on approx. will be central in door groove.
back of cavity unit. If door is pushing to one side of guide,
cavity or door are out of alignment.
Probable causes:
A Bottom plate not fixed in correct 4 7
position (see install notes, page 15).
If skirting block fixing is not installed
in correct position, door will not run
parallel inside pocket (door will contact
split jamb or closing jamb).
Fix the skirting block fixing to the floor only when the cavity pocket has been adjusted
so that the door closes neatly into the closing jamb and slides parallel to the bottom
plate of the cavity slider.
Skirting Block Fixing
Adjustment
Parallel
Door Equal
Parallel
© Cavity Sliders Limited Skirting Block Fixing
Realign front fixing position of bottom plate.
Ensure door runs parallel as shown. Contact CS for further explanation if
required.
B
Troubleshooting
Closing jamb not installed A--A = A
plumb. parallel A
gap
Door leaf
Realign closing jamb to plumb.
Ensure door runs parallel as A Drill
shown. A ø3mm
Skirting nail
fixing hole
block
Pre-drilled
60854/30 10.2017
Do not ø8mm hole
puncture for masonry
anchor
T-guideTrouble Shooting Solutions 31
Bowed jambs
Use a straight edge or string line to check the split jambs on the outside to see if
the jambs have bowed.
5* 5* This is HOT TIP! Use jamb spreader to
desired check clearance after install.
and
Door normal
Jamb
7* 7*
38
5* 5*
*based on 38mm door © Cavity Sliders Limited
Probable causes:
A Desired shape has not been maintained during installation
Use hands or wedges to reshape split jambs.
The aluminium jamb must be moved until past its elasticity point. Wedge both
sides of the door to avoid bowing the door. Ideally, door should be removed
prior to adjusting the jambs.
B Architraves/wall linings have moved, causing inward or outward pressure
on jambs.
Glue tension on wall board/architrave must be released (you will hear a crack!).
Troubleshooting
• Minor cracking of paint is a possibility.
• Ideally, door should be removed prior to adjusting jambs.
C Force from above track is acting down on cavity, causing pressure on
jambs.
Adjust track fixings/relieve tension acting down on track.
60854/31 10.2017
• Release excessive force acting down onto cavity pocket.
• Use Jamb Spreader to maintain 52-54mm clearance at lining and
architrave stage.32 Trouble Shooting Solutions
T-Guide groove off centre or swollen
Using a tape measure, check to see that the groove at the bottom of the door is
centred. Groove should be sealed to protect against moisture.
Also check if the groove is the correct size of 5 - 5.5mm wide and 20 - 21mm high.
Measure/sight groove to see if it has swollen. Alternatively, run a T-Guide through
the slot to see if it moves freely.
Groove off Centre Swollen Groove
Centre of
door 5 5
T-Guide
Re-cut slot to dimensions shown.
In extreme circumstances, a CS Guide block can be used at the back edge of the
door. Call CS for more information.
Groove Dimensions Guide Block
Troubleshooting
Edge Rear edge
of of door
Face of door leaf
door
leaf
60854/32 10.2017
20-21mm
5-5.5mm Guide blockTrouble Shooting Solutions 33
Carriages not running smoothly in track
Probable causes:
A Track is contaminated with paint, debris or swarf
Remove the door and carriages. Clean track with a soft cloth soaked in white spirits.
Aluminium track is soft. Do not clean with hard objects that may damage the
running surface.
Check that the carriages are clean before trying them in the track again.
B Track has been pinched
To test, run a carriage through the track
without the door attached. If track has
!
been pinched, contact CS to discuss
options.
C Carriage has flat spot on it
If a heavy door is left in one position for DO NOT PINCH
a long period of time, a flat spot may
Original track slot width must be
develop. Flat spot will come out over
maintained when lining ceiling
time with normal use of door.
Door not flush when in pocket
Probable causes:
A Door adjusted incorrectly
Adjust height of door until door edge is flush with jambs (see adjustment
diagram, page 34).
B Obstruction in cavity pocket
Remove door and remove obstruction.
Troubleshooting
C Pocket installed out of square
If door is flush and plumb when closed
but sticks out at the top or bottom
when open, the cavity pocket has been
installed out of square or not level. It
only takes the pocket to be out of level
60854/33 10.2017
by as little as 5mm for the door to
protrude a great deal more.
Pocket needs to be readjusted to square.34 Trouble Shooting Solutions
Door rolls open or closed by itself
Probable cause: Track not level
If door rolls open: Reinstall pocket so that track is level or change handle to a
latching option. Contact CS for further information.
If door rolls closed: Remove head jambs and use fixing screws through sides
of track to ‘pull up’ to a level position.
Carriage disconnects from mounting plate
Probable causes:
A Hanger pin not engaged in mounting plate correctly
Follow diagram To Remove door: 1 To Adjust door-height:
(right) in reverse 1 Push plunger Use ring-spanner (or original
down 2 UP spanner supplied by CS).
until you hear a UP Move spanner left to right.
click, meaning bolt 2 Slide bolt
across DOWN Move from right to left.
is located correctly. DOWN
B Door wound down past thread lock
Follow installation instructions to remove hanger bolt from mounting plate and
door from pocket. Remove carriage from track.
Carefully thread hanger bolt back into the carriage body, ensuring two full turns
into the nylon part of the nut.
C Mounting plate has come loose from door
Follow instructions (below). For non-standard doors or cavities, see page 18.
Troubleshooting
Fitting Fit the 4 screws as shown.
Mounting Curved Use extra screws where
release pin required for heavy doors.
Plates
Drill ø25mm (1”) x 13mm deep.
60854/34 10.2017
85mm to centre of the boss hole.Trouble Shooting Solutions 35
Doors in an OvertakingDoors unit come out together or stick
Probable causes:
A Doors are not adjusted correctly and are sitting on the next door’s U-Guide
Each door must be clear of the door behind it.
Rear
door
Maintain clearance
between the U-Guide
and bottom plate
and floor coverings
Black plastic T-guide
B Pickup extrusions and/or Fitting U-guides
U-Guides on doors are ‘grabbing’ or
Depending on the door thickness, steel
‘rubbing’ against other door/s.
shims (packers) may be needed:
Ensure extrusions and/or U-Guides are 35mm doors - use 3 x 1mm shims
correctly spaced in accordance with 36mm doors - use 2 x 1mm shims
door thickness. 37mm doors - use 1 x 1mm shim
38mm doors - no shims needed
39mm doors - rebate guide 1mm into
edge of door.
C Door is bowed (see page 29) Contact CS for shims if required.
Troubleshooting
D U-Guide under the door is making contact with the floor and/or bottom
plate of the cavity unit.
Ensure clearance throughout the opening.
60854/35 10.2017Useful Formula & Trim Sizes
Use our online door size calculator at www.csfordoors.co.nz
or www.cavitysliders.com.au
Standard Units
Dimension required Single Bi-Parting Single Only Single
Trim height DH + 95 DH + 95 DH + 95 DH + 105
Trim width (DW x 2) + 30* (DW x 4) +10* (DW x 2) - 70 (DW x 2) + 30*
Distance between jambs DW - 31 (DW x 2) - 42 DW - 31 DW - 31
Floor to under Timber DH + 18.5 DH + 18.5 DH + 18.5 DH + 18.5
side of jamb Aluminium DH + 13.5 DH + 13.5 DH + 13.5
*Door flush to jamb when fully open. DH = Door Height, DW = Door Width. All dimensions in millimetres.
Standard Trim Sizes - New Zealand
Single Bi-Parting
Door size Trim Size Door size Trim Size
Height Width Height Width Height Width Height Width
1980 x 610 2075 x 1250 1980 x 610 2075 x 2450
1980 x 660 2075 x 1350 1980 x 660 2075 x 2650
1980 x 710 2075 x 1450 1980 x 710 2075 x 2850
1980 x 760 2075 x 1550 1980 x 760 2075 x 3050
1980 x 810 2075 x 1650 1980 x 810 2075 x 3250
1980 x 860 2075 x 1750 1980 x 860 2075 x 3450
1980 x 910 2075 x 1850 1980 x 910 2075 x 3650
Standard Trim Sizes - Australia
Single Bi-Parting
Door size Trim Size Door size Trim Size
Height Width Height Width Height Width Height Width
2040 x 620 2135 x 1270 2040 x 620 2135 x 2490
2040 x 720 2135 x 1470 2040 x 720 2135 x 2890
2040 x 770 2135 x 1570 2040 x 770 2135 x 3090
2040 x 820 2135 x 1670 2040 x 820 2135 x 3290
2040 x 870 2135 x 1770 2040 x 870 2135 x 3490
2040 x 920 2135 x 1870 2040 x 920 2135 x 3690
CS FOR DOORS (New Zealand) CS Cavity Sliders (Australia)
T 0800 SLIDER (754 337) T 1300 9 SLIDE (975 433)
E info@csfordoors.co.nz E info@cavitysliders.com.au
W www.csfordoors.co.nz W www.cavitysliders.com.au
FOR DOORSYou can also read