Studio Class Training Manual - Revised Jan.2020 - (CCTV) Salem
←
→
Page content transcription
If your browser does not render page correctly, please read the page content below
Studio Class
Training Manual
Revised Jan.2020
Intro to Studio Production
In studio class, we will go over the basic functions of CCTV’s lighting equipment, camera set
up, tripods, audio, and the control room. These materials are meant to be an overview of the
studio; staff are available to help you learn more in-depth functions if you are interested.

Studio Roles (pages 1 - 3)
We will go over various studio production roles including producer, director, floor director,
tech director, sound engineer, and talent (host/guest).

Lighting (page 4)
We will learn how to adjust the lighting and how to properly light the set, and we will talk
briefly about other lighting available and how to use it.

Camera & Tripod Settings (pages 5 - 7)
We will go over camera settings, the rule of thirds, camera angles, and various suggested
camera shots, as well as learn how to move and adjust each tripod.

Audio (pages 8 - 9)
We will go over the various microphones we have available including lavalier, handheld,
shotgun, and concert mics. We will also learn the necessary setup for a talk show setting, and
we will talk briefly about more complex audio.

Audio/Video Capture (pages 10 - 11)
We will learn how to make sure that we are recording your program’s audio and video to your
hard drive, and recording a backup.

Control Room/Tricaster (page 12)
Here we will learn how to switch camera angles during your program, choose between cuts
and transitions, and communicate to camera operators.

Titles, Graphics & Green Screen (pages 13 - 17)
We will learn how to create graphics and titles, as well as use the green screen and virtual
sets.

Reminders (page 18)
Once you learn the basics of studio production, you will need to provide your proof of Salem
residency, purchase a hard drive, schedule follow up studio labs, and schedule studio time.
Read through these reminders as you go forward!

Studio Roles

1) Talent
The talent are the people in front of the camera! The performers, hosts, guests, etc.

2) Producer
The manager of the production. Responsible for program concept, structure, content, script,
and for arranging for talent, crew, equipment, playback times, and getting the production
started and finished.

3) Director
The person responsible for the technical production of the show. Before recording, the
director works with crew members to discuss lighting needs, camera placement, etc. During
the show, gives instructions via intercom to each crew member concerning composition of
shots, when to switch between cameras, when to display graphics, etc.

4) Technical Director
The person who pushes the buttons to control what the viewer sees – switching between
sources, creating the final program – at the command of the Director. Sometimes, the
Technical Director (TD) and the Director are the same person.

5) Floor Director
The Floor Director works in the studio to communicate information from the Director to the
talent. Relays instructions verbally or by hand signals.

6) Camera Operator
Each camera operator is responsible for correctly composing images in their camera to use
during the production. The camera operator needs to be comfortable with the zoom and
focus controls on the camera. The Director instructs the camera operators during the
production.

7) Audio Operator
Selects and places microphones in the studio and tests all sound sources before recording.
During the production the Audio Operator runs the audio board and brings in audio sources
as instructed by the Director. Controls volume levels and monitors sound quality.

8) Graphics
For some programs, including LIVE shows, the Director or TD creates pages on the computer
of titles, credits, and other written information to be superimposed over camera shots. During
the show the TD is responsible for calling up these pages as instructed by the Director. Not all
programs require graphics to be created ahead of time; many Producers choose to edit in all
graphics later.

                                                                                                   1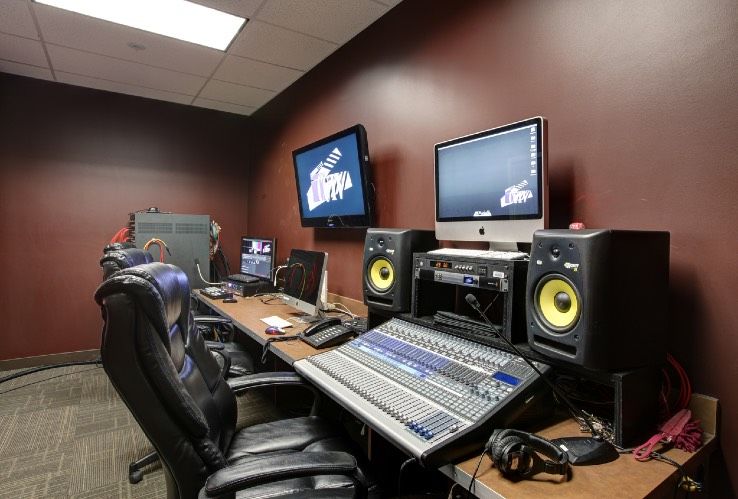
Listening to the director
Wear your headset to hear the director. The volume control is on the “belt pack", which is
connected to the tripod. Look for the TALK button, which will turn on your microphone so you
can talk to the director and control room.

Never talk out loud during recording! Your director may ask you yes or no questions; answer
them by "nodding" your camera. Speaking out loud not only distracts the talent but is picked
up by the microphones, resulting in an unprofessional-sounding program.

Taking direction
The director will usually tell you what shots they want for your camera. Make sure you know
which camera number you are, because that's how they'll address you. Be mindful of the
directions you're given and respond immediately.

Here are some examples of things you'll hear from the director:

 "Ready camera 1.. take 1"
 "Camera 2, you're offline now, could you check your focus, please?"
 "Camera 3, tilt down a little. Okay, now pan a little to the left."
 "Much better camera 2; ready 2, take 2. 2 is online."
 "1, looking good, be ready for the talent to stand up"
 "Ready 3, take 3"
 "Ready 1, take 1 ... there he goes, follow him, 1!”

A director should always be respectful, but you should also expect them to tell you what to do
and when to do it without "sugar-coating". A director should be direct, and some people
aren't used to having orders barked at them. Don't take it personally when a director is
abrupt.

Floor directing
It's the floor director's job to relay communication between the studio (talent) and the control
room (director). The director will ask the floor director to communicate when to be quiet on
the set, when to start the show, and when to wrap up the show. They are also responsible for
taking care of talent needs, like water.

The floor director may also be responsible for operating a camera, depending on the size of
the crew. If they are not on a camera, they can use the separate "floor director headset".
Attach the belt pack to your belt or pocket; it operates the same as the one on the cameras.

                                                                                                   2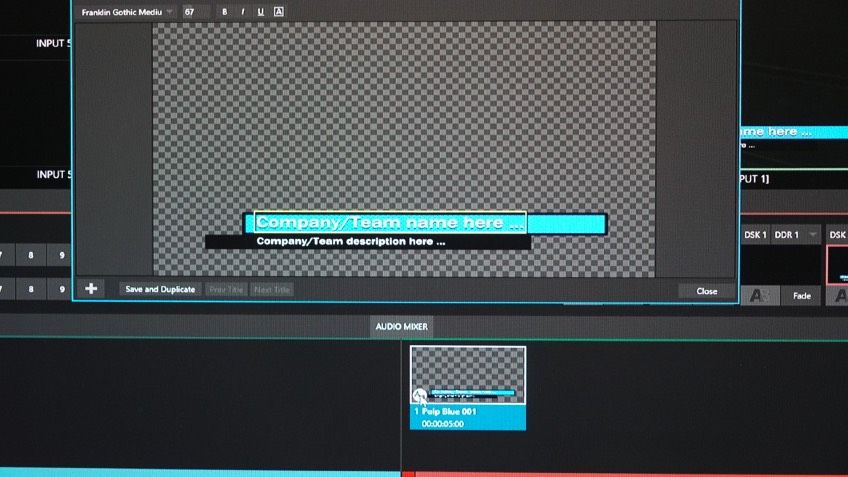
Equipment powered up

CCTV staff is responsible for turning on equipment and getting it in a "ready" state. If any of
the equipment is turned off, please let them know.

Being the director
It's the director's job to tell everybody on the crew when to act, and how. The director
decides when recording is to begin and gives the countdown for the start of the show. They
tell the camera operators exactly what shots to get, and may tell the audio operator to make
adjustments they deem necessary.

As we learn from being a camera operator, a director must be respectful but should also be
able to quickly direct orders to camera operators. Sometimes this means being very direct,
even abrupt. A good director knows how to combine confident, direct orders with positive
reinforcement. A director should NEVER be rude or condescending, nor use off- color
language.

Cuts and transitions
Cut between cameras using the switcher. You can click directly on the "virtual switcher" on-
screen or use the physical switcher. The Program (or Live) buttons determine what camera (1,
2, or 3) is "on-line", or the one being recorded. The Preview buttons allow you to look at a
camera on the preview monitor and use the waveform to adjust iris (brightness).

Use the Program and Preview buttons together to achieve a transition. Select a transition
(usually CrossFade) and choose the speed (Slow, Medium, Fast). Select the camera you want
to transition to on the Preview buttons. Press the Auto button to perform the transition. You
may also use the fader bar instead of the Auto button for direct control over the speed of the
transition.

                                                                                                  3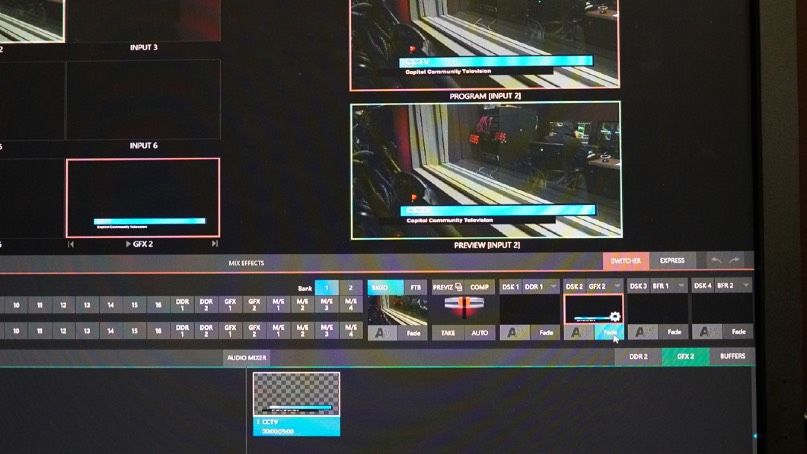
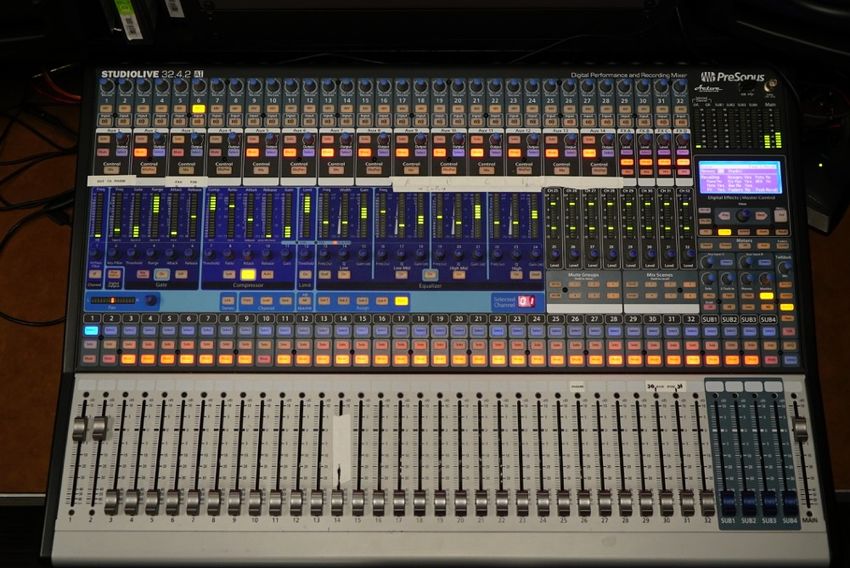
Lighting

Studio Light Grid
Each light in the grid has a number on it that corresponds with the sliders (faders) on the
lighting panel by the studio door. There is also a grand master slider that controls all the
lights at once. See the below breakdown of studio lights.

     1 - 12             Interview Lights

    13 - 17               Front Lights

    18 - 22           Green Screen Lights

    23 - 24        Back Green Screen Lights

    25 - 26                Spotlights

Interview Lights
You can fade the lights up or down depending on the
mood want to create (brighter for higher energy, dimmer
for more dramatic look). You will adjust the lights to your
liking, and CCTV staff can help you determine the best
look for your program.

Green Screen Lights
In addition to the interview and front lights, there is
another set of lights that illuminates the green screen wall. Try different combinations of
strength to give shape to your subject using key and fill lighting.

                                                                                               4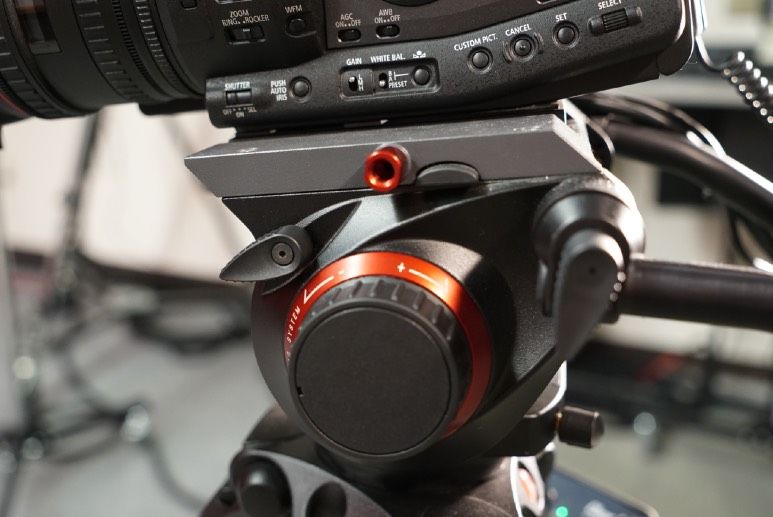
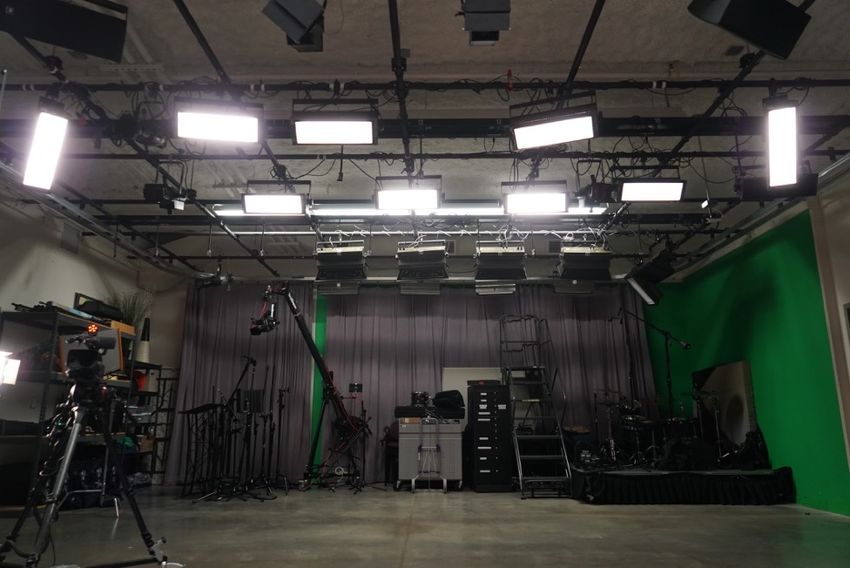
Camera

Rule of Thirds
The rule of thirds is a concept in video production in which the frame (what you see in the
camera viewfinder) is divided into nine imaginary sections, as illustrated below. This creates
reference points which act as guides for framing your image.

In most interview or talk show situations, the main line of interest is the line going through the
eyes. Eyes should be placed approximately 1/3 of the way down the frame. Also be aware of
how much headroom you create when positioning your subject vertically. Headroom refers to
the amount of space between the top of a person's head and the top of your frame. Too
much headroom makes the person appear to be sinking. Lastly, be sure to leave extra space
in the direction your subject is looking (referred to as “lead room”). See examples of how to
                                                 position your subject below.

                                                                                                     5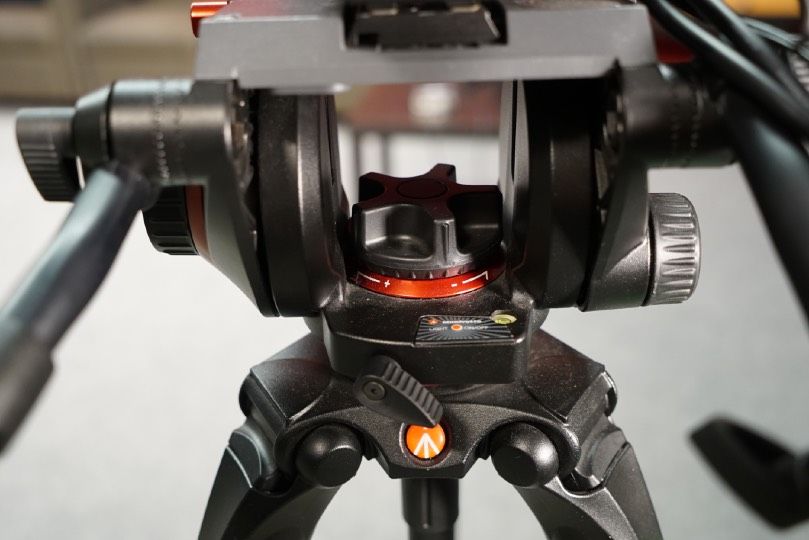
Camera settings
 The studio camera is the Canon XF305. First, let’s go over the basic settings on the camera.
 On the preview screen, you can set the resolution, frame rate, focus, iris and white balance.

AUTO FOCUS

  WHITE                                                                            RESOLUTION
BALANCE                                                                            & FRAME RATE

        IRIS                                                                       AUDIO METER

 Focus
 Auto Focus is recommended, though you may choose to use Manual Focus.

 Iris
 Itʼs best to set all three cameras to f2.4, then adjust each as needed. Auto iris is not
 recommended.

 White Balance
 All three cameras should produce colors that match. The easiest way to do this is to set all
 three to the same white balance preset. For the studio, the preferred setting is 4200k.

 Audio
 Before you begin your program, make sure each camera is recognizing audio.

                        Zoom Control
                        Zoom control is on the right control arm of the camera. Use the rocker
                        to zoom in and out. It's pressure-sensitive, so the harder you push, the
                        faster the zoom. You can switch between manual and autofocus and
                        iris, as well as start and stop recording from the zoom control.

                        Tally Light
                        There is a red light on the top of each
                        camera to signal to the talent and the
                        camera operator which camera is live and
                        capturing video during production.

                                                                                                   6
Intercom headset
The director can give each camera operator instructions by
using the intercom system in the studio. Each camera
operator can hear the director’s instructions when wearing
the headset. Camera operators can respond to the director
by pressing and holding the “talk” button on the intercom
pack. The volume can be controlled by adjusting the wheel
on the intercom pack.

Tripods + Pan/Tilt
Each camera is mounted on a Manfrotto tripod. The head
of the tripod includes both a lock and a tension control.
Use the lock for safety when stepping away from the
camera. Use the tension control to adjust the drag when
tilting the camera up and down. Don't use the lock to
adjust tension. The camera's pan lock can usually be left
loose for a smoother pan.

You can adjust the height of the tripod by first adjusting the top set of locks (on the legs),
being careful not to let go of the tripod while adjusting. Adjust the bottom locks of the tripod
legs if you need the camera to be even further elevated. Once the tripod has been set to the
desired height (hint: eye level for interviews), you will need to level the tripod. Twist the
center handle beneath the camera and, using the green level bubble, adjust the camera until
it is level. Lock the center handle by twisting it back the other direction.

Lastly, make sure to lock the wheels of each tripod once you’ve placed the camera in the
correct spot.

   TO START RECORDING:
   1) OPEN MEDIA EXPRESS
   2) CLICK “LOG AND CAPTURE”

                                                                                                   7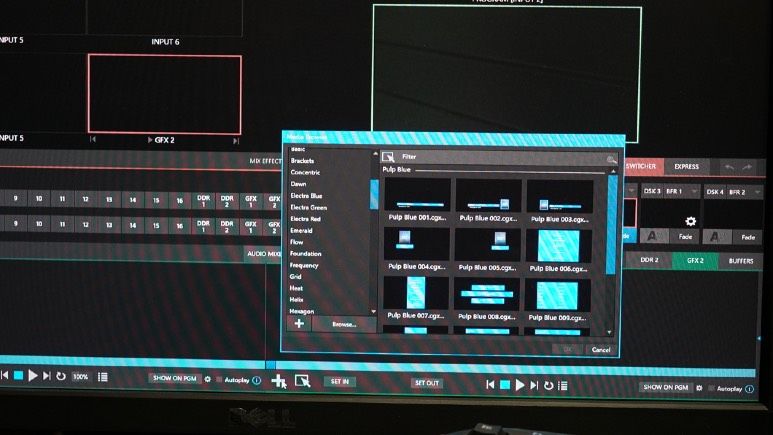
Audio

There are a variety of microphones available to use in the studio, and we will go over the
basic setup for each. We may have other microphones available if these do not meet your
needs.

1) Lavalier Microphone:
This is a small mic that is clipped on to clothing, and it usually used for talk shows. It can be
easily hidden from the camera and means that the talent does not have to hold a mic.

2) Concert Microphone:
This mic is mounted on a stand and is placed over a big group to capture sound from
multiple people.

3) Shotgun Microphone:
This is a directional microphone, meaning it picks up what it’s aimed at. It can be mounted on
a camera or a separate stand.

4) Wireless Microphone:
This microphone is similar to a lavalier however it does not have a wire, which makes it easy
for talent to move around.

5) Audio Snake
There is an audio snake in each studio (a box to connect and power wired microphones).
Each input (where a microphone is plugged in) is numbered and corresponds with an audio
channel in the control room. Plug your first microphone into input #1, then #2, and so on.

   1                    2                     3                    4                     5

                                                                                                    8
Audio Mixer
The console in the control room is the PreSonus Studio Live 32-channel digital audio mixer.
The number of channels you use on the mixer will depend on the number of microphones
you have set up in the studio. There are only four things you have to remember about the
mixer.
1) The level of the “Main” fader should be set at “U”.
2) Do the same for each audio channel you are using.
3) Be sure to unmute each channel (when the light is off, the channel is unmuted).
4) Set the Mic/Line (Trim Control) for each input to 3:00 to begin with, and adjust during
sound check
4
3
2 1
9Capturing your Program
Most producers switch their program live and capture the finished video onto a hard drive in
the control room. If you would prefer to multi-clip your production in the editing room, you
will need to have a CF card for each camera you operate. CF cards are different from standard
SD cards, and CCTV staff can make recommendations on where to purchase them.
First, connect your hard drive to the capture computer (middle of the control room). Next,
make sure you have enough space on your hard drive (1 GB per minute). To check your hard
drive space, right click on your drive and choose “Get Info”. A window will open and show you
your drive’s capacity, as well as the current available space.
CF CARD
After you have confirmed that you have enough space, you will need to create a folder for
today’s program. Double click on your drive, right click inside the window, and select “New
folder”. Give the file a name for today’s recording (program name + date is recommended).
Next, open Blackmagic Media Express from the dock.
Click “Log and Capture”, located to the left of the green “playback” tab toward the middle of
the screen.
TO START RECORDING:
1) OPEN MEDIA EXPRESS
2) CLICK “LOG AND CAPTURE”
Log and Capture
Media Express Icon
10Click “Media Express” from the very top left corner of the screen. Then select Preferences.
Make sure the video format is HD 720p 59.94 (1). Make sure the capture file format is
QuickTime Apple ProRes 422. In the second portion of the window, click the “Browse” button
(2) and locate your hard drive. Navigate to the folder you created for today’s program and
click “choose”. Close the preference window (red button in top left corner).
When you’re ready to record, click “Capture”
1 along the bottom of the Media Express window.
You will then begin to see red arrows moving
along the bottom of the screen, which means
you are capturing your audio and video. To
2 stop, click “Capture” again.
Don’t forget!
5) Before you begin your program, make sure each camera is recognizing audio.
6) Start recording at least five minutes before you begin your show!
Recording a Backup
At the back of the control room, there will be empty SSD drives ready for you to record your
backup. In the top right corner of the screen you will find the available record time for that
SSD. Make sure that you have enough time on the backup SSD for today’s program. When
you’re ready to record, click the record button (round circle). As long as you see the numbers
counting, you are running your backup. Start recording at least five minutes before you start
your show! RECORD RECORDING TIME LOG
STOP
Upon completion of your show, double check to make sure that your footage was capture in
its entirety on your hard drive. Backup drives are erased at the end of each day, so it’s your
responsibility to make sure you have a copy!
11Tricaster - TC1
You will use the Tricaster to switch camera angles during your program. You will see a
“preview” window (1), which allows you to see each camera angle before choosing one to
take, and the “program” window (2), which is what you are capturing to your hard drive and
backup.
The “LiveControl” keyboard on the countertop will allow you to preview and program your
camera angles. The middle row (LIVE) will allow you to change camera angles with the touch
of a button. The bottom row (PREVIEW) will allow you to preview angles before making them
live.
There are different ways of cutting to a new angle: you can do straight cuts, or you can use a
fade transition. If you prefer a fade, you will select your new camera angle on PREVIEW, and
then move the fader lever to add a transition. The faster you pull the lever, the faster the
transition. The slower you pull the lever, the longer the fade.
1 2
Intercom
Announce
Button
A
First, make sure that audio channel (A) is on (orange is on, blue is off). Now you can speak to
all your camera operators and directors at once. To talk to everyone in the studio (including
guests), press and hold the “Announce” button.
12Titles, and Graphics
Titles
Titles are used to identify your host and their guests, and display information on-screen. To
access the pre-made templates that Tricaster offers, select the (1) “GFX2” tab, along the
Lower right side of the screen.
1
2
(2). Move your cursor to the lower left side of the screen, and click on (+) bottom a window
will pop up with title templates. When you find the template you want to use, select it and
click “ok”. You should now see the title in the bottom right window.
(3) To edit the text of your graphic, click on the (Aa) icon in the middle left portion of the title.
3
134
5
(4) A window will open and allow you to change the text, as well as adjust the font settings.
Click “close” when you are finished.
(5) To create other titles using the same template, click the “Save and Duplicate” Icon.
Remember to change the text for each cloned title you create.
(6) Once your titles are ready, you can use them in your program by clicking
“Fade” (automatically displays the title). Click again to remove the title. Titles are usually left
on screen for about 10-15 seconds, but you can display them for any length of time.
6
14Green screen
(1) Select Camera (INPUT) you are going to use for green screen double click on it, a
window will open.
1
(2) Click on LiveMatte, once the next tab is open, the camera you are using will turn black.
Keying is a popular and powerful method of compositing multiples images, whether photos,
video clips or live camera streams.
2
15(3) The Crop Source process involves eliminating a portion of the image (effectively cutting a
digital ‘keyhole’ in it) to reveal a user-defined background scene. LiveMatte’s controls are
deceptively simple, making a great deal of complex digital manipulations easy to use.
SOURCE
16Hint: Chromakeying has become an essential tool in video and film production.
Typically, foreground footage is shot in front of a blue or green screen, and
then that background color – the key color – is treated as transparent, allowing
another image to be inserted.
For example, when you see a tv meteorologist in front of a weather map, that person is almost
certainly posed in front of a green screen. The background is ‘keyed out’, to be replaced by
computer generated imagery.
LiveMatte, Proc Amp, or Crop settings are active for a source, bright green,
blue and yellow indicators are lit under its monitor.
To use the green screen, you will first work with staff to turn on the appropriate lights to light
up the green screen.
Graphics can be used in combination with green screen in a couple different ways. One, you
can incorporate an image or piece of video into a portion of your virtual set. Two, you could
choose to replace the entire background with an image or piece of video.
17Submitting proof of Salem residency
As you learned in orientation, you will need to provide your proof of Salem residency before
making your first studio reservation (this includes studio labs). Proof of residency consists of a
current photo ID, and a current piece of mail (not junk mail) with your physical Salem address
(not a P.O. box). This information is updated annually.
Scheduling follow up Studio Labs
Once you have submitted your proof of residency, work with Luis Mendoza to schedule your
first studio lab. He will help you determine how much studio time to reserve.
Scheduling studio time
Once you are certified to use the studios, you can reserve time as it works with your schedule!
To reserve a studio, call the front desk at (503) 588-2288, ext. 0.
Purchasing a hard drive
In order to use the studios, you will need to purchase your own personal hard drive. We
recommend a terabyte or more of space. If you’re unsure where to purchase a drive, ask staff
for help.
Arranging studio crew
When you work in the studio, you will want to bring at least one person to help you in the
control room. The size of your crew can be scaled, depending on what you are trying to
accomplish. Talk with Luis Mendoza if you are unsure how many volunteers you’ll need for
your crew.
Questions?
Don’t hesitate to reach out to Luis Mendoza, CCTV’s Community Facilitator, with any
questions related to studio production. Hang on to these class materials and refer back to
them often!
18You can also read