THE WALKING DEAD TABLE GUIDE - BY SHORYUKENTOTHECHIN
←
→
Page content transcription
If your browser does not render page correctly, please read the page content below

Page 1 of 34
The Walking Dead Table Guide
By ShoryukenToTheChin
7
6
8 10
9
5
11
3 4
1 2
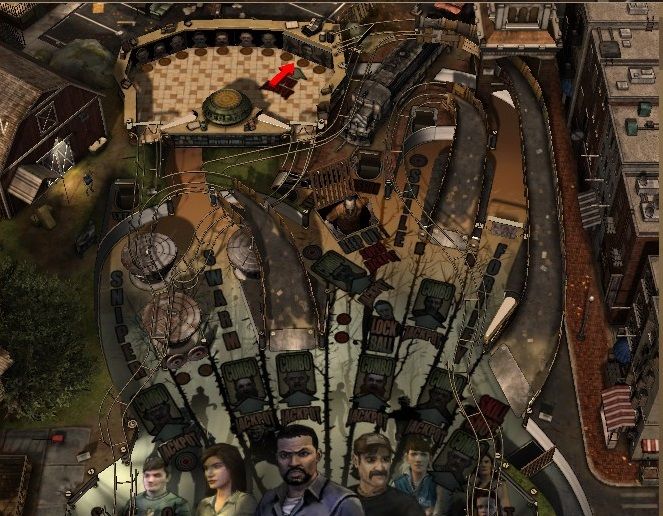
Key to Table Overhead Image –
1. Left Sniper Mini - Orbit
2. Swarm Orbit
3. Left Ramp
4. Ball Lock Targets
5. Right Sniper Mini - Orbit
6. Walker Target
7. Mission Sink Hole
8. Smile Mini - Orbit
9. Right Ramp
10. Fortify Orbit
11. Bell Tower Ramp
In this guide when I mention a Ramp, Lane, Hole etc. I will put a number in brackets which will correspond
to the above Key, so that you know where on the Table that particular feature is located.
Page 2 of 34

                                       TABLE SPECIFICS
  Notice: This Guide is based off of the Zen Pinball 2 (PS4/PS3/Vita) version of the Table on default
controls. Some of the controls will be different on the other versions (Pinball FX 2, etc...), but everything
                                    else in the Guide remains the same.

INTRODUCTION
This Table came about as a result of the partnership between Zen Studios and Telltale Games; this license
allowed Zen to produce a Table based on the hit game “The Walking Dead: A Telltale Game Series –
Season 1”.

This Table uses plot points from the first season of The Walking Dead game; the voice actors from the game
even lend their voices to the Table and thus make it feel even more authentic. Match all that with chilling
background music and you got one heck of a Pinball Table!

I hope my Guide will help you understand the Table better.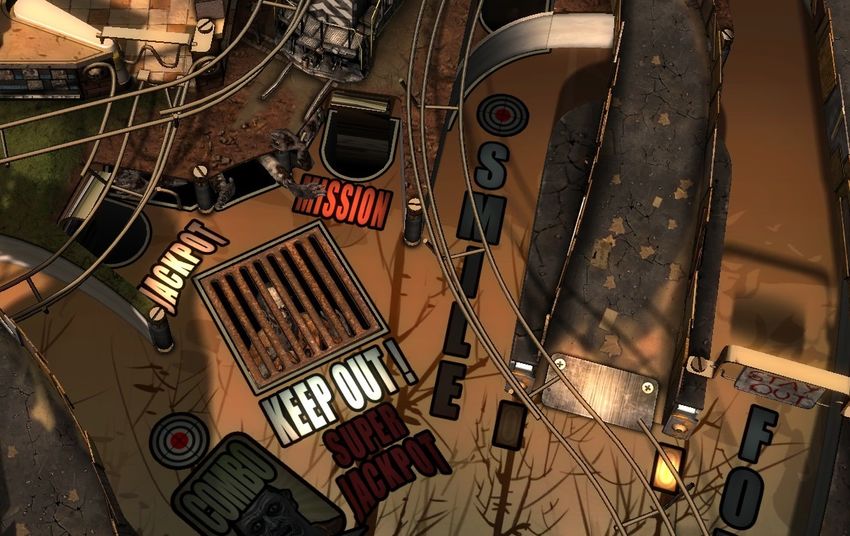
Page 3 of 34

Skill Shot - *1 Million Points*
On this Table a successful Skill Shot is scored in 2 Stages –

       1. First you must adjust the Plunger to give the Ball just enough momentum to launch onto the
          Playfield. Thus it will allow you to capture the Ball by holding up the Left Flipper.

       2. Upon the Ball leaving the Launch Lane you will have 5 Seconds to send the Ball up the Bell
          Tower Ramp (11) to gain the Skill Shot award.
Page 4 of 34

Kick Back & Ball Save
This Table uses a different method of which you may be accustomed in gaining the Kickbacks. For this
Table you will need to send the Ball through the Spinner located at the entrance of the Fortify Orbit (10).

                    Fortify Orbit (10)

Repeatedly do this until the Spinner has rotated 15 times and thus the Left Kickback will activate. Repeat
this process again to active the Right Kickback.

Once both Kickbacks are activated, repeating the process will earn you the Savannah Bonus award, the first
award is 500,000 Points. Every 15 spins after that increases it by 500,000 Points up to 5 Million Points max.
It resets when you lose a Ball, as do any activated Kickbacks.

                     *Note - This Table resets the Kickbacks earned if you lose a Ball*

Ball Save –

The Ball Save is activated within various Modes.

      *Note – Ball Save remains active until you lose the Ball or the Ball Save time limit runs out!*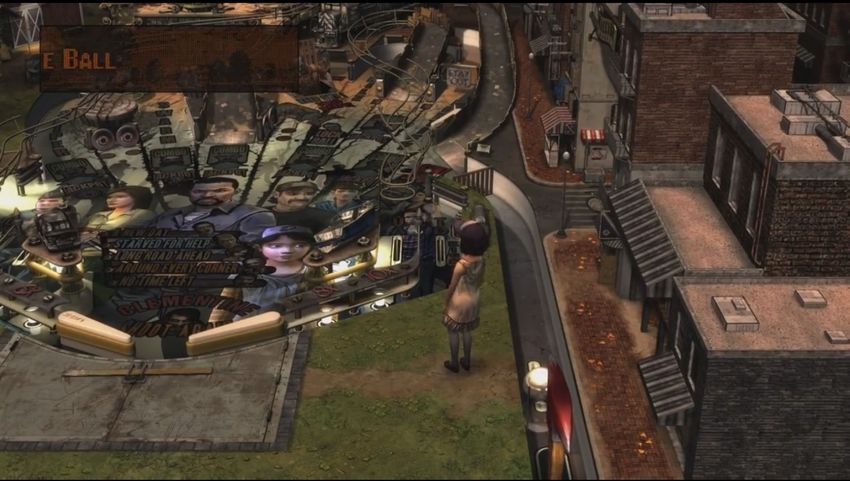
Page 5 of 34

Extra Balls
There are 4 Ways to achieve an Extra Ball – hit the Left Sniper Mini – Orbit (1) to land in the flashing Sink
Hole to claim the Extra Ball.

                      Claim the Extra
                       Ball when lit.

   •   Method 1: Topping the Bonus Multiplier; look just below this Section of the Guide at the Section
       titled ‘Raising the Multiplier’ for information on how get this Extra Ball.

   •   Method 2: Performing a 6 hit combo of shots; hitting lit Lanes within quick sequence will cause a
       combo to begin, if you manage to link a minimum of 6 lit Lanes then an Extra Ball will become
       available.

   •   Method 3: Completing 10 of the Side Modes; just complete one or a combination of the Side
       Modes 10 times to get this Extra Ball. How to start/complete these Side Modes can be found later in
       the Guide under ‘Side Mode’ section.

   •   Method 1: Locking 7 Balls; look later in the Guide at the Section titled ‘Multiball Modes – Ball
       Lock’ for information on how get this Extra Ball.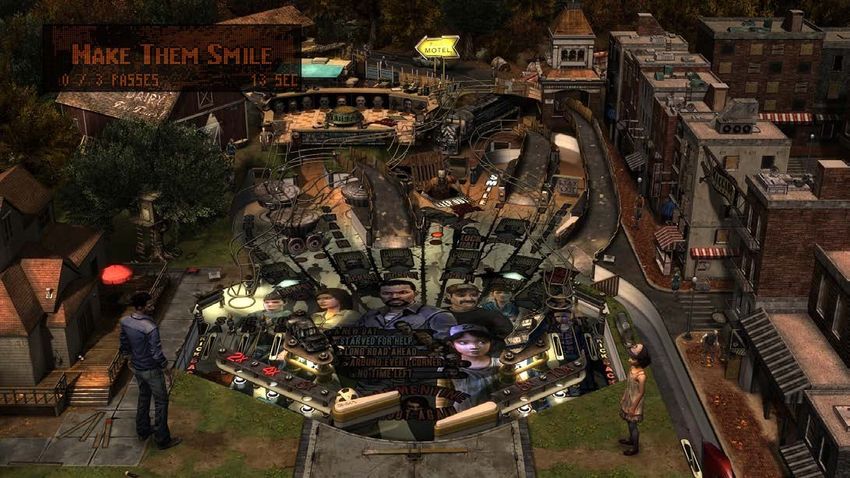
Page 6 of 34

Raising the Multiplier
To raise the Bonus Multiplier you will need to hit the Ball up the Right Ramp (9) to activate the Magnet at
the Bumpers for a limited amount of time -

                                    Right Ramp (9)

Now send the Ball towards the Bumpers either via the Swarm Orbit (2) or Fortify Orbit (10) -

                                           Fortify Orbit (10)

    Swarm Orbit (2)

The Magnet will cause the Ball to bounce around on the Bumpers. You need to have the Ball hit the
Bumpers a total of 15 times. Repeat this process until the Multiplier level advances to 2x times

Repeat this process again and again to raise the Bonus Multiplier until it maxes out at 10x times. Also, once
the Multiplier is maxed you get the Extra Ball the next time you complete 15 Bumper hits. Then each time
you complete 15 Bumper hits you get a Walker Bonus which starts at 500,000 Points and increases by that
amount.

                         *Note – Multiplier Level resets upon draining the Ball.*
Page 7 of 34

                                           Side Modes
Food is Scarce
To start up this Hurry Up Mode you will need to produce 3 quick successive hits on the Left Ramp (3) &/or
Right Ramp (9) –

                              Right Ramp (9)

              Left Ramp (3)

Once done the Hurry Up Mode will begin. At the start of the Mode you will have 17 Seconds to acquire 5
Rations -

You gain these Rations by hitting either of these Lanes –

   •   Left Sniper Mini – Orbit (1)
   •   Swarm Orbit (2)
   •   Smile Mini – Orbit (8)
   •   Fortify Orbit (10)

Each time one of those Lanes are hit you will also gain a +4 Seconds to the overall timer of the Mode.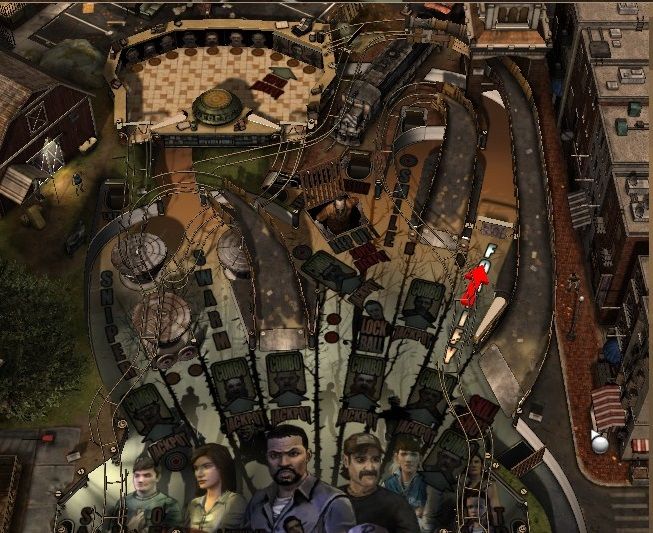
Page 8 of 34

Scout Ahead
You will need to light all of the ‘SCOUT AHEAD’ Rollovers on the In & Out lanes to start up this Hurry Up
Mode –
               ‘S’         ‘C’        ‘O’                                     ‘U’         ‘T’
               ‘A’         ‘H’        ‘E’                                     ‘A’         ‘D’

Use the Flipper Buttons to alternate which Rollover is lit as to try and make sure the Ball is rolling down an
un-lit Rollover as much as possible.

Once the 10 ‘SCOUT AHEAD’ Rollovers are lit, the Mode will begin –

                                                                                 Walker Ball

You will be given 37 Seconds to find 5 Paths, basically you just need to hit 1 of the 2 flashing Lanes to find
1 Path and then repeat the process a further 4 times to complete the Mode. Note that the flashing Lanes will
vary and for each Path you find a +5 Seconds will be added to the timer.

There is something though that makes this a bit trickier; a Walker Ball, that will be moving from side to side
at the entrances of the flashing Lanes. Hitting your Ball at it will result in the Ball disappearing and another
being launched out, causing you to lose time. You should therefore time your shots carefully so that you can
be more efficient.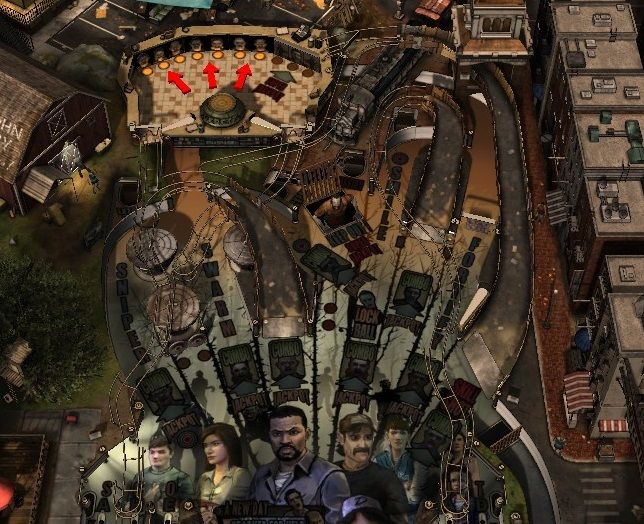
Page 9 of 34

Swarm
To start up this Hurry Up Mode you will need to send the Ball around the Swarm Orbit (2) a total of 5 times,
since each time you will light 1 Letter of ‘SWARM’ and finally send the Ball around one more time to begin
the Mode.

Once the Mode begins the Playfield will enter its Night state and Walkers will start rising from the Playfield
–

You will have 42 Seconds to hit 15 Walkers with your Ball. The Mode will end if a Walker makes it to your
Flippers or if the time runs out.
Page 10 of 34

Life – Saving Arms
To start up this Hurry Up Mode you will need to hit these 4 Targets; 2 Targets are located under the
Bumpers and the others 2 are located either side of the Right Ramp (9) entrance; as shown in the Image
below –

Once done, a Sink Hole will become available via the Left Sniper Mini – Orbit (1). Hit the Ball into it to
begin the Mode –

 Left Sniper Mini
    – Orbit (1)
Page 11 of 34 Once the Mode begins the Playfield will enter its Night state – You will then have 22 Seconds to hit these 3 Orbits – • Left Sniper Mini – Orbit (1) • Swarm Orbit (2) • Right Sniper Mini – Orbit (5) If you manage to complete this Mode you will gain 3 more Sniper Bullets (for use on the Sniper Hurry Up Mode which will be detailed later in the Guide).
Page 12 of 34

Make Them Smile
To start up this Hurry Up Mode you will need to send the Ball around the Smile Mini - Orbit (8) a total of 5
times, since each time you will light 1 Letter of ‘SMILE’ and finally send the Ball around one more time to
begin the Mode.

                            Smile Mini - Orbit (8)

Once the Mode begins the Ball will change into a Yellow Football/Soccer Ball –

Within this Mode 2 or 3 Ramps/Orbits will be flashing, hit the Ball up them within the allotted time to
complete the Mode (starts at 13 Seconds but after hitting a flashing Lane +5 Seconds will be added to the
timer).
Page 13 of 34 Supply Run To start up this Hurry Up Mode you will need to hit all of the Walker Head Targets on the Travelier Motel Mini – Playfield located at the Top Left of the Table Playfield. You gain access to this Mini – Playfield by sending the Ball all the way up the Bell Tower Ramp (11). Use the 2 Flippers (these are reversed; the Right Flipper is actually controlled by the Left Flipper Button, and the Left Flipper is controlled by the Right Flipper Button) on the Mini – Playfield to send the Ball towards the Walker Head Targets. If the Ball drains down the side of the Mini – Playfield just send the Ball back up the Bell Tower Ramp (11), and don’t worry your progress of Walker Head Targets hit will remain. Once done the Mode will begin –
Page 14 of 34

You will have 37 Seconds to collect 25 Items.

Hitting the various Targets, Lanes etc. will award –

   •   Hitting the Walker Head Targets & Bumpers will award you with 1 Item.

                    Walker Head Targets

                        Bumpers

   •   Hitting the Ramps/Orbits will award you with 3 Items.

All of these will award you with increased Scores.
Page 15 of 34
Everett’s
To start up this Frenzy Mode you need to have the Ball bounce off of the Everett Bumper (located on the
Travelier Motel Mini – Playfield) a total of 8 times.
Everett Bumper –
it will flash when
hit.
Upon doing so the Mode will begin –
During the 22 Seconds of the Frenzy, the Ball won’t be able to drain down the sides of the Mini – Playfield.
Instead you can just concentrate on scoring as many Points as possible by raising the Everett’s Jackpot; this
is done by hitting the Walker Heads.Page 16 of 34 Finally to claim the Points you will need to sink the Ball behind the Targets like so. When a gap appears within the Walker Head Targets hit the Ball there to sink it before the heads reappear –
Page 17 of 34

Sniper
To start up this Hurry Up Mode you will need to send the Ball around either the Left Sniper Mini - Orbit (1)
or Right Sniper Mini – Orbit (5) a total of 6 times, since each time you will light 1 Letter of ‘SNIPER’ and
finally send the Ball to the Sink Hole now available via the Smile Mini – Orbit (8).

Upon doing so you will be taken to the Sniper Playfield –

Walkers will randomly appear at the windows of the ruin buildings. Use the Flipper Buttons to move the
crosshair Left or Right, and then press the ‘Launch’ Button to fire. Remember you have 48 Seconds to hit as
many Walkers as possible, as well as having a limited amount of Ammo and therefore make sure every shot
counts!

 *Tip – Completing the Life – Saving Arms Hurry Up Mode (detailed a few pages above) will award you
                        with more Bullets that can be used during this Mode.*
Page 18 of 34
Multiball Modes
Ball Locking –
If you manage to hit both of the Ball Lock Targets (4) –
Ball Lock
Targets (4)
You will then have the chance to lock a Ball in the Sink Hole available via the Smile Mini – Orbit (8) –
The award for doing so is it will add an additional Ball to the next Multiball Mode –
• Lure Them Away
• Fortify The Shelter
• Clementine Wizard Mode
Also you should note if you manage to lock 7 Balls within a game, you will light Extra Ball.
There are 2 Multiball Modes available on this Table (outside the Side Modes and the Wizard Mode);Page 19 of 34
Lure Them Away Multiball *3 Balls* -
To start up this Multiball Mode you will need to hit all 3 of the Target Bank on the Right side of the
Travelier Motel Mini – Playfield, and then sink the Ball behind it to begin the Multiball Mode –
Target Bank
Once the 3 Ball Multiball begins the Playfield will go into its Night state and 6 Lanes are flashing to start
with.
Hitting one will cause it to deactivate (un-lit) for 9 Seconds and lights the Jackpot at the Left Sniper Mini –
Orbit (1). After 9 Seconds it re-lights and has to be hit to un-light it again.Page 20 of 34
Jackpot Available –
hit the Ball around the
Left Sniper Mini –
Orbit (1) to reach the
Jackpot Sink Hole.
If you hit the Jackpot Sink Hole (by going up the Left Sniper Mini – Orbit (1)) with 1 Lane unlit you get
just a Jackpot (around 1 Million Points), if you hit it with 2-4 Lanes unlit you get a Double Jackpot
(around 2 Million Points) and if you hit it with 5 or all 6 Lanes unlit you get the Super Jackpot which is
usually 2.5, 3 or 4 Million Points.
Repeat this process after collecting the Jackpot to relight the Jackpot at the Left Sniper Mini – Orbit (1).
This Multiball will continue as long as you have a minimum of 2 Balls in play. After losing the Multi-Ball,
you will have to repeat the above process to re-enter this Multiball Mode.Page 21 of 34 Fortify The Shelter Multiball *2 Balls* - To start up this Multiball Mode you will need to send the Ball around either the Fortify Orbit (10) a total of 7 times, since each time you will light 1 Letter of ‘FORTIFY’ Upon hitting it a 7th time the Multiball Mode will begin, a 2 Ball Multiball.
Page 22 of 34

Hitting 1 of the flashing Lanes will result in the Jackpot Sink Hole to open on the Left Sniper Mini – Orbit
(1). You can increase that Jackpot award by hitting more flashing Lanes before sinking the Ball via the Left
Sniper Mini – Orbit (1).

                                                                                    Jackpot Available –
                                                                                   hit the Ball around the
                                                                                     Left Sniper Mini –
                                                                                    Orbit (1) to reach the
                                                                                     Jackpot Sink Hole.

Hit the Ball around the Left Sniper Mini – Orbit (1) into the Jackpot Sink Hole to claim the Jackpot award
when you see the above notification light.

You can also claim a Super Jackpot by hitting all the Walker Head Targets on the Travelier Motel Mini –
Playfield and sinking the Ball into the revealed Super Jackpot Sink Hole (Right Side of the Mini –
Playfield), this Mini – Playfield is accessed via the Bell Tower Ramp (11).

                                                         Super Jackpot Available –
                                                          hit the Ball into it to claim,
                                                         after of course hitting all the
                                                             Walker Head Targets.

This Multiball will continue as long as you have a minimum of 2 Balls in play. After losing the Multi-Ball,
you will have to repeat the above process to re-enter this Multiball Mode.
Page 23 of 34
Episodes
To gain access to the Episode Mission Selection you will first need to clear the Walker which is blocking
your path to the Mission Sink Hole (7) –
Walker Target (6)
After 3 hits the Walker will go down and the Mission Sink Hole (7) will become available –
Mission Sink Hole (7)
Note that you are able to cycle through the Episodes available using the Flipper Buttons and select the
Episode using the ‘Launch’ Button.
Each Episode Mission will start off with you needing to make a decision (2 options) -
These options merely change the vocals heard within the Episode and has no bearing on what you need to do
within the Episode.Page 24 of 34 Episode 1 “A New Day” – *Timed* Upon starting this Episode you will need to score 1 Million Points within 28 Seconds. This is done by spinning the Spinner at the entrance of the Fortify Orbit (10) and hitting the Bumpers. Failure to do so will result in failure of the Episode Mission. – If you manage to do the above in time you will then have a choice of 4 Lanes, hit 1 of them. This must be done within 10 Seconds, otherwise the Episode will fail. – Completion of this Episode will award you with 5 Million Points.
Page 25 of 34

Episode 2 “Starved For Help” – *Timed*
Upon starting this Episode you will have 18 Seconds to hit 1 of the 2 randomly selected flashing Lanes to
bring up the Walker Target (6) (just below the Mission Sink Hole (7)) –

After doing the above you will need to hit the Walker Target (6) once within the 19 Second time limit.

                                                                                       Walker Target (6)

Once you hit the Walker Target (6), you will then need to repeat the above process again of hitting 1 of the
flashing lanes etc. only this time when the Walker Target (6) erects you will need to hit it twice. Once more
repeat the above process, and when the Walker Target (6) erects it will require 3 hits.
Page 26 of 34 If you manage to do the above you will then have 20 Seconds to sink the Ball into the Mission Sink Hole (7) – And finally after sinking the Ball you will then have a choice of 4 Lanes, hit 1 of them. This must be done within 10 Seconds, otherwise the Episode will fail. Completion of this Episode will award you with 5 Million Points.
Page 27 of 34

Episode 3 “Long Road Ahead” – *Timed*
Upon starting this Episode you will have 23 Seconds to hit 1 of the 2 randomly selected flashing Lanes
(every 6 Seconds the flashing Lanes will change) to bring down the Walker Target (6) (just below the
Mission Sink Hole (7)) –

You then will have 24 Seconds to hit the Ball into the Walker hands (located just left of the Mission Sink
Hole (7) and behind the “Keep Out” Sign) –

                                                                                     Walker Hands

The timer will then reset, you then need to repeat the above process a further 2 times.
Page 28 of 34 And finally you will then have a choice of 4 Lanes, hit 1 of them. This must be done within 10 Seconds, otherwise the Episode will fail. Completion of this Episode will award you with 5 Million Points.
Page 29 of 34

Episode 4 “Around Every Corner” – *Timed*
Upon starting this Episode you will be taken to the Sniper Playfield, and Walkers will randomly appear at
the windows of the ruin buildings. Use the Flipper Buttons to move the crosshair Left or Right, and then
press the ‘Launch’ Button to fire. You will have 13 Seconds to hit a Walker (every successful hit will add +3
Seconds), as well as having a limited amount of Ammo and therefore make every shot count!

                                                                                   The Dot – Matrix will display –

                                                                                       •   How many Walkers left
                                                                                           to down.
                                                                                       •   Ammunition left.
                                                                                       •   Time left.

Once you hit 10 Walkers the normal Playfield will then return. And finally you will then have a choice of 4
Lanes, hit 1 of them. This must be done within 10 Seconds, otherwise the Episode will fail.

Completion of this Episode will award you with 5 Million Points.
Page 30 of 34
Episode 5 “No Time Left” – *Non - Timed*
Upon starting the Episode, the Table will go to its night state and Walkers will rise from the Playfield. You
will need to hit all 5 Walkers before they reach the Flippers, as this would result in failing the Episode.
*Note – Draining the Ball at the above stage won’t result in a Ball loss.*
After hitting all 5 Walkers the captive Ball will release and now a 2 Ball Multiball will begin. The goal here
is to send a Ball up the Bell Tower Ramp (11) a total of 3 times, as well as making sure the oncoming
Walkers don’t make it to your Flippers (results in failure of the Episode). This Episode will continue as long
as you have a minimum of 2 Balls in play. After losing the Multi-Ball, you will have to repeat the above
process to re-enter this Episode.Page 31 of 34 Finally you will then have a choice of 4 Lanes, hit 1 of them. This must be done within 10 Seconds, otherwise the Episode will fail. Completion of this Episode will award you with 5 Million Points.
Page 32 of 34

    Wizard Mode – Clementine *Multiball
                  Mode*
The Clementine Wizard Mode will immediately begin upon completion of all 5 Episode Missions.

The Wizard Mode is actually more of a 3 Ball Multiball Frenzy; every Lane will be flashing and hitting
them will award you with a Jackpot as well as raising the base Jackpot Award. The Jackpot will go up
by 10,000 Points each time.
Page 33 of 34
You can score a Super Jackpot by hitting the Ball into the Mission Sink Hole (7) or the Super Jackpot Sink
Hole on the Travelier Motel Mini – Playfield. The Below Image shows the Super Jackpot being attained by
hitting a Ball into the Super Jackpot Sink Hole –
Super Jackpot being
acquired by hitting a Ball
into the Super Jackpot Sink
Hole within the Travelier
Motel Mini - Playfield.
The Super Jackpot base award (4 Million Points) can be raised by hitting a Ball into the Jackpot Sink Hole
(located just to the Left of the “Keep Out!” Sign) using the Top Right Flipper. I believe the max Super
Jackpot Award which can be acquired is 5 Million Points. –
Raise Jackpot Sink Hole
(available when Walker
Target (6) is down).
*Note - that during
Normal play you can raise
the Jackpot when the
Walker Target (6) is
down*.
This Wizard Mode will continue as long as you have a minimum of 2 Balls in play. After losing the Multi-
Ball, you will have to re-complete the Episodes to regain access to this Mode (Table Reset!).Page 34 of 34 Special Thanks to all the Zen Studios Forum Community! Members such as shogun00, Cloda, skyway73, tenorhero, DiscoKing & surf1der. I couldn’t have completed the Guide without your help either directly or indirectly - you are all awesome!!! In closing I hope you enjoyed this Table, I certainly have and I hope by using this Guide it increases that Fun factor for you and everyone else who plays with you. Check out the other Tables available, they are all available to download on the Xbox Live Marketplace in Add-Ons section or download it straight from the PFX2 Platform itself. Zen Pinball 2 on PlayStation Network, Zen Pinball on the Apple AppStore, Zen Pinball 3D on Nintendo 3DS and Zen Pinball THD on Android Marketplace. Thanks for viewing my Guide; any feedback would be greatly appreciated - “They’re nudging with the wrong people!” Yours ShoryukenToTheChin
You can also read