Your Do-It-All Dough - Bake from Scratch
←
→
Page content transcription
If your browser does not render page correctly, please read the page content below
JANUARY
             Your Do-It-All Dough

We’re kicking off our Better Baking Academy with our Do-It-All Dough, a
 versatile enriched dough powered by Bob’s Red Mill Organic All-Purpose
Flour. This miracle recipe can go sweet or savory, depending on the baker’s
  whim. Our module includes info on everything from how the ingredients
work to how to knead, proof, and shape your dough to perfection. Your first
            step to becoming a better baker? Preheat your oven!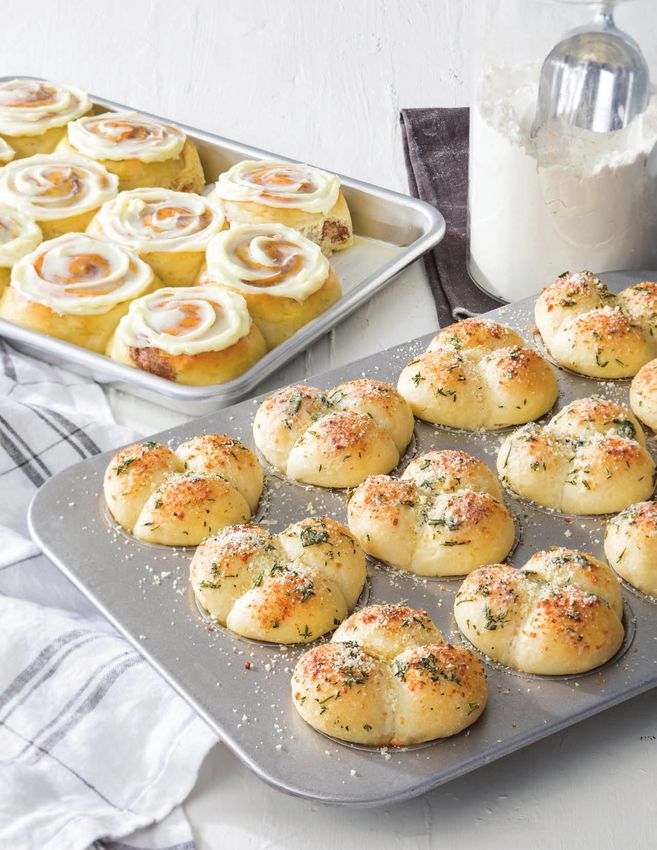
INGREDIENT BREAKDOWN
       Great recipes require great ingredients. Here’s how each key
         ingredient helps make this enriched dough so adaptable.
BOB’S RED MILL ORGANIC                        KOSHER SALT: The ratio of salt to            into the flour insulates it, so the
ALL-PURPOSE FLOUR: This versatile             flour in breads needs to be 1.8% to 2% by    temperature of our liquids (120°F/49°C
all-purpose wheat flour has a protein         weight. That means it’s important to weigh   to 130°F/54°C) is slightly warmer than
content of 10% to 12% and is an excellent     your salt because different salt crystals    when blooming in order to jump-start
choice for baking bread, cookies, cakes,      measure differently. Dough without           yeast activation.
muffins, piecrusts, pizza crusts, and more.   enough salt easily overferments. Salt
                                              enhances flavor, increases shelf life, and   UNSALTED BUTTER: We use
GRANULATED SUGAR: Sugar feeds                 helps with crust color.                      unsalted butter to control how much
the yeast. We opt for a small amount                                                       salt is added into the bread, as different
(2 tablespoons) so the dough can go           WATER AND WHOLE MILK: We                     brands have various ranges of salt in
sweet or savory easily. Plus, using sugar     use milk to add both fat and flavor, but     their salted butter. The milk fat in butter
makes this a true enriched dough.             we cut it with water to keep the dough       helps tenderize the dough, making it
                                              from getting too dark during baking. The     “enriched.”
ACTIVE DRY YEAST: Yeast is essential          temperature of the liquid is important.
to all bread doughs. It needs food (sugar     Warmer doughs ferment faster than            EGG: Adding an egg also makes this an
and carbohydrates), warmth (water             colder, and heat is needed to correctly      enriched dough, incorporating a boost
temperature and room temperature),            activate the yeast. Whisking the yeast       of fat. It must be room temperature in
and moisture for proper fermentation.                                                      order for it to not affect the temperature
Yeast is killed at 139°F (59°C), so keep                                                   of the dough.
your thermometer on hand. The ideal
temperature for yeast to proof is 78°F
(26°C) to 82°F (28°C).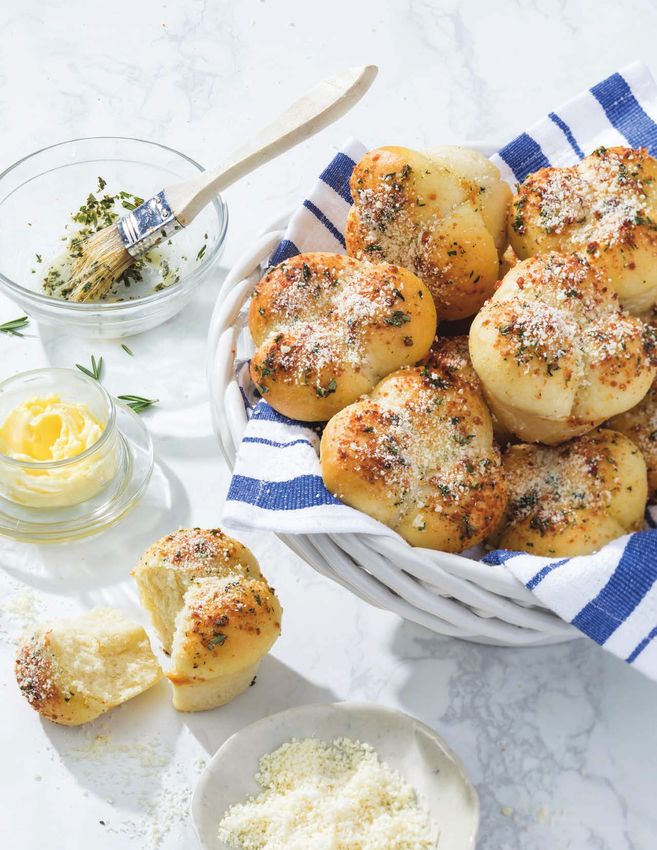
ENRICHED DOUGH 101
                    What it is, how you make it, why it works

An enriched dough is a bread dough
made with the baker’s richest
ingredients: milk, butter, eggs,
and sugar. They’re set apart from
lean doughs, like sourdough and
focaccia, by these incorporations.
They take a good amount of mixing
to properly develop gluten. Because
both of our recipes (Almond Cream
Rolls and Garlic Herb Clover
Rolls) require rolling and shaping,
gluten is essential to help them
hold their final form. We conduct
a windowpane test (see tutorial
on Testing for Proper Gluten
Development) to see if we’ve nailed
the gluten structure. With all of its
added fat affecting fermentation,
enriched dough can take longer to
proof than lean dough. To efficiently
check proofing, we measure and
track the dough in height using
a large 8-cup measuring cup or
ruler and then conduct a finger
dent test. (See tutorial on Testing
for Proofing.) After shaping, the
enriched dough will rise again, but
it won’t be the standard “doubled
in size,” puffing up only 66% to
77%. Then we perform another
finger dent test. As for baking, all
enriched doughs are done when
a thermometer inserted into the
bread registers 190°F (88°C).
DO-IT-ALL DOUGH                             ½   cup (120 grams) whole milk            add 2 cups (250 grams) flour, beating
Makes enough for 12 rolls                   ½   cup (120 grams) water                 just until a shaggy dough comes
                                            ⅓   cup (76 grams) unsalted butter        together and stopping to scrape sides
This flexible enriched dough will become    1   large egg (50 grams), room            of bowl.
the most trusted recipe in your bread           temperature                           3. Switch to the dough hook
repertoire. Luxuriously rich with milk,                                               attachment. Beat at low speed until a
butter, an egg, and just a dash of sugar,   1. In the bowl of a stand mixer fitted    soft, somewhat sticky dough forms,
our Do-It-All Dough can become the          with the paddle attachment, combine       6 to 7 minutes, stopping to scrape
tender base for both Almond Cream           1½ cups (188 grams) flour, sugar, salt,   dough hook and sides of bowl. Add up
Rolls and Garlic Herb Clover Rolls.         and yeast.                                to remaining ¼ cup (31 grams) flour,
                                            2. In a medium saucepan, heat milk,       1 tablespoon (8 grams) at a time, if
3¾ cups (469 grams) Bob’s Red               ½ cup (120 grams) water, and butter       dough is too sticky. Turn out dough
   Mill Organic All-Purpose Flour,          over medium heat until an instant-        onto a lightly floured surface, and
   divided                                  read thermometer registers 120°F          shape into a smooth round.
2 tablespoons (24 grams)                    (49°C) to 130°F (54°C). Add warm          4. Lightly oil a large bowl. Place
   granulated sugar                         milk mixture to flour mixture, and        dough in bowl, turning to grease top.
1 tablespoon (9 grams) kosher salt          beat at medium speed until combined.      Cover and let rise in a warm, draft-
1 (0.25-ounce) package (7 grams)            Add egg, beating until combined.          free place (75°F/24°C) until doubled
   active dry yeast                         With mixer on low speed, gradually        in size, 40 minutes to 1 hour.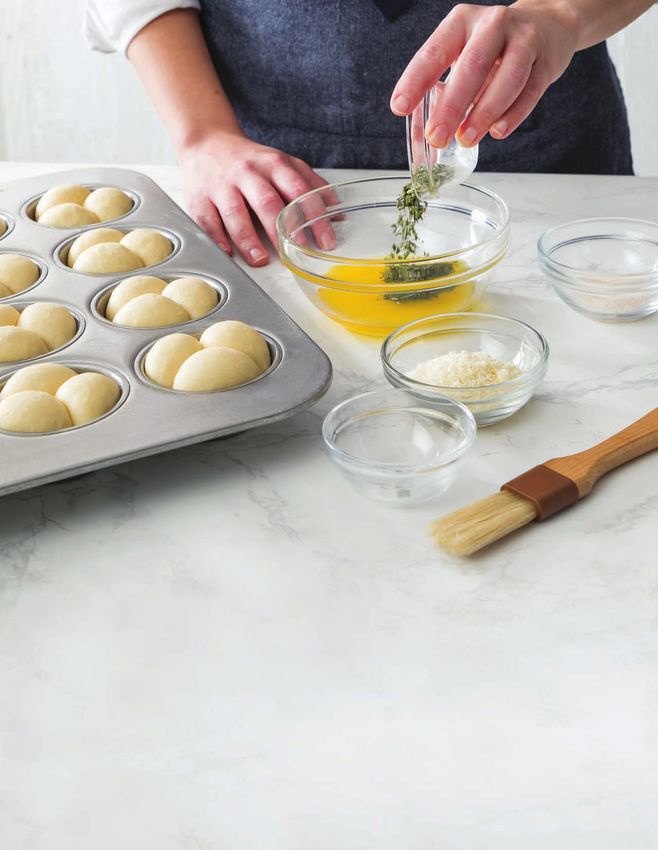
S T E P-B Y-S T E P

1. In the bowl of a stand mixer fitted    2. In a saucepan, heat milk, water,     3. Add warm milk mixture to flour
with the paddle attachment, combine       and butter over medium heat until an    mixture, and beat at medium speed
1½ cups (188 grams) flour, sugar, salt,   instant-read thermometer registers      until combined. Add egg, beating until
and yeast.                                120°F (49°C) to 130°F (54°C).           combined.

4. With mixer on low speed, gradually     5. Switch to the dough hook             6. Turn out dough onto a lightly
add 2 cups (250 grams) flour, beating     attachment. Beat at low speed until a   floured surface. Shape into a smooth
just until a shaggy dough forms, and      soft, smooth dough forms, 6 to          round by cupping the dough and
stopping to scrape sides of bowl with a   7 minutes, stopping to scrape dough     gently dragging it toward you. Repeat
silicon spatula or bowl scraper.          hook and sides of bowl, as needed.      this process several times until the
                                                                                  dough is smooth and taut.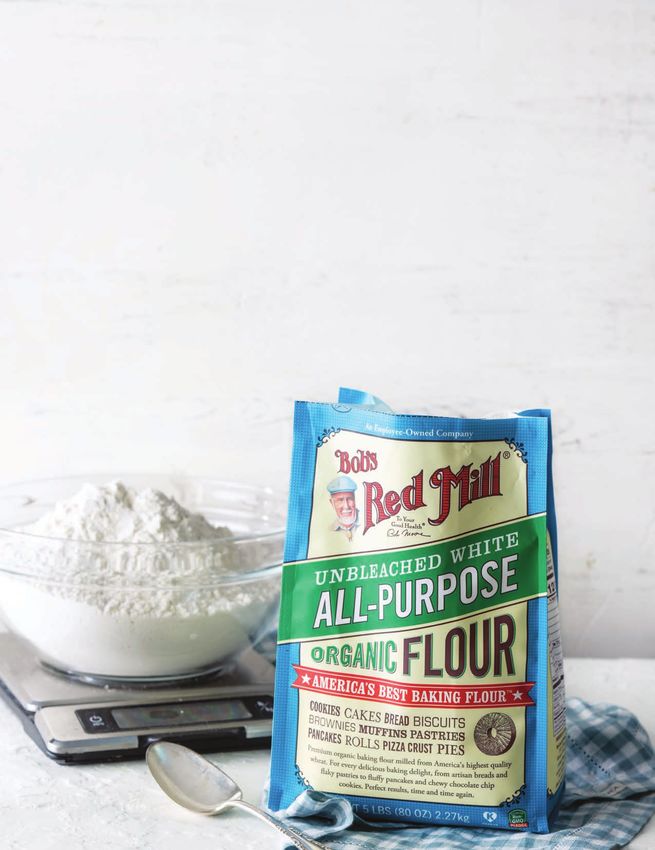
A CLOSER LOOK

     MIXING YOUR DOUGH
First, a little science behind our mixing method. We use the paddle attachment to incorporate
ingredients to decrease kneading time. We beat it at low speed with the paddle because 6 to
7 minutes with a sticky dough can be hard work on a stand mixer. Once that’s done, we switch
to the dough hook attachment for kneading and the final addition of flour.

                                    The dough will still be very sticky after incorporating the
                                    first two additions of flour. Then comes the delicate act
                                    of adding just enough of the remaining ¼ cup (31 grams)
                                    flour to create the proper dough consistency. Because
                                    absorbent flour is highly sensitive to moisture—even
                                    the humidity in the air—you’ll find that adding an exact
                                    amount of flour to create the perfect dough will vary
                                    from time to time. Sometimes you’ll add 3 tablespoons
                                    of flour, other times the full ¼ cup. Be cognizant of your
                                    dough’s stickiness after adding each tablespoon of flour.
                                    If the dough is not sticky enough, it will be hard to roll it
                                    out and create rolls. You are looking for the dough to be
                                    tacky but not stick to your fingers when touched.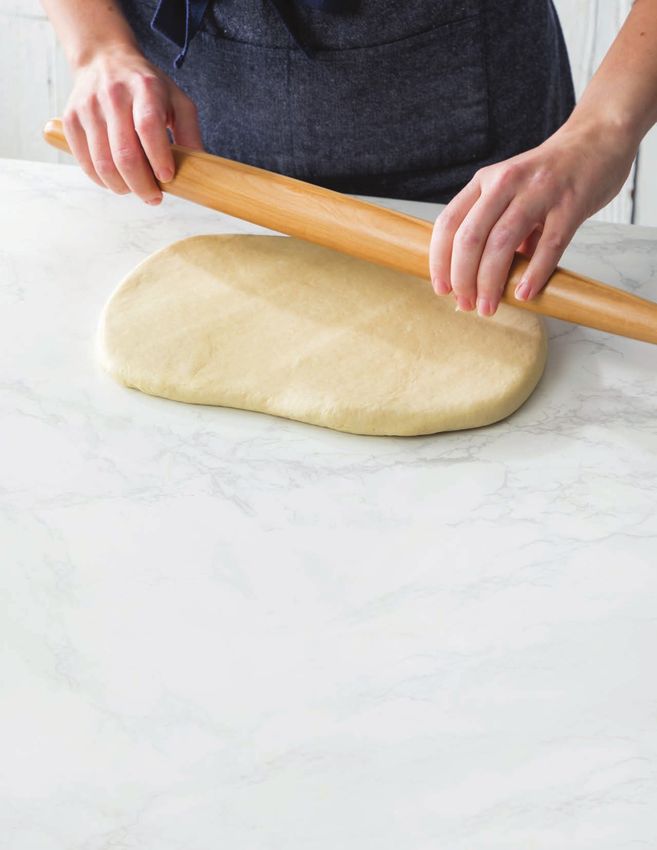
A CLOSER LOOK

      TESTING FOR PROPER
     GLUTEN DEVELOPMENT
There are a number of ways to test your enriched dough to see if it
 has been properly kneaded. We teach you how to use your senses
            (sight, sound, and touch) to tell if it’s ready.

THE SOUND TEST: Don’t just            THE WINDOWPANE TEST: Pinch or cut—but don’t tear, because
use your eyes! The sound of the       this damages the gluten strands—a small, golf ball-size piece of
dough will also indicate its gluten   dough. Then gently and slowly pull and rotate the dough out from
development. The dough will slap      the center. If the dough is ready, you will be able to stretch it until
or knock against the sides of the     it’s thin and translucent. If it fails to hold during the stretch, give your
bowl as a sign that the dough is      dough another minute of work and then test again. If it is too hard
close to being properly kneaded.      to stretch, it’s been overmixed. (See Expert Tip on Overmixing and
                                      Overproofing for more information.)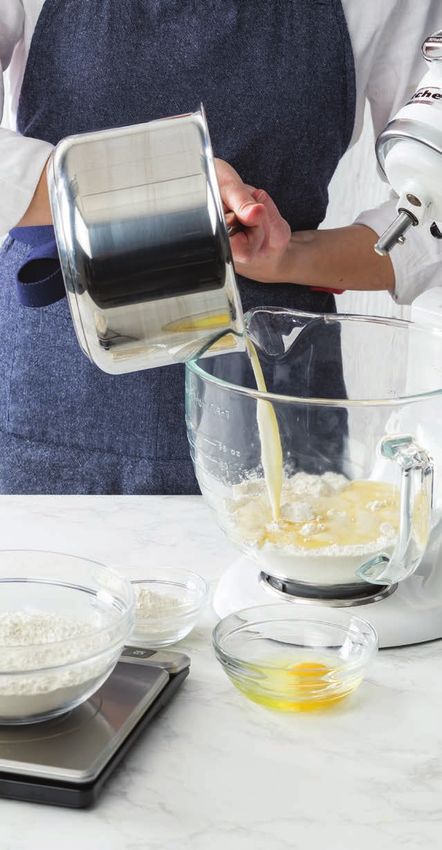
A CLOSER LOOK

TESTING FOR PROOFING
Like testing for gluten development, checking for proper fermentation
  of your dough can be achieved with a couple of tests. Here are two
   foolproof ways to know if you’ve expertly fermented your dough.

DOUBLED IN SIZE: First, shape the dough            THE FINGER DENT TEST: After your dough has rested
into a smooth round; it’ll be easier to tell       for 40 minutes to 1 hour, lightly flour the surface of the
when the dough has doubled in size and it’s a      dough, and gently press your finger about ½ inch into the
good way to make sure the dough has been           surface. If your dough has properly fermented, you should
evenly kneaded in the mixer. It’s best to use a    be able to watch the dough spring back slightly but still
straight-sided container like a plastic tub or a   show an indentation. If the dent disappears, the dough
tall-sided bowl. If you have a large container     is underproofed and needs more time. If the indentation
that has measurements on the sides, like an        stays completely, you’ve overproofed the dough. (See
8-cup measuring cup, that works great. If not,     Expert Tip on Overmixing and Overproofing for more
measure the height of the dough, double it         information.) Apply this method for the rise right before
and mark it with a piece of tape to know when      the shaping to ensure your dough has the perfect flavor
the dough is doubled in size.                      and texture.

       EXPERT TIP ON OVERMIXING AND OVERPROOFING
   If you overmix or overproof the dough, don’t throw it away or give up! Make a note so you remember
   for next time. It takes practice! You can still use the dough; just be prepared for it to be harder to work
   with. Overmixed dough will be harder to roll out, and overproofed dough will be denser after baking.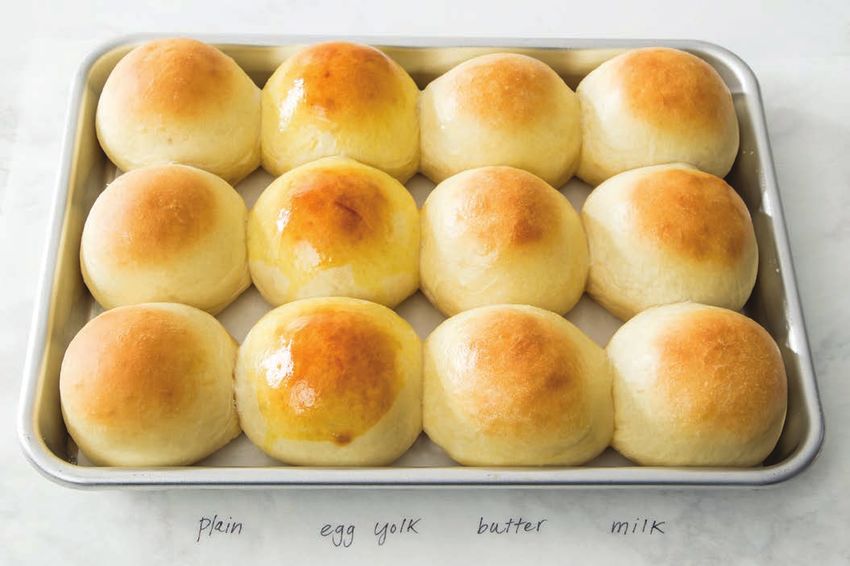
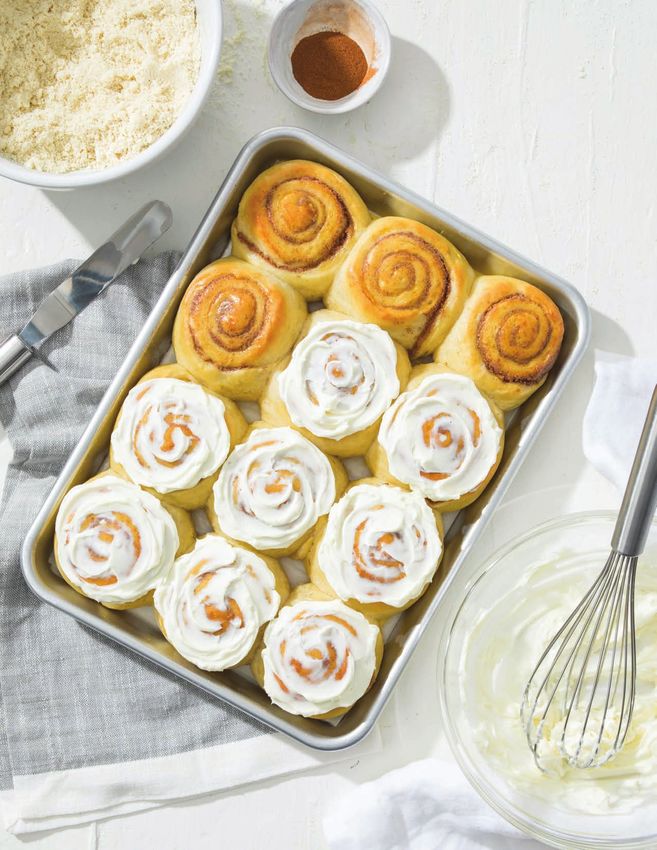
SWEET TAKE
  ALMOND
CREAM ROLLS
ALMOND CREAM ROLLS                           Spray sides with cooking spray.           (75°F/24°C) until puffed, 20 to
Makes 12 rolls                               2. In a medium bowl, beat butter and      30 minutes.
                                             sugar with a mixer at medium speed        4. In a small bowl, whisk together egg
With the Do-It-All Dough as its              until fluffy, about 1 minute. Beat in     yolk and milk. Brush tops and sides of
swirling base, these almond cream-filled     almond flour until combined. With         rolls with egg wash.
delights show off the sweet versatility of   mixer on low speed, add egg white         5. Bake until golden brown and an
the dough.                                   and almond extract, beating until         instant-read thermometer inserted in
                                             combined. Beat in flour, cinnamon,        center registers 190°F (88°C),
3  tablespoons (42 grams) unsalted           and salt. Refrigerate almond cream        14 to 16 minutes. Let cool for
   butter, softened                          until ready to use.                       5 minutes. Spread Almond Cream
¼ cup (50 grams) granulated sugar            3. Punch down Do-It-All Dough,            Cheese Glaze onto warm rolls. Serve
⅔ cup (64 grams) Bob’s Red Mill              and let stand for 5 minutes. Turn out     warm or at room temperature.
   Super-Fine Natural Almond Flour           dough onto a lightly floured surface,
1 large egg (50 grams), separated            and roll into an 18x11-inch rectangle.
⅛ teaspoon almond extract                    Using a small offset spatula, spread      Makes ¾ cup
¼ cup (31 grams) Bob’s Red Mill              almond cream onto dough, leaving
   Organic All-Purpose Flour                 a ½-inch border on one long side.         6 ounces (170 grams) cream
1 tablespoon (6 grams) ground                Starting with opposite long side,           cheese, softened
   cinnamon                                  roll up dough, jelly roll style. Gently   ¼ cup (30 grams) confectioners’
⅛ teaspoon kosher salt                       shape log to 18 inches long and             sugar
Do-It-All Dough (recipe precedes)            even thickness, if necessary. Using a     1 tablespoon (15 grams) whole milk
1 tablespoon (15 grams) whole milk           serrated knife dipped in flour, cut log   ⅛ teaspoon kosher salt
Almond Cream Cheese Glaze (recipe            into 12 slices (about 1½ inches thick),   ⅛ teaspoon almond extract
   follows)                                  trimming ends if needed. Tuck ends
                                             of rolls under, and place, tucked-        1. In a medium bowl, beat cream cheese
1. Preheat oven to 350°F (180°C).            end down, on prepared pan, leaving        until smooth, about 1 minute. Add
Line a rimmed quarter (13x9-inch)            even space between rolls. Cover and       confectioners’ sugar and all remaining
sheet pan with parchment paper.              let rise in a warm, draft-free place      ingredients, and beat until smooth.
SHAPE AND BAKE YOUR
ALMOND CREAM ROLLS
You’ve mixed, kneaded, and proofed your Do-It-All Dough. Here’s
how to transform it into sweet Almond Cream Rolls.
Punch down the dough to remove excess When rolling out the dough, preshape it into a rectangle and then roll out into a larger
air. Then let it stand for 5 minutes, rectangle, rolling from the center to the corners to keep your corners sharp. Use your
allowing the gluten to relax. These steps hands and eyes to look for even thickness throughout the dough. Use a ruler to check
make it easier to shape and roll out. your dimensions.
When spreading the almond cream onto the dough, leave a Once you roll up the dough, make sure you take the time
½-inch border on one long side. When you roll up the dough to double-check that it is at least 18 inches long and even in
into a tight spiral, this border will allow the dough to form an thickness. If it is slightly longer than 18 inches or if the ends are not
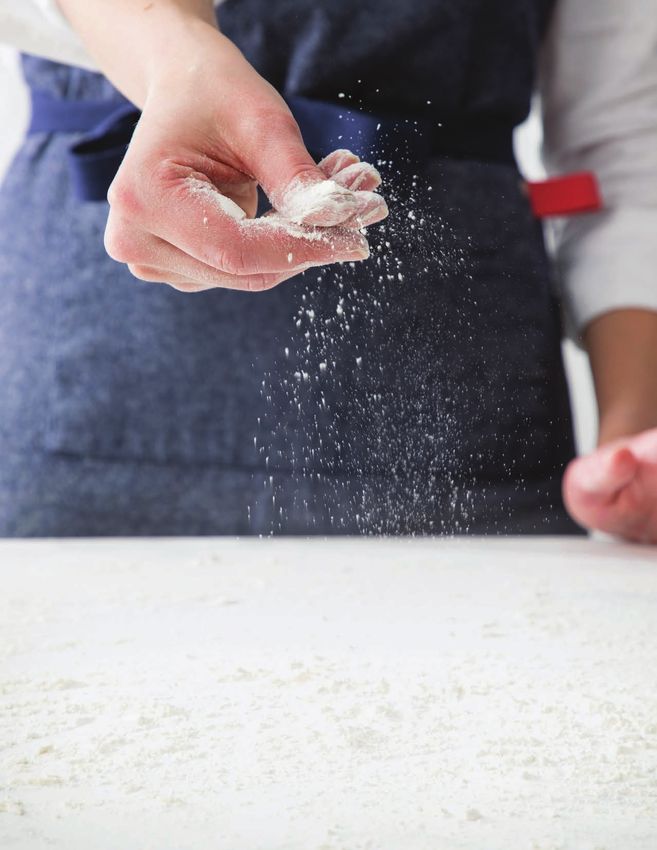
airtight seal. level or even, trim the dough to get it to the right size.We use a ruler to score (or mark) the Always cut using a knife dipped in flour. Once the dough is cut, take the end
dough at 1½-inch intervals so we can Place your flour on the counter so you can seam of each roll, tuck it in under the roll,
make even cuts. We use a sharp serrated easily place your knife in it as needed. As and press the roll, tucked-end down, on
knife for cutting because its jagged edges you cut, don’t press down too hard. Instead, the prepared pan. This adds height to the
more easily cut through the roll without let the blade do the work so you don’t roll and can help the center pop up into
pushing out the filling. smush the dough. a scroll.
EXPERT TIP
Instead of cutting your rolls
with a serrated knife, you
can also use unscented
dental flooss. Take the floss
under the roll, line up with
the score, and bring the
floss together to create a
quick, even cut.
When placing the rolls on the pan, Before baking, we brush the dough with
leave enough space for them to proof. egg wash to add color and shine to the final
You don’t want them to double in product. Egg wash can be made with whole
size here, only puff up about 66% to eggs, yolks, or whites and is thinned out with
75%. Conduct the finger dent test in water or milk. You can also brush the dough
an inconspicuous place (see tutorial with whole milk or butter—the fat will help
on Testing for Proofing) to check for it brown, but it will not be as shiny. (See
proper proofing. tutorial on Which Wash.)WHICH WASH
There are a number of egg washes you can use to give your bread dough
a golden, glossy finish. Here, we brush three of the four columns of plain
rolls with a different egg wash, leaving the first unwashed for a control so
you can see how each one affects your final bake.
PLAIN (UNWASHED): EGG YOLK WITH BUTTER: MILK:
The bread browns but MILK: This bread receives a The fat in the milk helps
appears paler than any This finish is glossy in the boost in color and in boost the brown color of
other bread dough that extreme and colors the flavor. Bonus points: use the rolls, but it doesn’t
does have a wash on most. We cut the egg salted butter so a little pack the gloss or flavor
top. It also lacks that with a little milk so that extra salt gets baked into that butter or egg yolk
attractive glossiness. it’s easy to brush on. the crust! does.SAVORY TAKE GARLIC HERB CLOVER ROLLS
GARLIC HERB CLOVER
ROLLS                                       1. Spray a 12-cup muffin pan with
Makes 12 rolls                              cooking spray.
                                            2. Punch down Do-It-All Dough,          and thyme. Brush rolls with butter
Baked in a muffin pan to form savory        and let stand for 5 minutes. Turn out   mixture, and sprinkle with
clover-shaped bread rolls, this rendition   dough onto a lightly floured surface,   1½ tablespoons (7.5 grams) cheese.
of the Do-It-All Dough gets a generous      and divide into 12 portions (about      5. Bake until golden brown and an
brush of garlic herb butter before          70 grams each). Working with            instant-read thermometer inserted in
being popped into the oven. The result?     1 portion at a time (keep remaining     center registers 190°F (88°C),
Buttery, aromatic perfection.               dough covered to prevent it from        8 to 12 minutes, rotating pan halfway
                                            drying out), divide into 3 pieces       through baking. Brush with butter
Do-It-All Dough (recipe precedes)           (about 23 grams each). Roll each        mixture, and sprinkle with remaining
¼ cup (57 grams) unsalted butter,           piece into a smooth ball. Place         1½ tablespoons (7.5 grams) cheese.
   melted                                   3 dough balls, seam side down, in       Serve warm or at room temperature.
¾ teaspoon (4 grams) garlic salt            each prepared muffin cup. Cover and     Store in an airtight container at room
½ tablespoon (1 gram) chopped               let rise in a warm, draft-free place    temperature for up to 4 days.
   fresh rosemary                           (75°F/24°C) until doubled in size,
½ tablespoon (1 gram) chopped               20 to 30 minutes.
   fresh thyme                              3. Preheat oven to 350°F (180°C).
3 tablespoons (15 grams) grated             4. In a small bowl, stir together
   Parmesan cheese, divided                 melted butter, garlic salt, rosemary,
SHAPE AND BAKE YOUR GARLIC HERB CLOVER ROLLS Punch down the dough to remove excess air. This makes the When shaping your dough into 12 equal portions, make sure to dough easier to shape. Then let it stand for 5 minutes, allowing the use a bench scraper (you don’t want to tear the dough) and a gluten to relax. This step also makes it easier to shape and roll out. scale (you want consistency and uniformity). Divide the dough gently, quickly, and as accurately as you can. As you cut into 12 portions, keep the dough covered so it does not dry Before portioning out dough, weigh it on a scale to get the total out. Plastic wrap or a kitchen linen works best. Before you’ve divided weight. Divide by 12 and that is your weight for each portion. (It each of the 12 portions into thirds (around 23 grams each), roll the should be around 70 grams per dough ball.) large portion into a log to cut into equal thirds.
There are two ways to shape into smooth balls. The first is to    The other way is to shape it using your counter surface. Use
hold the dough in one hand using your thumb and forefinger        your palm to press down on the dough to remove any air
and use the other hand to pull down and pinch the dough.          pockets; rotate your hand until it starts to form a ball and then
Rotate the dough 90 degrees, and keep pulling and pinching        turn your hand and make a C shape. Keep the dough under your
until the top is smooth and tight.                                palm, and continue rotating your hand and applying pressure in
                                                                  the same direction until the dough becomes a smooth, tight ball.

Place 3 dough balls, seam side down,         During proofing, the rolls will puff up 66% Here, we brush with with an herbaceous
in each muffin cup. (It is OK to have to     to 75%. Conduct the finger dent test (see and salty butter mixture to add flavor and
smush them slightly to make them fit.)       tutorial on Testing for Proofing).          help the cheese stick to the dough.

                 EXPERT TIP
              When baking, test for doneness by using an instant-read thermometer. All enriched
              doughs are done baking when the internal temperature reaches 190°F (88°C).
You can also read