3SPEED BLENDER MÉLANGEUR LICUADORA
←
→
Page content transcription
If your browser does not render page correctly, please read the page content below
3
       SPEED
      VITESSES
    VELOCIDADES

BLENDER
INSTRUCTIONS

MÉLANGEUR
INSTRUCTIONS

LICUADORA
INSTRUCCIONES

KSB540

9709948A

U.S.A./É.-U./EE.UU.:
1-800-541-6390
Canada/Canadá:                                   KitchenAid.com
1-800-807-6777                                     KitchenAid.ca
                                        ®

                       FOR THE WAY IT’S MADE.®
Proof of Purchase and Product Registration
Always keep a copy of the sales receipt us to contact you in the unlikely event of
showing the date of purchase of your a product safety notification and assist us
blender. Proof of purchase will assure you in complying with the provisions of the
of in-warranty service. Consumer Product Safety Act. This card
does not verify your warranty.
Before you use your blender, please fill out
and mail your product registration card Please complete the following for your
packed with the unit. This card will enable personal records:
Model Number ______________________________________________________________
Serial Number _______________________________________________________________
Date Purchased ______________________________________________________________
Store Name and Location ______________________________________________________
Preuve d’achat et enregistrement du produit
Veuillez conserver une copie du coupon de appeler dans l’éventualité improbable
caisse indiquant la date d’achat de votre d’un avis de sécurité et nous pouvons
mélangeur. La preuve d’achat vous assure aussi nous conformer plus facilement aux
du service après-vente sous garantie. dispositions de la loi sur la sécurité des
produits de consommation. Cette carte ne
Avant d’utiliser le mélangeur, veuillez confirme pas la garantie.
remplir et poster la carte d’enregistrement
du produit accompagnant l’appareil. Veuillez remplir ce qui suit pour votre
Grâce à cette carte, nous pourrons vous dossier personnel.
Numéro de modèle __________________________________________________________
Numéro d’identification _______________________________________________________
Date d’achat ________________________________________________________________
Nom du magasin et emplacement ______________________________________________
Comprobante de compra y registro del producto
Siempre conserve una copia del recibo con usted en el improbable caso de
de ventas que especifique la fecha de notificación de algún problema de
compra de su licuadora. El comprobante seguridad con el producto y nos ayudará a
de compra le asegurará el servicio técnico cumplir con las cláusulas de la Consumer
bajo garantía. Product Safety Act (Ley sobre la seguridad
de los productos para el consumidor). Esta
Antes de utilizar la licuadora, complete y tarjeta no asegura su garantía.
envíe por correo su tarjeta de registro del
producto que viene junto con la unidad. Complete lo siguiente para su
Esta tarjeta nos permitirá contactarnos registro personal:
Número del modelo __________________________________________________________
Número de serie _____________________________________________________________
Fecha de compra ____________________________________________________________
Nombre de la tienda y dirección ________________________________________________Table of Contents
INTRODUCTION
Proof of Purchase and Product Registration Card ................................. Inside Front Cover
Blender Safety ................................................................................................................2
Important Safeguards ....................................................................................................2
ENGLISH
Electrical Requirements ..................................................................................................3
FEATURES AND OPERATION
Blender Features ............................................................................................................4
Preparing the Blender for Use ........................................................................................6
Before First Use ......................................................................................................6
Blender Assembly ...................................................................................................6
Using the Blender ..........................................................................................................7
Before Use ..............................................................................................................7
Operating the Blender ............................................................................................7
Pulse Feature ..........................................................................................................7
Ingredient Cap .......................................................................................................7
Speed Control Guide .....................................................................................................8
CARE AND CLEANING
Cleaning the Blender .....................................................................................................9
Troubleshooting .............................................................................................................9
BLENDER TIPS
Quick Tips .............................................................................................................10
How To ................................................................................................................10
WARRANTY AND SERVICE INFORMATION
KitchenAid® blender Warranty ......................................................................................12
Hassle-Free Replacement Warranty – 50 United States and District of Columbia ..........13
Hassle-Free Replacement Warranty – Canada ...............................................................13
How to Arrange for Warranty Service in Puerto Rico ....................................................13
How to Arrange for Service after the Warranty Expires – All Locations .........................14
How to Arrange for Service Outside these Locations ....................................................14
How to Order Accessories and Replacement Parts ........................................................14
NOTE: Due to the unique container and blade design, read these instructions before
using your new KitchenAid® blender to achieve maximum peformance results.
1Blender Safety
Your safety and the safety of others are very important.
We have provided many important safety messages in this manual and on your
appliance. Always read and obey all safety messages.
ENGLISH
This is the safety alert symbol.
This symbol alerts you to potential hazards that can kill or hurt you
and others.
All safety messages will follow the safety alert symbol and either
the word “DANGER” or “WARNING.” These words mean:
You can be killed or seriously
DANGER injured if you don’t immediately
follow instructions.
You can be killed or seriously injured
WARNING if you don’t follow instructions.
All safety messages will tell you what the potential hazard is, tell you how to
reduce the chance of injury, and tell you what can happen if the instructions are
not followed.
IMPORTANT SAFEGUARDS
When you are using electrical appliances, basic safety precautions should always be
followed to reduce the risk of fire, electric shock, and/or injury to persons including the
following:
1. Read all instructions.
2. To avoid the risk of electrical shock, do not put blender in water or other liquid.
3. Close supervision is necessary when any appliance is used by or near children.
4. Unplug from outlet when not in use, before putting on or taking off parts, and
before cleaning.
5. Avoid contact with moving parts.
6. Do not operate the blender with a damaged cord or plug or after appliance
malfunctions, or is dropped or damaged in any manner. Return appliance to the
nearest Authorized Service Center for examination, repair or electrical or mechanical
adjustment.
7. Do not use outdoors.
8. Do not let cord hang over edge of table or counter.
9. Keep hands and utensils out of container while blending to reduce the risk of
severe injury to persons or damage to the blender. A scraper may be used but must
be used only when the blender is not running.
10. Blades are sharp. Handle carefully.
11. Always operate blender with cover in place.
12. The use of attachments, including canning jars, not recommended by KitchenAid
may cause a risk of injury to persons.
13. When blending hot liquids, remove center piece of two-piece cover.
14. This product is designed for household use only.
SAVE THESE INSTRUCTIONS 2Electrical Requirements
Electrical features: 120 VAC, 60 hz, 6 amp
NOTE: Your blender has a 3 prong
WARNING
grounded plug. To reduce the risk of
electrical shock, this plug will fit in an
outlet only one way. If the plug does
ENGLISH
not fit in the outlet, contact a qualified
electrician. Do not modify the plug in
any way.
Do not use an extension cord. If the Electrical Shock Hazard
power supply cord is too short, have a Plug into a grounded 3 prong
qualified electrician or serviceman install outlet.
an outlet near the appliance.
Do not remove ground prong.
Do not use an adapter.
Do not use an extension cord.
Failure to follow these
instructions can result in death,
fire, or electrical shock.
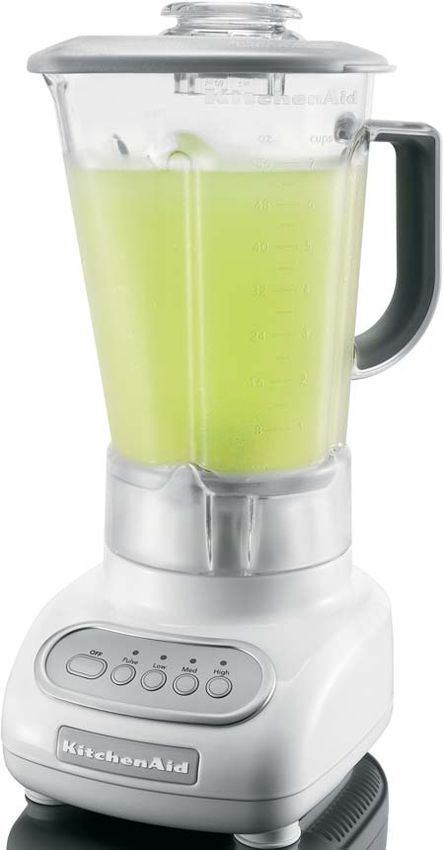
3Blender Features
Stay-Put Lid
with Clear,
2 oz (60 mL)
ENGLISH
Ingredient Cap
56 oz (1.75 L)
Polycarbonate Easy clean,
Pitcher One-Piece
Pitcher
Design
Patented
Stainless Steel
Blade
Durable Speed
Steel-Reinforced Selection
Coupler Buttons
Clean Touch™
Control Pad
Die-Cast
Metal Base
4Blender Features
This blender was built and tested to Speed Selection Buttons
KitchenAid quality standards for optimum Create frozen drinks and puree sauces or
performance and long, trouble-free life. soups in seconds. Blend with confidence,
control, and consistency at all settings:
Robust Motor LOW, MEDIUM, and HIGH. The PULSE
Rugged 0.9-horsepower motor supplies button gives added control for jobs that
ENGLISH
the power for superb performance with require short, quick bursts or longer bursts
all blending tasks – from pureeing sauces of power.
to making chunky salsas, or uniformly
crushing a pitcher of ice or frozen fruit Clean Touch™ Control Pad
within seconds for silky smoothies. Wipes clean in an instant. Smooth control
pad has no crevices or cracks to trap
Easy clean, One-Piece Pitcher Design ingredients.
One-piece design integrates a functional
pitcher with dynamic interior contours Durable Steel-Reinforced Couplers
that continually direct food into the Commercial-quality couplers with
blade for fast, thorough blending. The 12 interlocking teeth provide direct
one-piece design also means cleaning is transfer of motor power to the blade.
achieved without removing the blade and Pitcher coupler is coated for quiet
other parts. Pitcher stands up to extreme operation.
temperatures – from boiling soups to
frozen margaritas and has a wide pour Stay-Put Lid with Clear,
spout to ensure smooth pouring. Pitcher is 2 oz (60 mL) Ingredient Cap
dishwasher safe. Provides a strong seal. The flexible lid
will maintain its tight seal throughout
Polycarbonate Pitcher the life of the blender. The lid includes
One-piece 56 oz (1.75 L) a removable 2 oz (60 mL) cap for
capacity, clear, polycarbonate convenience in measuring and adding
pitcher is shatter resistant, ingredients.
scratch resistant, and stain
resistant. Pitcher’s handle Die-Cast Metal Base
features soft inner grip for firm, Heavy, die-cast metal base ensures stable,
comfortable, no-slip control. quiet operation when blending a full
pitcher of ingredients. Four rubber feet
Patented Stainless Steel Blade on wide, solid base provide a no-slip,
Sharp oversized blade tines are positioned non-marring grip. Smooth and rounded,
on four different planes for fast, thorough, the base is easy to clean and features
and consistent blending. Our durable convenient cord storage underneath.
blade design is built into the pitcher for
easy handling and cleaning.
5Preparing the Blender for Use
Before First Use 2. Place the 1-piece pitcher on the
blender base.
Before using your blender for the first time,
wipe blender base with a warm sudsy cloth,
then wipe clean with a damp cloth. Dry
with a soft cloth. Wash 1-piece pitcher, lid,
ENGLISH
and ingredient cap in warm, sudsy water
or just add soap and warm water to the
pitcher, place it on the blender base, and
blend to clean. See “Care and Cleaning”
section. Rinse parts and wipe dry.
Blender Assembly
1. Adjust the length of the power cord to
suit your needs.
3. Before plugging in the blender, be sure
to press OFF to ensure the blender is in
A. If you will be using the Off mode.
the blender within
2 ft (61 cm) of an
outlet, you can
shorten the power WARNING
cord by coiling it into
the storage area on
the bottom of the
base in the pattern
at right (indicated by
arrows):
Electrical Shock Hazard
Plug into a grounded 3 prong
B. If you will be using the outlet.
blender within
16" (41 cm) of an
Do not remove ground prong.
outlet, you can Do not use an adapter.
shorten the power
cord by coiling it into Do not use an extension cord.
the storage area on
the bottom of the Failure to follow these
base in this pattern: instructions can result in death,
fire, or electrical shock.
4. Plug into a grounded 3 prong outlet.
C. To store the majority
Blender is now ready for operation.
of the power cord 5. Before removing the pitcher from the
under the base of base after use, always press OFF and
your blender, follow A unplug the power cord. Lift the pitcher
cord wrap pattern “B”
above. Then, starting
in a straight, upward motion off of the
at point “A” in the blender base.
drawing at right, coil
a second layer of cord
into the base in the
pattern indicated by
the arrows:
6Using the Blender
Before Use Pulse Feature
NOTE: While the blender is on: Your KitchenAid® blender offers a Pulse
- Do not interfere with blade movement. feature.
- Do not remove pitcher lid. 1. Before operating the blender, make
sure the pitcher is properly in place on
Operating the Blender
ENGLISH
the blender base.
The KitchenAid® blender has 3 speeds: 2. Put ingredients into pitcher, and firmly
LOW, MEDIUM, and HIGH. It also features attach lid.
a PULSE button. 3. Press PULSE and hold for the desired
length of time. The red indicator will
appear. The Pulse feature allows user
easy control for short, quick bursts or
longer bursts of power.
1. With convenient 1-step operation, this
unit will operate only when a speed
selection button is pressed.
2. Before operating the blender, make
sure the pitcher is properly in place on
the blender base. Put ingredients in
pitcher and firmly attach lid.
4. To turn off the Pulse feature, simply
release the PULSE button. The blender
is now ready for continuous operation.
5. Before removing the pitcher, press OFF
to deactivate the blender, and unplug
3. Press the desired speed button for the power cord.
continuous operation at that speed.
Ingredient Cap
The red indicator above the selected
speed will appear. You may change The 2 oz (60 mL) ingredient cap can be
speeds without stopping the unit by used to measure and add ingredients.
pressing a new speed button. Remove cap and add ingredients at LOW
IMPORTANT: If blending hot foods or speed. When operating at higher speeds,
liquids, remove the center ingredient cap. with a full pitcher or with
Operate only on LOW speed. hot contents, stop the
lm 06
blender and then add
2 oz
4. To turn off the blender, press OFF. The
lm 03
ingredients. 1 oz
Off button will stop any speed and
deactivate the blender at the same
time. Before removing the pitcher,
press OFF to deactivate the blender,
and unplug the power cord.
7Speed Control Guide
Item Speed Item Speed
Cheesecake . . . . . . . . . . . . . . . . . . . . High Gravy . . . . . . . . . . . . . . . . . . . . . Medium
Chopped fruit . . . . . . . . . . . . . . . . . . Pulse Ice Cream-based drink . . . . . . . . . . . High
Chopped ice . . . . . . . . . . . . . . . . . . . Pulse Mousse . . . . . . . . . . . . . . . . . . . . . . . High
ENGLISH
Chopped vegetables . . . . . . . . . . . . . Pulse Pancake batter . . . . . . . . . . . . . . . . . .Low
Crushed ice . . . . . . . . . . . . . . . . . Medium, Sherbet-based drink . . . . . . . . . . . . . High
High or Pulse Smooth ricotta or
Frozen yogurt-based drink . . . . . . . . High cottage cheese . . . . . . . . . . . . Medium
Fruit-based drink . . . . . . . . . . . . . . . . High Streusel topping . . . . . . . . . . . . . . . . .Low
Fruit juice from Sweet crumb topping . . . . . . . . . . . . .Low
frozen concentrate . . . . . . . . . . . . .Low Waffle batter . . . . . . . . . . . . . . . . . . .Low
Grated hard cheese. . . . . . . . . . . . . . High White sauce . . . . . . . . . . . . . . . . . . . .Low
TIP: Process up to one standard ice cube tray or 12 to 14 standard ice cubes at a time.
No liquid needs to be added for processing; occasional stirring with a spatula will be
helpful, but should only be done when blender is OFF.
8Care and Cleaning
The blender pitcher and blade can be empty contents. Rinse the pitcher with
easily cleaned without disassembly. warm water until clean. The pitcher can
• Clean the blender thoroughly after every also be washed in the bottom rack of
use. an automatic dishwasher.
• Do not immerse the blender base or 2. To clean the lid and ingredient cap,
cord in water. wash in warm soapy water, then rinse
ENGLISH
• Do not use abrasive cleansers or and dry thoroughly. These parts can
scouring pads. also be washed in the top rack of an
automatic dishwasher. For best results,
1. To clean the blade, place the pitcher on hand washing is recommended.
the blender base, fill one-half full with 3. Wipe the blender base and cord with
warm (not hot) water, and add 1 or 2 a warm, sudsy cloth; wipe clean with a
drops of dishwashing liquid. Place the damp cloth, and dry with a soft cloth.
lid on the pitcher, press the LOW speed For storage, the cord can be coiled
setting, and run the blender for 5 to into the cord-wrap on the bottom of
10 seconds. Remove the pitcher and the base.
Troubleshooting
• If the blender does not operate • If the blender slows excessively
when a setting is selected: when blending heavy ingredients:
– Check to see if the blender is plugged – The blender may be overloaded. Press
into a grounded 3 prong outlet. If it OFF to stop the blender. Remove the
is, press OFF, then unplug the blender. pitcher from the base and divide the
pitcher contents into smaller batches.
Adding liquid to the pitcher may also
WARNING reduce the load on the blender.
• If the blade stops spinning:
– Blender ingredients or a foreign object
may have jammed the blender. Press OFF
to stop the blender. Remove the pitcher
from the base and free the blade by
breaking-up or removing the contents
Electrical Shock Hazard at the bottom of the pitcher.
Plug into a grounded 3 prong
If the problem cannot be fixed with the
outlet.
steps provided in this section, then contact
Do not remove ground prong. KitchenAid or an Authorized Service Center.
Do not use an adapter.
U.S.A./Puerto Rico: 1-800-541-6390,
Do not use an extension cord. Canada: 1-800-807-6777,
Mexico: 01-800-024-17-17
Failure to follow these
(JV Distribuciones)
instructions can result in death,
or
fire, or electrical shock.
01-800-902-31-00
(Industrias Birtman)
Plug it back in to the same outlet. If the
blender still does not work, check the See the KitchenAid Warranty and Service
fuse or circuit breaker on the electrical section for additional details. Do not
circuit the blender is connected to and return the blender to the retailer – they do
make sure the circuit is closed. not provide service.
9Blender Tips
Quick Tips How To ...
• Blend at HIGH if you’re making a large Reconstitute frozen juice: For a 6 oz
amount of beverage using lots of ice. For (175 mL) can of orange juice concentrate,
smaller quantities, use MEDIUM. combine the juice and correct amount of
• Smaller ice cubes can be chopped or water in the pitcher. Cover and blend at
ENGLISH
crushed faster than large ones. LOW until thoroughly combined, about
• Add food to this blender pitcher in 10 to 15 seconds.
larger quantities than you would with For a 12 oz (355 mL) can, combine the
other blenders – you can add 2 to juice and 1 can of water in the pitcher.
3 cups (475 to 710 mL) at a time versus Cover and blend at LOW until thoroughly
1 cup (235 mL) portions. combined, about 20 to 30 seconds. Stir in
• For many ingredient mixtures, start the remaining 2 cans of water.
blending process at LOW to thoroughly
combine the ingredients. Then increase to Dissolve flavored gelatin: Pour boiling
a higher speed, if necessary. water into the pitcher; add gelatin.
• Be sure to keep lid on pitcher while Remove center ingredient cap and blend
blending. at LOW until gelatin is dissolved, about
• If desired, remove center cap of pitcher 10 to 30 seconds. Add other ingredients.
lid to add liquids or ice cubes while the Make cookie and graham cracker
blender is operating at LOW speed. crumbs: Break larger cookies into pieces
• When operating at higher speeds with a about 11/2" (3.75 cm) in diameter. Use
full pitcher or with hot contents, stop the smaller cookies as is. Place in pitcher.
blender and then add ingredients. Cover and blend at LOW until desired
• Stop the blender before using utensils consistency is reached. Use the crumbs to
in the pitcher. Use a rubber spatula to make a quick topping for frozen yogurt,
mix ingredients only when the blender pudding, or a fruit compote.
is OFF. Do not use any utensil, including
spatulas, in the pitcher while the motor To make a finer crumb for pie and dessert
is running. crusts, break graham crackers or cookies
• Cool hot foods, if possible, before into pieces about 11/2" (3.75 cm) in
blending. Begin blending warm foods diameter and place in the pitcher. Cover
at LOW. Increase to higher speed, and blend at MEDIUM until desired
if necessary. consistency is reached, about 20 to
• Remove center ingredient cap when 30 seconds.
blending hot liquids and operate only on Make cracker crumbs: Follow procedure
LOW. Do not place bare hand on pitcher for cookies, blend at LOW. Use as a
lid when processing hot liquids. topping or as an ingredient in main dish
• Stop and check the consistency of foods casseroles and vegetable dishes.
after a few seconds to avoid Make bread crumbs: Tear bread into
over-processing. pieces about 11/2" (3.75 cm) in diameter.
Follow procedure for cookies, blend at
LOW. Use as a topping or as an ingredient
in main dish casseroles and vegetable
dishes.
10Blender Tips
Chop fruits and vegetables: Put Combine flour and liquid for
2 cups (475 mL) of fruit or vegetable thickening: Place flour and liquid in
chunks in pitcher. Cover and quickly PULSE pitcher. Cover and blend at LOW until
3 to 4 times, about 1 second each time, smooth, about 5 to 10 seconds.
until desired consistency is reached. Prepare white sauce: Place milk, flour,
ENGLISH
Puree fruits: Place 2 cups (475 mL) and salt, if desired, in pitcher. Cover, and
canned or cooked fruit in pitcher. Add blend at LOW until well-mixed, about
2 to 4 tbs (30 to 60 mL) fruit 5 to 10 seconds. Pour into saucepan and
juice or water per cup (235 mL) of fruit. cook as usual.
Cover and blend at MEDIUM about 5 to Prepare pancake or waffle batter
10 seconds. from mix: Place mix and other ingredients
Puree vegetables: Place 2 cups (475 mL) in pitcher. Cover and blend at LOW until
canned or cooked vegetables in pitcher. well-mixed, 10 to 20 seconds. Stop the
Add 2 to 4 tbs (30 to 60 mL) broth, water, blender and scrape sides of the pitcher as
or milk per cup (235 mL) of vegetables. needed.
Cover and blend at MEDIUM about 10 to Grate cheese: Cut very cold cheese into
20 seconds. 1/2" to 1" (1.25 to 2.5 cm) cubes. Place
Puree meats: Place cooked, cubed, up to 1/2 cup (120 mL) cheese in the
tender meat in pitcher. Add 3 to pitcher. Cover and blend at HIGH about
4 tbs (45 to 60 mL) broth, water, or 5 to 10 seconds. For hard cheeses, such
milk per cup (235 mL) of meat. Cover as Parmesan, bring to room temperature,
and blend on LOW 10 seconds. Stop the then blend at HIGH for 10 to 15 seconds.
blender and scrape sides of pitcher. Cover Make oatmeal for a baby: Place
and blend on MEDIUM 10 to 20 seconds uncooked rolled oats in pitcher. Cover and
longer. Stop the blender and scrape sides blend at LOW about 5 to 10 seconds, until
as needed. desired consistency. Cook as usual.
Puree cottage cheese or ricotta Make baby food from adult food:
cheese: Place cottage cheese or ricotta Place prepared adult food in pitcher.
cheese in pitcher. Cover and blend at Cover and blend at LOW about
MEDIUM until smooth, about 25 to 10 seconds. Then blend at MEDIUM
35 seconds. Stop the blender and scrape about 10 to 30 seconds.
sides as needed. If necessary, add
1 tbs (15 mL) of skim milk per cup Clean your blender pitcher: Fill pitcher
(235 mL) of cottage cheese. Use as a base one-half full with warm water. Add a
for low-fat dips and spreads. few drops of dishwashing liquid. Cover
and blend at LOW until sides are clean,
Combine liquid ingredients for baked about 5 to 10 seconds. Rinse and dry. For
goods: Pour liquid ingredients in pitcher. complete cleaning, pitcher and lid can also
Cover and blend at HIGH until well mixed, be cleaned in an automatic dishwasher.
about 10 to 15 seconds. Pour liquid
mixture over dry ingredients and stir well.
Take lumps out of gravy: If sauce or
gravy becomes lumpy, place in the pitcher.
Cover and blend at MEDIUM until smooth,
about 5 to 10 seconds.
11KitchenAid® Blender Warranty
Length of KitchenAid KitchenAid
Warranty: Will Pay For: Will Not Pay For:
50 United States, the 50 United States, the A. Repairs when blender
District of Columbia, District of Columbia is used in other than
and Canada: Hassle-free normal single family
ENGLISH
Canada, and Puerto
Rico: One-year limited replacement of your home use.
warranty from date of blender. See the following B. Damage resulting from
purchase. page for details on how to accident, alteration,
arrange for replacement. misuse or abuse or
OR use with products
In Puerto Rico: not approved by
The replacement parts KitchenAid.
and repair labor costs to C. Replacement parts
correct defects in materials or repair labor costs
and workmanship. Service for blender when
must be provided by an operated outside the
Authorized KitchenAid country of purchase.
Service Center. To arrange
for service, see the
following pages.
DISCLAIMER OF IMPLIED WARRANTIES; LIMITATION OF REMEDIES IMPLIED
WARRANTIES, INCLUDING TO THE EXTENT APPLICABLE WARRANTIES OF
MERCHANTABILITY OR FITNESS FOR A PARTICULAR PURPOSE, ARE EXCLUDED TO THE
EXTENT LEGALLY PERMISSIBLE. ANY IMPLIED WARRANTIES THAT MAY BE IMPOSED BY
LAW ARE LIMITED TO ONE YEAR, OR THE SHORTEST PERIOD ALLOWED BY LAW. SOME
STATES AND PROVINCES DO NOT ALLOW LIMITATIONS OR EXCLUSIONS ON HOW LONG
AN IMPLIED WARRANTY OF MERCHANTABILITY OR FITNESS LASTS, SO THE ABOVE
LIMITATIONS OR EXCLUSIONS MAY NOT APPLY TO YOU.
IF THIS PRODUCT FAILS TO WORK AS WARRANTED, CUSTOMER’S SOLE AND EXCLUSIVE
REMEDY SHALL BE REPAIR OR REPLACEMENT ACCORDING TO THE TERMS OF THIS
LIMITED WARRANTY. KITCHENAID AND KITCHENAID CANADA DO NOT ASSUME ANY
RESPONSIBILITY FOR INCIDENTAL OR CONSEQUENTIAL DAMAGES. This warranty gives
you specific legal rights and you may also have other rights which vary from state to
state or province to province.
12Hassle-Free Replacement Warranty –
50 United States and District of Columbia
We’re so confident the quality of our If your KitchenAid® blender should fail
products meets the exacting standards of within the first year of ownership, simply
KitchenAid that, if your blender should call our toll-free Customer Satisfaction
fail within the first year of ownership, Center at 1-800-541-6390 Monday
ENGLISH
KitchenAid will arrange to deliver an through Friday, 8 a.m. to 8 p.m. (Eastern
identical or comparable replacement to Time), or Saturday, 10 a.m. to 5 p.m. Give
your door free of charge and arrange to the consultant your complete shipping
have your original blender returned to us. address. (No P.O. Box numbers, please.)
Your replacement unit will also be covered When you receive your replacement
by our one year limited warranty. Please blender, use the carton and packing
follow these instructions to receive this materials to pack up your original blender.
quality service. In the carton, include your name and
address on a sheet of paper along with
a copy of the proof of purchase (register
receipt, credit card slip, etc.).
Hassle-Free Replacement Warranty – Canada
We’re so confident the quality of our If your KitchenAid® blender should fail
products meets the exacting standards within the first year of ownership, take the
of the KitchenAid® brand that, if your blender or ship collect to an Authorized
blender should fail within the first year KitchenAid Canada Service Centre. In the
of ownership, KitchenAid Canada will carton include your name and complete
replace your blender with an identical shipping address along with a copy of the
or comparable replacement. Your proof of purchase (register receipt, credit
replacement unit will also be covered card slip, etc.). Your replacement blender
by our one year limited warranty. Please will be returned prepaid and insured. If you
follow these instructions to receive this are unable to obtain satisfactory service
quality service. in this manner call our toll-free Customer
eXperience Centre at 1-800-807-6777.
Or write to us at:
Customer eXperience Centre
KitchenAid Canada
1901 Minnesota Court
Mississauga, ON L5N 3A7
How To Arrange for Warranty Service
in Puerto Rico
Your KitchenAid® blender is covered Take the blender or ship prepaid and
by a one-year limited warranty from insured to an Authorized KitchenAid
the date of purchase. KitchenAid will Service Center. Your repaired blender will
pay for replacement parts and labor be returned prepaid and insured. If you
costs to correct defects in materials and are unable to obtain satisfactory service in
workmanship. Service must be provided by this manner, call toll-free 1-800-541-6390
an Authorized KitchenAid Service Center. to learn the location of a Service Center
near you.
13How To Arrange for Service
after the Warranty Expires – All Locations
Before calling for service, please review the For service information in Canada,
”Troubleshooting” section. call toll-free 1-800-807-6777.
For service information in the 50 Or write to:
Customer eXperience Centre
ENGLISH
United States, District of Columbia,
and Puerto Rico, KitchenAid Canada
call toll-free 1-800-541-6390. 1901 Minnesota Court
Or write to: Mississauga, ON L5N 3A7
Customer Satisfaction Center
KitchenAid Portable Appliances
P.O. Box 218
St. Joseph, MI 49085-0218
Or contact an Authorized Service Center
near you.
How To Arrange for Service
Outside these Locations
Consult your local KitchenAid dealer or the For service information in Mexico,
store where you purchased the blender for call toll-free
information on how to obtain service. 01-800-024-17-17
(JV Distribuciones)
Or
01-800-902-31-00
(Industrias Birtman)
How To Order Accessories
and Replacement Parts
To order accessories or replacement To order accessories or replacement
parts for your blender in the 50 parts for your blender in Canada,
United States, District of Columbia, call toll-free 1-800-807-6777.
and Puerto Rico, Or write to:
call toll-free 1-800-541-6390 Monday Customer eXperience Centre
through Friday, 8 a.m. to 8 p.m. (Eastern KitchenAid Canada
Time), or Saturday, 10 a.m. to 5 p.m. 1901 Minnesota Court
Or write to: Mississauga, ON L5N 3A7
Customer Satisfaction Center, To order accessories or replacement
KitchenAid Portable Appliances, parts for your blender in Mexico,
P.O. Box 218, call toll-free
St. Joseph, MI 49085-0218 01-800-024-17-17
(JV Distribuciones)
Or
01-800-902-31-00
(Industrias Birtman)
14Table des matières
INTRODUCTION
Preuve d’achat et carte d’enregistrement du produit....................Deuxième de couverture
Sécurité du mélangeur ..................................................................................................16
Consignes de sécurité importantes ................................................................................16
Contraintes électriques..................................................................................................17
CARACTÉRISTIQUES ET FONCTIONNEMENT
Caractéristiques du mélangeur ......................................................................................18
Préparation du mélangeur avant l’utilisation .................................................................20
Avant la première utilisation ..................................................................................20
FRANÇAIS
Assemblage du mélangeur ....................................................................................20
Utilisation du mélangeur...............................................................................................21
Avant l’utilisation...................................................................................................21
Fonctionnement du mélangeur ..............................................................................21
Caractéristique du mode PULSE (IMPULSION) ........................................................22
Capuchon doseur d’ingrédients .............................................................................22
Guide des touches de vitesse ........................................................................................22
ENTRETIEN ET NETTOYAGE
Nettoyage du mélangeur ..............................................................................................23
Dépannage ...................................................................................................................24
CONSEILS SUR LE MÉLANGEUR
Conseils rapides .....................................................................................................25
Comment... ...........................................................................................................25
INFORMATION SUR LA GARANTIE ET LES RÉPARATIONS
Garantie du mélangeur KitchenAid® ..............................................................................28
Garantie de satisfaction totale et de remplacement -
50 États des États-Unis, district fédéral de Columbia. ....................................................29
Garantie de satisfaction totale et de remplacement – Canada .......................................29
Comment obtenir une réparation sous garantie à Puerto Rico ......................................29
Comment obtenir une réparation hors garantie – tous les territoires .............................30
Comment obtenir une réparation en dehors de ces territoires .......................................30
Comment commander des accessoires et des pièces de rechange. ................................30
NOTA : Du fait du design unique du récipient et de la lame, veuillez lire ces instructions
avant d'utiliser ce mélangeur KitchenAid® pour obtenir des résultats optimums.
15Sécurité du mélangeur
Votre sécurité et celle des autres est très importante.
Nous donnons de nombreux messages de sécurité importants dans ce manuel
et sur votre appareil ménager. Assurez-vous de toujours lire tous les messages
de sécurité et de vous y conformer.
Voici le symbole d’alerte de sécurité.
Ce symbole d’alerte de sécurité vous signale les dangers
potentiels de décès et de blessures graves à vous et à d’autres.
Tous les messages de sécurité suivront le symbole d’alerte de
sécurité et le mot “DANGER” ou “AVERTISSEMENT”. Ces mots
signifient :
FRANÇAIS
Risque possible de décès ou de
DANGER blessure grave si vous ne suivez pas
immédiatement les instructions.
Risque possible de décès ou de
AVERTISSEMENT blessure grave si vous ne suivez
pas les instructions.
Tous les messages de sécurité vous diront quel est le danger potentiel et vous
disent comment réduire le risque de blessure et ce qui peut se produire en cas
de non-respect des instructions.
CONSIGNES DE SÉCURITÉ
IMPORTANTES
Lorsque vous utilisez un appareil électrique, vous devez toujours respecter les consignes
de sécurité fondamentales afin de réduire les risques d’incendie, de choc électrique et/
ou de blessure y compris les consignes suivantes :
1. Lisez toutes les instructions.
2. Pour éviter le risque de choc électrique, ne pas immerger le batteur dans de l’eau
ou tout autre liquide.
3. Il est nécessaire de surveiller de près l’utilisation de cet appareil par des enfants ou
à proximité de ceux-ci.
4. Débranchez l’appareil de la prise de courant lorsqu’il n’est pas utilisé, avant de
monter ou de démonter des pièces et avant de le nettoyer.
5. Évitez de toucher aux pièces mobiles.
6. N’utilisez pas le mélangeur si le cordon ou la fiche sont endommagés ou s’ils
présentent un défaut de fonctionnement ou s’ils tombent ou sont endommagés de
quelque manière que ce soit. Rapportez l’appareil au centre de réparation le plus
proche pour le faire examiner, réparer ou régler.
7. N’utilisez pas l’appareil à l’extérieur.
8. Ne laissez pas pendre le cordon du bord de la table ou du comptoir.
9. N’introduisez pas les doigts ni des ustensiles dans le récipient pendant le mélange
pour limiter les risques de blessures graves ou de dommages au mélangeur. Utilisez
un grattoir, mais seulement quand le mélangeur est arrêté.
16CONSIGNES DE SÉCURITÉ
IMPORTANTES
10. Les lames sont aiguisées. Manipulez-les avec soin.
11. Utilisez toujours le mélangeur avec le couvercle en place.
12. L’utilisation d’accessoires, dont les bocaux de conserve, non recommandés par
KitchenAid peut présenter un risque de blessure.
13. Enlevez la pièce centrale du couvercle à deux pièces si vous mélangez des liquides
chauds.
14. Ce produit est réservé uniquement à un usage domestique.
CONSERVEZ CES INSTRUCTIONS
FRANÇAIS
Contraintes électriques
Caractéristiques électriques : 120 V CA
60 Hz 6 A AVERTISSEMENT
NOTA : Votre mélangeur est muni d’une
fiche de terre à 3 broches. Pour réduire
les risques de choc électrique, cette fiche
ne peut rentrer dans la prise que d’une
façon. S’il est impossible d’introduire la
fiche dans la prise, appelez un électricien
compétent. Ne modifiez pas la prise de Risque de choc électrique
quelque façon que ce soit.
Brancher sur une prise à 3
N’utilisez pas une rallonge. Si le cordon
alvéoles reliée à la terre.
fourni est trop court, demandez à un
électricien ou technicien compétent Ne pas enlever la broche de
d’installer une prise près de l’appareil. liaison à la terre.
Ne pas utiliser un adaptateur.
Ne pas utiliser un câble de
rallonge.
Le non-respect de ces
instructions peut causer
un décès, un incendie ou un
choc électrique.
17Caractéristiques du mélangeur
Couvercle
Stay-Put avec
capuchon doseur
d’ingrédients
transparent
contenant
60 ml (2 oz)
Récipient Récipient
en polycarbonate monopièce
de 1,75 l (56 oz) facile à
nettoyer
FRANÇAIS
Lame en acier
inoxydable
brevetée
Coupleurs Touches de
durables sélection de
renforcés d’acier la vitesse
Clavier de
commande
Clean Touch™
Socle en métal
coulé sous
pression
18Caractéristiques du mélangeur
Ce mélangeur a été construit et testé Touches de sélection de la vitesse
suivant les normes de qualité de KitchenAid Créez des boissons glacées et mettez des
pour fournir une performance optimum et sauces ou des soupes en purée en quelques
une vie utile longue et sans problèmes. secondes. Mélangez avec confiance, contrôle
et consistance sur tous les réglages de vitesse :
Moteur robuste LOW (BASSE), MEDIUM (MOYENNE) et
Un moteur robuste de 0,9 HP fournit HIGH (ÉLEVÉE). Le mode PULSE (IMPULSION)
l’énergie nécessaire à une performance fournit un contrôle supplémentaire pour
excellente pour tous les types de mélange les taches qui demandent des impulsions
- de la mise en purée de sauces aux courtes et rapides ou des impulsions
salsas en morceaux, ou pour concasser d’énergie plus longues.
uniformément et rapidement des
glaçons ou des fruits surgelés lors de la Clavier de commande Clean Touch™
préparation d’un yogourt fouetté. Se nettoie en un instant. Le clavier de
FRANÇAIS
commandes lisse n’a pas de fentes ni
Récipient monopièce facile à nettoyer de fissures qui peuvent emprisonner des
Le design monopièce intègre un récipient aliments.
fonctionnel avec des contours intérieurs
dynamiques qui dirigent de façon continue les Coupleurs durables renforcés d’acier
aliments sur la lame pour un mélange rapide Des coupleurs de qualité commerciale
et complet. Le design monopièce signifie aussi avec 12 dents entrecroisées transfèrent
que l’on peut nettoyer la lame et d’autres directement l’énergie du moteur à la lame.
pièces sans les enlever. Le récipient peut Le coupleur du récipient est renforcé,
résister à des températures extrêmes – des offrant un fonctionnement silencieux.
soupes bouillantes aux margaritas glacées
- et possède un bec large pour verser sans Couvercle Stay-Put avec capuchon
éclabousser. Le récipient va au lave-vaisselle. doseur d’ingrédients transparent
d’une contenance de 60 ml (2 oz)
Récipient en verre Fournit une grande étanchéité. Le
Récipient en polycarbonate couvercle flexible maintiendra son
Récipient monopièce de étanchéité pendant toute la vie utile du
1,75 l (56 oz) transparent fait mélangeur. Le couvercle comprend un
de polycarbonate. Résiste aux capuchon amovible de 60 ml (2 oz) pour
bris, aux égratignures et aux faciliter la mesure et l’ajout d’ingrédients.
taches. Poignée avec prise
souple pour assurer le confort et Socle en métal coulé sous pression
l’adhérence. Le socle en métal coulé sous pression
assure un fonctionnement stable et
Lame en acier inoxydable brevetée silencieux lors du mélange d’une grande
Les dents très grandes de la lame sont quantité d’ingrédients dans le récipient.
placées à quatre niveaux différents pour Quatre pieds en caoutchouc sur un large
fournir un mélange rapide, complet socle solide font bien tenir sans glisser
et uniforme. Notre design de lame ni salir. Le socle lisse et arrondi est facile
durable est incorporé dans le récipient à nettoyer et comprend un pratique
pour pouvoir le manipuler et le nettoyer compartiment de rangement du cordon.
facilement.
19Préparation du mélangeur avant l’utilisation
Avant la première utilisation
C. Pour ranger presque tout
Avant d’utiliser le mélangeur pour la le cordon d’alimentation
première fois, essuyez le socle avec un sous le socle de votre
chiffon savonneux tiède, puis essuyez-le bien mélangeur, suivez le
motif d’enroulement
avec un chiffon humide. Séchez-le avec un “B“ au bas, à gauche. A
chiffon doux. Lavez le récipient, couvercle Commencez ensuite au
et bouchon d’ingrédient en une pièce dans point “A“ du dessin
l’eau tiède savonneuse ou ajoutez tout à droite, enroulez un
deuxième niveau de
simplement le savon et l’eau tiède dans le cordon dans le socle
récipient, placez-le ensuite sur le socle du selon le motif indiqué
mélangeur et mélanger pour nettoyer. Voir par les flèches :
la section “Entretien et nettoyage“. Rincez et
essuyez les pièces. 2. Placer le récipient sur le socle du
FRANÇAIS
mélangeur.
Assemblage du mélangeur
1. Réglez la longueur du cordon
d’alimentation en fonction des besoins.
A. Si vous prévoyez
utiliser le mélangeur à
61 cm (2 ft) ou
moins d’une prise, vous
pouvez raccourcir le
cordon en l’enroulant
dans la section de
rangement sous le
socle de la manière 3. Avant de brancher le mélangeur, n’oubliez
indiquée à droite (par
des flèches) : pas d’appuyer sur OFF (ARRÊT) pour
que le mélangeur soit bien arrêté.
B. Si vous prévoyez
utiliser le mélangeur à
41 cm (16") ou
moins d’une prise, vous
pouvez raccourcir le
cordon en l’enroulant
dans la section de
rangement sous le
socle de la manière
suivante :
20Préparation du mélangeur avant l’utilisation
4. Branchez sur une prise à 3 alvéoles
AVERTISSEMENT reliée à la terre. Vous pouvez
maintenant utiliser le mélangeur.
5. Avant de retirer le récipient du socle
après utilisation, enfoncez toujours la
touche OFF (ARRÊT) et débranchez le
cordon d’alimentation. Tenez le récipient
bien droit quand vous soulevez le socle.
Risque de choc électrique
Brancher sur une prise à 3
alvéoles reliée à la terre.
FRANÇAIS
Ne pas enlever la broche de
liaison à la terre.
Ne pas utiliser un adaptateur.
Ne pas utiliser un câble de
rallonge.
Le non-respect de ces
instructions peut causer
un décès, un incendie ou un
choc électrique.
Utilisation du mélangeur
Avant l’utilisation 2. Avant d’utiliser le mélangeur, assurez-
vous que le récipient est bien en place
NOTA : Pendant que le mélangeur
sur le socle. Mettez les ingrédients dans
fonctionne :
le récipient et fermez bien le couvercle.
- Ne touchez pas aux lames.
- Ne retirez pas le couvercle du récipient.
Fonctionnement du mélangeur
Le mélangeur KitchenAid® a trois vitesses :
LOW (BASSE), MEDIUM (MOYENNE)
et HIGH (ÉLEVÉE). Il possède aussi une
touche PULSE (IMPULSION).
3. Appuyez sur la touche de vitesse
désirée pour faire tourner le mélangeur
de façon continue à cette vitesse.
Le voyant rouge près de la vitesse
sélectionnée reste allumé. Il est possible
de changer de vitesse sans arrêter
l’appareil en appuyant sur une autre
touche de vitesse.
IMPORTANT : Si vous mélangez des
1. Grâce à son fonctionnement en une
aliments ou des liquides chauds, retirez
seule étape pratique, cet appareil ne se
la partie centrale du couvercle. Utilisez
met en marche que si une touche de
seulement la vitesse LOW (BASSE).
vitesse est enfoncée.
21Utilisation du mélangeur
4. Pour éteindre le mélangeur, appuyez 4. Relâchez la touche PULSE (IMPULSION)
sur la touche OFF (ARRÊT).Cette touche pour arrêter la fonction PULSE
arrête toutes les vitesses en même temps (IMPULSION). Le mélangeur est
que le mélangeur. Avant de retirer le maintenant prêt à être utilisé de façon
récipient du socle, désactivez le mélangeur continue.
en enfonçant la touche OFF (ARRÊT) et 5. Avant d’enlever le récipient, appuyez
débranchez le cordon d’alimentation. sur OFF (ARRÊT) pour désactiver le
mélangeur et débrancher le cordon
Caractéristique du mode PULSE
électrique.
(IMPULSION)
Capuchon doseur d’ingrédients
Le mélangeur KitchenAid® dispose d’une
fonction d’impulsion. Le capuchon doseur d’ingrédients de
1. Avant d’utiliser le mélangeur, assurez- 60 ml (2 oz) peut être utilisé pour mesurer
vous que le récipient est correctement et ajouter des ingrédients. Enlevez le
FRANÇAIS
placé sur le socle. capuchon et ajoutez des ingrédients à LOW
2. Mettez les ingrédients dans le récipient (BASSE) vitesse. Si vous utilisez le mélangeur
et fermez bien le couvercle. à grande vitesse avec un lm 06
3. Appuyez sur PULSE (IMPULSION) et récipient plein ou un 2 oz
tenez le temps désiré. L’indicateur contenu chaud, arrêtez lm 03
1 oz
rouge apparaîtra. La fonction PULSE le mélangeur, puis
(IMPULSION) permet à l’utilisateur de ajoutez les ingrédients.
contrôler facilement des pulsations
brèves ou plus longues.
Guide des touches de vitesse
Article Vitesse Article Vitesse
Gâteau au fromage. . . . . . . . High (Élevée) Jus de fruits à partir
Fruits hachés . . . . . . . . . . Pulse (Impulsion) de concentré congelé . . . . . Low (Basse)
Glace concassée . . . . . . . Pulse (Impulsion) Fromage dur râpé . . . . . . . . . High (Élevée)
Légumes hachés . . . . . . . Pulse (Impulsion) Sauce . . . . . . . . . . . . .Medium (Moyenne)
Glace pilée . . . . . . . . Medium (Moyenne), Boisson à base
. . . . . . . . . . . . . . . . . . . . . High (Élevée) de crème glacée . . . . . . . . High (Élevée)
. . . . . . . . . . . . . . . ou Pulse (Impulsion) Mousse . . . . . . . . . . . . . . . . . High (Élevée)
Boisson à base de Pâte à crêpe . . . . . . . . . . . . . . Low (Basse)
yogourt congelé . . . . . . . . High (Élevée) Boisson à base de sorbet . . . . High (Élevée)
Boisson à base Ricotta velouté ou
de fruits . . . . . . . . . . . . . . High (Élevée) fromage cottage . . .Medium (Moyenne)
22Guide des touches de vitesse
Garniture à Streusel . . . . . . . . Low (Basse) Pâte à gaufres . . . . . . . . . . . . . Low (Basse)
Garniture émiettée sucrée . . . . Low (Basse) Sauce béchamel . . . . . . . . . . . Low (Basse)
CONSEIL : Broyez jusqu’à un plateau à glaçons standard ou 12 à 14 glaçons de format
standard à la fois. Vous n’avez pas à ajouter de liquide pour la préparation, mais il serait
utile de mélanger à l’occasion avec une spatule. Ceci ne doit se faire que lorsque le
mélangeur est ÉTEINT.
Entretien et nettoyage
Le récipient et la lame peuvent être 2. Pour nettoyer le couvercle et le
nettoyés sans avoir à les démonter. capuchon doseur d’ingrédients, lavez-
• Nettoyez soigneusement le mélangeur les dans l’eau tiède et savonneuse, puis
FRANÇAIS
après chaque utilisation. rincez-les et séchez-les soigneusement.
• N’immergez pas le socle ni le cordon Ces pièces peuvent aussi être lavées
dans l’eau. dans le panier supérieur d’un lave-
• N’utilisez pas de produits de nettoyage vaisselle. Pour de meilleurs résultats, il
abrasifs ni de tampons à récurer. est recommandé de les laver à la main.
3. Essuyez le socle et le cordon avec un
1. Pour nettoyer le socle, placez le chiffon tiède et savonneux, puis avec
récipient sur le socle du mélangeur, un chiffon humide. Séchez-les avec
remplissez-le à moitié d’eau tiède (pas un chiffon doux. Rangez le cordon en
chaude) et ajoutez 1 ou 2 gouttes l’enroulant dans l’espace de rangement
de détergent pour vaisselle. Placez le sous le socle.
couvercle sur le récipient, appuyez sur
le réglage de vitesse LOW (BASSE) et
faites tourner le mélangeur pendant
5 à 10 secondes. Retirez le récipient
et videz-le de son contenu. Rincez le
récipient à l’eau tiède jusqu’à ce qu’il
soit propre. Il peut aussi être lavé dans
le panier inférieur d’un lave-vaisselle.
23Dépannage
• Si le mélangeur ne fonctionne pas • Si le mélangeur ralentit de façon
sur le réglage choisi : excessive quand on mélange des
– Assurez-vous que le mélangeur est ingrédients denses :
branché sur une prise à 3 alvéoles reliée à – Le mélangeur est peut-être exagérément
la terre. Si tel est le cas, appuyez sur OFF sollicité. Appuyez sur OFF (ARRÊT) pour
(ARRÊT), puis débranchez le mélangeur. arrêter le mélangeur. Enlevez le récipient
du socle et divisez le contenu en portions
plus petites. Ajouter du liquide dans le
AVERTISSEMENT récipient peut aussi réduire la charge à
laquelle est soumis le mélangeur.
• Si la lame s’arrête de tourner :
– Les ingrédients du mélangeur ou un
objet peuvent l’avoir enrayé. Appuyez
FRANÇAIS
sur OFF (ARRÊT) pour arrêter le mélangeur.
Enlevez le récipient du socle et libérez
Risque de choc électrique la lame en divisant ou en enlevant le
contenu au fond du récipient.
Brancher sur une prise à 3
alvéoles reliée à la terre. Si le problème ne peut pas être résolu
Ne pas enlever la broche de en suivant les étapes de cette section,
liaison à la terre. contactez KitchenAid ou un centre de
réparation autorisé.
Ne pas utiliser un adaptateur.
États-Unis/
Ne pas utiliser un câble de
Puerto Rico : 1-800-541-6390,
rallonge.
Canada : 1-800-807-6777,
Le non-respect de ces Mexico: 01-800-024-17-17
instructions peut causer (JV Distribuciones)
un décès, un incendie ou un ou
choc électrique. 01-800-902-31-00
(Industrias Birtman)
Rebranchez-le dans la même prise. Si le Consultez la section Garantie et réparations
mélangeur ne fonctionne toujours pas, des produits KitchenAid pour obtenir plus
vérifiez le fusible ou le disjoncteur du de détails. Ne retournez pas le mélangeur
circuit électrique alimentant le mélangeur chez le détaillant, car celui-ci n’offre pas
et assurez-vous que le circuit est fermé. de service de réparation.
24You can also read