Aeroflex USA Aerocel EPDM Insulation Installation Guide - www.aeroflexusa.com
←
→
Page content transcription
If your browser does not render page correctly, please read the page content below
EPDM Closed Cell Elastomeric Foam Insulation

                     HVAC | VRF | Chilled Water | Refrigeration
                            Duct Wrap | Duct Liner | Plumbing

     Aeroflex USA
              ®

Aerocel EPDM Insulation
      ®

   Installation Guide

   www.aeroflexusa.com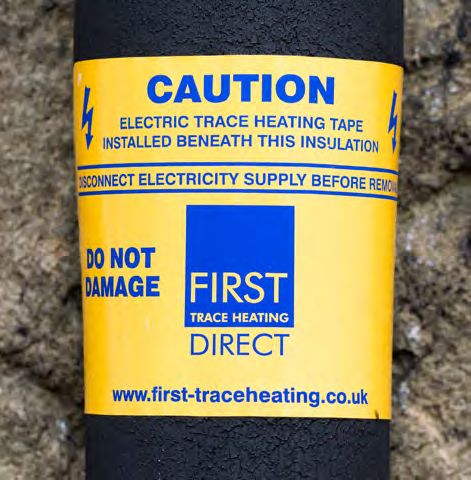
INTENT
The intent of the Aeroflex USA Installation Guide is to provide building/facility owners, mechanical
engineers, design-build mechanical and insulation contractors with illustrated step-by-step instructions
and best practices for correctly installing the Aerocel® brand of EPDM closed cell flexible elastomeric
foam insulation.

Although specific application methods are referenced in this guide, such as fabricating a variety of
fitting covers, there can be alternative installation methods to achieve a successful outcome with many
applications. This guide does not address every method.

For additional industry references related to the installation of flexible closed cell elastomeric insulation,
Aeroflex USA recommends considering the guidance of the following industry standards and installation
specifications:

                                               ASTM International
  C1710 “Standard Guide for Installation of Flexible Closed Cell Preformed Insulation in Tube and Sheet Form”
                                https://www.astm.org/Standards/C1710.htm

                                     National Insulation Association (NIA)
                                           https://insulation.org

                   National Institute of Building Sciences | National Insulation Association
                                 “Mechanical Insulation Design Guide” (MIDG)
            https://www.wbdg.org/guides-specifications/mechanical-insulation-design-guide

                             Midwest Insulation Contractors Association (MICA)
                          “National Commercial & Industrial Insulation Standards”
                         https://www.micainsulation.org/standards-manual.html

                 Sheet Metal & Air Conditioning Contractor’s National Association (SMACNA)
                          “HVAC Duct Construction Standards - Metal & Flexible”
                                          https://www.smacna.org

                                                         For more information, visit www.aeroflexusa.com         1
PREVIOUS PAGE

    INTRODUCTION
    Aerocel is available in the following formulas:
    •   AC (HVAC/Plumbing)
    •   REF™ (Refrigeration)
    •   ULP® (Ultra-Low Perm)
    •   WG (White/Gray)

         Aeroflex USA, Inc. manufactures
           the Aerocel® brand of EPDM
           closed cell elastomeric foam
          insulation in Sweetwater, TN.
              Aerocel complies with
          Buy American requirements.

    Aerocel is available in the following formats:
    •   Tubes (unslit – AC, REF, ULP, WG)
    •   Tubes (pre-slit, Stay Seal® with Protape® | SSPT™ - AC, REF, ULP, WG)
    •   Tubes (unslit or SSPT - Aerocel with SaniGuard™)
    •   Tubes (AC Continuous Tube)
    •   Sheets (AC & ULP Sheet, AC & ULP Sheet with PSA)
    •   Rolls (AC & ULP Roll, AC & ULP Roll with PSA)
    •   AeroFit™ factory fabricated fitting covers (standard and mechanical-
        grooved available in all Aerocel formulas)

2       For more information, visit www.aeroflexusa.com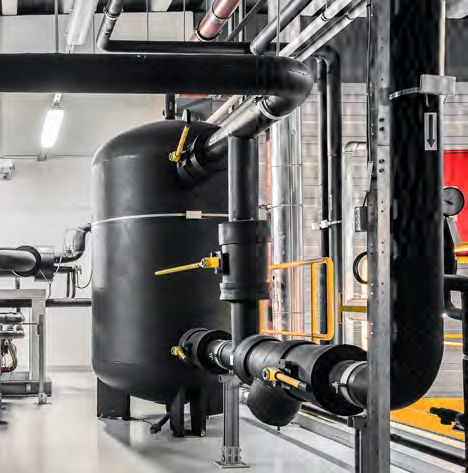
PREVIOUS PAGE                            Aerocel® EPDM Insulation | Installation Guide

Aerocel installation system accessories include:
• Adhesives
  - Aeroflex Cel-Link II® glueless seam seals
  - Aeroseal (all applications)
  - Aeroseal LVOC™ Black (low-VOC, LEED® compliant)
  - REF 1520™ (all applications)
• Protape® EPDM high-performance zero-perm rubber tape
• Aerotape™ EPDM foam tape
• Aerofix® insulated pipe hanger supports
• Aerocoat™ premium UV-protective coating
• Aerocoat LVOC™ low-VOC UV-protective coating (LEED® compliant)

Key Compliances:
ASTM C534 Grade 1, Type I & II                     ANSI/ASHRAE/IES 90.1
ASTM C692                                          International Energy Conservation Code® (IECC®)
ASTM D1056, 2C1                                    California Title 24
ASTM D1171                                         California Department of Public Health CDPH 01350
ASTM E84                                           USGBC LEED®
ASTM G7                                            RoHS 3
ASTM G21                                           REACH
NFPA 90A/90B                                       MIL-P-15280
International Mechanical Code® (IMC®)              Free of CFC’s, HFC’s, HCFC’s, PBDE’s & Nitrosamine
International Residential Code® (IRC®)             Asbestos, formaldehyde & fiber-free
Buy American Act

                                                   For more information, visit www.aeroflexusa.com      3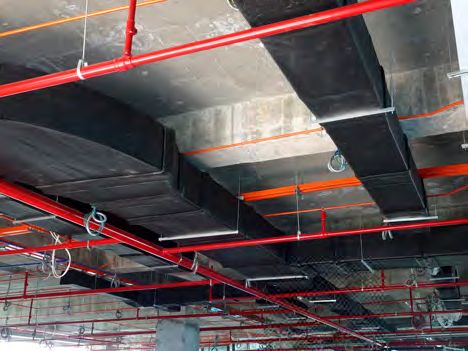
PREVIOUS PAGE

    TABLE OF CONTENTS
    GENERAL INFORMATION
    Definitions . . . . . . . . . . . . . . . . . . . . . . . . . . . . . . . . . . . . . . . . . . . . . . . . . . . . . . . . . . . . . . . . . . . . . . . . . . . . . . . . . . . . . . . 6
    Symbols . . . . . . . . . . . . . . . . . . . . . . . . . . . . . . . . . . . . . . . . . . . . . . . . . . . . . . . . . . . . . . . . . . . . . . . . . . . . . . . . . . . . . . . . . 6
    Tools . . . . . . . . . . . . . . . . . . . . . . . . . . . . . . . . . . . . . . . . . . . . . . . . . . . . . . . . . . . . . . . . . . . . . . . . . . . . . . . . . . . . . . . . . . . . . 6
    Best Practices . . . . . . . . . . . . . . . . . . . . . . . . . . . . . . . . . . . . . . . . . . . . . . . . . . . . . . . . . . . . . . . . . . . . . . . . . . . . . . . . . . . 7
        Substrate Preparation . . . . . . . . . . . . . . . . . . . . . . . . . . . . . . . . . . . . . . . . . . . . . . . . . . . . . . . . . . . . . . . . . . . . . . . . . . 7
        Aerocel EPDM Insulation . . . . . . . . . . . . . . . . . . . . . . . . . . . . . . . . . . . . . . . . . . . . . . . . . . . . . . . . . . . . . . . . . . . . . . . . 7
        Cel-Link II Glueless Seam Seals . . . . . . . . . . . . . . . . . . . . . . . . . . . . . . . . . . . . . . . . . . . . . . . . . . . . . . . . . . . . . . . . . . 9
        Aerocel Adhesives . . . . . . . . . . . . . . . . . . . . . . . . . . . . . . . . . . . . . . . . . . . . . . . . . . . . . . . . . . . . . . . . . . . . . . . . . . . . . 10
        AeroFit Fitting Covers . . . . . . . . . . . . . . . . . . . . . . . . . . . . . . . . . . . . . . . . . . . . . . . . . . . . . . . . . . . . . . . . . . . . . . . . . . 10
        Aerofix Insulated Pipe Hanger Supports . . . . . . . . . . . . . . . . . . . . . . . . . . . . . . . . . . . . . . . . . . . . . . . . . . . . . . . . . . 11
        Aerocel with SaniGuard . . . . . . . . . . . . . . . . . . . . . . . . . . . . . . . . . . . . . . . . . . . . . . . . . . . . . . . . . . . . . . . . . . . . . . . . . 11
        Protape | Aerotape . . . . . . . . . . . . . . . . . . . . . . . . . . . . . . . . . . . . . . . . . . . . . . . . . . . . . . . . . . . . . . . . . . . . . . . . . . . . . 12
        Aerocoat | Aerocoat LVOC . . . . . . . . . . . . . . . . . . . . . . . . . . . . . . . . . . . . . . . . . . . . . . . . . . . . . . . . . . . . . . . . . . . . . . 12
        Sleeving | Multi-Layering . . . . . . . . . . . . . . . . . . . . . . . . . . . . . . . . . . . . . . . . . . . . . . . . . . . . . . . . . . . . . . . . . . . . . . . . 12
        Aerocel Sheet & Roll | Pipes . . . . . . . . . . . . . . . . . . . . . . . . . . . . . . . . . . . . . . . . . . . . . . . . . . . . . . . . . . . . . . . . . . . . . 13
        Stainless Steel Piping . . . . . . . . . . . . . . . . . . . . . . . . . . . . . . . . . . . . . . . . . . . . . . . . . . . . . . . . . . . . . . . . . . . . . . . . . . . 13
        Exterior Applications . . . . . . . . . . . . . . . . . . . . . . . . . . . . . . . . . . . . . . . . . . . . . . . . . . . . . . . . . . . . . . . . . . . . . . . . . . . 14
        Cladding | Jacketing . . . . . . . . . . . . . . . . . . . . . . . . . . . . . . . . . . . . . . . . . . . . . . . . . . . . . . . . . . . . . . . . . . . . . . . . . . . . 14
        Direct Burial | Underground . . . . . . . . . . . . . . . . . . . . . . . . . . . . . . . . . . . . . . . . . . . . . . . . . . . . . . . . . . . . . . . . . . . . . 14
        Heat Trace Systems . . . . . . . . . . . . . . . . . . . . . . . . . . . . . . . . . . . . . . . . . . . . . . . . . . . . . . . . . . . . . . . . . . . . . . . . . . . . 14
        Maintenance | Repair | Replacement . . . . . . . . . . . . . . . . . . . . . . . . . . . . . . . . . . . . . . . . . . . . . . . . . . . . . . . . . . . . . . 15

    SMALL DIAMETER PIPES
    Unslit Aerocel tubes . . . . . . . . . . . . . . . . . . . . . . . . . . . . . . . . . . . . . . . . . . . . . . . . . . . . . . . . . . . . . . . . . . . . . . . . . . . . . . . 16
    Pre-slit Aerocel SSPT tubes . . . . . . . . . . . . . . . . . . . . . . . . . . . . . . . . . . . . . . . . . . . . . . . . . . . . . . . . . . . . . . . . . . . . . . . . . 18
    AeroFit Factory Fabricated Fitting Covers . . . . . . . . . . . . . . . . . . . . . . . . . . . . . . . . . . . . . . . . . . . . . . . . . . . . . . . . . . . . . 20
    Using the Aerocel Template | Field-Fabricated Fittings . . . . . . . . . . . . . . . . . . . . . . . . . . . . . . . . . . . . . . . . . . . . . . . . . . 20
    Pipe Bends | 45° angle | Elbows . . . . . . . . . . . . . . . . . . . . . . . . . . . . . . . . . . . . . . . . . . . . . . . . . . . . . . . . . . . . . . . . . . . . . . 20
    Pipe Bends | 90° angle . . . . . . . . . . . . . . . . . . . . . . . . . . . . . . . . . . . . . . . . . . . . . . . . . . . . . . . . . . . . . . . . . . . . . . . . . . . . . 21
        Elbows (welded). . . . . . . . . . . . . . . . . . . . . . . . . . . . . . . . . . . . . . . . . . . . . . . . . . . . . . . . . . . . . . . . . . . . . . . . . . . . . . . . 21
        Elbows (oversized) . . . . . . . . . . . . . . . . . . . . . . . . . . . . . . . . . . . . . . . . . . . . . . . . . . . . . . . . . . . . . . . . . . . . . . . . . . . . . 23
    Curved Pipe Bends [< 90°] | Elbows (segmented) . . . . . . . . . . . . . . . . . . . . . . . . . . . . . . . . . . . . . . . . . . . . . . . . . . . . . . . 24
    Curved Pipe Bends [> 90°] | Elbows (oversized) . . . . . . . . . . . . . . . . . . . . . . . . . . . . . . . . . . . . . . . . . . . . . . . . . . . . . . . . 24
    Pipe Intersections . . . . . . . . . . . . . . . . . . . . . . . . . . . . . . . . . . . . . . . . . . . . . . . . . . . . . . . . . . . . . . . . . . . . . . . . . . . . . . . . . 25
        T’s . . . . . . . . . . . . . . . . . . . . . . . . . . . . . . . . . . . . . . . . . . . . . . . . . . . . . . . . . . . . . . . . . . . . . . . . . . . . . . . . . . . . . . . . . . . 25
        Angle-T’s . . . . . . . . . . . . . . . . . . . . . . . . . . . . . . . . . . . . . . . . . . . . . . . . . . . . . . . . . . . . . . . . . . . . . . . . . . . . . . . . . . . . . . 27
        Y-Tubes . . . . . . . . . . . . . . . . . . . . . . . . . . . . . . . . . . . . . . . . . . . . . . . . . . . . . . . . . . . . . . . . . . . . . . . . . . . . . . . . . . . . . . . 28
    Pipe Reducers . . . . . . . . . . . . . . . . . . . . . . . . . . . . . . . . . . . . . . . . . . . . . . . . . . . . . . . . . . . . . . . . . . . . . . . . . . . . . . . . . . . . . 29
    Valves . . . . . . . . . . . . . . . . . . . . . . . . . . . . . . . . . . . . . . . . . . . . . . . . . . . . . . . . . . . . . . . . . . . . . . . . . . . . . . . . . . . . . . . . . . . . 30

4      For more information, visit www.aeroflexusa.com
PREVIOUS PAGE                                                               Aerocel® EPDM Insulation | Installation Guide

LARGE DIAMETER PIPES | ROUND DUCTS
Aerocel Sheet & Roll . . . . . . . . . . . . . . . . . . . . . . . . . . . . . . . . . . . . . . . . . . . . . . . . . . . . . . . . . . . . . . . . . . . . . . . . . . . . . . . 32
Pipe Bends. . . . . . . . . . . . . . . . . . . . . . . . . . . . . . . . . . . . . . . . . . . . . . . . . . . . . . . . . . . . . . . . . . . . . . . . . . . . . . . . . . . . . . . . 35
Pipe Intersections . . . . . . . . . . . . . . . . . . . . . . . . . . . . . . . . . . . . . . . . . . . . . . . . . . . . . . . . . . . . . . . . . . . . . . . . . . . . . . . . . 39
Collars | Reducers . . . . . . . . . . . . . . . . . . . . . . . . . . . . . . . . . . . . . . . . . . . . . . . . . . . . . . . . . . . . . . . . . . . . . . . . . . . . . . . . . 40
Flanges . . . . . . . . . . . . . . . . . . . . . . . . . . . . . . . . . . . . . . . . . . . . . . . . . . . . . . . . . . . . . . . . . . . . . . . . . . . . . . . . . . . . . . . . . . . 43
Valves . . . . . . . . . . . . . . . . . . . . . . . . . . . . . . . . . . . . . . . . . . . . . . . . . . . . . . . . . . . . . . . . . . . . . . . . . . . . . . . . . . . . . . . . . . . . 45
Angled Valves . . . . . . . . . . . . . . . . . . . . . . . . . . . . . . . . . . . . . . . . . . . . . . . . . . . . . . . . . . . . . . . . . . . . . . . . . . . . . . . . . . . . . 49
Pumps . . . . . . . . . . . . . . . . . . . . . . . . . . . . . . . . . . . . . . . . . . . . . . . . . . . . . . . . . . . . . . . . . . . . . . . . . . . . . . . . . . . . . . . . . . . 52
Couplings . . . . . . . . . . . . . . . . . . . . . . . . . . . . . . . . . . . . . . . . . . . . . . . . . . . . . . . . . . . . . . . . . . . . . . . . . . . . . . . . . . . . . . . . . 52

PIPE HANGERS
Insulate with Aerofix EPDM pipe supports . . . . . . . . . . . . . . . . . . . . . . . . . . . . . . . . . . . . . . . . . . . . . . . . . . . . . . . . . . . . 53
Insulate with other pipe supports . . . . . . . . . . . . . . . . . . . . . . . . . . . . . . . . . . . . . . . . . . . . . . . . . . . . . . . . . . . . . . . . . . . . 54
Insulate over pipe hanger brackets. . . . . . . . . . . . . . . . . . . . . . . . . . . . . . . . . . . . . . . . . . . . . . . . . . . . . . . . . . . . . . . . . . . 54

TANKS & VESSELS . . . . . . . . . . . . . . . . . . . . . . . . . . . . . . . . . . . . . . . . . . . . . . . . . . . . . . . . . . . . . . . . . . . . . . . . . . 55

DUCT WRAP | RECTANGULAR | ROUND . . . . . . . . . . . . . . . . . . . . . . . . . . . . . . . . . . . . . . . . . . . . . . . . . 60

DUCT LINER | RECTANGULAR . . . . . . . . . . . . . . . . . . . . . . . . . . . . . . . . . . . . . . . . . . . . . . . . . . . . . . . . . . . . . 65

TECHNICAL RESOURCES
Sleeving | Multi-Layering schedule . . . . . . . . . . . . . . . . . . . . . . . . . . . . . . . . . . . . . . . . . . . . . . . . . . . . . . . . . . . . . . . . . . . 70
Yield Table | Aerocel Sheet & Roll . . . . . . . . . . . . . . . . . . . . . . . . . . . . . . . . . . . . . . . . . . . . . . . . . . . . . . . . . . . . . . . . . . . . 71
Cladding | Jacketing schedule . . . . . . . . . . . . . . . . . . . . . . . . . . . . . . . . . . . . . . . . . . . . . . . . . . . . . . . . . . . . . . . . . . . . . . . 72
Aeroflex USA Technical Bulletins. . . . . . . . . . . . . . . . . . . . . . . . . . . . . . . . . . . . . . . . . . . . . . . . . . . . . . . . . . . . . . . . . . . . . 73
Insulation Thickness calculator . . . . . . . . . . . . . . . . . . . . . . . . . . . . . . . . . . . . . . . . . . . . . . . . . . . . . . . . . . . . . . . . . . . . . . 73
Aeroflex USA Express Limited Warranty . . . . . . . . . . . . . . . . . . . . . . . . . . . . . . . . . . . . . . . . . . . . . . . . . . . . . . . . . . . . . . 74

                                                                                                   For more information, visit www.aeroflexusa.com                                                  5
PREVIOUS PAGE

    DEFINITIONS
    Reference: ASTM C1710 Standard Guide for Installation of Flexible Closed Cell
                                                                                    TOOLS
    Preformed Insulation in Tube and Sheet Form (license agreement)

                                                                                        Template (printed on every Aerocel tube carton)

    •     Seams – longitudinal or horizontal cross-
          sections where insulation meets and must be                                   Tape measures (rigid & flexible)
          adhered to itself or other system components.
    •     Butt Joints – cross-sections where two pieces                                 Straight edge
          of tubular or sheet insulation must be adhered
          to itself or other system components.
                                                                                        Chalk (to mark measurements and cuts)
    •     Vapor (Water) Stops – locations/methods to
          prevent water or water vapor from traveling
          from one pipe insulation section to an adjacent                               Ink marking pen (silver or light color)
          insulation and prevent water traveling down
          annular space between the pipe insulation and                                 Caliper (to measure outside diameters)
          the tubular pipe.
    •     Sleeving/Multi-Layering – applying another
                                                                                        Divider (to draw reference lines)
          layer of insulation over the first layer. This
          process is used when the insulation thickness
          required is greater than that which is                                        Scissors
          commercially available. This technique is also
          employed when proper installation practice                                    Denatured alcohol (to clean insulation and substrates)
          requires multiple layers and or staggered joint
          application, even if a single layer thickness is
                                                                                        Acetone (to clean tools)
          available.

                                                                                        Short knives (3”, 7.6 cm)
    SYMBOLS
                                                                                        Long knives (10”, 25.4 cm)

                      Direction/Application
                                                                                        Knife sharpener or stone

                                                                                        Sharp pipe ends (to make holes for common pipe
                      Measurement
                                                                                        sizes)

                                                                                        Aerocel squeegee (one included in every SSPT carton)
                      Measurement/Dimension
                                                                                        Brushes (short firm bristles to apply adhesives,
                                                                                        standard for coatings)
                      Section to be glued
                                                                                        Roller(s) to apply adhesives and coatings on flat
                                                                                        surfaces

                                                                                        Gluemaster

                                                                                        Weighted roller

6       For more information, visit www.aeroflexusa.com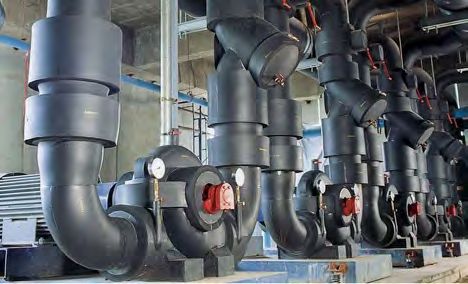
PREVIOUS PAGE                                Aerocel® EPDM Insulation | Installation Guide

BEST PRACTICES                                             adhesive from thickening. Stir frequently to
                                                           prevent activators from settling to bottom.
                                                             Note: Do not use adhesives when relative
Substrate Preparation                                        humidity is 100% due to the formation of
- Never insulate a system in operation. Turn off             condensation on substrates.
  system 24 hours prior to installation to avoid
  moisture development under insulation, potential       Aerocel EPDM Insulation
  corrosion under insulation (CUI) and adhesive          1. Storage: store Aerocel insulation at 40°F - 100°F
  failure. Follow Aerocel adhesive complete dry             [4°C - 38°C] prior to installation. Cold closed
  times prior to system start-up.                           cell elastomeric foam insulation will lose its
- Clean substrates with denatured alcohol.                  flexibility. Keep dry.
  Remove dirt, dust, grease, moisture, oil and           2. Pressure-Sensitive Adhesive (PSA): SSPT
  other contaminants that can serve as corrosion            tubes, Cel-Link II, Sheet & Roll with PSA,
  accelerators beneath the insulation and bond-             Protape and Aerotape should be installed when
  breaking agents on direct-adhered adhesive                substrate and ambient temperatures are above
  applications.                                             50°F [10°C]. At temperatures between 0°F - 50°F
- Untreated steel surfaces must be treated with a           [4°C - 10°C], significant pressure must be applied
  rust inhibitor for HVAC/R applications. Follow the        to achieve an adequate bond. Installation of PSA
  rust inhibitor manufacturer’s full cure time prior        products below 40°F [4°C] is not recommended.
  to installing Aerocel.                                    Pinch corner and pull release liner back 6" - 10"
- Corrosion Protection Primers: test Aerocel                [15 cm - 25 cm] at a time during installation.
  adhesive for compatibility with epoxy resin               For sheets/rolls, use weighted roller to achieve
  and polyurethane primers. Adhesives are not               complete contact.
  compatible with asphalt, bitumen, linseed oil or
  red lead primers.
- Recommended application temperature range
  (substrates and ambient) is 40°F - 100°F [4°C -
  38°C].
- Cold weather installation: cold substrates will
  prolong flash time of adhesives. When conditions
  are below 40°F [4°C], adhesive bonded to very
  cold substrates may not flash off at all due to
  formation of condensation from latent heat of
  adhesive. Adhesive container can be warmed in a
  bucket of hot water. Adhesive container opening
  should be covered with a Aerocel sheet insulation                                                    2
  or cardboard cut-out with brush hole to prevent
  adhesive from thickening. Stir frequently to
  prevent activators from settling to bottom.
- Hot weather installation: heated substrates
  will cause adhesive to flash off very quickly. If
  adhesive is left open beyond flash time, adhesion
  will not occur. Adjust by applying adhesive to
  smaller areas. Adhesive container opening should
  be covered with a Aerocel sheet insulation or
  cardboard cut-out with brush hole to prevent

                                                       For more information, visit www.aeroflexusa.com           7
PREVIOUS PAGE

    3. Sizing: properly sized pipe insulation tubes           5. Push, Never Pull (Stretch) Insulation
       should slide easily over the pipe and fittings.
       Aerocel ID’s are designed to properly fit copper
       and iron piping. A tube that fits loosely over
       a pipe is better than a smaller size that is too
       snug. Never stretch Aerocel insulation. An air
       gap between the pipe and insulation (annular
       space) is acceptable provided that all seams are
       completely sealed with an Aerocel adhesive.
       When measuring sheet material, mark where the
       adjoining edges overlap.                                                        5
            Note: Although Aerocel SSPT tubes are
            available up to 16” IPS, Sheet & Roll can be
            used on pipe sizes ≥4” [10 cm] OD.                6. Spacing: allow a minimum of 4” [10 cm]
                                                                 between insulated chilled water and
                                                                 refrigeration pipes to allow for air movement to
                                                                 prevent condensation.

                                                                                      4”

      3

    4. Cutting: use sharp non-serrated knives. Knife                                   6
       should be maintained at low angle to prevent tip
       from cutting/slitting inside wall. Cut flattest side
       of tube. Measure and cut all lengths (tube and         7. Seams, Butt Joints & Termination Points:
       sheet) long +1/8” [.32 cm] on each side (1/4”, .64        completely seal with Aerocel adhesive to create
       cm) to install under compression. Use sharpened           vapor seal in order to prevent air and moisture
       pipe cut-offs for holes. Glued seams should               from penetrating under the insulation and
       never be stretched and under stress.                      causing corrosion under insulation (CUI). Seal all
                                                                 cut-outs and termination points, such as flanges,

      4
                                                                7

8    For more information, visit www.aeroflexusa.com
PREVIOUS PAGE                                 Aerocel® EPDM Insulation | Installation Guide

   supports and valves, with Aerocel adhesive.                was dry to the touch prior to contact. For
       Note: Never use zip ties as substitute for             exterior applications, taping all glued seams
       adhesive; zip ties do not seal and they                with Protape is required; turn taped longitudinal
       compress the insulation.                               seams away from direct sun exposure when
8. Vapor Stops: for below-ambient (cold)                      possible.
   applications, adhere the tube or sheet insulation        • Note: Protape should never be installed over
   directly to the pipe a maximum of every 18                 a seam that is not sealed with an Aerocel
   linear feet [5.5 m]. The adhesive width should be          adhesive or Cel-Link II.
   at a minimum equal to the insulation thickness.
   Protape wrapped around the pipe can be used
                                                          Cel-Link II Glueless Seam Seals
   as vapor stop in place of adhesive. Seal butt
                                                          - Cel-Link II glueless seam seals, Aeroflex squeegee
   joints with Aerocel adhesive or Cel-Link II for
                                                            and instructions are included with every carton of
   SSPT installations.
                                                            Aerocel SSPT pipe insulation.
                                                          - Install Cel-Link II over pipe and between adjoining
                                                            tubes.
                                                          - Peel seam seal from release liner.
                                                          - Apply exposed adhesive side of Cel-Link II to
                                                            one tube and thoroughly compress to maximize
                                                            adhesion.
                                                          - Peel gold release liner to other side of seam seal
                                                            facing adjoining tube and align longitudinal seams.
                                                          - Press adjoining tubes together under
  8                                                         compression.
                                                          - Apply 2” Protape evenly over all butt joints
                                                            (required).
9. Taping Seams: applying zero-perm Protape
   over sealed seams for interior applications
   is recommended as an additional level of
   protection to prevent CUI. For pipe sizes over
   6" IPS [15 cm] and sheets/rolls over 1" thick [2.5
   cm], apply 2" [5 cm] Protape evenly over seams
   followed by 2" on either side of taped seam
   (4" [10 cm] total taped seam width). Protape
   may be applied immediately over glued seams
   if Aeroseal or Aeroseal LVOC Black adhesive

  9

                                                        For more information, visit www.aeroflexusa.com           9
PREVIOUS PAGE
Aerocel Adhesives TIP - Use the “fingernail test” to determine when
tack time has been achieved; touch the glued
surface with fingernail; if fingernail sticks and
glue transfers, the adhesive is not ready; if the
fingernail does not stick, there is no glue transfer
and adhesive is either dry to the touch (Aeroseal
and Aeroseal LVOC Black) or tacky (REF 1520),
the two glued surfaces are ready for contact.
- Apply thin even coat to both surfaces to be sealed
with a short stiff-bristle brush from the inside out
(tubes) or with an adhesive/short-nap roller for
sheets and rolls.
- Brush adhesive on approximately 7” [18 cm] on
- Read label and follow warnings; work area should one surface, then 7” [18 cm] on the other surface,
be well-ventilated; do not smoke. alternating back and forth until longitudinal seam
- Do not thin adhesives. is glued; once adhesive is ready for contact, press
- Substrates, ambient temperatures and adhesive both surfaces together under compression to
should be 40°F - 100°F [4°C - 38°C]. ensure full adhesion.
- Do not use below 40°F [4°C]. - Avoid stretching and tension at glued seams.
- Store at 60°F - 80°F [16°C - 27°C]. - When applying to surfaces other than insulation
- Do not allow to freeze. (i.e. metal termination points), apply adhesive to
- Cold adhesive containers can be warmed in Aerocel insulation first, then the other surface.
bucket of hot water. - For applications over concrete substrates, consult
- Stir thoroughly before use and frequently during with Aeroflex USA.
use. - For exterior applications, turn glued seams away
- For non-brush top containers, use a Gluemaster from sun when possible.
or cover opening with Aerocel sheet insulation - Use acetone to clean tools.
or cardboard cut-out with brush hole to prevent
adhesive from thickening. AeroFit Fitting Covers
- Follow tack time on label and adjust based on
jobsite conditions – ambient temperature, relative
humidity and wind.
- Aeroseal and Aeroseal LVOC Black adhesives
must be dry to the touch (no transfer) prior to
contact to ensure immediate adhesion and a
permanent bond.
- REF 1520 adhesive must be tacky (no transfer)
prior to contact to ensure a permanent bond.
- Aeroseal LVOC Black adhesive requires a - AeroFit fitting covers ship unslit.
longer tack time than Aeroseal or REF 1520; - When fittings and straight runs are same size,
allow 3-5 minutes depending on ambient install fittings first followed by straight sections.
conditions during installation. LVOC adhesive - When fittings are larger than straight runs
must be dry to the touch (no transfer) prior to (oversized), install straight runs first.
contact to ensure immediate adhesion and a - Slit inside radius of fitting (throat) with sharp
permanent bond. knife.
10 For more information, visit www.aeroflexusa.comPREVIOUS PAGE Aerocel® EPDM Insulation | Installation Guide
- Install over pipe fitting to ensure proper fit - snug Aerocel with SaniGuard
or slightly loose (not stretched).
- Apply adhesive to both sides of radius seam; allow
to tack up and press together under compression
to ensure full adhesion and vapor seal.
- When bonding fitting covers to straight runs of
pipe insulation, allow adhesive to tack up and
press together under compression to ensure
complete adhesion and vapor seal.
- Optional: for interior applications, apply Protape
over glued seams.
- Required: for exterior applications, apply Protape
over glued seams; turn taped longitudinal seams
away from direct sun exposure when possible. - Outer surface temperature of Aerocel
insulation must be continuously maintained
Aerofix Pipe Hanger Fittings below 150°F [65°C].
- Follow best practices to install Aerocel unslit
tube, SSPT tube and AeroFit fitting covers.
- SaniGuard PVC jacket sections are included in
carton with 3-foot [.91 m] Aerocel unslit tube or
SSPT pipe insulation. AeroFit 90° long-radius
elbows, SaniGuard White 2” [5 cm] PVC Tape and
welding adhesive are sold separately.
- SaniGuard sections are intentionally 2” [5 cm]
longer than the insulation tubes to ensure an
overlap at SaniGuard seams. When cutting
SaniGuard, add 2” [5 cm] to all measurements.
- When applicable, install AeroFit fittings first
followed by straight pipe runs.
- Open Aerofix fitting, remove two inside release - Ensure that all longitudinal seams, butt joints and
liners, wrap around pipe, center at hanger termination points of insulation are sealed with an
location and firmly press two halves together. Aerocel adhesive or Cel-Link II and covered with
- Remove release liner from Protape outer jacket Protape prior to installing the SaniGuard jacket.
and apply with firm pressure to achieve a strong - Carefully install SaniGuard jacket over sealed
bond. Aerocel insulation to prevent surface damage.
- Position Aerofix so seam between the two halves - Position longitudinal overlap of SaniGuard jacket
is horizontal to the legs of pipe support system. downward to allow watershed and position out of
- Do not allow any gaps in the closure of the sight line.
insulation envelope. - Prior to sealing seams, fit SaniGuard jacket tightly
- Seal Aerofix to adjoining Aerocel insulation tubes to outer surface of Aerocel insulation leaving no
with Aerocel adhesive and press together under gaps.
compression to ensure vapor seal. - Seal the SaniGuard overlaps with pressure-
- Optional: for systems operating above -20˚F sensitive adhesive release liner located on inside
[-29˚C], apply Protape over glued seams. of jacket; peel, seal and apply firm pressure to
- Required: for systems operating below -20˚F ensure complete adhesion.
[-29˚C], apply Protape over glued seams. - Once a sufficient amount of jacketing has been
For more information, visit www.aeroflexusa.com 11PREVIOUS PAGE
applied over pipe insulation, seal all outside - Required: For pipe sizes over 6" IPS and sheets/
edge of all longitudinal seams, butt joints and rolls over 1" thick, apply 2" Protape evenly over
termination points with SaniGuard Tape. seams followed by 2" on either side of taped seam
- Do not stretch SaniGuard Tape; it will shrink and (4" [10 cm] total taped seam width).
recover.
- Ensure that 2” [5 cm] SaniGuard Tape is applied Aerocoat | Aerocoat LVOC Coatings
continuously and evenly over all seams. - Select Aerocoat LVOC for
- To meet FDA and USDA washdown requirements, LEED® registered projects.
SaniGuard jacket seams must be welded with - Recommended application
PIC Welding Adhesive for warranty purposes; temperature is 50°F - 100°F
SaniGuard Tape should not be installed for this [10°C - 38°C]
application. - Ensure insulation surface
is free from dust, grease,
Protape oil or moisture prior to
application. Use denatured
alcohol if necessary.
- Do not dilute or tint.
- No primer is required.
- If Aeroseal or Aeroseal
LVOC Black adhesives were
installed and dry to the touch
prior to contact, coating may
be applied immediately after insulation installation
(seams and full coverage adhesion).
- If REF 1520 adhesive was installed and tacky to the
touch prior to contact, coating may be applied over
seams (24-36 hours) and full adhesive coverage (7
- Clean surfaces to receive Protape with denatured days) after insulation installation.
alcohol. - Stir thoroughly and apply with new brush or short-
- Recommended substrate and ambient nap roller.
temperature should be above 50°F [10°C]. At - Two coats are required to achieve 100% coverage;
temperatures between 40°F - 50°F [4°C - 10°C], allow a minimum of 4 hours between coats.
significant pressure must be applied to achieve an - Apply Aerocoat or Aerocoat LVOC within 2 weeks
adequate bond. Installation is not recommended of installation for optimum UV protection.
below 40°F [4°C]. - Clean-up: clean water.
- If Aeroseal or Aeroseal LVOC Black adhesives
were dry to the touch prior to contact, Protape Sleeving | Multi-Layering
may be applied over sealed seams immediately
after insulation installation (seams and full
coverage adhesion).
- If REF 1520 adhesive was tacky to the touch
prior to contact, tape may be applied over sealed
seams (24-36 hours) and full adhesive coverage
(7 days) after insulation installation.
- Optional: for interior installations, apply Protape
over glued seams.
12 For more information, visit www.aeroflexusa.comPREVIOUS PAGE Aerocel® EPDM Insulation | Installation Guide
- Piping: • Adhere second layer to first layer with full
• Stagger and seal all longitudinal and transverse coverage using Aerocel adhesive.
seams with Aerocel adhesive. • Apply Protape over sealed seams for additional
• Sheet or Roll should be used as second layer protection (required for exterior applications).
when tube size is not available.
• Edges of second layer (tubes or sheets) should
be adhered to first layer with Aerocel adhesive.
Aerocel Sheet & Roll on Pipes
• 16" - 24" [41 cm - 61 cm] pipes: adhere bottom
3rd of first layer to pipe, or second layer to first
layer, with Aerocel adhesive to prevent sagging.
• 24”+ [61 cm] pipes: full adhesion with Aerocel
adhesive is required for all layers.
- To minimize waste of Aerocel Sheet & Roll, refer
to Aerocel Yield Table – Sheet & Roll.
Stainless Steel Piping
• Apply Protape over sealed seams for additional
protection (required for exterior applications).
• Reference: aeroflexusa.com/technical
resources/technical bulletins/december 2020.
- Flat Surfaces
• Stagger all seams of first and second layers.
- Aerocel EPDM is safe for austenitic stainless-steel
piping; Aerocel will not cause external stress
crack corrosion (ESCC).
• Reference: aeroflexusa.com/technical
resources/technical bulletins/february 2021.
• First layer of Aerocel sheets to be installed with
full Aerocel adhesive coverage or Aerocel with
PSA (pressure-sensitive adhesive back).
For more information, visit www.aeroflexusa.com 13PREVIOUS PAGE
Exterior Applications does not compress the insulation. See “Cladding |
- Although Aerocel EPDM has greater UV- Jacketing” schedule under Technical Resources for
resistance than traditional NBR/PVC closed cell Aerocel pipe insulation OD’s.
flexible elastomeric insulation, UV protection • Reference: aeroflexusa.com/technical
is recommended to resources/technical bulletins/september 2020.
prolong the life of
Aerocel. Options include Direct Burial | Underground
Aerocoat, Aerocoat
LVOC or an insulation
jacketing system. When
mechanical damage,
such as impacts from
maintenance, extreme
weather, birds, etc.
are expected, Aerocel
should be protected with a jacketing system. - Aerocel should be sleeved within a protective
- For pipe sizes over 6" IPS and sheets/rolls over conduit, such as a fully-supported and sealed
1" thick, apply 2" Protape evenly over seams waste-water drainage pipe, to ensure long-term
followed by 2" on either side of taped seam (4" performance once backfilled.
[10 cm] total taped seam width). - Direct contact with soil acids, ground water
• Note: Aerocoat and Aerocoat LVOC satisfy chemicals, contaminants, plus insulation
national and state energy code requirements, compression from the weight of the backfilled
such as ASHRAE 90.1, IECC® and California Title soil, can reduce the thermal efficiency and life of
24, for outdoor service protection from solar the insulation.
radiation (adhesive tape is not permitted). • Reference: aeroflexusa.com/technical
• Reference: aeroflexusa.com/technical resources/technical bulletins/april 2020.
resources/technical bulletins/july 2020.
Heat Trace Systems
Cladding | Jacketing
- Aeroflex USA does not recommend specific
protective jacketing systems. However, the specified
and installed system should be sized correctly so it
14 For more information, visit www.aeroflexusa.comPREVIOUS PAGE Aerocel® EPDM Insulation | Installation Guide
- Aerocel is compatible with self-regulating heat adhesion and a vapor seal.
trace systems which ensure that the continuous - Apply Protape over sealed seams (optional
line temperature does not exceed 257°F [125°C]. for interior applications, required for exterior
- For proper fit, the next tube ID size up should be applications).
installed. • Cuts/nicks to surface (skin)
- An air gap between the pipe and insulation - Seal with Aerocel adhesive and apply
(annular space) is acceptable provided that all Protape over sealed repair (optional for
seams are completely sealed with an Aerocel interior applications, required for exterior
adhesive to create a vapor seal. applications).
• Reference: aeroflexusa.com/technical
resources/technical bulletins/august 2020. - Replacement
Maintenance | Repair | Replacement
• Carefully cut out damaged section on pipe, duct
or equipment with sharp non-serrated knife.
- Maintenance
• For multi-layer applications, take care not to cut
• For light-duty cleaning, use non-acidic neutral
into 1st or 2nd layers; avoid cutting directly over
cleaner.
sealed seams below to maintain staggered seam
• For heavy-duty cleaning, use denatured alcohol.
layout.
- Repair
• Cut replacement piece of same Aerocel tube,
sheet or roll insulation to fit under compression.
• Apply Aerocel adhesive to existing edges and
replacement piece; allow adhesive to tack up.
• When ready for contact, carefully install
replacement piece under compression without
gaps.
• Ensure complete adhesion to create vapor seal.
• Apply Protape over sealed seams (optional
for interior applications, required for exterior
applications).
• Openings at longitudinal seams and butt joints
- Apply Aerocel adhesive to existing edges and
allow adhesive to tack up.
- When ready for contact, apply firm pressure
to both sides of seams to ensure complete
For more information, visit www.aeroflexusa.com 15PREVIOUS PAGE
SMALL DIAMETER PIPES - Adhere insulation directly to the pipe with
Aerocel adhesive a maximum of every 18’ [5.5
m] to create a vapor stop on below-ambient
(cold) systems. BEST PRACTICES/AEROCEL
EPDM INSULATION/VAPOR STOPS.
- Glue adjoining tubes and fittings with Aerocel
adhesive following BEST PRACTICES/
AEROCEL ADHESIVES.
- Once adhesive is ready for contact, press both
sides of glued butt joints together with firm
pressure under compression to ensure
complete adhesion.
- Unslit Aerocel Tubes
• Optional: for interior installations, apply
• Slide-On Method (new uninstalled piping) Protape over glued butt joints and fittings.
- Push (never pull) tube over pipe. • Required: for exterior installations, apply
• Note: Aerocel unslit tube sizes up to 3-1/8” Protape over glued longitudinal seams, butt
[7.9 cm] ID ship with an asbestos-free talc joints and fittings.
for ease of installation. • Optional (recommended): to maximize
- Do not push tube over pipe bends when Aerocel life cycle for exterior applications,
insulation thickness is 1/2” [1.3 cm] or greater. apply Aerocoat, Aerocoat LVOC or jacketing
system for UV protection. For mechanical
protection, install jacketing system
specifically designed for pipe insulation.
• Snap-On Method (installed piping)
- Install AeroFit or field-fabricated mitered fittings
at pipe bends to prevent insulation compression
(reduced thickness) and condensation.
16 For more information, visit www.aeroflexusa.comPREVIOUS PAGE Aerocel® EPDM Insulation | Installation Guide
- Slit flattest side of tube along 6’ [1.8 m]
longitudinal seam with sharp non-serrated
knife; maintain knife at low angle to prevent
tip from cutting inside wall of tube.
- Turn longitudinal seam down or out of sight
line before adhering to butt joints and fittings
with Aerocel adhesive.
- Once adhesive is ready for contact, press both
sides of glued longitudinal seams and butt
- Install mitered fittings at pipe bends to joints together under compression with firm
prevent insulation compression (reduced pressure to ensure complete adhesion.
thickness) and condensation.
• Notes:
- Welded pipes (pipe & fittings same size) -
insulate fittings first.
- Pipes with large fittings - insulate straight
runs first.
- Snap slit tube over clean pipe.
- Adhere insulation directly to the pipe with
Aerocel adhesive a minimum of every 18’ [5.5
m] to create a vapor stop on below-ambient
(cold) systems. BEST PRACTICES/AEROCEL
EPDM INSULATION/VAPOR STOPS.
• Optional: for interior installations, apply
Protape over glued longitudinal seams, butt
joints and fittings.
• Required: for exterior installations, apply
Protape over glued longitudinal seams, butt
joints and fittings; turn taped longitudinal
seams away from direct sun exposure when
possible.
• Optional (recommended): to maximize
Aerocel life cycle for exterior applications,
apply Aerocoat, Aerocoat LVOC or jacketing
system for UV protection. For mechanical
- Glue longitudinal seams, butt joints and protection, install jacketing system
fittings with Aerocel adhesive. BEST specifically designed for pipe insulation.
PRACTICES/AEROCEL ADHESIVES
For more information, visit www.aeroflexusa.com 17PREVIOUS PAGE
- Pre-slit Aerocel SSPT Tubes wall and slowly pull away from tube
approximately every 12” [30 cm].
12”
• Carefully line up and press approximately 12”
[30 cm] PSA seam together with firm pressure
to ensure complete adhesion.
• CAUTION: BEST PRACTICES/AEROCEL
EPDM INSULATION/PRESSURE-SENSITIVE
ADHESIVE (PSA)
• Install mitered fittings at pipe bends to prevent
insulation compression (reduced thickness) and
condensation.
- Notes:
• Welded pipes (pipe & fittings same size) -
insulate fittings first.
• Pipes with large fittings - insulate straight
runs first.
• Open SSPT tube and snap on pipe. • Repeat until inside wall of SSPT tube is
completely sealed.
• If necessary, clean outside skin of tube where
Protape will adhere to with denatured alcohol.
• Locate release liner to Protape double closure
seal and slowly pull away.
• Gently press Protape double closure seal away
from inside seam before adhering inside walls
together.
• Locate the end of gold release liner on inside
18 For more information, visit www.aeroflexusa.comPREVIOUS PAGE Aerocel® EPDM Insulation | Installation Guide
• Carefully press Protape double closure seal
onto clean outside wall of tube with firm
pressure, avoiding any kinks or gaps, until the
SSPT tube is fully sealed.
• Turn longitudinal seam down or out of line of
sight before adhering to butt joints and fittings.
• Once adhesive is ready for contact, press glued
butt joints together under compression with
firm pressure to ensure complete adhesion of
• Apply Aeroflex SSPT squeegee (included in Aerocel adhesive.
every carton of SSPT) to Protape seam seal to
remove any air bubbles, kinks or gaps.
• Adhere insulation directly to the pipe with
Aerocel adhesive a minimum of every 18’ [5.5
m] to create a vapor stop on below-ambient
(cold) systems. BEST PRACTICES/AEROCEL
EPDM INSULATION/VAPOR STOPS
- Optional: for interior installations, apply
Protape over glued butt joints and fittings.
- Required: for exterior installations, apply
Protape over glued butt joints and fittings;
turn taped longitudinal seams away from
direct sun exposure when possible.
- Optional (recommended): to maximize
• Glue adjoining tubes and fittings with Aerocel Aerocel life cycle for exterior applications,
adhesive following BEST PRACTICES/ apply Aerocoat, Aerocoat LVOC or jacketing
AEROCEL ADHESIVES. system for UV protection. For mechanical
protection, install jacketing system
specifically designed for pipe insulation.
For more information, visit www.aeroflexusa.com 19PREVIOUS PAGE
- AeroFit Factory Fabricated Fitting Covers - Straight pipe runs are typically insulated up to
BEST PRACTICES/AEROFIT FITTING COVERS 45° bend.
- Using the Aeroflex Template | Field-Fabricated
Fittings
• The Aeroflex Template is printed on every
carton of Aerocel pipe insulation as a convenient - Cut Aerocel unslit tube at 22.5° angle using
alternative to a miter box to fabricate quality Aeroflex Template and long sharp knife.
fittings in the shop or field for the most common
pipe fittings.
B
r
• Break down an empty carton or cut out
template and place on flat work surface.
• Use a sharp non-serrated knife with a knife r
sharpener on hand. A
• Place tube along bold horizonal base line.
• Mark cuts with light-colored marker or chalk. - Cut horizontal and vertical lengths long to
• Align knife with desired angle reference and install with compression to adjoining tubes.
cut smoothly through tube; ensure clean cuts - Glue two 22.5° pieces under compression to
without rough edges. Sharpen knife if necessary. form 45° angle with Aerocel adhesive.
- Pipe Bends | 45° | 2-piece
• Elbows - Welded (fitting & piping same
diameter)
22.5
20 For more information, visit www.aeroflexusa.comPREVIOUS PAGE Aerocel® EPDM Insulation | Installation Guide
- Once 45° seam is bonded, cut inside radius of - Pipe Bends | 90° | 2-piece
cover (throat). • Elbows - Welded (fitting & piping same
diameter)
- Install over pipe fitting and glue throat under
compression with Aerocel adhesive. - Install fitting cover before insulating straight
- Glue fitting cover to adjoining tubes under runs.
compression with Aerocel adhesive.
• Note: If straight runs are installed prior to
- Ensure complete vapor seal with no gaps 90° fitting cover, measure and cut fitting
present. cover to fit with compression.
• Optional: for interior installations, apply
Protape over glued longitudinal seams, butt
joints and fittings.
• Required: for exterior installations, apply
Protape over glued longitudinal seams, butt
joints and fittings; turn taped longitudinal
seams away from direct sun exposure when
possible.
• Optional (recommended): to maximize
Aerocel life cycle for exterior applications,
apply Aerocoat, Aerocoat LVOC or jacketing
system for UV protection. For mechanical
protection, install jacketing system
specifically designed for pipe insulation.
For more information, visit www.aeroflexusa.com 21PREVIOUS PAGE
- Cut Aerocel unslit tube at 45° angle using - Install over pipe fitting and glue throat under
Aeroflex Template and long sharp knife. compression with Aerocel adhesive.
45˚
OD
OD
- Cut horizontal and vertical lengths long to - Glue fitting cover to adjoining tubes under
install with compression to adjoining tubes. compression with Aerocel adhesive.
- Glue two 45° pieces under compression to
form 90° angle with Aerocel adhesive.
- Ensure complete vapor seal with no gaps
present.
- Once 45° seam is bonded, cut inside radius of • Optional: for interior installations, apply
cover (throat). Protape over glued longitudinal seams, butt
joints and fittings.
• Required: for exterior installations, apply
Protape over glued longitudinal seams, butt
joints and fittings; turn taped longitudinal
seams away from direct sun exposure when
possible.
• Optional (recommended): to maximize
Aerocel life cycle for exterior applications,
apply Aerocoat, Aerocoat LVOC or jacketing
system for UV protection. For mechanical
protection, install jacketing system
specifically designed for pipe insulation.
22 For more information, visit www.aeroflexusa.comPREVIOUS PAGE Aerocel® EPDM Insulation | Installation Guide
• Elbows – Oversized (fitting larger than piping)
≥ 1"
- Cut two (2) segmented pieces to form 90°
angle.
- Insulate straight runs before fitting covers.
45˚
OD
OD
- Glue two (2) sections to form elbow with
- Select Aerocel unslit tube ID that snugly fits Aerocel adhesive.
over insulated straight run pipe.
- Cut horizontal and vertical lengths long to
install with compression to adjoining tubes.
For more information, visit www.aeroflexusa.com 23PREVIOUS PAGE
- Once 45° seam is bonded, cut inside radius of - Curved Pipe Bends | 90° | Segmented
cover (throat). • 3-Piece Elbows - Welded (fitting & piping same
diameter)
22.5°
- Install over pipe fitting and glue throat under
compression with Aerocel adhesive.
OD
22.5˚ 22.5˚
OD
3/8"
• 3-Piece Elbows - Oversized (fitting larger than
- Glue fitting cover to outside surface of piping)
insulated straight runs under compression
with Aerocel adhesive.
- Ensure complete vapor seal with no gaps present.
• Optional: for interior installations, apply
Protape over glued longitudinal seams, butt
joints and fittings.
• Required: for exterior installations, apply
Protape over glued longitudinal seams, butt
joints and fittings; turn taped longitudinal
seams away from direct sun exposure when
possible.
• Optional (recommended): to maximize
Aerocel life cycle for exterior applications,
apply Aerocoat, Aerocoat LVOC or jacketing
system for UV protection. For mechanical
protection, install jacketing system
specifically designed for pipe insulation.
24 For more information, visit www.aeroflexusa.comPREVIOUS PAGE Aerocel® EPDM Insulation | Installation Guide
• 4-Piece Elbows - Welded (fitting & piping same • 5-Piece Elbows - Welded (fitting & piping same
diameter) diameter)
15° 11.25°
3/8” 3/8”
11.25˚ 11.25˚ 11.25˚ 11.25˚
15˚ 15˚
OD
OD
3/8” OD 3/8” OD 3/8”
- Pipe Intersections
• 4-Piece Elbows - Oversized (fitting larger than • Tee’s
piping) - Hole Punch method
OD
OD
• Punch hole in tube to insulate main
(horizontal) pipe with sharpened pipe end
of right diameter; use divider to cut hole for
larger pipes.
For more information, visit www.aeroflexusa.com 25PREVIOUS PAGE
• Slit tube and snap over main pipe at • Using Aeroflex Template, cut two 45° angles
intersection with hole positioned over to center at end of tube for branch (vertical)
branch (vertical) pipe. pipe.
• At end of tube used for branch (vertical)
pipe, cut radiused recess which will contact
bottom of main pipe inside horizontal tube. 1/2 OD 1/2 OD
• Slit tube and snap over branch pipe and join
with horizontal tube.
• Glue horizontal and vertical pieces together 1/2 OD
with Aerocel adhesive and to adjoining 45˚ 45˚
straight runs. 1/2 OD
• Ensure complete vapor seal with no gaps
present. 45˚ 45˚
- Optional: for interior installations, apply
Protape over glued longitudinal seams,
butt joints and fittings.
- Required: for exterior installations, • Cut two 45° angles in bottom center of
apply Protape over glued longitudinal main (horizontal pipe) at intersection; notch
seams, butt joints and fittings; turn taped should fit OD of branch pipe.
longitudinal seams away from direct • Join and glue two fabricated pieces
sun exposure when possible; turn taped together with Aerocel adhesive.
longitudinal seams away from direct sun • Slit Tee on sides, snap over pipe intersection
exposure when possible. and glue seams and butt joints to adjoining
- Optional (recommended): to maximize straight runs under compression with
Aerocel life cycle for exterior applications, Aerocel adhesive.
apply Aerocoat, Aerocoat LVOC or • Ensure complete vapor seal with no gaps
jacketing system for UV protection. For present.
mechanical protection, install jacketing - Optional: for interior installations, apply
system specifically designed for pipe Protape over glued longitudinal seams,
insulation. butt joints and fittings.
- Required: for exterior installations,
- Miter Box / 90° method apply Protape over glued longitudinal
seams, butt joints and fittings; turn taped
longitudinal seams away from direct sun
exposure when possible.
- Optional (recommended): to maximize
Aerocel life cycle for exterior applications,
apply Aerocoat, Aerocoat LVOC or jacketing
system for UV protection. For mechanical
protection, install jacketing system
specifically designed for pipe insulation.
26 For more information, visit www.aeroflexusa.comPREVIOUS PAGE Aerocel® EPDM Insulation | Installation Guide
- 3-Piece Segmented method - Optional (recommended): to maximize
Aerocel life cycle for exterior applications,
apply Aerocoat, Aerocoat LVOC or
jacketing system for UV protection. For
mechanical protection, install jacketing
system specifically designed for pipe
insulation.
• Cross Joints
OD
1/2 OD
45˚ 45˚
1/2 OD
45˚ 45˚
OD
• Using Aeroflex Template, place tube on
baseline.
OD
• Make one 45° cut.
• Make 2nd 45° cut in opposite direction of 1st
OD
cut while holding both pieces together.
• Make 3rd 45° cut.
• Lengths of cuts must be equal.
• Join and glue three fabricated pieces
together with Aerocel adhesive. • Angle-T’s / Y-Branches
• Slit Tee on sides, snap over pipe intersection - Cut piece of Aerocel unslit tube to correct
and glue seams and adjoining straight runs length for main vertical pipe.
under compression with Aerocel adhesive.
• Ensure complete vapor seal with no gaps
present.
- Optional: for interior installations, apply
Protape over glued longitudinal seams,
butt joints and fittings.
- Required: for exterior installations,
apply Protape over glued longitudinal
seams, butt joints and fittings; turn taped
longitudinal seams away from direct sun
exposure when possible.
For more information, visit www.aeroflexusa.com 27PREVIOUS PAGE
- Punch hole in tube at correct location and - Cut U-shape at end of 45° cut that meets up
angle with hole punch or sharpened copper with main vertical pipe insulation so there are
pipe with the correct OD of branch pipe. no gaps.
- Cut mitered piece along one side, fit over pipe
and glue seam.
- Glue mitered branch to main pipe under
compression with Aerocel adhesive.
- Cut main vertical tube lengthwise where it
intersects with branch pipe and glue seam
with Aerocel adhesive.
- Ensure complete vapor seal with no gaps present.
• Optional: for interior installations, apply
Protape over glued longitudinal seams, butt
joints and fittings.
• Required: for exterior installations, apply
Protape over glued longitudinal seams, butt
joints and fittings; turn taped longitudinal
seams away from direct sun exposure when
possible.
• Optional (recommended): to maximize
Aerocel life cycle for exterior applications,
apply Aerocoat, Aerocoat LVOC or jacketing
- Using Aeroflex Template, cut another tube to system for UV protection. For mechanical
fit branch pipe with 45° angle cut at one end. protection, install jacketing system
specifically designed for pipe insulation.
• Y-Tubes
45˚ Bend 45˚ Bend
90˚ Bend
28 For more information, visit www.aeroflexusa.comPREVIOUS PAGE Aerocel® EPDM Insulation | Installation Guide
- Collars / Pipe Reducers • Glue notched edges together with Aerocel
adhesive
• With piece of Aerocel tube the same ID as larger
pipe, cut a section larger than opening between • Cut end of notched size so diameter lines up
straight run tubes installed on either side of with OD of smaller tube.
pipe transition.
• Cut end of larger ID side so length of reducer is
• At one end, cut two equal notches out of 1/2” longer than opening to allow for 1/4”
opposite sides to fit smaller tube. compression on each side.
For more information, visit www.aeroflexusa.com 29PREVIOUS PAGE
• Cut reducer along entire length and snap on - Valves
pipe collar.
• Valve stem (small diameter)
• Glue reducer seam and butt joints under - From edge of straight run tube to center of
compression with Aerocel adhesive. valve stem, cut and punch hole same
diameter as stem.
• Ensure complete vapor seal with no gaps
present. - Install tube on pipe and fit under compression
- Optional: for interior installations, apply around valve and with adjoining tube.
Protape over glued longitudinal seams, butt
joints and fittings.
- Required: for exterior installations, apply
Protape over glued longitudinal seams, butt
joints and fittings; turn taped longitudinal
seams away from direct sun exposure when
possible.
- Optional (recommended): to maximize
Aerocel life cycle for exterior applications,
apply Aerocoat, Aerocoat LVOC or jacketing
system for UV protection. For mechanical
protection, install jacketing system
specifically designed for pipe insulation. - Glue valve stem, seam between valve stem,
end of tube and butt joint under compression
with Aerocel adhesive.
30 For more information, visit www.aeroflexusa.comPREVIOUS PAGE Aerocel® EPDM Insulation | Installation Guide
- Seal all terminations with Aerocel adhesive. - Slit sleeve along entire length and flatten out.
- Ensure complete vapor seal with no gaps present. - Measure and cut seam longitudinally from
• Optional: for interior installations, apply edge of sleeve to center of valve stem.
Protape over glued longitudinal seams, butt
joints and fittings.
• Required: for exterior installations, apply
Protape over glued longitudinal seams, butt
joints and fittings; turn taped longitudinal
seams away from direct sun exposure when
possible.
• Optional (recommended): to maximize
Aerocel life cycle for exterior applications,
apply Aerocoat, Aerocoat LVOC or jacketing
system for UV protection. For mechanical
protection, install jacketing system
specifically designed for pipe insulation - Punch hole to wrap around valve stem at end
of seam.
• Valve stem (large diameter) - Install sleeve over valve and adjoining tubes.
- Install straight runs of Aerocel pipe insulation
up to valve stem.
- Wrap Protape securely around the base of valve.
- Glue sleeve to both adjoining tubes and
seams within sleeve under compression with
Aerocel adhesive.
- If space allows between sleeve and valve
- Cut length of Aerocel tube with the same ID as
handle, insulate by fabricating, gluing and
OD of installed tubes; this will be the sleeve.
installing a donut to insulate the stem.
For more information, visit www.aeroflexusa.com 31PREVIOUS PAGE
- Seal all terminations with Aerocel adhesive.
- Ensure complete vapor seal with no gaps LARGE DIAMETER PIPES |
present.
• Optional: for interior installations, apply
ROUND DUCTS
Protape over glued longitudinal seams, butt
joints and fittings.
• Required: for exterior installations, apply
Protape over glued longitudinal seams, butt
joints and fittings; turn taped longitudinal
seams away from direct sun exposure when
possible.
• Optional (recommended): to maximize
Aerocel life cycle for exterior applications,
apply Aerocoat, Aerocoat LVOC or jacketing
system for UV protection. For mechanical
protection, install jacketing system
specifically designed for pipe insulation.
- Block at Pipe End (no termination point)
- Aerocel Sheet & Roll
• Using proper sized sharpened pipe end, cut
• Sheet:
plug out of same thickness of Aerocel sheet/roll
- Standard Back (no PSA) - available in 3’x4’
insulation.
[.91 m x 1.2 m], thicknesses 1/4” to 3” [.63 cm -
• Glue end of tube ID and fabricated plug with
7.6 cm] (ASTM E84 25/50 through 2”)
Aerocel adhesive.
- PSA Back - available in 3’x4’ [.91 m x 1.2 m],
• Once glue is ready for contact, insert plug in
thicknesses 1/4” to 2-1/2” [.64 cm - 6.4 cm]
end of tube.
(ASTM E84 25/50 through 2”)
• Ensure complete vapor seal with no gaps
• Roll:
present.
- Standard Back (no PSA) - available in 48” [122
cm] width, thicknesses 1/8” to 2-1/2” [.32 cm -
6.4 cm] (ASTM E84 25/50 through 2”)
- PSA Back - available in 48” width [122 cm],
thicknesses 1/4” to 2-1/2” [.64 cm - 6.4 cm]
(ASTM E84 25/50 through 2”)
32 For more information, visit www.aeroflexusa.comPREVIOUS PAGE Aerocel® EPDM Insulation | Installation Guide
- Sheet & Roll | Pipe Size Applications • Apply Aerocel
adhesive to cut
Outside Pipe Diameter (inches) edges of longitudinal seam, allow to tack up
Sheet/Roll
Thickness ≥ 4” ≥ 5” ≥ 6” ≥ 8” until ready for contact.
[10 cm] [13 cm] [15 cm] [20 cm]
3/8” [.95 cm] • • • •
1/2” [1.3 cm] • • • •
3/4” [1.9 cm] • • • •
1” [2.5 cm] • • • •
1-1/2” [3.8 cm] • • •
2” [5 cm] •
- Pipes (straight runs)
• Determine pipe circumference by wrapping strip
of Aerocel Sheet or Roll, the same thickness to
be installed, around pipe; add 1/4” [.64 cm] to
measurement. • Place insulation over pipe and adhere glued
longitudinal seam by pressing from the outside
edges towards the middle to ensure straight
edges at butt joints, full adhesion and vapor
seal.
• Do not stretch strip; insulation should fit slightly
loose over pipe without stress on seams.
• Mark and cut length of sheet or roll with
straight edge. • Glue butt joints under compression with Aerocel
adhesive.
For more information, visit www.aeroflexusa.com 33You can also read