COLLECTION 2019 - Melton Stone Supplies
←
→
Page content transcription
If your browser does not render page correctly, please read the page content below
COLLECTION 2019

WHY CHOOSE AL FRESCO?
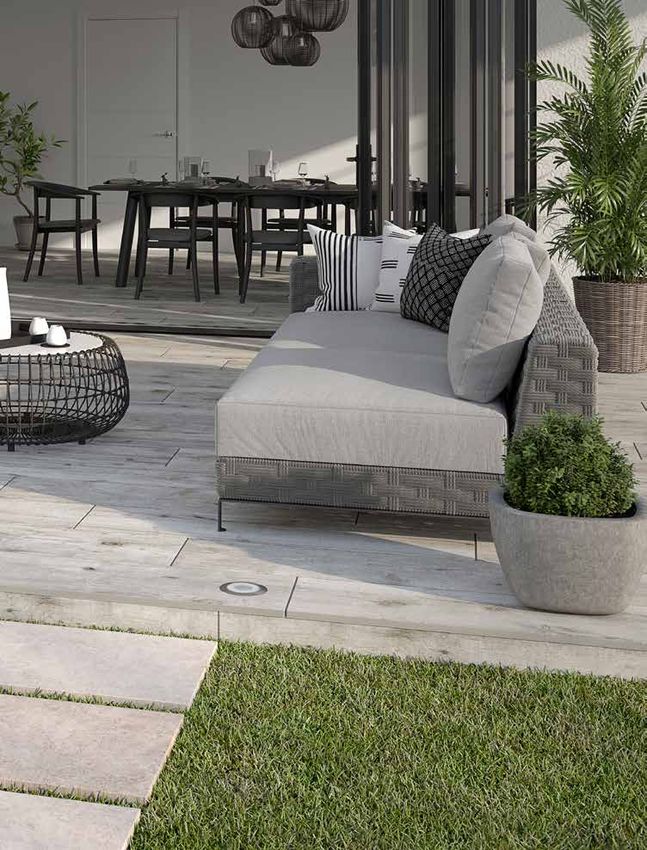
Our new premium porcelain Al Fresco
range features 10mm tiles for indoor use
and 20mm tiles for outdoor use to create
seamless open plan living spaces.
Our premium porcelain outdoor tiles offer
a stylish alternative to stone or concrete
flagstones and our wood effect range
creates the look of high-end timber
decking but with many added benefits
such as good slip resistance. Hard wearing
and practical, these tiles have a 10 year
guarantee, are simple to install and require
no sealing - the perfect way to create a
durable and low maintenance living space.
2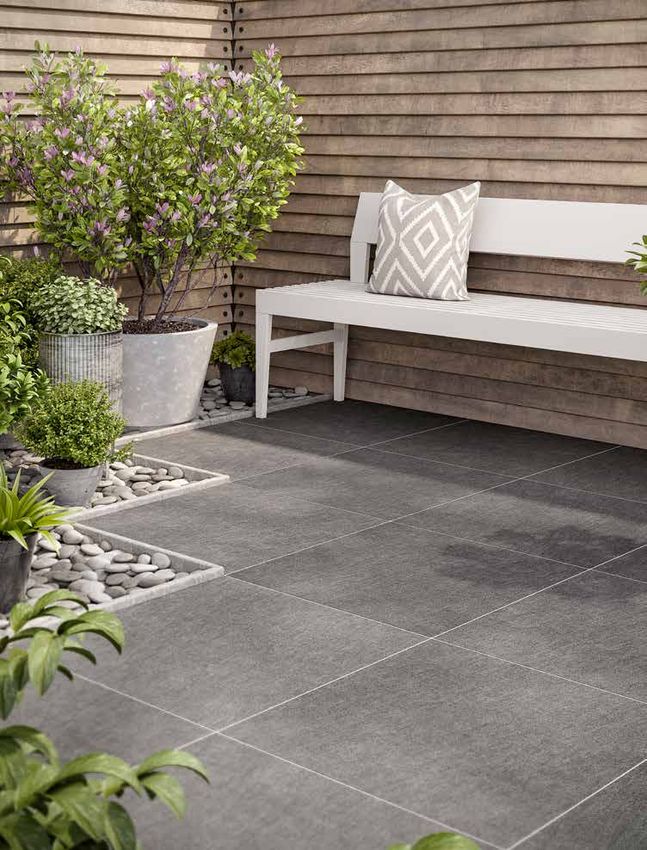
CONTENTS

4     FEATURES & BENEFITS

6     GUIDE TO VARIATIONS

7     THE COLLECTION

22    LAYOUT INSPIRATION

23    DESIGN INSPIRATION

24    INSTALLATION ADVICE

28    PRODUCT OVERVIEW

30    GENERAL INFORMATION

                            3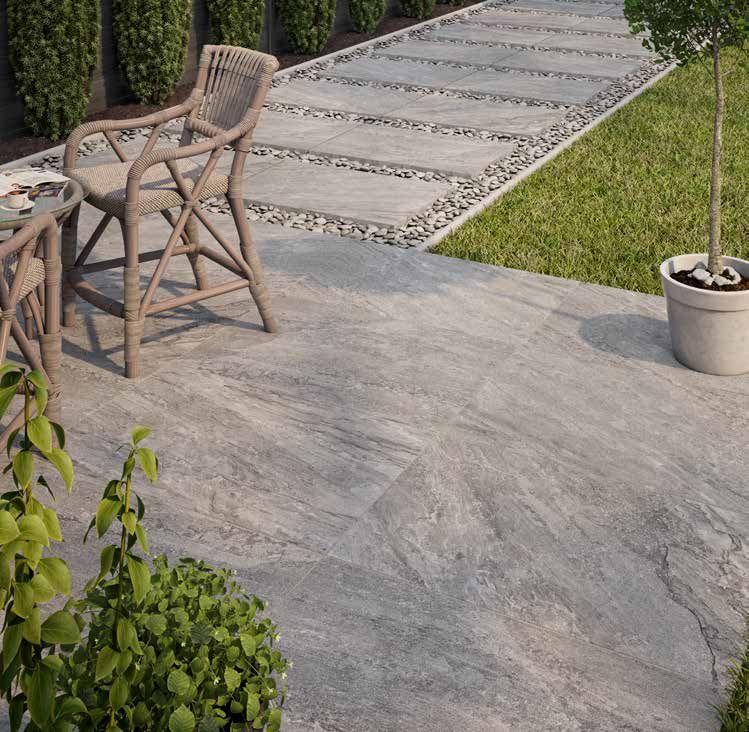
FEATURES & BENEFITS
     Not only do Al Fresco tiles look amazing, they also have many
    other beneficial properties. Our tiles are manufactured in a way
    that avoids all imperfections associated with natural stone and
     traditional paving slabs. Pressed in a raw state and heated at
    very high temperatures, Al Fresco tiles are strong, durable and
                       have a 10 year guarantee!

    Algae & Moss
      Resistant                                     No need to worry about your tiles turning
                                                   green - Al Fresco tiles are resistant to algae
                                                   and moss keeping them looking their best
                                                                  all year round.

                                                                                     Easy to
       Al Fresco tiles have been designed to                                          Clean
    provide you with low maintenance living. To
     clean, simply use a hard brush and soapy
                        water.

       Fade
     Resistant
                                                   Unlike traditional paving, Al Fresco tiles are
                                                   great for sunny spots and will not fade or
                                                                 lose their colour.

4
4
Simple to
   Loose lay Al Fresco tiles onto grass or                                      Install
 gravel, or use the pedestal system which
 allows you to create patio areas without
the need for sealing. See Page 24 for more
  information on installation techniques.

  Uniform
 Thickness                                       Al Fresco tiles are manufactured to be
                                                  completely level and flat. Every tile is
                                               created at the exact same thickness giving
                                                  any project a premium perfect finish.

                                                                              Frostproof
 Al Fresco tiles are the perfect option for
all seasons. Frostproof and durable, these
tiles will not crack in winter temperatures.

 Good Slip
 Resistance                                     Hard wearing and practical, Al Fresco tiles
                                               have a good slip rating of up to R11 making
                                                them ideal for indoors and outdoors. See
                                               page 30 for more information on R ratings.

                                                                                              55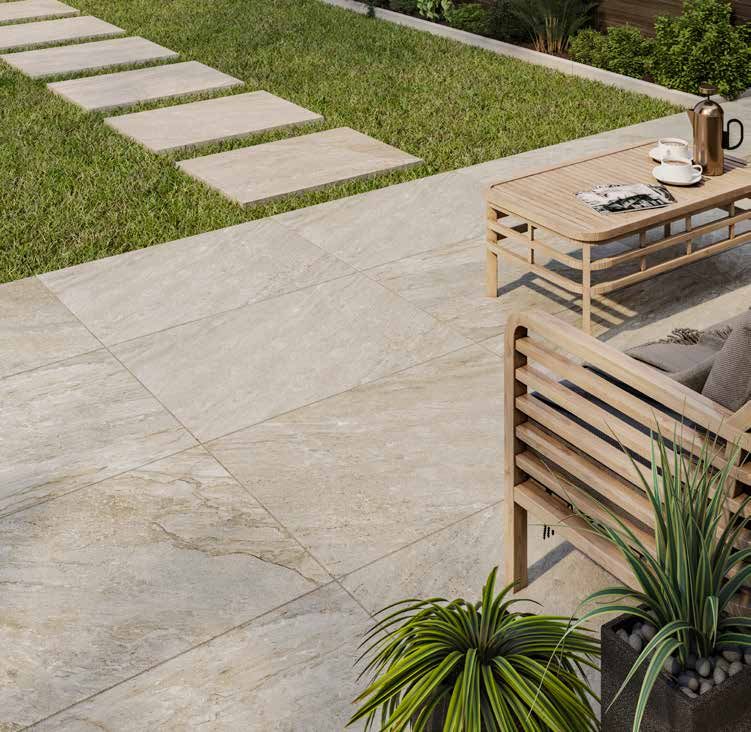
GUIDE TO VARIATIONS
          Al Fresco tiles are designed to replicate natural materials and feature a variety of
        textures, patterns and colours. Below is a simple guide to shading and tone to aid you
                               in choosing the perfect tile for your space.
                          Look for the icons on the individual product pages.

                                 Uniform appearance
                                 Shading and colour differences are minimal.

                                 Slight variation
                                 Distinguishable yet subtle differences in texture and
                                 pattern with similar colouring.

                                 Moderate variation
                                 Varying texture, pattern and shading but with a similar
                                 colour identity.

                                 Substantial variation
                                 Random colour, texture and pattern differences between
                                 each tile that creates a totally unique look.

    6
6
6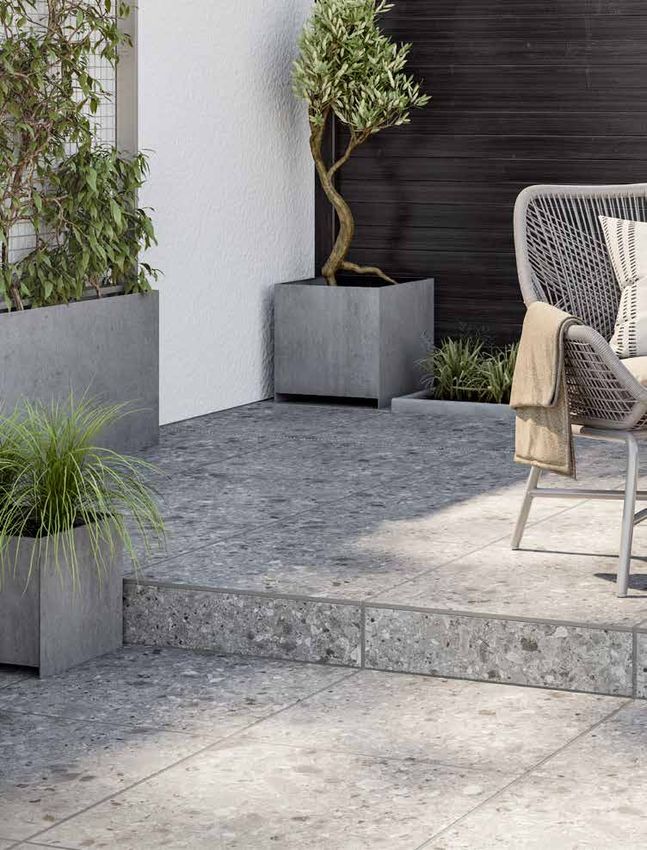
THE COLLECTION

 8    BARRINGTON

 10   HAMPTON

 12   ASCOT

 14   TATTON

 16   CLAREMONT

 17   EMMETT

 18   WESTBURY

 19   LODGE

 20   KENWOOD

                   7
                       77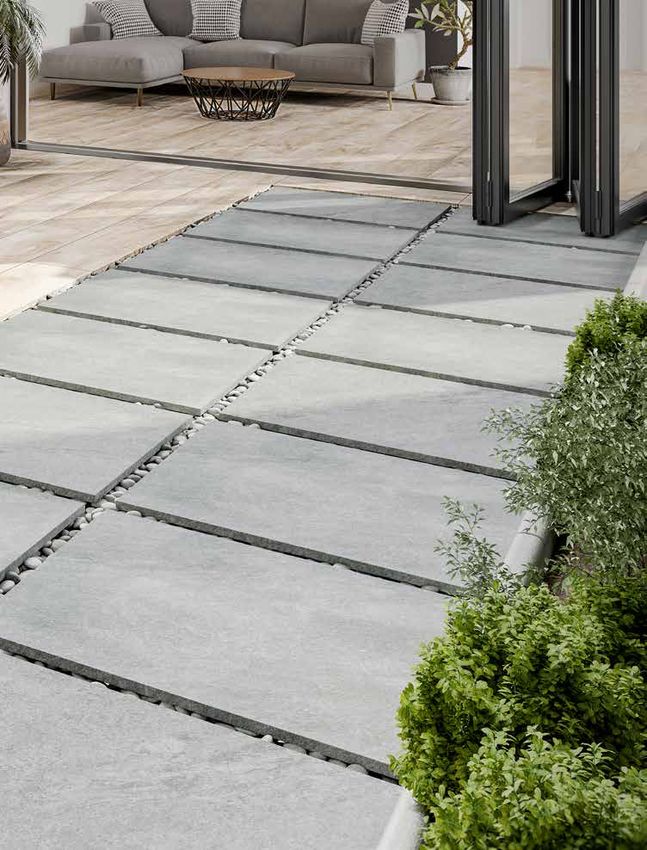
BARRINGTON BEIGE
            Code           P10684
             Size         60 x 90 cm
          Thickness        20 mm
            Finish          Matt
          Suitability   Outdoor Floors
         Slip Rating         R11
8
8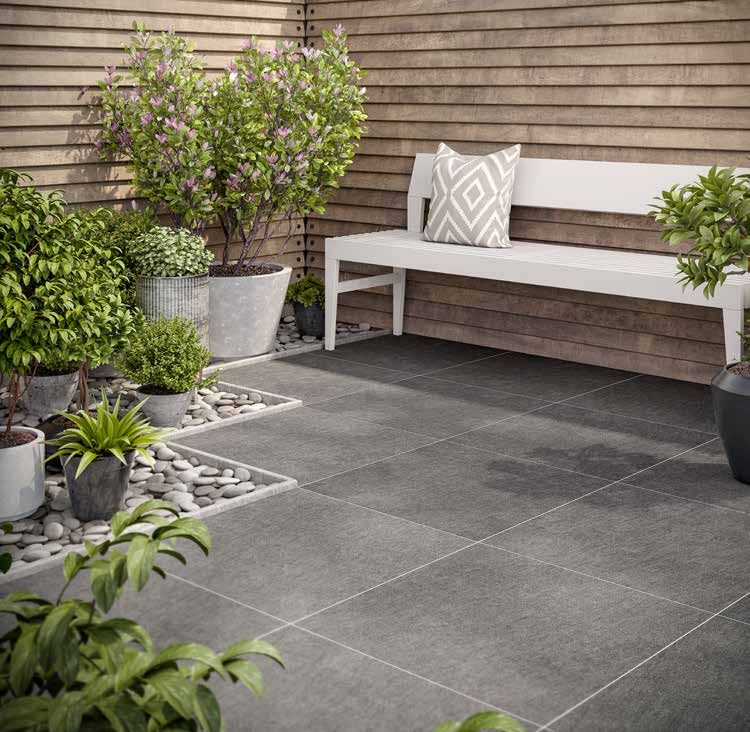
BARRINGTON GREY
       Code           P10685
        Size         60 x 90 cm
     Thickness        20 mm
       Finish          Matt
     Suitability   Outdoor Floors
     Slip Rating        R11
                                    99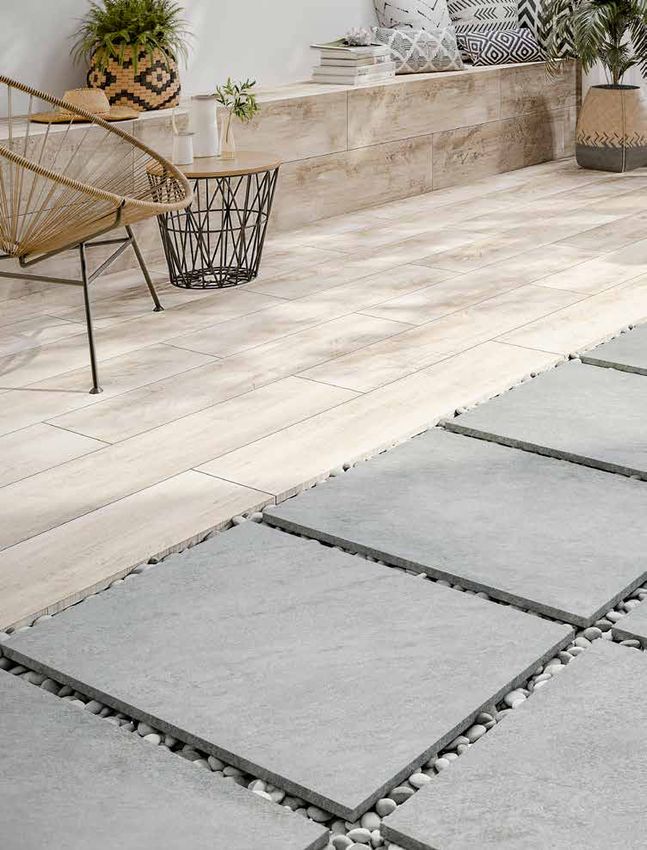
Hampton Silver 60 x 60 cm indoor & outdoor

     HAMPTON SILVER
       Code           P10687            P10783             P10811
        Size         45 x 90 cm        60 x 60 cm        60 x 60 cm
     Thickness        20 mm             20 mm              10 mm
       Finish          Matt               Matt               Matt
     Suitability   Outdoor Floors    Outdoor Floors   Indoor Floors & Walls

     Slip Rating        R11               R11                 R9
10
10
Hampton Beige 60 x 60 cm indoor & outdoor
HAMPTON BEIGE
Code P10686 P10699 P10812
Size 45 x 90 cm 60 x 60 cm 60 x 60 cm
Thickness 20 mm 20 mm 10 mm
Finish Matt Matt Matt
Suitability Outdoor Floors Outdoor Floors Indoor Floors & Walls
Slip Rating R11 R11 R9
11
11ASCOT IVORY
Code P10781 P10813
Size 60 x 60 cm 60 x 60 cm
Thickness 20 mm 10 mm
Finish Matt Matt
Suitability Outdoor Floors Indoor Floors & Walls
Slip Rating R11 R9
12
12ASCOT SILVER
Code P10782 P10814
Size 60 x 60 cm 60 x 60 cm
Thickness 20 mm 10 mm
Finish Matt Matt
Suitability Outdoor Floors Indoor Floors & Walls
Slip Rating R11 R9
13
13Tatton Sand 60 x 60cm outdoor & Tatton Grey 60 x 60cm indoor
TATTON SAND
Code P10689 P10815
Size 60 x 60 cm 60 x 60 cm
Thickness 20 mm 10 mm
Finish Matt Matt
Suitability Outdoor Floors Indoor Floors & Walls
Slip Rating R11 R10
14
14TATTON GREY
Code P10688 P10816
Size 60 x 60 cm 60 x 60 cm
Thickness 20 mm 10 mm
Finish Matt Matt
Suitability Outdoor Floors Indoor Floors & Walls
Slip Rating R11 R10
15
15CLAREMONT GREY
Code P10786
Size 60 x 60 cm
Thickness 20 mm
Finish Matt
Suitability Outdoor Floors
Slip Rating R11
16
16EMMETT BLACK
Code P10785 P10817
Size 60 x 60 cm 60 x 60 cm
Thickness 20 mm 10 mm
Finish Matt Matt
Suitability Outdoor Floors Indoor Floors & Walls
Slip Rating R11 R9
17
17Westbury Grey 60 x 60 cm indoor & outdoor
WESTBURY GREY
Code P10768 P10662 P10663
Size 60 x 90 cm 60 x 60 cm 60 x 60 cm
Thickness 20 mm 20 mm 10 mm
Finish Matt Matt Matt
Suitability Outdoor Floors Outdoor Floors Indoor Floors & Walls
Slip Rating R11 R11 R9
18
18Lodge Natural 30 x 120 cm indoor & outdoor & Westbury Grey 60 x 90 cm
LODGE NATURAL
Code P10692 P10818
Size 30 x 120 cm 30 x 120 cm
Thickness 20 mm 10 mm
Finish Matt Matt
Suitability Outdoor Floors Indoor Floors & Walls
Slip Rating R11 R9
19
19Kenwood Ash 30 x 120 cm indoor & outdoor & Hampton Beige 45 x 90 cm
KENWOOD ASH
Code P10691 P10819
Size 30 x 120 cm 30 x 120 cm
Thickness 20 mm 10 mm
Finish Matt Matt
Suitability Outdoor Floors Indoor Floors & Walls
Slip Rating R11 R9
20
20Kenwood Oak 30 x 120 cm, Hampton Silver 45 x 90 cm outdoor & 60 x 60 cm indoor
KENWOOD OAK
Code P10690 P10820
Size 30 x 120 cm 30 x 120 cm
Thickness 20 mm 10 mm
Finish Matt Matt
Suitability Outdoor Floors Indoor Floors & Walls
Slip Rating R11 R9
21
21LAYOUT INSPIRATION
When it comes to laying tiles in your home and garden, many people choose a regular grid of
square or rectangular slabs, all the same size and colour. By playing with different textures, colours
and patterns you can create beautiful statement floors. It’s surprisingly easy to create a practical
space that blends the boundaries between indoors and outdoors.
Here are some simple yet creative ideas to inspire you and help you to design your perfect space.
Stack bond is the simplest and Create an interesting twist on a Third bond is a great way to lay
most common way to lay a patio. simple pattern with this diagonal planks and larger tiles for a
linear layout. natural look.
Modular patterns use mixed shapes The herringbone pattern is a good Please note:
to create a natural look. way to create a sense of space in We do not recommend half bond
Ideal for Hampton & Westbury small areas. Suitable for rectangular (brick bond) for Al Fresco tiles.
which feature multiple sizes. and plank shaped tiles.
22
22DESIGN INSPIRATION
Whatever type of home you have and whatever size the outdoor space, there’s plenty to consider
when giving it a makeover. With a little design know-how and creative inspiration even the
smallest space can become a peaceful retreat or a functional entertaining area.
Take a look at the ideas below, the possibilities are endless and you might just find the inspiration
you need for your next project.
Create exciting paths and patio Create an interesting contrast by Stagger loose laid tiles next to
areas by combining fixed tiles with using the same collection a fixed patio area for a soft and
loose laid patterns. in different colours for indoor natural feel, gradually blending
& outdoor. the tiles into the landscape.
Mix sizes and textures together “Step up” your patio to the Treat your garden as an extension
with different installation next level with carefully designed of your home. Create “rooms” and
techniques to create a diverse tiered spaces. zones with a mixture of textures,
structured space. colours and tile sizes.
Visit us at www.alfrescotiles.co.uk for more inspiration ideas and to share your completed project images!
23
23INSTALLATION ADVICE
With the right materials and preparation, you can easily install your own Al Fresco tiles. Follow
these simple steps to create your own seamless indoor & outdoor space!
HOW TO CUT OUTDOOR PORCELAIN TILES
Our outdoor 20mm tiles are super strong and cannot be cut using traditional hand tools. Here’s a quick guide on how
to cut your tiles to size.
1. In order to minimise breakage and spoiled cuts, we recommend using a water fed cutter with a diamond
blade. This will also help to minimise dust.
2. Measure and mark a line where you would like to cut the tile.
3. Cut from the top surface with the blade running at half-revs. Bring the blade into contact with the tile.
4. As the blade bites the tile, increase the revs if necessary and progress along the marked line.
5. Ensure the blade is water fed throughout and remains evenly balanced.
HOW TO LAY SINGLE TILES
Create pathways and patterns by loose laying Al Fresco tiles on to grass or gravel.
1. Place the tiles on the ground in the desired pattern. Measure around the tile and mark the area with posts
and string.
2. Remove the tile from the ground and dig down 150mm.
3. Compact the bottom and walls of the well and line with a water proof membrane.
4. Fill the well with gravel until it is 20mm from the top. This will allow for drainage.
5. Ensure the gravel is sturdy and level then place your tile on top.
24
24HOW TO LAY A PATIO
Al Fresco tiles are a great alternative to traditional stone, paving or decking. See our easy guide below for how to
install a traditional patio.
1. Mark out the area with posts and string.
2. Measure the length and width and multiply these values together to calculate the square meterage and how
many tiles you will need.
3. Dig down 150-200mm to allow for foundations. The ground should have a slight slope to allow for drainage.
Fill with hardcore (gravel and crushed hard rock) to a depth of 100-150mm and use a rake to distribute the
mixture. Compress the hardcore using a whacker power plate, building up in layers.
4. Add a layer of mortar on top of the compressed hardcore. We recommend 4 parts sand to 1 part cement.
5. Apply a layer of priming slurry on top of the mortar.
6. Coat the underside of the first tile with priming slurry.
7. Place the tile into position using a corner as a starting point, eg. next to a wall or house
8. Press into place and use a rubber mallet to secure and adjust the level.
9. Continue to lay tiles in this way leaving a 2-3mm joint gap. Use a bucket and sponge to clean up any mortar
or slurry as you go.
10. Once complete, leave to dry for at least 24 hours. If wet weather is forecast, cover the area with a
plastic sheet.
11. If you wish to infill any joint gaps, use the same mix of mortar as before and use a brush to mix over the
joints, gradually and evenly filling them all in.
12. Once the joints are filled, use a pointing trowel to firm the mortar into place. Add more mortar mix if needed
to create a clean and level area.
13. Alternatively, instead of mortar mix you can use kiln-dried sand. Spread the mix on the area and brush it into
the joints. You may need to repeat this process a few days later once the sand has settled.
25
25HOW TO CREATE A RAISED PATIO WITH PEDESTALS
Pedestals are a great way to create a patio without the need for lots of equipment. They also allow for drainage
and you can hide cables and equipment underneath. As the tiles are not attached with adhesive, you can easily
move them around if you change your mind. The pedestal system can be laid over any solid surface such as patios,
concrete or balconies - If you don’t already have a solid surface, you’ll need to create one. See page 29 for the full
range of pedestals and accessories.
1. Use a corner as a starting point, e.g. next to a wall or house, and place the first pedestal. Place three more
pedestals in a grid layout at the same distance to the corners of your tile.
2. Use the edge disc near walls and edges so that the tile sits on top of the whole pedestal surface and
flush to the wall.
3. Place the tile on top of the pedestals ensuring that the corners sit flush into the tabs where applicable.
4. For larger tiles, we recommend placing an additional pedestal without tabs in the centre of the tile for
extra support.
5. Twist the pedestals to increase or decrease the height to create a level surface.
6. Continue to lay pedestals in a grid shape and adjusting the levels as you place each tile.
7. If you are not laying your tiles in a stack bond pattern (see page 22), place pedestals at even intervals,
removing any tabs that are not needed.
8. If an area is slightly sloped, the pedestals will self-level. The angle is based on the gradient of the slope.
You can adjust the level in the same way as before by twisting to increase or decrease the height.
9. Use the edge disc and the front support pieces together to hide any exposed edges of the patio area and to
create a clean step front. Attach the edge disc and align the pedestal with the edge of the last tile.
10. Measure from the ground to the top of the pedestal fixing. Cut your tile to the correct height using the
instructions on page 23 and place into the front support piece to create a clean step front.
26
26HOW TO CUT INDOOR PORCELAIN TILES
Indoor spaces often pose many more obstacles than outdoor spaces. Here’s a quick guide on how to cut indoor tiles
to different shapes and sizes.
1. Measure where the tile needs to be cut.
2. If you have a manual tile cutter, place the tile in
the cutter and square up to the plate.
3. Press down hard on the cutter and push
forwards to score a line.
4. Some cutters will automatically snap the tile
as you push down to score it. If your cutter
doesn’t, apply pressure to both sides of the
tile to snap it into two pieces.
5. Use a file to smooth the edges if needed.
6. If you need to cut a curve or a shape, use tile
nippers to nibble the tile away until you
achieve the desired shape.
7. You can also use an electric cutter in a similar
technique as described for our outdoor
Al Fresco tiles.
HOW TO FIT TILES INDOORS
Al Fresco 10mm tiles are ideal for indoor floors and walls. Here’s our easy guide to creating your own unique space.
1. Plan your layout and the starting point of the first tile. We recommend tiling from the centre of the floor or
wall for an even finish.
2. Plan ahead to ensure you can easily exit the room once finished. As you fix your tiles, you should avoid
knocking or stepping on them.
3. Mix the tile adhesive as per the manufacturer’s instructions and begin to spread it evenly on the floor or
wall around 1 square metre at a time. Use a notched trowel at a 45° angle ensuring the notches face the
same direction.
4. Apply a thin layer of adhesive to the back of the tile then place onto the wall or floor adhesive – press and
twist to secure. Use a spirit level to check it is straight and flat.
5. Continue to repeat steps 3 & 4. Space the tiles 2-3mm apart using tile spacers.
6. Clean any mess on the tiles and joints as you work using a sponge and clean water.
7. Allow the tiles to fully set – check the advice on the adhesive bag for setting times.
8. Mix water and grout powder in a bucket as per the manufacturer’s instructions.
9. Hold a grout float at a 45° angle and apply the grout to all joints ensuring they are filled.
10. Allow the grout to dry for 10-15 minutes then wipe the tile surface with a damp sponge.
11. Leave the tiles for a further 60 minutes to allow the grout to harden. Us a grout profiler at a 45° angle and
drag it along the joints to smooth the surface and remove any excess.
12. Use a clean cloth and polish the tiles until they are completely clean.
27
27PRODUCT OVERVIEW
ASCOT IVORY ASCOT IVORY ASCOT SILVER ASCOT SILVER BARRINGTON BEIGE BARRINGTON GREY
60X60CM | 20MM 60X60CM | 10MM 60X60CM | 20MM 60X60CM | 10MM 60X90CM | 20MM 60X90CM | 20MM
PAGE 12 PAGE 12 PAGE 13 PAGE 13 PAGE 8 PAGE 9
CLAREMONT GREY EMMETT BLACK EMMETT BLACK HAMPTON BEIGE HAMPTON BEIGE HAMPTON BEIGE
60X60CM | 20MM 60X60CM | 20MM 60X60CM | 10MM 45X90CM | 20MM 60X60CM | 20MM 60X60CM | 10MM
PAGE 16 PAGE 17 PAGE 17 PAGE 11 & 20 PAGE 11 PAGE 11
HAMPTON SILVER HAMPTON SILVER HAMPTON SILVER KENWOOD ASH KENWOOD ASH KENWOOD OAK
45X90CM | 20MM 60X60CM | 20MM 60X60CM | 10MM 30X120CM | 20MM 30X120CM | 10MM 30X120CM | 20MM
PAGE 10 & 21 PAGE 10 PAGE 10 PAGE 20 PAGE 20 PAGE 21
KENWOOD OAK LODGE NATURAL LODGE NATURAL TATTON GREY TATTON GREY TATTON SAND
30X120CM | 10MM 30X120CM | 20MM 30X120CM| 10MM 60X60CM | 20MM 60X60CM | 10MM 60X60CM | 20MM
PAGE 21 PAGE 19 PAGE 19 PAGE 15 PAGE 15 PAGE 14
28
28TATTON SAND WESTBURY GREY WESTBURY GREY WESTBURY GREY
60X60CM | 10MM 60X90CM | 20MM 60X60CM | 20MM 60X60CM | 10MM
PAGE 14 PAGE 18 & 19 PAGE 18 PAGE 18
SMALL PEDESTAL MEDIUM PEDESTAL LARGE PEDESTAL EDGE DISC FRONT SUPPORT PEDESTAL TABS
CODE A10069 CODE A10070 CODE A10071 CODE A10072 CODE A10073 2MM CODE A10074
HEIGHT 42-48MM HEIGHT 60-85MM HEIGHT 112-140MM 3MM CODE A10075
Barrington Grey 60 x 90 cm
29
29GENERAL INFORMATION
DIMENSIONS, COLOUR & SHADING
Although we have made every effort to display the colours accurately, we cannot guarantee that this printed brochure
directly reflects the colours of the actual product. As products can vary slightly from these images, we advise you to
order a sample for true colour representation. Please note that tiles are created in batches and some shade variation
may occur between batches. Products with the same colour name, such as “grey”, are not necessarily the same exact
colour shade as another product with “grey” in its name. Please do not order using colour names or product names
as your guide to colour. We manufacture our tiles to extremely tight tolerances, however due to the nature of the
manufacturing process, sizes, weights, capacities, dimensions and measurements indicated may vary slightly.
HEALTH AND SAFETY
Installing your own Al Fresco tiles is both rewarding and satisfying but you could be exposed to various risks if the
correct safe methods of work as described in this booklet are not followed. Before you begin, be sure you have the
appropriate protective equipment.
• Always wear gloves and safety footwear.
• Always wear goggles & respiratory protection when using cutting equipment.
• Handle your Al Fresco tiles with care to avoid breakages and chipping that may result from mishandling.
• Larger tiles may require assistance when lifting.
GOODS
We take care to ensure that all of our Goods leave us in perfect condition. All orders must be examined on delivery and
any shortages, damages or other discrepancies should be brought to the supplier’s attention before installation.
Confirm that all products have been inspected and approved before installation begins, as the installation of the
product signifies acceptance.
MAINTENANCE
To keep your tiles looking their best, sweep the area to clear away dust, dirt and debris. Fill a bucket with warm soapy
water. Washing up liquid will work fine – do not use acid based or abrasive cleaning products. Wet a scrubbing brush
with the soapy water and scrub the surface of the tiles until clean. Leave to dry naturally.
GUARANTEE
Al Fresco tiles have a 10 year structural guarantee. We warrant that the structural integrity of the product will
not fail, under normal conditions, within a period of 10 years from date of purchase. Because specific installation
details, structural design and environmental conditions are beyond the control of the Company, we cannot accept
responsibility for the improper installation and/or care and maintenance of our products after they are installed.
However, in the event of latent defects in the product caused by improper manufacturing, the Company will replace
any defective product, provided the Company is notified in writing. The Company will also not be responsible if tiles
are installed with a visible defect. The Company must pre-approve the cost of the replacement, in writing, prior to
commencement of any warranty work.
SLIP RESISTANCE
R Ratings are determined via testing in accordance with DIN 51130:2004, which is the “Testing of floor coverings;
determination of the anti-slip properties; workrooms and fields of activities with slip danger; walking method; ramp test
German National standard 2004”. This is fully recognised and adopted in the UK. The “R” values range from R9, which
has a small degree of slip resistance, up to R13 which is the highest slip resistance. R9 & R10 ratings are suitable for
indoor domestic areas, wheres R11 ratings and above are also suitable for external applications.
30
30Claremont Grey 60x60cm
31
31Emmett Black 60 x 60cm
Please note that product images are shown for indicative purposes only and colour reproduction throughout this catalogue is as accurate as printing techniques allow.
Although we endeavour to communicate any changes as soon as possible, we reserve the right to amend or withdraw products contained within this catalogue at any
time without prior notice.
As variations in colour, shading and texture may occur between different batches of tiles, we recommend you purchase sufficient tiles in one go to complete a project.
Please ensure a satisfactory blend of shades can be achieved BEFORE fixing as claims relating to variations that were apparent before fixing will not be accepted once
the tiles have been installed.
Please refer to our Terms & Conditions of Sale for further details.
CODE M10126
January 2019
Supplied and distributed by Verona Group www.alfrescotiles.co.uk 0113 244 4984
32You can also read