Crocodile5 Baby - V1.0 User Manual & Setup Guide - GEPRC
←
→
Page content transcription
If your browser does not render page correctly, please read the page content below

Crocodile5 Baby

   User Manual & Setup Guide
             V1.0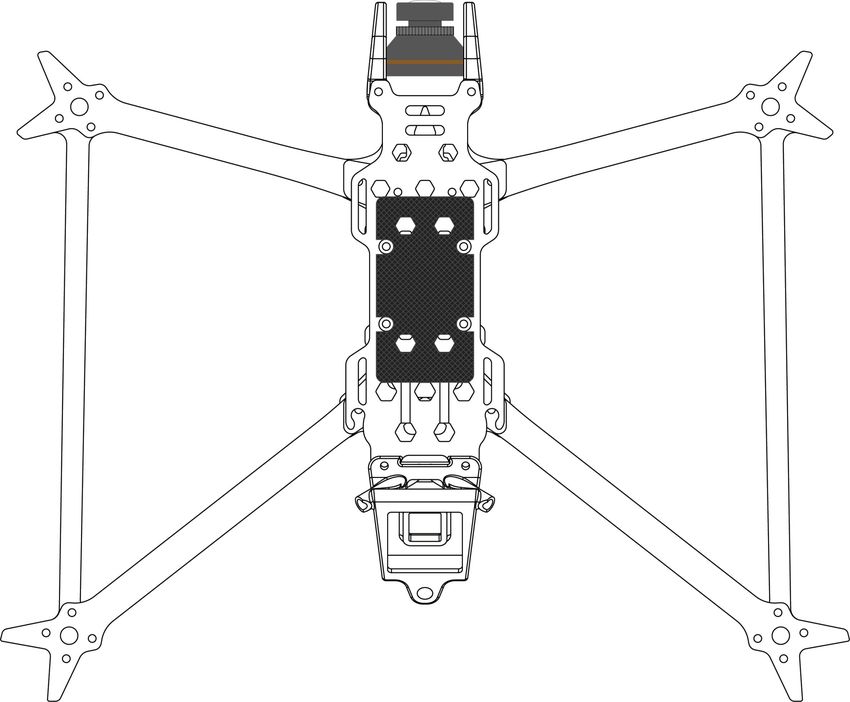
Contents
Overview:................................................................................................................................... 3
       Specification:......................................................................................................................3
       Features:.............................................................................................................................3
Warranty Policy:.........................................................................................................................4
       PS:....................................................................................................................................... 4
DJI Digital FPV System:............................................................................................................. 5
Bind TBS NanoRX:..................................................................................................................... 6
Bind FrSky R-XSR:......................................................................................................................7
Install Betaflight:........................................................................................................................ 8
       Install Drivers:.................................................................................................................... 8
ARM(DJI Transmitter):............................................................................................................... 9
OpenTX Transmitter:...............................................................................................................10
IRC Tramp(Analog):.................................................................................................................12
Install Silicone Pad,Landing pads:..........................................................................................14
Install Propellers, Battery strap:..............................................................................................15
GEPRC Super Buzzer:..............................................................................................................16
Pre-flight Check:..................................................................................................................... 17
Include:.....................................................................................................................................18
Contact:.................................................................................................................................... 18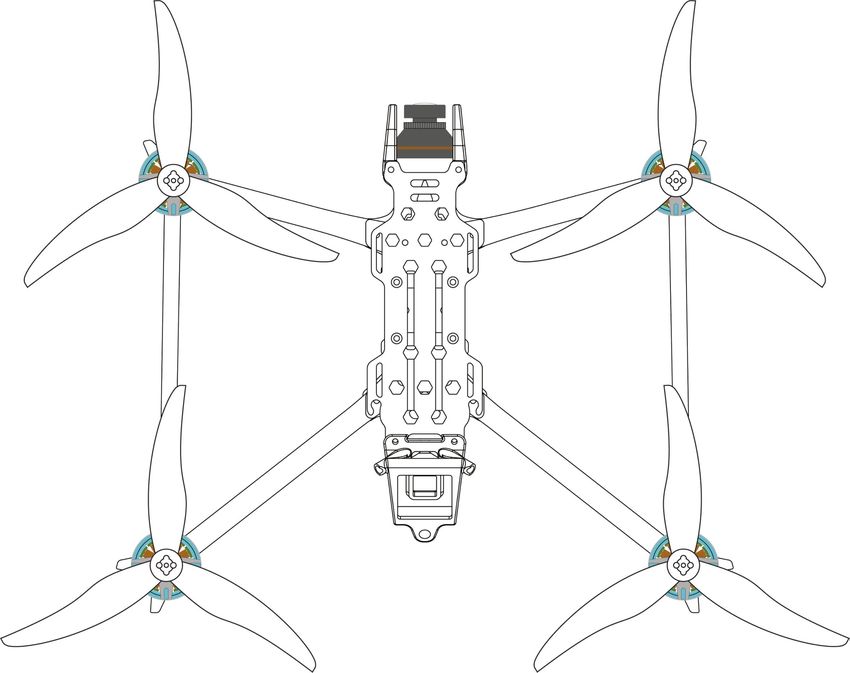
Overview:
GEPRC Crocodile5 Baby is launching right now. It is a brand new Long Range 5inch FPV.
There are three versions: DJI Air Unit,Vista Polar and (Analog)5.8G 600mW.

Crocodile5 Baby LR is a lightweight long range FPV, Which can cruise smoothly for a long
time or Freestyle.It is Light-weight, Long Range and has excellent flight performance.

To summarise, this is a clever choice to purchase it.

Specification:

Model: Crocodile5 Baby LR Quadcopter

FC: GEP-F722-35A AIO

ESC: BLheli_S 35A

VTX: DJI Air Unit Module/VISTA/ GEP-STABLE-VTX58600N

Camera: DJI Camera/ Caddx Polar/Caddx Ratel2

Antenna: DJI Antenna/Momoda UFL LHCP/MMCX RHCP Antenna

Motor: GR2004 2550KV

Propeller: GemFan5130

Frame: GEP-CB5

Motor to Motor: 227mm

Weight: 252.2g(DJI)/232.7g(Polar)/213.8g(Analog)

Receiver: PNP,Frsky RXSR ,TBS Nano RX

Features:

1.Combined with with DJI Air Unit Moudile, It supports recording 1080p 60fps video.

2.Latest GEP 2004 High Efficiency Motor, It has good heat dissipation effect, high efficiency
and more abundant power.

3.The Lightweight design scheme is suitable for Long Range flight and Freestyle flight.

4.The latest GEP F722 AIO FC, which has fast operation speed and higher compatibility

5.Support GPS rescue mode, Long-range more safer

6.Flight Time:25-30min(Li-ion 3000mAh Battery)

                                             3 / 18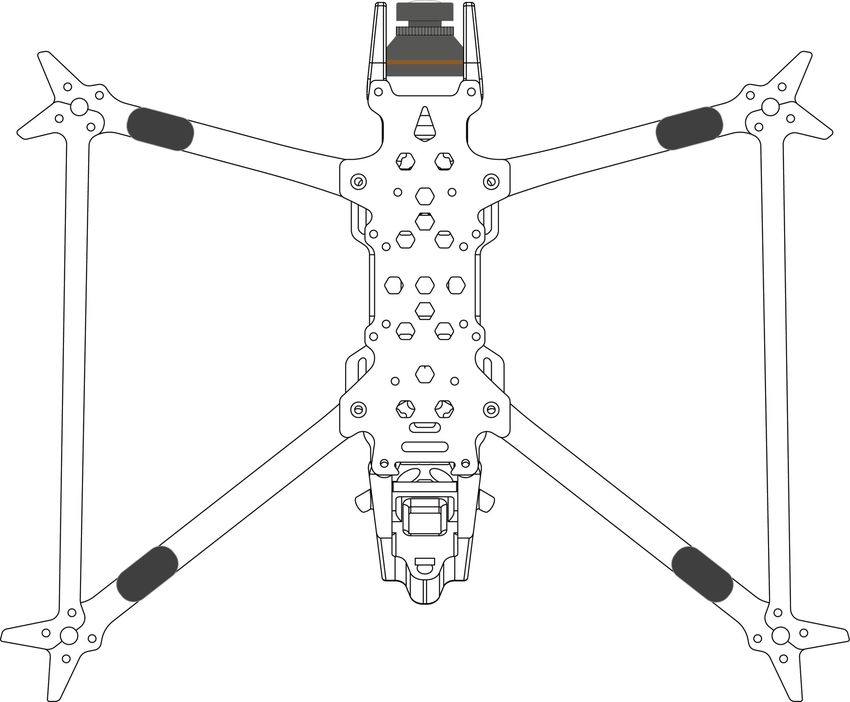
Warranty Policy:
1. If Quadcopter is damaged or unknown issue,please contact GEPRC. We'll do our best to
get this taken care of quickly for you.

2. Any impact damage, product liquid damage, high temperature burn or other artificial
damage is not covered by warranty.

PS:

1. All components has been strictly inspected and tested before shipping.

2. If you have any problems, please cooperate with our engineers to figure out solutions.
(E-mail: support@geprc.com.)

                                           4 / 18
DJI Digital FPV System:
1. Turn the power of the FPV Goggles, DJI FPV Transmitter,and Quadcopter. Press the FPV
Goggles bind button twice, and it will beep to indicate the binding state.

                                                            Bind Button

2. Press the VISTA bind button,the indicator light turn red ,indicating that it is binding.Then
the indicator light turns yellow, means the binding is successful,and the FPV Goggles will
display the received picture.

                                       Bind Button

                 Binding                                       Binding successful
3. Press the C1 custom button, record button and right scroll wheel button of the remote
controller,at the same time. The indicator light turns blue, and the remote controller sends a
beep indicating that it is binding.

         Record Button               C1         Custom          Right Scroll Wheel Button

                           Binding                     Binding Successful

4. Press the VISTA bind button,the indicator light turn red ,indicating that it is binding.Then
the indicator light turns yellow, means the binding is successful.And the remote controller
inducator light turns Green.

                                       Bind Button

                 Binding                                       Binding Successful
                                             5 / 18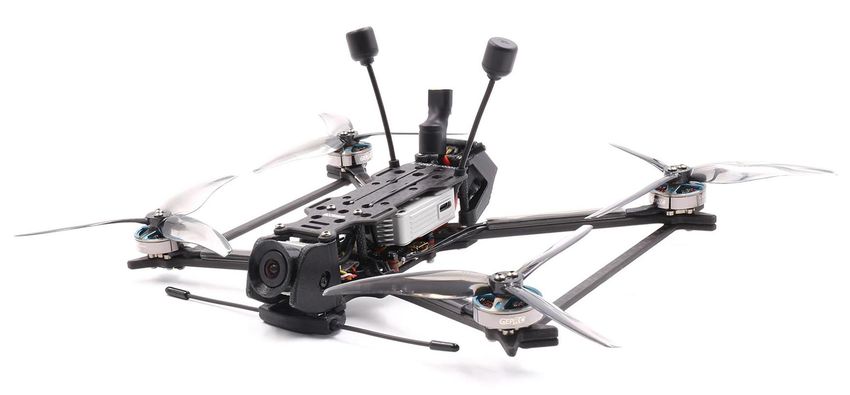
Bind TBS NanoRX:
1. For Taranis X9D/X9D Plus/X9E and Taranis QX7, turn on the transmitter, go to the TOOLS – CROSSFIRE
   SETUP – XF Micro TX ,and select Bind.

2. Turn on the receiver while holding the bind button on the receiver, release the button and the green LED
   on flash .and then holding the button for 8 second ,and release. And the green light is off and the red
   light is flashing, ‘update micro RX?’ will appear on the transmitter screen, and select ‘ENTER’.

3. Wait for the update to complete, the binding is successful, and the receiver green light is on.

     1

     2                                                                       Bind Button

     3

                                                                               Binding

     4

     5                                                                   Binding Successful

     6

                                                    6 / 18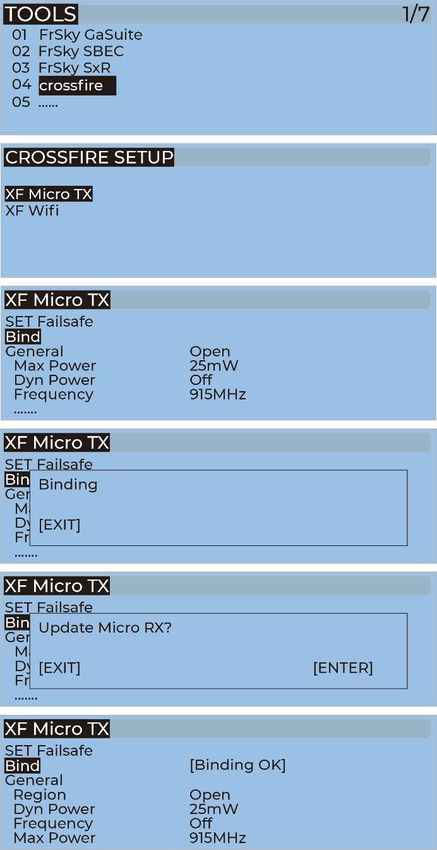
Bind FrSky R-XSR:
1. For Taranis X9D/X9D Plus/X9E and Taranis QX7, turn on the transmitter, go to the MENU –
MODEL SETUP – PAGE 2, choose Internal RF, and select BIND.

2. Turn on the receiver while holding the bind button on the receiver, release the button and
the bule,red,yellow LED on .

3. When the red light flashes, it indicates that the binding is successful.Turn off the
receiver,and then turn on the receiver.The blue light and yellow light of receiver are on,
indicating that the link is normal.

   1

                                                                            Binding Button
   2

   3
                                                                               Binding

                                                                          Binding

                                            7 / 18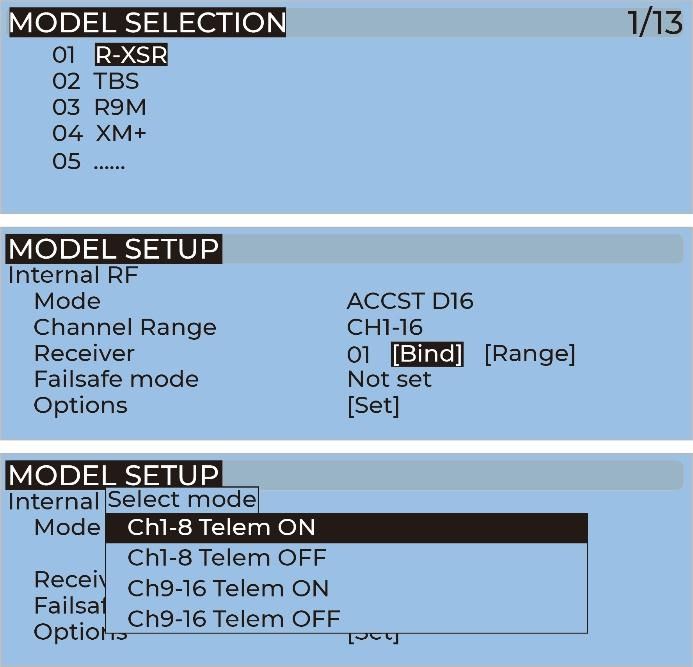
Install Betaflight:
Although your Quadcopter comes from the factory nearly completely ready to fly, you still
need to install betaflight to facilitate your subsequent use of betaflight for debugging.
Installation package download address:
                https://github.com/betaflight/betaflight-configurator/releases
Enter the web page, pull to the bottom, and select the appropriate installation package to
download. EXE suffix is Windows system, DMG suffix is MacOS system, RPM / DEB suffix is
Linux system, APK suffix is Android system.

Install Drivers:

If you are on windows, you must install the driver manually. MacOS and Linux do not.

  CP210x Drivers:

https://www.silabs.com/products/development-tools/software/usb-to-uart-bridge-vcp-dri
                                        vers

  STM USB VCP Drivers:

              http://www.st.com/en/development-tools/stsw-stm32102.html

  Zadig:

                                   http://zadig.akeo.ie/

                                           8 / 18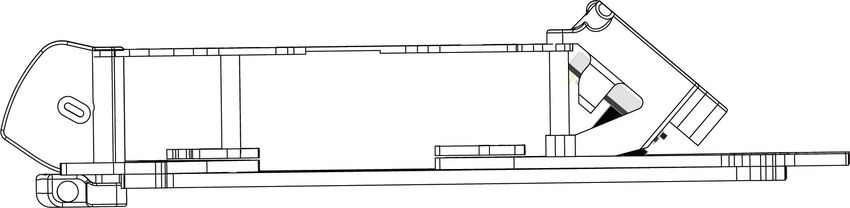
ARM(DJI Transmitter):
With DJI FPV Transmitter, the toggle switch is set at the factory. The corresponding functions
of each switch are as follows:
SAAUX1(ARM)
SBAUX2(MODES)
SCAUX3(BEEPER)
SDAUX4(Vacancy)
DJI toggle switches are all three sections. If you move the Yellow cursor of the corresponding
aux channel of the switch, the corresponding function will be turned on when you move to
the set range.
9 / 18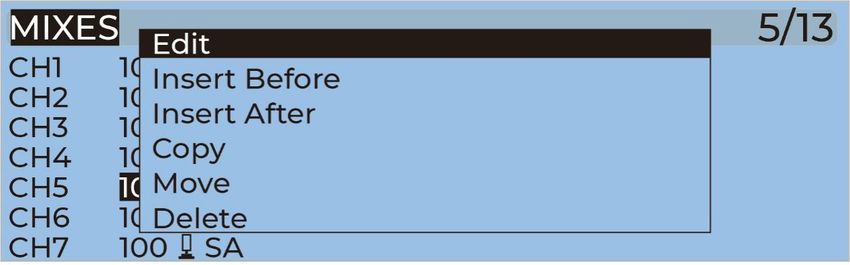
OpenTX Transmitter:
The transmitter of openTX system needs to check the AUX channel. For Taranis X9D/X9D
Plus/X9E and Taranis Q X7, turn on the transmitter, go to the MENU –MIXS and view the
current AUX channel settings.
CH1-CH4 corresponds to four channels of rocker
CH5(SF)AUX1(ARM)
CH6(SG)AUX2(MODES)
CH7(SA)AUX3(BEEPER)
CH8(Vacancy)AUX4(Vacancy)
FrSky X9D transmitter SF toggle switch are two sections. If you move the Yellow cursor of the
corresponding aux channel of the switch, the corresponding function will be turned on when
you move to the set range.
Use the transmitter wheel to move the cursor to select the AUX channel, and then press and
hold the wheel key to edit the channel.
10 / 18You can name the aux channel, or set the toggle switches you want, and exit and save it.
11 / 18IRC Tramp(Analog):
Turn on the transmitter,THR middle,YAW left,PITCH up,enter the OSD menu. The PITCH
moves the cursor up and down, and the ELE right to enter the next item. Finally,save and
exit.
12 / 1813 / 18
Install Silicone Pad,Landing pads:

                    14 / 18
Install Propellers, Battery strap:
The direction of rotation of the propellers is internal rotation . After installation, check the
direction of the propellers.
15 / 18GEPRC Super Buzzer:
The buzzer is connected to the FC. When the power of the quadcopter is turned on, it will
automatically turn on. When the power of the quadcopter is turned off, the buzzer will make
a 100 dB drip sound and the red light flashes, which is convenient for you to find the
quadcopter.
Button
Press the button once to turn off the buzzer.
16 / 18Pre-flight Check:
In many cases, the cause of a Quadcopter crash is not checked before takeoff. For the sake
of safety, we suggest that you check before every flight.The steps are as follows:
1. Turn on the transmitter and select the correct mode. Please confirm that the arming
switch on the transmitter is in the “disarmed”position and throttle is all the way down;
2. Please perform a physical inspection of the Quadcopter for damage. If there is damage,
please repair first;
3. Please comfirm the propeller is in the right direction and the propeller nut is locked,
otherwise there is a risk of crash;
4. Check LiPo battery voltage. A fully-charged LiPo should be about 4.2 volts per cell, or
about 12.6 volts for a 3S, or 16.8 volts for a 4S;
5. Please comfirm the battery is securely attached to the aircraft by the strap. And secure
the balance lead so that it can’t be struck by the props;
6. Please Scan the flight area for any safety issues that might be present, such as people or
animals;
7. Verify that you have clean, strong video in your FPV goggles or screen. If you see
interference or you see another pilot’s feed, resolve this issue before flying;
8. Arm the quadcopter. Listen for the props hitting anything like an antenna or the battery
wire;
9. At this stage, take off and enjoy flying.
Note: if you choose to fly close to water, please pay attention to the flight safety. It is difficult
to salvage the Quadcopter when it falls into the water, and the water in the Quadcopter is
not covered by the warranty.
17 / 18Include:
1 x Crocodile5 Baby5 LR Quadcopter
4 x Gemfan 5130 Props(pairs)
8 x foot pads
1 x The silicone pad
1 x L-shaped screwdriver
2 x Antenna protection tubes
1 x 15*220mm battery strap
Contact:
Website: https://geprc.com/
18 / 18You can also read