DO IT YOURSELF T H E INSTALLATION GUIDE - Purchase Green
←
→
Page content transcription
If your browser does not render page correctly, please read the page content below
THE

  DO IT
YOURSELF
  INSTALLATION
      GUIDE
Table of Contents
Getting Started
Introduction.................................................................................................................................3

Buying and Receiving Your Grass.............................................................................................4
DIY Installation Overview..........................................................................................................5

Step-by-Step Installation for Basic Home Lawn

Example Projects ........................................................................................................................8
Perimeter Framing Options.......................................................................................................9

Basic Installation Technique......................................................................................................10
Advanced Installation Technique..............................................................................................11
Job Site Preparation....................................................................................................................12

Sub-Grade Bend-a-Board...........................................................................................................13

Subbase Selection.......................................................................................................................14

Subbase Compaction..................................................................................................................15

Grass Grain and Stretching........................................................................................................16

Seaming........................................................................................................................................17

Perimeter Cuts............................................................................................................................19
Benefits of Infill...........................................................................................................................20

Types of Infill...............................................................................................................................21

Finishing Touches.......................................................................................................................22

Frequently Asked Questions.....................................................................................................23

                                                                                                                   Nature's Sod Plush

  © 2021 Purchase Green - a division of Path to Prosperity, Inc.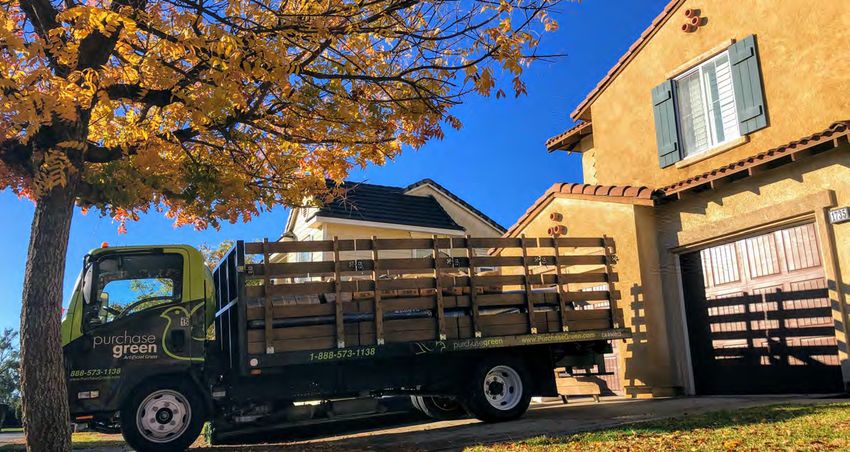
Introduction
So you want to install artificial grass? Not only are you closer to lower maintenance bills, you're also
helping to protect the environment by reducing water usage and eliminating the need for harsh
chemicals like pesticides, as well as reclaiming your precious free time – all while ensuring that your
lawn looks impeccable year-round.

With Purchase Green Artificial Grass, you can:

     Save time and energy on lawn maintenance
     Save money by reducing water and energy costs associated with lawn upkeep
     Enjoy a great-looking yard all year
     Apply for project financing
     Apply for local and state programs that reward homeowners with rebates and cash incentives
     for installing artificial grass
     Increase the value of your property and elevate your curb appeal

Since its establishment in 2008, Purchase Green has grown to become the second largest importer of
artificial grass goods in the nation; and because of the brand's position in the industry, we're able to
offer our customers competitive pricing, provide a reliable and diverse inventory of goods, and a
lifetime product warranty.

By keeping up with advancements in manufacturing technology and applied sciences in material
production, Purchase Green will undoubtedly have the perfect artificial landscape solution for your
unique needs - whether you need a durable, aesthetic, temperature-treated, or antimicrobial turf.

Our staff of industry and product experts are happy and ready to build your free DIY quote today!

                                                                                                           3

© 2021 Purchase Green - a division of Path to Prosperity, Inc.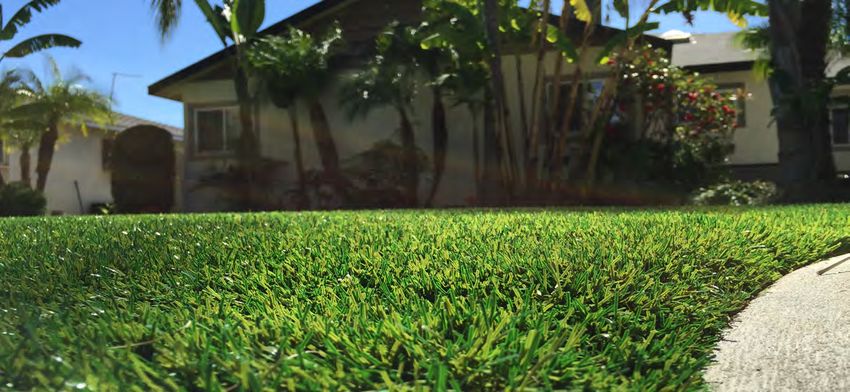
Buying and Receiving Your Grass
Get your grass how you want it, when you want it
   In-Person
   Visit any of our local showrooms to see and feel the products for yourself, collect free
   samples, and speak with a product expert about the best grass for your home.

   Shop Online
   Shop any of our artificial grasses, accessories, and tools online; real Purchase Green
   associates are available through the website's live chat if you have any questions.

   Will-Call Pick Up
   Buy online and schedule a free will-call pick up at your nearest Purchase Green store.

   Delivery
   Curbside deliveries are available for scheduling. Contact your local store for rates and
   availability

Our Locations
                   We're growing fast and adding new locations all the time.
         Visit www.purchasegreen.com/locations for an up-to-date list of our showrooms

                                                                                              4

© 2021 Purchase Green - a division of Path to Prosperity, Inc.
DIY Installation Overview
 1. Site Walk
 Walk around the site and take a quick survey of the area and
 surroundings. Pre-planning helps ensure an easy and
 successful installation. Clear the work area, set up and stage
 tools for easy access, and create a pathway to the area in
 which you’ll be working.

                                          2. Excavation
                                          Excavate the project area to a depth of at least 3 inches. A
                                          sod cutter can make quick work of large areas while hand
                                          tools can be used for smaller areas. This is also the time to
                                          make any necessary changes to irrigation, drainage, or other
                                          underground elements.

3. Perimeter Board
After excavation, it’s optional but recommended to install a
perimeter board, as the perimeter is the most susceptible to
visible wear over time. The more robust and realistic-looking
perimeter solution is Subgrade Bend-a-Board, a pliable
composite board that is secured to the perimeter line with
Mendocino stakes every 12-18 inches. Alternatively, Landscape
Bend-a-Board or Wonder Edge are other cost-effective options
for perimeter reinforcement.
                                        4. Subbase
                                        Choice of subbase will mostly depend
                                        on the type of installation. Putting
                                        greens require at least the top layer to
                                        be Decomposed Granite to achieve the
                                        desired ball roll, whereas standard
                                        landscape applications can work with
                                        any concrete/gravel mixture that is ¾”
                                        to fine, such as Class 2 Roadbase or
Crushed Miscellaneous Base (CMB). Apply subbase in 2 inch layers, lightly wetting and compacting each
layer 2-3 times. A vibratory plate compactor is recommended for ease of use, but smaller applications
and hard-to-reach corners can be compacted with a hand tamper. The amount of subbase installed
depends on the depth of excavation and how much of the artificial grass’ pile height you want to be
exposed.
                                                                                                          5

© 2021 Purchase Green - a division of Path to Prosperity, Inc.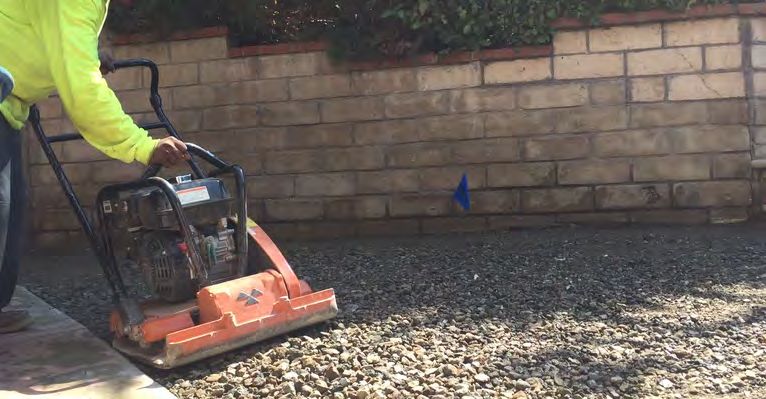
5. Underlayments
 To deter weeds or critters and prevent subbase
 contamination, it is advised to install a landscape fabric, such
 as our Weed Barrier, either above or below the subbase
 depending on the type of soil in the area and if there will be
 dogs. If installing for a kid's play area, you might also need to
 include a shock pad; or if you're installing on a rooftop or
 patio deck, you may need a drainage mat such as AirDrain.

                                               6. Measuring, Cutting, and Orienting
                                               Leave the turf rolled out in the sun for 1-2 hours for
                                               increased pliability, and take this opportunity to inspect
                                               the material before making permanent alterations. If the
                                               install requires seams, orient the largest piece of grass
                                               first and rough-cut where needed; best practice is to
                                               leave a couple inches of excess on the perimeter just in
                                               case. Once your turf has been measured and oriented as
                                               desired, anchor one side of the installation with a row of
                                               nails placed 1 inch inward and spaced 6 inches apart.
                                               Then use a Carpet Kicker to fully lengthen the turf for a
                                               taut installation - anchoring with more nails as you
                                               continue to kick and stretch.

 7. Seaming
 The most common seaming method is in-line seams;
 these seam cuts are made parallel to the turf's stitch
 rows. Where there's a seam, pin back the two pieces of
 turf to create a 12 inch opening, then cut the needed
 length of seam tape. Anchor the tape ends with nails
 and drizzle the Supreme Seam glue down the center of
 the tape strip, then spread the glue evenly over the
 entire tape surface using a trow or piece of cardboard.
 Let the glue sit for about 15 minutes or until tacky, then
 unpin and drop one side of the seam at a time, firmly
 pressing the turf onto the tape and glue. Next, starting
 in the middle of the seam, hammer nails every 1-3
 inches in a staggered arrangement along the seam line.

                                                                                                            6

© 2021 Purchase Green - a division of Path to Prosperity, Inc.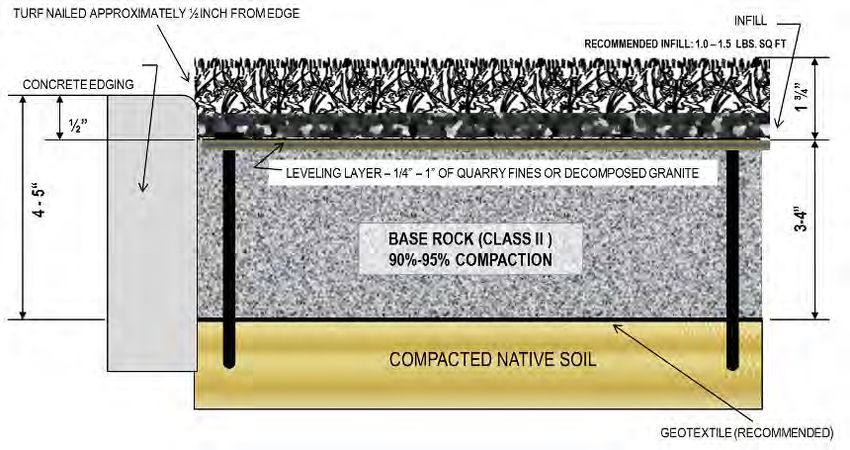
8. Secure the Perimeter
 Complete the perimeter by first fine-cutting any extra material. If you’re installing without a
 perimeter board, carefully fine-cut the turf to exactly where the perimeter line will be and secure with
 nails every 3 inches. If you installed Subgrade Bend-a-Board, chisel and tuck the extra 2-3 inches of
 material over the board and nail the turf to the board with an 18 gauge pneumatic staple gun every
 1-3 inches. Once the perimeter is secured, continue to hammer nails every 3 square feet within the
 interior. Be sure to spread the blades and fully expose the backing material when nailing so that no
 fibers are caught beneath the nail head, leaving the nail exposed.

9. Infill and Finishing Touches
Evenly and quickly apply infill by dumping one 40-50 bag of infill into the drop spreader, adjust the
dial to the desired ratio of pounds per square foot (usually between 2 and 4), and walk at a moderate
pace up and down the install site until all infill has been distributed. Work the infill into the grass
fibers by using either a Turf Broom or Power Broom; continue until you cannot see any exposed
infill. For edges and tight corners, you may need to spread the infill by hand.

                                                                                                            7

© 2021 Purchase Green - a division of Path to Prosperity, Inc.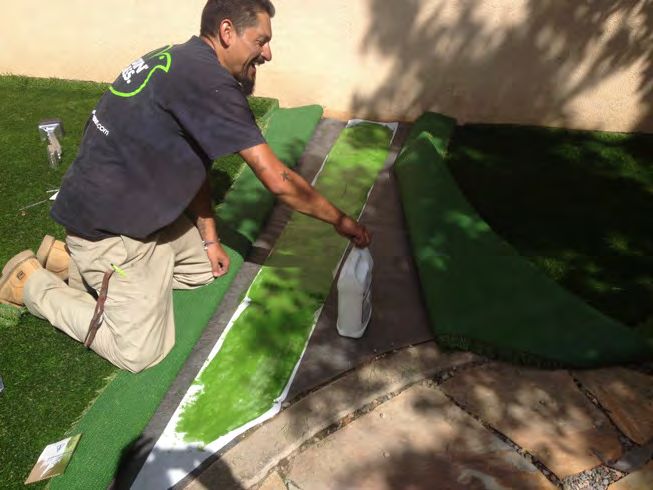
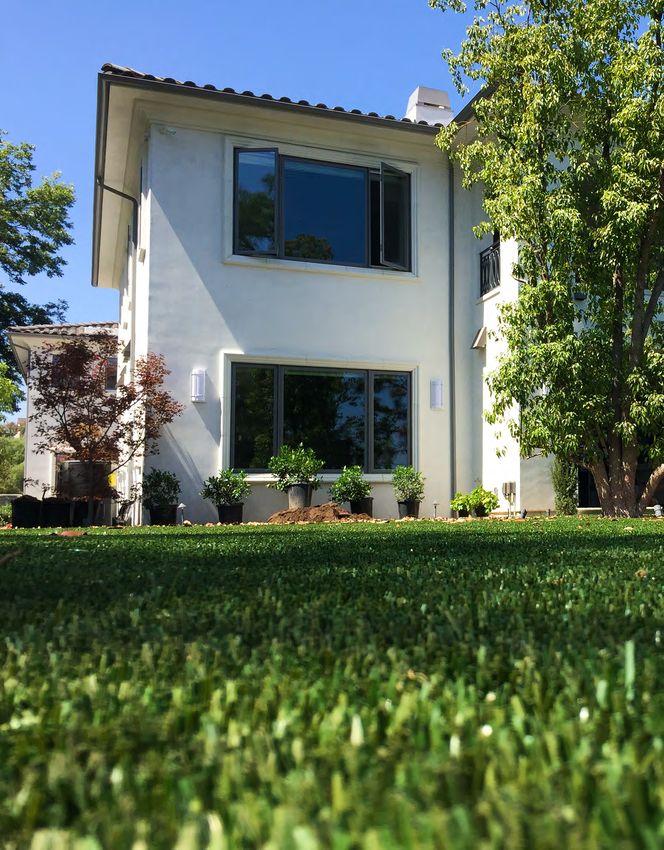
Example Projects

   When installing synthetic grass, follow best practices to ensure your
   lawn performs properly and lasts.

   Before starting your project, consider the various types of edges
   with which you’ll be working and make note of your area's drainage
   requirements. Both of these considerations affect the labor
   required as well as the amount and type of materials you’ll need.
                                                                            Soft edges do not butt up against any
                                                                            hard element and allow your project
   PHOTO A shows artificial grass that was installed in an open area             significant design flexibility.
   without any constructed restrains (ex: walkways, patios, fencing,
   retaining wall). Instead, the edges are secured with nails and bark
   creates a transition in landscape, defining the perimeter line.

   PHOTO B is an example of an application supported by constructed
   restraints and the perimeter reinforced with subgrade bend-a-
   board - a perimeter board that requires constructed restraints to
   be installed. The existing irrigation system on this property was
   capped off.

   When estimating a project with constructed restraints, additional
   material is often recommended to ensure there is enough working          Hard edges butt up against elements
   room to create a perfect fit along those perimeters. You don’t want     that can't be moved. The artificial grass
   to wind up with grass that is only a few inches short of what you          will need to be hand-trimmed to
                                                                                  accommodate these edges.
   need.

   PHOTO C shows a cleaned up a side yard. This area uses a drainage
   system with 3-inch corrugated, flexible pipe and inline drain catch
   basins. Water runoff travels down the structure’s gutters and
   downspouts through the attached fittings and underground drain
   system.

   To ensure optimal drainage, we recommend using base materials
   to achieve gravity-fed drainage that flows down through porous
   artificial grass layers to a properly engineered drainage system that
   meets your local code requirements.                                                                          C

                                                                                                                    8

© 2021 Purchase Green - a division of Path to Prosperity, Inc.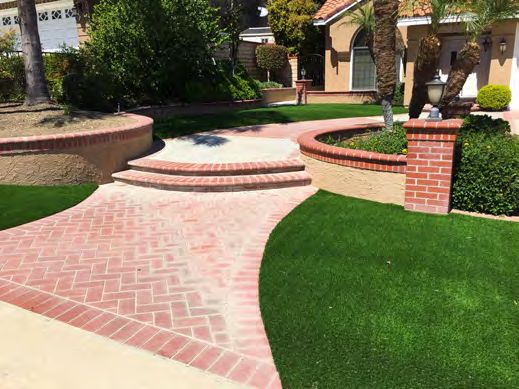
Perimeter Framing Options

                                                 Patio and Flagstones:
                                                 These can sit nicely on top of synthetic turf and help to
                                                 create great contrasts. Invest in stones that are sturdy
                                                 and will sit at least 1/2 to 1 inch below the turf pile
                                                 height.

                                                 Between Concrete Slabs and Pads:
                                                 Drainage is the most important aspect of this design
                                                 treatment. Several inches of drain rock at the base layer,
                                                 set prior to the installation of compacted materials, can
                                                 improve drainage. Also keep in mind the pile height of
                                                 the turf and how much of it you want exposed, as that
                                                 will determine how much base to install.

                                                 Against Concrete Walkways and Drives:
                                                 Grasses are cut to the exact shape of the hard edge so
                                                 you get a perfect fit. Grasses can be set below, at or
                                                 above the grade of the concrete, depending on the final
                                                 look and feel you wish to achieve.

                                                 Natural Rock:
                                                 Grasses can be tucked and secured under any rock
                                                 material. Be sure to install sturdy, durable landscape
                                                 fabrics underneath the turf to protect against erosion
                                                 over time and for underground pest control. Loose,
                                                 decorative rocks, stones and lava are an attractive finish
                                                 to perimeter lines.

                                                 Retaining Walls and Garden Beds:
                                                 Perimeters with hard elements in areas where natural
                                                 growth, weeds or other organic material would
                                                 otherwise touch the turf is a great way to provide a solid
                                                 edge from between native plants and your new artificial
                                                 grass.

                                                                                                              9

© 2021 Purchase Green - a division of Path to Prosperity, Inc.
Basic Installation Technique

    Excavate 3-5 inches of the native soil, lightly moisten the soil and compact the ground with a
    vibratory plate compactor; an optional layer of weed barrier may be laid down on top of the
    excavated surface.
    Fill the excavated area with subbase in 1-2 inch layers or 'lifts'. Each subbase layer should be
    dampened with a garden hose and compacted using a vibratory plate compactor 2-3 times to
    achieve the desired 95% compaction rate. Leave a space of ¾ inch between the top of the subbase
    and the hard scape edge. You may leave a greater gap depending on how much of the turf's pile
    height you want to be exposed.
    Unroll your turf and leave in full sun exposure for 1-2 hours, helping the backing to become more
    pliable and for the blades to stand straighter. Also take this opportunity to inspect the material for
    any defects before making permanent alterations.
    An optional layer of weed barrier may be laid down on top of the sub-base. Apply the first sheet of
    fabric at the bottom of the site's grade, with each new sheet moving up the grade and overlapping
    on the edges by 2-3 inches; then trim the fabric where needed and nail into place.
    If your installation requires seaming, seam tape and glue are recommended to attach the two
    pieces for a more robust hold. Once seamed, secure the turf to the subbase with 5 inch, non-
    galvanized nails every 3 inches in a staggered arrangement down the seam line. Then, secure the
    perimeter by nailing every 2 - 4 inches, with the nails placed about an 1/2 inch inward from
    perimeter line. And complete by hammering nails every 3 square feet within the interior of the
    application to ensure the material will not creep over time.
    Now that the grass is installed and secure, use a drop spreader to evenly spread 2-3 pounds
    of infill per square foot, then use a turf broom or power broom to work the infill into the thatch of
    the turf.

                                                                                                        10

© 2021 Purchase Green - a division of Path to Prosperity, Inc.
Advanced Installation Technique
After excavation (refer to basic technique), you have the option to cap off sprinkler heads. To do so,
ensure that the new cap is compatible with the system; in most cases a threaded half-inch cap will
suffice, and in fewer cases you may need a three-quarter inch cap. Begin with turning off the water
line and removing the dirt surrounding the head, creating a hole roughly 2-3" in diameter. Remove the
old sprinkler head and lightly coat both the new cap and the opening of the sprinkler line with a
primer and sealer, screw on the new flat cap, and refill the hole.
Unroll the turf in full sun exposure for at least two hours and inspect the material for any defects.
Prior to installing Subgrade Bend-a-Board along the perimeter, install and compact only enough
subbase to leave a space of 2.5" between the top of the constructed restraint and the top of the
subbase. Then, along the perimeter, place the board about a 1/4" away from the constructed restraint,
leaving a gap for the turf to be tucked into later. Next, hammer Mendocino Stakes every 12"-18" on the
inner side of the board until the tops of the stakes are about a 1/2"-1" below the top of the board; then
secure them in place by screwing 1 5/8" decking screws through the stakes into the board. Install and
compact the remaining subbase until it is flush with the perimeter board
Once the turf has been appropriately oriented over the base, rough-cut to fit the general shape of the
perimeter, but be sure to leave a couple inches of excess material. Next, anchor the top perimeter
edge with 5" nails spaced 6” apart and use a carpet kicker to stretch the turf outward from the anchor
nails and along the perimeter edge every 4”-6” . When stretching, loose turf will begin to bunch; just in
from the bunched material, hammer the non-galvanized nail where the turf is now pulled taut,
securing the hold. After the row of anchor nails have been set along the top perimeter, continue
stretching and securing in horizontal rows with nails every 2-3 square feet - or approximately 2’ feet
between each row and 2’ between each nail, like a grid.
After the turf is seamed and secured to the subbase (refer to basic technique), use a hammer and
chisel to tuck the 2"-3" of turf into the 1/4" gap between the board and constructed restraint. Once the
turf is tucked, secure the turf to the bend-a-board by using an 18 gauge pneumatic staple gun every
1/2"-1".
Finally, use a drop spreader to evenly spread 2-3 pounds of infill per square foot, then use a turf
broom or power broom to work the infill into the thatch of the turf.
11
© 2021 Purchase Green - a division of Path to Prosperity, Inc.Job Site Preparation
Be sure to create an installation plan. Examples
are shown at right. Take care to make note of,
and reroute if needed, underground utility
lines.
Remove all organic materials and other debris.
Material left under the installed surfaces may
decompose or shift, causing the compacted
subbase to concave and lead to site failures.
Organic materials include, but are not limited to:
Sod, grass, weeds, roots (live or dead), bark, nuts,
fruits, leaves, and rocks.
For projects with constructed restraints, ensure
the edges are excavated to the proper depth,
which is approximately 3 to 4 inches below
grade. All root systems within the project area
should be thoroughly removed if possible.
Purchase Green recommends using Weed
Barrier to create a layer between your native soil
and your sub-base. Weed Barrier will also help
enhance stabilization and add further protection
against rodents and burrowing creatures/insects.
The Weed Barrier should be installed over the
entire project area and overlap by 2 to 3 inches.
Ensure the fabric has as few wrinkles as possible
to allow for optimal sub-surface drainage. Sub-
surface fabrics like Weed Barrier will also help
add dimensional stability to your artificial grass
project.
12
© 2021 Purchase Green - a division of Path to Prosperity, Inc.Sub-Grade Bend-a-Board
Using sub-grade Bend-a-Board usually adds about $0.30 per square foot to the total job cost and is
optional but recommended. The use of a perimeter board in artificial grass installations mainly
serves a structural purpose, providing a sturdy boundary along the outermost edges of your project
to provide a more robust installation - as the perimeter is the weakest area of artificial turf
installations. The sub-grade Bend-a-Board also adds an aesthetic bonus, giving the look of a
manicured edge due to the way the turf is tucked OVER the board, creating realistic curvatures.
Purchase Green recommends that the top of your Bend-A-Board and the top of your subbase
should be about a half-inch below the grade of any bordering sidewalks, patios, and walkways to
maximize the amount of pile height that is exposed above the adjacent flat work for the most
realistic appearance. However, this gap between the height of the base and constructed restraint
can be greater or less depending on the pile height of the turf being installed and the personal
preference for aesthetic.
13
© 2021 Purchase Green - a division of Path to Prosperity, Inc.Subbase Selection
Subbase is a non-expansive,
crushed rock mixture and a
critical component to the
installation process as it replaces
the expansive native soil you’ve
just excavated. Proper subbase
selection, installation, grading,
and compaction also allows for
ideal drainage conditions. When
it comes to base selection, there
are a few options - though
dependent upon the type of
installation and project budget.
Class 2 Road Base and Crushed Miscellaneous Base are typically going to be the least expensive and
tend to compact better. However, they do not create a perfectly smooth surface and might not drain
as well compared to other subbases. On the other hand, Decomposed Granite - another popular base
option, drains better than Class 2 or CMB and creates a smooth finish; but it is also more costly and
doesn’t compact as tightly.
When choosing which subbase is best, first consider the type of application you’re installing for. Most
regular landscape installations do well with either Class 2 or CMB; whereas putting greens, seeing as
they require a much smoother finish, will perform better with DG. Another consideration to make
when selecting the base, is your budget. Take a putting green install for example; DG is recommended
but it’s a bit more expensive, so the cost can add up. If cost is a concern, you may choose to use a
combination of base materials instead - the bottom couple inches being Class 2 or CMB, and only the
top inch in DG.
The amount of subbase required for any particular job will also vary. Seeing as rockeries or landscape
supply stores can sell by either the ton or cubic yard, simply contact your closest supplier and provide
them with the job’s total square footage and how many inches you need to fill. Then, discuss delivery
pricing and availability.
14
© 2021 Purchase Green - a division of Path to Prosperity, Inc.Subbase Compaction
Now it’s time to install your
subbase. Depending on where
the subbase was delivered and
it’s distance from the install site,
the base may need to be
shoveled into wheelbarrows,
dumped, and evenly distributed
using either a shovel, a
landscape grader, or even a
piece of 2x4. It is advised that the
subbase be laid and compacted
in lifts - or layers. Depending on
the excavation depth, these lifts
will be 1-3” thick. Additionally,
when installing base, depending
on the pile height of the grass
and your preferences on the
finished look, leave between a ½” to an 1” of space below the adjacent hard edge. This spacing can
affect how much of a grass’ pile is visible - taller grasses may need closer to a 1” base gap, while a
shorter grass is more visible with a 1⁄2” gap. Proper installation will also require you to lightly wet each
base lift with a hose and compact with a vibratory plate compactor; repeated 2 to 3 times for each lift
in order to achieve the desired 95-98% compaction rate.
Alternatively, you may use a sod roller in lieu of a plate compactor - a more cost-effective option,
though it may not compact as tightly and you will need to install the base in more lifts. For example,
with a plate compactor, you may only need to lay 2-3 lifts, but with a roller, that could increase to 4-6.
Also, while the majority of properties will already have a grade or a slope to them, in the rare instances
where the front or backyard is flat, you must ensure that the base is installed to achieve a 2% fall so
that water drains away from the property.
15
© 2021 Purchase Green - a division of Path to Prosperity, Inc.Grass Grain and Stretching
Begin by unrolling the turf and leaving in full sun
exposure for at least one hour, preferably two, in
order for the backing to become more pliable and
to help the grass fibers to stand. Before making
any cuts, it’s crucial to inspect the turf for any
potential defects or damages. This is especially
important as the product cannot be returned once
the material has been cut into.
Next, you will need to appropriately position the
turf. For the most attractive view, orient the turf in
such a way that the fibers are pointing toward the
main vantage-point. For example, if you’re installing in a front yard, the main vantage-point will be the
street, where people drive and walk by; but if you’re installing in a backyard, the main vantage-point
might be the house. However, this can be disregarded if there’s focus on reducing material waste on
odd-shaped installations. Additionally, when installing multiple pieces of turf, always be sure the grass’
grain is pointing in the same direction for each piece.
Once the turf has been positioned, rough-cut to fit the general shape of the perimeter, but be sure to
leave a couple inches of excess material, leaving room for error. Next, you will need to thoroughly
stretch the turf to ensure a taut install. Start by anchoring the top perimeter edge with 5” non-
galvanized nails, placed 1” inward from the edge and spaced 6” apart. On turnkey installations, there
would be two to three assisting installers using carpet kickers to stretch the turf, but DIYer’s can use a
carpet kicker, too. After the row of anchor nails have been set along the top perimeter, kick and stretch
the turf outward from the anchoring nails. As you do, loose turf will begin to bunch, then hammer a
nail where the turf is now pulled taut, securing the stretch. Continue stretching and nailing in
horizontal rows with nails every 2-3 square feet - or approximately 2’ feet between each row and 2’
between each nail, like a grid.
16
© 2021 Purchase Green - a division of Path to Prosperity, Inc.Seaming
If you’re installing multiple pieces of turf, you will want to dry seam next. Dry seaming is a method to
help prepare for and ensure an invisible seam, by allowing you to freely position multiple pieces of
turf before permanently securing.
But first, you must consider which seaming
method is best for the installation’s layout. The
two most common seaming methods are in-line
seams and butt seams. In-line seams are seams
cut parallel to the stitch rows of the artificial turf
backing; whereas butt seams are cut
perpendicular to the stitch rows. To the right is
an example of where both of these methods
might be used on one installation:
To prepare for an in-line seam, grab the edge of a piece of turf that is running parallel to the stitch
rows and peel back a few inches, revealing the backing material. Then, with your utility knife, cut into
the backing directly alongside the outermost stitch row - leaving the stitch row itself flush with the
edge. Next, take your conjoining piece and peel back as well, revealing the backing; but this time, cut
off the outermost stitch row. This leaves you with just enough material on the edge to maintain the
gauge between the individual pieces - maintaining the gauge will ensure that the seam is invisible.
Then, unfold the pieces back together and brush up the fibers along the seam to look for visible lines.
If all looks well, you may temporarily hold the two pieces in place with nails approximately every 6” on
each side, hammered halfway - or, if you’re ready, you may begin securing your seams!
As for butt seams, take your
conjoining pieces and position
them so that the stitch rows
perfectly line up, and leave no gap
- which may require you to further
trim the edges if the original cuts
were not straight. The fibers
should all be pointing in the same
direction with no visible lines. If
your installation has both in-line
and butt seams, where these two
methods meet is referred to as a
T-seam. If there are T-seams, be
sure to secure the in-line seams
first, and then the butt seams.
17
© 2021 Purchase Green - a division of Path to Prosperity, Inc.Seaming (continued)
Depending on the chosen installation method or budget, your seaming materials will be either 5”
nails or the combination of seaming tape, seaming glue, and nails. Seaming with nails is going to be
much faster and with a lower cost, but also much less robust - as nails become loose over time;
whereas seaming tape, glue, and nails creates a stronger hold, but these materials cost more.
To seam with 5” nails, hammer a
nail every 3-6” down the seam
line - staggered on each side. Or,
to seam with tape and glue,
you’ll need to peel back the turf
once more and lightly pin the
folds open with nails. Then, lay
your tape inside the gap - nailing
the ends to hold it in place - and
slowly drizzle the glue down the
center, but not too much
because next you’ll lightly
spread the glue across the
entire tape’s surface. Then, depending on the weather, the glue will need to sit between 10 and 20
minutes so that it gets tacky; once it is, unpin and unfold the pieces back together, pressing down
onto the tape and glue firmly.
Additionally, keep in mind that it will take roughly 24 hours for the glue to fully cure, so in order to
complete the installation without disturbing the curing seams, hammer a nail every 3-6”, staggered
down the seam line for reinforcement. For installations utilizing tape and glue, it will also be best to
keep foot traffic sparse for the first day.
18
© 2021 Purchase Green - a division of Path to Prosperity, Inc.Perimeter Cuts
The most vulnerable part of any installation is the
perimeter, so adequate time and attention must be
given to ensuring the entire perimeter line is thoroughly
secured. Begin with fine-cutting the material's edge.
Fine-cutting the perimeter on basic installations is
simply cutting the material to exactly where the
perimeter line will be. Just fold the grass back about a
half inch and gently cut, a little bit at a time, while
periodically setting the turf back down to see if it falls in
place correctly. Be sure to make small, incremental cuts
when fine-cutting. Then, to secure, hammer 5” non-
galvanized nails about ½”-1” inward and spaced 2 - 4”
apart along the perimeter edge.
It is also recommended to inspect the perimeter after
nailing to feel for areas where the turf might still be a
little loose. Every few inches, firmly tap the surface
along the perimeter edge and wherever you hear a gap
between the base and the turf, hammer another nail.
Depending on the shape of the area, relief cuts may be
needed along curved edges as well. Relief cuts (bottom
right) allow the artificial grass to more easily conform to
a curved shape than it would otherwise. The goal is to
minimize relief cuts, but we use them as needed to
ensure a clean look to the installation.
NEVER MAKE PERIMETER CUTS UNTIL ALL
IMPORTANT SEAMS ARE DONE!
If you make the perimeter cuts before your seams and
you make a seaming mistake, your grass pieces may no
longer fit together.
19
© 2021 Purchase Green - a division of Path to Prosperity, Inc.Benefits of Infill
The final step in the
installation process is
adding infill. The
amount of infill that is
needed depends on
the density and pile
height of your artificial
grass as well as the
expected foot traffic.
As a general rule,
Purchase Green
recommends infill be
added at a rate of 2-3
lbs. per square foot.
Infill is important for
the long-term success of your artificial grass installation because it serves three primary purposes.
Infill protects the primary backing from UV exposure
Like anything left outside, artificial grass backings can suffer from exposure to the sun. Coating the
primary backing with infill adds protection which helps to extend the useful life of your artificial grass
product.
Infill adds weight
Artificial grass is like carpet in that it will expand and contract with changes in temperature. The
addition of weight in conjunction with using a sufficient number of nails helps to ensure your artificial
grass doesn’t end up looking like carpet that needs to be stretched.
Infill adds ballast
By “adding ballast” you are helping support the
fibers against matting down and the resulting
wear patterns. Another way to describe this is to
say infill helps to improve the “memory” of the
fibers.
You may have heard that infill isn't necessary.
Don't believe it. Artificial grass is an investment
and infill is terrific for helping to protect it so it
always looks and performs the way it is intended
Infill will also be required to qualify for Purchase Green's product warranty.
20
© 2021 Purchase Green - a division of Path to Prosperity, Inc.Types of Infill
Silica Sand as an artificial grass infill is the most common and the lowest in cost, and it will suffice
for most regular landscape applications. However, silica sand is not suitable for pet use, as it will
absorb and hold onto the ammonia in urine, creating a pungent odor. This infill type also comes
with a California Prop 65 Warning, but this is only applicable during the installation process, where
the infill can get dusted up and inhaled.
Zeodorizer infill contains zeolite, which is a natural, inert, non-toxic substance primarily used for its
odor reducing capabilities. Zeolite is a negatively charged, honeycomb-shaped molecular structure
which absorbs liquids and gases like a magnet to prevent ammonia from forming a gas. (The
ammonia buildup in pet urine is what you typically associate with the smell.) This molecular
structure holds the ammonia until the sodium ions found in rain water release the magnetic ability
which forces the odor causing bacteria down into the ground ultimately “flushing out” the ammonia
smell. The purity rate is the key component in the ability of the Zeolite infill to perform its intended
function. A maintenance item to pay attention to when using a Zeolite infill is that it is best NOT to
flush your turf from a garden hose when using zeolite for urine odor control because the hose
water is usually filtered and will end up being encapsulated in the Zeolite granule in lieu of the
urine. Zeodoizer infill also cools the turf's surface temperature by absorbing heat from the
available sunlight, condensing the sunlight, and through evaporation of the water along with
transpiration from the earth’s surface to the atmosphere, the result is cooler surface temperatures.
HeroFill is a premium infill used in a variety
of application types and is also strongly
recommended for pet areas, as it is infused
with Zinc, ZPT, and ZOE to inhibit the growth
of mildew and algae, effectively controlling
odors. This infill is sub rounded to resist
compaction over time, resulting in better
blade ballast over the life of the product
(when used in sufficient quantities). HeroFill
is also produced with a vinyl coating to help
encapsulate the silica dust and reduce
moisture absorption.
Use a drop spreader to evenly distribute your infill. Once all the infill has been deposited, use a
Power Broom (more on the next page) to help further distribute the infill and to help it settle down
and between the blades of grass. If a Power Broom is unavailable, you can use a plastic bristle rake
such as Purchase Green’s Turf Broom.
21
© 2021 Purchase Green - a division of Path to Prosperity, Inc.Finishing Touches
After installing your artificial grass, Purchase Green
recommends using a Power Broom to brush up the
turf's blades, efficient for fluffing matted fibers and
helping infill settle. The Power Broom features stiff
plastic bristles that spin on a rotating drum. This
spinning action helps each individual blade of grass
stand up tall and straight. Using a Power Broom on
your unrolled grass prior to installation will make
installation easier as the grass will be better
stretched and will receive infill more easily. Once
your grass is installed, one more pass with the
Power Broom will give the blades optimal lift and
really enhance the wow-factor.
The Power Broom is also a fantastic tool for helping
to remove traffic wear patterns on your artificial
grass lawn and restore it to a like-new appearance.
If your grass has begun to take on a matted look, a
few minutes spent with a Power Broom will restore
your grass to its original splendor
Power Brooms are typically used during the initial installation of your lawn and as called for by
periodic maintenance. Some Purchase Green stores have Power Brooms available for both rental and
for purchase; they may also be rented at most power equipment rental shops.
DO NOT USE METAL RAKES OR BRUSHES as
they break down the blades, making them
weaker, frayed and prone to failure. In addition,
the use of metal rakes or brushes for installation
or grooming may void your Purchase Green
Lifetime Warranty.
For manual brushing or brooming Purchase
Green offers the Turf Broom. The Turf Broom is a
synthetic bristle rake that is suitable for small
artificial grass projects or when a Power Broom is
unavailable.
22
© 2021 Purchase Green - a division of Path to Prosperity, Inc.Frequently Asked Questions
HOW MUCH DOES IT COST?
Most DIY projects cost between $3 - $6 per square foot for turf, tools, and accessories.
HOW DO I CHOOSE THE PERFECT GRASS?
First, decide on your application. In other words, will your
project be for a landscape, pets, a putting green, a
playground or for sports? Second, think about how much
foot traffic you expect on your grass. A lot? A little? A
medium amount? Third, consider the profile of the grass.
What kind of finish do you prefer? What about texture and
color? How important is shape and temperature? Once you
go through those three steps we’ll be able to help you
identify the perfect grass for you.
WHAT TYPE OF MAINTENANCE IS REQUIRED?
There is very little maintenance associated with artificial
grass. That is, after all, one of the reasons people make the
switch! However, over time, especially in high-traffic areas, it
may be useful to brush the grass up every once in a while to
keep the blades standing tall. Our Turf Broom is perfect for
that. You may also elect to periodically use a leaf blower to
clear the grass of leaves and other debris, as well as apply
Turf Bomb weekly if you have pets. Other than that, there
isn't much else required.
HOW LONG DOES ARTIFICIAL GRASS LAST?
The majority of our grasses have a Lifetime Warranty and an
expected useful lifespan of 20 years.
WHAT ABOUT PETS?
All Purchase Green grasses are safe for people and pets. If your pets will be using the grass as a
restroom then you definitely want to use a premium infill like HeroFill or Zeodorizer. These infills are
terrific for reducing odor from pet urine. You should also consider shorter, less dense grass for your
project as thick, tall grass can be more difficult to clean. Generally though, solid waste is cleaned the
same as on natural lawns and liquid waste drains away – though a spritz with the hose once in a
while won’t hurt. A weekly or bi-weekly application of our enzymatic cleaning solution Turf Bomb is
also highly recommended to mitigate the build up of odors from urine.
23
© 2021 Purchase Green - a division of Path to Prosperity, Inc.Frequently Asked Questions
THE BACKING IS CRIMPED AND SOME OF THE GRASS BLADES ARE BENT. HOW DO I FIX THIS?
Artificial grass is made on machines that roll the grass as it’s produced. Sometimes there may be
sections where creases form on the roll. Fixing this usually means nothing more than unrolling your
grass and leaving it to warm in the sun for a few hours. This will loosen up the crimps and straighten
out the blades. Installing in colder climates and/or colder seasons means some manual stretching
may be needed. If that’s the case, Purchase Green has carpet kickers available that are designed for
this process.
OK GIVE IT TO ME STRAIGHT…CAN I
REALLY DO THIS MYSELF?
Yes! If you’re somewhat handy and –
more importantly – not afraid of hard
work, then you can join the thousands
of other Purchase Green customers
who’ve installed their own grass. The
hardest part will be excavating the
project area and building the sub-
base. It’s not complicated work but it
is labor intensive. You’ve also got to
have a plan for what to do with the
excavated soil. The trickiest part is
seaming. Seaming is as much an art
as a skill. A good seam is invisible
whereas a bad seam is very visible.
Go slow and remember to measure
twice (or thrice) and cut once.
HOW MUCH WATER WILL I SAVE?
An average size lawn is between 600 and 700 square feet, which will use between 24,000 and
36,000 gallons of water each year. With artificial grass that water consumption is virtually
eliminated, as is lawn mower maintenance, gas, fertilizers and other chemicals. That’s why we say
that a typical artificial grass lawn will pay for itself in 3-7 years.
24
© 2021 Purchase Green - a division of Path to Prosperity, Inc.Frequently Asked Questions
SO WHAT MAKES PURCHASE GREEN SO GREAT?
We believe it’s our dedication to providing the best products, the best prices and the best customer
service that distinguishes us from our competitors. We have everything you need all in one place
and Purchase Green folks are always happy, helpful and happy to help! Plus we have dozens of
different grasses in stock at all stores to suit any project need. And our grasses feature Purchase
Green’s Lifetime Warranty so you’ll always have peace of mind.
WHAT SHOULD I KNOW ABOUT REFLECTIVE SURFACES AND MELTING?
Artificial grass has a very high melting point – around 200 °F. But reflective surfaces can generate
heat in excess of that mark. So, when installing your artificial grass, take note of which direction
reflective surfaces, such as your windows, face. If they face west or (especially) south, consider
installing an outdoor solar screen or protective window film. These relatively inexpensive solutions
will also contribute to better energy-efficiency in your home. Also, be sure to check neighboring
windows to see if they may be the culprit. You may also take note of where reflections hit the
surface and install your artificial grass such that it isn’t bearing the brunt of the reflected heat.
Thank you for downloading our DIY Install eBook - we hope you found this guide to be helpful! For
even more informative content, browse our website or blog, or follow us on social media for
landscape inspiration!
If any questions remain, you can speak with our industry and product expert staff on our website's
live chat or by calling your local store. Our showrooms are also open, where you may view and feel
the turf for yourself, collect free samples, and get your DIY material quote! Installation services
are available as well.
25
© 2021 Purchase Green - a division of Path to Prosperity, Inc.You can also read