7KG CLOTHES DRYER - INSTRUCTION MANUAL - Stirling Appliances
←
→
Page content transcription
If your browser does not render page correctly, please read the page content below
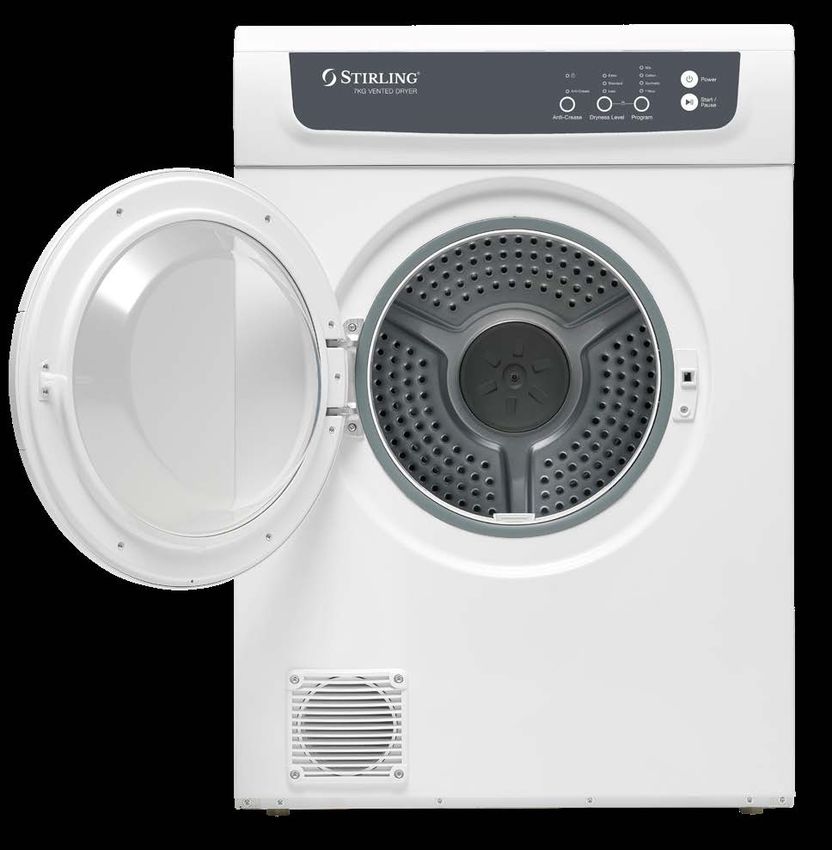
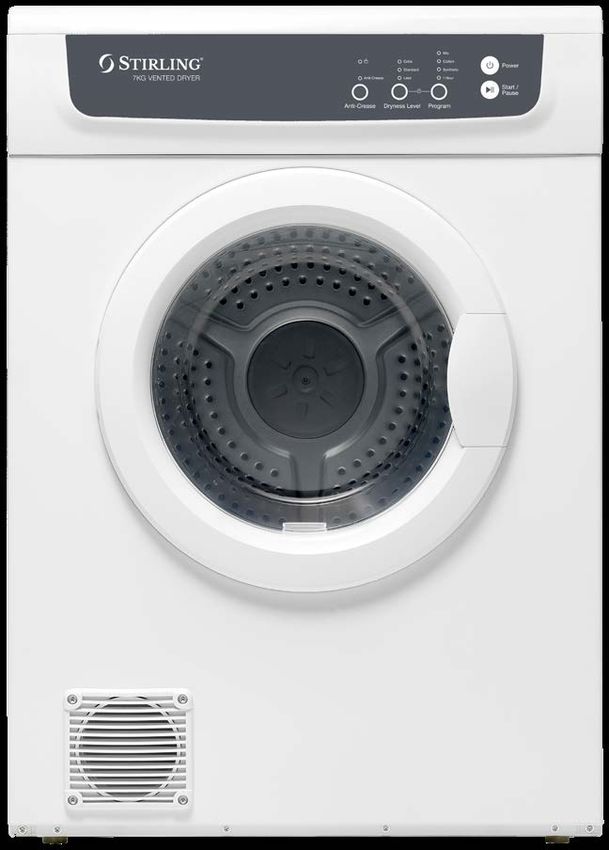
7KG CLOTHES DRYER
MODEL NUMBER SVD7

INSTRUCTION MANUAL
IM Version No.: V1.5   Issue Date: 06/2020
Welcome                                                                                            Contents
Congratulations on choosing to buy a STIRLING® product.                                            02		   Welcome

All products brought to you by STIRLING® are manufactured to the highest standards                 05		   Warranty Details
of performance and safety and, as part of our philosophy of customer service and                   06		   General Safety Instructions
satisfaction, are backed by our comprehensive 3 Year In Home Warranty. We hope you
will enjoy using your purchase for many years to come.                                             09		   Product Overview
                                                                                                   11		   Installation
                                                                                                   17		   Getting Started
                                                                                                   18		   Instructions
                                                                                                   22		   FAQs and Troubleshooting Guide
                                                                                                   24		   Other Useful Information
                                                                                                   27		   Repair and Refurbished Goods or Parts Notice

2                                                   MODEL: SVD7 | PRODUCT CODE: 701109 | 06/2020                                        MODEL: SVD7 | PRODUCT CODE: 701109 | 06/2020   3
This page
is intentionally
left blank
7kg Clothes Dryer
REGISTER YOUR PURCHASE AT www.aldi.com.au/en/about-aldi/product-registration/ TO KEEP UP-TO-DATE WITH IMPORTANT PRODUCT INFORMATION
Congratulations! You have made an excellent choice of this quality product. Our commitment to quality also includes our service. Should you, contrary to
expectations, experience defects due to manufacturing faults, ALDI will provide you with a warranty against defects as follows:
Warranty
The product is guaranteed to be free from defects in workmanship and parts for a period of 36 months from the date of purchase. Defects that occur within this
warrantyTheperiod, under normal
product use and care, will be
is guaranteed torepaired,
be free replaced
fromordefects
refunded atinourworkmanship
discretion. The benefits
andconferred
partsbyforthisawarranty
period are in addition to
all rightsof
and36
remedies in respect
months from of the
theproduct
datethat
ofthepurchase.
consumer hasDefects
under the Competition
that occur and Consumer
within Act 2010
this and similar period,
warranty state and territory laws.
Our goodsunder
come with normal usethatand
guarantees care,
cannot will be
be excluded repaired,
under replaced
the Australian or refunded
Consumer Law. attoour
You are entitled discretion.
a replacement The
or refund for a major failure
and for compensation for any other reasonably
benefits conferred by thisforeseeable
warranty lossare
or damage. You are also
in addition to entitled to haveand
all rights the goods repaired or
remedies inreplaced
respect if theof
goods fail to be o
acceptablethequality and the failure
product that thedoes not amount to a major
consumer failure. the Competition and Consumer Act 2010 and
has under
Proof ofsimilar
Purchasestate and territory laws.
This warranty is valid for the original purchase and is not transferable. Please keep your purchase docket, tax invoice or receipt as the best proof of purchase, an
Our
as proof of dategoods come
on which the with
purchase wasguarantees
made. that cannot be excluded under the Australian Consumer
Law.
Extent of Warranty You are entitled to a replacement or refund for a major failure and for compensation
for any
This warranty other
is limited reasonably
to defects foreseeable
in workmanship loss or
or parts. All defective damage.
products or partsYou
will beare also
repaired entitled to have the
or replaced.
Normal goods
Wear andrepaired
Tear or replaced if the goods fail to be of acceptable quality and the failure does
not amount to a major
This warranty does not cover normal failure.
wear and tear to the products or parts.
Exclusions
This warranty does not cover:
• Any defects caused by an accident, misuse, abuse, improper installation or operation, lack of reasonable care, unauthorised modification, loss of parts,
tampering or attempted repair by a person not authorised by the distributor.
• Any product that has not been installed, operated or maintained in accordance with the manufacturer’s operating instructions provided with the product
• Any product that has been used for purposes other than domestic use.
• Any damage caused by improper power input or improper cable connection.
To Make a Claim
This warranty against defects is provided by ALDI Stores, Locked Bag 56, St Marys Delivery Centre, NSW 2760, Phone (02) 9675 9000. If a defect in the goods
appears within 36 months, you are entitled to claim a warranty, please contact or send all warranty claims to:
Residentia Group Pty Ltd
118 Campbell Street, Collingwood, VIC 3066
Hotline number: 1300 11 4357
Email: support@residentiagroup.com.au
When making a return, please ensure the product is properly packaged so as to ensure that no damage occurs to the product during transit.
Please provide the original or a copy of the proof of purchase. Also please make sure you have included an explanation of the problem.
Please note that the costs of making a warranty claim, including any return postage, will be covered by the supplier identified above.
4 MODEL: SVD7 | PRODUCT CODE: 701109 | 06/2020 Please note upon receiving your warranty claim, the supplier will send,MODEL:
via the post
SVD7or email, a repairCODE:
| PRODUCT and refurbished goods
701109 | 06/2020 5
or parts notice.
Please provide your email address and advise the supplier, if you wish to obtain a repair and refurbished goods or
General Safety Instructions (Cont.)
General
GeneralSafety
SafetyInstructions
Instructions General Safety Instructions (Cont.)
• Indoor use only: Do not use the appliance outdoors.
IMPORTANT SAFETY INSTRUCTIONS
• Usage restriction: The appliance is not intended for use by persons (including
READ CAREFULLY AND KEEP FOR FUTURE REFERENCE
children) with reduced physical, sensory or mental capabilities, or lack of
Read this manual thoroughly before first use, the safety precautions enclosed herein experience and knowledge, unless they have been given supervision or instruction
reduce the risk of fire, electric shock and injury when correctly adhered to. Keep the concerning use of the appliance by a person responsible for their safety.
manual in a safe place for future reference, along with the completed warranty card
and purchase receipt. If applicable, pass these instructions on to the next owner. • Children: Supervise children to ensure they do not play with the dryer. Close
supervision is necessary when any appliance is used by or near children.
Always follow basic safety precautions and accident prevention measures when
using an electrical appliance, including the following: • Installation requirements: Do not install the appliance in a tight fitting cabinet.
Do not install it near heat sources such as radiators, heaters, air ducts or direct
Electrical safety and cord handling sunlight. If the clothes dryer is not wall-mounted, place it on a flat, firm, dry and
• Voltage: Make sure your outlet voltage and circuit frequency correspond to the stable floor in a well ventilated area. Use the adjustable legs to assist in levelling the
voltage indicated on the appliance rating label and your outlet socket is properly dryer if required. Do not place it on any soft material such as foam or plastic.
earthed. If this is not the case, do not use the dryer.
• Ventilation: Do not block any ventilation openings. Ensure that vents are not
• Separate circuit: We strongly recommend you connect the appliance to a separate covered by newspapers, tablecloths, curtains, carpet, etc.
circuit serving only this appliance. This provides the best performance and prevents
overloading the house wiring circuits that could cause a fire hazard from overheating. • Before use: Make sure to remove transport packaging at the rear of the dryer.
WARNING: Before loading the dryer, always ensure no pet or young child has
• Electrical hazard: Do not insert any objects into the appliance.
climbed into it. Do not overload the clothes dryer.
• No extension cord: Do not use this appliance with a power adaptor or extension
• Suitability for tumble drying: Only load suitable items into the clothes dryer. See
cord. CAUTION: If such a device must be used, the cord or outlet device must be
the box on the opposite page for which items and materials are unsuitable for the
positioned so that it is not subject to splashing or ingress of moisture.
clothes dryer and may present a fire risk.
• Protect the power cord. Do not kink or damage the power cord. Position the cord
out of the way so no one steps on or places anything on the cord or against it. Do • Preparation: Make sure all pockets of clothing to be dried are empty. Hard, sharp
not run the cord under floor coverings. Arrange the cord away from traffic areas objects such as coins, safety pins, bra wires, nails, screws, lighters or matches
where it will not become a trip hazard. must be removed as they can cause extensive damage to the dryer.
WARNING: Any damage or malfunction resulting from foreign objects is not
• Damage: Do not operate the appliance after it malfunctions or has been dropped
covered by your warranty and may lead to expensive repairs.
or damaged. In case of damage, contact the after sales support line for advice.
• No open flames: Do not place open flame sources such as candles on the dryer.
• Damaged cord: If the power supply cord is damaged, do not attempt to change
it yourself. A damaged cord or plug must be replaced by the manufacturer or a • Hot surface: The door window may be hot after a long drying cycle. Always ensure
qualified person in order to avoid a hazard. children are kept away from the machine. Do not store plastic, paper or clothing
• Disconnect: Unplug the clothes dryer from the power supply after use, before that may burn or melt on top of the dryer during operation.
cleaning, servicing or moving the appliance. To disconnect, turn the appliance off, • Cool down: The final part of a clothes dryer cycle occurs without heat (cool down
switch off the power outlet and remove the plug from the power outlet. Grip the cycle) to ensure that the items are left at a temperature that will not damage them.
plug when disconnecting; do not pull on the cord. After disconnection, wait at least WARNING: Never stop the clothes dryer before the end of the drying cycle unless
2 minutes before turning the appliance back on again. all items are removed quickly and spread out so the heat is dissipated.
• RCD: Unless your home is already fitted with a residual current device (safety • Subsequent cycles: After turning off the power supply to the clothes dryer, wait at
switch), we recommend installing an RCD with a rated residual operating current least two minutes before turning it back on again.
not exceeding 30mA to provide additional safety protection when using electrical • Lint filter: WARNING! The lint filter must be in place when drying. It must be
appliances. See your electrician for professional advice. cleaned before or after each use.
Usage conditions and restrictions • Service/repair: Except for the filters that require cleaning, this appliance contains no
General Safety Instructions (Cont.)
• Domestic use only: This appliance is intended for household use only. It is not user-serviceable parts inside. Do not attempt to open, disassemble or repair it your-
General Safety Instructions (Cont.)
suitable for commercial, industrial or trade use. Do not use it for anything other than
its intended purpose (drying domestic quantities of washing), and only use it as
self; only have it serviced by qualified personnel, call our after sales support centre.
The appliance should not be tilted or turned sideways during use or maintenance.
described in this manual. • No timer: In SALES
orderSUPPORT
to avoid a hazard due to inadvertent resetting of the thermal cut-out,
AFTER
• Indoor use only: Do not use the appliance outdoors.
AFTER SALES SUPPORT 6 this appliance must
AUS 1300 not
886 649 be supplied through an external switching device, such
info@tempo.org
as 06/2018
a
• Usage restriction:
AUS 1300 886 649 The appliance is not intended for usePRODUCT
MODEL: MDR70-VR031 by persons
info@tempo.org
(including
CODE: 61494 06/2018 5 MODEL: MDR70-VR031 PRODUCT CODE: 61494
timer, or connected to a circuit that is regularly switched on and off by the utility.
children) with reduced physical, sensory or mental capabilities, or lack of • Liability: Improper use or installation may result in the risk of fire, electric shock and/
experience and knowledge, unless they have been given supervision or instruction or injury. We assume no liability for any eventual damages caused by improper use or
6 concerning use of the appliance by a person responsibleMODEL: for their
SVD7 safety.
| PRODUCT CODE: 701109 | 06/2020 handling, or by any other noncomplianceMODEL: with the instructions
SVD7 | PRODUCT CODE:in this manual.
701109 | 06/2020 7
• Children: Supervise children to ensure they do not play with the dryer. Close
supervision is necessary when any appliance is used by or near children. CAUTION!General Safety Instructions (Cont.)
and tie fabric belts. This will also help reduce impact noise when the items hit
against the turning drum.
•General Safety
Place small, delicate itemsInstructions
in a mesh bag, but do (Cont.)
not add too many to one bag. (It Product Overview
General
Installation
is not recommendedSafety Instructions
Instructions
to dry underwire
must not be supplied
bras in a clothes(Cont.)
• No timer: In order to avoid a hazard due to inadvertent resetting of the thermal cut-out,
General
this applianceSafety (Cont.)
through an external
dryer.)
switching device, such as a Product Overview
Scope of delivery
•• No timer:
To avoid
timer, items getting
In order
or connected tangled
totoavoid thatup
a hazard
a circuit in
isdue the dryer, which
to inadvertent
regularly switched onresults
resetting ofin
and off uneven
the
by thermal
the drying,
cut-out,we
utility.
this appliance
recommend must use
placing notitems
be installation
supplied
into the through
dryer an
one external
atthe switching
aresetting
time. device, such asand/
a
Liability:
• No timer: In
Improper
order to avoid or a hazard duemay result
to inadvertent in risk ofoffire,
theelectric
thermal shockcut-out, Clothes dryer
Unpacking
timer,
or
• this
When
or
injury. connected
We assume
closing
appliance thenot
must to a
no
dryer
circuit
beliability that
door prior
supplied is regularly
forthrough
anyto eventual
starting
switched
damages
an external on
the switching
and
caused
unit, ensure
off
device,by the
by such
that
utility.
improper
items usenot
as aare or
•• timer,
Liability:
This
handling,
jammed Improper
product has
or the
by
or connected
in any touse
been
door.otheror noncompliance
installation
packaged
a circuit maywith
that istoregularly
protect resulttheininstructions
it against
switched the risk
andofofffire,
ontransportation
in electric
bythis
the utility.shock and/
damage.
manual.
or injury. Improper
Remove
• Liability: Wepackaging
all assumeuseno or liability
materials for
installationfromany
may eventual
around
result the damages
in theappliance caused
and
risk of fire, from
electric by improper
the
shock inside. use or
and/
• handling,
CAUTION: Do not
or assume
by any overload
other the dryer:
noncompliance the
withmaximum
CAUTION! the in amount
instructions inbyof
this dry textile
manual. material
• or injury.
Keep theWeoriginal no liability
packaging for anyand
carton eventual damages
materials caused
a safe place. Itimproper
will helpuse or
prevent
that can or beby dried in onenoncomplianceload is 7kg (see the table belowinfor some reference weights). 1
Theanyitems
handling, damage listed if anybelow
the other
product are UNSUITABLE
needs to be with forthe
transported clothes indrying.
instructions the future, They
this can
manual.
and you cause
can usefire in
the dryer CAUTION!
it to storeorthe extensive
appliance damage.
when it DO is not NOT in use.place In them
the event in the that clothes
the carton dryer. is to be
The items listed below are UNSUITABLE CAUTION!
:disposed
Items of, please
containing foam recyclerubber all(also
packaging knownfor clothes
materials
as latex where
foam) drying.
or possible.They textured
similarly can cause fire in
rubber-like 2
thematerials
The dryer
items or listedextensive
below damage.
are UNSUITABLE DO NOT for place
clothes them in
drying. the Theyclothes can dryer.
cause fire
• Plastic wrapping — when can heated, these materials
be a suffocation hazard canfor spontaneously
babies and young combust and cause
children, soin a fire.
the dryercontaining
or extensive damage. DO NOT place themfoam) in theorclothes dryer.
General Safety Instructions (Cont.)
: Items
ensure
: Items
materials
substances
all packaging
containing
—— when
foam
foam
these heated,
rubber
materials
rubberthese
substances
(also
are
: Items that have been spotted or soaked with cooking oil, or with highly flammable
(alsomaterials
known
known
out
constitute
of as
their
ascanlatex
latex
reach
foam)
spontaneously
a fire hazard.
and similarly
disposed
or similarly
Highly
of
textured
combust
textured
safely.
and
rubber-like
rubber-like
cause a fire.
• Inspect the cord and plug for damage or wear before each use. flammable
Do not usesubstances the
materials
Items
:appliance that — when
have heated,
been spotted these ormaterials
soaked can
with spontaneously
cooking oil, orcombust
with highlyand cause
flammable a fire.
• Noused timer:inIndomestic if the
order avoidenvironments
to appliance a hazard ordue its to include
cord have
inadvertent acetone,
been
resetting alcohol,
damaged
of the thermal petrol,
or are kerosene,
not working
cut-out, some stain
:thisItems
substances
removers, that have — been
these
dry-cleaning spotted
substances
solvents, or soakedconstitute
turpentine, with cooking
a fire
waxes, oil,
hazard.
wax or with
Highly
removers highly flammable
flammable
and some substances
hair care
properly. In case of damage, contact our after sales support centre.
appliance must not be supplied through an external switching device, such as a
substances
used
products.
timer, in domestic
or connected — these
(This toalso
a circuitsubstances
environments
includes items
that is regularly constitute
include that
switched a fire
acetone,
have hazard.
onpreviously
and off by Highly
alcohol, been
the petrol,flammable
utility. kerosene,
cleaned orsubstances
some with
spotted stain 6
• Read used
removers, all instructions
inImproper
domestic useenvironments
dry-cleaning in this manual include and make
acetone, sure
alcohol, you understand
petrol, kerosene, all warnings.
some
some stain
• Liability:
dry-cleaning solvents orsolvents,
or installation othermay turpentine,
flammable
result in the waxes,
orrisk
explosive
of wax removers
substances.)
fire, electric shock and/ and hair care
removers,
•:orWipeinjury.the
products. We inside dry-cleaning
assume
(This of
nothe
also liability solvents,
drum
includes for any with turpentine,
a
eventual
items damp
that damages
have waxes,
cloth to
caused waxbyremovers
remove
previously any
improper
been dustandor
use
cleaned some
from or hair carewith
transport.
spotted
Installation
If it is unavoidable that fabrics that contain vegetable or cooking oil, or that have
products.
handling,
dry-cleaning or by (This also includes
any other
solvents noncompliance
or other items thatthe
with
flammable have previously
instructions
orbe explosive in thisbeenmanual. cleaned or spotted with
been
SALEScontaminated by or hair
othercare products, insubstances.)
placedsubstances.) a tumble dryer,info@tempo.org they should
Important
AFTER
: AUS
dry-cleaning
If it1300
notes
SUPPORT
isbeunavoidable
solvents regarding
thatwater fabrics that
CAUTION!
installation
flammable
contain
or explosive
vegetable or will
cooking oil,CODE:
or 61494
that have 17 3
first 886washed
649 in hot with extra detergent MODEL:—MDR70-VR031
this reduce,
PRODUCT but not06/2018
eliminate,
: If
•TheThis it is unavoidable
clothes dryer that
canby fabrics
be installed that contain
freestanding, vegetable on or
floorcooking oil, or that have
been
items
the contaminated
listed below
hazard. The are
‘cool hair
UNSUITABLE
down’ care
cycle products,
for ofclothes
a clothesbe placed
drying. dryerThey incan
shouldalevel,
tumble
cause
be orusedwall-mounted,
dryer,
fire in to theyreduce or
should
the
Unpackingbeen
thewall-mounted
dryerbe contaminated
or extensive upside bydown.
damage. hairDO careIfNOT products,
you beinplaced
are wall-mounting
place them the in it,
clothes a tumble
please
dryer. dryer,
follow they
thenot should
instructions
first
temperature washed of in
the hot
items. water They with extra
should detergent
not be removed— this will reduce,
from the clothes but dryer eliminate,
or piled
•:This first be
product washed has in
been hot water
packaged withtoextra detergent — this will reduce, but not eliminate,
on the
Items
or the next
hazard.
containing
stacked pages.
The
foam
while ‘coolWall-mounting
rubber
hot. down’
(also known cycleprotect
itofupside
as it against
a clothes
latex foam) downor dryer transportation
will
similarly bring
should
textured the
be damage.
control
used
rubber-like topanel
reduce in easier
the
the hazard.
Remove all when The
packaging ‘cool materials
down’ cycle from of a spontaneously
around clothes the dryercombustshould be usedthe ato reduce theway up.
materials
reach—use
temperature
Undergarments
— theofheated,
extra
the
that
these
control
items.
contain
materials
They panel
metal
can
shouldlabel not
reinforcements beappliance
(supplied), removed so the
(such
and
and
from
as
from
cause
printing
the clothes inside.
isfire.
the right
dryerwhich
or piled
:Items
••:Keep
temperature
the have of
that original been the items.
spotted
packaging orTheysoaked
carton
shouldwith
and
not beoil,
cooking
materials
removed
or
in with
a safe
from
highly theunderwire
flammable
place.
clothes
It will help
bras),
dryer or piled can
prevent 5
Do or
come
or stacked
NOT
stacked install
loose while
while the
during hot.
hot. appliance:
drying and damage
substances — these substances constitute a fire hazard. Highly flammable substances the clothes dryer.
any damage if the product needs to be transported in the future, and you can use
:
:it: Undergarments
used Behind
Plastic in domestic a lockable thatcontain
environments contain
door, include metal
sliding acetone, reinforcements
door or
oralcohol, a doorpetrol, (such
with as
a hinge
kerosene, underwire
some onstainthe bras), which
opposite can can
: to storearticles
Undergarments the appliance such
that aswhen shower metal
it is not caps
reinforcements
in use. waterproof
In the (such
event baby as
that bibs.
underwire
the carton bras),
is to which
be
come
removers,
come side
Rubber-backed loose
of
loose the during
dry-cleaning
dryer,
during drying
solvents,
in
drying and
articles, such and
turpentine,
clothes a damage
way
damage
waxes,
that
fitted the athe
with
wax
full clothes
clothes
removers
opening
foam dryer.dryer.
rubber
and
of some
the
pads,
hair caredryer door is
tumble
pillows,
:disposed
products. of, please
(This also includesrecycle items all that
packaginghave materials
previously beenwherecleaned possible.
or spotted with galoshes and
restricted.
Plastic
:dry-cleaning
rubber
Plastic articles
coated
articles such
tennis
such asas shower
shoes. caps oror waterproof baby bibs.
• :Plastic wrapping solvents can or be other ashower
flammable
suffocation caps or explosive
hazard waterproof baby
substances.)
for babies and bibs.young children, so 3
::
: :
:ensureit In
Fabric aall
Rubber-backed
IfRubber-backed tight
softeners
is unavoidable fitting
packaging that orcabinet.
articles,
articles, similar
fabrics
materials clothes
clothes
that arefitted
products,
contain fitted
out ofwith with
unless
vegetable their foamfoam
or rubber
rubber
specifically
cooking
reach and pads,
oil, pads,
thatpillows,
orrecommended
disposed have pillows,
of safely. galoshes
galoshesby theand and
product
: rubber
been
rubber anthe
manufacturer coated
Incontaminatedarea
coated wheretennis
byuse
tennis
for hair shoes.
care
itshoes.
will
in a products,
be
clothes exposed be placed
dryer to in a tumblethe
totemperatures
eliminate dryer, they should
below
effects offreezing,
static or exposed
electricity.
• Inspect cord and plug for damage or
first be washed in hot water with extra detergent — this will reduce, but not eliminate, wear before each use. Do not use the
Fabric
:appliance
: to water
Fabric softeners
softenersor‘cool ororsimilar
weather, similar which products,
orproducts, could unless
cause
unless specifically
permanent
specifically recommended
damage
recommended andby by product
invalidate
the the product
the
the hazard. ifThe the appliance
down’ cycle its
of cord
a clothes have dryer been shoulddamaged
be usedor to are
reduce notthe working
CAUTION!manufacturer
warranty.
manufacturer
properly. In of
case for
forofuse useThey
damage,inina aclothesclothes
contact dryer
dryer to
toafter
ourremoved eliminate
eliminate
sales thethe
support effects
effects of
of static
centre. static electricity.
electricity.
temperature the items. should not be from the clothes dryer or piled
• Do not use
or stacked whilethe hot.tumble dryer if industrial chemicals have been used for cleaning.
:
•CAUTION!
Read In allaninstructions
area where ingas thisor flammable
manual and makesubstances
sure you are used. all warnings.
understand
•CAUTION!
: Do not dry
Undergarments unwashed
that containitems in the
metal reinforcements tumble dryer.
(such as underwire bras), which can
•• WipeThe
Do
Do notplug
not
not the use
use
allowmust
the
inside the
lintofbe
tumble
the
tumble
to accessible
drumdryer
accumulate dryer withif ifafter
industrial
a damp
industrial
around installation.
chemicals
cloth
the to
chemicals
tumble remove have
dryer. any
have been
Clean dust
been used
the from
used fortransport.
filter cleaning.
for
after cleaning.
every use.
••
come loose during drying and damage the clothes dryer. 4
•: DoDo
Plastic
Ensure not
Adequate dry
notarticles
dry
that unwashed
unwashed
ventilation
such
all as shower
electrical items
items
has toinbe
caps inthe
connections orthe tumble
providedtumble
waterproof are dryer.
to dryer.
baby avoid
made bibs.by the backflow
qualified of gasesand
personnel intoallthe room
Important
••: Dofrom not allow notes
appliances lint regarding
totoburning
accumulate
clothesother
installation
aroundfuels, thethe tumble dryer. Clean thethe filterand afterafterevery use.use.
Do not
Rubber-backed
instructions allow lint
articles,
in this accumulate
manual as around
fitted with
well asincluding
foam tumble
rubber
local open
pads,
safety dryer. fires.
pillows, Clean
regulations galoshes arefilterobserved. every
Adequate
•• ThisAdequate ventilation has to beprovided
rubber clothes
coated ventilation
dryer
tennis can
shoes. has
be to
installedbe freestanding,
provided to to avoid thethe
on floor
avoid backflow
level,
backflow of gases
or wall-mounted,
of gases intointo the room
or the room
•:wall-mounted
Place
from
from the dryer
Fabricappliances
appliances
softeners orThis
upside asymbol
inburning
burning
similar dry,
down. other
products, Ifalerts
well
otheryou fuels, youwall-mounting
ventilated
are
fuels,
unless to take
including area,
including
specifically careaway
open as oil-affected
from
it,fires.
open
recommended please
fires.by heat the items
follow and thedirect
product can ignite
instructions sunlight.
manufacturer for spontaneously,
use in a clothes dryer toespecially
eliminate when
the exposed
effects of static to heat,
electricity. such as in a clothes dryer.
• on the nextairpages.
Exhaust must
This Wall-mounting
not be become
discharged it upside down
intocausinga flue will
aswhichbring the
is control
used panel
forcan in in
exhausting easier
oil. fumes
reach—use the Thissymbol
The
extra
items
symbol
control
alerts
alerts
panel
you you
label
to to
warm, take take care
(supplied), care so
oil-affected
an
as oxidation
oil-affected
the printing
items
reaction
is items
the
ignite
can
right
the
ignite
way up.
Oxidation 1 Control panel NOTE: Due to continued product
from appliances
CAUTION! burning
spontaneously,
creates
spontaneously, heat. gas or
Ifespecially
the other
heat when
especially fuels.
cannot
when exposed
escape,
exposed tothe heat,
to items
heat,such can
such as become
inasa inclothes hotdryer.
a clothes enough
dryer.
The
to items become warm, causing an oxidation reactionitems in thecan oil. prevent
Oxidation 2 Door improvement, images and illustrations
•• Do
Do not
NOT
CAUTION:
useinstall
the tumble
HEAVY!Thecatch
the dryer
appliance:
items iffire.
Ensure Piling,
industrial
become
youheat stacking
chemicals
warm,
have or storing
have
atcausing
least
been
oneanused oil-affected
for cleaning.
oxidation
helper reaction
tocan
move andin the oil. the
install heat
Oxidation
• Do not dry unwashed creates
from heat.
in theIftumble
escaping
items theand so cannot
create
dryer. aescape,
fire the
hazard. items become hot enough 3 Door locking mechanism in this manual may vary slightly from the
: Behind
dryer. a creates
lockable door, heat. If
slidingthe heat
door orcannot
a door escape,
with a the
hinge items
on thecan become
opposite hot enough
• Do not allow lint to to catch fire.
accumulate Piling,
around thestacking or storing
tumble dryer. Clean theoil-affected
filter after every itemsuse.can prevent heat
•AFTER side of
Adequate
SALES the dryer,tohas
from
ventilation
SUPPORT
catch
in tosuch
escaping fire.a Piling,
way so
and
be provided
stacking
that a full
to create
avoid the
or
aopening
fire storing
hazard.
backflow
oil-affected
ofofthe
gasestumble
into the
items
dryer
room
can isprevent heat
door 4 Front vent flange product purchased. All images in this
AUSrestricted.
from appliances from escaping and so
1300 886 649 burning other fuels, including open fires.
create a fire hazard. info@tempo.org
MODEL: MDR70-VR031 PRODUCT CODE: 61494 06/2018 7 5 Lint filter manual are for reference purposes only.
AFTER SALES SUPPORT
:
AFTER In1300
a 886
AUSSALES tight fitting cabinet.
SUPPORT
649 This symbol alerts you to take care as oil-affected items can
MODEL: MDR70-VR031 ignite
PRODUCT
info@tempo.org
CODE: 61494info@tempo.org
06/2018 7 7
6 Drying drum Parts are not necessarily pictured to scale.
AUS 1300 886 649spontaneously, especially when exposed to heat, such as in a clothes
CODE: dryer.
: In an areaThe where it will be exposed to temperatures below PRODUCT
MODEL: MDR70-VR031
items become warm, causing an oxidation reaction in the oil. Oxidation
freezing, or exposed
61494 06/2018
to water or
AFTER weather,
creates
SALES heat.
SUPPORTwhich
If the heatcould cause
cannot permanent
escape, the items candamagebecomeand invalidate the info@tempo.org
hot enough
10 warranty. to AUScatch fire. Piling, stacking or storing oil-affected items can prevent heat
1300 886 649
from escaping and so create a fire hazard. MODEL: MDR70-VR031 PRODUCT CODE: 61494 06/2018
AFTER SALES SUPPORT
: In an area where gas or flammable substances are used.
AFTER SALES SUPPORT
8 AUS 1300 886 649
info@tempo.org
MODEL: MDR70-VR031 PRODUCT CODE: 61494 06/2018
• The plug
AUS 1300 886 649 must be accessible after installation.
info@tempo.org
MODEL: MDR70-VR031 PRODUCT CODE: 61494 06/2018 7
8 MODEL: SVD7 | PRODUCT CODE: 701109 | 06/2020 MODEL: SVD7 | PRODUCT CODE: 701109 | 06/2020 9
• Ensure that all electrical connections are made by qualified personnel and all
instructions in this manual as well as local safety regulations are observed.
• Place the dryer in a dry, well ventilated area, away from heat and direct sunlight.Product Overview (Cont.) Installation
Control panel Unpacking
• This product has been packaged to protect it against transportation damage.
7 8 9 10 Remove all packaging materials from around the appliance and from the inside.
• Keep the original packaging carton and materials in a safe place. It will help prevent
any damage if the product needs to be transported in the future, and you can use
it to store the appliance when it is not in use. In the event that the carton is to be
disposed of, please recycle all packaging materials where possible.
• Plastic wrapping can be a suffocation hazard for babies and young children, so
ensure all packaging materials are out of their reach and disposed of safely.
• Inspect the cord and plug for damage or wear before each use. Do not use the
appliance if the appliance or its cord have been damaged or are not working
properly. In case of damage, contact our after sales support centre.
• Read all instructions in this manual and make sure you understand all warnings.
• Wipe the inside of the drum with a damp cloth to remove any dust from transport.
11 12 13 14 Important notes regarding installation
• This clothes dryer can be installed freestanding, on floor level, or wall-mounted, or
7 Child lock and Anti-Crease indicators wall-mounted upside down. If you are wall-mounting it, please follow the instructions
8 Dryness level indicators on the next pages. Wall-mounting it upside down will bring the control panel in easier
9 Program indicators reach—use the extra control panel label (supplied), so the printing is the right way up.
10 Power
On / Offbutton
button • Do NOT install the appliance:
11 ANTI-CREASE button : Behind a lockable door, sliding door or a door with a hinge on the opposite
12 DRYNESS level button side of the dryer, in such a way that a full opening of the tumble dryer door is
13 PROGRAM button restricted.
14 START/PAUSE button : In a tight fitting cabinet.
Wall-mounting kit (not shown here) : In an area where it will be exposed to temperatures below freezing, or exposed
2 Hanging brackets to water or weather, which could cause permanent damage and invalidate the
4 Expansion bolts warranty.
2 Spacers : In an area where gas or flammable substances are used.
Positioning paper (template) • The plug must be accessible after installation.
Extra printed control panel sticker (for upside down use)
• Ensure that all electrical connections are made by qualified personnel and all
Documentation (not shown) instructions in this manual as well as local safety regulations are observed.
Instruction manual • Place the dryer in a dry, well ventilated area, away from heat and direct sunlight.
Quick start guide • Exhaust air must not be discharged into a flue which is used for exhausting fumes
Warranty certificate from appliances burning gas or other fuels.
• CAUTION: HEAVY! Ensure you have at least one helper to move and install the
dryer.
AFTER SALES SUPPORT AFTER SALES SUPPORT
10 AUS 1300 886 649 info@tempo.org
9
MODEL: SVD7 | PRODUCT CODE: 701109 | 06/2020
MODEL: MDR70-VR031 PRODUCT CODE: 61494 06/2018 10 AUS 1300 886 649 MODEL: SVD7 | PRODUCT CODE: 701109 | 06/2020
info@tempo.org
MODEL: MDR70-VR031 PRODUCT CODE: 61494 06/2018
11Installation
Installation (Cont.)
(Cont.) Installation (Cont.)
Freestanding, floor level installation Step-by-step wall-mounting instructions
• If you want to use the dryer on the floor level, place the appliance in a ventilated area. Step 1: Parts required
• Make sure the floor surface is firm, flat, dry and stable, and there is an appropriate • Confirm that you have all the components from the wall-mounting kit (Fig. 2), plus
wall outlet nearby. Do not place the appliance on soft material such as foam, plastic one extra printed control panel sticker (for use if wall-mounting upside down).
or carpet, as this will block the air intake.
• At least 10cm of clear space is required between the dryer and any wall(s) (Fig. 1). Fig. 2
• For ventilation purposes, we recommend that there are no obstacles within 1.5m in
front of the dryer.
• The appliance must be installed level, otherwise its operation will be impaired. Use a
spirit level to ensure it is level. If your floor is slightly uneven, adjust the height using
the adjustable levelling feet at the bottom of the appliance.
• Do not place the back of the dryer near curtains or similar that can get caught up in
the exhaust air.
Fig. 1 2x Hanging brackets 2x Spacers 4x Expansion bolts 1x Positioning paper
• Confirm that you have the following extra tools required:
– Drill (with a ∅14mm drill bit)
– Phillips head screwdriver
– Another person to help you lift the dryer onto the wall.
Step 2: Preparation
• This dryer must only be installed on a solid wall.
• The distance in front of the wall must be more than 1.5m.
• If you intend to wall-mount the dryer upside down, take the additional printed
Wall-mounted installation control panel (supplied) and affix it over the existing panel so that the printing is the
IMPORTANT! right way up when installed upside down.
• Only mount this dryer on a structurally sound wall area that is strong enough
to hold the weight of the heater. If in doubt, consult a builder.
• The supplied installation hardware (and the following instructions) are for wall-
mounting the dryer onto a solid (masonry) wall. Please obtain expert advice (from a
builder or similarly qualified person) if you intend to mount the appliance onto any
other type of wall.
• Allow at least 5cm space between the top of the dryer and the ceiling for ease of
installation.
• Allow sufficient room to open the lid of a top load washer, if wall-mounting the
dryer above a washing machine.
NOTE: This dryer is NOT suitable for placement directly on top of a washing machine.
• Ensure the dryer is unplugged from the power supply before installation.
AFTER SALES SUPPORT AFTER SALES SUPPORT
12 AUS 1300 886 649
info@tempo.org
11
MODEL: SVD7 | PRODUCT CODE: 701109 | 06/2020
MODEL: MDR70-VR031 PRODUCT CODE: 61494 06/2018 12 AUS 1300 886 649 MODEL: SVD7 | PRODUCT CODE: 701109 | 06/2020
info@tempo.org
MODEL: MDR70-VR031 PRODUCT CODE: 61494 06/2018
13Installation (Cont.) Installation (Cont.)
Step 3: Wall preparation Step 4: Bracket installation
• Determine the dryer position on the wall and, using a spirit level, draw a level line • Attach the brackets to the wall using the four expansion bolts. The expansion bolts
the length of the positioning paper (Fig. 3-A). consist of a bolt, an expansion tube, a nut and washers.
NOTE: Ensure the screw holes are in an appropriate position: they must not overlap a. Insert a bolt and expansion tube into each of the four drilled holes and then
with any power outlets, cabling or taps. thread a nut onto the end of the bolts. To prevent the thread being damaged, do
The bottom edge of the positioning paper must be at least 45cm+ above floor level. not expose the end-thread of the bolt. Then hammer the four bolts into the holes
(Fig. 6).
• Remove the adhesive paper from the back of the position paper and paste the
paper horizontally to the wall (Fig. 3-B). Fig. 6
Fig. 3-A Fig. 3-B
b. After you have hammered the bolts into the wall, remove the nut and washers.
Attach the hanging brackets to the bolts, then put the washers back on: first the
flat washer, then the spring washer, then the nut.
• Using a drill with a ∅14mm drill bit, drill four holes for the expansion bolts c. Tighten the brackets with a socket or a wrench (Fig. 7).
according to the drawing on the positioning paper (Fig. 4). The hole depth must be
60mm.
Fig. 7
Fig. 4
NOTE: If you are installing the appliance on a tiled wall, use a special ∅14mm drill
bit for use on tiles (Fig. 5).
Fig. 5
AFTER SALES SUPPORT AFTER SALES SUPPORT
14AUS 1300 886 649 info@tempo.org
13
MODEL: SVD7 | PRODUCT CODE: 701109 | 06/2020
MODEL: MDR70-VR031 PRODUCT CODE: 61494 06/2018 14 AUS 1300 886 649
MODEL: SVD7 | PRODUCT CODE: 701109 | 06/2020
info@tempo.org
MODEL: MDR70-VR031 PRODUCT CODE: 61494 06/2018
15Installation (Cont.) Getting Started
Step 5: Attaching the spacers Quick start guide
• Place the unpacked dryer on the floor and unscrew the two screws at the back of The pictorial quick start guide below only contains basic information. For detailed
the dryer using a Phillips head screwdriver (Fig. 8). operating instructions, please read the corresponding content on the following pages
NOTE: Remove the top screws if installing the dryer upside down, or the bottom of the manual.
screws if wall-mounting it as is (Fig. 8).
CAUTION!
• Insert the screws through the holes in the spacers and then fasten them into the
Please ensure the dryer is properly and securely installed before using it.
original screw holes.
Step 6: Hanging the dryer on the wall Preparation
• With assistance, mount the clothes dryer onto the wall brackets. To do so, lift the
dryer and align the slots at the back of the machine with the wall brackets. Then 1 2 3
carefully hang the dryer onto the brackets (Fig. 9).
• Make sure the hooks of the brackets are firmly inserted into the slots (Fig. 10).
Fig. 8 Fig. 9
Insert the hooks into
these slots if wall-
Attach the spacers here mounting the dryer as is.
if wall-mounting the
dryer upside down. Plug in Load Close door
Drying
Attach the spacers here
if wall-mounting the
dryer as is.
Insert the hooks into Power
On / Off Select function Start/pause
these slots if wall- or default
mounting the dryer
upside down.
After drying
Fig. 10
1 2 3
Step 7: Electrical connection
• Once the clothes dryer is properly installed, plug the electrical cord into an
appropriately earthed three pin wall socket, switch on power at the socket and try
Unload Unplug and switch off power Clean filter
the machine (see page 19 for usage instructions).
AFTER SALES SUPPORT AFTER SALES SUPPORT
16AUS 1300 886 649 info@tempo.org
15
MODEL: SVD7 | PRODUCT CODE: 701109 | 06/2020
MODEL: MDR70-VR031 PRODUCT CODE: 61494 06/2018 16 AUS 1300 886 649
MODEL: SVD7 | PRODUCT CODE: 701109 | 06/2020
info@tempo.org
MODEL: MDR70-VR031 PRODUCT CODE: 61494 06/2018
17Instructions Instructions
Instructions (Cont.)
(Cont.)
Control panel
Before each drying
The control panel at the front of the clothes dryer has easy to use press buttons for
• Make sure you have read all safety precautions in this manual and are aware of the machine operation and indicator lights for the selected programs, dryness level, child
items (listed on page 7) that cause a hazard if placed in the clothes dryer. lock and anti-crease function.
• The clothes dryer is intended only for drying textile material that has been washed in
water and well spin-dried. Thoroughly spin the laundry in your washing machine on a
high spin speed, which can reduce the drying time and save energy consumption.
• Make sure the lint filter is clean and properly in place. 1
• Check and ensure that none of the items to be dried have the following symbols
anywhere on them, which indicate that items are UNSUITABLE for clothes drying:
• As the dryer heat may permanently set stains, check and ensure your washing is
clean and free of stains. 6 5 4 3 2
• For uniform drying results, sort the laundry according to fabric type and drying
program. Separate dark and light coloured items as you would do when washing.
1 On / Off button
POWER
• Ensure that the items to be dried do not have combustible materials or foreign
Press to turn on.
objects (such as lighters, hair pins, coins) inside pockets.
• Turn items with zippers inside out, close zippers, hooks and eyelets, fasten buckles
2 START/PAUSE button
Press to start or pause the drying cycle.
and tie fabric belts. This will also help reduce impact noise when the items hit
against the turning drum. 3 PROGRAM button
• Place small, delicate items in a mesh bag, but do not add too many to one bag. (It Press, repeatedly, to select your desired drying program from the following
is not recommended to dry underwire bras in a clothes dryer.) options: Mix, Cotton, Synthetic, 1 Hour. The selected option will be illuminated
above.
• To avoid items getting tangled up in the dryer, which results in uneven drying, we
recommend placing items into the dryer one at a time. 4 CHILD LOCK
The child lock function can be set after pressing the START/PAUSE button, when
• When closing the dryer door prior to starting the unit, ensure that items are not
the appliance is running.
jammed in the door.
* Press and hold the PROGRAM and DRYNESS LEVEL buttons simultaneously for
• CAUTION: Do not overload the dryer: the maximum amount of dry textile material more than 3 seconds to lock all buttons (except the On / Off button).
that can be dried in one load is 7kg (see the table below for some reference weights). * To cancel the child lock, press and hold the PROGRAM and DRYNESS LEVEL
buttons simultaneously for more than 3 seconds.
5 DRYNESS LEVEL button
Press, repeatedly, to select your desired dryness level from the following options:
Extra Dry, Normal, Light Dry. The selected option will be illuminated above.
6 ANTI-CREASE button
Press to activate the anti-crease function. After the drying program has finished,
the dryer will continue rotating the drum (without heat output) for a maximum time
of 2 hours, or until the door is opened, to help minimise creasing of your load.
AFTER SALES SUPPORT
AFTER SALES SUPPORT
18 AUS 1300 886 649 info@tempo.org
17
MODEL: SVD7 | PRODUCT CODE: 701109 | 06/2020
18 AUS 1300 886 649 MODEL:CODE:
MODEL: SVD7 | PRODUCT MDR70-VR031
701109PRODUCT
info@tempo.org
CODE: 61494 06/2018
| 06/2020 19
MODEL: MDR70-VR031 PRODUCT CODE: 61494 06/2018Instructions (Cont.) Instructions
Instructions (Cont.)
(Cont.)
Drying programs Using the dryer
The drying programs automatically sense the moisture level of your load and adjust • Connect: Make sure the dryer is properly installed, plugged in and power is supplied
the drying time according to the dryness level selected. to the appliance. Then press the On / Off button on the control panel.
Thoroughly spin the laundry in your washing machine on a high spin speed before • Load: Open the door and load the dryer following the guidelines on page 17.
– The total weight of the load to be dried should not exceed the appliance’s rated
drying in the clothes dryer.
drying capacity of 7kg.
Capacity Dryness level – Textiles made of wool or silk are NOT suitable for drying in the clothes dryer.
Program Textiles to be dried * – Items must be properly spin dried on high speed before drying in a clothes dryer.
(kg) options
Then close the door and ensure that no items are caught in the door.
Cotton # 7 Extra Dry
• Program selection: Select your desired program, dryness level and anti-crease
Cotton Cotton 7 Normal function, if desired, then press the START/PAUSE button to start the program. Do
Cotton 7 Light Dry not dry items for longer than required. Over-dried clothes can easily crease.
7 Extra Dry • Door opening: While you can open the door during operation to add an item you
Mix Blended fabrics forgot, we recommend you do NOT open the door until the program has finished to
7 Normal avoid getting scalded, as parts of the machine will be hot during operation. If the
3.5 Extra Dry door is opened during operation, the dryer will automatically stop. To restart it, you
Synthetic Synthetics must close the door securely and press START/PAUSE.
3.5 Normal
• Cool down: To help prevent creasing and cool the items just dried, the motor will
1 Hour Cotton 1 (or less) n/a generate cool air for the last 3 minutes of the drying programs (10 minutes in the
1 Hour program).
Notes:
• At the end of the program: A buzzer will alert you that the program has finished.
* Always check your clothes labels for recommended drying times and temperatures.
Off button and unplug the dryer from the power supply.
Press the On / Off
# The Cotton program and Extra Dry were used for testing the appliance to the
standard. • Unload: One or two minutes after the program has finished and the dryer has
n/a The dryness level cannot be set in the 1 Hour program. stopped operation, take out the dry clothes.
• After use: Clean the filter after every use. Cleaning instructions follow on page 23.
Cotton: Use this program for your cotton towels, sheets, pillowcases, quilt covers,
etc. Choose Extra Dry for full drying, or Normal or Light Dry if you prefer to retain
some residual moisture to help with ironing. CAUTION!
Mix: This program is suitable for a mixed load containing items made from cotton and • CAUTION: HOT SURFACE! To avoid scalding and creating a fire risk, do
other materials, for example, polyester cotton shirts or easy iron clothing. “Extra Dry” not stop the clothes dryer before the end of the drying cycle, as parts of the
and “Normal” dryness level options are available in these programs. appliance do get hot during use.
• If you must remove items during the drying cycle, open the door, remove them
Synthetic: Use this program for synthetic clothing. “Extra Dry” and “Normal” dryness
quickly, and spread them out so that the heat is dissipated.
level options are available in these programs.
• Do not use any combustible substances (for example, spray cans) close to the
1 Hour: This one-hour program is suitable for a smaller load of cotton items. A
dryer while it is in operation. If gas has escaped from the can, do not touch the
dryness level cannot be selected for this program.
plug or start/pause the appliance.
NOTE: If your load is not dry enough for your purposes at the end of the program,
please select a higher dryness level.
AFTER SALES SUPPORT
AFTER SALES SUPPORT
20AUS 1300 886 649 info@tempo.org
19
MODEL: SVD7 | PRODUCT CODE: 701109 | 06/2020
MODEL: MDR70-VR031 PRODUCT CODE: 61494 06/2018
20 AUS 1300 886 649 MODEL: SVD7 | PRODUCT CODE: 701109 | 06/2020
info@tempo.org
MODEL: MDR70-VR031 PRODUCT CODE: 61494 06/2018
21FAQs and Troubleshooting Guide FAQs and Troubleshooting Guide (Cont.)
Troubleshooting guide Safety reset
If your clothes dryer has a fault, is not working properly, or you think it should work The dryer has a safety cut-out switch, which shuts down the power supply to the unit
better, use the list below to identify and solve any problems. If you cannot solve the if the temperature inside the unit is too high. Should this happen, proceed as follows:
problem, please contact our after sales support centre. Do not attempt to dismantle or • Unplug the dryer and let it cool down for 10 minutes.
repair the dryer yourself.
• Reset the safety cut-out switch. It is located at the back panel of the unit (Fig. 11-A).
Problem Possible cause Solution • Check and ensure that the filter is clean and that nothing is obstructing the air
intake and outlet grilles (see “Prevent overheating”, below).
The dryer does Is there a power failure? Check and try again when the
not start. power is back. • Plug in the dryer and restart it.
Is the power plug inserted firmly? Insert the power plug firmly. If the dryer still does not work properly, or the problem occurs repeatedly, please
contact our after sales support centre, or a qualified service technician.
Is the door closed? Close the door securely.
Is the power switched on at the Switch on power at the wall Prevent overheating
wall socket? socket. • The most common reason for the dryer to overheat is a blocked lint filter (Fig. 12-A).
Is your drying load too large? The dryer has a load capacity of Check the filter and ensure nothing is blocking it – for example, a lightweight item
7kg (dry clothes) and the items such as a handkerchief might have been sucked over the filter. Clean the filter after
must be well spin dried. each drying load. Cleaning instructions follow on the next page.
The dryer is Is the lint filter dirty? Check and clean the filter. • Also ensure that the front vent flange (Fig. 12-B) and the ventilation grille at the
hot or “smells Is the front vent flange dirty? Check and clean the front vent. back of the unit (Fig. 11-B) are clean and free of obstructions. Use a cloth, soft
hot”. brush or the brush attachment of a vacuum cleaner to clean the grilles.
Is the ventilation grille dirty? Check and clean the ventilation
grille at the back of the dryer. • Other reasons for the dryer to overheat include poor ventilation in the laundry –
make sure you have a window or door open when you are using the clothes dryer.
Clothes shrink. Are the clothes are unsuitable for Check the clothes label and
drying in the clothes dryer? hang dry if recommended.
Have the clothes been dried at too If the clothes are suitable for Fig. 11 Fig. 12
A
high heat? tumble drying, choose a different
program and Light Dry.
The washing is Is the filter clogged? Check and clean the filter.
not thoroughly Is there too much washing in the Reduce the amount of washing
dried. dryer? in the dryer.
Have items been added while the Dry damp items again for a little
dryer is in operation? longer.
A
Has the washing been twisted Untwist the items and dry them
while drying? for a little longer.
Is the dryer operating in a small The dryer should be installed in a B
and poorly ventilated area? well-ventilated area. B
There are Heavy, wet clothes, and the steam These noises are normal. Make
some strange generated when drying, can cause sure your drying load is properly
noises. bumping noises when the drum is spin dried to limit the noises.
turning.
AFTER SALES SUPPORT AFTER SALES SUPPORT
22 AUS 1300 886 649 info@tempo.org
21
MODEL: SVD7 | PRODUCT CODE: 701109 | 06/2020
MODEL: MDR70-VR031 PRODUCT CODE: 61494 06/2018 22 AUS 1300 886 649
MODEL: SVD7 | PRODUCT CODE: 701109 | 06/2020
info@tempo.org
MODEL: MDR70-VR031 PRODUCT CODE: 61494 06/2018
23Other
Other Useful
Other Useful Information
Useful Information
Information Other Useful Information (Cont.)
Cleaning
Cleaning and
and maintenance
Cleaning and maintenance
maintenance
Keeping your clothes dryer in good, clean condition will prolong its service life.
Storage
Keeping your clothes dryer in good, clean condition will prolong its service life.
Keeping your clothes dryer in good, clean condition will prolong its service life. If you are not going to use the appliance for an extended period of time, unplug it and
store it upright in the original packaging to protect it from dust. Store the unit in a dry
WARNING!
WARNING! place, out of children’s reach.
•• Before
WARNING!
Before cleaning
cleaning or
or maintenance,
maintenance, unplug
unplug the
the dryer
dryer from
from the
the wall
wall socket.
socket.
•
••
Before cleaning or maintenance, unplug the dryer from the wall socket.
The
The lint filter must be in place when drying. It must be cleaned before
lint filter must be in place when drying. It must be cleaned before or
or after
after
Service, repair and spare parts
• The lint
each filter must be in place when drying. It must be cleaned before or after
each use.
use. If the appliance is damaged, do not attempt to repair it yourself. Contact our after
each use. sales support centre to arrange for examination or repair of the product.
Cleaning
Cleaning the
the lint
lint filter
filter
The following spare parts for the clothes dryer are available for purchase from our after
Cleaning the lint filter
• Before cleaning the dryer or any of its parts, 1300 11
sales support centre. To purchase a spare part, call the centre on 1300 88643649
57 or
• Before cleaning the dryer or any of its parts, Fig. 13
Fig. 13 email us at info@tempo.org
support@residentiagroup.com.au
• Before
make cleaning the dryerdownor any of is its parts,
make sure
sure itit has
has cooled
cooled down and and is safe
safe to
to Fig. 13
make
touch. sure it has cooled down and is safe to • Accessory assembly
touch.
touch. • Adjustable foot assembly
•
• To
To remove
remove thethe filter,
filter, open
open thethe door
door to
to the
the
• clothes
To remove thegripfilter,the
open the door to the • Belt
clothes dryer, grip the filter and pull it
dryer, filter and pull it straight
straight • Cabinet motherboard
clothes
up dryer, the
grip the filter and pull it straight
up and
and out
out of
of the drumdrum (Fig.
(Fig. 13).
13). • Capacitor
up and out of the drum (Fig. 13).
•
• To
To clean
clean the
the filter,
filter, wipe
wipe it it with
with aa soft,
soft, damp
damp • Control panel and stickers
• cloth,
To clean the filter, wipe under
it withrunning
a soft, damp
cloth, or wash it gently under running water.
or wash it gently water. • Door (hinge, pin)
cloth, or wash it gently under running water.
• Let the filter dry completely before reinstalling
• Let the filter dry completely before reinstalling • Door (inner, outer, window)
• it
Let the filterits
dry completely before gently
reinstalling
it back
back into
into its space.
space. Press
Press downdown gently to to • Door switch support
it back it
secure into itsplace.
into space. Press down gently to • Electric filter assembly
secure it into place.
secure it into place. • Front vent flange
Cleaning
Cleaning the
the cabinet
cabinet and
and drum
drum • Gasket
Cleaning the cabinet and drum
• Use a soft, dry or damp cloth to wipe the • Heater
• Use a soft, dry or damp cloth to wipe the
• Use
dryer a soft, dryand/or
or damp cloth to wipe the • Impeller assembly
dryer cabinet
cabinet and/or thethe drum,
drum, if if necessary.
necessary.
dryer cabinet and/or the drum, if necessary. • Internal wire assembly
•
• If
If using
using a
a damp
damp cloth,
cloth, make
make sure
sure it it is
is not
not too
too wet.
wet. Leave
Leave the
the appliance
appliance door
door open
open
• If using
after a damp
cleaning tocloth,
ensure make
the sure itcan
drum is not
air too completely.
dry wet. Leave the appliance door open • Lint filter assembly
after cleaning to ensure the drum can air dry completely. • Motor (single phase, asynchronous)
after cleaning to ensure the drum can air dry completely.
•
• Do
Do not
not use
use any
any type
type ofof spray
spray cleaner
cleaner when when cleaning
cleaning thethe interior.
interior. If
If the
the dryer
dryer drum
drum • Motor support
• becomes
Do not usestained,
any type of spray cleaner when cleaning the interior. the
If the dryer drum
becomes stained, clean the drum with a damp cloth. If cleaning the drum has
clean the drum with a damp cloth. If cleaning drum has left
left • PCB
becomes
any stained, clean themake drum withtoa removedamp cloth. If cleaning thethe drumload.
has left
any residues
residues onon the
the drum,
drum, make sure sure to remove it it before
before drying
drying the nextnext load. • Power cord
any residues on the drum, make sure to remove it before drying the next load. • Reset button
•
• Use
Use a a dry
dry cloth
cloth or
or soft
soft brush,
brush, or or the
the soft
soft brush
brush attachment
attachment of of aa vacuum
vacuum cleaner,
cleaner, toto
• clean
Use a the
dry cloth or soft brush, or the soft brush attachment of is
a vacuum cleaner, to • Sealing gasket
clean the areas
areas around
around the
the air
air intake
intake andand exhaust
exhaust opening.
opening. ItIt is important
important that
that they
they
clean
are theclean
kept areasand
around
free the
fromairlint,
intake
dust and
and exhaust
dirt. Any opening. It is important
obstructions around that
the they
exhaust • Temperature sensor
are kept clean and free from lint, dust and dirt. Any obstructions around the exhaust
are kept might
opening clean and freethe from lint, dust and dirt.to Any obstructions around the exhaust • Thermostat
opening might reduce
reduce the airflow,
airflow, and/or
and/or lead
lead to overheating
overheating of of the
the appliance.
appliance.
opening might reduce the airflow, and/or lead to overheating of the appliance.
WARNING!
WARNING!
•• Never
WARNING!
Never wash the exterior or interior of
wash the exterior or interior of the
the appliance
appliance directly
directly with
with water.
water.
• Never wash the exterior or interior of the appliance directly with water.
•• Do
Do not
not use
use solvents,
solvents, thinner,
thinner, alcohol
alcohol based
based or
or harsh
harsh or
or abrasive
abrasive cleaners
cleaners on
on any
any
• Dothe
of notdryer
use solvents,
surfaces.thinner, alcohol based or harsh or abrasive cleaners on any
of the dryer surfaces.
of the dryer surfaces.
AFTER SALES SUPPORT
AFTER SALES SUPPORT
AFTER
AUSSALES SUPPORT
info@tempo.org
info@tempo.org 23
23 AFTER SALES SUPPORT
24AUS 1300 886 649
1300 886 649
AUS 1300 886 649
MODEL: MDR70-VR031 PRODUCT CODE:info@tempo.org
MODEL: MDR70-VR031 PRODUCT
MODEL: SVD7 CODE:
61494 06/2018
61494 06/2018
| PRODUCT 23
CODE: 701109 | 06/2020
MODEL: MDR70-VR031 PRODUCT CODE: 61494 06/2018 24 AUS 1300 886 649
MODEL: SVD7 | PRODUCT CODE: 701109 | 06/2020
info@tempo.org
MODEL: MDR70-VR031 PRODUCT CODE: 61494 06/2018
25You can also read


