EVERLOC+ COMPRESSION-SLEEVE SYSTEM SISTEMA DE CASQUILLOS DE COMPRESIÓN EVERLOC+ SYSTÈME DE MANCHON À COMPRESSION EVERLOC+MC - Product Instructions ...
←
→
Page content transcription
If your browser does not render page correctly, please read the page content below

EVERLOC+™ COMPRESSION-SLEEVE SYSTEM
SISTEMA DE CASQUILLOS DE COMPRESIÓN EVERLOC+™
SYSTÈME DE MANCHON À COMPRESSION EVERLOC+MC
Product Instructions / Instrucciones del producto / Instructions relatives au produit
CONTENTS
    1. Scope		                                                                       3

    2. System Overview                                                               4

    3. System Components                                                             5

    4. Assembly                                                                      7

       4.1 EVERLOC+ Tool Safety Warnings                                             8

       4.2 Fitting Assembly 3/8 to 1 in.                                             9

       4.3 Fitting Assembly 1 1/4 to 2 in.                                         12

    5. Assembly Considerations                                                     17

    6. Installation Considerations                                                 19

    7. System Testing and Maintenance                                              22

    For updates to this publication and the most current technical instructions, safety information and manufacturer’s recommendations, visit www.na.rehau.com/resourcecenter

2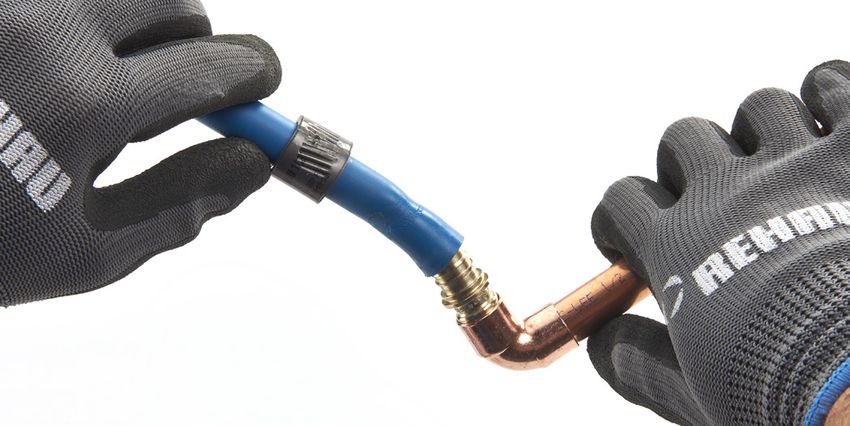
1. SCOPE
Thank you for your purchase. These instructions contain information           Contact the EVERLOC+ distributor in your area if you do not under-
about the assembly and use of the EVERLOC+™ compression-sleeve                stand the information in this manual or if you have questions about
system with RAUPEX® UV shield pipe (PEXa Pipe) intended for use in            the REHAU Technical Guidelines.
hot- and cold-water potable systems and RAUPEX O2 Barrier pipe for
hydronic heating and cooling systems.                                         This manual contains safety-related information that requires your
                                                                              special attention. It is indicated with the safety alert symbol and the
For professional use only. Persons using this guide must be experi-           signal words described below: :
enced and appropriately licensed professional contractors who
understand the principles and practices associated with the proper
installation of hot- and cold-water potable and hydronic systems.                                     Indicates a hazardous situation which, if not
                                                                                    DANGER            avoided, will result in death or serious injury.
The information presented in this product instruction manual is
intended to demonstrate the proper assembly method and installation                                   Indicates a hazardous situation which, if not
recommendations for the EVERLOC+ compression-sleeve system.                         WARNING           avoided, could result in death or serious
Allow only persons who fully understand this manual to participate in                                 injury.
the assembly and use of the EVERLOC+ compression-sleeve system
with RAUPEX PEXa pipe.                                                                                Indicates a hazardous situation which, if not
                                                                                    CAUTION           avoided, could result in minor or moderate
It is the responsibility of the licensed contractor to check the prevailing                           injury.
local codes and to verify that the technical information presented in
this guide is appropriate for a particular installation.                                              Indicates a risk of property damage,
                                                                               NOTICE                 including damage to the power tool or its
Nothing in this manual supersedes national or local code requirements                                 individual components.
or the recommendations of other manufacturers regarding their
components. Observe all applicable national, state and local laws,
regulations, standards, codes and ordinances. If you believe REHAU            Only trained personnel should be engaged in the installation process.
product information conflicts with applicable code requirements,              Follow the instructions in this manual and other REHAU Technical
industry standards, or the recommendations of other manufacturers             Guidelines and use common sense to reduce the risk of injury or
regarding their components, contact the REHAU distributor in your             property damage.
area and consult with the building authority having jurisdiction before
installing the EVERLOC+ compression-sleeve system.
                                                                                    WARNING
                                                                                               Read the instruction manual for the EVERLOC+
Before starting the installation process, read the REHAU PEXa Limited
                                                                                               compression-sleeve tools before use and follow all
Warranty, available at www.na.rehau.com/warranties. It can also be
                                                                                               safety precautions - improper use can cause serious
obtained from your authorized REHAU distributor or by writing to                               personal injury
REHAU Construction LLC, 1501 Edwards Ferry Road NE, Leesburg VA
20176 US.

Proper installation is the responsibility of the installing contractor.
                                                                                    WARNING
                                                                                               EVERLOC+ compression-sleeve tools use a strong
Review the REHAU Technical Guidelines prior to installation of the
                                                                                               hydraulic force to expand PEXa pipe and compress
REHAU crosslinked polyethylene (PEXa) piping system. REHAU
                                                                                               components of the REHAU EVERLOC+ compressi-
Technical Guidelines are defined in the REHAU PEXa Limited Warranty                            on-sleeve system.
as: The most current and applicable versions of all the technical
literature available on the REHAU North America website at www.                                To reduce the risk of crush and laceration injury,
na.rehau.com/resourcecenter, including, but not limited to, technical                          keep fingers, hands and all parts of your body away
manuals, instruction guides, technical bulletins, submittals and                               from the expander head, hydraulic slide and
REHAU Academy training presentations. Check the REHAU Resource                                 compression jaws during operation. Remove the
Center (www.na.rehau.com/resourcecenter) for the latest updates.                               battery before attempting to change or adjust the
                                                                                               expander head or compression jaws.

                                                                                                                                                         3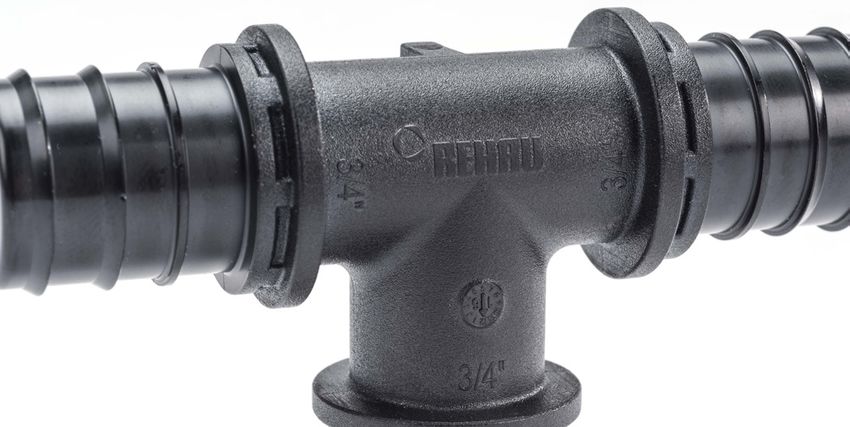
2. SYSTEM OVERVIEW
    Applications
    The EVERLOC+ compression-sleeve system is designed for use with
    RAUPEX PEXa pipe, specifically RAUPEX UV shield pipe for potable
    plumbing system applications and RAUPEX O2 barrier pipe for
    hydronic radiant heating and cooling system applications.

    The REHAU PEXa plumbing system is intended for use in hot- and
    cold-water potable systems as defined by the following national
    codes:
    - ICC International Plumbing Code (IPC)
    - ICC International Residential Code (IRC)
    - IAPMO Uniform Plumbing Code (UPC)                                RAUPEX O2 barrier crosslinked polyethylene (PEXa) pipe
    - National Plumbing Code of Canada (NPCC)

    The REHAU PEXa radiant system is intended for use in hydronic
    heating and cooling systems as defined by the following national
    codes:
    - IMC International Mechanical Code (IMC)
    - International Building Code (IBC)
    - International Residential Code (IRC)
    - Uniform Mechanical Code (UMC)
    - National Building Code of Canada (NBCC)
    - CSA B214 Installation Code for Hydronic Heating Systems

                                                                       EVERLOC+ compression-sleeve fittings and sleeves

    RAUPEX UV shield crosslinked polyethylene (PEXa) pipe

                                                                       EVERLOC+ compression-sleeve tools

4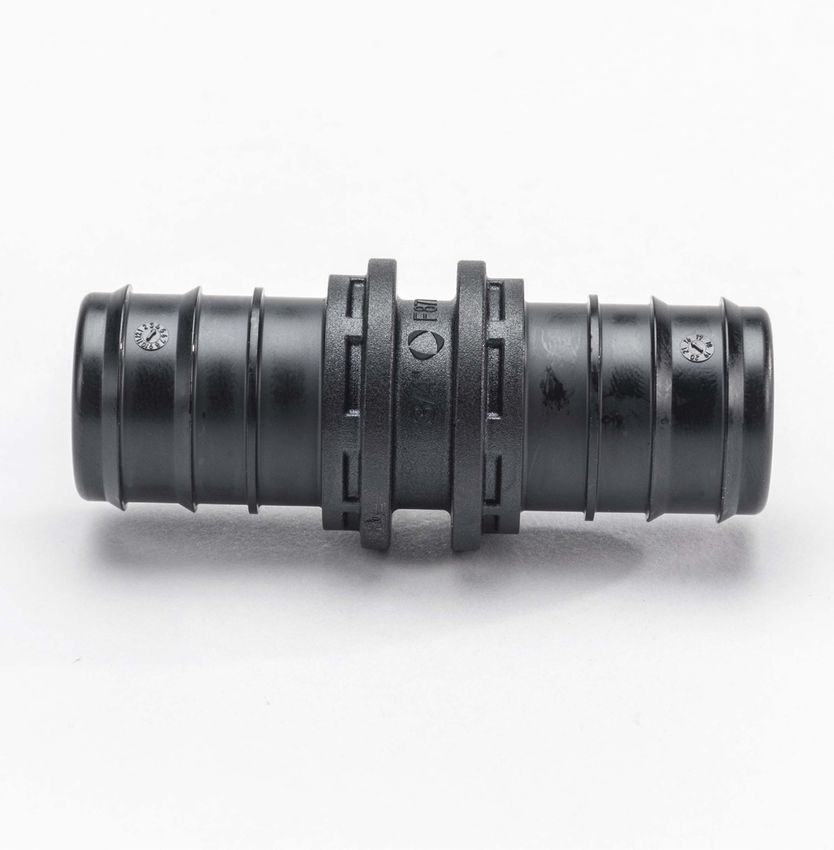
3. SYSTEM COMPONENTS
The EVERLOC+ compression-sleeve system is a cold-expansion PEXa            Fitting and Sleeve Markings
fitting system that is available in polymer and lead-free (LF) brass and   All polymer fittings include the following marks for identification
is assembled with a specially designed PEXa compression sleeve. The
fitting is designed specifically for use with RAUPEX pipe and should
only be assembled with the EVERLOC+ compression-sleeve tools.
                                                                           			                               OR
For a detailed description of the REHAU system components, refer to
the REHAU Sustainable Building Technology Product Catalog
(855.312).

Product Range
EVERLOC+ fittings are available in 3/8, 1/2, 5/8, 3/4, 1, 1 1/4, 1 1/2
and 2 in. sizes and are intended for use with RAUPEX SDR9 copper
tube size (CTS) pipe manufactured in accordance with ASTM F876.

Fitting Features
EVERLOC+ polymer and lead-free (LF) brass fittings have the
following features:
1. Four sealing edges                                                      Fitting size (3/4” for example)
2. Pipe stop
3. Fitting collar
4. Tool jaw body

             1
                                        3

                                                                           Batch code for production date

                                                                           All LF brass fittings are marked "REHAU"

                                                                           All sleeves include the following
                                                                           marks for identification

                                   4

                            2                                              - Sleeve size (1/2” for example)
                                                                           - Batch code for production date

                                                                                                                                                 5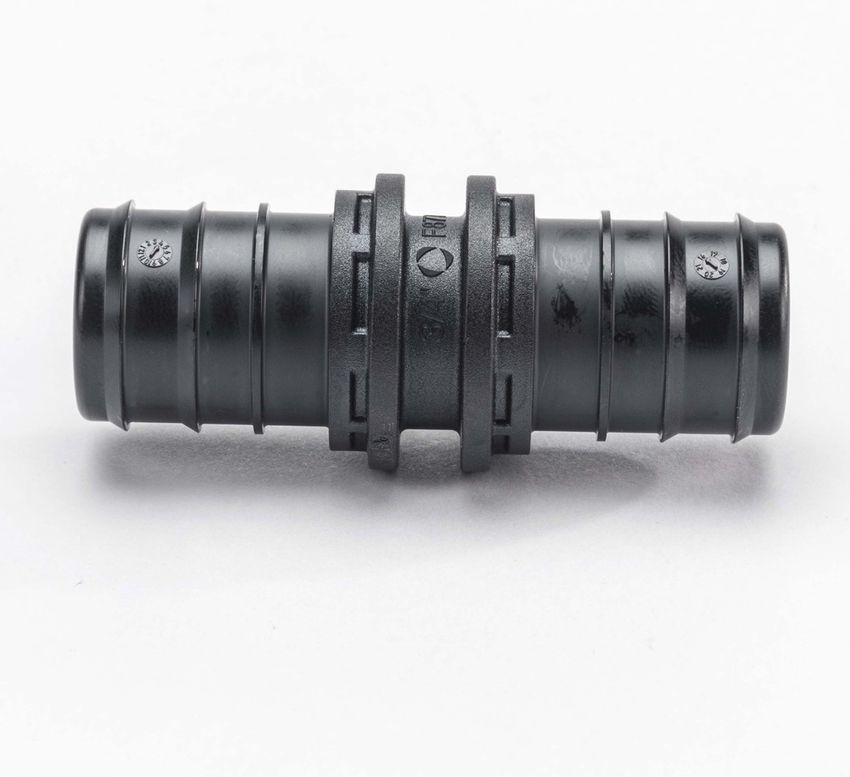
Polymer Fittings
    EVERLOC+ polymer fittings are available in couplings, tees, elbows,
    multi-port tees and plugs. All polymer fittings are produced from a
    polyphenylsulfone (PPSU) material that meets the requirements of
    NSF61 for health effects of drinking water system components and
    complies with the lead-free requirements of the U.S. Safe Drinking
    Water Act. See also REHAU Technical Bulletin TB265 EVERLOC+
    Polymer Fitting Material - PPSU.

                                                                             Packaging, Handling, Storage
                                                                             EVERLOC+ fittings and sleeves are shipped in cardboard boxes to
                                                                             protect them from sunlight, rain, dirt and other hazards. Keep the
                                                                             products in the original packaging until they are required for installa-
                                                                             tion. Return unused products to the packaging for storage.

                                                                             Fittings and sleeves must be handled with care. At a minimum, avoid
                                                                             the following:
                                                                             - Storing loose fittings in tool boxes
                                                                             - Contact with oil or petroleum-based products, adhesives, paints,
                                                                               solvents, oxidizing agents or other aggressive chemicals or products
    Lead Free (LF) Brass Fittings                                            - Exposure of polymer fittings and PEXa sleeves to soldering or any
    EVERLOC+ LF brass fittings are available as couplings, tees, elbows,       open flame
    plugs and transition fittings to NPT thread and copper solder            - Excessive or permanent exposure to sunlight of polymer fittings and
    connections. All metal fittings are produced from ECO BRASS®               PEXa sleeves
    (UNS69300 or CW724R) that meets the requirements of NSF61 for
    health effects of drinking water system components and complies
    with the lead-free requirements of the U.S. Safe Drinking Water Act.     NOTICE
    See also REHAU Technical Bulletin TB264 EVERLOC+ Lead-free Brass         Exposing the EVERLOC+ compression-sleeve system to oil or
    Fitting Material.                                                        petroleum-based products, adhesives, paints, solvents, oxidizing
                                                                             agents or other aggressive chemicals or products can damage the
                                                                             compression-sleeve system and result in leaking and property
                                                                             damage. See Installation Considerations for further information.

                                                                             Certifications
                                                                             The EVERLOC+ compression-sleeve system is certified to the
                                                                             following standards:
                                                                             - ASTM F877 Standard Specification for Crosslinked Polyethylene
                                                                               (PEX) Hot- and Cold-Water Distribution Systems
    Metal Manifolds                                                          - NSF/ANSI 14 Plastic Piping System Components and Related
    Manifolds are 1 in. Type L copper with EVERLOC+ LF brass fittings          Materials
    brazed into the header.                                                  - NSF/ANSI 61 Drinking Water System Components – Health Effects
                                                                             - NSF/ANSI 372 Drinking Water System Components – Lead Content
    PEXa Compression Sleeves                                                 - CSA B137.5 Crosslinked polyethylene (PEX) Tubing Systems for
    EVERLOC+ compression sleeves are produced using a specially                Pressure Applications
    formulated PEXa material and are designed specifically for use with
    EVERLOC+ fittings and RAUPEX pipe. EVERLOC+ compression
    sleeves have the following features:
    - Co-extruded platinum-colored PE coating
    - Squarely cut ends that can be slid over the pipe in either direction
    - Grooved and roughened inside surface for locking the sleeve into
      place once slid over the pipe and fitting

6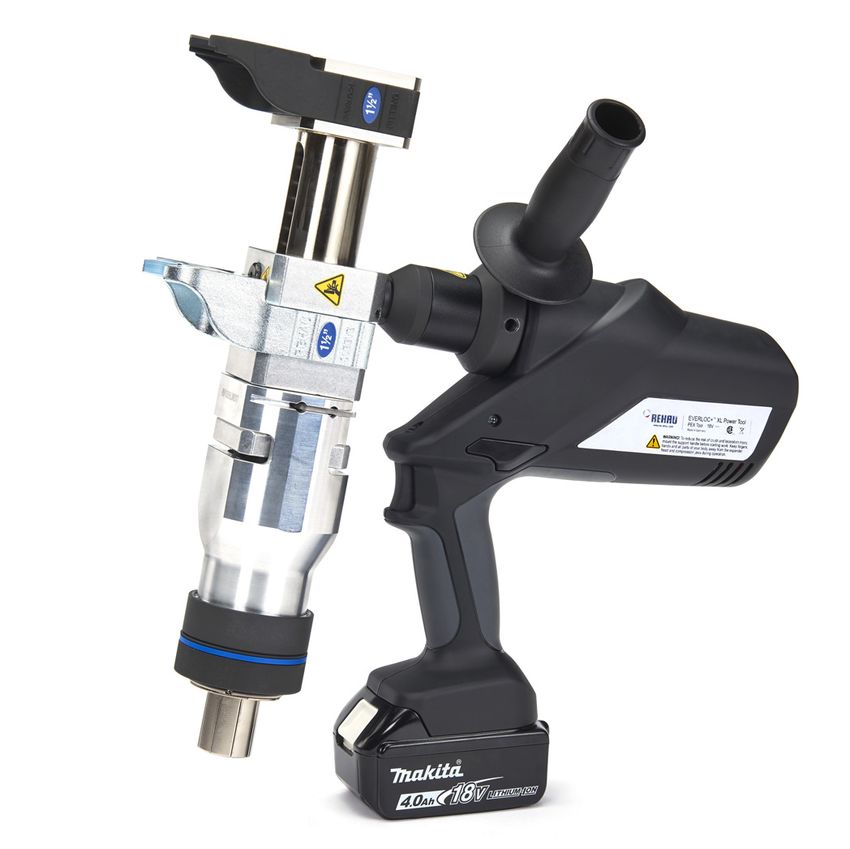
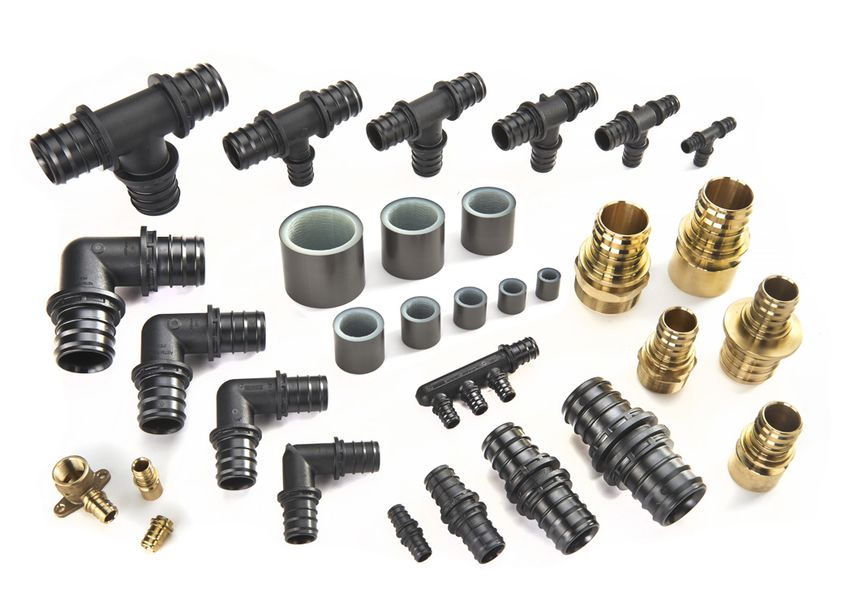
4. ASSEMBLY
Fitting Assembly                                                           Required assembly tools include:
Assembling and installation of the EVERLOC+ compression-sleeve             - REHAU RAUPEX pipe cutter
system requires the use of the EVERLOC+ compression-sleeve tools.          - EVERLOC+ compression-sleeve tools
These tools are battery-operated, hand-held tools. Only make               - EVERLOC+ expander heads and compression jaws
EVERLOC+ compression-sleeve joints with these tools.
                                                                           EVERLOC+ Compression-sleeve Tool Assembly
Refer to the EVERLOC+ Power Tool Product Instruction Manual                The EVERLOC+ compression jaws and expander heads are color-
(855.725), EVERLOC+ XL Power Tool Product Instruction Manual               coded per each size to provide a visual confirmation that the correct
(855.728) and the EVERLOC+ XL Expander Tool Product Instruction            jaws and expander head are assembled onto the tool. Prior to making
Manual (855.729) for a complete understanding of operation, care           a compression joint, ensure the correct size of jaws and heads are
and use of the EVERLOC+ compression-sleeve tools.                          being used.

     WARNING
             Read the instruction manual for the EVERLOC+                  Diameter  Color		          Tool

             compression sleeve tools before use and follow all safety
                                                                           3/8 in.   Yellow       EVERLOC+ Power Tool
             precautions – improper use can cause serious personal

             injury or property damage.                                    1/2 in.   Red
                                                                                             1/2”
                                                                                                  EVERLOC+ Power Tool

                                                                           5/8 in..  Orange       EVERLOC+ Power Tool
     WARNING
             To reduce the risk of permanent eye injury, always wear       3/4 in.   White
                                                                                             3/4”
                                                                                                  EVERLOC+ Power Tool
             close-fitting protective eyewear with side protection.
                                                                                              1”
             Eyewear must be impact-rated and marked as                    1 in.     Green        EVERLOC+ Power Tool
             complying with ANSI Z87.1.
                                                                           1 1/4 in. Magenta      EVERLOC+ XL Power Tool
                                                                           		                     EVERLOC+ XL Expander Tool
NOTICE
Use only EVERLOC+ compression-sleeve tools for assembly and                1 1/2 in. Blue         EVERLOC+ XL Power Tool
installation. Use of other tools will result in an improperly assembled    			                    EVERLOC+ XL Expander Tool
joint, which may result in leaking and property damage.
                                                                           2 in.     Gray         EVERLOC+ XL Power Tool
The basic process of assembling an EVERLOC+ compression-sleeve             			                    EVERLOC+ XL Expander Tool
joint is as follows:
- Make a clean, square cut of the RAUPEX pipe using a REHAU pipe
  cutter                                                                   NOTICE
- Slide the EVERLOC+ compression sleeve over the RAUPEX pipe               For use only with RAUPEX PEXa pipe and the EVERLOC+ compres-
  ensuring the sleeve is a minimum of two times the length of the          sion-sleeve fitting system. Other materials or fittings may crack or
  sleeve from the end of the cut pipe to allow for expansion of the pipe   otherwise fail which could result in leaking and property damage.
  only
- Expand the RAUPEX pipe twice, ensuring the expander head is              Use only REHAU or REHAU-approved expander heads and compres-
  rotated 1/2 of one expander head segment between expansions,             sion jaws that match the dimension of the RAUPEX PEXa pipe being
  using the EVERLOC+ compression-sleeve tools                              installed (e.g., ½ in. expander head and compression jaws for ½ in.
- Insert the EVERLOC+ compression-sleeve fitting into the expanded         pipe). Use of unauthorized attachments or REHAU attachments that
  end of the RAUPEX pipe so that the pipe is touching the pipe stop on     are the wrong size may result in faulty joints, which can lead to leaking
  the fitting                                                              and property damage.
- Compress the EVERLOC+ compression sleeve over the RAUPEX
  pipe and EVERLOC+ compression-sleeve fitting using the
  EVERLOC+ compression-sleeve tools

                                                                                                                                                       7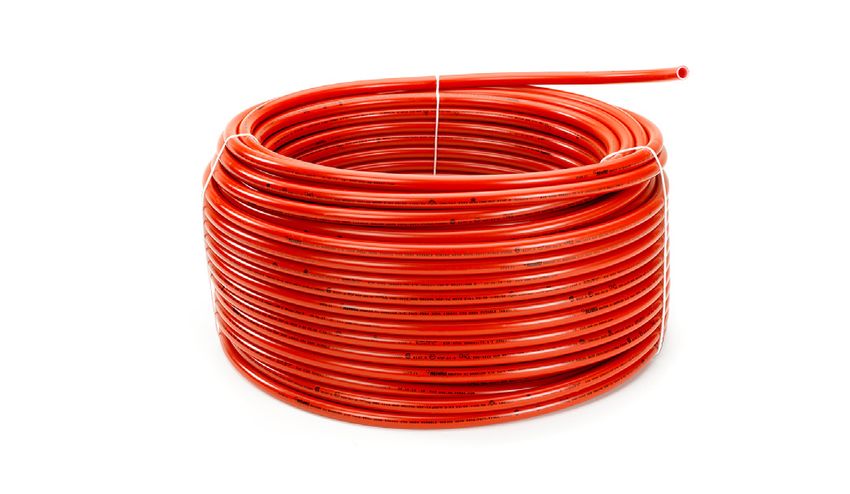
4.1 EVERLOC+ TOOL SAFETY WARNINGS
        WARNING                                                                 --For use only with REHAU or REHAU-authorized accessories or
                    To reduce the risk of electric shock, fire or serious         attachments. Although certain unauthorized accessories and
                    personal injury, read the instruction manual for your         attachments may fit onto the power tool, their use may, in fact, be
                    EVERLOC+ power tool, along with all warnings and              extremely dangerous and result in personal injury and faulty
                    instructions for the battery and charger before operation     connections, which can lead to leaking and property damage.
    --Risk of electric shock. Never operate the power tool in damp or           --For proper installation, the expander head and compression
      wet conditions – never expose to rain or submerge in water or other         jaws must match the dimension of the RAUPEX PEXa pipe
      liquids. Never operate the power tool near wires or cables carrying         being installed. Failure to mount the proper size expander head or
      electric current.                                                           compression jaws before installing a connection may be dangerous
    --Always wear close-fitting protective eyewear that is impact-                and also result in a faulty connection, which can lead to leaking and
      rated with side protection to reduce the risk of permanent eye              property damage.
      injury.                                                                   --For use only with RAUPEX PEXa pipe and the EVERLOC+
    --Always check your power tool and its attachments for proper                 compression-sleeve fitting system. Other materials or fittings
      condition before starting work. Using a power tool that is                  may crack or otherwise fail, which could result in leaking and
      modified, damaged, improperly adjusted or maintained, or not                substantial property damage.
      completely and securely assembled can increase the risk of severe         - If your power tool or any part is damaged or does not function
      personal injury or a faulty connection and property damage.                 properly, have it repaired by an authorized REHAU service
    --The EVERLOC+ Power Tool and EVERLOC+ XL Expander tool                       center. There are no user-authorized repairs for the battery, charger
      are designed for one-handed operation. Wrap your fingers                    or power tool. Do not use the power tool until the problem has been
      tightly around the control handle as shown in this manual and               corrected.
      keep a secure grasp on the tool during work. Loss of control can          --To reduce the risk of personal injury from accidental activation
      lead to injuries.                                                           of the power tool, always remove the battery pack before
    --The EVERLOC+ XL Power Tool is designed for two-handed                       changing attachments, inspecting, cleaning, lubricating or
      operation. Wrap your fingers tightly around the control handle              performing any other type of maintenance, inspection, repair
      and the support handle as shown in this manual. Keep a                      or cleaning.
      secure grasp on both tool handles during work. Loss of control            --Follow all charging instructions and do not charge the battery
      can lead to injuries.                                                       pack or tool outside the temperature range specified in the
    --Always mount the support handle on the EVERLOC+ XL Power                    instructions. Charging improperly or at temperatures outside the
      Tool before starting work. The support handle helps the operator            specified range may damage the battery and increase the risk of fire.
      maintain control of the power tool and helps reduce the risk of crush     --Do not expose the battery pack or tool to fire or excessive
      or cut injuries. Never operate the power tool without the support           temperature. Exposure to fire or temperature above 265°F (130°C)
      handle securely in place.                                                   may cause explosion.
    --Use only your index finger to trigger the tool. Using other fingers       --Do not use a battery pack or tool that is damaged or modified.
      to trigger the tool may cause you to lose control of the power tool or      Damaged or modified batteries may exhibit unpredictable behavior,
      increase the risk of personal injury, including pinch injuries.             resulting in fire, explosion or risk of injury.
    --Moving parts can crush and cut. Keep hands and fingers clear              --Never service damaged battery packs. Service of battery packs
      of the compression jaws, hydraulic slide and expander head                  should only be performed by the manufacturer or authorized service
      while operating. Always keep hands and fingers away from the                providers.
      hydraulic slide and compression jaws to avoid trapping your fingers       --Do not operate the power tool while under the influence of any
      in moving parts. The hydraulic slide and compression jaws are               substance (drug, alcohol, medication, etc.) that might impair
      potential pinch points.                                                     vision, balance, dexterity or judgment.
    --Keep hands and other parts of your body away from the                     --Working with a power tool can be strenuous. The operator must
      expander head, hydraulic slide and compression jaws during                  be in good physical condition. To reduce the risk of injury from loss
      operation to reduce the risk of injury. Avoid wearing bulky gloves          of control, be alert. Do not operate the power tool when tired. Take a
      that may become caught in the compression jaws or make handling             break if you become tired. Always hold the tool firmly while working
      the tool awkward or difficult.                                              as directed in the instruction manual.
    --To reduce the risk of unintended activation, remove the battery           --Make sure you have good balance and secure footing at all
      before changing or adjusting the expander head or compres-                  times. Use caution when working from a ladder or other elevated
      sion jaws. Pinching fingers or trapping other parts of your body in         platform. Do not overreach.
      the expander head, hydraulic slide or compression jaws can result in
8     serious crush and cut injuries.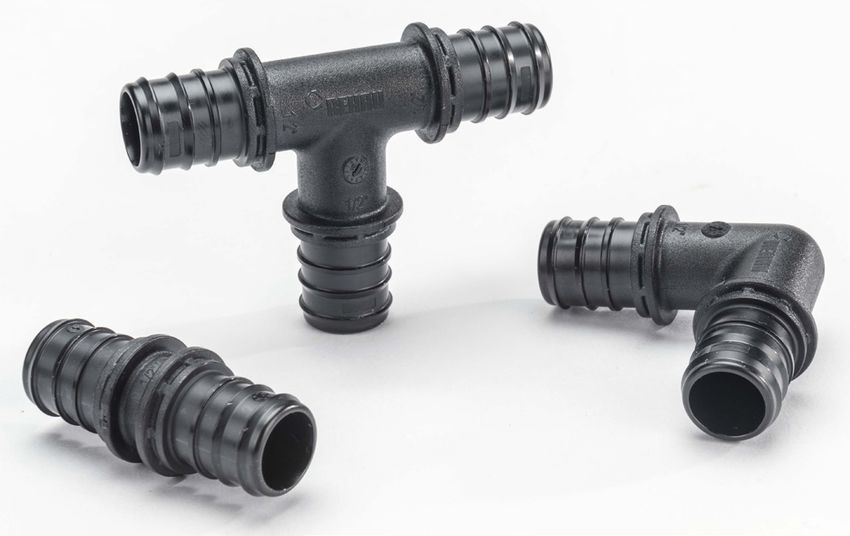
4.2 FITTING ASSEMBLY 3/8 TO 1 IN.
Assembling the EVERLOC+ compression-sleeve system with                      - Slide the sleeve down the pipe at least two times the length of the
diameters of 3/8 to 1 in. require the use of the EVERLOC+ Power               sleeve so the expander head can be inserted.
Tool. Refer to the EVERLOC+ Power Tool Product Instruction Manual           - The compression sleeve must not be expanded with the tool.
(855.725) for a complete understanding of operation, care and use of
the tool.

                                                                               WARNING
                                                                           To reduce the risk of serious personal injury from accidental activation
                                                                           of the power tool:
                                                                             -- Always remove the battery pack before mounting or changing the
                                                                                expansion adapter, expander head or compression jaws, and
                                                                                before performing any other type of inspection, maintenance or
                                                                                cleaning.

                                                                            3. Place expander head on tool expander adapter.
                                                                            - Select the properly sized expander head for the pipe diameter
                                                                               (e.g., 1/2 in. expander head for 1/2 in. pipe).
                                                                            - Each expander head has six separate segments. Inspect each
Cold Expanding RAUPEX Pipe                                                     expander head to ensure no segments are broken or chipped. Do
The expansion process consists of the following steps:                         not use if the expander head is damaged.
 1. Squarely cut the RAUPEX pipe.
 - Using the pipe cutter, cut the pipe to the desired length. Prior to
    cutting the pipe, ensure the pipe cutter is in good condition with a
    sharp blade.
 - The cut must be clean and square (i.e., forming a 90° angle with
    side of pipe) and must be free of burrs, nicks and jagged ends.

NOTICE
Not having a clean, square cut of the pipe could cause leakage of the
finished joint.                                                            NOTICE
  2. Slide the EVERLOC+ compression sleeve onto RAUPEX pipe.               Do not use damaged expander tools or expander heads, as these may
  - Slide the properly-sized sleeve onto the pipe. The sleeve is           produce faulty joints that could leak.
     omnidirectional so either end of the compression sleeve can slide
     on the pipe first.

                                                                                                                                                      9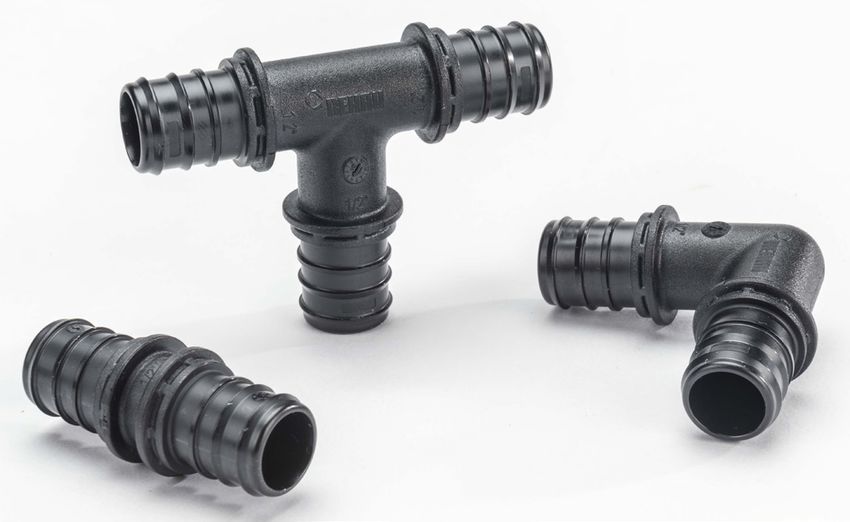
WARNING
     Improper handling of the power tool can increase the risk of pinch or
     crush injury. The tool is designed for one-handed operation and there
     are no gripping surfaces outside of the control handle. To reduce the
     risk of serious personal injury:
     - Wrap your fingers tightly around the control handle as shown in this
       manual and keep a secure grasp on the tool during work.
     - Use only your index finger to trigger the tool. Using other fingers to
       trigger the tool may cause you to lose control of the power tool or
       increase the risk of personal injury, including pinch injuries.
     - Keep hands away from the expander head, hydraulic slide and
       compression jaws during operation.

      4. Insert expander head into end of RAUPEX pipe.
      - Fully insert the expander head into the end of the pipe ensuring
         the sleeve is slid past the end of the expander segments.
      - Ensure the end of the pipe makes contact with the first step of the
         expander head.
      - Ensure the compression sleeve is a minimum of two times the
         length of the sleeve from the end of the pipe. The compression
         sleeve must not be in the expansion zone.

                                                                                NOTICE
                                  2x                                            Do not expand the pipe and sleeve together. This could cause leakage
                                sleeve                                          of the finished joint.
                                length

                                                                                 6. Insert EVERLOC+ compression-sleeve fitting into expanded
                                                                                    RAUPEX pipe.
                                                                                 - Push the fitting into the pipe so that the end of the pipe is
                                                                                    contacting the pipe stop of the fitting.
                                                                                 - If the fitting does not insert far enough, remove the fitting and
                                                                                    repeat the expansion process so that the fitting can be properly
         WARNING                                                                    inserted.
     Moving parts can crush and cut. This power tool uses a strong
     hydraulic force to expand RAUPEX PEXa pipe and compress compo-
     nents of the REHAU EVERLOC+ compression-sleeve system. To
     reduce the risk of serious personal injury during operation:
     - Never touch the expander head, hydraulic slide or compression jaws
       during operation.
     - Keep hands and other parts of your body away from the expander           Compressing the Sleeve Onto the Fitting
       head, hydraulic slide and compression jaws during operation.             The EVERLOC+ Power Tool has interchangeable compression jaws to
                                                                                pull the compression sleeve over the pipe and fitting to complete the
      5. Expand RAUPEX pipe twice.                                              assembly. This step completes the fitting installation process.
      - Once the expander head is fully inserted into the pipe, press the
         trigger button on the power tool.                                      The compression process consists of the following steps:
      - Ensure the expander head is rotated 1/2 of one expander head             1. Place the EVERLOC+ compression jaws onto fitting and pipe.
         segment between expansions.                                             - The compression jaws are color coded. For each size, there is a
      - Remove the expander head from the pipe.                                     black jaw and a chrome-plated jaw. The black jaw is to be inserted
                                                                                    onto the fitting collar and the chrome-plated jaw is to be inserted
                                                                                    onto the pipe with contact to the end of the sleeve.

10
3. Inspect completed EVERLOC+ compression-sleeve joint.
- The EVERLOC+ compression sleeve should close tightly against
the collar of the fitting. A maximum gap of up to 0.030 in (0.75
mm), or about the thickness of a credit card, is acceptable. This
applies to all sizes of fittings. If the gap is more than 0.030 in
(0.75 mm) and the joint has just been completed, use the power
tool to slide the sleeve further onto the fitting.
Once complete, the fitting is immediately ready for system
pressure testing.
2. Compress sleeve onto fitting.
- Once the jaws are placed firmly against the fitting and sleeve,
press the trigger on the power tool and the sleeve will slide over
the fitting. Allow the power tool to completely cycle through so the
sleeve meets the front of the collar on the fitting. When com-
pleted, remove the tool from the fitting.
- If necessary to make installation easier, the tool head can be
rotated, the compression jaws can be mounted on the side or the
compression jaws can be swapped and flipped.
WARNING
To reduce the risk of crush or cut injury, remove index finger from
trigger before rotating the tool head.
WARNING
In the event of a pinch or unintended compression, release the
hydraulic pressure with the release button.
114.3 FITTING ASSEMBLY 1 1/4 TO 2 IN.
Assembling the EVERLOC+ compression-sleeve system with 2. Slide the EVERLOC+ compression sleeve onto RAUPEX pipe.
diameters of 1 1/4 to 2 in. requires the use of the EVERLOC+ XL - Slide the properly-sized sleeve onto the pipe. The sleeve is
Power Tool. Refer to the EVERLOC+ XL Power Tool Product Instruction omnidirectional so either end of the compression sleeve can slide
Manual (855.728) for a complete understanding of operation, care on the pipe first.
and use of the tool. - Slide the sleeve down the pipe at least two times the length of the
sleeve so the expander head can be inserted.
- The compression sleeve must not be expanded with the tool.
WARNING
To reduce the risk of serious personal injury from accidental activation
of the power tool:
- Always remove the battery pack before mounting or changing the
Cold Expanding RAUPEX Pipe expansion adapter, expander head or compression jaws, and before
The expansion process consists of the following steps: performing any other type of inspection, maintenance or cleaning.
1. Squarely cut the RAUPEX pipe.
- Using the pipe cutter, cut the pipe to the desired length. Prior to 3. Place expander head on tool expander adapter
cutting the pipe, ensure the pipe cutter is in good condition with a - Select the properly sized expander head for the pipe diameter
sharp blade. (e.g., 1 1/2 in. expander head for 1 1/2 in. pipe).
- The cut must be clean and square (i.e., forming a 90° angle with - Each expander head has eight separate segments. Inspect each
side of pipe) and must be free of burrs, nicks and jagged ends. expander head to ensure no segments are broken or chipped. Do
not use if the expander head is damaged.
NOTICE
Not having a clean, square cut of the pipe could cause leakage of the NOTICE
finished joint. Do not use damaged expander tools or expander heads, as these may
produce faulty joints that could leak.
12WARNING 5. Expand RAUPEX pipe twice.
Improper handling of the power tool can increase the risk of pinch or - Once the expander head is fully inserted into the pipe, press the
crush injury. The tool is designed for two-handed operation and there trigger on the power tool.
are no gripping surfaces outside of the control handle and the support - Ensure the expander head is rotated 1/2 of one expander head
handle. To reduce the risk of serious personal injury: segment between expansions.
- Wrap the fingers of your trigger hand tightly around the control - Remove the expander head from the pipe.
handle and the fingers of your other hand around the support handle
as shown in this manual.
- Keep a secure grasp with both hands during work.
- Use only your index finger to trigger the tool. Using other fingers to
trigger the tool may cause you to lose control of the power tool or
increase risk of personal injury, including pinch injuries.
- Keep hands away from the expander head, hydraulic slide and
compression jaws during operation.
4. Insert expander head into end of RAUPEX pipe.
- Fully insert the expander head into the end of the pipe ensuring
the sleeve is slid past the end of the expander segments.
- Ensure the end of the pipe makes contact with the first step of the
expander head.
- Ensure the compression sleeve is a minimum of two times the
length of the sleeve from the end of the pipe. The compression
sleeve must not be in the expansion zone.
WARNING
Rotating the tool too quickly after the first expansion can dislodge the
expander head from the expander adapter, causing it to fall off the
tool, which may result in damage to the expander head or personal
injury.
6. Insert EVERLOC+ compression-sleeve fitting into expanded
RAUPEX pipe.
NOTICE - Push the fitting into the pipe so that the end of the pipe is
Do not expand the pipe and sleeve together. This could cause leakage contacting the pipe stop of the fitting.
of the finished joint. - If the fitting does not insert far enough, remove the fitting and
repeat the expansion process so that the fitting can be properly
inserted.
WARNING
Moving parts can crush and cut. This power tool uses a strong
hydraulic force to expand RAUPEX PEXa pipe and compress compo-
nents of the REHAU EVERLOC+ compression-sleeve system. To
reduce the risk of serious personal injury during operation:
- Never touch the expander head, hydraulic slide or compression jaws
during operation.
- Keep hands and other parts of your body away from the expander
head, hydraulic slide and compression jaws during operation.
13Compressing the Sleeve Onto the Fitting
The EVERLOC+ XL Power Tool has interchangeable compression jaws
to pull the compression sleeve over the pipe and fitting to complete
the assembly. This step completes the fitting installation process.
The compression process consists of the following steps:
1. Place the EVERLOC+ compression jaws onto fitting and pipe.
- The compression jaws are color coded. For each size, there is a
black jaw and a chrome-plated jaw. The black jaw is to be
inserted onto the fitting collar and the chrome-plated jaw is to be
inserted onto the pipe with contact to the end of the sleeve.
WARNING
In the event of a pinch or unintended compression, release the
2. Compress sleeve onto fitting. hydraulic pressure with the release button.
- Once the jaws are placed firmly against the fitting and sleeve,
press the trigger button on the power tool and the sleeve will slide 3. Inspect completed EVERLOC+ compression-sleeve joint.
over the fitting. Allow the power tool to completely cycle through - The EVERLOC+ compression sleeve should close tightly against
so the sleeve meets the front of the collar on the fitting. When the collar of the fitting. A maximum gap of up to 0.030 in (0.75
completed, remove the tool from the fitting. mm), or about the thickness of a credit card, is acceptable. This
- If necessary to make installation easier, the tool head can be applies to all sizes of fittings. If the gap is more than 0.030 in
rotated, the compression jaws can be mounted on the side or the (0.75 mm) and the joint has just been completed, use the power
compression jaws can be swapped and flipped. tool to slide the sleeve further onto the fitting.
WARNING Once complete, the fitting is immediately ready for system
To reduce the risk of crush or cut injury, remove index finger from pressure testing.
trigger before rotating the tool head.
14Using the EVERLOC+ Expander Tool for Expansion 2. Slide the EVERLOC+ compression sleeve onto RAUPEX pipe.
In addition to the EVERLOC+ XL Power Tool, the EVERLOC+ XL - Slide the properly-sized sleeve onto the pipe. The sleeve is
Expander Tool can be used for the expansion steps of the 1 1/4 to 2 omnidirectional so either end of the compression sleeve can slide
in. fitting assembly process. on the pipe first.
- Slide the sleeve down the pipe at least two times the length of the
Refer to the EVERLOC+ XL Expander Tool Product Instruction Manual sleeve so the expander head can be inserted.
(855.729) for a complete understanding of operation, care and use of - The compression sleeve must not be expanded with the tool.
the tool.
WARNING
To reduce the risk of serious personal injury from accidental activation
of the power tool:
Cold Expanding RAUPEX Pipe - Always remove the battery pack before mounting or changing the
The expansion process consists of the following steps: expander head, and before performing any other type of inspection,
1. Squarely cut the RAUPEX pipe. maintenance or cleaning.
- Using the pipe cutter, cut the pipe to the desired length. Prior to
cutting the pipe, ensure the pipe cutter is in good condition with a 3. Place expander head on tool expander adapter
sharp blade. - Select the properly sized expander head for the pipe diameter
- The cut must be clean and square (i.e., forming a 90° angle with (e.g., 1 1/2 in. expander head for 1 1/2 in. pipe).
side of pipe) and must be free of burrs, nicks and jagged ends. - Each expander head has eight separate segments. Inspect each
expander head to ensure no segments are broken or chipped. Do
not use if the expander head is damaged.
NOTICE
Not having a clean, square cut of the pipe could cause leakage of the
finished joint. NOTICE
Do not use damaged expander tools or expander heads, as these may
produce faulty joints that could leak.
15WARNING
Improper handling of the power tool can increase the risk of pinch or
crush injury. The tool is designed for one-handed operation and there
are no gripping surfaces outside of the control handle. To reduce the
risk of serious personal injury:
- Wrap your fingers tightly around the control handle as shown in this
manual.
- Keep a secure grasp on the tool during work.
- Use only your index finger to trigger the tool. Using other fingers to
trigger the tool may cause you to lose control of the power tool or
increase risk of personal injury, including pinch injuries.
- Keep hands away from the expander head during operation..
4. Insert expander head into end of RAUPEX pipe.
- Fully insert the expander head into the end of the pipe ensuring
the sleeve is slid past the end of the expander segments.
- Ensure the end of the pipe makes contact with the first step of
the expander head.
- Ensure the compression sleeve is a minimum of two times the
length of the sleeve from the end of the pipe. The compression
sleeve must not be in the expansion zone.
WARNING
In the event of a pinch or unintended compression, release the
hydraulic pressure with the release button.
WARNING
Rotating the tool too quickly after the first expansion can dislodge the
expander head from the expander adapter, causing it to fall off the
tool, which may result in damage to the expander head or personal
injury.
6. Insert EVERLOC+ compression-sleeve fitting into expanded
NOTICE RAUPEX pipe.
Do not expand the pipe and sleeve together. This could cause leakage - Push the fitting into the pipe so that the end of the pipe is
of the finished joint. contacting the pipe stop of the fitting.
- If the fitting does not insert far enough, remove the fitting and
WARNING repeat the expansion process so that the fitting can be properly
Moving parts can crush and cut. This power tool uses a strong inserted.
hydraulic force to expand RAUPEX PEXa pipe and compress
components of the REHAU EVERLOC+ compression-sleeve system.
To reduce the risk of serious personal injury during operation:
- Never touch the expander head during operation.
- Keep hands and other parts of your body away from the expander
head during operation..
5. Expand RAUPEX pipe twice.
- Once the expander head is fully inserted into the pipe, press the
trigger on the power tool. Compressing the Sleeve Onto the Fitting
- Ensure the expander head is rotated 1/2 of one expander head To pull the compression sleeve over the pipe and fitting to complete
segment between expansions. the assembly process, refer to Section 4.2 Fitting Assembly 1 1/4 to
- Remove the expander head from the pipe. 2 in. under the heading Compressing the Sleeve Onto the Fitting. This
step completes the fitting installation process.
165. ASSEMBLY CONSIDERATIONS
Fitting Size - Ensure the compression sleeve is a minimum of two times the
Prior to assembly, verify that the fitting and sleeve are the proper size length of the sleeve from the end of the pipe. Do not expand the
to be connected with the pipe. The size (i.e. 1/2 or 1 1/4 in.) is sleeve and the pipe together.
marked on each fitting and each sleeve.
Fitting and Sleeve Inspection
Carefully inspect all fittings and sleeves for damage prior to assembly.
Do not use fittings or sleeves if there is any doubt about their
integrity.
Sleeve Direction
The sleeve is omnidirectional and can be slid on the pipe in either
direction.
Pipe Cutting - Expand the RAUPEX pipe twice, ensuring the expander head is
When cutting the pipe to length, the cut must be clean and at a right rotated 1/2 of one expander head segment between expansions.
angle (90º) to the pipe wall. Ensure there are no burrs or debris This ensures that the fitting can be properly inserted.
inside the pipe.
Expansion of Pipe
- Verify that the RAUPEX pipe is placed completely onto the properly
sized expander head. The pipe should be fully inserted to the first
step of the expander head.
17Fitting Insertion Finished Joint
Verify that the RAUPEX pipe is inserted completely onto the fitting and - A properly completed EVERLOC+ joint requires the compression
is touching the pipe stop. If the end of the pipe is not touching the sleeve to be flush with the fitting collar. A small gap of 0.030 in
pipe stop of the fitting, the fitting should be removed and the pipe (0.75 mm) is acceptable.
expanded again for proper insertion.
- A finished EVERLOC+ joint should appear aligned when visually
inspecting the pipe in relation to the fitting and sleeve.
- To avoid putting unnecessary stress on the pipe, fitting or sleeve,
ensure that the transition of the pipe into the EVERLOC+ fitting is
not at an angle.
- A finished joint can be visually inspected. There are no calibration
tools or go/no-go gauges required to inspect a finished joint.
186. INSTALLATION CONSIDERATIONS
Some precautions and additional considerations that should be taken
when installing the system.
- EVERLOC+ LF brass fittings CAN be reused, as long the rib area
was not damaged during removal.
- EVERLOC+ polymer fittings CANNOT be reused and should be
discarded immediately.
- EVERLOC+ compression sleeves CANNOT be reused and should be
discarded immediately.
Removal time is typically 90 to 120 seconds.
Note: Do not use open flames to disassemble the joint.
For re-assembly of a new joint, the following should be considered:
- The end of the pipe where the previous fitting had been installed
must be completely cut off prior to making a new joint. Cutting off a
minimum of 3 in (approximately 75 mm) is recommended.
Fitting Removal for Completed Joint (LF brass ONLY)
If it is required to remove the fitting or disassemble the compression-
sleeve joint, use the following procedure:
If the fitting has been inserted into the pipe and the sleeve has been
compressed, heat the sleeves with a heat gun. Support the pipe while
keeping hands and other body parts away from the heat. Be careful
not to damage the fitting with the tool.
Fitting Removal for Partially Completed Joint (LF brass ONLY)
1. Heat the sleeve directly using a hot air gun. If the fitting has been inserted into the pipe, but the sleeve has not
2. Rotate the joint several times while heating. been compressed, attempt to remove it without damaging the fitting.
3. Remove heat and use pliers to pull the sleeve off the fitting, then If fitting cannot be easily removed, heat 1 to 1 1/2 in (25 to 38 mm) of
immediately pull the fitting out of the pipe. the pipe that covers the fitting and then follow procedures 2 and 3
under Fitting Removal for Completed Joint.
19Protecting EVERLOC+ Joints NOTICE
REHAU permits EVERLOC+ compression-sleeve joints (polymer and Use only REHAU recommended protective tapes for wrapping
LF brass) to be buried or concealed. REHAU recommends that EVERLOC+ joints. Do not use other types of tapes (e.g. duct tape,
threaded connections never be buried or concealed as they must be standard electrical tape) to wrap the joint, as chemicals in the
accessible for periodic inspection, per building codes. adhesive may not be compatible with the PPSU fitting material or the
PEX pipe.
The requirement to wrap an EVERLOC+ joint can depend on many
factors including location and the presence of other materials that NOTICE
contact or can come in contact with the joint. In general, REHAU Never use heat shrink tubing (e.g. RAUCROSS) to wrap the joint, as
recommends the following: the extremely high temperatures produced from a heat gun will soften
the pipe and may cause it to pull away from the fitting. See also
Concealed in inaccessible locations (e.g. behind drywall): REHAU Technical Bulletin TB266: Protecting EVERLOC+ Joints.
When EVERLOC+ joints are concealed but are still in open air space,
it is not necessary to wrap the joint. However, the installer should
ensure that the fitting does not come in contact with chemicals (e.g.
PVC glues, solvents, cements) that could damage the fitting material.
Use only Linerless Rubber Tape, Black (Art. 241002) also available at
most distributors and retailers (Scotch™ 2242).
Buried directly in a concrete slab:
When burying an EVERLOC+ joint directly in a concrete slab, it is not
necessary to wrap the joint. However, there are some additives in
concrete that could potentially damage the fitting material, and in this Pressure Testing
case, wrapping is recommended. Use only Linerless Rubber Tape, The compression-sleeve joint is ready for immediate pressure test and
Black (Art. 241002) also available at most distributors and retailers use after completion of the assembly process. There is no wait time
(Scotch™ 2242). for the system to be put into service. See also REHAU Technical
Bulletin TB211 Pressure Testing of REHAU PEXa Piping Systems.
Buried in a sub-base or underground in soil:
In these instances, the joint must be wrapped. Use only Linerless Pressure and Temperature Ratings
Rubber Tape, Black (Art. 241002) also available at most distributors The maximum temperature and pressure ratings of the EVERLOC+
and retailers (Scotch™ 2242). compression-sleeve fitting system is in accordance with ASTM F877
and CSA B137.5 for SDR9 PEX, see REHAU pipe product submittals
With foaming agents: for ratings.
Foaming agents and solvents in closed-cell foam insulation kits can
damage the PPSU fitting material. Therefore, it is necessary to wrap Ultraviolet Resistance
polymer fittings in a protective tape to protect from polyurethane The fittings and sleeves must never be stored in direct sunlight or
foams. Use only REHAU Protective Tape, Red (Art. 246869-001) or stored outside of the original cardboard packaging. In addition, the
Linerless Rubber Tape, Black (Art. 241002). system is not intended for permanent outdoor applications or in areas
with continuous exposure to UV.
Freeze Break Resistance
The flexibility of the RAUPEX pipe allows it to expand as water freezes
in the pipe as long as the pipe has room to expand. However, this
does not ensure the integrity of the joint. Therefore, installers must
take precautions to ensure that pipes and fittings do not freeze. This
When wrapping an EVERLOC+ joint, the following is required: may result in leaks and operational failures.
- Wrap the joint, ensure minimum of 50% overlap of the tape.
- Avoid wrinkles or kinks in the tape and ensure the joint is completely Chlorine Resistance
covered, extending on to the pipe as necessary. EVERLOC + compression-sleeve joints have the same chlorine
- Indicate the location of each joint as required on the “as-built” resistance ratings as the RAUPEX pipe. Refer to REHAU Technical
drawings. Bulletin TB135 Chlorine Resistance of RAUPEX Pipe for permitted
operating conditions.
20Stress Corrosion Resistance Copper Soldering
EVERLOC+ LF brass fittings have been tested in accordance with Proper soldering techniques must be followed when soldering all
NSF/ANSI 14 and comply with the requirement for stress corrosion compression-sleeve fittings according to the Copper Development
resistance. However, fittings should not be exposed to harmful Association (CDA) Handbook:
chemicals or aggressive water conditions that could result in opera- - The surface of the fitting soldering area must be properly cleaned for
tional failures. a good solder connection. Applying flux is not considered sufficient
cleaning for the soldering area. Using a proper sanding or brush
Chemical Compatibility technique is necessary to remove the surface oxides. In order to
There are certain chemicals that can damage the EVERLOC+ prevent further formation of oxides, the flux should be applied
compression-sleeve system. This applies to external exposure of immediately after the cleaning process. A proper flux that is
chemicals and to the transport of such chemicals by the piping compatible with the brass alloy must be used.
system. - Care must be taken to not overheat the soldering surface as this can
lead to the formation of oxides preventing good adhesion of the
Chemicals that may damage the compression-sleeve system include solder material. It is imperative that the fitting is heated evenly
(but are not limited to): around the entire surface so as to not overheat one particular area.
- Adhesives and tapes other than those recommended by REHAU - All completed solder joints must be tested for joint integrity following
- Oil/petroleum-based products the procedures prescribed by local applicable codes.
- Paints, solvents
- Oxidizing agents (e.g., bleach) When soldering an EVERLOC+ fitting:
- Disinfectants (e.g., separate dosing unit integrated into building - When using an EVERLOC+ copper adapter fitting, the fitting must
distribution system) be soldered onto the copper first.
- PVC glues, solvents, cements - Allow the solder joint to cool to ambient room temperature prior to
making an EVERLOC+ connection.
- Never solder after EVERLOC+ connection has been made.
Ensure that the employed sealants, cleaning agents, building foams,
insulation, protective tape, adhesive tape or thread sealant do not
contain any components which cause stress cracking or corrosion,
such as ammonia, ammonia-bearing, aromatic and oxygenated
solvents (e.g., ketone and ether), chlorinated hydrocarbons or chloride
ions which can leach.
Protect systems against contact to chemicals and damage. Only use
leak detection agents (e.g., foaming agents) approved by the respec-
tive manufacturer for PPSU materials. Only use sealants, thread
sealants, cleaning agents, building foams, insulation, protective tape,
adhesive tape and flux approved by the respective manufacturer for
the PPSU materials. Check the compatibility of materials for the
corresponding area of application.
Contact with aromatic and oxygenated solvents (e.g., ketone and WARNING
ether) as well as halogenated hydrocarbons (e.g., chlorinated Use gloves and a holding tool. Heated pipe and fittings can cause
hydrocarbons) is not permitted. Contact with water-based acrylic burns.
paints and adhesive/protective primers is not permitted.
217. SYSTEM TESTING AND MAINTENANCE
A pressure test must be performed on the system to ensure the
RAUPEX pipe and EVERLOC+ joints are leak free.
In addition, a visual inspection of all joints is recommended to ensure
all connections have been properly assembled.
22ÍNDICE
1. Alcance 24
2. Información general del sistema 25
3. Componentes del sistema 26
4. Montaje 28
4.1 Advertencias de seguridad de la herramienta
EVERLOC+ 29
4.2 Montaje de accesorios de 3/8 a 1 in 30
4.3 Montaje de accesorios de 1 1/4 a 2 in 33
5. Consideraciones para el montaje 38
6. Consideraciones para la instalación 40
7. Prueba del sistema y mantenimiento 43
Para acceder a las actualizaciones de esta publicación y a las instrucciones técnicas, información de seguridad y recomendaciones del fabricante más actuales, visite
www.na.rehau.com/resourcecenter (US/CAN) or www.rehau.com.mx/centralderecursos (México/Centroamérica).
231. ALCANCE
REHAU Norteamérica en www.na.rehau.com/resourcecenter,
incluidos entre otros, manuales técnicos, manuales de instrucciones,
boletines técnicos, presentaciones y presentaciones de del Academy
REHAU. Visite el Centro de recursos de REHAU (www.na.rehau.com/
Gracias por su compra. Estas instrucciones contienen información resourcecenter) donde encontrará las últimas actualizaciones.
acerca del montaje y el uso del sistema de casquillos de compresión
EVERLOC+™ con el tubo con protección UV RAUPEX® (tubo PEXa) Comuníquese con el distribuidor EVERLOC+ de su área si no entiende
que se utiliza para los sistemas de agua potable fría y caliente y el la información contenida en este manual o si tiene alguna pregunta
tubo con barrera de O2 RAUPEX para sistemas hidrónicos de acerca de las Directrices técnicas de REHAU.
refrigeración y calefacción.
Este manual contiene información de seguridad que requiere su
Para uso profesional solamente. Las personas que utilicen esta guía especial atención. Está indicada con el símbolo de alerta de seguridad
deben ser contratistas profesionales debidamente autorizados y y el texto de señalización que se describe a continuación:
experimentados que entiendan los principios y las prácticas asociados
con la correcta instalación de sistemas hidrónicos de agua potable Indica una situación peligrosa que, si no
se evita, provocará la muerte o lesiones
fría y caliente. PELIGRO graves.
La información que se presenta en este manual de instrucciones del Indica una situación peligrosa que, si no
producto pretende demostrar el método de montaje correcto y las ADVERTENCIA se evita, provocaría la muerte o lesiones
recomendaciones de instalación para el sistema de casquillos de graves.
compresión EVERLOC+. Permita que solo las personas que entiendan Indica una situación peligrosa que, si no
se evita, provocaría lesiones menores o
completamente este manual participen en el montaje y uso del ATENCIÓN moderadas.
sistema de casquillos de compresión EVERLOC+ con el tubo PEXa
RAUPEX. Indica el riesgo de daños materiales,
AVISO incluso daños a la herramienta eléctrica o
Es responsabilidad del contratista autorizado verificar los códigos a sus componentes individuales.
locales vigentes y verificar que la información técnica presentada en
esta guía sea apropiada para una instalación en particular. Solo el personal capacitado debe participar en el proceso de
instalación. Siga las instrucciones contenidas en este manual y
Nada de lo contenido en este manual reemplaza los requisitos de los demás Directrices técnicas de REHAU y use el sentido común para
códigos locales o nacionales ni las recomendaciones de otros reducir el riesgo de lesiones o de daños materiales.
fabricantes acerca de sus componentes. Cumpla con todas las leyes,
regulaciones, normas, códigos y ordenanzas locales, estatales y
nacionales aplicables. Si usted cree que la información del producto
ADVERTENCIA
Lea el manual de instrucciones de las herramientas
de REHAU entra en conflicto con los requisitos de los códigos
para casquillos de compresión EVERLOC+ antes de
aplicables, normas de la industria o las recomendaciones de otros
usar y siga todas las precauciones de seguridad; el uso
fabricantes acerca de sus componentes, comuníquese con el incorrecto puede provocar lesiones físicas graves.
distribuidor de REHAU en su área y consulte con la autoridad del área
de la construcción con jurisdicción competente antes de instalar el ADVERTENCIA
sistema de casquillos de compresión EVERLOC+.
Las herramientas para casquillos de compresión
EVERLOC+ utilizan fuerza hidráulica intensa para
Antes de comenzar el proceso de instalación, lea la Garantía limitada expandir el tubo PEXa y comprimir los componentes
PEXa de REHAU, que encontrará en www.na.rehau.com/warranties. del sistema de casquillos de compresión EVERLOC+ de
También puede obtenerla a través de su distribuidor REHAU autoriza- REHAU.
do o solicitarla por escrito a REHAU Construction LLC, 1501 Edwards
Ferry Road NE, Leesburg VA 20176 US. Para reducir el riesgo de lesiones por golpes y
laceración, mantenga los dedos, las manos y todas las
La instalación correcta es responsabilidad del contratista instalador. partes de su cuerpo alejados del cabezal expansor, la
corredera hidráulica y las mordazas de compresión
Consulte las Directrices técnicas de REHAU antes de la instalación del
durante el funcionamiento. Retire la batería antes de
sistema de tuberías de polietileno reticulado (PEXa) de REHAU. Las
intentar cambiar o ajustar el cabezal expansor o las
Directrices técnicas de REHAU están definidas en la Garantía limitada mordazas de compresión.
PEXa de REHAU, a saber: Las versiones más actuales y vigentes de
toda la documentación técnica están disponibles en el sitio web de
242. INFORMACIÓN GENERAL DEL SISTEMA
Aplicaciones
El sistema de casquillos de compresión EVERLOC+ está diseñado
para su uso con tubos PEXa RAUPEX, específicamente el tubo con
protección UV RAUPEX para aplicaciones en sistemas de plomería de
agua potable y el tubo con barrera de O2 RAUPEX para las aplicacio-
nes de sistemas hidrónicos de refrigeración y calefacción radiante.
El sistema de plomería PEXa de REHAU está destinado al uso en
sistemas de agua potable, fría y caliente, definidos por los siguientes
códigos nacionales:
- Código Internacional de Plomería (IPC) de ICC
- Código Internacional Residencial (IRC) de ICC Tubo de polietileno reticulado (PEXa) con barrera de O2 RAUPEX
- Código Uniforme de Plomería (UPC) de IAPMO
- Código Nacional de Plomería de Canadá (NPCC)
El sistema radiante PEXa de REHAU está destinado al uso en
sistemas hidrónicos de refrigeración y calefacción definidos por los
siguientes códigos nacionales:
- Código Internacional de Mecánica (IMC) de IMC
- Código Internacional de Construcción (IBC)
- Código Internacional Residencial (IRC)
- Código Uniforme de Mecánica (UMC)
- Código Nacional de Construcción de Canadá (NBCC)
- Código de Instalación CSA B214 para Sistemas de Calefacción
Hidrónica
Casquillos y accesorios de compresión EVERLOC+
Tubo de polietileno reticulado (PEXa) con protección UV RAUPEX
Herramientas para casquillos de compresión EVERLOC+
253. COMPONENTES DEL SISTEMA
El sistema de casquillos de compresión EVERLOC+ es un sistema de Marcas de los casquillos y los accesorios
accesorios PEXa de expansión en frío que está disponible en polímero Todos los accesorios de polímero incluyen las siguientes marcas para
y latón sin plomo (LF) que se ensambla con el casquillo de compre- su identificación:
sión PEXa especialmente diseñado. El accesorio está diseñado
específicamente para su uso con el tubo RAUPEX y solo debe
ensamblarse con las herramientas para casquillos de compresión O
EVERLOC+.
Para obtener una descripción detallada de los componentes del
sistema REHAU, consulte el Catálogo de productos de tecnología para
una construcción sustentable de REHAU (855.312).
Gama de productos
Los accesorios EVERLOC+ están disponibles en tamaños de 3/8”,
1/2”, 5/8”, 3/4”, 1”, 1 1/4”, 1 1/2” y 2” y están destinados para su
uso con el tamaño de tubos de cobre (CTS) SDR9 RAUPEX, fabrica-
dos de conformidad con la norma ASTM F876.
Características de los accesorios Tamaño del accesorio (p. ej., 3/4”)
Los accesorios de polímero y de latón sin plomo (LF) EVERLOC+
tienen las siguientes características:
1. Cuatro bordes de sellado
2. Tope del tubo
3. Collarín del accesorio
4. Cuerpo de la mordaza de la herramienta
1
3
Código de lote por fecha de producción
Todos los accesorios de latón sin plomo tienen la marca “REHAU”.
Todos los casquillos incluyen las
siguientes marcas para su
identificación:
4
2
- Tamaño de accesorio (p. ej., 1/2”)
- Código de lote por fecha de
producción
26You can also read