HEALTHECONNECTIONS AUTHORIZED USER TRAINING GUIDE
←
→
Page content transcription
If your browser does not render page correctly, please read the page content below
HealtheConnections
Authorized User Training Guide

To gain access to myConnections as an Authorized User you must complete
training and complete an Authorized User application. That application must
  be approved and signed by the RHIO Administrator for each participating
  organization for which the user is employed and wishing to access patient
                                    records.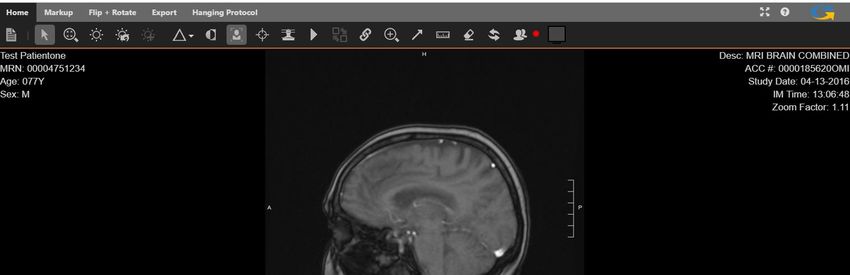
Contents
   Contents ............................................................................................................................................................... 2
HealtheConnections: myConnections ...................................................................................................................... 2
Accessing myConnections ....................................................................................................................................... 3
Logging in to myConnections ................................................................................................................................... 4
myConnections......................................................................................................................................................... 6
Service Badges ........................................................................................................................................................ 7
Navigation Bar .......................................................................................................................................................... 8
Searching for Patients – Patient Lookup .................................................................................................................. 9
Consent- Emergency .............................................................................................................................................. 12
Consent- Deny ....................................................................................................................................................... 13
Adding Consent Value ............................................................................................................................................ 14
Patient Lookup ....................................................................................................................................................... 15
More Patient Information ........................................................................................................................................ 21
MyResults............................................................................................................................................................... 22
Logging Out ............................................................................................................................................................ 24
Form Reference ..................................................................................................................................................... 24
2
HealtheConnections: myConnections
With myConnections, HealtheConnections Authorized Users can:
Access our services including:
o Patient Lookup
o Direct Mail
o Provider Directory for Direct Mail
o myAlerts
o myReferrals
o myResults
o myData
Audit Reports
Access training materials and forms
Get updates on what’s new with HealtheConnections
Check for updates or outages
Access our Participant Map
Request assistance from our Support Team
In this manual, we will focus on Patient Lookup services. User Guides are also
available for the other listed services.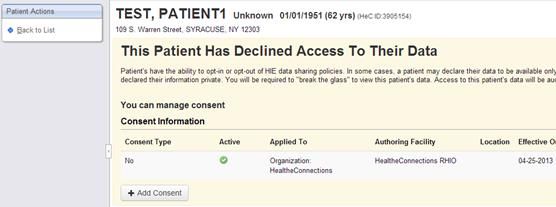
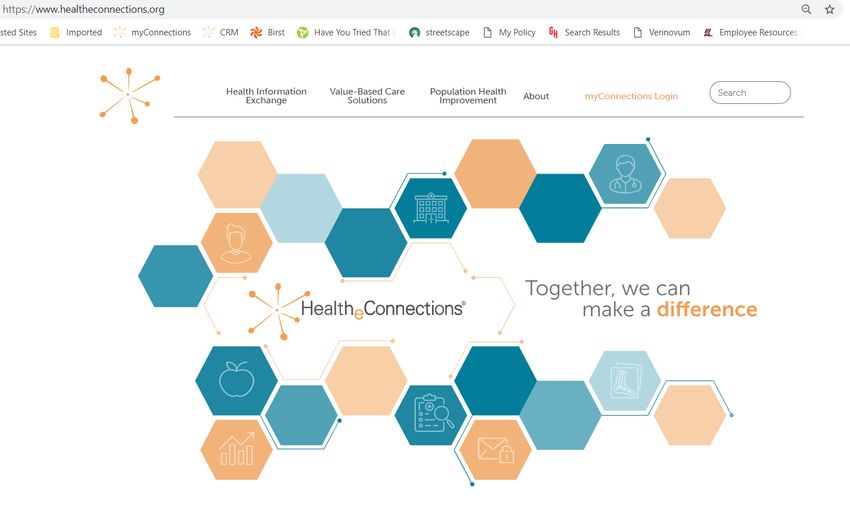
3

Accessing myConnections

You can access myConnections from our website: https://www.healtheconnections.org.

Alternatively, in your Internet browser at https://hie.healtheconnections.org.
4

Logging in to myConnections

Type your HealtheConnections Username and Password into the appropriate fields and click
Log In.
5

You will be locked out if you enter the wrong username or password too many times. If this
happens, select “Need Help Signing In” to receive an email from noreply@okta.com to reset
your password.

If you do not currently have a myConnections account contact HealtheConnections support at
support@healtheconnections.org or 315.671.2241 x 5 for your credential
6
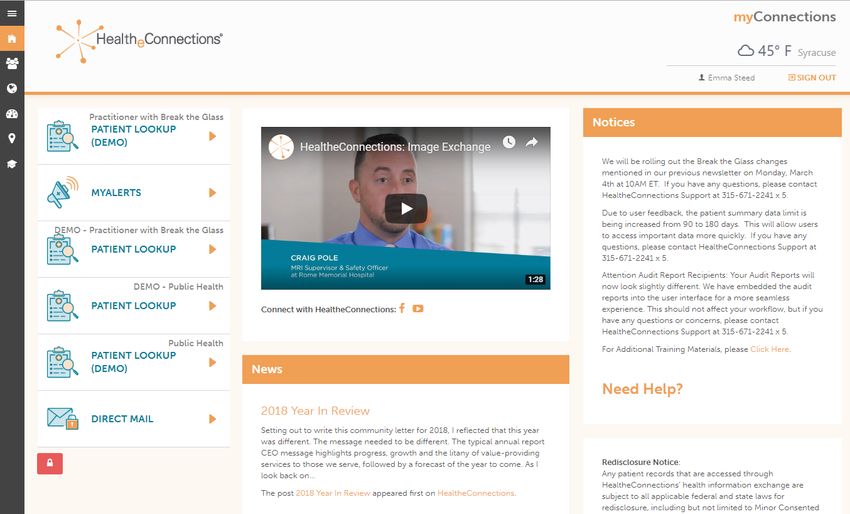
myConnections
Navigation
User Name and Sign Out
Use Cases
Notices and Help
Badges
News
Important messages and news from HealtheConnections regarding outages or new features
will be posted on the right side of the screen in the Notices section. A link to training materials
is also included in the Notices section.
Need Help? Send a message to our Support team via email by clicking the Need Help text.
HealtheConnections News displays the most recent news from the HealtheConnections
website (www.healtheconnections.org).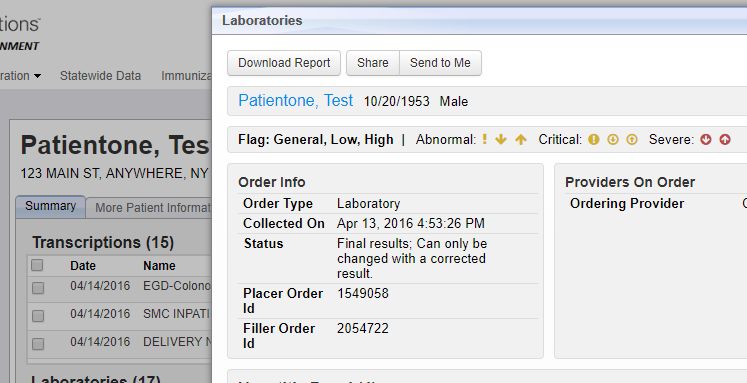
7

Service Badges
To rearrange the order of your service badges, scroll to the bottom of the list of services and
click the Unlock button.

                                                             1. Click the Red
                                                              Unlock button

                                                         2. Drag and drop each badge
                                                         to order to your preferences.

Drag and drop each badge to order of your preferences. Click the Unlocked Blue
Button to save your preferences. The button will turn back to red.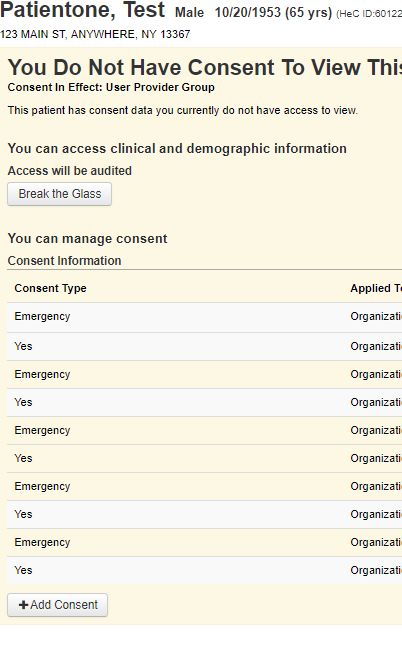
8

Navigation Bar

                 Toggle Sidebar

                 Home

                 Practice Subscriptions

                 HealtheConnections Website

                 HealtheCNY

                 Participant Map

                 Training and Reference Material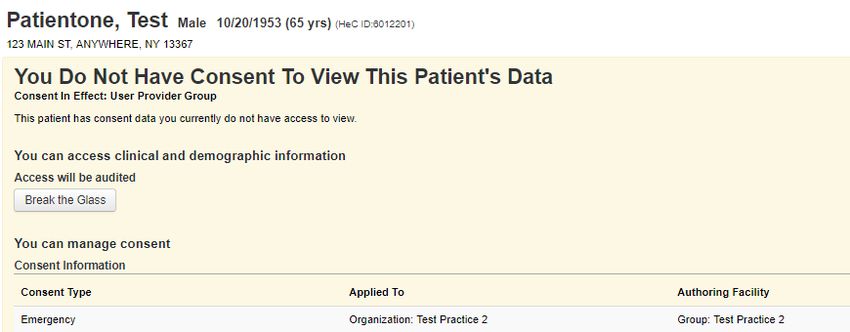
9

Searching for Patients – Patient Lookup

Click on Patient Lookup. If you work at more than one organization, you will see multiple
Patient Lookup badges. Click the badge for the organization for which you are accessing the
patient.

                                        Patient Lookup Badge

This will navigate you to the Patient Lookup screen.
10
There must be a “Reason” selected in order to execute a search. The reason automatically
defaults to “Treatment”; however, you can choose other options by clicking the down arrow:
Emergency Treatment
Treatment
Manage Consent
Quality Improvement Activity
You may search for the patient by using either: Demographic Search using “Last Name” and
“Date of Birth” or Identifier Search using the “Patient ID” which is the patient’s Hospital
Medical Record Number (MRN).
The required fields are marked with asterisks. You can further refine your search by
filling out the other data elements; however, they are not required.11
Click on the desired patient
If multiple patients with the same information are returned (e.g., they have the same last name
and date of birth), the system will then display additional criteria (e.g. first name, address,
gender, etc.) in order for you to choose your patient.
Click on the desired patient and the Patient Summary will be displayed, dependent on the
patient’s consent for your facility.
To clear this search, click the Clear Search Button.12
Consent- Emergency Default or Emergency
Only Access Screen
If the patient does not authorize a change in their consent, you are unable to view the record
any further. To search for a new patient, click the Back to List request on the Patient Actions
tab.
Break the Glass is only available for select users. See your RHIO Administrator if you wish to
have Break the Glass privileges in case of medical emergency.13
Consent- Deny
Consent Value of “No”
ssssss
If patient consent is “No”, you will not be able to access their records until the patient signs a
new affirmative consent document.
If your organization is sharing medical records electronically with HealtheConnections, adding
consent may be automated through your EMR. Please check with your RHIO Administrator if
you are unsure. If you are directed to add consent manually, please follow the next steps.14 Adding Consent Value To add consent manually, click the Add Consent button. Select Yes, No or Emergency. Change the date if necessary. The date will default to today’s date. Select the calendar or type in the date, if it needs to be changed. Click Submit Then, you will click “Back to List” to return to the Patient List. Click the same patient again and the patient’s summary page will be displayed.
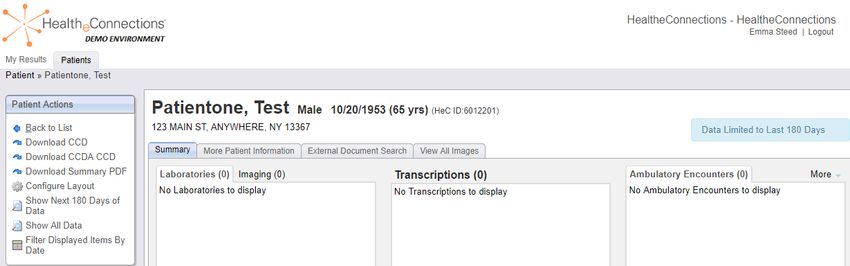
15

Patient Lookup

Once you have selected the patient and consent has been indicated as affirmative, the Patient
Summary page will be displayed.
16
Upon initial search, data will be limited to the last 180 days. If you would like historical
data on the patient, you can click Show Next 180 Days of Data, Filter Displayed
Items by Date, or Show All Data.
To return to the Patient List
To configure the order of information
you see on the Summary Screen
To define the amount of information
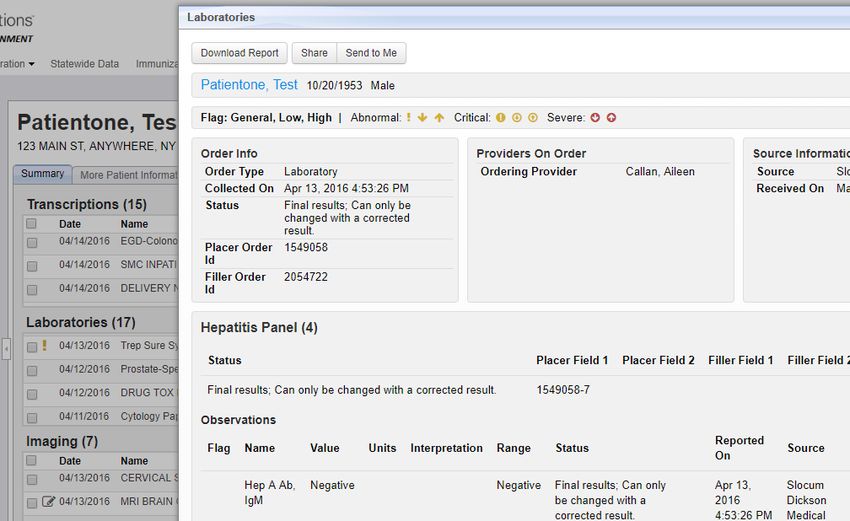
you will see17 You will see information by Name, Source, and Date for each type of data. Information is defaulted to show in chronological order, with newest results first. Within each type of data, by clicking on the heading (Date, Name, Source) you can re-sort to your preference. To access an item, click on the descriptor and it will open the document for your review. An exclamation mark in front of an item indicates an abnormal result. A pencil icon mark in front of an item indicates a preliminary result. By hovering over an item, you can see via a pop-up screen, more information on that item including the source name, rather than the abbreviated identifier.
18

To download or print this document, select Download Report. Follow the prompts to print or
download to a PDF document.

Imaging reports are available as well as the image itself if View All Images or View This
Image is displayed. You can currently access X-Rays, CT Scans, MRI, Sonogram images from
many sources. You may receive a notice of the image being blocked. You must disable Pop-
Up blockers to always allow these images to load.
19

Refer to the Imaging guide for explanation of the navigational tools for this screen after
selecting View This Image.

For View All Images you can see all imaging studies for this patient that are stored on the
Source server.

Up to four can be selected to perform comparative studies.

This will open a screen with all selected studies for your review.
20

Documents section will provide you a summary of a particular provider’s record up to the
date listed on the document. Select the document you wish to view, View as HTML or
Download Original. View will allow you to see a readable version of this document.
Download will download the document in CCD format for consumption to your EMR.

.

To exit, click the X at the top, right-hand corner.
21

More Patient Information
The More Patient Information tab will give you Demographic Information regarding your
patient. If you are a Demographic Only access user, you will ONLY have access to this tab –
no clinical information. Select the topic you wish to view by clicking on the heading.

To search for Veterans Administration (VA), Department of Defense (DOD), other HIE’s in
NYS data (Statewide Data), select the External Document Search tab. A search was
launched upon initial access of the Patient’s medical record. If the patient has records in any of
these external sources, records you will receive a result here. Click on the result to access.
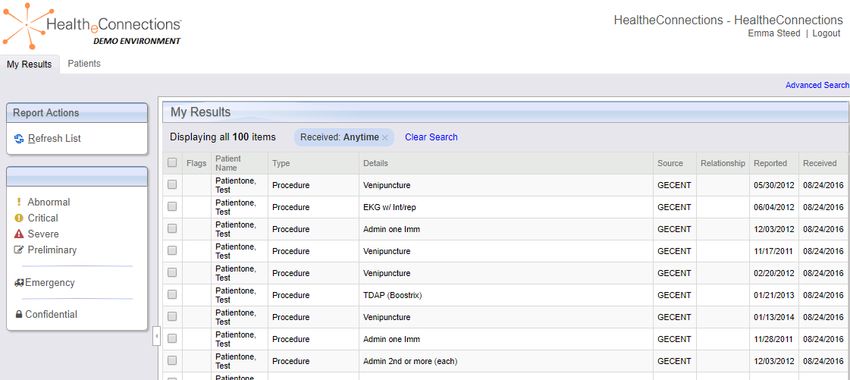
22

MyResults
If you are a named provider, or have been delegated by a named provider, you can receive
your results via the My Results tab.

You will immediately see the results where you are named as the Ordering, Consulting,
Referring, Admitting, Discharging, or other named resource within the previous 24 hours for
any patient.

You do not need consent to view these records as you have a treating relationship with the
named patient.

This is the same information you would see on the Patient Lookup Summary screen and can
be accessed either way.
23

If you would like to see beyond the previous 24 hours, click on the Advanced Search button to
perform a more defined search.

                                                          Select the date frame and type of
                                                          services you wish to filter the
                                                          results. Then click Submit box.
24 Logging Out For security purposes, you should always Log Out of your Authorized User account, rather than simply closing the application. Click on Sign Out and then close the application. Form Reference The below form is utilized in the configuration of Authorized User account. Authorized-User-Certification-and-Application_07_09_2020 The Authorized User Certification and Application form is utilized for new users requesting credentials for access. This form must be co-signed and identity verified by a RHIO Administrator or HealtheConnections Community Engagement Specialist.
You can also read