Helix Authentication Service Administrator Guide - 2021.1 May 2021 - Perforce ...
←
→
Page content transcription
If your browser does not render page correctly, please read the page content below

Helix Authentication Service
    Administrator Guide
             2021.1
            May 2021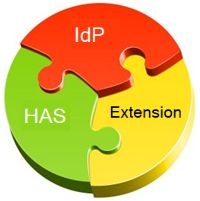
Copyright © 2020-2021 Perforce Software, Inc..
All rights reserved.
All software and documentation of Perforce Software, Inc. is available from www.perforce.com. You can download and use
Perforce programs, but you can not sell or redistribute them. You can download, print, copy, edit, and redistribute the
documentation, but you can not sell it, or sell any documentation derived from it. You can not modify or attempt to reverse engineer
the programs.
This product is subject to U.S. export control laws and regulations including, but not limited to, the U.S. Export Administration
Regulations, the International Traffic in Arms Regulation requirements, and all applicable end-use, end-user and destination
restrictions. Licensee shall not permit, directly or indirectly, use of any Perforce technology in or by any U.S. embargoed country or
otherwise in violation of any U.S. export control laws and regulations.
Perforce programs and documents are available from our Web site as is. No warranty or support is provided. Warranties and
support, along with higher capacity servers, are sold by Perforce.
Perforce assumes no responsibility or liability for any errors or inaccuracies that might appear in this book. By downloading and
using our programs and documents you agree to these terms.
Perforce and Inter-File Branching are trademarks of Perforce.
All other brands or product names are trademarks or registered trademarks of their respective companies or organizations.
Contents

How to use this guide                                    6
 Syntax conventions                                      6
 Feedback                                                6
 Other documentation                                     7
Overview of Helix Authentication Service                 9
 Helix Core and Helix ALM                                9
   Supported client applications and minimal versions    9
   Sequence for Helix Core                              10
   Sequence for Helix ALM                               11
   Important security consideration                     12
 Load balancing                                         12
Installing Helix Authentication Service                 13
 Prerequisites                                          13
 Four ways to install HAS                               14
 Package installation                                   15
   Verify the Public Key                                15
   For APT (Ubuntu)                                     16
   For YUM (Red Hat Enterprise Linux or CentOS)         16
   Next                                                 17
 Installation script                                    17
   Installation steps                                   17
   Next                                                 18
 Manual installation                                    18
   Easy way to install Node.js                          19
   CentOS/RHEL 6, 7, 8, Fedora 31, Ubuntu 14, 16, 18    19
   Other Linux distributions                            20
   Windows 10 Pro and Windows Server 2019               20
   Windows as a service                                 20
   Installing Module Dependencies                       20
   Next                                                 20
Installing as a Windows service                         21
 Installation                                           21
   Prerequisites                                        21

                                                             3
Installing Module Dependencies 21
Starting and Stopping the Service 22
Configuration 22
Logging 22
Removal 23
Configuring Helix Authentication Service 24
The example.env and .env files 24
Recommended: configure-auth-service.sh 24
Certificates 25
Restarting the Service 26
OpenID Connect settings variables 26
SAML settings variables 27
Other Settings 30
Logging 32
Load configuration changes without restarting HAS 34
Next 35
Starting Helix Authentication Service 36
Overview 36
npm 36
systemd 36
Process Managers 36
pm2 36
Next 37
Example Identity Provider configurations 38
Auth0 38
OpenID Connect 38
SAML 2.0 39
Azure Active Directory 40
OpenID Connect 40
SAML 2.0 40
SAML via Azure's Active Directory Gallery 41
Okta 41
OpenID Connect 41
SAML 2.0 42
4OneLogin 43
OpenID Connect 43
SAML 2.0 43
Google G Suite IdP 44
OpenID Connect 44
SAML 2.0 44
Next 44
Example Helix Swarm configuration 45
Service Address Consistency 45
Swarm SAML 45
Example Swarm config.php 45
entityID values 46
Authentication Service 46
logout_url for Swarm 47
Next steps for Helix Core 48
Next steps for Helix ALM 49
Upgrading Helix Authentication Service 50
Troubleshooting 52
"Missing authentication strategy" displayed in browser 52
Redirect URI error displayed in browser 52
Environment settings and unexpected behavior 52
pm2 caching environment variables 53
OIDC challenge methods not supported 53
pm2 restart has no effect for CentOS service package 53
Glossary 54
License statements 73
5How to use this guide
How to use this guide
This section provides information on typographical conventions, feedback options, and additional
documentation.
Syntax conventions
Helix documentation uses the following syntax conventions to describe command line syntax.
Notation Meaning
literal Must be used in the command exactly as shown.
italics A parameter for which you must supply specific information. For example, for a
serverid parameter, supply the ID of the server.
-a -b Both a and b are required.
{-a | - Either a or b is required. Omit the curly braces when you compose the command.
b}
[-a -b] Any combination of the enclosed elements is optional. None is also optional.
Omit the brackets when you compose the command.
[-a | - Any one of the enclosed elements is optional. None is also optional. Omit the
b] brackets when you compose the command.
... Previous argument can be repeated.
n p4 [g-opts] streamlog [ -l -L -t -m max ] stream1
...
means 1 or more stream arguments separated by a space
n See also the use on ... in Command alias syntax in the Helix Core P4
Command Reference
Tip
... has a different meaning for directories. See Wildcards in the Helix Core P4
Command Reference.
Feedback
How can we improve this manual? Email us at manual@perforce.com.
6Other documentation
Other documentation
See https://www.perforce.com/support/self-service-resources/documentation.
Tip
You can also search for Support articles in the Perforce Knowledgebase.
7Overview of Helix Authentication Service
The Helix Authentication Service (HAS) is designed to enable certain Perforce products to integrate with
your organization's Identity Provider (IdP).
HAS supports:
n Two protocols: Security Assertion Markup Language (SAML) and OpenID Connect (OIDC).
l HAS can work with one IdP per protocol. For example, you might want to use OpenID
Connect with Azure Active Directory, and SAML with Google G Suite IdP.
n Security-Enhanced Linux (SELinux) enabled in enforcing mode
The officially supported "Example Identity Provider configurations" on page 38 include AuthO, Azur
Active Directory, Okta (identity management), OneLogin, Google G Suite IdP for SAML. In addition, we
have positive results with our initial testing with Shibboleth for SAML and Ping Identity. We expect HAS
can also work with Cisco Duo Security and probably any standard IdP.
Helix Core and Helix ALM
After you perform the tasks of "Installing Helix Authentication Service" on page 13, "Configuring Helix
Authentication Service" on page 24, and "Starting Helix Authentication Service" on page 36, you will go
to one of the following:
n "Next steps for Helix Core" on page 48 so you can to learn about the necessary work with a Helix
Core Server Extension
n "Next steps for Helix ALM" on page 49 so you can to learn about the necessary work with the
Helix ALM License Server
Supported client applications and minimal versions
The client version must be equal to or greater than the version specified:
9Sequence for Helix Core
Helix ALM or
Helix Core Client
Surround SCM
n Helix Swarm 2018.3, the free code review tool n Helix ALM 2019.4.0
clients
n P4V 2019.2, the Helix Core Visual Client
n Surround SCM
n P4 2019.1, the Helix Core command-line client
2019.2.0
n P4VS 2019.2 patch 2, the Helix Plugin for Visual
Studio
n P4EXP 2019.2, the Helix Plugin for File Explorer
n Helix Plugin for Eclipse (P4Eclipse) 2019.1
patch 2
n Helix Plugin for Matlab (P4SL) 2019.1
Sequence for Helix Core
10Sequence for Helix ALM
Important
Helix Core clients get a p4 ticket to log in from a Helix Core Server Extension on the Helix Core
server. To learn about the necessary work with a Helix Core Server Extension, see "Next steps for
Helix Core" on page 48.
Sequence for Helix ALM
Important
For Helix ALM clients, the user gets a login response from the Helix ALM License Server. See "Next
steps for Helix ALM" on page 49.
11Important security consideration
Important security consideration
Warning
The IdP authentication precedes and is separate from the Helix Core "ticket" and the ALM License
Server login reponse. Therefore, when the user logs out of Helix Core, the user is not necessarily
logged out from the IdP's perspective.
Logging out of a Helix Core or Helix ALM client does not invoke a logout with the IdP. Depending on
the IdP, subsequently starting a Helix Core or Helix ALM client might result with the user being logged
in again without the user being prompted to provide credentials.
Load balancing
If you are using load balancing in front of HAS, configure your load balancer to:
n preserve session cookies so the login sequence can succeed
n use session affinity (sticky sessions) so that all requests from the client go to the same HAS
instance
12Installing Helix Authentication Service
Prerequisites
n Administrative expertise with the software of your Identity Provider
n Expertise in security administration sufficient to work with both your Identity Provider (IdP) and
your Perforce server product.
n A web browser. Any client using the authentication service requires a web browser.
n Any client (even the p4 command-line client) is still required to authenticate through your IdP's
website. We recommend that at least one user with super level access use Perforce
authentication instead of Helix Authentication Service. See the Authorizing Access in the Helix
Core Server Administrator Guide.
n Two valid certificates: a certificate for HAS and a certificate for the other half of the solution,
which is either a Helix Core Server Extension or a Helix ALM License Server.
n One or more of the following:
Helix Core Server, version 2019.1 or later, assuming that you have Helix ALM, version
knowledge of Perforce administration for authentication with tickets - 2019.4 or later, or
see Authenticating using passwords and tickets in the Helix Core Surround SCM,
Server Administrator Guide. version 2019.2 or
later.
Important
l To configure Helix Authentication Service for Helix Core Important
Server (P4) and the Helix Core visual client (P4V), you must To use the Helix
configure a Helix Core Server Extension. See the Authentication
Administrator's Guide for Helix Authentication Extension in Service to
the docs directory of the Helix Authentication Extension authenticate from
repository on GitHub. Helix ALM or
Surround SCM,
l Extensions are currently disabled for Helix Core installs on
you must
Windows servers.
configure Helix
l The Helix Authentication Extension provides a mechanism ALM License
to test the Helix Authentication Service with a select group Server. see the
of users prior to rolling out the service organization-wide. See Helix ALM
the Testing the extension section in the Administrator's License Server
Guide for Helix Authentication Extension in the docs Admin Guide.
directory of the Helix Authentication Extension repository on
GitHub.
13Four ways to install HAS
Note
The diagrams at "Sequence for Helix Core" on page 10 and "Sequence for Helix ALM" on
page 11 show the flow of information between three components:
l the IdP
l Helix Authentication Service
l Helix Core Extension (or ALM License server)
The installation and configuration of these three
components can be in any order.
Tip
If you want to use multi-factor authentication (MFA) with the Helix Authentication Service,
consider using the multi-factor authentication solution provided by your IdP.
We do NOT recommend using the Helix MFA Authenticator with Helix Authentication Service.
The Helix MFA Authenticator should only be implemented when your password store and MFA
service are separated. The typical use case for the Helix MFA Authenticator is to have an on-
prem password store (such as LDAP) and a cloud-based MFA service.
Four ways to install HAS
You can install Helix Authentication Service (HAS) by using any of the following:
Docker The easiest option is the pre-build Docker container for download. For more
information, see https://hub.docker.com/r/perforce/helix-auth-svc
"Package The next easiest option is the package installation.
installation" on the
Supports
facing page
n CentOS 7, 8
n Ubuntu 16, 18, 20
14Package installation
"Installation script" Supports
on page 17
n CentOS/RHEL 7, 8
n Debian 8, 9, 10
n RedHat Fedora 31
n Ubuntu 14, 16, 18, 20
Automates the installation of required software, including Node.js
Requires some installation steps
"Manual installation" Supports
on page 18
n CentOS/RHEL 6, 7, 8
n Fedora 31
n Ubuntu 14, 16, 18, 20
n other Linux distributions (untested)
n Windows 10 Pro and Windows Server 2019, which
l are supported for use with the Helix ALM License Manager
l are not supported for use with Helix Core
Requires an installation of:
n Node.js, version 14 or later - see "Easy way to install Node.js " on
page 19
n a process manager
n module dependencies
Package installation
If your operating system is CentOS 7, 8 or Ubuntu 16, 18, perform the package installation that allows
you to use the YUM or APT package manager.
Package installation requires sudo or root level privileges.
Verify the Public Key
To ensure you have the correct public key for installing Perforce packages, verify the fingerprint of the
Perforce public key against the fingerprint shown below.
15For APT (Ubuntu)
1. Download the public key at https://package.perforce.com/perforce.pubkey
2. To obtain the fingerprint of the public key, run:
gpg --with-fingerprint perforce.pubkey
3. Verify that it matches this fingerprint:
E581 31C0 AEA7 B082 C6DC 4C93 7123 CB76 0FF1 8869
Follow the instructions that apply to you:
n "For APT (Ubuntu) " below
n "For YUM (Red Hat Enterprise Linux or CentOS)" below
For APT (Ubuntu)
1. Add the Perforce packaging key to your APT keyring. For example,
wget -qO - https://package.perforce.com/perforce.pubkey |
sudo apt-key add -
2. Add the Perforce repository to your APT configuration.
Create a file called /etc/apt/sources.list.d/perforce.list with the following
line:
deb http://package.perforce.com/apt/ubuntu {distro} release
Where {distro} is replaced by one of the following: precise, trusty, xenial or
bionic.
3. Run apt-get update
4. Install the package by running sudo apt-get install helix-auth-svc
Alternatively, you can browse the repository and download a Deb file directly from
https://package.perforce.com/apt/
For YUM (Red Hat Enterprise Linux or CentOS)
1. Add Perforce's packaging key to your RPM keyring:
sudo rpm --import
https://package.perforce.com/perforce.pubkey
2. Add Perforce's repository to your YUM configuration.
Create a file called /etc/yum.repos.d/perforce.repo with the following content:
[perforce]
name=Perforce
baseurl=http://package.perforce.com/yum/rhel/{version}/x86_64
enabled=1
gpgcheck=1
16Next
where version is either 6 for RHEL 6 or 7 for RHEL 7
3. Install the package by running sudo yum install helix-auth-svc
Alternatively, you can browse the repository and download an RPM file directly from
https://package.perforce.com/yum/
Next
See the configuration steps in the "Configuring Helix Authentication Service" on page 24 section.
Installation script
If your operating system is not supported by the package installation, we recommend using the
installation script rather than performing a "Manual installation" on the next page. The installation script
supports:
n CentOS 7, 8
n Debian 8, 9, 10
n RedHat Fedora 31, RHEL 7 and 8
n Ubuntu 14, 16, and 18
Installation steps
1. Download Helix Authentication Service from the Perforce download page by selecting Plugins &
Integrations.
2. For Family, choose Platform Independent, select TGZ or ZIP, and Download.
3. Expand the downloaded .tgz or .zip file.
17Next
4. Verify that you now have a README file, an example.env file, and an install.sh file.
The install.sh is the bash installation script.
5. Verify that the bin subdirectory contains the configure-auth-service.sh file.
6. Run the bash script named install.sh, which installs Node.js and then builds the service
dependencies.
Note
When you type
./install.sh -h
the output is:
Installation script for authentication service.
Usage:
install.sh [-m] [-n]
Description:
Install the authentication service and its dependencies.
-m
Monochrome; no colored text.
-n
Non-interactive; does not prompt for confirmation.
-h | --help
Display this help message.
7. Modify the service configuration by creating your own editing the .env file. Configuration
consists of defining the identity provider (IdP) details for either OIDC or SAML, and setting the
SVC_BASE_URI of the authentication service.
8. (Recommended) For better security, replace the example self-signed SSL certificates with ones
signed by a trusted certificate authority.
9. Restart the service by using the systemctl restart helix-auth command. (The
systemctl command is part of the systemd process manager for Linux.)
Next
See the configuration steps in the "Configuring Helix Authentication Service" on page 24 section.
Manual installation
The manual installation supports more operating systems than does the package installation.
18Easy way to install Node.js
Easy way to install Node.js
If you are going to do a manual installation of HAS, a prerequisite is an installation of Node.js. Various
packages for Node.js make it easy to install Node.js.
Installing Node.js on Ubuntu
14, 16, and 18
Packages from NodeSource are easy to install:
$ sudo apt-get install build-essential curl git
$ curl -sL https://deb.nodesource.com/setup_14.x | sudo -E bash
-
$ sudo apt-get install nodejs
Installing Node.js on CentOS/RHEL 7
CentOS, Oracle Linux, and RedHat Enterprise Linux lack Node.js packages of the versions required by
this service, but there are packages available from NodeSource that are easy to install.
$ sudo yum install curl git gcc-c++ make
$ curl -sL https://rpm.nodesource.com/setup_14.x | sudo -E bash -
$ sudo yum install nodejs
Installing Node.js on CentOS/RHEL 8
$ sudo yum install curl git gcc-c++ make
$ curl -sL https://rpm.nodesource.com/setup_14.x | sudo -E bash -
$ dnf --repo=nodesource download nodejs
$ sudo rpm -i --nodeps nodejs-14.*.rpm
$ rm -f nodejs-14.*.rpm
Installing Node.js on Fedora 31
This release of Fedora provides a compatible version of Node.js, so installation is simple.
$ sudo dnf install nodejs
CentOS/RHEL 6, 7, 8, Fedora 31, Ubuntu 14, 16, 18
1. Make sure you have an installation of Node.js, version 14 or later (see "Easy way to install
Node.js " above).
2. Perform the step under "Installing Module Dependencies" on the next page.
19Other Linux distributions
Other Linux distributions
1. Download and install the Linux Binaries for Node.js, version 14 or later, making sure that the bin
folder is added to the PATH environment variable when installing and starting the service.
2. Perform the step under "Installing Module Dependencies" below.
Windows 10 Pro and Windows Server 2019
Note
For Helix ALM and Surround SCM configurations only because Helix Core Extensions are currently
disabled for Helix Core installs on Windows servers.
1. Download and run both:
a. the Windows-based installer for Git because it is a precondition for installing Node.js
b. the Windows-based installer for Node.js LTS
2. Perform the step under "Installing Module Dependencies" below.
Note that Windows native toolchain, available by installing the Chocolatey Windows package manager,
is not required for the authentication service.
Windows as a service
If you want HAS to run automatically as a service, see "Installing as a Windows service " on the facing
page.
Installing Module Dependencies
The following command copies dependencies from the Node.js package site into the node_modules
directory within HAS. Open a terminal window and change to the directory containing the service code,
then run:
$ npm install
1. Download Helix Authentication Service from the Perforce download page by selecting Plugins &
Integrations.
2. Expand the .tgz or .zip file you downloaded.
3. Verify that you now have a README file and an ecosystem.config.js file.
Next
See the configuration steps in the "Configuring Helix Authentication Service" on page 24 section.
20Installing as a Windows service
Installing as a Windows service
The Helix Authentication Service can be deployed to Windows-based systems, and managed as a
Windows service. The guide below outlines the installation and configuration process.
Note
For Helix ALM and Surround SCM configurations only because Helix Core Extensions are currently
disabled for Helix Core installs on Windows servers.
Installation
Prerequisites
Download and run the Windows-based installers for Git and Node.js LTS. Note that the native tool chain,
available with the Chocolatey package manager, is not required for the authentication service.
Installing Module Dependencies
Installing the module dependencies for the authentication service is done from a command prompt. Open
a Windows PowerShell window (preferably as an Administrator) and change to the directory containing
the authentication service, then run the following commands:
> npm ci --only=prod --no-optional
> npm -g install node-windows
> npm link node-windows
> node .\bin\install-windows-service.js
If you run the commands as a normal user, as opposed to an administrator, several User Access Control
prompts from Windows will request your permission for the installation of the service.
HAS is now installed and running as a Windows service. If the system restarts, the authentication
service starts automatically.
Tip
If the service does not appear to be installed and running, run the uninstall script and then install a
second time.
> node .\bin\uninstall-windows-service.js
> node .\bin\install-windows-service.js
21Starting and Stopping the Service
Starting and Stopping the Service
You can start and stop the HAS Windows service by using the Windows service utilities. The Services
application provides a graphical interface for this purpose.
Alternatively, the NET command can be run as administrator from the command shell:
To stop the service,
> net stop helixauthentication.exe
To start the service,
> net start helixauthentication.exe
Configuration
The configuration of the authentication service is managed through environment variables. An easy
method for setting the variables for the service is with a file named .env in the directory containing the
authentication service. The .env file is a text file that contains names and values, separated by an
equals (=) sign. For example:
1. Stop the service.
2. Add these lines to the .env file:
SVC_BASE_URI=https://has.example.com
LOGGING='C:\\helix-auth-svc\\logging.config.js'
3. Start the service.
For additional settings, see "Configuring Helix Authentication Service" on page 24.
Logging
The output of the authentication service is captured in text files in the bin\daemon directory within the
directory containing the authentication service. The error output is in a file named
helixauthentication.err.log and the normal output is in a file named
helixauthentication.out.log.
By default, basic logging of the service executable is written to the Windows event log in a source named
helixauthentication.exe, which shows when the service starts, stops, or has critical errors.
There might also be a second source named Helix Authentication wrapper that is created
by the program that runs the authentication service as a Windows service.
The authentication service supports writing its own logging to the events log, and this can be enabled
by configuring the logging. See the "Logging" on page 32 section. To enable logging to the Windows
event log, use the transport value of event, and optionally define additional properties, as
described below.
22Removal
Name Description Default
eventLog Selects the event log scope, either APPLICATION
APPLICATION or SYSTEM
source Label used as the source of the logging event HelixAuthentication
An example of logging all messages at levels from info up to error, to the SYSTEM events log, with
a source named Auth-Service:
module.exports = {
level: 'info',
transport: 'event',
event: {
eventLog: 'SYSTEM',
source: 'Auth-Service'
}
}
Removal
To remove HAS as a Windows service, open the PowerShell and execute the following commands from
the installation directory of the Helix Authentication Service.
> net stop helixauthentication.exe
> node .\bin\uninstall-windows-service.js
23Configuring Helix Authentication Service
The authentication service is configured using environment variables. Because there are numerous
settings, it is easiest to create a file called .env that contains all of the settings. If you change the
.env file while the service is running, the service must be restarted for the changes to take effect.
The choice of process manager affects how these environment variables are defined. For further details,
see "Starting Helix Authentication Service" on page 36"Starting Helix Authentication Service" on
page 36.
The example.env and .env files
We recommend that you use the example.env file as your starting point for configuring the service.
The example.env file is in your installation directory. The example.env file is a plain text file that
contains:
n NAME=VALUE pairs
n comment lines starting with #
For example:
# this is a comment
CA_CERT_FILE='certs/ca.crt'
NODE_ENV='production'
OIDC_CLIENT_ID='client_id'
OIDC_CLIENT_SECRET_FILE='secrets/oidc_client.txt'
OIDC_ISSUER_URI='http://localhost:3001/'
If you use example.env as your starting point, rename it to .env because the service needs that
name to operate.
Make sure your .env file is located in the current working directory when the service is started.
Typically this is the same directory as the package.json file of the service code.
Note
Be aware that the configuration of the service with your identity provider might require some
assistance from Perforce Support.
Recommended: configure-auth-service.sh
We recommend that you use the configure-auth-service.sh script because it is easier than
a manual configuration of .env file.
24Certificates The configuration script is in the bin directory of your installation. For example, if you installed HAS using the package, to get the help for the configuration script, type /opt/perforce/helix-auth-svc/bin/configure-auth-service.sh -h and the output will be: Certificates Warning We strongly recommend that you use proper certificates and a trusted certificate authority (CA). A self-signed certificate might be rejected at any time. 25
Restarting the Service

The Helix Authentication Service reads its certificate and key files using the paths defined in SP_
CERT_FILE and SP_KEY_FILE, respectively. The path for the CA certificate is read from the CA_
CERT_FILE environment variable. Providing a CA file is only necessary if the CA is not one of the root
authorities whose certificates are already installed on the system. Clients accessing the
/requests/status/:id route will require a valid client certificate signed by the certificate
authority.
If the certificate files are changed, the service will need to be restarted because the service only reads
the files at startup.

Restarting the Service
If you installed by using the packager or the installation script, HAS is already running and its helix-
auth is its service name. However, any changes to the HAS environment settings only take effect
when the service is restarted.

    n   If you installed the HAS by using the package or install script, use the systemd system
        manager to restart the helix-auth service.
    n   If you are running the service under Windows, see "Installing as a Windows service " on page 21.

OpenID Connect settings variables
  Variable
                      Description
  Name
  OIDC_               The client identifier as provided by the OIDC identity provider
  CLIENT_ID
  OIDC_               The client secret as provided by the OIDC identity provider
  CLIENT_
  SECRET
  OIDC_               Path of the file containing the client secret as provided by the OIDC identity
  CLIENT_             provider. This setting should be preferred over OIDC_CLIENT_SECRET to
  SECRET_             prevent accidental exposure of the client secret.
  FILE
  OIDC_CODE_          The default behavior is to detect the supported methods in the OIDC issuer data.
  CHALLENGE_          Therefore, in most cases it is optional to specify the authorization code challenge
  METHOD              method, which is either S256 or plain.
                      However, not all identity providers supply this information, in which case this
                      setting becomes necessary.
  OIDC_               The OIDC provider issuer URL
  ISSUER_URI

                                                                                                             26
SAML settings variables
OpenID Connect has a discovery feature in which the identity provider advertises various properties via a
"discovery document". The URI path will be /.well-known/openid-configuration at the
IdP base URL, which is described in the OpenID Connect (OIDC) specification. This information makes
the process of configuring an OIDC client easier.
The OIDC client identifier and secret are generally provided by the identity provider during the setup and
configuration of the application, and this is unique to each identity provider. For guidance with several
popular identity providers, see "Example Identity Provider configurations" on page 38.
The OIDC issuer URI value is advertised in the discovery document mentioned above, and will be a
property named issuer. Copy this value to the OIDC_ISSUER_URI service setting. Do NOT to use
one of the "endpoint" URL values, because those are different from the issuer URI.
SAML settings variables
Note
SAML identity providers advertise some of the information for the variables through their metadata
URL (or metadata file).
The URL is different for each provider, unlike OIDC. See "Example Identity Provider configurations"
on page 38.
When configuring the service as a "service provider" within a SAML identity provider, provide an
entityID that is unique within your set of registered applications. By default, the service uses the
value https://has.example.com, which can be changed by setting the SAML_SP_
ENTITY_ID environment variable. Anywhere that https://has.example.com appears in
this documentation, replace it with the value you defined in the identity provider.
Name IDP_CERT_FILE
Description Path of the file containing the public certificate of the identity provider, used to
validate signatures of incoming SAML responses. This is not required, but it
does serve as an additional layer of security.
Default none
Name IDP_CONFIG_FILE
Description Path of the configuration file that defines SAML service providers that will be
connecting to the authentication service.
27SAML settings variables
Default When the authentication service is acting as a SAML identity provider, it
reads some of its settings from a configuration file in the auth service
installation. By default, this file is named saml_idp.conf.js and is
identified by the IDP_CONFIG_FILE environment variable. It is evaluated
using the Node.js require() function.
Name SAML_AUTHN_CONTEXT
Descripti The authn context defines the method by which the user will authenticate with the IdP.
on Normally the default value works on most systems, but it may be necessary to change
this value. For example, Azure might want this set to
urn:oasis:names:tc:SAML:2.0:ac:classes:Password in certain
cases.
Default urn:oasis:names:tc:SAML:2.0:ac:classes:PasswordProtect
edTransport
Name SAML_DISABLE_CONTEXT
Description If set to true, do not request a specific authentication context from the SAML IdP.
Instead, allow Active Directory Federation Services (ADFS) to decide. Some
configurations use different contexts depending on how the user is authenticating.
For example, accessing the server from outside the corporate network might
correspond to a different context than accessing the server from inside the corporate
network.
Default false
Name SAML_IDP_ENTITY_ID
Description The entity identifier for the identity provider. This is not required, but if
provided, then the IdP issuer will be validated for incoming logout
requests/responses.
Default none
Name SAML_IDP_METADATA_FILE
28SAML settings variables
Description Specifies the path of a local file that contains the identity provider's metadata in XML
format. An example of a SAML IdP that uses a file instead of a URL is Google
Workspace (G Suite). If you use SAML_IDP_METADATA_FILE, it takes
precedence over SAML_IDP_METADATA_URL.
Default none
Name SAML_IDP_METADATA_URL
Description URL of the IdP metadata configuration in XML format.
Note
If you fetch the IdP metadata by the SAML_IDP_
METADATA_URL setting, several other settings
might be configured automatically by the service.
Which settings depends on the information the IdP
advertises via the metadata. Possibilities include
SAML_IDP_SSO_URL, SAML_IDP_SLO_
URL, SAML_NAMEID_FORMAT, and the IdP
certificate that would be loaded from the file
named in IDP_CERT_FILE.
In the unlikely scenario that the IdP returns data
that needs to be modified, set the correct value in
the appropriate environment variable, such as
SAML_NAMEID_FORMAT
Default none
Name SAML_IDP_SLO_URL
Description URL of IdP Single Log-Out service.
Default none
Name SAML_NAMEID_FIELD
Description Name of the property in the user profile to be used if nameID is missing,
which is likely to be the case when using another authentication protocol
(such as OIDC) with the identity provider (such as Okta).
29Other Settings
Default none
Note: Changing the configuration file requires restarting the service because Node
caches the file contents in memory.
Name SAML_SP_AUDIENCE
Description Service provider audience value for AudienceRestriction assertions.
Default none
Name SAML_SP_ENTITY_ID
Description The entity identifier (entityID) for the Helix Authentication Service.
Default https://has.example.com
Other Settings
Name Description Default
BIND_ Define the IP address upon which the service will listen for 0.0.0.0
ADDRESS requests. Setting this to 127.0.0.1 (that is, localhost)
means that only processes on the same host can connect, while
a value of 0.0.0.0 means requests made against any
address assigned to the machine will work.
DEBUG Set to any value to enable debug logging in the service (writes none
to the console).
CA_CERT_ Path of certificate authority file for service to use when verifying none
FILE client certificates.
CA_CERT_ Path of directory containing certificate authority files for service none
PATH to use when verifying client certificates. All files in the named
directory will be processed.
30Other Settings
Name Description Default
CLIENT_ By default, HAS accepts any valid client certificate that is signed by none
CERT_CN the designated certificate authority. If you want additional security,
consider using this setting.
Specify a name or pattern to match against the Common Name in
the client certificate used to acquire the user profile data. The patterns
supported are described in the library at
https://github.com/isaacs/minimatch, with the asterisk (*) being the
most common wildcard. For example:
client.example.com
*.example.com
*TrustedClient*
DEFAULT_ The default authentication protocol to use. Can be oidc or saml. saml
PROTOCOL
FORCE_ If set to any non-empty value, will cause the service to require none
AUTHN the user to authenticate, even if the user is already
authenticated. For SAML, this means setting the forceAuthn
field set to true, while for OIDC it will set the max_age
parameter to 0. This is not supported by all identity providers,
especially for OIDC.
LOGGING Path of a logging configuration file. See the Logging section none
below. Setting this will override the DEBUG setting.
LOGIN_ How long in seconds to wait for user to successfully 60
TIMEOUT authenticate.
SESSION_ Password used for encrypting the in-memory session data. keyboard
SECRET cat
SP_CERT_ The service provider public certificate file, needed with SAML. none
FILE
SP_KEY_ The algorithm used to sign the requests. sha256
ALGO
SP_KEY_ The service provider private key file, typically needed with none
FILE SAML.
31Logging
Name Description Default
SVC_ The authentication service base URL visible to end users. Needs to none
BASE_URI match the application settings defined in IdP configuration.
Note
If you use a load balancer in front of HAS, such as Amazon Web
Services Elastic Load Balancing (ELB), the load balancer can
have a certificate installed and use SSL termination (decryption).
Such a process requires a protocol to forward the traffic to a port.
Therefore, HAS supports setting the PORT and PROTOCOL
configuration variables.
If SVC_BASE_URI is defined, it sets the value of PORT and
PROTOCOL. For example,
https://has.example.com:443explicitly sets
PROTOCOL to https and PORT to 443. In this scenario, 443
might also be considered the DNS name of the load balancer.
The default value of PORT is 3000, and the default value of
PROTOCOL is http.
You can explicitly set PROTOCOL to http or https. The
PORT value can be implicitly defined because http defaults to
80 and https defaults to 443.
Note that the PORT for SVC_BASE_URI is distinct from the
syslog port described under "Logging" below.
For information about configuring the service to treat the
connection to the load balancer and/or proxy as secure, use the
TRUST_PROXY setting. For details, see
http://expressjs.com/en/guide/behind-proxies.html.
Logging
The authentication service will, by default, write only HTTP request logs to the console. With the DEBUG
environment variable set to any value, additional logging will be written to the console. For more precise
control, the LOGGING environment variable can be used to specify a logging configuration file. The
format of the logging configuration file can be either JSON or JavaScript. Name the logging file with an
extension of .json for a JSON file, or .js for a JavaScript file.
The top-level properties are listed in the table below.
32Logging
Name Description Default
level Messages at this log level and above will be written to the named none
transport; follows syslog levels per RFC5424, section 6.2.1.
Levels in order of priority: emerg, alert, crit, error,
warning, notice, info, debug
transport console, file, or syslog none
An example of logging messages to the console, starting explicitly at debug and including emerg:
module.exports = {
level: 'debug',
transport: 'console'
}
Logging to a named file can be achieved by setting the transport to file. Additional properties can
then be defined within a property named file, as described in the table below.
Name Description Default
filename Path for the log file. auth-svc.log
maxsize Size in bytes before rotating the file. none
maxfiles Number of rotated files to retain. none
An example of logging messages to a named file, starting at the level of warning and including
emerg, is shown below. This example also demonstrates log rotation by defining a maximum file size
and a maximum number of files (maxfiles) to retain.
module.exports = {
level: 'warning',
transport: 'file',
file: {
filename: '/var/log/auth-svc.log',
maxsize: 1048576,
maxfiles: 10
}
}
Logging to the system logger, syslog, is configured by setting the transport to syslog.
Additional properties can then be defined within a property named syslog, as described in the table
below. Note that the syslog program name will be helix-auth-svc for messages emitted by the
authentication service.
33Load configuration changes without restarting HAS
Name Description Default
facility Syslog facility, such as auth, cron, daemon, kern, mail, etc. local0
path Path of the syslog unix domain socket. For example, /dev/log none
host Host name of the syslog daemon. none
port Port number on which the syslog daemon is listening. none
protocol Communication protocol, such as tcp4, udp4, unix none
An example of logging all messages at levels from info up to emerg, to the system log, is shown below.
This example demonstrates logging to syslog on Ubuntu 18, in which the default installation uses a unix
domain socket that has /dev/log as its name.
module.exports = {
level: 'info',
transport: 'syslog',
syslog: {
path: '/dev/log',
protocol: 'unix'
}
}
Load configuration changes without restarting HAS
If you want to change the configuration for HAS, choose one of the following methods:
n Edit the configuration file, stop the service instance, then restart it.
n Signal the service process to reload the configuration.
l One way is to use the Unix command kill -HUP to send a literal "signal" to the
process. (This is similar to how some daemon programs might use SIGHUP as a signal to
restart themselves to re-read a configuration file that has been changed.)
l Another way is to send the USR2 signal to the process, get the process identifier of the
service, and invoke the kill command:
kill -USR2
An example of this command, and the correct process ID, are written to the log at info level
when the service starts up.
When HAS receives the USR2 signal, it reloads all the environment variables except those
settings that cannot be changed during runtime:
34Next
BIND_ADDRESS CA_CERT_FILE
CA_CERT_PATH DEBUG
LOGGING PROTOCOL
PORT REDIS_URL
SESSION_SECRET SVC_BASE_URI
TRUST_PROXY
Next
See "Starting Helix Authentication Service" on page 36.
35Starting Helix Authentication Service
Overview
Helix Authentication Service does not rely on a database because all data is stored temporarily in
memory. The configuration is defined by environment variables.
Tip
Knowing that the service can start is necessary but not sufficient. After you know the service can
start, you need to go to either "Next steps for Helix Core" on page 48 or "Next steps for Helix ALM" on
page 49.
npm
The simplest way to run the Helix Authentication Service is using npm start from a terminal window.
However, that is not robust because if the service fails, it must be restarted. Therefore, we recommend
that you use a Node.js process manager to start and manage the service.
systemd
If you are using the systemd process manager for Linux, the systemd service unit is named helix-
auth, and you can start and stop the HAS service by using the systemctl command that systemd
provides.
Process Managers
Node.js process managers generally offer many advantages over using just npm to run a Node.js
application. Such managers include pm2, forever, and StrongLoop. These Node.js process managers
typically hook into the system process manager (for example, systemd) and thus will only go down if
the entire system goes down.
pm2
The pm2 process manager is recommended for deploying this service. Aside from it offering many
convenient functions for managing Node.js processes, it also aggregates and rotates log files that
capture the output from the service: use the pm2 logs command to list the files, and pm2 info to
get the location of the log files. See the example configuration file, ecosystem.config.js, in the
top-level of the service installation directory.
36Next Next See "Example Identity Provider configurations" on page 38. 37
Example Identity Provider configurations
This section:

    n   provides details for several hosted identity providers, but is not an exhaustive list of supported
        identity providers
    n   refers to variables that are described in "OpenID Connect settings variables" on page 26 and
        "SAML settings variables" on page 27
          l   for every occurrence of the SVC_BASE_URI variable in the instructions below, substitute
              the actual protocol, host, and port for the authentication service (for example,
              https://localhost:3000 for development environments). This address must
              match the URL that the identity provider is configured to recognize as the "SSO" or
              "callback" URL for the application.

Auth0

OpenID Connect
   1. From the admin dashboard, click the CREATE APPLICATION button.
   2. Enter a meaningful name for the application.
   3. Select the Regular Web Application button, then click Create.
   4. Open the Settings tab,
         a. Copy the Client ID and Client Secret values to the OIDC_CLIENT_ID and
            OIDC_CLIENT_SECRET settings in the service configuration
         b. For Allowed Callback URLs, add {SVC_BASE_URI}/oidc/callback
         c. For Allowed Logout URLs, add {SVC_BASE_URI}
         d. Scroll to the bottom of the Settings screen and click the Advanced Settings link.
         e. Find the Endpoints tab and select it.
   5. In a new browser tab,
         a. Open the OpenID Configuration value to get the raw configuration values.
         b. Find issuer and copy the value to OIDC_ISSUER_URI in the service config.
         c. Close the browser tab.
   6. At the bottom of the page, click the SAVE CHANGES button.

                                                                                                             38
SAML 2.0
SAML 2.0
1. From the admin dashboard, click the CREATE APPLICATION button.
2. Enter a meaningful name for the application.
3. Select the Regular Web Application button, then click Create.
4. On the application Settings screen, add {SVC_BASE_URI}/saml/sso to the Allowed
Callback URLs field.
5. For Allowed Logout URLs add {SVC_BASE_URI}/saml/slo
6. At the bottom of the page, click the SAVE CHANGES button.
7. Click the Addons tab near the top of the application page.
8. Click the SAML2 WEB APP button to enable SAML 2.0.
9. Enter {SVC_BASE_URI}/saml/sso for the Application Callback URL
10. Ensure the Settings block looks something like the following:
{
"signatureAlgorithm": "rsa-sha256",
"digestAlgorithm": "sha256",
"nameIdentifierProbes": [
"http://schemas.xmlsoap.org/ws/2005/05/identity/claims/emailaddress"
],
"logout": {
"callback": "{SVC_BASE_URI}/saml/slo"
}
}
11. Click the ENABLE button at the bottom of the page.
12. On the Usage tab of the addon screen, copy the Identity Provider Login URL to the
SAML_IDP_SSO_URL setting in the service configuration.
13. To get the single logout URL, download the metadata and look for the
SingleLogoutService element, copying the Location attribute value to SAML_IDP_
SLO_URL in the config.
39Azure Active Directory
Azure Active Directory
OpenID Connect
1. Visit the Microsoft Azure portal.
2. Register a new application under Azure Active Directory.
3. You can use a single app registration for both OIDC and SAML.
4. For the redirect URI, enter {SVC_BASE_URI}/oidc/callback
5. Copy the Application (client) ID to the OIDC_CLIENT_ID variable.
6. Open the OpenID Connect metadata document URL in the browser.
Click the Endpoints button from the app overview page.
7. Copy the issuer URI and enter it as the OIDC_ISSUER_URI variable.
If the issuer URI contains {tenantid}, replace it with the Directory (tenant) ID
from the application overview page.
8. Under Certificates & Secrets, click New client secret, copy the secret value to the OIDC_
CLIENT_SECRET environment variable.
9. Add a user account (such as guest) such that it has a defined email field.
Note that "personal" accounts do not have the email field defined.
10. Make sure the user email address matches the user in Active Directory.
SAML 2.0
1. Visit the Microsoft Azure portal.
2. Register a new application under Azure Active Directory.
3. You can use a single app registration for both OIDC and SAML.
4. Enter the auth service URL as the redirect URL.
5. Copy the Application (client) ID to the SAML_SP_ENTITY_ID environment
variable
6. Open the API endpoints page.
Click the Endpoints button from the app overview page
7. Copy the SAML-P sign-on endpoint value to the SAML_IDP_SSO_URL environment
variable.
8. Copy the SAML-P sign-out endpoint value to the SAML_IDP_SLO_URL environment
variable.
9. Set the SAML_NAMEID_FORMAT environment variable to the value
urn:oasis:names:tc:SAML:1.1:nameid-format:emailAddress
40SAML via Azure's Active Directory Gallery
10. Make sure the user email address matches the user in Active Directory.
11. Configure the extension to use nameID as the name-identifier value.
SAML via Azure's Active Directory Gallery
These steps involve a template that might make configuration easier.
1. Visit the Microsoft Azure portal.
2. Select Azure Active Directory.
3. Under Enterprise applications, click New Application.
4. In the Add an application page, enter Perforce and select the Perforce Helix Core
- Helix Authentication Service.
5. Click the Add button.
6. Wait for the application to be added.
7. In Assign users and groups, add a user or a group.
8. In the Single sign-on page, click SAML.
9. In the Basic SAML Configuration section, configure the required fields:
n For the Entity ID, enter the value from the SAML_SP_ENTITY_ID setting in the HAS
service configuration.
n For the Reply URL, enter {SVC_BASE_URI}/saml/sso
n For the Sign on URL, enter {SVC_BASE_URI}
10. Click the Save button.
11. Click Single sign-on and navigate to SAML Signing Certificate area.
12. Copy the value in the field for App Federation Metadata Url to the SAML_IDP_
METADATA_URL variable.
13. Make sure the user email address matches the user in Active Directory.
14. Configure the extension to use nameID as the name-identifier value.
Okta
OpenID Connect
1. On the Okta admin dashboard, click the Create a New application button, which is available in
the "classic ui".
2. Select Web as the Platform and OpenID Connect as the Sign on method.
3. Provide a meaningful name on the next screen.
41SAML 2.0
4. For the Login redirect URIs, enter {SVC_BASE_URI}/oidc/callback
5. For the Logout redirect URIs, enter {SVC_BASE_URI}
6. On the next screen, find the Client ID and Client secret values and copy to the OIDC_
CLIENT_ID and OIDC_CLIENT_SECRET service settings.
7. From the Sign On tab, copy the Issuer value to OIDC_ISSUER_URI
If you are already logged into Okta, do one of the following:
n assign that user to the application you just created
n log out so you can log in again using the credentials for a user that is assigned to the application.
Otherwise you will immediately go to the login failed page, and the only indication of the cause is in the
Okta system logs.
SAML 2.0
1. On the Okta admin dashboard, click the Create a New application button, which is available in
the "classic ui".
2. Select Web as the Platform and SAML 2.0 as the Sign on method.
3. Provide a meaningful name on the next screen.
4. Click Save to go to the next screen.
5. For the Single sign on URL, enter {SVC_BASE_URI}/saml/sso
6. For the Audience URI, enter https://has.example.com
7. Click the Show Advanced Settings link and check the Enable Single Logout checkbox.
8. For the Single Logout URL, enter {SVC_BASE_URI}/saml/slo
9. For the SP Issuer, enter https://has.example.com
10. For Signature Certificate, select and upload the certs/server.crt file.
11. Click the Next button to save the changes.
12. There might be an additional screen to click through.
13. From the Sign On tab, click the View Setup Instructions button and copy the values for IdP
SSO and SLO URLs to the SAML_IDP_SSO_URL and SAML_IDP_SLO_URL settings in
the environment.
14. Configure the extension to use nameID as the name-identifier value.
15. Configure the extension to use user as the user-identifier value.
If you are already logged into Okta, do one of the following:
n assign that user to the application you just created
n log out so you can log in again using the credentials for a user that is assigned to the application.
42OneLogin
Otherwise you will immediately go to the login failed page, and the only indication of the cause is in the
Okta system logs.
OneLogin
OpenID Connect
1. From the admin dashboard, create a new app: search for "OIDC" and select OpenId
Connect (OIDC) from the list.
2. On the Configuration screen, enter {SVC_BASE_URI}/oidc/login for Login Url
3. On the same screen, enter {SVC_BASE_URI}/oidc/callback for Redirect URI's
4. Click the Save button.
5. From the SSO tab, copy the Client ID value to the OIDC_CLIENT_ID environment
variable.
6. From the SSO tab, copy the Client Secret value to OIDC_CLIENT_SECRET (you might
need to "show" the secret to enable the copy button).
7. From the SSO tab, find the OpenID Provider Configuration Information link and open in a new
tab.
8. Find the issuer and copy the URL value to the OIDC_ISSUER_URI environment variable.
9. Ensure the Application Type is set to Web.
10. Ensure the Token Endpoint is set to Basic.
SAML 2.0
1. From the admin dashboard, create a new app: search for "SAML" and select SAML Test
Connector (Advanced) from the list.
2. On the Configuration screen, enter https://has.example.com for Audience
3. On the same screen, enter for Recipient
4. For ACS (Consumer) URL Validator, enter .* to match any value
5. For ACS (Consumer) URL, enter
6. For Single Logout URL, enter
7. For Login URL, enter
8. For SAML initiator select Service Provider
9. Click the Save button.
10. From the SSO tab, copy the SAML 2.0 Endpoint value to the environment variable.
43Google G Suite IdP
11. From the SSO tab, copy the SLO Endpoint value to SAML_IDP_SLO_URL
12. Configure the extension to use nameID as the name-identifier value.
Google G Suite IdP
OpenID Connect
See the GitHub project, Configuring Helix Core with Google single-sign-on.
SAML 2.0
1. Visit the Google Admin console.
2. Click the Apps icon.
3. Click the SAML apps button.
4. Click the Add a service/App to your domain link.
5. Click the SETUP MY OWN CUSTOM APP link at the bottom of the dialog.
6. On the Google IdP Information screen, copy the _SSO URL_ and _Entity ID_ values
to the SAML_IDP_SSO_URL and SAML_IDP_ENTITY_ID environment variables.
7. Click the NEXT button.
8. For the ACS URL enter {SVC_BASE_URI}/saml/sso
9. For the Entity ID enter https://has.example.com
10. Click the NEXT button, and then FINISH, and then OK to complete the initial setup.
11. On the Settings page for the new application, click the EDIT SERVICE button.
12. Change the Service status to ON to enable users to authenticate with this application.
Next
See one of the following:
n "Next steps for Helix Core" on page 48
n "Next steps for Helix ALM" on page 49
44Example Helix Swarm configuration
Example Helix Swarm configuration
Helix Swarm 2018.3 and later support the SAML 2.0 authentication protocol.
You can configure:
n Swarm to use SAML authentication with HAS as the IdP
n HAS to use an authentication protocol, such as OpenID Connect
Swarm will authenticate the user using HAS and the Helix Authentication Extension. See "Sequence for
Helix Core" on page 10.
Note
Separate from the HAS configuration, the Swarm administrator can configure a "logout_url for Swarm"
on page 47.
Service Address Consistency
Swarm When specifying the URL of HAS, the authentication service SVC_
configuration BASE_URI and the address specified in the Swarm configuration must
match. Either they are both IP addresses, or they are both host names.
Otherwise browser cookies will be inaccessible to the authentication
service and login will silently fail.
IdP The IdP address for the authentication service (Service Provider) must
configuration match the SVC_BASE_URI setting (before the suffix /saml/login).
Swarm SAML
For instructions on configuring single sign-on in Swarm, see Single Sign-On PHP configuration in the
Helix Swarm Guide.
Under idp/singleSignOnService, set the value of x509cert to the contents of the public
key of the authentication service. This is the file named in the SP_CERT_FILE setting. Collapse the
contents into a single line of text without the -----BEGIN CERTIFICATE----- header or the -
----END CERTIFICATE----- footer.
Example Swarm config.php
In this example:
45entityID values
n the authentication service is reachable at https://has.example.com:3000, which
would also be the value of the SVC_BASE_URI setting
n Swarm is reachable at http://swarm.example.com on the default port.
This example illustrates that the url setting under idp/singleSignOnService matches the value
of the SVC_BASE_URI setting with the suffix /saml/login and note that 'sp' represents Swarm
as the service provider.
'saml' => array(
'header' => 'saml-response: ',
'sp' => array(
'entityId' => 'urn:swarm-example:sp',
'assertionConsumerService' => array(
'url' => 'http://swarm.example.com',
),
),
'idp' => array(
'entityId' => 'urn:auth-service:idp',
'singleSignOnService' => array(
'url' => 'https://has.example.com:3000/saml/login',
),
'x509cert' => 'MIIDUjCCAjoCCQD72tM......yuSY=',
),
)
entityID values
urn:auth-service:idp the entityId for the IdP cannot be changed without
modifying the authentication service source code
https://has.example.com default value of the entity ID for HAS
urn:swarm-example:sp an example of a value that the Swarm admin might set
for the entity ID for Helix Swarm
Authentication Service
The authentication service must be configured to know about the service provider (Swarm) that will be
connecting to it. This is defined in the IDP_CONFIG_FILE configuration file. See the description of
IDP_CONFIG_FILE under "SAML settings variables" on page 27.
46You can also read