How to Create Dynamic Cheese Displays to Attract Customers and Increase Profits
←
→
Page content transcription
If your browser does not render page correctly, please read the page content below

How to Create Dynamic Cheese Displays to Attract Customers and Increase Profits

4
The ABC’s of Carving Cheese

 Why Carve Wisconsin Cheese                                                 ....................................................................................                                                                         2
 Carving as a Niche for Sales
 Cheese as a Carving Medium
 Two-dimensional vs. Three-dimensional Carving

 Plan Ahead                    ............................................................................................................                                                                                              3
 Order the Best Wisconsin Cheese for the Job
 The Right Environment
 Lighting
 Sanitation Guidelines
 Fatigue
 Storage and Shipping

 Tools & Supplies                             ....................................................................................................                                                                                       6
 Carving Tools & Supplies

 Carving . . . . . . . . . . . . . . . . . . . . . . . . . . . . . . . . . . . . . . . . . . . . . . . . . . . . . . . . . . . . . . . . . . . . . . . . . . . . . . . . . . . . . . . . . . . . . . . . . . . . . . . . . . . . . . . . . 8
 Choosing a Design
 How to Make a Pattern
 How to Transfer a Pattern onto the Cheese
    Toothpick Method for Simple Patterns
    Knife-cut Method for Simple and Most Complex Patterns
    Carbon Paper Method for Complex Patterns
 Crowd Control
 Putting Your Tools to Work
     2-D Carving (Relief)
     3-D Carving (Sculpture)
     Borders
         Square or Rectangular Border
         Round Scalloped Border
     Insets
     Backgrounds
         Gouged Texture
         Woodgrain Motif
         Polka Dots
 Finishing Touches
 Quick Fixes

 Supplies Checklist                             .................................................................................................                                                                                     14

                                                                                                                                                                                                                                               1

                                                         ©2012 WISCONSIN MILK MARKETING BOARD
Why Carve
Wisconsin
Cheese?
CARVING A NICHE FOR SALES
Cheese carvings attract customer attention,
which increases the opportunity for sales.
They add drama to in-store displays, buffet
tables, and party platters. Cheese carvings
suggest something special, an extra effort.
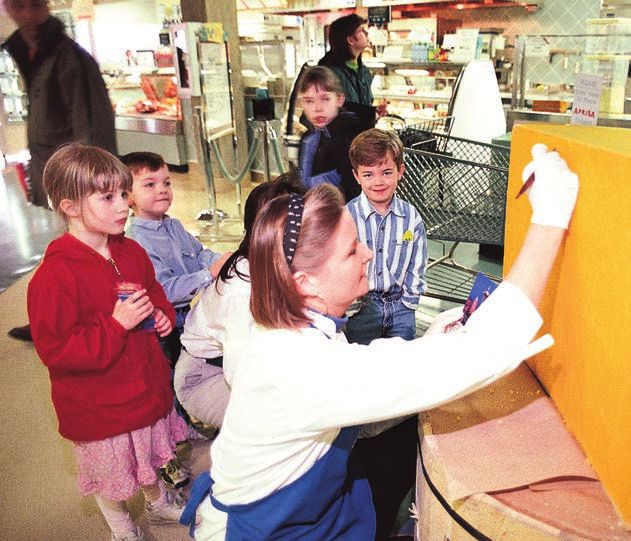
CHEESE AS A CARVING MEDIUM
Cheese carves easily because of its texture and
plasticity. It comes in a variety of sizes, colors, and
shapes—ready to carve. Properly cared for, cheese
carvings can be reused a number of times and
stored easily between uses.
TWO-DIMENSIONAL VS.
THREE-DIMENSIONAL CARVING
BY DEFINITION
Two-Dimensional (2-D) or Relief
If you’ve never carved before, begin with a two-
Carvings: The projection of figures or
dimensional (2-D) (relief) carving to learn the
basics. Next, move up to three-dimensional (3-D) forms from a flat background.
Three-Dimensional (3-D) or Sculpture:
carvings (sculptures), working with small pieces
of Wisconsin cheese to create simple shapes. The shaping of figures or design
If your first attempts aren’t quite ready for prime appearing to have depth or thickness
in addition to height and width.
time, use them as an ingredient in a recipe.
Anyone can learn to produce simple carvings that
will attract customer attention and help increase
sales. If you find you have a knack for carving,
you can go on to larger, more elaborate pieces.
2
THE ABC’S OF CARVING CHEESE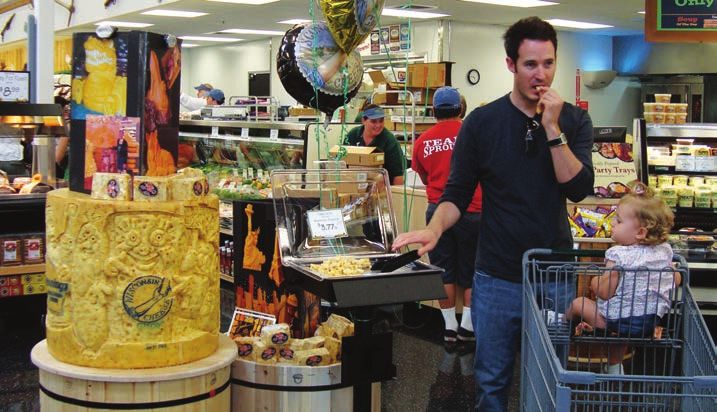
Plan
             Ahead
ORDER THE BEST WISCONSIN                                                                      Wisconsin Cheddar Weights and Dimensions

CHEESE FOR THE JOB
                                                                                                Style*                 Weight/lbs.           Height/in.      Diameter/in.

Cheddar remains the best all around cheese                                                      Gem                            3                 3.5             5.5
for carving because of its firm, compact body                                                   Favorite                       5                   4              7
and smooth texture. Young Cheddar, three to                                                     Midget                        15                   5              10
                                                                                                Daisy                         22                   6              13
twelve weeks in age, carves most easily. Cheddar
                                                                                                Flat                          35                   7              15
also has the advantage of coming in a range of
                                                                                                Mammoth                       75                 14.5            11.5
sizes from small to very large. Cheddar lends                                                   Mammoth                      150                  18              16
itself to both 2-D and 3-D carvings and, with                                                   Mammoth                      300                  23              20
care, can be displayed out of refrigeration for                                                 Mammoth                      500                  28              22
several hours at a time.                                                                        Block                         40             7.25 H x 11.5 W x 14.5 L
                                                                                                Loaf                           5              3.5 H x 3.5 W x 11.5 L
Semi-soft Wisconsin cheeses (Brick, Muenster,                                                   *Suggested two person handling requirement for Mammoths exceeding 75 lbs.
Jack, Baby Swiss, Blue) make ideal candidates for
small carvings, especially bowls. These can be
displayed under refrigeration or for brief
periods, on buffet tables, for example, at room
temperature. These cheeses work for either 2-D
or 3-D carvings.
Firm Wisconsin cheeses (Colby, Gouda, Edam,
Colby Jack, Provolone) have textures similar to
Cheddar, although they are not as compact. Use
these for small 2-D or 3-D carvings.
Hard Wisconsin cheeses (Parmesan, Romano,
Asiago) have granular textures that do not lend
themselves to detailed carving. They perform
best for 2-D carvings. Be sure to bring them to
room temperature before you begin carving.

             Wisconsin Mammoth Cheddar Weights and Dimensions
                                     CHEESE ONLY                     CHEESE WITH BOX & WHEELS               HEIGHT WITH        YIELD/LBS. OF WHEEL CUTS         HANDWIRE
                                                                                                             WHEELS/in.
              Pounds       Diameter/in.          Height/in.        Diameter/in.          Height/in.                                4" Slab       6" Slab      Lengths*/in.

                    75            14.5                11.5                 16                 13                 N/A                 25                40        24, 12
                  150              18                  16                  20                 18                 N/A                 35                55        24, 12
                  300              23                  20                  27                 25                  35                 60                90        36, 24
                  500              28                  22                  33                 25                  35                 90             135          36, 24
                1,000              36                  28                  39                 41                  41                 35                50        50, 36
                2,000              47                  40                  50                 51                  51                200             300          72, 36
                3,000              47                  60                  50                 70                  70                200             300          72, 36
                5,000              62                  45                  68                 60                  60                450             675          96, 48
                8,000              62                  80                  68                 94                  94                400             600          96, 48
              10,000               66                  80                  72                 94                  94                500             750          96, 48
             Weights and dimensions are approximate and may vary slightly.
             Two or three people are recommended for handling and cutting Mammoths 150 lbs. and larger.
             *Have two handwires ready to use for cutting a Mammoth: a longer one for making the first cuts and a shorter one for subsequent smaller cuts.

                                                                                                                                                                             3

                                         ©2012 WISCONSIN MILK MARKETING BOARD
THE RIGHT ENVIRONMENT                             SANITATION GUIDELINES
    You may carve cheese in a prep area away from     Food safety remains a key issue for the
    the public or on the sales floor to attract       industry and customers alike. Because cheese
    customer attention. No matter where you work,     is a living food subject to undesirable molds,
    cleanliness, organization, and neat work habits   good sanitation is crucial.
    top the list of guidelines, especially when
                                                          • Have a small bucket of cleaning solution
    carving in public.

    LIGHTING
                                                            (1 quart warm water, 1/2 cup vinegar, and
                                                            2 tablespoons salt) and clean towels close
                                                            by for frequent cleaning of hands, tools,
    Whether public or private, carving areas rarely         and work area.
    have good task lighting. Bring your own free-
    standing or goose-neck lamp. Place it close to        • Sanitize tools and the work area daily,
    light the carving area but not close enough to          using a commercial sanitizing solution or
    warm the cheese. Use wide tape to secure                create your own by mixing 1 gallon warm
    electrical cords to the floor.                          water with 1 tablespoon chlorine bleach.
                                                          • Wear an apron or chef’s jacket to
                                                            protect your clothing and to project a
                                                            professional image.
                                                          • Keep your hair clean and tidy. Long hair
                                                            should be tied back.
                                                          • Keep hands and fingernails clean. Wearing
                                                            disposable gloves helps keep the cheese
                                                            clean and void of fingerprints and projects
                                                            a sanitary image. Never touch hair or face
                                                            when working with food.
                                                          • Remove cheese trimmings frequently,
                                                            keeping edible (anything fit to be eaten) and
                                                            inedible (not fit to be eaten) cheese separate.
                                                          • Clean carving tools frequently. Hardened
                                                            cheese is difficult to remove, and the
                                                            moisture in cheese promotes rust.
                                                          • Spread butcher paper on the floor around
                                                            the carving area, and frequently sweep
                                                            carving area.

4

                                      THE ABC’S OF CARVING CHEESE
FATIGUE
Carving for hours causes physical and mental
fatigue. Because these factors affect the end
result, use the following tips to pace yourself.
    • When carving in cool temperatures, take a
      15- to 20-minute break every two hours. In
      warmer temperatures, take a break every

                                                     STORAGE AND SHIPPING
      hour and refrigerate the cheese uncovered
      for 30 minutes. Use a timer to keep track.
      Remember, these are recommended                Whether you’re out to lunch or gone for the day,
      guidelines. Don’t push yourself. If you feel   cheese carvings should be refrigerated properly
      tired or unsure about your next move, take     in an out-of-the-way place.
      a break. Fatigue can ruin a carving.
                                                     Always store your carving in a designated area
    • Take full advantage of your break time.        in the cooler. Be sure to confirm this with the
      In private, sit down, take your shoes off      cooler manager.
      and elevate your legs. Change into another
      pair of shoes to minimize foot and lower       When you’re working on the carving,
      back discomfort, especially if carving for     periodically refrigerate it, uncovered. Cool cheese
      more than four hours.                          holds its shape better. If you plan to leave the
                                                     carving area for a short break, loosely cover the
    • If you sit while carving, walk around          carving with plastic wrap. Also, you may leave a
      during breaks. Try stretching to relieve       sign asking people not to touch the carving.
      tension in the neck, shoulders, lower back,
      or anywhere you feel tight.                    For overnight storage, allow the uncovered
                                                     carving to cool, refrigerated for about 30
    • Frequently sip water to prevent dehydration.   minutes. Then, to prevent condensation, cover
    • If your hand starts to cramp, massage the      loosely with plastic wrap. Colorful signs that say
      palm and gently rotate the wrist. Slowly       “Fragile” or “Do Not Touch” help alert others to
      bend fingers backward and hold the             be careful around the carving.
      stretch for several seconds. Make a loose      If you ship a carving, allow the cheese to cool
      fist, then shake out the hand completely.      completely before wrapping securely in plastic.
      Repeat until cramping subsides. Try to         Pad any fragile areas, and pack the carving in a
      minimize cramping by carving with both         sturdy box. Try to keep the carton out of direct
      hands, using the non-dominant hand at          sun and use cold packs inside to keep the air
      less critical times.                           around the carving as cool as possible.

                                                                                                           5

                             ©2012 WISCONSIN MILK MARKETING BOARD
Tools &
     Supplies
    Always keep tools and supplies organized and out
    of reach of anyone not involved in the carving
    project. Some of the tools are very sharp; so never
    leave them unattended. (A useful checklist of
    supplies is found on page 14.)

    CARVING TOOLS & SUPPLIES
    You have at your disposal a wide assortment of
    carving tools. As you use tools, you’ll discover new
    ways to create desired effects with one tool or a
    combination. The following list will help you select
    tools, and it indicates whether the tool is best used
    for 2- or 3-D carving. These tools can be purchase
    from arts and crafts stores. For mail order, contact Sax Arts and Crafts:
    toll-free nationwide 800-558-6696 or toll-free Wisconsin 800-242-4911.

    Bent Square Chisel: to remove cheese from the background or perimeter
    of patterns; to smooth background areas and to repair projects with
    “cheese putty.” (2-D)

    Straight Small Gouge: to remove cheese in confined areas, such as around
    lettering, in corners; to create texture or patterns in background areas. (2-D)

    Double Wire End Tool: to define edges of designs, create borders, and carve
    letters and words. (2-D)

    Flat Double Wire End Tool: to smooth background areas and remove small
    amounts of cheese around letters and borders. (2-D, 3-D)

    Chef’s Knife: to cut small cheese slabs for inset designs; to cut through
    cheeses with hard rinds. (2-D)

    Wood Whittling Tool: to cut through patterns and carbons. (2-D)

    Miniature Clay Tools (with removable attachments): to remove cheese in
    confined areas, produce well-defined letters, create detailed backgrounds. (2-D)

6

                                        THE ABC’S OF CARVING CHEESE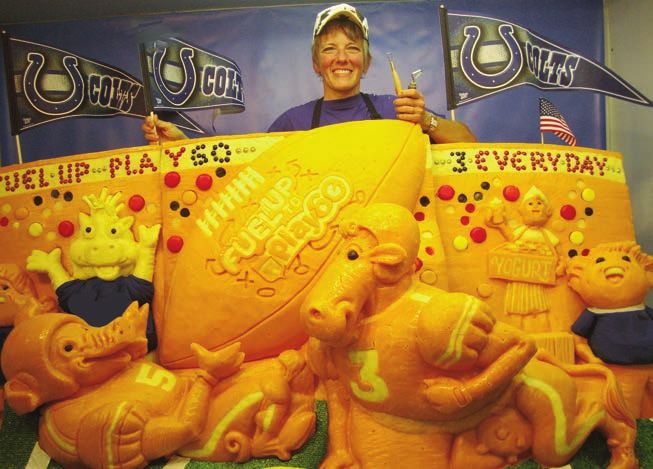
Flat Loop Tool: to remove and smooth cheese on surfaces; to define borders. (2-D)

Exacto Knife: to cut inset designs and around patterns. (2-D)

Paring Knife: to cut small blocks of cheese and inset designs; to cut around
patterns for 3-D carvings. (2-D, 3-D)

Cheese Plane: to smooth cheese surface before applying pattern; to remove
large amounts of cheese for 3-D carvings. (2-D, 3-D)

Cheese Wire or Fish Line Cutter: to cut slabs and smaller pieces from large
blocks and wheels; to create smooth, even surface for 2-D carvings. (2-D, 3-D)

Double-handled Cheese Knife: to trim or cut large cheeses into smaller
pieces. (2-D, 3-D)

Wheel Turning Tool (with removable attachments): to remove large amounts
of cheese from surfaces that must remain smooth; to smooth curved areas of
large carvings. (3-D)

Boning Knife: to make first cuts to shape 3-D carvings. (3-D)

Large Curved Loop Tool: to remove planes of cheese from surfaces that must
remain smooth; to sculpt round or curved surfaces on large carvings. (3-D)

Melon Baller: to make small holes and background texture. (2-D, 3-D)

Cheese Shredder: to create background texture; to create hay bales, gravel
roads, etc. (2-D, 3-D)

Carpenter’s Tool: to score tops of cheese wheels in one, easy stroke. (2-D, 3-D)

Pastry Bag and Tips: to decorate carvings with Cold Pack or Cream cheese.
(2-D, 3-D)

Cookie and Pastry Cutters: to create inset designs. (2-D)

                                                                                    7

                            ©2012 WISCONSIN MILK MARKETING BOARD
Carving
                   CHOOSING A DESIGN
                   The ease of working with Wisconsin cheese plus
                   the range of sizes and shapes available make
                   almost any idea possible. Logos, holidays,
                   seasons, promotions, sports, and customer
                   requests inspire cheese carvings. You don’t have
                   to be a graphic artist to carve Wisconsin cheese.
                   You can find clip art in arts and crafts stores as

                   HOW TO MAKE A PATTERN
                   well as on the internet.

                   After you’ve decided on your design, you’re
                   ready to create a pattern. Once you complete the
                   pattern, place it on the cheese when you’re ready
                   to begin carving.
                   For two-dimensional carvings, first place the
                   cheese to be carved on butcher paper and draw
                   an outline of the side of the cheese you will be
                   carving. You can also draw the outline from
                   measurements of the cheese.
                   Next, size the artwork to fit on the cheese. Enlarge
                   or reduce your artwork leaving about a one-inch
                   border around the perimeter of the cheese. Allow
                   more space if you plan to design a border.
                   For a simple design, trim away all excess paper
                   from the pattern. For complicated designs or
                   lettering, cut around the pattern, leaving about a
                   one-inch border.

8

    THE ABC’S OF CARVING CHEESE
HOW TO TRANSFER A PATTERN ONTO THE CHEESE
  1. Toothpick Method for Simple Patterns             3. Carbon Paper Method for
     Cut excess paper from around the design.            Complex Patterns
     Place the pattern so it’s in the desired            Cut around the design, leaving a
     position on the cheese. Step back and               one-inch border. Position the pattern on
     assess placement in its entirety. If you’re         the cheese and slip a piece of carbon paper
     satisfied, insert stick pins on every corner        underneath, making sure both are secure
     and every few inches around the design.             and wrinkle-free. Carbon paper is used to
     Using a toothpick or bamboo skewer,                 transfer the interior lines that need to be
     outline around the edge of the design.              defined later but not carved. Using a
     Use a tracing wheel to outline designs              ballpoint pen, gently but firmly trace the
     with straight lines. Remove the pins and            interior pattern lines to imprint them on
     pattern. Using an exacto knife, cut along           the cheese. Leaving the pattern in place,
     the inside of the toothpick lines. Make the         remove the carbon paper. Proceed as
     cuts at least three-fourths-inch deep against       explained for the Knife-cut method.
     a straightedge to ensure straight lines.

  2. Knife-cut Method for Simple and Most
     Complex Patterns
     Cut around the design, leaving about a
     one-inch border. After positioning the
     pattern on the cheese, secure it in place
     with stick pins. Using an exacto knife, cut
     through the pattern paper around the
                                                      Crowd
     lettering or design. Cut with a sawing
     motion at least three-fourths-inch deep.
                                                      Control
     Cut against a straightedge to ensure straight   Carving creates interest among customers and co-workers,
     lines. Leaving the pattern in place, remove     be prepared for questions. Signs can answer some.
                                                     The most common questions include:
     the paper trim from around the design.
                                                         • Is that really cheese?
                                                         • Do you eat what you’re cutting off? No?
                                                           What you will do with it?
                                                         • What is it going to be?
                                                         • Where does the cheese come from?
                                                         • How much is it a pound?
                                                         • What will you do with it when it’s finished?
                                                         • May I try a piece of Wisconsin cheese?
                                                     When carving in public, rope off the carving area to
                                                     discourage people from touching the carving, yet allow them
                                                     a close-up view. You can create signs asking people not to
                                                                                                                   9
                                                     touch the carving if you can’t rope off the area.
Square or Rectangular Borders
3A 3B
3C 3D
PUTTING YOUR TOOLS TO WORK 3. Borders
1. 2-D Carving (Relief)
Once you’ve had a little practice, consider
adding a border or frame to your 2-D
To create the 2-D effect, remove cheese
cheese carving.
from around the pattern. Starting one-inch
Square or Rectangular Border
away from the edge of your design, insert
the bent square chisel to a one-fourth-inch
Measure a one-inch border with a ruler.
depth and move with a smooth, horizontal
Leaving a one-inch edge allowance, start at
motion gently toward the edge of the
the upper left corner of the slab and run a
cheese. Once the tool contacts the cut edge,
toothpick the length of each side. Use a ruler
back off slightly and carefully lift the
for straight lines and square corners (3A).
cheese upward. As you remove the cheese,
Insert the double-wire end tool (narrow
the sharply defined edge of the design
loop) into the toothpick line, moving it
should be clearly visible. Repeat this
slowly and steadily around the cheese (3B).
process all the way around the design.
Remove the long, spaghetti-like trimmings; a
Be careful to make the chisel depths
distinct gouge line will be visible. Using the
consistent. Depending on the design and
bent square chisel, start one-inch away from
size of the cheese, a final depth of
the edge of the border and slowly remove
one-half- to one-inch is recommended.
cheese up to the gouge line (3C). Continue
Use a small gouge to remove cheese from
working around the entire slab. The gouge
confined areas and tight corners.
2. 3-D Carving (Sculpture)
line can be made deeper, if desired. Using
the flat double-wire end tool, begin
After you’ve gained the experience and removing the cheese between the design
confidence from 2-D carving, you may want and the cheese border (3D). Keep the depth
to tackle a cheese sculpture. Here are some uniform across the surface of the cheese
guidelines for the beginning 3-D carver. background. Continue working until the
Determine correct proportions. Prepare cheese is smooth and uniform on all surface
pattern of the actual size. More than one areas of the background. Gently run the
pattern may be required. Cut a block of same tool around the border edge and the
cheese close in size to the pattern design edge to further define the border.
dimensions. Trace the design on all cheese
surfaces before you begin carving. Remove
cheese until established lines are achieved.
10
THE ABC’S OF CARVING CHEESERound Scalloped Borders Insets
3E 3F 4A 4B 4C
3G 3H 4D 4E
4. Insets
Round Scalloped Border Insets add an additional shape or
Reduce or enlarge scallop border pattern dimension to your carving. One or more
to fit the cheese. Center the pattern on the can be added using one or more varieties
cheese and use stick pins to hold it in of Wisconsin cheese. You can also fill in
place. Using a toothpick, outline around designs cut for insets with Cream cheese or
the entire edge of pattern to create cutting Cold Pack. Add inserts after you’ve
line (3E). Remove the pattern. Using an removed all of the background cheese from
exacto knife, cut around the inside edge of around the primary design. Inset depths
toothpick line to desired depth (3F). may vary depending on the size of the
Cut with an up-and-down sawing motion. carving and the desired effect. As with the
Using a bent square chisel, start one-inch primary design, make a pattern for each
away from the edge of the border and inset. The actual dimensions of the finished
slowly remove cheese up to the scallop cut inset depend on the size of the overall
line (3G). Continue working around the carving. Cut a piece of cheese to fit each
entire slab. Using a flat double-wire end pattern that’s three-fourths-inch deep.
tool, continue working until the cheese is Secure the pattern in place with stick pins.
smooth and uniform on all surfaces of the Using a toothpick, carefully outline the
background (3H). pattern to form the cut lines (4A). Remove
the pattern. Using a paring knife, cut the
inset out of the cheese, cutting through the
slab in a straight up-and-down motion
(4B). Take the inset and position it on the
cheese carving. Using a toothpick, outline
around the inset to form cut lines (4C). Set
the inset aside. With an exacto knife, cut to
a one-half-inch depth along the cut lines.
Using a bent square chisel, start from the
center of the inset outline and gently push
toward the cut line, removing cheese to a
one-half-inch depth throughout (4D). Place
the inset into the inset hole to check for a
proper fit (4E). Trim the inset, if necessary,
to fit. Insert toothpicks in the hole so they
extend one-fourth-inch above the inset hole
cheese surface. Carefully press the inset
into the hole, making sure the toothpicks
do not penetrate through the outside
surface. With the inset in place, check for
small gaps around the inset. Use a bent
square chisel to press “cheese putty” (see
instructions on page 13) into the gaps and
smooth the surface.
11
©2012 WISCONSIN MILK MARKETING BOARD5A 5B 5C
5. Backgrounds FINISHING TOUCHES
Backgrounds add visual richness to Gently brush the entire carving with a
Wisconsin cheese carvings. Although they nylon brush.
take time and patience, they are not
Carefully examine your carving and make any
difficult to create.
last minute repairs.
Gouged Texture Gently remove carbon marks or smears with a
This technique creates a dramatic effect on moist towelette until the carving is immaculate.
a simple, flat design (5A). To create this
When the carving goes on display, take plenty
effect, take the narrow gouge tool and
of photographs.
make shallow one-fourth-inch long gouges
on the background surface. Gouge marks If your carving will be exposed to air while on
can be made in random patterns or they display or if it will be refrigerated for a long time
can radiate from a center point for a while on display, spray the carving with cooking
starburst effect. oil, either pump or aerosol. This will help keep
Wood-grain Motif gives the carving a shiny quality. Be sure to
the cheese from drying out. In addition, spraying
This pattern provides a rustic look photograph the carving before spraying.
(5B, 5C). Using the narrow double-wire
end tool, run vertical lines about one- to
one-and-one-half inches apart down the
background of the carving surface. Using
the same tool, randomly make short and
long lines on the “boards” that you’ve just
created, adding small turns at the ends of
the lines. Then scatter a few “knotholes”
by twirling the tool in a circular motion
and removing a tiny plug of cheese.
Polka Dots
Making polka dots doesn’t require
removing cheese (not shown). Take a
tubular object, about one-fourth-inch in
diameter, such as the top of a felt tip pen,
press into the background area of the
carving, turn and remove.
12
THE ABC’S OF CARVING CHEESEHow to Make
Cheese Putty
Take fresh scraps of cheese and press
between your fingers into a paste.
QUICK FIXES
When working with as many variables as carving
presents, mistakes do happen. Avoid most
carving errors by taking your time. Carefully
prepare the work area, and assemble your tools
and supplies before you begin.
Use these tips for fixing common mistakes:
Should your tool slip and slice the carving
without removing a large chunk of cheese, you
may be able to press the cheese back into place.
Young cheeses (aged less than six weeks) often
knit back together.
If a large chunk of cheese breaks away, press a
piece of freshly carved trimming (similar in size
to the broken chunk) into the hole or on the
surface of the carving. Then, with a vary sharp
knife, re-cut the lines and trim the surface of the
added piece to look like the surrounding area.
Gently apply pressure on the piece as you
re-style it. Make this repair immediately.
If a chunk breaks away or is sliced off intact,
toothpicks or skewers help secure it in place.
13
©2012 WISCONSIN MILK MARKETING BOARDSupplies
Checklist
The following supplies are essential accessories for the well-prepared carver.
You may want to copy this and use it as a checklist!
c Sanitary work gloves: to keep carving clean and present a sanitary image
c Goose-neck lamp: for task lighting
c Toothpicks: to outline simple designs directly onto cheese; to attach insets
c Pencils: to draw patterns
c Scissors: to trim patterns
c Push pins: to hold patterns in place
c Carbon paper: to trace complicated designs
c Pre-moistened towelettes: to remove carbon paper marks or smears; to clean hands, tools and
work surfaces
c Nylon brush: to remove particles of cheese during and after carving
c Plastic wrap: to cover carving during breaks and storage
c Tape measure, steel ruler or flexible ruler: to measure cut lines and make straight cuts on flat
and curved surfaces
c Plastic food bags: to store trim intended for consumption
c Cleaning solution: to clean hands, tools, and work surfaces
c Sanitizing solution: to sanitize tools and work surfaces
c Poster board, sign stand, and markers: to make informational or instructional signs
c First aid kit: to treat minor injuries (At a minimum, have hydrogen peroxide, antibiotic
ointment, and band-aids on hand.)
c Butcher paper: to cover work surfaces and floor around carving
c Duct tape or wide masking tape: to keep butcher paper in place; to tape electrical cords to floor
c Bamboo skewers: to etch and draw on cheese; to attach multiple carvings and support
heavy carvings
14
©2012 WISCONSIN MILK MARKETING BOARDWisconsin Milk Marketing Board
8418 Excelsior Drive • Madison, Wisconsin 53717
608-836-8820
www.EatWisconsinCheese.com
© 2012 WMMB, Inc. FS2054You can also read