In.tune II User's manual - Designed to be used in humid environments.
←
→
Page content transcription
If your browser does not render page correctly, please read the page content below
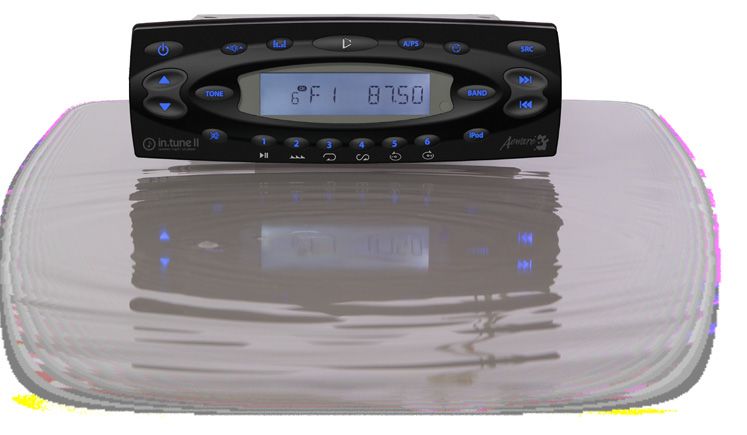
in.tune II
                                                            ™

                               Fully and truly waterproof
                         am-fm receiver / mp3 / cd player

                                User's manual

Designed to be used in
humid environments.

                                                                         f!
                                                                 aterproo
                                                                W
in.tune II™                                                                                                                                                                          table of contents

Table of contents

features............................................................................................ 3    basic operations of optional in.k455™
warning........................................................................................... 4      wired remote control with display............................................ 37
about compact discs..................................................................... 6                basic operations of optional IR remote control (IRMT-4™) . .. 40
parts list........................................................................................... 8   accessories.................................................................................... 42
installation                                                                                              specifications................................................................................ 43
         - in.tune II™......................................................................... 9
         - in.k455™........................................................................... 13
connections
         - speaker & supply............................................................ 15
         - with auxiliary source...................................................... 18
         - with keypad..................................................................... 19
         - with in.p3.110™............................................................... 20
operation
         - function description....................................................... 21
         - icon description............................................................ 22
         - basic operation.............................................................. 23
         - radio................................................................................ 26
         - auxiliary........................................................................... 28
         - iPod................................................................................. 29
         - cd..................................................................................... 32
         - mp3................................................................................. 35

                                                                                                                                                                                                               1
in.tune II™

2
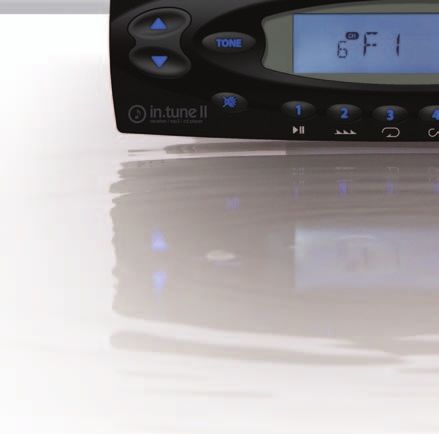
in.tune II™                                                                                                                 features

Congratulations!                                                   Main features

Congratulations on the purchase of your very own in.tune II™       Fully waterproof
CD player! You own one of the industry’s best entertainment
                                                                   Speaker outputs 50 Watts x 4 ch.
system. This system is UV, salt spray and water resistant and is
designed to provide hours of troublefree usage. Take a moment      AM/FM tuner
to read through this manual and become familiar with the           Automatic/manual tuning
operations and features of your new product.                       Compatible with European and North American radio stations
                                                                   Multiple station presets
                                                                   Built-in IR remote sensor
                                                                   Compatible with Aeware’s® auxiliary controls (in.k175™ & in.k455™)
                                                                   Fader key (Aeware’s® exclusive feature)
                                                                   LCD display and clock functions
                                                                   CD, CD-R and CD-RW
                                                                   MP3 player with ID3 tag
                                                                   Compatible with in.p3-110™ waterproof docking station for iPod

                                                                                                                                    3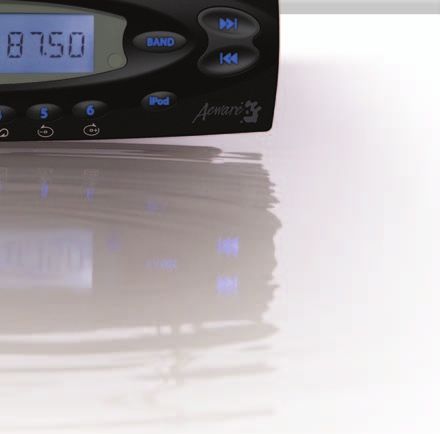
warning                                                                                                                          in.tune II™

           WARNING                                                   firmly-fixed to a solid part. Failure to do so may result in damage to the
           Before installing or connecting the unit,                 unit and annulment of the warranty, (see page 11 for more details).
           please read the following.
                                                                     DO NOT INSERT A WET CD DISK IN YOUR IN.TUNE II™
DO NOT DISASSEMBLE OR ALTER.                                         Do not insert a wet CD disk in the disk slot of your in.tune II™ recei-
Doing so may result in an accident, fire or electrical shock.        ver/CD player. Doing so will void the warranty of your in.tune II™.

USE THE CORRECT AMPERE RATING WHEN REPLACING FUSES.
Failure to do so may result in fire or electrical shock.                       PRECAUTIONS
DO NOT BLOCK VENTS OR RADIATOR PANELS.                               Damaged disc
Doing so may cause heat to build up inside and may result in fire.   Do not attempt to play a cracked, warped or damaged disc.
                                                                     Playing such a disc could severely damage the mechanism.
DO NOT PLACE HANDS, FINGERS OR FOREIGN OBJECTS IN
INSERTION SLOTS OR GAPS.                                             Maintenance
Doing so may result in personal injury or damage to the product.     If you have problems, do not attempt to repair the unit yourself.
                                                                     Return it to your dealer or service station for servicing.
DO NOT PLACE HANDS OR FINGERS ON RADIATOR PANELS.
Doing so may result in personal injury.                              Accessory parts
                                                                     Be sure to use only the specified accessory parts. Use of other
DO NOT USE FOAM TO ISOLATE THE UNIT.                                 than designated parts may damage this unit internally or may not
Doing so may cause heat to build up inside and may result in fire.   securely install the unit in place. This may cause parts to become
                                                                     loose resulting in hazards or product failure.
INSTALL UNIT 1" AWAY FROM OTHER SURFACES.
Make sure to leave a clearance of at least 1" from other surfaces.   Disposal of the product
                                                                              The appliance (or the product) must be disposed of
INSTALL MOUNTING STRAP.                                                       separately in accordance with the local waste disposal
The in.tune II™ must always be installed with the mounting strap              legislation in force.

4
in.tune II™                                                                                                                       warning

          WARNING
          When this equipment is provided as an audio/video
          component for spas, UL 1563 - 5th edition requires that
          the following instructions (or equivalent) be provided as
          part of the instruction manual for the spa equipment.                   CAUTION– RISK OF ELECTRIC SHOCK !
PREVENT ELECTROCUTION                                                   DO NOT LEAVE COMPARTMENT DOOR OPEN.
Do not connect any auxiliary components (for example cable,
additional speakers, headphones, additional audio/video                 REPLACE COMPONENTS ONLY WITH IDENTICAL COMPONENTS.
components, etc) to the system.
                                                                        DO NOT OPERATE THE AUDIO/VIDEO CONTROLS WHILE
These units are not provided with an outdoor antennae; when             INSIDE THE SPA.
provided, it should be installed in accordance with Article 810 of
the National Electrical Code, ANSI/NFPA 70.

Do not service this product yourself as opening or removing covers
may expose you to dangerous voltage or other risk of injury.                      WARNING            EUROPEAN INSTALLATION
Refer all servicing to qualified service personnel.
                                                                        European norms require that this equipment installation as well as
When the power supply connections or power supply cord(s) are           its electrical wiring be protected against water flooding and water
damaged; if water is entering the audio/video compartment or any        splashing, to meet IPX5 rating.
electrical equipment compartment area, if the protective shields
or barriers are showing signs of deterioration; or if there are signs
of other potential damage to the unit, turn off the unit and refer
servicing to a qualified service personnel.

                                                                                                                                              5
about compact discs                                                                                                        in.tune II™

Never attempt the following         Inserting a disc                     CD logo marks                   New discs

Do not grip or pull out the disc    Make sure label side is facing       Use only compact discs with     New discs may sometimes
while it is being pulled back       up when you insert the disc.         the label side showing the CD   have some roughness around
into the player by the automatic                                         logo marks above.               the edges. If such discs are
reloading mechanism. Do not         Do not try to insert another disc                                    used, the player may not work
attempt to insert a disc into the   when one has already been            Correct performance can't       properly. Use a ballpoint pen
unit when power is off.             inserted.                            be guaranteed if you use        or the like to remove any
                                                                         unspecified compact discs.      roughness from the edge of
                                    If a disc is inserted incorrectly,                                   the disc.
                                    the "DISC ERROR" message             A CD-R or CD-RW that hasn't
                                    will be displayed twice, then        been finalized (closed) or on
                                    CD player will return to Radio       which a recording failure has
                                    mode. If the player continues to     occurred can't be played.
                                    display "DISC ERROR" message,
                                    push the Reset button with
                                    a pointed object such as a
                                    ballpoint pen.

6
in.tune II™                                                                                                      about compact discs

Irregular shaped discs               Correct handling                  Disc cleaning                      Storage

Be sure to use round shape           Handle the disc by its edge.      Fingerprints, dust or soil on      Do not expose discs to direct
discs only for this unit and never   To keep the disc clean, do not    the surface of the disc could      sunlight or any heat source.
use any special shape discs.         touch the surface. Never stick    cause the CD player to skip. To    Do not expose discs to excess
Using a special shape disc           paper or tape on the surface      remove these, wipe the playing     humidity or dust.
may cause damage to the              of the disc or mark the surface   surface with a clean, soft cloth
mechanism.                           with a pencil or pen.             from the center of the disc to
                                                                       the outer edge.

                                                                       Never use solvents, such
                                                                       as commercially available
                                                                       cleaners, anti-static spray or
                                                                       thinner to clean discs.

                                                                                                                                          7
parts list                                                                                                                in.tune II™

                                                      Screw M5x16 (1)
                                                                                                             Drilling template
                                         Mounting
                                          strap (1)

                                Mounting
                               brackets (2)

                   CD player

      Protective                                                                                             Mounting
      cover                                                                                                  sleeve (1)
                                                                                 Rear nut M5 (1)
                                                                               Rear lock washer (1)
                                                                               Rear flat washer (1)

                                                                                     "O" ring (4)

                                                                          Self tapping screw# 6 type A (6)

                                                               Cap-plugs (4)
                                                           Overlays (2)

8
in.tune II™ installation
Mounting surface
7 11/16
2 1/16 "
"
Template
Step 1 Step 2 Step 3
Using the drilling template supplied with the unit, determine the Insert the mounting sleeve into If the installation location is
mounting location and then stick the template on the location. the hole (installation opening). not perfectly even (e.g. wood
TOP
surface), make a silicone
Center line
7 11/16"
195 mm joint between the installation
location and the mounting
sleeve (to avoid water leakage).
7 3/16"
183 mm
Apply silicone all around the
Drill 3/16" 2 1/8" 1 7/16" Drill 3/16" unit. Let the silicone dry and
5 mm 36 mm 5 mm
54 mm
remove excess.
Cut out gray area
Note: Failure to apply silicone
Cut and remove the hatching area on the template. Then drill six may damage the unit and
3/16” (5mm) mounting holes in the exact position according to the surround equipment!
mounting paper.
9installation in.tune II™
Step 4 Step 5 Step 6
Fixing the mounting sleeve: Note: The use of an Connect wires. Insert the CD player into the
adjustable torque wrench mounting sleeve.
a) Insert mounting bracket. is recommended. Torque Refer to wiring section (page 16)
b) Then pull bracket setting: 8-12 lbs∙in of this manual for more details. Open front panel and fix CD
towards you. (0.9-1.36 N∙m). player with (4) self tapping
c) Fix bracket with self tapping screws # 6 x 2" type A.
screws # 6 x 2" type A.
d) Make sure the 6 holes are Note: The use of an
correctly aligned. adjustable torque wrench
e) Brake the installation is recommended. Torque
handle by moving it back setting: 8-12 lbs∙in
and forth. (0.9-1.36 N∙m).
f) Repeat steps a) to e) for
the other bracket.
10in.tune II™ installation
Attachment points
Threaded stud
30°
Mounting strap Left view
Step 7 Installation angle Step 8
Re-inforce the back side of the CD Player attaching the threaded If installation angle exceeds Make sure that the 4 fixing
stud to the metal mounting strap. Attach the other end of the strap 30˚ from horizontal, the unit screws (M4x60) that hold
to a solid part of the mounting area (as illustrated above). Please might not give its optimum the in.tune II™ are properly
note that if necessary, the strap can be bent to the desired angle performance. installed.
(to fit the mounting area).
Important: The in.tune II™ must always be installed with the mounting strap firmly fixed to a solid
part. Failure to do so may result in damage to the unit and annulment of the warranty.
Note: Threaded stud and mounting strap are included.
11installation in.tune II™
Step 9 Step 10 Step 11 Step 12
Place the cap plugs for the When properly installed, Peel off the protective paper When properly installed,
in.tune II™ with the concavity the caps set even with the from the back of the overlay. the caps set even with the
toward the recess of each of the installation surface. Make sure the overlay is well installation surface. Clean the
4 fixing screws. aligned and rests perfectly in surface of the in.tune II™ with
Clean the surface of the the recess of the in.tune II™. a paper towel.
in.tune II™ with a paper towel.
12in.tune II™ installation
6 7/32"
Installation in.k455 with adhesive (optional)
TM
158 mm
Drill 2x 3/8”
2x 9 mm
The keypad should be installed directly on the edge of the spa so
2 5/16"
that it is easily accessible to the user. 59 mm
• Using the drilling template supplied with the unit, determine the
mounting location and then stick the template on the location.
• Drill two 3/8” (9 mm) diameter holes at 6 7/32” (158 mm) from Follow profile with jig saw
center to center, in the exact position according to the drilling
template.
Gasket with adhesive
• Cut out and remove the material between the two holes
following the profile with a jig saw (see illustration).
3/8"
• Clean the installation surface and peel the adhesive gasket from
the back of the keypad.
69
/16
"
• Insert keypad and align it correctly, then secure it properly in 2 5/
16"
place by using the two wing nuts provided.
Wing nuts
13installation in.tune II™
Drilling template (in.k455 )
TM
6 7/32"
158 mm
Drill 2x 3/8”
2x 9 mm
2 5/16"
59 mm
Follow profile with jig saw
14in.tune II™ connections
Wiring diagram White
iPod connection
CD player Black
Wired remote control
Antenna
Aux in RCA red (right)
Aux in RCA white (left)
Purple Rear
RCA red (right) right
Purple/Black speaker
Rear
RCA white (left)
Green Rear
left
RCA red (right) Green/Black speaker
Front
RCA white (left)
Orange Blue
Dimmer Power antenna
Red
Ignition key switch
Yellow 1A ATC/ATO blade fuse
Battery B+
Black
15A ATC/ATO blade fuse Ground (B-) ATC
Front White Grey Front
left right
speaker White/Black Grey/Black speaker
15connections in.tune II™
Wiring
Yellow wire (w/fuse) Blue wire Gray wire Purple wire
Connect this wire to a constant Connect this wire to the (+) Connect this wire to the right Connect this wire to the
+12 volt power source. power antenna activation cir- front speaker (+) positive right rear speaker (+) positive
cuit. If no power antenna exists, terminal or wire. terminal or wire.
tape off the end of this wire to
Red wire prevent shorting out of the unit.
Connect this wire to a constant Gray wire with black stripe Purple wire with black stripe
or switched +12 volt power Black wire Connect this wire to the right Connect this wire to the
source (a power source turned Connect this wire to ground front speaker (-) negative right rear speaker (-) negative
on and off by the ignition key). power source. terminal or wire. terminal or wire.
Orange wire White wire Green wire Gray cable with red/white
Connect this wire to the Connect this wire to the left Connect this wire to the left rear RCA connectors
light control switch (dimmer front speaker (+) positive speaker (+) positive terminal Connect to the audio line
control). If no lighting circuit is terminal or wire. or wire. output of any additional audio
available, tape off the end of or video sound source.
this wire to prevent shorting out
of the unit. White wire with black stripe Green wire with black stripe
Connect this wire to the left Connect this wire to the left rear Black cable with red/white
front speaker (-) negative speaker (-) negative terminal RCA connectors
terminal or wire. or wire. Provides L/R channel (front/
rear) audio signal output to an
additional amplifier.
16in.tune II™ connections
Wiring (Con't.)
Note:
This unit is designed to connect 4 speakers. If the installation
only requires 2 speakers, use the white and gray wire sets to
connect the speakers.
WARNING
Any wires left unconnected must be taped off or capped off to
prevent shorting.
DO NOT connect speaker ground wires together.
DO NOT connect speaker ground wires to the power supply
ground.
DO NOT connect front and rear speaker wires together.
FAILURE TO FOLLOW ANY OF THESE WARNINGS WILL RESULT
IN DAMAGE TO THIS UNIT AND VOIDS THE WARRANTY.
17connections in.tune II™
Auxiliary connection
Audio out from VCR
in.tune II™ VCR / TV
or
Red RCA (Right)
TV
White RCA (Left)
Auxiliary audio input
gray cable with RCA connector
18in.tune II™ connections
Connecting keypad to
in.tune II™
The in.k455™ comes with a 20 ft
cable terminated with a 8-pin in.tune II™
mini din male connector.
TM
Wired remote in.k455
To connect the keypad, simply (optional)
insert the 8-pin mini din male or
connector into the 8-pin mini
din receptable as illustrated.
Female 8-pin Male 8-pin
mini din connector mini din connector TM
in.k175
(optional)
19connections in.tune II™
Connecting in.p3-110™
to in.tune II™
in.p3-110™
(optional)
The in.p3-110™ dock station
comes with a 10 ft cable
terminated with a 9-pin mini
din connector.
To connect the dock station
simply insert the 9-pin mini in.tune II™
din male connector into the
9-pin mini din receptable as
illustrated.
White
Model supported: Female 9-pin Male 9-pin mini din connector
iPod 4TH & 5TH generation mini din connector
iPod nano (1G - 5G)
iPod classic
Note: It's not possible to directly control the iPod once connected
to the in.p3-110™ docking connector.
20in.tune II™ function description
Equalization Auto memory
Power On/Off Open storing Display Source
Fader (Preset scan)
Volume Search
Up/Down (Track Up/Down)
Mute iPod
Audio selector Intro scan Station preset #5 Radio band
(Station preset #2)
Play/Pause Repeat Random Station preset #6
(Station preset #1) (Station preset #3) (Station preset #4)
21icon description in.tune II™
Radio frequencies
Track number broadcast in stereo
indication MP3
Preset channel
indication
Animated disc
(when CD is playing)
Intro scan mode Random mode iPod
(in CD mode) (in CD mode)
Repeat mode
(in CD mode)
22in.tune II™ basic operation
Power on/off Clock setting Volume up or down Mute
Press Power to turn system on When the time is displayed Press Volume up or down to Press Mute to mute the audio
or off. (clock), press and hold Display increase or decrease volume. output. Press again to return to
for 3 seconds. previous volume level.
Time then flashes on the dis-
play. Set the hours by using
Track up or down.
Press Display again. Set the
minutes.
When done, press and hold
Display again for 3 seconds
to exit (or simply wait for
5 seconds).
23basic operation in.tune II™
Tone Source Equalization
Use TONE to select either (in order): volume, bass, treble, balance Pressing SRC will allow you to Successive presses on EQ will
or fader. To change the desired parameter, use Volume up or select a source between the allow you to choose from DSP
down. following (in order): Off, Jazz, Pop, Classic, Rock
or Vocal.
Bass control: Adjusts the amount of low frequency that you hear. Tuner, CD and Aux, iPod.
Press and hold EQ to enable or
Treble control : Adjusts the amount of high frequency that disable "LOUD" function.
you hear.
Balance control: Adjusts the amount of sound output to the left
and right speakers.
Fader control: Adjusts the amount of sound output (see Fader key
on next page).
Note: Bass and Treble settings are available only if EQ is set to
DSP Off.
24in.tune II™ basic operation
Reset
button
Fader Reset button USA/Europe switch Protective cover
Successive presses on Fader If keys on the front panel You can switch from American We recommend to install the
will allow you to select become locked up, i.e. keys do (USA) to European radio protective cover on the front
from one of the following not function at all, or the display stations. To do so, power down panel when CD player is not
adjustments: area becomes unreadable,or the unit first. Then lift up the used for a long period of time
any other malfunction try this: sticker which is located under or when the surface on which
FAD-FRONT: Front speaker with a ballpoint pen press the the CD player. the CD player is installed needs
only. Reset button. some cleaning.
FAD-REAR: Rear speaker only. Pressing Reset button clears
all memory (except station
FAD-ALL: Front and rear presets) and resets the display
speakers. to its default settings. The clock
will lose the set time. Switch from American (USA)
to European or vice-versa, as
indicated on the sticker then
put sticker back in place and
power up the unit.
25radio in.tune II™
Selecting radio mode Selecting radio band Tuning up or down Preset stations
Press SRC until Radio mode Press BAND to select between Press Track up to manually Any station may be preset
is displayed. FM1, FM2, FM3, AM1, AM2. adjust frequency up. Press and simply by pressing and holding
hold Track up to make a seek one of the keys (1 to 6).
up to the next station. Scan
mode stops as soon as a strong Press one of the keys (1 to 6) to
station is found. recall the stored stations.
Press Track down to manually
adjust frequency down. Press
and hold Track down to make
a seek down to the next station.
Scan mode stops as soon as
a strong station is found.
26in.tune II™ radio
Auto scan Display information
Press A/PS to scan preset Press Display to switch
stations. The tuner will scan between the following
up and wait for a few seconds, display information:
then scan up again.
Frequency - Clock (clock is
Once the desired station is displayed for 5 seconds only).
found, press A/PS again to stop
Scan mode.
Pressing and holding A/PS
will scan and store stations
automatically in each memory
(6) of the selected band.
27auxiliary mode in.tune II™ Auxiliary input Press SRC until the display reads "AUX", which indicates that the auxiliary unit is playing. This mode allows to play sound from external source such as a TV, video, etc. (please refer to "installation & connections" section for the connection of such external devices). 28
in.tune II™                                                                                                                                iPod

Selecting iPod mode              BAND                                   Track up/down                          Display

Press iPod (or SCR key succes-   Press BAND successively to             Press       to do a track              Press the key to change display
sively) to access iPod mode.     access the following menus:            forward or backward.                   information as following:
                                 “Playlist”, “Artist”, “Album”, “Song                                          Track number/elapsed time -
                                 name”, “Genre”, “Composer”.            Once BAND key has been                 Track number/number of tracks
                                 Press once again to exit.              pressed, press one of these            - Artist - Song name - Album-
                                                                               keys to scroll through the      - Clock.
                                 If no key is pressed within            selected menu content:
                                 5 seconds, it will exit without        "Playlist”, “Artist”, “Album”, “Song   When Clock is displayed, press
                                 changing.                              name”, “Genre” or “Composer”           and hold the key to adjust the
                                                                        in increasing or decreasing            Clock.
                                                                        alphabetical order. Press BAND
                                                                        key again to confirm selection.        (continues on next page).

                                                                                                                                             29
iPod in.tune II™ Display (continuation) Play/Pause Fast forward Rewind The system can only display the Press this key to pause iPod Press and hold key to fast Press and hold key to do fast first 8 letters of ID3 tags. If the playback. Press again to return forward song track. backward song track. recorded information is longer to Play mode. than 8 letters, text will scroll to the left once, then the 8 first letters will be displayed. The characters A-Z, 0-9 can be displayed on this unit, other characters may not be displayed correctly. 30
in.tune II™                                                                                                                       iPod

Intro scan                       Repeat                          Random                              Folder up/down

A press will plays the first     Press this key to repeat song   A press will plays all song         Press BAND successively to
several seconds of each song     track.                          tracks on the current playlist in   access the following menus:
track on the current playlist.                                   random order.                       “Playlist”, “Artist”, “Album”, “Song
                                                                                                     name”, “Genre”, “Composer”.
                                                                                                     Then, press one of these keys
                                                                                                           to scroll through the
                                                                                                     selected menu content.
                                                                                                     Press BAND key again to
                                                                                                     confirm selection.

                                                                                                     Press             to scroll
                                                                                                     through the content of your
                                                                                                     choice (e.g. if "Album" playback
                                                                                                     is selected, these keys will
                                                                                                     enable you to view the next/
                                                                                                     previous album).

                                                                                                                                      31
cd in.tune II™
Eject
button
Inserting compact disc Ejecting compact disc Selecting CD mode Track up or down
Press Open to flip down the To eject CD, flip-down front Press SRC until CD mode To change music track, simply
front panel and access the CD panel must be open, then press is displayed. press Track up or down.
slot. Insert CD into the CD slot. Eject button, located on the left.
The CD will load and play auto-
matically.
If the CD does not auto load,
do not force it. Press the Eject
button as you may already have
a disc inserted.
32in.tune II™ cd
Pause mode Intro scan mode Repeat mode Random mode
To pause the playing of a disc, You can preview each song To play a song repeatedly, Press Random to play song
press Pause. of the current disc for about press Repeat. tracks randomly.
10 seconds. Simply press Scan.
To resume play, press Press again to turn off Press again to turn off
key again. Press again to turn off this feature. this feature.
this feature.
33cd in.tune II™ Display information Press Display to switch between the following display information: If specific info has not been recorded on an MP3 disc, NO FOLD, Track no. / Playtime - Clock (clock is displayed for 5 seconds only). NO TRK, NO TLT, NO ALBM, NO ART will be displayed. If you inserted a CD containing MP3 files, a different display info The characters A-Z, 0-9 can be displayed on this unit, will appear if you press Display: other characters may not be displayed correctly. Track no. / Playtime – Folder no. / Track no. – Folder name – File name – Song name – Artist’s name – Album name - Clock (clock is displayed for 5 seconds only). Display limitations The system can only display the first 8 letters of ID3 tags. If the recorded information is longer than 8 letters, text will scroll to the left once, then the 8 first letters will be displayed. 34
in.tune II™                                                                                                                   mp3

Playback order of MP3 files                                   Reading files on a disc            MP3 playing order

• A directory that does not include an MP3 file is skipped.   When a disc containing MP3         When selected to play, files
• Maximum number of files: 999                                data is loaded, the unit checks    and folders are accessed in
• Maximum number of folders: 250                              all the data on the disc. If the   the order in which they were
• We recommend that you make no more than two folder levels   disc contains a lot of folders     written by the CD writer.
  for each disc.                                              with many levels, it takes a       Therefore, the playing order
• Maximum number of folder levels: 8                          longer time to start playback.     may not be the same as
• Maximum number of characters for MP3 file name and                                             the order in which they are
  folder name: 16                                             In addition, it may take time      expected to be played.
• Sampling frequency: 8 kHz, 11.025 kHz, 16 kHz, 22.05 kHz,   for the unit to move to the
  32 kHz, 44.1 kHz, 48 kHz                                    next MP3 file and Fast Forward     For example, a disc with the
• Bit rates: 8-384 Kbps                                       function may not be performed      following folder/file hierarchy
• MP3 decoding format: MPEG 1 & 2 & 2.5 Audio Layer 1, 2, 3   smoothly.                          is subject to Folder Select, File
• Folder names and file names can be displayed with up to                                        Select and playback order as
  8 characters (see Display key).                                                                shown on next page.
• ID3 tag is supported (see Display key).

                                                                                                                                 35
mp3 mode in.tune II™
Example of a disc's folder/file hierarchy Operation of keys
Level 1 Level 2 Level 3 Level 4 Level 5
Press to select folder down
8 7 6 5 4 3 2 1
( 1 )
Press to select folder up
1
1 2 3 4 5 6 7 8
2
2 Press (Track Down) to select file down
8 7 6 5 4 3 2 1
5
5 Press (Track Up) to select file up
3 8 1 2 3 4 5 6 7 8
6 8 Press and hold to return 10 files behind.
6
Press and hold to go 10 files forward.
7
4
7
3
4 Folder File
36in.tune II™ basic operations of optional in.k455™ wired remote control
On/Off key Up/Down keys
Source key Band Key Track down key Track up key
* Option accessible through the in.tune II™ only.
37basic operations of optional in.k455™ wired remote control in.tune II™
Radio frequencies
broadcast in stereo
Preset channel Track number
indication indication MP3
Animated disc
(when CD is playing)
Intro scan mode Random mode iPod
(in CD mode) (in CD mode)
Repeat mode
(in CD mode)
38in.tune II™ basic operations of optional in.k455™ wired remote control
Key Description
Press Power to turn system on or off.
Pressing SRC will allow you to select a source between the following (in order): Tuner, CD, iPod, Aux.
Radio mode:
Press BAND to select between AM1, AM2, FM1, FM2, FM3.
iPod mode:
Press BAND successively to access “Playlist”, “Artist”, “Album”, “Song name”, “Genre” or “Composer” and once again to exit.
Use Track Up or the Track Down keys to scroll through the selected menu content. Press BAND key again to confirm selection.
In all modes, press and hold the BAND key to mute the audio output. Do it again to return to previous volume level.
Press the Volume Up or Volume Down keys to increase or decrease the volume.
Radio mode:
Press Track Up or the Track Down keys to go to the next or previous preset station.
CD mode:
Press Track Up or the Track Down keys to change music track.
MP3 mode:
Press Track Up or the Track Down keys to select file up or down.
Press and hold the Track Up or the Track Down keys to go to the next or previous folder.
iPod mode:
Press Track Up or the Track Down keys to select file up or down. When the BAND key has been pressed,
press Track Up or the Track Down keys to scroll “Playlist”, “Artist”, “Album”, “Song name”, “Genre” or “Composer”.
Press and hold the Track Up or the Track Down keys to scroll through the content of your choice
(e.g. if “Album” playback is selected, these keys will enable you to view the next/previous album).
39basic operations of optional IR remote control (IRMT-4™) in.tune II™
Key/Icon Description
When pressing a key, the red LED blinks to show that the remote control is
working properly and sending signals.
Use setup for all programming sequences. Refer to the remote control (IRMT-4™)
instructions manual for detailed explanation on programming sequences.
Press Power to turn system on or off.
Press CD to control the in.tune II™ *.
Press VOL + or - to increase or decrease volume.
Radio mode:
Press CH + or - to go to the next or previous preset station. Press and hold CH +
or - to make a seek up or down to the next station. Scan mode stops as soon as a
strong station is found.
CD mode:
Press CH + or - to change music track. Press and hold Track Up or Down to fast
Sold separately forward or rewind.
MP3 mode:
* The code for your in.tune II™ Press CH + or - to select file up or down.
is 0101.
iPod mode:
Press CH + or - to select file up or down. Press and hold key to fast fwd or rew.
When the Band key has been pressed, press CH + or - to scroll "Playlist", "Artist",
"Album", "Song name", "Genre" or “Composer”.
40in.tune II™ basic operations of optional IR remote control (IRMT-4™)
Key/Icon Description
Pressing SRC will allow you to select a source between the following (in order): Tuner, CD, Aux, iPod.
MP3 mode: Press to select folder down and press to select folder up. Press and hold one of these keys to
skip 10 songs forward or backwards from where you are currently positioned.
iPod mode: Press to scroll through the content of your choice (e.g. if "Album" playback is selected, these
keys will enable you to view the next/previous album).
Radio mode: Press BAND to select between FM1, FM2, FM3, AM1, AM2.
iPod mode: Press the key successively to access “Playlist”, “Artist”, “Album”, "Song name", “Genre”, "Composer"
and once again to exit. Use CH + or - keys to scroll through the selected menu content.
Press BAND key again to confirm selection.
Press to mute the audio output. Press again to return to previous volume level.
While holding shift, press one of the following keys to select secondary functions (the LED lights up above key).
+ 1,2,3,4,5,6 Radio mode: Use these keys (1-6) to recall the stored stations. Any station may be preset simply by pressing and
holding one of the keys (1 to 6).
+ Press to access iPod mode. Press again to turn off iPod and return to previous mode.
+ Successive presses on will allow you to select from one of the following adjustments:
FAD-FRONT: Front speaker only.
FAD-REAR: Rear speaker only.
FAD-ALL: Front and rear speakers.
41accessories in.tune II™
Optional panel housing Optional in.k455™
(30° mounting bezel) wired remote control
for in.tune II™ Player. with display
Optional in.p3-110™
Waterproof protection,
Optional IRMT-4™ docking, connectivity and
infrared remote control remote control for iPod.
Optional in.k175™
Optional antenna cable for in.tune II™ wired remote control
Sold separately.
in.power.210™
For more information on wired and infrared remotes
or other accessories, visit our website at www.aeware.ca Designs are subject to change without prior notice.
42in.tune II™ specifications
General specifications: Weather band:
Power supply voltage: 14,4V (11–14,4V allowable), negative ground Usable sensitivity (S/N=20dB): 2dBuV
Max. current consumption: 15A Signal to noise ratio (S/N): 45dB
Back-up current (Ignition OFF): 15mA (Max.) Frequency range: 162,40MHz – 162,55MHz
Speaker impedance: 4Ω
Operating temperature: 50˚C (122˚F) to –20˚C (68˚F)
Weight: 2.18kg (4.8lbs) CD player:
Dimensions (W x H x D): Signal to noise ratio (S/N): > 65dB
Chassis: 178mm x 50mm x 190mm (7’’ x 2’’ x 7-1/2’’) Channel separation: > 50dB (at 1kHz)
Front Panel: 212mm x 70mm x 32mm (8-3/8’’ x 2-3/4’’ x 1-1/4’’) Dynamic range: 80dB (at 1kHz)
Frequency response: 20Hz to 18kHz
Total harmonic distortion (THD): 0,5% (at 1kHz)
Audio specifications: Sampling frequency: 44.1kHz
Max. power output: 50W x 4 ch (200W total)
Continuous average power output: 20W x 4 ch, into 4 Ω, 20Hz
to 20kHz, 1%TDH
Bass control: ± 10dB (100Hz)
Treble control: ± 10dB (10kHz)
Loudness contour: + 10dB (100Hz),
+ 10dB (10kHz) (at volume –20dB)
Max. preout level/load: 5V/10KΩ
Specifications and design are subject to change without prior notice.
43specifications in.tune II™
FM tuner: Applicable Standards:
Usable sensitivity (S/N = 30dB): 4μV UL 1563 Fifth Ed.
Stereo separation: 30dB File: E241878
Signal to noise ratio (S/N): 55dB CSA No. 22.2 - 218.1-M89.
Frequency range:
American (USA): 87,5MHz – 107,9MHz *EN/IEC
Europe: 87,5MHz – 108MHz EN 55013
Frequency spacing: EN 55020
American (USA): 200kHz
Europe: 50kHz *Note: see warning section for installation under the spa skirt.
AM tuner:
Usable sensitivity (S/N = 20dB): 31μV
Frequency range:
American (USA): 530kHz – 1710kHz
Europe: 522kHz – 1620kHz
Frequency spacing:
American (USA): 10kHz
Europe: 9kHz
Specifications and design are subject to change without prior notice.
44Printed in China
Advanced electronics! Water resistance!
9919-100794-B
Rev. 03/11 Gecko Alliance
450 des Canetons, Quebec City (QC) G2E 5W6 Canada, 1.800.78.GECKO
© 2010 Groupe Gecko Alliance Inc. 9225 Stellar Court, Corona, CA 92883 USA , 951.667.2000
TM trade-marks of/marques de commerce de Groupe Gecko Alliance Inc.
iPod is a trademark of Apple Inc., registered in the U.S. and other countries. www.geckoalliance.comYou can also read


