INSTALLATION GUIDE 2020-2021 Edition - Stagestep
←
→
Page content transcription
If your browser does not render page correctly, please read the page content below

INSTALLATION GUIDE
                2020–2021 Edition
         Supersedes all previous editions as of February 2021

 U.S. (800) 523-0960 | Canada (866) 491-9019 | STAGESTEP.COM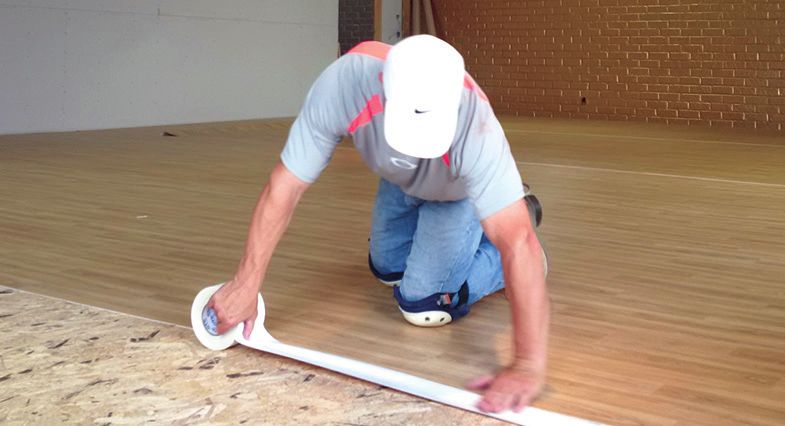
TABLE OF CONTENTS

     Floor Preparation........................................................................................................ 3, 4
     Vinyl Floor Preparation................................................................................................ 5, 6
     Environmental Control.................................................................................................7, 8
     Subfloors.................................................................................................................. 9, 10
     Underlayments............................................................................................................. 11
     Concrete Floors............................................................................................................ 12
     Existing Resilient Floors...........................................................................................13, 14
     Associations & Institutes............................................................................................... 15
     Bone Dry Plus............................................................................................................... 16
     Adhesive Application on Concrete............................................................................ 17, 18
     Roll Out Vinyl Installation.............................................................................................. 19
     Roll Out Vinyl Installation (2–3 Years)..................................................................... 20, 21
     Roll Out Vinyl Installation (3–4 Years)..................................................................... 22, 23
     Roll Out Vinyl Installation with ReUseIt (4–10 Years)............................................... 24, 25
     ReUseIt Diagram........................................................................................................... 26
     Adhesive ...................................................................................................................... 27
     Cutting and Fitting Sheets...................................................................................... 28, 29
     Heat Welding.......................................................................................................... 30, 31
     Spingstep ll Subfloor............................................................................................... 32, 33
     Spingstep lll Subfloor.............................................................................................. 34, 35
     Spingstep lV Subfloor.............................................................................................36–38
     Spingstep lV-A Subfloor.......................................................................................... 38, 39
     Spingstep lV-B Subfloor.......................................................................................... 40, 41
     Permanent Hardwood Flooring................................................................................42–44
     Encore Flooring......................................................................................................45–50
     Vented Wall Base.................................................................................................... 51, 52
     FloorShield for Vinyl................................................................................................53–55

2                            U.S. (800) 523-0960 | Canada (866) 491-9019 | STAGESTEP.COM                                                  26
FLOOR PREPARATION

     Inspection of Material
     • Material should be delivered to the job site in its original unopened packaging
       with all labels intact.

     • Examine the packaging for any damage which may have occurred during
       transit. The contents shipped to you should be secured to an 8’ pallet with
       orange strapping.

     • Upon receipt, all rolls of vinyl flooring should be immediately removed from
       this pallet, inspected and stood upright on a perfectly level surface or leaned
       against a wall in the most upright position possible. Failure to do so may result
       in deformation of the vinyl product, for which Stagestep is not responsible,
       voiding the warranty.

     • If you have questions about the condition of the flooring, or if the rolls have
       been removed from their packaging, take multiple photos from different
       angles. Be sure the photos are clear with good lighting and no glare. Contact
       Stagestep customer service as soon as possible. All damaged product must be
       noted on the shipping receipt at the time of delivery.

     • All issues regarding damage in transit or visual defect must be reported to
       Stagestep within 72 hours of delivery or claims may not be honored.

                                                     Floor Preparation Continues on Page 4...
27                    U.S. (800) 523-0960 | Canada (866) 491-9019 | STAGESTEP.COM           3
FLOOR PREPARATION
Storage
• Materials must be stored in an area that is fully enclosed and weather-tight, with
a permanent HVAC system set to a uniform temperature of 68° and a relative
humidity of 50% for at least 72 hours prior to and during the installation.
• Material should always be visually inspected during installation. No labor cost will
be covered on claims based on visual defects that could have been seen prior to
or during installation. Installation of flooring denotes acceptance.
Caution: All Concrete slabs must be covered or sealed with a vapor barrier. Use
Stagestep Plastic Vapor Barrier and Moisture Proof Tape, or Stagestep supplied
Bone Dry Plus. The space between the sealed concrete floor and the subfloor must
be vented. This is achieved by a ¼” or ½” gap around the perimeter of the subfloor.
Use Vented Wall Base to conceal this gap and allow moisture to escape.
• Wood, like vinyl, needs time to acclimate to the space. Most wood floors require
professional installation except for Stagestep’s Encore flooring system. For more
information on installation preparation for subfloors and wood flooring systems,
please see pages 32–44. For pricing of Stagestep installation products, including
Springstep IV subfloor systems go online to stagestep.com.
• Stagestep is not responsible for costs related to the shipping delay, damage or
installation of its flooring. Floors are insured in customer’s name against shipping
damage. All floors will be replaced free of charge if there is a manufacturer defect
or if damaged by the trucking company when reported within 72 hours of receipt.
4 U.S. (800) 523-0960 | Canada (866) 491-9019 | STAGESTEP.COMVINYL FLOOR PREPARATION
Do’s & Don’ts
Do Make sure the smooth surface is up and foam or texture side down when
installing. To lay flooring, securely hold the ends of the roll and unroll flooring from
the core so that smooth-side surface is always facing up. Save core or center tube
for future use unless installing permanently. Flooring returned to Stagestep for any
reason must be re-rolled using core or center tube. The unrolling of vinyl flooring
may require 2-4 people with adequate strength depending on length of roll and
weight.
Do Not Flip flooring edge over edge. Flooring can tear or crack. Be careful not to
severely bend vinyl flooring. Such bending or inadvertent stepping on folded flooring
can result in stretch marks or cracking.
Do Wash the new floor 2-3 times with ProClean and lukewarm water before
using. For special non-slip requirements or treatments, call our customer support
department.
Do Not Use rosin, solvents, abrasive cleaners, cola, vinegar, ammonia, bleach, or any
product that says it will leave your floor shiny.
Do Keep the space at a standard room temperature of 68–78° F with humidity
between 40–60% prior to and during the installation process. The use of humidifiers
or dehumidifiers may be required.
Vinyl Floor Preparation Continues on Page 6...
U.S. (800) 523-0960 | Canada (866) 491-9019 | STAGESTEP.COM 5VINYL FLOOR PREPARATION
Vinyl Flooring
• Ensure that moisture tests of the concrete slab have been conducted and meet
standard for moisture content. Have the permanent HVAC system turned on and
set to a minimum of 68– 78° F and a relative humidity between 40–60% for a
minimum of 72 hours prior to, during and after installation. After the installation,
the maximum temperature should not exceed 100° F.
• Flooring material must be acclimatized to the installation area for a minimum of
24 hours prior to installation.
• Only Stagestep approved adhesive should be used. Using an unapproved
adhesive may void warranty. Use a 1/32” x 1/16” x 1/32” fine notch trowel only.
Professional installers are required for permanent installs.
• Material should always be visually inspected prior to installation. Any materials
installed with visual defects will not be considered a legitimate claim as it
pertains to labor cost.
• Some Stagestep sheet vinyl has a fiberglass interlayer which gives them
dimensional stability. They will not shrink or compress. If cut too full or back
rolled, it can result in a bubble.
• Install all cuts and rolls in consecutive sequence.
• Ensure that all recommendations for subfloor and job site conditions are met
prior to beginning the installation. Once the installation is started, you have
accepted those conditions.
6 U.S. (800) 523-0960 | Canada (866) 491-9019 | STAGESTEP.COMENVIRONMENTAL CONTROL
Moisture Test
• It is essential that moisture tests be taken on all concrete and wood floors
regardless of the age or grade level.
• Concrete should be tested in a minimum of three places for every 1,000 square
feet.
• The test should be conducted according to ASTM F1869-98 using a calcium
chloride test or digital meter.
• The test should be conducted around the perimeter of the room, at columns,
and where moisture may be evident.
• The moisture emission from the concrete should not exceed 5.0 lbs. per 1,000
square feet in 24 hours.
• Wood should be tested with a digital moisture meter and should have content
not lower than 5% and not higher than 10%.
• If your results exceed these limits, please contact Stagestep for more
information.
• It is not the floor installer’s responsibility to conduct the test. However, the floor
covering installer is responsible to make sure these tests have been conducted
with proper results prior to installing the floor covering.
• When moisture tests are conducted, it only indicates the conditions at the time
of the test. The flooring contractor cannot be held responsible if moisture is
present in the future and causes failure.
Environmental Control Continues on Page 8...
29 U.S. (800) 523-0960 | Canada (866) 491-9019 | STAGESTEP.COM 7ENVIRONMENTAL CONTROL
Job Conditions
• The installation of flooring should not begin until the work of all other trades has been
completed, especially overhead trades.
• Areas to receive flooring should be clean, fully enclosed, weather-tight with the
permanent HVAC set at a uniform temperature of 68–78° F and a relative humidity
between 40-60%. The flooring material should be conditioned in the same manner.
Maximum temperature should not exceed 100° F after installation. All reasonable
efforts must be made to keep installed floor at room temperature and proper humidity
at all times.
• Areas to receive flooring shall be adequately lit to allow for proper inspection of the
substrate, installation and seaming of the flooring, and final inspection.
Note: Moisture tests should be conducted after HVAC system has been installed and all
materials have had ample time to acclimatize. Failure to have a controlled environment
within the recommended 68-78° F and 40-60% relative humidity may cause flooring
system failure.
8 U.S. (800) 523-0960 | Canada (866) 491-9019 | STAGESTEP.COMSUBFLOORS
Summary
• The finished appearance and performance of the floor covering will be determined
and affected, in part, by the condition of the subfloor. It is essential that all subfloors
be structurally sound, finished smooth, flat, level, permanently dry, clean, and free of
all foreign materials such as dust, paint, grease, oils, solvents, curing and hardening
compounds, sealers, asphalt, and old adhesive residue.
• Flat and level means, and the applicable parameter to maintain product warranties is
1/8” – ¼” for every 10 feet. Subfloor preparation should be done with the permanent
HVAC set 68-78° F and humidity controlled at 40-60%.
• Vacuuming the subfloor with a commercial shop vac is a preferred method for
removing dirt and dust. For concrete floors, damp mopping the subfloor is an excellent
way to remove fine dust. A clean subfloor ensures proper bond between the subfloor
and the floor covering.
Note: Wherever trade names, trademarks, product names, or company names are
mentioned, they are used only as a reference to establish a comparative standard of
quality. It should not be assumed that these products are the only products for the
suggested or intended use. Also, it does not mean that other products of similar or equal
quality may not be suitable.
Subfloors Continues on Page 10...
U.S. (800) 523-0960 | Canada (866) 491-9019 | STAGESTEP.COM 9SUBFLOORS
Grade Levels
1. On Grade A location for a finished floor with no portion below ground level, and with the
floor and the ground in contact or separated by less than 18” of well-ventilated space
between the bottom of the lowest horizontal structural member and the ground at any
point.
2. Above Grade A location for a finished floor where the floor is not in contact with the
ground and which provides at least 18” of well-ventilated space between the bottom of
the lowest horizontal structural member and the ground at any point.
3. Below Grade A location for a floor structure which is in contact with the ground or with
less than 18” of well-ventilated space between the bottom of the lowest horizontal
structural member and the ground, at any point and if part or all of the floor is below
ground level.
While many types of subfloor construction are acceptable for use with our products,
Springstep and SpringFlex subfloors are the only acceptable subfloor/underlayment
combinations for our flooring. Dancestep Plus, Woodstep Plus and Woodstep Ultra
should be installed directly on your existing smooth slab, and do not require a sprung
subfloor.
For further information you may refer to ASTM F141. For wood subfloors, refer to
ASTM F1482.
Existing floors must be structurally sound, free from excessive movement and have well-
ventilated air space below. Stagestep floor coverings should not be installed over wooden
subfloors built on sleepers over, on grade, or below grade concrete floors without the use
of a vapor barrier. Failure to use a vapor barrier will result in high rates of failure due to
the excessive moisture vapor emissions from the concrete.
10 U.S. (800) 523-0960 | Canada (866) 491-9019 | STAGESTEP.COMUNDERLAYMENTS
Summary
• Underlayment panels are used to correct deficiencies in the subfloor and to provide
a smooth, sound surface on which to adhere the resilient flooring. Use ¼” luan for
permanent installs.
• Other types of underlayment panels such as Tecply, Multiply, and Masonite Brand
Underlayment should not be used with Stagestep subfloor systems. Always install and
fasten underlayment panels according to the manufacturer’s recommendations.
Strip Wood/Plank Flooring
• Due to expansion and contraction of strip and plank subflooring during seasonal
changes, we recommend Springstep IV subfloor panels be installed over these types
of floors.
Note: The use of a skim coat of patching material over wooden subfloors may cause
problems in joint areas. The moisture from the patch is absorbed by the wood, swelling
the wood fibers, causing telegraphing through the newly installed floor covering. Proper
installation of a wooden subfloor is critical to the successful installation of your flooring
surface.
U.S. (800) 523-0960 | Canada (866) 491-9019 | STAGESTEP.COM 11
32CONCRETE FLOORS
Summary
(Refer to ASTM F710-98)
• Floors shall be smooth, rigid, flat, level, permanently dry, clean, and free of all
foreign materials such as dust, paint, grease, oils, solvents, curing and hardening
compounds, sealers, bond breakers, asphalt and old adhesive, residue.
• Concrete shall have a minimum compressive strength of 3500 psi/150 pounds per
cubic feet and be covered with a vapor barrier prior to construction of the subfloor.
• Telegraphing of patched joints and subfloor imperfections may often be accentuated
if the flooring material is maintained with a high gloss finish.
Note: The use of Stagestep Vapor Barrier, either liquid like Bone Dry Plus, or 8 mil.
or better plastic barrier, is mandatory when installing Stagestep products over, above,
on, or below grade concrete. Failure to do so will void all warranties.
35
12 U.S. (800) 523-0960 | Canada (866) 491-9019 | STAGESTEP.COMEXISTING RESILIENT FLOORS
Most Stagestep floor coverings may be installed over
a single layer of non-cushioned resilient flooring
provided it meets certain conditions.
• The existing flooring must be fully adhered and well-bonded.
• The existing flooring must not be embossed or textured enough that it will
telegraph through the new flooring.
• All waxes and finishes must be removed and rinsed with clean water and a pH
test should be conducted to assure stripper residues have been removed. An
adhesive bond test should be conducted to ensure proper bond between the
adhesive and the existing flooring material.
• Cuts, gouges, dents, and other irregularities must be repaired or replaced.
• The current subfloor must be sprung and must meet the recommendations of
the existing and the new floor covering.
• The use of embossing levelers is not recommended for commercial installations.
Note: Application of a skim coat of patching material over the existing resilient
flooring may cause more problems than it resolves, such as bonding failures,
cracking and indentations.
• The responsibility of determining if the existing flooring is suitable to be
installed over rests solely with the installer and the flooring contractor. If
there is any doubt as to its suitability, it should be removed or an acceptable
underlayment installed over it.
• Installations over existing resilient flooring may be more susceptible to
indentation, and there is always a possibility the existing flooring may telegraph.
Existing Resilient Floors Continues on Page 14...
U.S. (800) 523-0960 | Canada (866) 491-9019 | STAGESTEP.COM 13
38EXISTING RESILIENT FLOORS
• Telegraphing is when the seams of the subfloor/underlayment shows through
to the surface of the flooring. This condition should not affect activity on the
surface or impact wear. It is a common occurrence with floating wood subfloors
and is not covered by warranty.
Radiant Heated Floors
Stagestep floor coverings may be installed over radiant heated floors provided the
operating temperature does not exceed 85° F. To allow proper adherence of the
adhesive to the subfloor, the radiant heating system should be lowered or turned
off for at least 48 hours prior to installation of Stagestep flooring material. This will
ensure the surface temperature of the subfloor does not exceed 65° F during the
installation of the flooring material.
The room temperature must be maintained at a minimum of 65° F prior to, during,
and after installation for 72 hours. Then, the temperature of the radiant heating
system can be increased. When raising the floor temperature, do so gradually
so that the substrate and flooring material can adapt to the temperature change
together. A rapid change could result in bonding problems.
For more information, contact our technical support at (800) 523-0960 or
sales@stagestep.com.
Directional Install
When installing Stagestep vinyl flooring, all sheets must be installed running in the
same direction.
37
14 U.S. (800) 523-0960 | Canada (866) 491-9019 | STAGESTEP.COMASSOCIATIONS & INSTITUTES
For more extensive guidelines and information on the mentioned topics, we
encourage you to contact the following associations:
• APA – The Engineered Wood Association (253) 565-6600
or apawood.org
• ACI – American Concrete Institute (248) 848-3700 or concrete.org
• PCA – Portland Cement Association (847) 966-6200 or cement.org
• RFCI – Resilient Floor Covering Institute (706) 882-3833 or rfci.com
• ASTM – American Society for Testing and Materials 610-832-9500 or astm.org
U.S. (800) 523-0960 | Canada (866) 491-9019 | STAGESTEP.COM 15BONE DRY PLUS APPLICATION
Application Instructions
• Surface sealers, paint, grease, oils and adhesives, etc., must be removed prior
to the application of Bone Dry Plus. Slick, hard toweled surfaces should be
etched with Bone Dry Plus products, or mechanically opened to enable Bone
Dry Plus to penetrate into the concrete.
• Use Bone Dry Plus at full strength. Saturate the surface with Bone Dry Plus.
Application can be made with an airless sprayer or hand pumped garden type
sprayer. Do not allow Bone Dry Plus to pond or puddle, as a white residue will
likely form on the surface.
• The time for the application of additional material can be judged by observing
the time it takes for Bone Dry Plus to soak into the concrete. If the material
soaks in quickly, generally less than 15 minutes after application, additional
applications are required.
• If necessary, 24 hours after the final application of Bone Dry Plus, flush or mop
the surface thoroughly with water to remove any foreign material that may be
brought through the concrete up to the surface.
• After certain applications, a crust of both alkali and lime may be brought up
through the concrete to the surface. To remove, use a stiff bristle brush or
scrubbing machine with a wire block brush. After removal, flush with water.
• The concrete is now cleaned, deodorized and permanently sealed. Flooring can
be installed approximately 72 hours after application. You can safely walk on
concrete during the 72 hour window, although surface can be slippery when
wet.
16 U.S. (800) 523-0960 | Canada (866) 491-9019 | STAGESTEP.COMADHESIVE APPLICATION ON CONCRETE
Application Instructions
• Use on grade, above grade, or below grade. May be used over plywood,
hardboard, concrete, terrazzo, steel, and well-bonded, wax-free floor coverings.
• Use a high quality latex/Portland cement patching compound to fill or level any
irregular areas.
• The floor must be sound, dry, and free from dirt, dust, old adhesives, grease,
wax, or other foreign matter. Concrete floors must be fully cured, free from dust,
moisture, excessive alkalinity, curing agents, and excessive moisture vapor
emissions (5 lbs./1,000 SF/24 hrs.)
• On and below grade concrete must have a satisfactory moisture barrier beneath
the slab.
• Do not use Safe-Set 299 where moisture is present in the concrete
subfloor; moisture may retard or prevent the adhesive from setting.
• May be used over old cutback adhesive provided the following procedure
is followed: scrape and remove the adhesive to expose at least 80% of the
concrete surface. Random specs of adhesive and the appearance of a brown
surface stain are acceptable.
Adhesive Application on Concrete Continues on Page 18...
U.S. (800) 523-0960 | Canada (866) 491-9019 | STAGESTEP.COM 17ADHESIVE APPLICATION ON CONCRETE
Application Instructions
The adhesive and room should be maintained at a minimum temperature of 65°
F for 48 hours prior to, during, and after installation. For porous subfloors apply
the adhesive with a 1/16” x 1/16” x 1/16” square notched trowel; for non-porous
subfloors use a 1/32” x 1/32” x 1/16” trowel. Immediately after spreading the
adhesive, roll it with a short nap roller dampened with adhesive to flatten the
adhesive ridges. This procedure will ensue that the trowel notch pattern does
not telegraph through to the finished floor. When using the “wet-set method” of
installation test the adhesive to see if it has “strings” and is moist to the touch
before installing the floor covering. Check periodically to make sure there is full
transfer of adhesive to the back of the floor covering. When using the “tacky”
method of installation allow the adhesive to become tacky before beginning the
installation (adhesive should not transfer to the finger when touched). That set-up
time will vary with the temperature, humidity, and porosity of the subfloor. To test,
touch the adhesive lightly; if it does not transfer to your finger, proceed with the
installation. Place the vinyl flooring into the adhesive within two hours of spreading.
Within an hour of installation roll the entire floor with a 100 lb. roller. Roll twice,
once in each direction. Restrict heavy foot traffic or rolling loads for at least 24
hours.
Clean-up
Dried adhesive can be difficult to remove; take care to remove wet adhesive from
the surface of the material before it dries. Fresh adhesive (less than 8 hours old)
can be removed with ice cold soapy water and wet cloth. For dried adhesive film,
use mineral spirits or acetone carefully, as these products can compromise the
floor finishes. Always refer to the material manufacturer for proper dried adhesive
removal procedures.
18 U.S. (800) 523-0960 | Canada (866) 491-9019 | STAGESTEP.COMROLL OUT VINYL/INSTALLATION
Five Ways to Install
• Temporary Installation
• Semi-Permanent Installation using 2” double-faced tape and top tape
• Long-Term Semi-Permanent Installation using 4” seam tape
• Extended-Term Semi-Permanent Installation Using ReUseIt
• Permanent Installation
Timestep™ Installation Tips
1. Timestep™ and all flooring vinyl must be removed from the pallet and stored in the
vertical position immediately after receiving.
2. It should always be unrolled or unraveled with outside/dance surface up.
3. Never flip vinyl from side to side. Never grab or hold with one hand.
4. Must be moved careful by multiple installers after acclimated to room temperature
between 70° and 80°F.
Timestep Black must be handled with extra care.
Temporary Installation (1 Day–2 Weeks)
Use Top Tape, Vinyl or Cloth Tape
1. Floor must be installed over a clean, smooth, level and dry surface. It is best to install
over a sprung subfloor or stage.
2. Before taping, unroll flooring and allow to sit on subfloor until flooring lies flat and
acclimates to room temperature.
3. Letting the floor sit overnight or longer is ideal. Flooring must lie flat before taping.
Leave a 1/16” gap at all seams and a ½” gap at walls.
4. Tape all seams and the perimeter of the floor using 1-1/2” or 2” vinyl or cloth tape.
U.S. (800) 523-0960 | Canada (866) 491-9019 | STAGESTEP.COM 19ROLL OUT VINYL INSTALLATION
Semi-Permanent Installation (2-3 Years)
Use Double-Faced Tape and Top Tape, Vinyl or Cloth Tape.
1. Seal concrete slab against moisture. On concrete slab, use liquid moisture
barrier such as Bone Dry Plus as directed or Stagestep Vapor Barrier plastic
sheeting 8 mil or greater. If using plastic sheeting, roll out and place so each
sheet overlaps 5” – 7” with Moisture Proof Tape at seams, and allow to run
up to wall and tape with same waterproof tape at base of perimeter to seal
moisture below.
2. Subfloor (ideally sprung subfloor) surface must be clean, dry, level and smooth,
with all screw holes and seams filled with wood putty, wood filler or taped
over. (See instruction for Springstep II, III, or IV). It is not necessary to tape
tight fitting seams as should be the case with properly installed Springstep II,
III or IV. Taping will result in possible telescoping which is normal.
3. Roll out flooring and let it acclimate to room temperature. When the floor
arrives, it may be rolled inside out. Please make certain that the smooth side
is up, and the foam or textured surface is down. The room temperature should
be the highest temperature the room will reach when in use. Acclimatizing the
floor may take anywhere from a few hours to a few days.
4. Make certain the floor is lying flat to the subfloor and that all seams are even.
Make all appropriate cuts. Leave a ½” gap at walls and 1/16” gap between the
seams.
5. Your floor should look like it is ready to be used.
6. Secure one end of each roll of flooring with weight so it will not move.
Roll Out Vinyl Installation (2–3 Years) Continues on Page 21...
20 U.S. (800) 523-0960 | Canada (866) 491-9019 | STAGESTEP.COM7. Mark the edges of the flooring onto the subfloor with a pencil. Begin by
re-rolling the flooring roll closest to the furthest wall onto its core and apply
double-faced tape to the subfloor at the marked perimeter (not under the seam)
and down the middle 3.25 ft. from the edge. Leave all other rolls in place and
rolled out.
8. Roll the flooring into place and check positioning over the tape.
9. If all is fine, roll up the floor, remove the protective paper from the double-faced
tape and re-roll over the exposed tape surface. Be careful not to step on rolled
down vinyl over the double-faced tape until you are confident the vinyl is flat
without any ripples or rolls.
10. Repeat procedures 7 through 9 for each roll.
11. If necessary, use a 75 lb. roller to further secure the floor using an “S” path
allowing ripples or air bubbles to be pushed out and not trapped under the
flooring.
12. Tape all seams and perimeter of the floor using 1-1/2” or 2” vinyl or cloth tape.
Caution: Change top tape every three months or as necessary. Change double-
faced tape a minimum of every two years. Failure to do so can cause flooring to
crack and ripple due to tape failure.
U.S. (800) 523-0960 | Canada (866) 491-9019 | STAGESTEP.COM 21ROLL OUT VINYL INSTALLATION
Semi-Permanent Installation (3-4 Years)
Use double-faced professional 4” seam tape. No top tape is required.
1. Seal concrete slab against moisture. On concrete slab, use liquid moisture
barrier such as Bone Dry Plus as directed or Stagestep Vapor Barrier plastic
sheeting 8 mil or greater. If using plastic sheeting, roll out and place so each
sheet overlaps 5” – 7” with Moisture Proof Tape at seams, and allow to run
up to wall and tape with same waterproof tape at base of perimeter to seal
moisture below.
2. Subfloor (ideally sprung subfloor) surface must be clean, dry, level, and
smooth, with all screw holes and seams filled with wood putty, wood filler
or taped over. It is not necessary to tape tight fitting seams as should be the
case with properly installed Springstep II, III or IV. Taping will result in some
telescoping which is normal.
3. Roll out flooring and let it acclimate to room temperature. When the floor
arrives, it will be rolled inside out. Please make certain that the smooth side
is up, and the foam or textured surface is down. Room temperature should be
the highest temperature the room will reach when in use. Acclimatizing the
floor may take anywhere from a few hours to a few days.
4. Make certain floor is lying flat to the subfloor and that all seams are even.
Make all appropriate cuts. Leave a ½” gap at all walls. Seam areas may be
overlapped by up to 1 inch and double, or trace cut to realize two fresh edges
so that edges of the 2 adjacent rolls are perfectly aligned. Do not cut floor
seams until #12.
Note: Double-cutting will reduce coverage of material in the floor width. Please be
sure that there is enough material to complete the job before installing the floor in
this manner.
Roll Out Vinyl Installation (3–4 Years) Continues on Page 23...
22 U.S. (800) 523-0960 | Canada (866) 491-9019 | STAGESTEP.COM5. Your floor should look like it is ready to be used.
6. Secure one end of each roll of flooring with weight so it will not move.
7. Mark the edges of the flooring onto the subfloor with a pencil. Begin by re-
rolling the flooring roll closest to the furthest wall onto its core and apply 4”
professional seam tape to the subfloor at the marked perimeter (not under the
seams) and down the middle 3.25 ft. from the edge. Leave all other rolls in
place and rolled out.
8. Re-roll out this roll to check the positioning over the tape.
9. If all is fine, roll up the floor, remove the protective paper from the double-faced
tape and re-roll over the exposed double-faced tape. Be careful not to step on
rolled down vinyl over the double-faced tape until you’re confident the vinyl is
laid out flat without any ripples or rolls. Rolling out vinyl flooring onto double-
faced tape should always be done slowly and methodically.
10. Repeat procedures 7 through 9 for each roll.
11. If necessary, use a 75 lb. roller to further secure the floor using an “S” path
allowing ripples or air bubbles to be pushed out and not trapped under the
flooring.
12. Once entire floor surface has been rolled, if you have overlapped the rolls at
seams, double or trace cut all seams. Once all seams have been cut, roll seam
area with 75 to 100 lb. roller. Trimming seams may not be necessary if the roll
seams match up.
13. Tape perimeter of the room using 1-1/2” or 2” vinyl or cloth tape unless
covered by optional vented cove base.
Caution: Change 4-inch seam tape a minimum of every three years. Failure to do
so can cause flooring to crack and ripple due to tape failure.
U.S. (800) 523-0960 | Canada (866) 491-9019 | STAGESTEP.COM 23ROLL OUT VINYL INSTALLATION WITH REUSEIT
Long Term Semi-Permanent Installation (4–10 Years)
Stagestep’s ReUseIt (Diagram on Page 26)
1. Seal concrete slab against moisture. On concrete slab, use liquid moisture barrier
such as Bone Dry Plus as directed or Stagestep Vapor Barrier plastic sheeting
8 mil or greater. If using plastic sheeting, roll out and place so each sheet
overlaps 5” – 7” with Moisture Proof Tape at seams, and allow to run to wall
and use same tape at base of perimeter to seal moisture below.
2. Subfloor (ideally sprung subfloor) surface must be clean, dry, level, and smooth,
with all screw holes and seams filled with wood putty, wood filler or taped over.
It is not necessary to tape tight fitting seams as should be the case with properly
installed Springstep II, III or IV. Taping will result in some telescoping which is
normal.
3. ReUseIt covers the entire floor perpendicular to the direction of the rollout floor
surface. If your floor runs north-south, ReUseIt will run east-west.
4. As you roll out ReUseIt, you expose the adhesive on the bottom which will stick
to your subfloor.
5. As one person slowly walks backwards unrolling ReUseIt, another person
secures the adhesive side to the subfloor by smoothing it out with a stiff bristle
push broom or roller. (See step 1 illustration.)
6. When you reach a wall, cut ReUseIt with a utility knife and start the next run. It is
good to line up seams as close as possible; however, slight overlaps or gaps are
OK. (See step 1 illustration.)
Roll Out Vinyl Installation With ReUseIt Continues on Page 25...
24 U.S. (800) 523-0960 | Canada (866) 491-9019 | STAGESTEP.COM7. Roll out top flooring perpendicular to ReUseIt make all rough cuts along wall
perimeter, and let top flooring acclimate for at least 24 hours. If floor edges are
damaged or deformed, seam areas may be overlapped by up to 1 inch and double or
trace cut to realize two fresh edges. Do not make double cuts until step 12. (See step
2 illustration).
8. Roll your flooring up half way using a flooring tube. Do this one section at a time.
Peel off the top protective layer of ReUseIt exposing the top adhesive. (See step 3
illustration).
9. Gently roll flooring back into adhesive top, making sure not to shift or change
alignment of the flooring. Smooth out flooring from the center to the edges.
10. Repeat procedure on each half of the remaining sheets of flooring. Do not cut any
seams at this time (See step 4 illustration).
11. Once all flooring has been affixed to ReUseIt, roll each sheet one at a time from the
center to the edges with a 75 to 100 lb. floor roller. (See step 5 illustration.)
12. Once entire floor surface has been rolled, double cut or scribe all seams if necessary.
Be careful not to cut the ReUseIt during this procedure. Cutting the ReUseIt at the
seam areas will weaken its ability to properly hold the seams closed. Once all seams
have been cut, roll seam area with 75 to 100 lb. roller (See step 5 illustration).
Tips
• Room should be warm and dry. ReUseIt should not be used in damp areas or outside.
• If a mistake is made and the floor gets tangled or misaligned, gentle pull floor
material up and try again. If ReUseIt gets dirty, damaged, or wet, cut damaged area
out and lay in replacement piece.
Roll Out Vinyl Installation With ReUseIt Continues on Page 27...
U.S. (800) 523-0960 | Canada (866) 491-9019 | STAGESTEP.COM 25S1 S2 S3 S4
REUSEIT
S1 S2 S3 S4
T1
S1 S2 S3 S4
Stagestep’s ReUseIt Diagram
T2
S3 S4
S1 S2 S3 S4
T1
T1 T1
T2
T1 S3 S4
T2 T2 T2
STEP 1 STEP 2
S3 S4
T2 T1
T1 S3 S4
T1 T1
T1 T1 S4
T2 T2
T2 T1
S3 S4
T2 T2
T2 T2
T2 T2 T2
T2 T2
STEP
T1T13 T1 T1 STEP 4 S4
T1 S4
T2 T2
T2 T2 T2
T2 T2
T1
T1 T1 S4
T2 T2
T2 T2
T2 T2 T2
T1 S4
STEP 5
T2 T2
26 U.S. (800) 523-0960 | Canada (866) 491-9019 | STAGESTEP.COMADHESIVE
• Test ReUseIt to confirm it will stick to your subfloor prior to installation.
ReUseIt is designed to work with Stagestep subfloor systems and most plywood
types, however, Stagestep cannot guaranty suitability with any system other than its
own. Suitability should be tested prior to installation.
ReUseIt is designed to be removed and not render the subfloor or vinyl flooring
unusable. Other permanent installation methods typically mean that the subfloor and
vinyl floor cannot be used again. It may be necessary to use double-faced tape or 4”
seam tape to hold ReUseIt to secure its leading edges.
Caution: Extreme heat can damage ReUseIt resulting in its failure to bond flooring to
subfloor. Use 4” seam tape to address this issue.
Note: Do not overlap seams if doing so will compromise floor fit! Do not use ReUseIt to
install Timestep T. Use double-faced tape and top tape or 4” installation tape.
Permanent Installation (10+ Years)
Stagestep Adhesive
Professional installation recommended. Complete instructions are included with each
container of Stagestep Adhesive. Seams should be double cut by a professional.
Chemical welding is not recommended. Heat welding is not necessary but again should
only be done by a professional. Stagestep carries heat Welding Rod material in all
colors.
If you have any questions call (800) 523-0960 or or email sales@stagestep.com. You
can also see heat welding instructions on page 30.
U.S. (800) 523-0960 | Canada (866) 491-9019 | STAGESTEP.COM 27CUTTING AND FITTING SHEETS
Stagestep Sheet Vinyls
Stagestep sheet vinyls are flexible and easy to handle when properly acclimated. In
most cases, a qualified installer will be able to hand fit the material in areas where base
or trim moldings will be installed after the installation is complete.
1. Cut the required length off the roll, including enough to run up the wall 2-3” at
either end.
2. Push the length of the sheet as close to the starting wall as possible, letting the
extra length run up the wall at each end.
3. Set the scribes to a minimum of 3/8” more than the greatest distance between the
wall and the flooring material. Scribe the shape of the wall onto the flooring.
4. Next, cut the material along the scribe line using a utility blade knife. Place the
fitted sheet approx. ½” from the wall. There should be a ½” gap around entire
perimeter of room.
5. Cut second sheet with proper extra length.
6. Position second sheet with a ½ - 1” overlap over first sheet at the seam.
7. Repeat steps 5 and 6 for as many sheets as necessary to complete the area or
those sheets that can be installed that day.
8. Lap back all overlapped sheets as one, halfway back.
9. Snap chalk line along area where adhesive will be spread to assure an even and
straight line of adhesive. Spread adhesive with proper notched trowel over entire
area. Be very careful not to leave any adhesive ridges or puddles.
Note: The subfloor porosity and room atmosphere conditions (temperature, humidity,
etc.) can affect the working time of the adhesive. Floor must be placed into adhesive
while wet. Do not install flooring into dry adhesive.
Cutting and Fitting Sheets Continues on Page 29...
28 U.S. (800) 523-0960 | Canada (866) 491-9019 | STAGESTEP.COM10. Push lapped flooring from the fold onto adhesive, working toward the wall. Do not
flop material in—air will be trapped causing bubbles. Rolling or laying out vinyl
flooring onto adhesive should always be done slowly and methodically.
11. Roll floor with 75 to 100 lb. roller in both directions. Roll across with width first,
then across the length. Using the top floor piece edge as a guide, cut bottom sheet
with a sharp utility knife.
Note: To ensure proper bonding of the material, it is recommended to roll the material
next to the walls with a hand seam roller.
12. After material has been laid into the adhesive, double, trace or scribe cut seams. If
scribe cutting, underscribe the seams using the short scribes with either the scribe
blade or scribe pin.
Note: Set scribes so that the seam will have a slight gap, about half the thickness of
a razor blade. If cut too full, it will result in bubbles or ridges. Heat welding Stagestep
vinyl sheet flooring is optional. When installing Super Timestep, both seam edges must
be trimmed as the factory edge is at 45 degree angle.
13. Cut material along scribe line with utility knife.
14. Roll the seam with a hand roller.
15. Repeat the same procedure on the other half of the room. Take
Caution not to overlap adhesive lines or leave ridges of adhesive.
16. Heat weld seams the following day if required.
Note: The above instructions assume a permanent install with adhesive. Therefore,
these instructions are for professional installers. Any questions, please call
(800) 523-0960 or email sales@stagestep.com.
U.S. (800) 523-0960 | Canada (866) 491-9019 | STAGESTEP.COM 29HEAT WELDING
To be done by experienced professionals only:
• Heat welding is the optional procedure for all seams, coving, and corner fill pieces
of our sheet vinyls. Heat welding provides for strong and hygienic seams. They are
not invisible. Heat welding is not appropriate for temporary or semi-permanent
installations.
• The welding cord for our vinyls is made of pure PVC which is designed to melt
at the same temperature as the PVC of the sheet vinyl flooring. This is why you
should never use Welding Rods other than those specified for the product you are
installing.
• Heat welding should be done after the flooring adhesive has set-up, usually a
minimum of 24 hours after sheet vinyl installation.
• It is always a good idea to practice on a scrap piece of material first to ensure
proper temperature and speed.
Procedure
1. Seam edges should be tight. Gaps in the seam will deter a quality weld.
2. Groove seam using a vinyl groover. The depth of the groove should be about 2/3
the depth of the material. Be careful not to go too deep. This is very important to
ensure proper strength and bonding of the Welding Rod.
3. The ends of the seam, where the groover cannot reach, must be completed using
the hand groover.
4. Clean all grooves thoroughly.
5. Use only professional quality welding guns that will maintain the proper
temperatures. Use 5 mm speed tip.
Heat Welding Continues on Page 31...
30 U.S. (800) 523-0960 | Canada (866) 491-9019 | STAGESTEP.COM6. Preheat welding gun for several minutes before beginning.
7. Cut length of Welding Rod long enough to weld over half the seam.
8. Insert rod through welding nozzle about 3-4”, hold on to excess and immediately
begin welding.
9. The welding tip should always be parallel to the flooring and directly over the
groove.
10. Determine the correct welding speed by ensuring that the Welding Rod actually
melts into the groove. A small bead should form on either side of the Welding
Rod.
11. While the Welding Rod is still warm, trim the excess material with the crescent
knife and trim plate in one continuous movement.
12. If the Welding Rod has not properly bonded, a new piece of rod can be fused in
and trimmed.
13. Repeat the same procedure on the other half starting from the opposite wall
working toward the center. Overlap the Welding Rod approximately 1” where
they join.
14. After the rod has cooled to the touch, make the final trim using only the crescent
knife.
15. Minor repairs and smoothing out of the rod may be done using the butane repair
tool.
Note: Seamless does not mean invisible. Heat welding prevents moisture from
penetrating the seam and destroying the adhesive. Classic and Super Bravo cannot be
heat welded.
U.S. (800) 523-0960 | Canada (866) 491-9019 | STAGESTEP.COM 31SPRINGSTEP II SUBFLOOR
Construction
Materials Needed:
1. Two layers of ½” underlayment grade solid core no void plywood, one side
finished. (To be supplied locally.)
2. Springstep 2” high density foam cubes or 3” x 3” x ¾” foam blocks.
3. Contact cement or liquid nails (to be supplied locally) but not necessary if using
peel-and-stick cubes or blocks.
4. 1” continuous thread wood deck screws with counter sinking heads. Do not use
drywall screws or nails. (To be supplied locally.) (See schematic at bottom of page
33.)
5. Vapor barrier (Choice of plastic sheeting such as Stagestep Vapor Barrier with
reinforcement scrim laminated between polyethylene layers or a liquid vapor
barrier like Bone Dry Plus.
6. Moisture Proof Tape to tape vapor barrier at seams if using plastic sheeting.
7. Tape floor patch to fill screw holes and realize a smooth surface (to be supplied
locally.)
8. Vented wall and transition pieces (optional)
Process
1. Seal concrete slab against moisture. On concrete slab, use liquid moisture barrier
such as Bone Dry Plus or Stagestep Vapor Barrier plastic sheeting 8 mil or
greater. If using plastic sheeting roll out and place so each sheet overlaps 5” – 7”
with Moisture Proof Tape at seams, and allow to run up to wall and tape with
same Moisture Proof Tape at base of perimeter to seal moisture below.
Springstep ll Subfloor Continues on Page 33...
32 U.S. (800) 523-0960 | Canada (866) 491-9019 | STAGESTEP.COM2. Glue or peel and stick foam blocks to bottom layer of ply. (See schematic
below.)
3. Position bottom layer of ply with foam affixed. Stagger seams.
4. Run top layer of ply perpendicular to bottom layer. (See schematic on page 35.)
5. Floor is complete when you reach the walls or the desired size. Leave ½” gap
around perimeter.
6. Use 1” continuous thread wood deck screws with counter sinking heads. (See
schematic below.)
7. Tape or patch screw heads and sand seams to realize smooth surface if
necessary.
8. Three foot transition pieces are available. May require a custom order.
Call (800) 523-0960 or email sales@stagestep.com.
Note: Do not use any wood with moisture content exceeding 10%.
Caution: By using substandard wood and/or hard-wood, you increase the risk
of subfloor failure. Rough edges, defective or non-specified screws can result in
damage to your wear surface. Double check your subfloor is secure.
SCREWS 6” SPRINGSTEP ll SPRINGSTEP ll
ON CENTER FOAM BLOCK FOAM CUBE
150-160 SCREWS LAYOUT 52 LAYOUT 100
PER 4’X8’ SHEET REQUIRED PER REQUIRED PER
OF PLYWOOD 4’ X 8’ SHEET 4’ X 8’ SHEET
U.S. (800) 523-0960 | Canada (866) 491-9019 | STAGESTEP.COM 33SPRINGSTEP IIl SUBFLOOR
Construction
Materials Needed:
1. Two Layers of ½” underlayment grade solid core no void plywood, one side
finished. (To be supplied locally.)
2. Stagestep ½” foam sheeting (rolls come in 5’ width by your custom length up to
100.’)
3. 1” continuous thread wood deck screws with counter sinking heads. Do not use
drywall screws or nails. (To be supplied locally.) (See schematic.)
4. Vapor barrier (choice of plastic sheeting such as Stagestep Vapor Barrier with
reinforcement scrim laminated between polyethylene layers or a liquid vapor
barrier such as Bone Dry Plus.
5. Moisture Proof Tape to tape vapor barrier at seams if using plastic sheeting.
6. Tape or floor patch to fill screw holes and realize a smooth surface. (To be
supplied locally.)
Process
1. Seal concrete slab against moisture. On concrete slab, use liquid moisture barrier
such as Bone Dry Plus as directed, or Stagestep Vapor Barrier plastic sheeting
8 mil or greater. If using plastic sheeting roll out and place so each sheet overlaps
5” – 7” with Moisture Proof Tape at seams, and allow to run up to wall and tape
with same waterproof tape at base of perimeter to seal moisture.
2. Roll out foam sheeting to conform to slab.
3. Tape seams of foam sheeting.
4. Loosely lay bottom layer of ply directly on foam. Stagger seams.
Springstep lll Subfloor Continues on Page 35...
34 U.S. (800) 523-0960 | Canada (866) 491-9019 | STAGESTEP.COM5. Run top layer of ply perpendicular to bottom layer. (See schematic below.)
6. Floor is complete when you reach the walls or desired size. Leave ½” gap
around perimeter.
7. Use one continuous threadwood deck screws with counter sink heads. (See
schedule on page 33.)
8. Tape or patch screw heads and sand seams to realize smooth surface if
necessary.
Note: Do not use any wood with moisture content exceeding 10%.
Caution: By using substandard wood and/or hardwood, you increase the risk of
subfloor failure. Rough edges, defective or non-specified screws can result in
damage to your wear surface. Double check your subfloor is secure.
SPRINGSTEP lll CROSS SECTION
TOP LAYER 1/2” PLYWOOD (FINISHED ONE SIDE)
BOTTOM LAYER 1/2” PLYWOOD
1/2” FOAM
VAPOR BARRIER
CONCRETE SLAB
TOP LAYER
BOTTOM LAYER
U.S. (800) 523-0960 | Canada (866) 491-9019 | STAGESTEP.COM 35SPRINGSTEP IV SUBFLOOR
Springstep IV is a nominal 2’ x 2’ board made with a resin that resists moisture.
Comes pre-assembled with ¾” thick L-Shaped foam forms. Designed for multi-
purpose studios.
Springstep IV-A
Unassembled panels with ½” thick foam sheeting (for firm, absorbent floor and sound
reduction). Excellent for ballroom dance.
Springstep IV-B
Unassembled panels with 2” foam cubes for increased resiliency. Ideal for high impact
activities.
Construction
Materials needed:
1. Springstep IV subfloor panels.
2. Vapor barrier (choice of plastic sheeting such as Stagestep Vapor Barrier with
reinforcement scrim laminated between polyethylene layers or our liquid vapor
barrier, Bone Dry Plus.
3. Moisture Proof Tape to tape vapor barrier at seams if using plastic sheeting.
4. Vented Wall Base. (Optional)
5. Transition Pieces. (Optional)
6. Tools: Rubber mallet or hammer, 2 x 4 block, rotary saw to cut perimeter panels.
Springstep lV Subfloor Continues on Page 37...
36 U.S. (800) 523-0960 | Canada (866) 491-9019 | STAGESTEP.COMProcess
1. Seal concrete slab against moisture. On concrete slab, use liquid moisture barrier
such as Bone Dry Plus as directed or Stagestep Vapor Barrier plastic sheeting
8 mil or greater. If using plastic sheeting roll out and place so each sheet overlaps
5”–7” with Moisture Proof Tape at seams, with same waterproof tape at base of
perimeter to seal off moisture from below.
2. Press or tap boards into each other making sure to stagger seams. Can use mallet
and 2 x 4 blocks on groove side of panel.
3. Every other row should begin with a full board. Rows should alternate starting with
full boards and half boards as illustrated.
4. Leave ¼” – ½” gap at walls to allow air to circulate.
5. Floor is complete when you reach the walls or the desired size.
6. Vented Wall Base and transition pieces/ramps are available.
The average two-person crew can complete a minimum of 125-150 sq. ft. per hour,
1,000-1,200 sq. ft. per day.
Note: A vapor barrier on your slab is required with all subfloors. The use of Stagestep
Vapor Barrier, 8 mil is mandatory when installing our products over, above, on, or
below grade concrete. Failure to do so will void all warranties.
*Resiliency is the measurement of “spring.” Increased resiliency = more “spring.” Less
resiliency = more firm. Shock absorption of all SSIV products is virtually the same and
helps to prevent dance and sport related impact injuries.
Springstep lV Subfloor Continues on Page 38...
U.S. (800) 523-0960 | Canada (866) 491-9019 | STAGESTEP.COM 371 Complete SSIV board with High Density
1- 2' x 2' x 5/8 '' SSIV board Foam Cushions Pre-Attached
6 - L shaped self adhesive High Density Just snap and Go!
Foam Cushion $3.25/ft2
$3.00/ft2
SPRINGSTEP IV SUBFLOOR Top View
L L = 23.38''
(15.88 mm) (593.85 mm)
W W = 23.38''
(15.88 mm)
(593.85 mm)
(35.05 mm)
H = 1.38''
FOAM FORM LAYOUT FOAM BLOCK
H (35.05 mm) LAYOUT
9.0''
(228.60 mm)
23.38''
(593.85 mm) 3/4'' High Density Foam Cushion
23.38'' (593.85 mm) Edging and Transition Pieces Also
Follow 2”x2”x2”
Available
Foam Form Layout
STAGGERED BRICKWORK PATTERN
SPRINGSTEP IV-A SUBFLOOR
Greater energy absorbency and sound reduction.
Construction
Materials needed:
1. Stagestep Springstep IV panels.
2. Stagestep ½” foam sheeting (rolls come in 5’ width by your custom length up to
100.’)
3. Vapor barrier (choice of plastic sheeting such as Stagestep Vapor Barrier
with reinforcement scrim laminated between polyethylene layers or Stagestep
supplied liquid vapor barrier Bone Dry Plus.
Springstep lV-A Subfloor Continues on Page 39...
38 U.S. (800) 523-0960 | Canada (866) 491-9019 | STAGESTEP.COMSPRINGSTEP IV-A SUBFLOOR
4. Moisture Proof Tape to tape at foam sheeting seams and also tape vapor barrier
at seams if using plastic sheeting.
5. Vented Wall Base. (Optional)
6. Transition pieces or ramps. (Optional)
7. Tools: Rubber mallet or hammer, 2 x 4 block, rotary saw to cut perimeter panels.
Process
1. Seal concrete slab against moisture. On concrete slab, use liquid moisture barrier
such as Bone Dry Plus as directed or Stagestep Vapor Barrier plastic sheeting
8 mil or greater. If using plastic sheeting, roll out and place so each sheet overlaps
5” – 7” with Moisture Proof Tape at seams, with same waterproof tape at base
of perimeter to seal off moisture from below.
2. Roll out foam sheeting to conform to slab. Cut with sharp matte knife to fit.
3. Tape seams of foam sheeting.
4. Press or tap boards into each other making sure to stagger seams. Can use mallet
and 2 x 4 blocks on groove side of panel.
5. Every other row should begin with a full board. Rows should alternate starting
with full boards and half boards as illustrated.
6. Leave ¼” – 1/2” gap at walls to allow air to circulate.
7. Floor is complete when you reach the walls or the desired size.
8. Vented Wall Base and transition pieces/ramps are available. The average two-
person crew can complete a minimum of 125-150 sq. ft. per hour, 1,000-1,200
sq. ft. per day.
U.S. (800) 523-0960 | Canada (866) 491-9019 | STAGESTEP.COM 39SPRINGSTEP IV-B SUBFLOOR
Construction
Materials needed:
1. Springstep IV-B subfloor panels. For increased resiliency.
2. Stagestep 2” high density foam cubes. 2” foam cubes and Springstep IV panels
will ship in separate packages.
3. Contact cement or liquid nails for SSIV-B to be supplied locally but not needed if
using peel and stick cubes.
4. Vapor barrier (choice of plastic sheeting such as Stagestep Vapor Barrier
with reinforcement scrim laminated between polyethylene layers or Stagestep
supplied liquid vapor barrier Bone Dry Plus.
5. Moisture Proof Tape to tape vapor barrier at seams if using plastic sheeting.
6. Vented Wall Base. (Optional)
7. Transition pieces or ramps. (Optional)
8. Tools: Rubber mallet or hammer, 2 x 4 block, rotate saw to cut perimeter panels.
Process
1. Seal concrete slab against moisture. On concrete slab, use liquid moisture barrier
such as Bone Dry Plus as directed or Stagestep Vapor Barrier plastic sheeting
8 mil or greater. If using plastic sheeting roll out and place so each sheet overlaps
5”–7” with Moisture Proof Tape at seams, with same waterproof tape at base of
perimeter to seal off moisture from below.
Springstep lV-B Subfloor Continues on Page 41...
40 U.S. (800) 523-0960 | Canada (866) 491-9019 | STAGESTEP.COMYou can also read


