IPlayer 3 Author, configure, and control dynamic LED light shows for DMX lighting networks
←
→
Page content transcription
If your browser does not render page correctly, please read the page content below
iPlayer 3
Author, configure, and control dynamic LED light shows for DMX
lighting networks
iPlayer 3
Author, configure, and control dynamic LED light shows for DMX
lighting networks
iPlayer 3 controller is a compact yet powerful show storage and playback device capable of delivering light
shows to installations with up to 340 unique light addresses. Packaged with ColorPlay 3 light show authoring
software, iPlayer 3 is designed to add new levels of sophistication and flexibility to your lighting installations
while eliminating the need for expensive lighting boards and technical programming expertise.

• Easy to use — With factory preset shows,                 • Supports the optional AuxBox expansion device
  custom show-authoring capabilities, an intuitive           — AuxBox automatically triggers up to eight
  LCD interface, removable SD card storage,                  iPlayer 3 light shows using any remote triggering
  and onboard light addressing features, iPlayer 3           device with a dry-contact closure. Via the
  enables you to spend more time on the creative             AuxBox, you can trigger light shows by motion
  aspects of lighting design and less time on setup.         sensors, 3rd party control or sensor systems, and
                                                             more.
• Packaged with ColorPlay 3 light show authoring
  software — ColorPlay 3 gives you the flexibility         • Control two DMX universes — iPlayer 3 has two
  to create and manage light shows using fully               DMX output ports, each controlling a universe of
  customizable effects, multi-track editing, timeline        512 DMX channels.
  layering, and transition styles.
                                                           • Automate show playback — Set alarms to
• Designed for use with the optional Controller              automatically trigger show playback based on
  Keypad — Controller Keypad is a wall-mounted               a specific date, day of the week, weekdays,
  user interface providing instant pushbutton                weekends, or an astronomical event, such as
  playback of up to eight light shows.                       sunrise or sunset.

                                                                                                                     Design, Store, and
                                                                                                                     Play Light Shows
                                                                                                                     iPlayer 3 factory preset
                                                                                                                     light shows get you
                                                                                                                     started.

                                                                                                                     Enhance your shows
                                                                                                                     using ColorPlay 3 visual
                                                                                                                     effects and timeline
                                                                                                                     editing features.
                                                                                                                     Set up fixture groups
                                                                                                                     to enable simultaneous
                                                                                                                     playback of multiple
                                                                                                                     effects at the same time.
                                                                                                                     Link together a sequence
                                                                                                                     of shows within a single
                                                                                                                     ColorPlay 3 project to
                                                                                                                     create a sophisticated
                                                                                                                     presentation.

2    iPlayer 3   Product Guide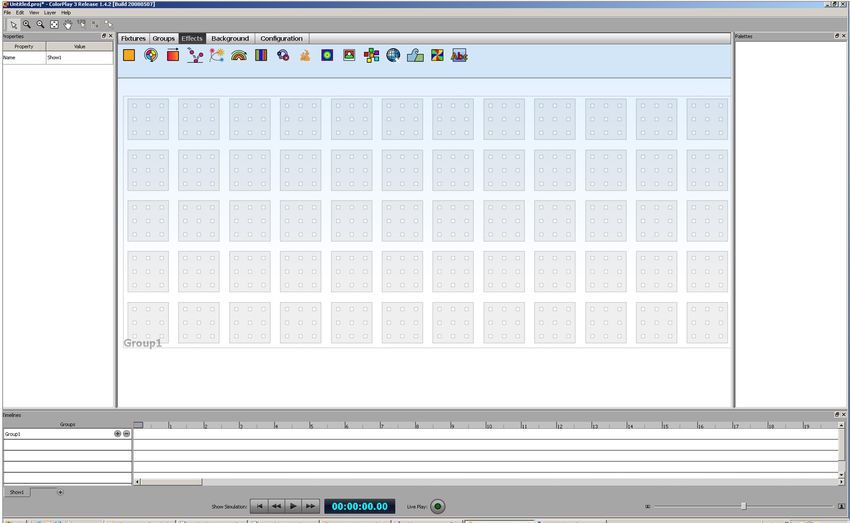
ColorPlay 3 Light Show Authoring Software
Smith Campus Center, Pomona College
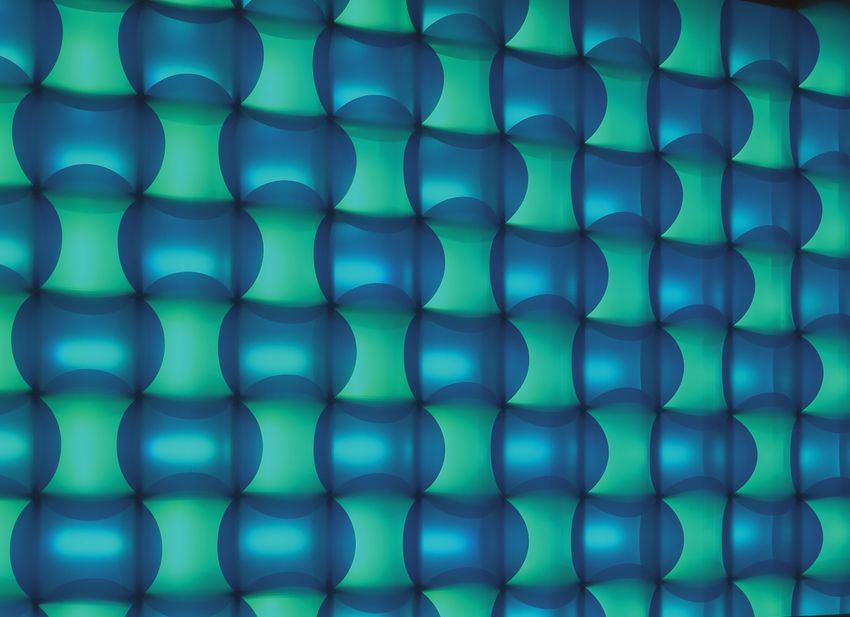
How better to reinvigorate a dark and uninviting space than with dynamic color-changing light. Philips LED lighting proved just that
as part of a major renovation of Pomona College’s Smith Campus Center, intended to be the social hub for students.
Photography: Benny Chan fotoworks
What’s in a ColorPlay 3 Light Show
A light show is a set of digital instructions orchestrating how and when your
installation produces visual effect. Whether your light show is as simple as one
fixture displaying a single color, or as complex as dozens of fixtures each with a
unique effect or layers of effects, the goals are the same: to create mood, interest,
and impact.
ColorPlay 3 provides 24 customizable effects, including the following:
Ripple Particle Burst
ColorPlay 3 offers multiple techniques for editing the appearance and behavior of an
E For complete instructions on how to design effect — you can adjust basic size and shape settings, create unique color palettes,
unique light shows, refer to the ColorPlay 3 User
Guide, available at www.philipscolorkinetics.com/
specify transitions, and more. ColorPlay 3 provides you with the flexibility to design
ls/controllers/iPlayer3 light shows based on your creative vision.
iPlayer 3 Product Guide 3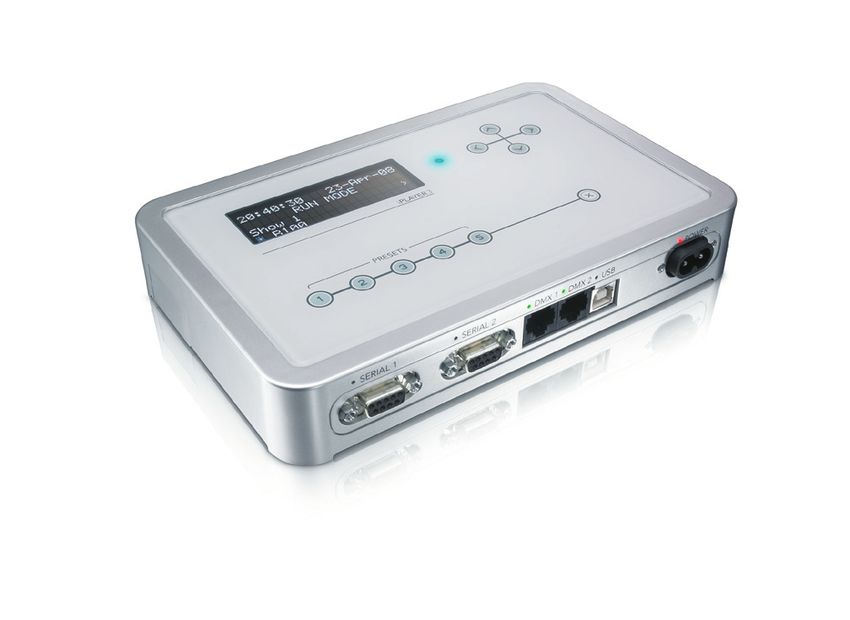
Specifications
Due to continuous improvements and innovations, specifications may change without notice.

    Item             Specification               Details

    Capability       Capacity                    2 universes of 512 DMX addresses each                                   5.4 in
                                                                                                                       (137 mm)

    Electrical       Input Voltage               100 – 240 VAC, 50 / 60 Hz, 5 W
                     Computer Interface          USB 2.0

                     External / Auxiliary        Two DMX512 RJ45 ports
    Control          Interface                   Two RS-232 9-pin serial ports

                     Data Storage                Removable Secure Digital Card drive                                               SERIAL 1       SERIAL 2         DMX 1 DMX 2   USB          POWER

                                                                                                                          1.3 in
                                                                                                                        (33 mm)
                     Dimensions
                                                 8.2 x 5.4 x 1.3 in     (209 x 137 x 33 mm)
                     (Width x Depth x Height)

                     Weight                      1.2 lb (0.54 kg)
    Physical
                     Housing                     Polycarbonate
                     Operating Temperature       14° – 104° F       (-10° – 40° C)
                     Humidity                    0 – 95%, non-condensing

    Certification    Certification               UL / cUL, FCC Class B, CE, CQC, C-Tick
    and Safety       Environment                 Dry Location, IP20

                                                                                                                                                                   8.2 in
                                                                                                                                                                 (209 mm)

Software Requirements
    System                                                                                                                                                     8.7 in
                        Specification           PC                                      Mac
    Requirements                                                                                                                                             (222 mm)

    Software            Operating System        Windows 2000 / XP / Vista               Mac OS 10.5 or greater                                                 4.8 in
                                                                                                                                                             (123 mm)
                        Memory                  512 MB RAM                              512 MB RAM

                        Disk space              60 MB free disk space                   60 MB free disk space
                                                                                                                                                                               2.6 in
                                                                                                                     4.7 in
                                                                                                                   (120 mm)                                                  (67 mm)

iPlayer 3 and Accessories
                                                                                                                                                               9.4 in
    Item                     Type                                Item Number                  Philips 12NC                                                   (238 mm)

                             North America Power Cord                  103-000019-00              910403327101
    iPlayer 3                Europe Power Cord                         103-000019-01              910503700392
                             China (CCC) Power Cord                    103-000019-02              910503700738

    Controller Keypad        DB-9 Serial                               103-000020-00              910503700223
    AuxBox                   DB-9 Serial                               103-000021-01               910503702433
                                                                                                                                                                 iPLAYER3

                                                                 Use Item Number when ordering in North America.
                                                                                                                                                  PRESETS

                                                                                                                                        1     2     3        4        5                   x

                                                                                                                                                                                         6.0 in
                                                                                                                                                                                       (152 mm)

                                                                                                                                                     Cable Clearance

4          iPlayer 3   Product Guide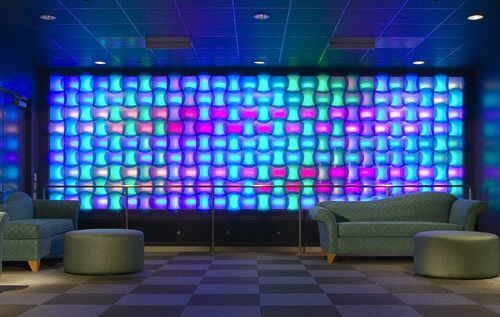
Typical Installation Configuration Examples
The following installation scenarios depict two typical lighting installations,
E For detailed wiring diagrams, visit
www.philipscolorkinetics.com/wiring/ each controlled via iPlayer 3.
ls_prod.html/
iColor Cove QLX fixtures
Controller Keypad
iPlayer 3
Controller
OFF
AuxBox iPLAYER
3
? PRESET
X
AUXBO 2 S
3
6
7
8
4
5
STATUS 5
4
3
2
?
PORT
S SERIAL
INPUT
X
24 VDC
+/ -
USB
PO
WER
Line voltage
DMX 1
Control to Lights
DMX 2
Power / Data Supply
Control to Lights
iColor Cove QLX Installation
In this scenario, iPlayer 3 controls an ColorPlay 3
Software
installation designed for indirect lighting.
The power / data supply sends data from the
iPlayer 3 and supplies power to
the fixtures.
Controller Keypad
iPlayer 3
Controller
OFF
AuxBox iPLAYER
3
OX PRESET
AUXB 2 S
3
6
7
8
4
5
STATUS 5
4
3
2
PORT
SERIAL
INPUTS
ColorBlast Powercore fixtures
X
24 VDC
+/ -
ColorPlay 3
USB Software
PO
WER
DMX Control 2
DMX Control 1
to fixtures
to fixtures
Line voltage
ColorBlast Powercore Installation
In this scenario, iPlayer 3 controls an installation
set up for direct lighting. The Data Enabler Pro
Fixture
Cable sends combines data from the iPlayer 3 and power
from a line voltage source.
Data Enabler Pro
iPlayer 3 Product Guide 5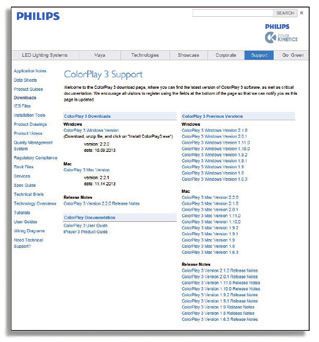
Prepare for the Installation
Owner / User Responsibilities
It is the responsibility of the contractor, installer, purchaser, owner, and user to      E Refer to the iPlayer 3 Installation
install, maintain, and operate the iPlayer 3 controller in such a manner as to comply     Instructions for specific warning and caution
with all applicable codes, state and local laws, ordinances, and regulations. Consult     statements.
with an appropriate electrical inspector to ensure compliance.

Create a Lighting Design Plan and Mapping Grid
• Create a lighting design plan that specifies the appropriate location of each
  Data Enabler Pro or power / data supply in relation to the fixtures, and fixtures
  in relation to each other.
• On an architectural diagram or other diagram that shows the physical layout of
  the installation, identify the locations of all switches, controllers, power / data
  supplies, leader and jumper cables, and fixtures.
•		Select a convenient but unobtrusive location for mounting the iPlayer 3 that will      E Controller Keypad and AuxBox are
   be accessible to a computer via USB connection. If also installing external show       packaged with a standard 20 ft (6.1 m)
   selection switches such as Controller Keypad or AuxBox, mount the iPlayer 3 in         serial cable. Custom serial cable lengths up
                                                                                          to 50 ft (15.2 m) are supported.
   a location accessible to the maximum serial cable length of 50 ft (15.2 m).
•		Verify that the iPlayer 3 mounting location meets environmental specifications for
   operating temperature range and maximum relative humidity (see page 4).
• Each Philips fixture comes pre-programmed with a unique serial number. As
  you unpack the fixtures, record the serial numbers in a mapping grid (typically a
  spreadsheet or list) for easy referencing and addressing. You can address fixtures
  using an addressing tool, such as iPlayer 3 itself, or in conjunction with a software
  tool, such as QuickPlay Pro.                                                            E You can download QuickPlay Pro from
                                                                                          www.philipscolorkinetics.com/support/
•		Assign each fixture to a position in the lighting design plan.                         addressing/

Start the Installation
1. Install all data enablers or power supplies and fixtures, including any interfaces
    with controllers. If your installation calls for jumper cables to add space between
    fixtures, make sure they are available.
2. If necessary, address your fixtures using an addressing tool, such as QuickPlay Pro.

3. Ensure that all additional parts, including mounting hardware and tools,
   are available.

6    iPlayer 3   Product Guide
Install iPlayer 3
1. Confirm all components received
iPLAYER
3
Take a moment to confirm you have received these iPlayer 3 components:
x
S
• iPlayer 3
PHILIP
S 5
SET
PRE 4
3
2 POWER
1
2 USB
1 DMX
DMX
L2
• Mounting bracket
SERIA
L1
SERIA
• Mounting bracket screws
• Power cord (North American or European)
• USB 2.0 cable
• RJ-45 DMX512 data cable
• Installation Instructions
• Quick Start Guide
2. Install mounting bracket
Choose a method for mounting bracket installation: quick-release or secure.
Quick-release mounting method
Snap-off tabs a) With the release tab pointing downward, screw the mounting bracket onto a
surface using the innermost screw holes. The outer mounting tabs will not be used
and may be snapped off, if desired.
Quick-release method
b) Slide iPlayer 3 onto the mounting bracket until it clicks securely into place.
Secure mounting method
a) Slide iPlayer 3 onto the mounting bracket until it clicks securely into place. Using
the supplied machine screws, secure the mounting bracket to iPlayer 3.
b) Using the outermost screw holes, install the mounting bracket and iPlayer 3
iPLAYER3
assembly onto a surface. Secure with screws suitable for mounting substrate.
PRESETS
1 2 3 4 5 x
3. Attach power cable
Secure method
4. Install ColorPlay 3 software
Windows Installation
a) Download the ColorPlay 3 Software from
http://www.philpscolorkinetics.com/support/iplayer3/.
b) Double-click Install ColorPlay 3.exe,
c) The Welcome to the ColorPlay 3 Setup Wizard window appears. Click Next
to begin the installation. After reading the license agreement, select I Agree to
consent to the terms of the license agreement, then click Next to continue.
d) When the Select Installation Folder window appears, accept the default location,
or click Browse to select a folder. Click Next to continue.
e) At the Confirm Selection window, click Next to start installation.
f) The Installation Complete window appears. Click Close to exit the wizard.
Mac OS Installation
a) Download the ColorPlay 3 Software from
http://www.philpscolorkinetics.com/support/iplayer3/. The ColorPlay 3
folder icon ppears on your desktop.
b) Drag the ColorPlay 3 application icon from the Mac folder to the Applications
folder on your computer.
iPlayer 3 Product Guide 75. Connect computer with USB cable
If using Windows, you must install ColorPlay 3 prior to connecting iPlayer 3 to your
PC. iPlayer 3 installs the device drivers required for USB connectivity.
6. Attach external show selection devices, as required
Connect a Controller Keypad
a) Unplug the power cord from the iPlayer 3. OFF
iPLAYE
R3
b) Connect the cable end with the 4-pin leads into the back of the
X PRESE
AUXBO 2 TS
Input from 3
4
Controller
8
7
6
5
STATUS 5
4
3
Keypad
2
Controller Keypad.
PORT
S SERIAL
INPUT
X
24 VDC
+/ -
c) Connect the cable end with the DB9 cable connector to serial port 1 or 2
USB
Input from PO
AuxBox WER
on the iPlayer 3.
d) As needed, set the Range switch position on the back of the keypad. By default,
switch position 0 (zero) sets the keypad to trigger shows 1 – 8.
e) Reconnect the power cord to the iPlayer 3.
Connect an AuxBox
a) Unplug the power cord from the iPlayer 3.
b) Connect the female end of the serial cable to the AuxBox serial port.
c) Connect the male end with of the serial cable to serial port 1 or 2 on iPlayer 3.
d) As needed, set the Range switch position on the front of the AuxBox. By default,
switch position 0 (zero) sets the AuxBox to trigger shows 1 – 8.
e) Connect each external triggering device’s two-wire cable to a terminal pair on
the AuxBox.
f) Connect the 24 VDC power cable to the 24 VDC terminals on the AuxBox,
then plug it in.
h) Reconnect the power cord to the iPlayer 3.
7. Connect Lighting Systems with RJ-45 Cable 2
PRESE
TS
iPLAY
ER 3
3
4
Each DMX output port controls 512 DMX addresses:
5
X
• DMX port 1 controls light universe 1 (DMX addresses 1 – 512). Use DMX port 1 USB
for single-universe installations. PO
WER
• DMX port 2 controls light universe 2 (DMX addresses 1 – 512). DMX 1
Control to Lights
8. Firmware Update
DMX 2
Control to Lights
The iPlayer 3 firmware image is periodically updated to improve system performance
and functionality. If your iPlayer 3 is not running the most recent firmware version, it
is recommended that you update to maximize system performance. The most recent
firmware version can be downloaded from www.colorkinetics.com/support/iPlayer
33/.
1. Launch Configuration Mode by pressing on the iPlayer 3 faceplate.
2. Access the Info menu, then select Version. The screen should display the
firmware version in the form v01.00xx b00001
3. If the “xx” value is a lower number than the most recent image on the website,
follow the update procedure in the iPlayer 3 User Guide.
8 iPlayer 3 Product Guide
DMX 1Light Show Playback
Out-of-the-box, the iPlayer 3 comes programmed with pre-configured light shows.
When you start up the iPlayer 3, it automatically plays the default Color Wash show
assigned to preset button .
• To play additional shows, press – .
• To adjust the overall brightness level of your show, press and .
• Press to pause playback and turn all fixtures OFF.
iPlayer 3 Hardware Features
Current mode and information
Displays the color appearing on light
address 1 (DMX output port 1)
09:21:48 15-Dec-09
Config Mode
show type? <
downloaded show Adjust brightness level
Change mode
Navigate menus
Pause / Lights Off
Lights On / Resume
Cancel menu action
Select a trigger for show playback
Access panel for SD memory card
and configuration DIP switches
USB 2.0 port
Activity LEDs
Power inlet
DMX output port 1
DMX output port 2
Serial port 1
Serial port 2
iPlayer 3 Product Guide 9Configuration Menus
You can change the following options via Configuration mode:
Triggers Menu
09:23:03 15-DEC-09
Config mode
Trigger number? <
1
Triggers enable you to assign shows to the Preset buttons on the iPlayer 3,
the keypad buttons on the Controller Keypad, or the contact switches connected
to an AuxBox. Triggers also specify playback behaviors such as repeat or jump to
another show.
Alarms Menu
09:23:22 15-DEC-09
Config mode
Alarm days? <
Specific month/day
Alarms enable you to automate show playback by specific time, date, day of the week
or astronomical event.
Setup Menu
09:23:39 15-DEC-09
Config mode
Setup menu <
Set date & time
The setup menu provides access to port configuration, clock setup, LCD setup,
and more.
Info Menu
09:23:52 15-DEC-09
Config mode
memory usage <
232k/246760k
The info menu displays the device firmware version, memory usage, and more.
At any time during playback, press to launch Configuration mode and open the
Main Menu. From the Main Menu, press and to scroll through menu options
and to access a submenu. To save your changes, continue pressing until you reach
the Save Changes menu item, then press a final time to save. Press at any time
to cancel the menu action and return to playback mode.
Example: Changing the Pre-configured Show Assigned to Preset Button 2
1. Launch Configuration mode, access the Triggers submenu, and then select menu
option 2.
2. Access the Show Type submenu, then select Canned Effect to open the pre-
configured show types.
3. Access the Effect Type submenu, then pick Cross Fade, which produces a smooth
transition from one solid color to another.
4. Navigate through the effect-specific submenus, specifying properties for start
color, end color, hold time duration, fade time duration, and offset (angle).
5. At the Test Effect submenu, preview your show, then press to continue.
6. Select show Transition type Snap (no transition).
7. Press to save your changes.
10 iPlayer 3 Product GuideColorPlay 3 Effects
Fixed Color — Displays a single solid color Image Fade — Produces a visual sequence
simultaneously on all fixtures in a group. in which one image fades gradually into a
second image.
Cross Fade — Creates a smooth transition
from one solid color to a second solid color Video — Sisplays moving images from a
on all fixtures simultaneously. digital video sequence.
Color Wash — Creates a smooth transition Text — Scrolls a text message across a solid
through a series of solid colors on all fixtures background color, from right to left.
simultaneously.
Strobe — Produces solid pulses of a
Chasing — Creates bars of repeated color foreground color over a background color.
moving or “chasing” each other in one When the pulses are short in duration,
direction across a grid of fixtures or nodes. produces an intermittent flashing effect that
emulates a strobe light.
Chasing Node — Displays bands of color
that appear to move or “chase” each other Ripple — Displays rings of color moving over
in sequence. Colors appear to chase each a solid background color.
other from fixture to fixture or node to
node. Particle — Produces animated circular
shapes of varying sizes over a solid
Sweep — Displays a progressive transition background color. This effect simulates a
of one or more foreground colors across a particle system such as clouds, fire, or rain.
solid background color in a sweeping motion
across a grid of nodes or fixtures. Colored Bars — Randomly displays bars
of varying widths and colors over a solid
Sweep Node — Displays a progressive background.
transition of one or more foreground colors
across a solid background color. Foreground Constant Modifier — Applies a constant
colors transition from fixture to fixture or change to the hue, saturation, and/or
node to node. brightness of all visible effects underneath it
in a group.
Sparkle — Flashes one or more foreground
colors at random intervals over a solid-color Wave Modifier — Uses different wave
background, producing a sparkling effect. patterns to vary the appearance of effects
over time. You can vary the hue, saturation,
Streak — One or more narrow bands of or brightness of all effects underneath it in
color move across a solid background, a group.
following the group’s currently selected node
pattern. Fade In Fade Out Modifier — Gradually
fades in or fades out the saturation or
Spiral — Produces arcs of color originating brightness of all effects underneath it
from a central point and moving across a grid in a group. The effect can also gradually
of nodes in a clockwise or counterclockwise transition all colors through a range of hues.
direction.
RGB Range Modifier — Sets limits on the
Burst — Produces concentric rings of color red, green, and/or blue channels of all effects
moving either towards the edge of a group underneath it in a group.
or towards a defined focal point.
Perlin Noise Modifier — Overlays a random,
Random Color — Produces a sequence smooth-flowing pattern of noise over all
of two or more randomly generated solid effects underneath it in a group.
colors simultaneously on all fixtures in a
group.
iPlayer 3 Product Guide 11Creating a Light Show with ColorPlay 3
1. Map Fixtures
Each ColorPlay 3 show begins as a virtual map of light fixtures. To start designing
your show, you must plot, or map, fixtures on a grid. The map represents your
installation and enables ColorPlay 3 to send instructions to the iPlayer 3 operating
your lights.
2. Arrange Groups
Next, you must arrange the mapped fixtures into groups. Groups coordinate
the show, enabling you to rapidly select and move multiple fixtures, change node
ordering to match your installation, and assign effects across multiple fixtures
simultaneously.
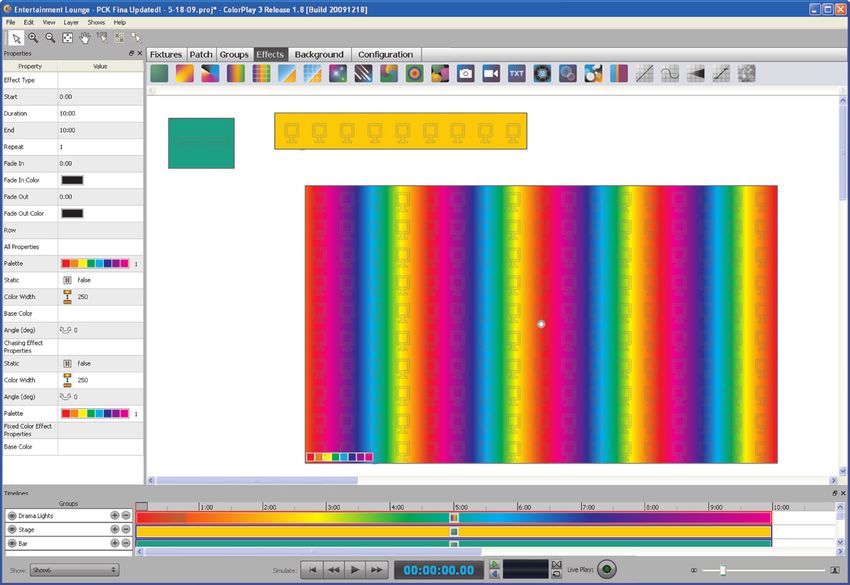
3. Create Effects
After arranging groups, you can begin assigning effects. Each effect possesses editable
properties, including color palettes, start time, timeline duration, and more. Note
that effects are applied to groups; to assign an effect to a fixture, that fixture must be
part of a group. Note also that you can assign more than one effect to each group.
4. Simulate and Test Your Light Show
Next, you simulate and refine your show with the timeline editor. The timeline
editor contains multiple tracks, or rows, which enable you to quickly adjust effect
properties, modify effect transitions, and manage multiple effects applied to the same
group. The timeline editor contains the playback controls used for previewing your
show on-screen or running your show live on installation fixtures.
5. Download Shows to the iPlayer 3 and Create Triggers
The final step in creating a ColorPlay 3 project has two stages: first you download
your show files to an iPlayer 3 and then you configure your show playback
instructions by creating triggers.
Copyright © 2015 Philips Solid-State Lighting Solutions, Inc. All rights reserved. Philips Color Kinetics
Chromacore, Chromasic, CK, the CK logo, Color Kinetics, the Color Kinetics
logo, ColorBlast, ColorBlaze, ColorBurst, ColorGraze, ColorPlay, ColorReach,
3 Burlington Woods Drive
iW Reach, eW Reach, DIMand, EssentialWhite, eW, iColor, iColor Cove, Burlington, Massachusetts 01803 USA
IntelliWhite, iW, iPlayer, Optibin, and Powercore are either registered trademarks Tel 888.385.5742
or trademarks of Philips Solid-State Lighting Solutions, Inc. in the United States
Tel 617.423.9999
and / or other countries. All other brand or product names are trademarks
or registered trademarks of their respective owners. Due to continuous Fax 617.423.9998
improvements and innovations, specifications may change without notice. www.philipscolorkinetics.com
DAS-000020-00 R04 12 Aug 2015You can also read