Kia / Hyundai Turbo JB4 - Last Updated: 6-14-2020 - N54Tech.com
←
→
Page content transcription
If your browser does not render page correctly, please read the page content below

Kia / Hyundai Turbo JB4
Last Updated: 6-14-2020

Use subject to terms and conditions posted at http://www.burgertuning.com/terms.html
THIS PART IS LEGAL FOR USE ONLY IN COMPETITION RACING VEHICLES AS DEFINED UNDER
CALIFORNIA LAW, AND IS NOT LEGAL FOR USE IN ANY OTHER MOTOR VEHICLE. California law defines
a "racing vehicle" as "a competition vehicle not used on public highways." (Calif. Health & Safety Code 39048)
This part may only be used on competition racing vehicles operated exclusively on a closed course in
conjunction with a sanctioned racing event. Competition-only motor vehicles may not be driven to a racing
event on a public highway and must be transported on a trailer or other carrier. USE OF THIS PART IN ANY
OTHER VEHICLE MAY SUBJECT YOU TO FINES AND PENALTIES FOR VIOLATION OF FEDERAL
AND/OR STATE LAW, WILL VOID YOUR WARRANTY FROM BURGER MOTORSPORTS, INC, AND CAN
VOID YOUR VEHICLE'S WARRANTY. It is your responsibility to comply with all applicable federal and state
laws relating to use of this part, and Burger Motorsports, INC hereby disclaims any liability resulting from the
failure to use this part in compliance with all applicable federal and state laws.
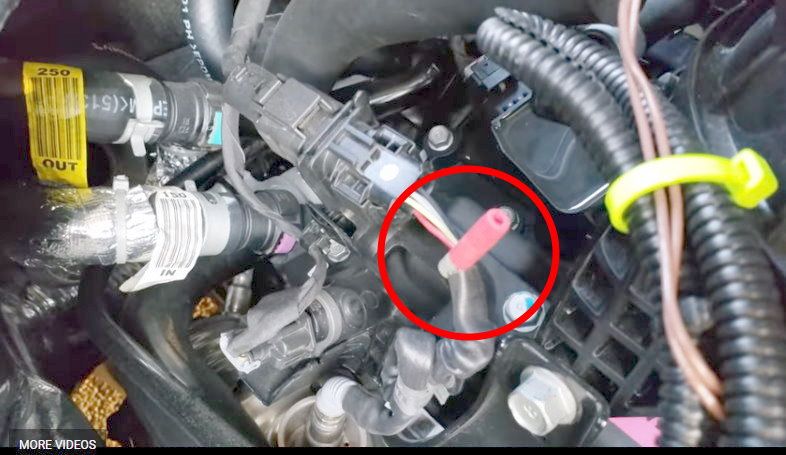
Open the hood, lock the doors, place your key far enough from the car not to wake it
up, and wait 5 min for the vehicles computer to go to sleep.

The JB4 harness has two similar looking connectors on it for. The one with the rainbow
colored wires will attach to the TMAP sensor in the front of the engine, while the one
with the brown wires will attach to the MAP sensor on the back of the intake manifold.
You’ll unplug the factory sensor, plug the JB4 harness plug in, and plug the factory
plug back in to the matching JB4 harness plug completing the loop. This guide features
photos for the 3.3L model but the 2L and 1.6L models are essentially the same with the
two MAP sensors being located in slightly different locations under the hood. At the
bottom of this guide are 1.6L specific photos from the Kia Forte for additional
reference.

Attach the rainbow connection to the TMAP sensor on the charge piping:
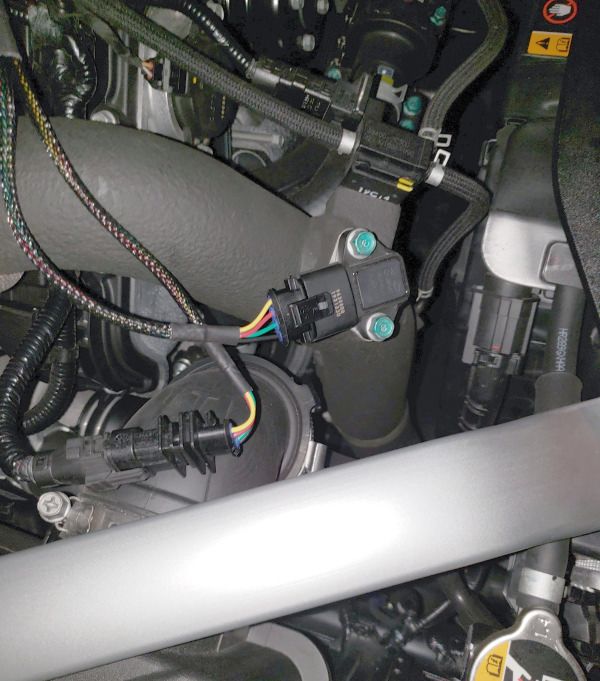
Attach the brown connection to the MAP sensor on the intake manifold:
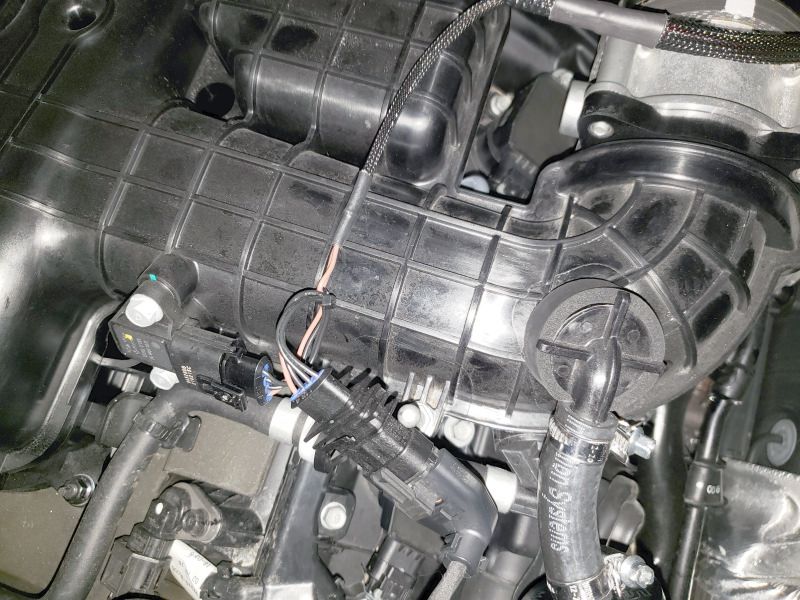
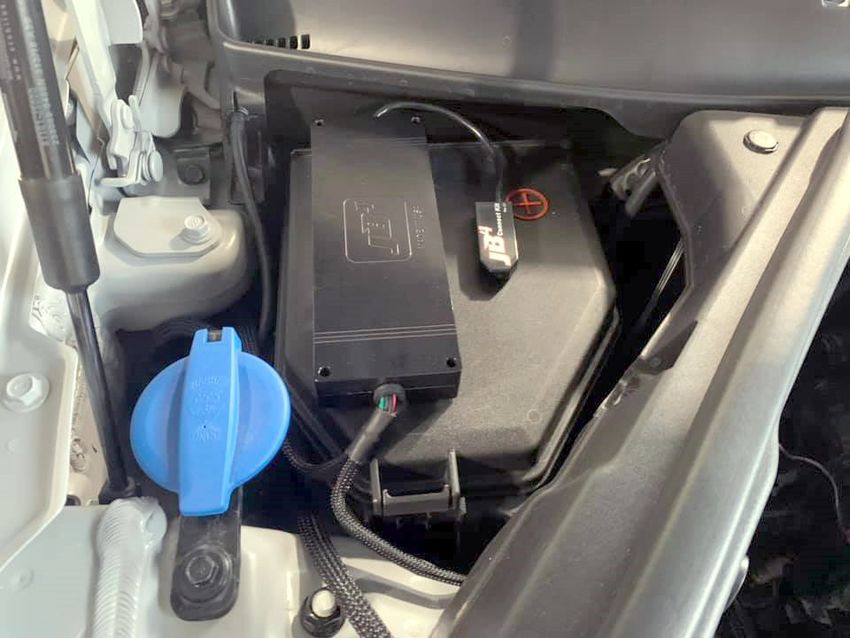
Finally, route the cables and place the control box as shown. Shown with optional JB4
Mobile adapter attached. Note attaching JB4 mobile to the metal enclosure may
reduce it’s range so best to leave it not attached.
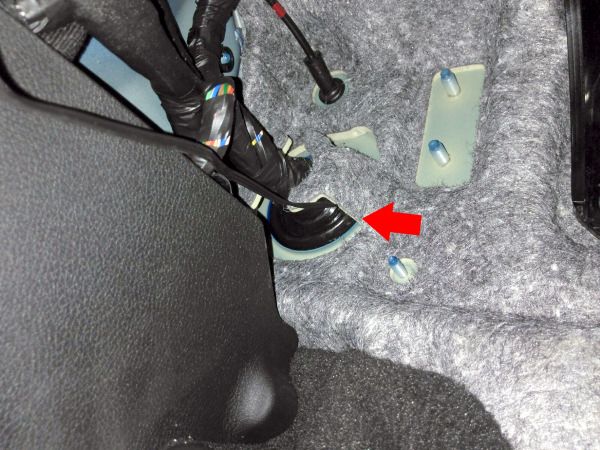
The optional OBDII cable unlocks full CANbus control for the most advanced tuning
and logging features and is strongly suggested. The cable can be routed the “quick”
way through the door jamb or the “clean” way through the firewall detailed below.

Plug the cable in to the OBDII port and using a screwdriver slightly push out the
grommet as shown. Pass the wire in to the engine bay, and then push the grommet
back in from the engine side.
Remove the brake booster cover by popping up the 3 plastic locks that hold it down,
reach down and pull the OBDII wire up.
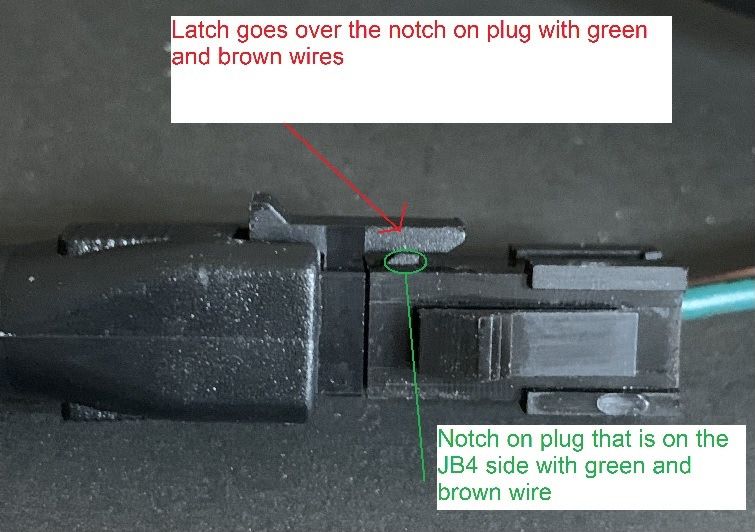
Route the cable across the cowl tucking it under the rubber grommet and plug it in to
the 2 position matching connector near the JB4 control box. The latch on the connector
must line up with the clip for CANbus to operate.
The JB4 includes optional black fuel control wires giving the JB4 the ability to directly
change the air/fuel ratio. The factory tuning runs in the 10:1 range and leaning that out
to 11.5:1 has proven to be worth significant power at higher engine speed. Note these
are preinstalled on the JB4 harness now so only need to be attached to the o2 sensor
signal wire to enable using the included posi-taps or our optional fuel harness
adapters.

No setting changes are needed to enable the fuel control wires.

For 3.3L they attach to the primary o2 sensor signal RED wire. For 2L applications only
the longer wire is used and it goes to the primary o2 sensor signal WHITE wire. For
1.6L applications it attaches to the BLUE wire. For those using the optional harness
adapters the 3.3L signal wire is also RED for your convenience. There is a video
posted in the main support thread linked below showing you how to attach the posi-
taps. For 2L & 1.6L models this wire connection is mainly intended for those who plan
to also use E85 mixtures and can be skipped initially.
If you’ve purchased the optional JB4 mobile adapter open the enclosure and plug the
adapter into the JB4 board directly as shown. When closing the enclosure ensure the
control board is properly lined up and only tighten down screws once the case closes
smoothly to avoid damaging the JB4 board. Note some older JB4 mobile adapters
have a separate blue wire which will need to be attached to the JB4 harness via a posi-
tap, refer to the video on the JB4 Mobile adapter page for additional directions.
Reinstall the engine cover and installation is complete!

The JB4 comes preset to Map 1 which runs approximately 4psi over stock peak
tapering to 2psi over stock at redline.

Maps can be changed using the JB4 Wireless Mobile Connect Kit or BMS Data Cable
to adjust boost levels, record data logs, read/delete fault codes, and load free firmware
updates.

Refer to the link below for the full map guide, software, firmware updates, how to
videos, and tuning details.

http://www.n54tech.com/forums/showthread.php?t=52020
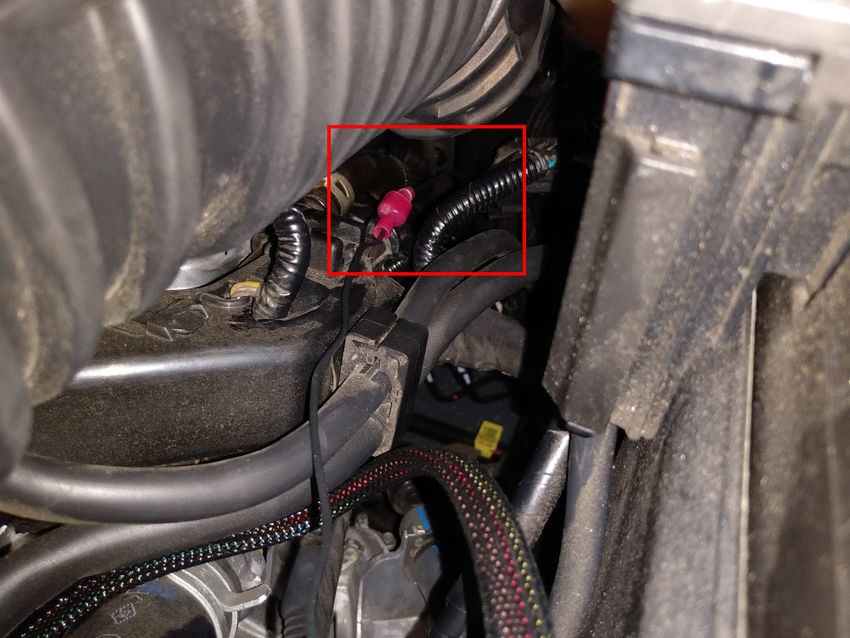
Kia Forte Supplemental Photos

These reference photos are specifically from a Kia Forte and mirror the general
installation directions above.

MAP sensor placement, brown JB4 patch:
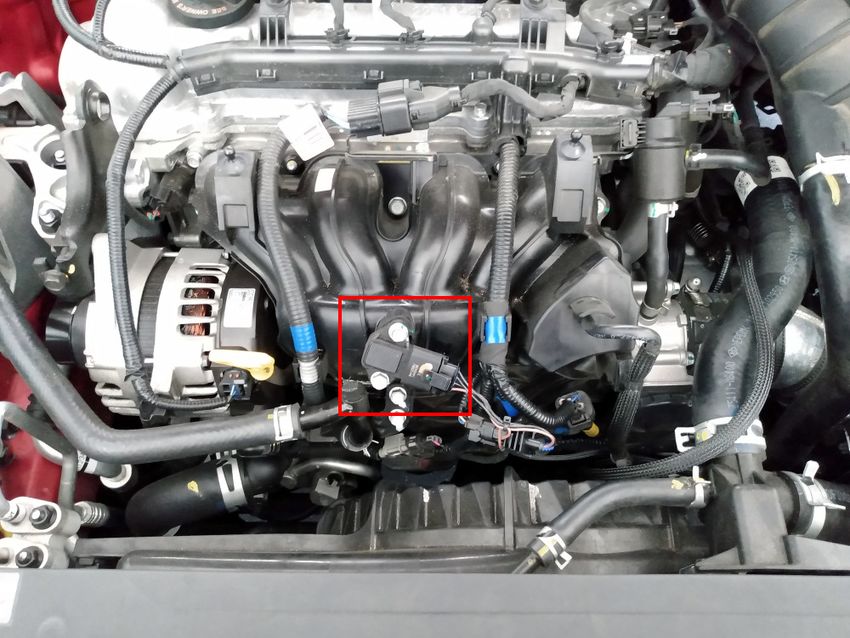
MAP sensor placement, yellow/red/black/green JB4 harness. Note you may need to lift
up airbox to reach this connection.
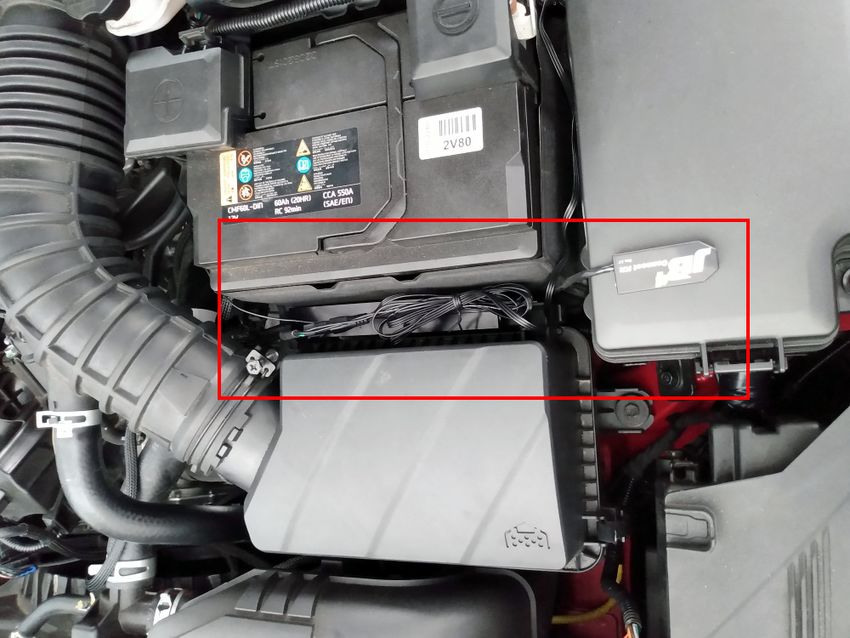
Suggested JB4 system placement between battery and airbox
General location of the o2 sensor harness for the optional fuel control wire. Generally
only installed on the 1.6L if you’re planning on using E85 fuel, for pump fuels no need
to connect it. Note the longer of the two fuel wires is used, the primary o2 sensor is the
black lower o2 sensor harness, and the tap attaches to the BLUE o2 sensor signal
wire. If using the BMS fuel adapter the normal RED jumper wire in the BMS adapter is
used. To access this area you may need to remove the inlet tube which is easily done.
You can also read