Kurzanleitung für Komplett PCs - This Manual contains the following languages: English
←
→
Page content transcription
If your browser does not render page correctly, please read the page content below
Kurzanleitung
                    für

     Komplett PCs

This Manual contains the following languages:

                  English

            Copyright © JOY‐iT®                 www.JOY‐iT.net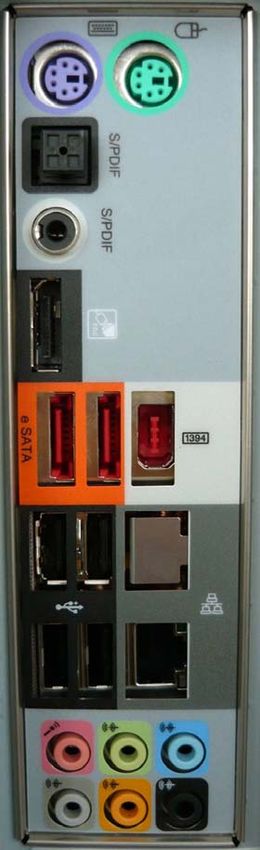
Brief Instructions
Thank you very much for buying this PC system – the following brief instructions shall help you when
assembling the PC.
Please read the complete manual!!!
This is a general manual, the illustrations are therefore to be understood as examples and may deviate, just
as may the equipment components, the illustrations show the maximum equipment components
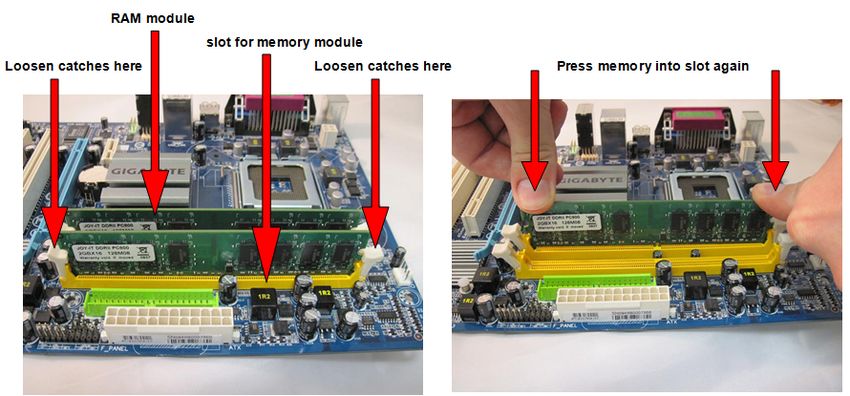
Connection rear Connections front panel
Switch ON/OFF
Power connection USB microphone headset USB
(pink) (green)
Keyboard + mouse Monitor connections (rear):
Display port
SPDIF (optical)
HDMI
SPDIF (coax)
FDC
(Foxconn digital
connector)
VGA
2x Esata / Firewire
2x USB*
2x USB +LAN
DVI
Microphone (pink)
Line OUT (green)
Line IN (blue)
LS Front (grey)
LS Center (orange)
LS Rear (black)
(*USB 3.0 connections are blue as a rule)
Copyright © JOY‐iT® www.JOY‐iT.net
Connection and Installation
You find the updated drivers on the homepage of the mainboard manufacturer.
You find the model and brand name on the flyer accompanying the PC or directly on the mainboard.

Please also visit our homepage www.joy‐it.net, where you find the current information and links to the
various manufacturers.

Manufacturer websites for mainboards:
Biostar:      www.biostar‐europe.com               Foxconn:     www.foxconnchannel.com
Elitegroup:   www.ecs.com.tw                       Nvidia:      www.nvidia.de
ATI / AMD     www.amd.de                           Gigabyte:    www.gigabyte.de
Asus          www.asus.de

1. Please first connect all the cables and only then switch the power ON.
2. Should you have bought the PC with a pre‐installed operating system, all you need do is switch your PC
ON. The operating system and the drivers have already been installed. All you still need do is to enter some
information to round off the installation.
If you have bought the PC without an operating system, please place your operating system CD into the
drive. The system boots automatically from the CD or DVD inserted.
3. Install the operating system. (see next page)
Should you have any questions please contact the manufacturer of the operating system or the company
from which you bought the operating system.
4. Please then insert the driver CD for the mainboard. Follow the instructions of the installation program
and install the drivers.

5. Then insert the CD for the WLAN adapter (optional) and here again please follow the instructions of the
installation program.
Attention! The drivers supplied with the PC are, as a rule, for the operating systems Vista & Windows7,
partly also for Windows XP. If you would like to use other operating systems, this is of course possible.
However, we would like to expressly point out that these have not been tested and perfect function cannot
be assured.
Maintenance / upgrade
Before opening the PC casing remove the power cable and touch a metal part of the casing for earthing.
The PC system can be damaged by static charge!
You should only open the casing if you intend to upgrade or clean the PC (remove dust). Both intentions call
for a certain amount of specialist know‐how therefore we shall not go into more detail on this point. If you
have not experience in this field, please contact a trusted PC dealer.

Liability disclaimer:
We assume no liability whatsoever for errors, data loss or incompleteness.
Please make backups of your data at regular intervals.

                                         Copyright © JOY‐iT®                          www.JOY‐iT.net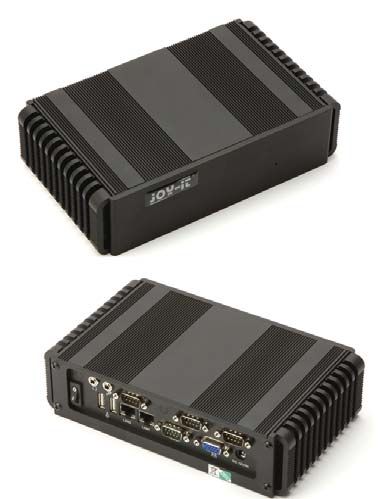
Operating System Installation
Windows XP / Windows Vista / Windows 7                                             As per 04/2011

These instructions only provide a small help for the installation. However, please note that if you have
bought a PC without an operating system, you yourself are responsible for the installation. Should you
not feel up to installing it, or problems arise during installation we recommend that you commission a PC
dealer / technician with the installation.

These instructions have no claim on being complete. We bear no liability whatsoever for damages that
arise from using these instructions; we particularly do not bear any liability for the loss of data.

1 Adapt Bios boot sequence (Only necessary should the PC not start automatically from the CD)
‐ Start the computer and then immediately repeatedly press the "DEL" (or on a German keyboard "ENTF")
key to enter Bios. You get the message "please press "XXX" to enter Bios" (you have to press this key
repeatedly)
‐ Search for the option "Boot device priority" or "First Boot device" in Bios, usually this is found in the
submenu "Advanced" or in the submenu "Boot" depending on which Bios is used.
‐ Change the First Boot Device to DVD and Second Boot Device to HD (hard disk) here
‐ Store the Bios (usually by pressing the F10 key)

2 Installation
‐ Insert the operating system CD or DVD into the drive
‐ Reboot the system. After being prompted on the screen press an optional key to
  boot from CD/DVD, press a key after the prompt is displayed.
‐ The installation program starts up.
‐ Follow the instructions of the installation program and carry out the installation:
         ‐After the software has carried out some checks on your PC you are asked on which hard disk you
         want to install the operating system.
         Attention ‐ when formatting all your data on the hard disk is deleted!
         Select the hard disk. If you want to partition the hard disk you are offered several possibilities via
         the button "extended". (Problem: a hard disk is not displayed when using and older version of XP,
         see 1)

‐ After installing the operating system please insert the driver CD of the mainboard and install it.
‐ Should you have bought a PC with a WLAN or TV card, driver CDs are also enclosed which still require
installing.
‐ We recommend that you connect the PC to the internet after installation to download the current
updates for the operating system (Windows update) and to activate it.

Enjoy and have fun with your new PC

                                          Copyright © JOY‐iT®                            www.JOY‐iT.net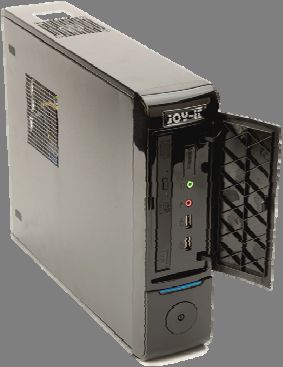
Known Problems / Windows XP
1‐ Attention, if you use old versions of Windows XP it may happen that your harddisk is not detected. This is
not a computer error, but is simply due to the fact that Windows XP has been on the market since 2001
already and current day hardware did not exist at that time and is therefore not supported by old versions.

In this case you have to create a SATA or AHCI drive disk for which you need a second PC. The exact
procedure differs from one PC to the next.

Normally there is a tool on the mainboard driver CD to create this disk. Please consult the mainboard
manual in this connection.

Reboot the PC! After beginning the installation a message appears that you should press the "F6" key to
add drivers. Then press the F& key and put the floppy into the drive and select the driver as demanded.

This is only possible using a floppy (disk drive), if your PC is not fitted with a floppy drive you have to install
one or use an updated windows version. USB media or CDs are not supported in this case!

Attention Microsoft Windows XP is, unfortunately, no longer an up to date operating system on many
current PCs, however it can still, indeed be installed, the number of PC systems for which Windows XP
drivers are no longer offered is constantly increasing, assurance can therefore not be given that Windows
XP will still function on your PC system.

Microsoft only provides security updates and support for Windows XP Service Pack 3, however, this is
expected to stop in 2014 too.

We recommend

              Please find the declaration of conformity for JOY‐iT® products on our hompage:

                                           Copyright © JOY‐iT®                             www.JOY‐iT.net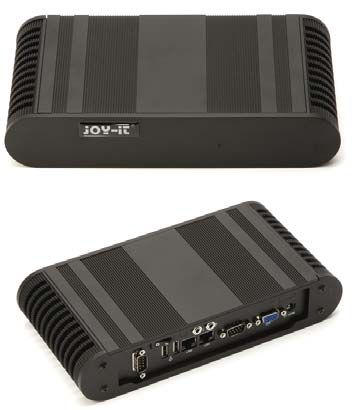
Known Problems / Solutions

Unfortunately it does occur at times that the RAM modules get loose,

Failure: Display does not react when switched on and the PC may peep.

Instructions to eliminate this failure:

    1.   Remove the power cable from the power supply
    2.   Then press the power switch button again
    3.   Remove the left casing cover (with the ventilation slits)
    4.   Localise the RAM modules, they are usually on the mainboard in the upper right field.
    5.   Now touch a metal part of the casing to discharge possible static charge.
         The PC may otherwise be damaged by static charge!
    6.   Remove the RAM module by pressing both catches on the right and left of the RAM outwards.
    7.   Now press the RAM modules back into the inserts, they automatically catch into the RAM and lock
         it.
    8.   Check that the catches are correctly locked into the recesses of the RAM, if this is not the case the
         RAM has to be pressed further into the memory slot.
    9.   Reassemble the side panel and connect the power supply cable again.

    Should the failure not have been eliminated, please contact the dealer from whom you bought the
    system. (see following page)

                                          Copyright © JOY‐iT®                           www.JOY‐iT.net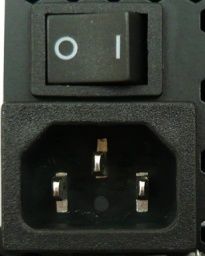
Quality /Service
Dear Customer,
We congratulate you on buying a JOY‐iT® computer.
JOY‐iT® PC systems are assembled in Germany* and are subject to strict quality controls.
Unfortunately defects can never be excluded 100 %, it may even occur that a component loosens or is
damaged during transportation.
The guarantee exclusively covers hardware which is originally assembled in the PC supplied and not
problems occurring as a result of upgrading or in connection with software.
Should you experience a defect please contact the dealer from whom you bought the system.
Some of our PC models are fitted with a transport protection which protects the graphics card and the
CPU cooler during transport. Before sending the PC back again, these have to be inserted again, damages
resulting from a missing transport protection or insufficient packaging are not covered by the guarantee!

         Please, without fail, enclose this page with the error description in your return shipment!

                                                Error description
 Please describe the error providing as many details as possible. Error descriptions such as defect or broken do not
                                             suffice to find the failure.

Failure: (Please tick)             No image         DVD does not function
  Internet does not function, connected via         LAN             WLAN
  PC peeps          No sound / distorted PC crashes / Blue Screen
  Transport damage casing          hard disk is not detected        PC produces unusual sounds
  Not possible to install operating system          XP              Vista          Windows 7
                                                     Other (please draw up below)
Was Windows pre‐installed on your PC?        Yes      No
When does the error occur:          constantly      sometimes       after _______ minutes

Other information about the problem:

…………………………………………………………………………………………………………………………………………………………

…………………………………………………………………………………………………………………………………………………………

 Liability disclaimer: When doing repairs work, a test installation may be installed, the hard disk is deleted.

          Please make your own backups of your data; we cannot bear any liability for loss of data.

                                (*The components used may originate in other countries)

                                            Copyright © JOY‐iT®                             www.JOY‐iT.net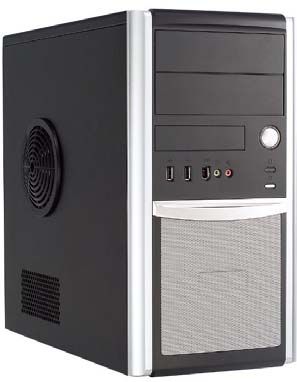
JOY‐iT® ist eine eingetragene Marke der

      JOY‐iT® is a registered trademark

     JOY‐iT® est une marque déposée de

    JOY‐iT® is een geregistreerd merk van

 Simac Electronics Handel GmbH

            Kelvinstraße 5

47506 Neukirchen‐Vluyn, Germany

         Copyright © JOY‐iT®                 www.JOY‐iT.net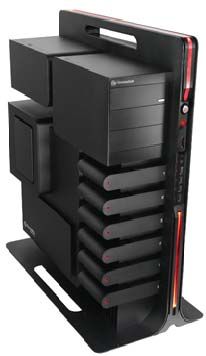
Also ask for other                               Fragen Sie auch nach anderen

          products                                             Produkten

Consultez‐nous sur nos autres                          Informeer ook naar andere

          produits                                             producten

                          www.joy‐it.net

                                Copyright © JOY‐iT®                        www.JOY‐iT.net
You can also read