MAKE A WIFI CAMERA BIRD BOX - CHEEPY CHEAP! - WILD IDEAS
←
→
Page content transcription
If your browser does not render page correctly, please read the page content below
instructables
Make a WiFi Camera Bird Box - Cheepy Cheap!
by Hey Jude
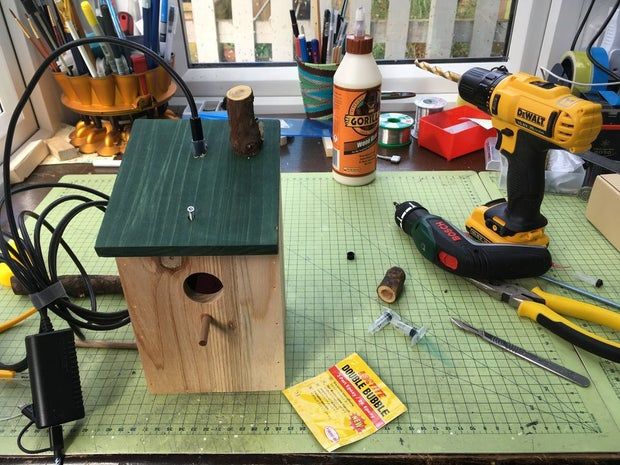
Build your own WiFi-Camera-enabled Bird Box,
cheaply, and quickly. Perfect for an After-
School/Club/Scouts project or a weekend DIY build.
Watch birds build nests, raise young, and before long
Safety - Please note, I have shown pictures of my toddler using a
- the young y leave the nest!
drill, glue, etc. He is supervised, but you remain responsible for
evaluating the risks to the child/ren in your care. I cannot accept
Although camera kits do exist for bird boxes, they
any responsibility.
have a few limitations - they are usually wired (i.e. not
Supplies:
WiFi) and if they are, they are at least 2-3x more
expensive than this - and don't 'scale up' e ectively: Essentials:
You have to have one camera to one next box, it'll cost
Bird Box (x4 bargain): https://amzn.to/3cbFc30
Make a WiFi Camera Bird Box - Cheepy Cheap!: Page 1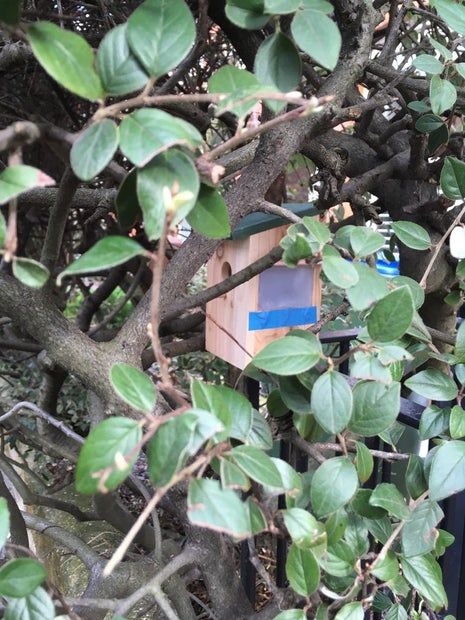
Bird Box (x4 bargain): https://amzn.to/3cbFc30
a fortune, if you wanted to observe multiple boxes. (Can get larger bulk quantities for Schools, but 4
(With that said, if you do still want to install seems a good starter pack!)
permanent 1:1 camera:box, then this is still much
cheaper! (see Appendix 1)). WiFi Endoscope: https://amzn.to/2VgWupq
(One endoscope can be taken round multiple boxes,
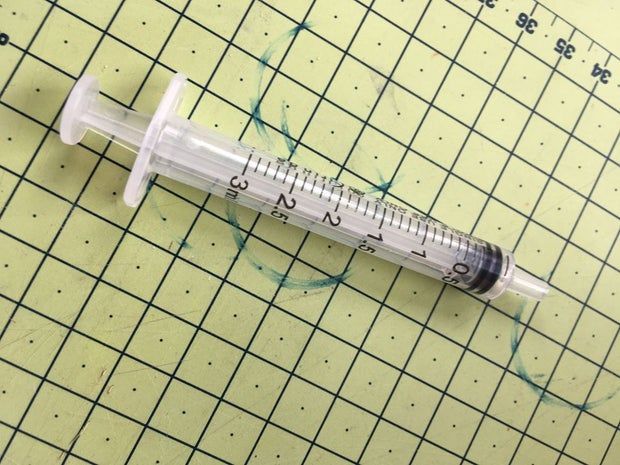
This 'bird cam variation' uses 3ml Syringe Tubes to where accessible).
create nifty little rainproof 'spy holes' to insert a WiFi
endoscope in/out of, with minimal disruption to the Drill: https://amzn.to/2VfQAEJ (in case interested).
nesting birds. The pictures and video can be viewed
on any smartphone. 3ml Syringes: https://amzn.to/3bXPkfH (suggested
size).
Endoscopes are used to inspect drains, under oors,
doing car repairs - you name it. Consequently, they are 10mm Drill Bit: https://amzn.to/37WzKxj (suggested
made at higher volume than bird cams, and hence are size).
cheaper (and arguably much more compact). Indeed,
once the season is over / when not in use, you still Mini FIles: https://amzn.to/2VhyK4u
have a useful device. So I think this is an e ective way
to get started, and if you really become obsessed, sure
- upgrade to the fancy kit ;o)
Cost Comparison:
PS - Images are not from me. I'm just at the start of WiFi Bird Boxes c.£80+
the season, and will update when I get pics... This Build: Box c.£3.5 each, WiFi Cam c.£25-£30,
Make a WiFi Camera Bird Box - Cheepy Cheap!: Page 2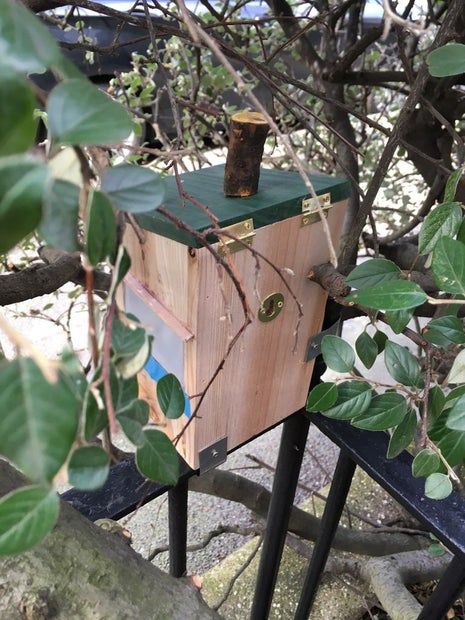
Make a WiFi Camera Bird Box - Cheepy Cheap!: Page 3
Step 1: Upgrading the Bargain Box

The Box shown is a fair price (around £3.5/box). It's      sure how much this improves the chances of nesting,
hard to argue with this, when you consider you'd have      but it'd seem plausible to want to not y into a hole
to buy screws, hinges, paint, nails, and drill and         without looking, right? We shall see...
assemble. So I really think that this is a good starter
project - especially for schools, where many kids want
to have a go, you can buy a large quantity to install in
                                                           Teachers Note: The hole size also in uences what species will
a number of locations.
                                                           nest, so good around and enlarge/reduce if you want to
                                                           experiment further as part of STEM projects, etc.
However, if you really want to make one from scratch,
                                                           Update: Following a helpful comment below, if you are in
this looks good:
                                                           N.America you may wish to not put this peg in, if you don't want
https://www.rspb.org.uk/fun-and-learning/for-famil...
                                                           to attract certain invasive species. Obviously it'd your call though
                                                           - kinda fun to try it and see!
I 'upgraded' this bird box with some dowel on the
front, so birds could perch and check it out. I'm not

Step 2: Preparing the Syringe (Camera Mount)
                                Make a WiFi Camera Bird Box - Cheepy Cheap!: Page 4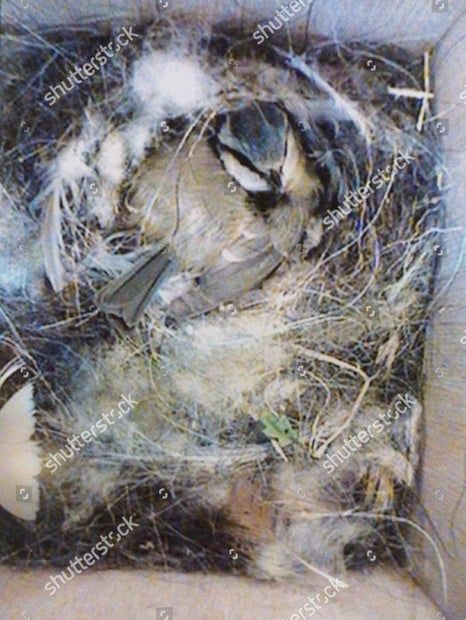
I used a 3ml syringe, which has a 10mm OD and 8mm ID.

The camera has an OD of 7.75mm so ts nicely into the tube. It's coincidence, but works a treat.

Cut in two, around the '2.5ml' region - or - [10mm + the thickness of your bird box wood walls].

If you nd it a bit tight, give it a stretch with some pliers.

Step 3: Centre the Camera Mount

I 'hovered' the camera in the approximate middle to             from the oor of the bird box.
check the alignment. This turned out to be 4.5mm
from the back of the (roof ) of the bird box, and               Lastly, I gave the drill a slight 'wiggle' to allow a not
naturally dead-centre.                                          too tight t.

Taking a 10mm drill bit, I drilled the hole. Note: rst I        I inserted the Syringe piece from underneath, as
drilled perpendicular to the roof, and then once                shown.
'established', I manoeuvred the drill to be vertical

                                 Make a WiFi Camera Bird Box - Cheepy Cheap!: Page 5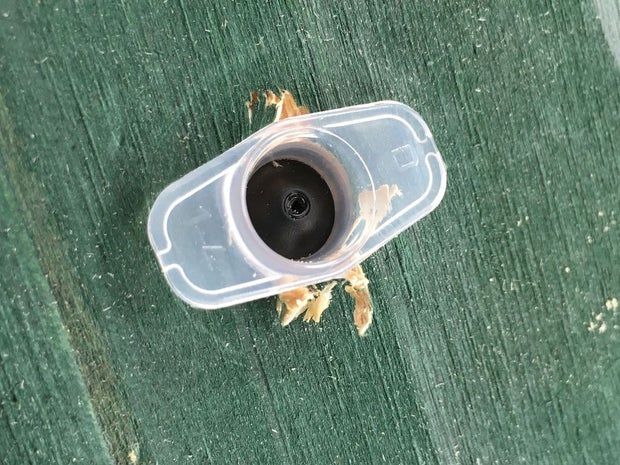
Make a WiFi Camera Bird Box - Cheepy Cheap!: Page 6
Step 4: Align the Camera

I removed the 'collar' of the camera (this is a screw tting for other attachments, not needed here), to give easy
passage in the tube. If it is tight, use a small le, or a bit of studding to free up the hole.

                               Make a WiFi Camera Bird Box - Cheepy Cheap!: Page 7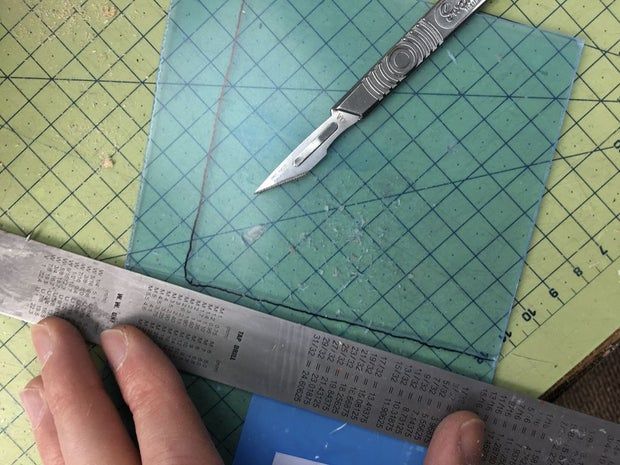
Make a WiFi Camera Bird Box - Cheepy Cheap!: Page 8
Step 5: First Video Test

Follow the instructions on the endoscope to get images, as above.

---

Safe to say, rotating the camera to get a good angle is easy.

But do pay attention to the angle (x and y axis), and gently twist the syringe into the best position.

Don't glue it yet, but get happy with the set-up.

       https://youtu.be/7vmy_Zf1Kb4

                                      Make a WiFi Camera Bird Box - Cheepy Cheap!: Page 9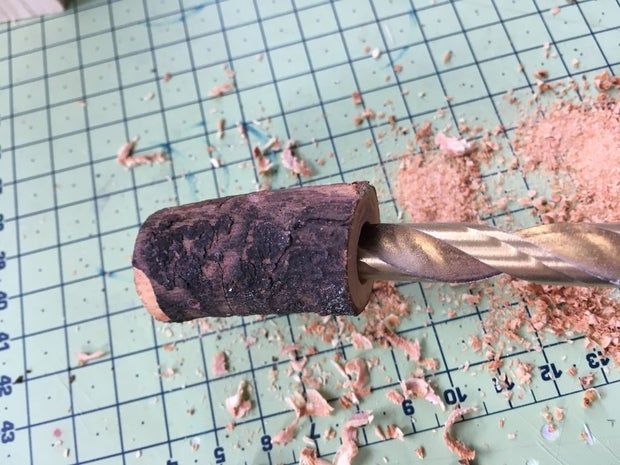
Make a WiFi Camera Bird Box - Cheepy Cheap!: Page 10
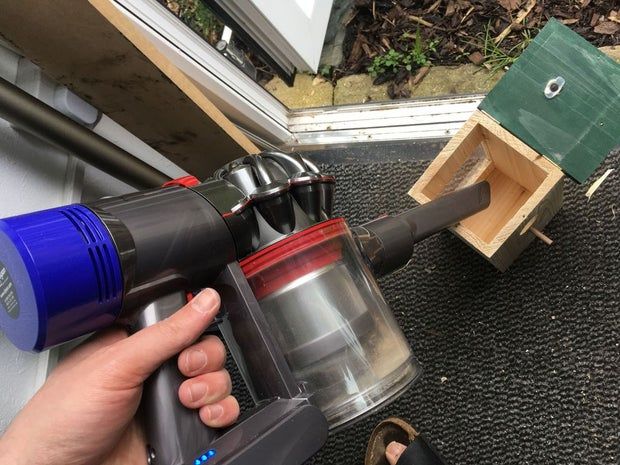
Step 6: Rain Proof Bung

I realised if I made a 'viewing port', I'd need to create a   Instructable!!
reliable water-tight bung, that was still easy to
remove. This might sound easy, but I can assure you           Anyway, using a scalpel or pliers, cut the plunger in
from my time as an engineer at Dyson, that rubber             half, and re-insert the seal end into the syringe to
seals are not trivial. So why 'reinvent the wheel' when       stop water dripping on your chicks when not viewing
there was a great one in the Syringe. Indeed, this was        with the camera.
the initial inspiration, and as it t the endoscope - it
seemed to lucky to just ignore, so I wrote up the

Step 7: Lights, Camera - ACTION!

So with my rubber ducky mounted on some blocks to what I anticipated to be the next height, I checked the
camera function, focus, etc. I was very impressed, and as you can see the focal point is good.
                                 Make a WiFi Camera Bird Box - Cheepy Cheap!: Page 11
Step 8: Glue in Place
Make a WiFi Camera Bird Box - Cheepy Cheap!: Page 12Now you have the syringe 'camera mount' all set, Sugru (optional): https://amzn.to/2T4MEEe
carefully remove the camera.
Wood Glue (optional): https://amzn.to/2Vg2ajq
Take some superglue and x in place. If you have a lot
of space that needs ' lling', use some woodglue, or Mini Super Glue (bargain!): https://amzn.to/2Vg2ajq
even Sugru, as shown. Indeed, a pack of Sugru is (recommended to get).
rather expensive for one project, but I reckon one
single pack of it would have done easily 10 seals here. Double Bubble Epoxy (not essential):
https://amzn.to/2Vg2ajq
Adhesives:
Make a WiFi Camera Bird Box - Cheepy Cheap!: Page 13Step 9: Chimney
I bit of an optional extra, but I like that this drilled-out twig looks nice, but is a secondary barrier to the elements.
Follow steps as shown, and be aware to cut slight angles, to match the slope of the roof, and also to keep rain o
the top of the chimney/stick.
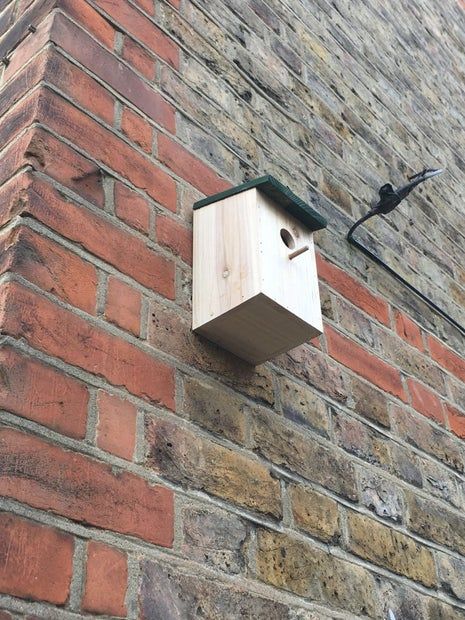
Make a WiFi Camera Bird Box - Cheepy Cheap!: Page 14Step 10: Mass Production!
For c.£4 per box, one can get going with making quite a few of these!
My son and I were very pleased with these, and we'll look froward to installing these around the
garden/trees/shed/etc. to see what works best.
Wish us luck!
Step 11: Say Cheese!
Make a WiFi Camera Bird Box - Cheepy Cheap!: Page 15OK - so forgive the earnestness here, but I'll be back unsure, then perhaps installing the WiFi cam
with some real images in due course. permanently might not be a bad idea.
I'm not a fan of posting if I have not tested fully, but Not only is the Endoscope WiFi Cam cheaper, but even
given this design is based on existing RSPB bird boxes, if you use it 1:1 ratio, it will allow you to learn the best
it really has no reason to perform less well than other viewing angles for each species, etc. I will post more as
successful alternatives. Safe to say one must take care I learn more =D
not to disturb the birds once established, and if you're
https://youtu.be/5aDNEA2X_hg
Step 12: Appendix 1: Installing WiFi Cam Permanently
Make a WiFi Camera Bird Box - Cheepy Cheap!: Page 16Although I've suggested keeping this setup as a high or other quali ed person.
ratio of [experimental] bird boxes, and 1 camera, you
can of course install the system 1 cam : 1 box, as a For example:
permanent setup. Enclosure: https://amzn.to/32n9viw
USB Charger: https://amzn.to/2PjDnar
To do this you'd need to place the WiFi transmitter in a
waterproof enclosure. Sometimes called an 'IP rated'
enclosure, these are commonly sold for all manner of
electronics that need to survive the elements
outdoors.
NOTE OF CARE:
I'm not a bird expert, but it's fair to imagine that birds
Luckily the endoscope cable (i.e. not unit) is
don't appreciate you leaving the lights on while they
waterproof, so this can be left exposed. However, the
are trying to sleep any more than you or I do... So if
electronic 'box' and the USB connection should be
you do install permanently, please remember to
placed inside. Care should be taken to ensure that the
switch o the lights perhaps 1 hour before sunset, so
USB power supply wire is kept dry at the side being
their little-birdy-circadian-rhythms are not messed-
plugged in.
up! Aww.
You can buy a timer switch if you are the forgetful
When working with main electricity (even when 'safe'
type! Timer: https://amzn.to/3a67H07
at the USB side) care should be taken to ensure the
installation is safe. If in doubt, consult an electrician
Step 13: Appendix 2: Horizontal & Vertical Viewing/Filming Holes
I realised I had some Syringe Tube left over. I was going to chuck this in the trash, when I realise that it might well
be put to good use to create more viewing holes...
...I set about installing them at di erent heights, vertically, but also horizontally too.
Make a WiFi Camera Bird Box - Cheepy Cheap!: Page 17Make a WiFi Camera Bird Box - Cheepy Cheap!: Page 18
Step 14: Appendix 3: Making a Natural Light 'Window'.

I've seen a few camera bird boxes, and it seems that one issue is that if the camera has poor low-light management,
then the images are dim/poor quality.

Having just been playing around with vacuum forming in HDPE, from recycled Milk Jugs, I realised I could make a
nice 'opaque' window from this. I used a heat gun for quickness, as the form was simple. Steps as shown.

                              Make a WiFi Camera Bird Box - Cheepy Cheap!: Page 19
Make a WiFi Camera Bird Box - Cheepy Cheap!: Page 20
Make a WiFi Camera Bird Box - Cheepy Cheap!: Page 21
Step 15: Appendix 4: Window Back-Viewing

I should say upfront, I'm very sceptical about the        Secondly, I suspect that if mounted to a 'busy'
various advertised bird boxes that claim to be able to    window, this will freak out the birds. I didn't see any
stick with suction-cups to windows, and be able to be     convincing reviews or videos of people with actual
viewed from inside.                                       birds nesting. My hunch is that it needs to be covered
                                                          up most of the time - hence I chose a window I have in
Firstly, I think the suction cups will not cope with      my shed, which the blind is usually down. Do
changes in moisture, heat, cold, etc. - and will likely   hopefully this will work. We shall see....
fall o , which would be a real shame if there were
eggs/young killed in the process.

                                Make a WiFi Camera Bird Box - Cheepy Cheap!: Page 22
Make a WiFi Camera Bird Box - Cheepy Cheap!: Page 23
Make a WiFi Camera Bird Box - Cheepy Cheap!: Page 24
Step 16: Thanks - and Please Share!

If you have any tips, pictures - please post below.     More like this at: http://www.judepullen.com/
                                                        and https://twitter.com/Jude_Pullen
If you have a school or are a teacher, do ask if
anything is unclear - I intend to do this at my local   Lastly, ple a se vo t e if you liked this! Thanks =D
nursery/afterschool facility, so hence trying to keep
costs down.

                               Make a WiFi Camera Bird Box - Cheepy Cheap!: Page 25
Make a WiFi Camera Bird Box - Cheepy Cheap!: Page 26
Some sort of opaque window in the roof would work well to provide light recording but allow the
birds darkness to sleep.
I put mine on the side, and I'm hoping it's enough, but I worried that it'd leak on the top, as it's
harder to do a seal that way. But I'm open to suggestions. And indeed, if birds dislike skylights, and
prefer sidelights. Complex animals, huh! xD

Spying on hapless birds? :o
Can't a bird have a bit of privacy?
This cartoon did come to mind as I was doing it, I have to admit! xD

I love this project since I've built a few birdhouses in my days as a Boy Scout & now.
I have one suggestion/tip. Make the back panel longer than the house itself. The extra wood
extending beyond the bottom of the house makes for easier and more secure mounting. A house
hanging from a nail will eventually fall.

You can also have the panel extend above as well, but you have to modify your hinged roof.
Another option is a hinged front that swings out from the top.

                         Make a WiFi Camera Bird Box - Cheepy Cheap!: Page 27
I think I got lucky with this particular birdbox - as cheap as it is, it has a brass 'keyhole', and I
mounted it on a 2inch screw, so I'm hoping that'd do it. But taking your point seriously, I do think a
backboard is a good suggestion, and given the storms of late, I'm inclined to reinforce actually,
before anything sets up nest. Nice idea with the 'side flip' roof...will have a think at how to do this
for V2.0! Thanks.
This is a fantastic concept and project! The next step would be to modify it with a motion sensor
that could detect when a bird enters or exits the box and give it a stand-alone power source. I'm
thinking of an application where a the scope stays attached to a single box and off in a tree and
one might walk within wifi range and simply use the phone's app to see what's going on. This is
beyond my talents but it's cool to think about.
That's a great call :o)
I guess I've been aware that I could do some fancy Raspberry Pi stuff, but of course it requires
some knowledge of coding. This project is certainly more 'low entry' on skill level, intentionally.
That said, I'd be up for finding a simpler hack....so here's hoping Instructables community might
have some ideas! There is a very comprehensive one I mentioned, but it's very very advanced tbh.
So something in-between is needed. Hmmm. Any thoughts - please share!
This is really cool! Good job! :D
Thanks =)
Have you found any Infrared Endoscopes? Alternatively, tiny wifi spy cameras are about $10.
How would those function differently than the endoscope? I'm very interested in that lower price
point, haha
The biggest advantage would be infrared LED which the birds can not see. I am thinking about
doing this for owl boxes so 24/7 daylight might be an issue. Be sure to get the ones that will allow
the the IR LEDS to stay on with exterior power. The other issue is supplying power. While power
cables are cheaper than video cable ( not much) since you need to supply power ( for constant
use) might as well use a wired camera. This is a great project, I am just tweaking it to my personal
need. Here is an IR borescope but not wifi https://www.overstock.com/Electronics/SpyTec-16ft-
USB-Borescope-Endoscope-Inspection-Camera-w-IR-LEDs-for-Night-
Vision/14585391/product.html
So I've not tested this, but it seems around £28 (inc postage in UK). https://amzn.to/2I2ieNS
True, tiny 10-buck spy cams do exist, but often get warm quickly - I was keen to put as much of the
electronics away from the birds as possible.
I might be worrying unnecessarily, but until I know better I'm trying
to minimise disturbance to birds. Thanks for comment tho - got me thinking!
Thanks... I'm going to try this. Although I'm no birdhouse expert, I have read in more places than
one that the perch on the outside is totally unnecessary and even a hazard as it gives predators
like raccoons, squirrels, etc. a perch to hang on to while burglarizing the nest. I've made a point to
watch the birds around here and none of them seem to have a problem perching on the entry hole
while investigating their future home.
Some species of birds require the perch, for others they do not want the perch.
You can use that to select the kind of bird that you want in the bird house.
You will have to do some research to find out their preference.
Make a WiFi Camera Bird Box - Cheepy Cheap!: Page 28I check with my Birder Buddy. Short answer is he was sceptical that it made a huge difference to a
predator. He's had woodpeckers break in (make the hole bigger), even without a perch. Suspects
that if a squirrel can get near the box, the post is not a factor, as they are so agile.
=) learning a lot!! Do keep the questions coming ;o)
2x on the recommendation to avoid the outside perch. In North America this only encourages
House Sparrow and European Startling to take up residents, or worse, kill the current inhabitants
and take over. They are considered pest and a noxious invasive species here.
That's an interesting point! Thanks =)
I will check with my Birder friend, and update.
With no word of a lie, I have seen a Great Tit and a Blue Tit perch on one this morning, so although
it may be superfluous, it is allowing them to check it out... They are quite cautious I notice, and are
only peeping in (not going in), so I guess it has pros/cons.
Cool update: This might just work!
A friend, and pro birder, David Pallash, just sent me a video of his hand-held endoscope footage -
and thinking hard mounting it would work. So this looks like it might just work!
/assets/img/pixel.png
Find out more at: https://wildlifewander.blog/
Make a WiFi Camera Bird Box - Cheepy Cheap!: Page 29You can also read