NHSmail Portal User Guide
←
→
Page content transcription
If your browser does not render page correctly, please read the page content below
NHSmail Portal
 User Guide

                 1
                     1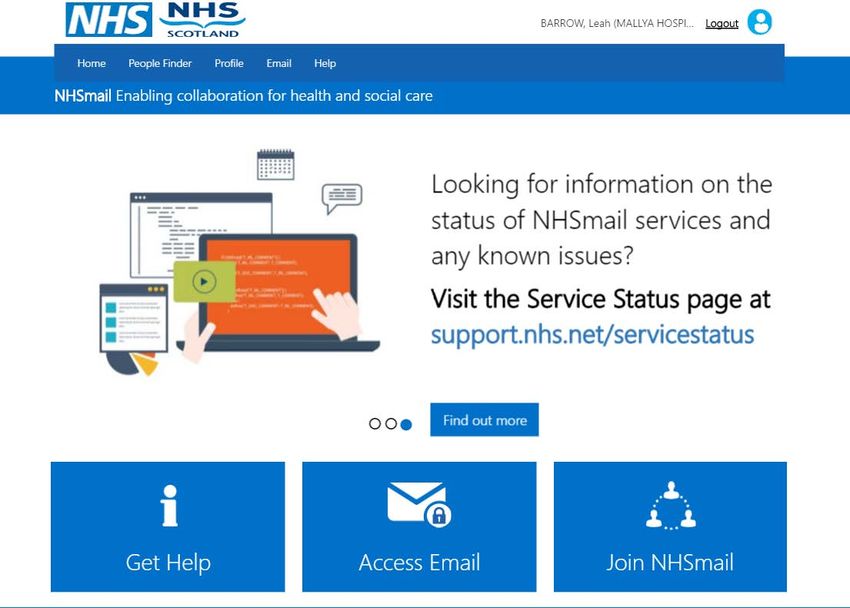
NHSmail Portal User Guide
Document Version Control
Document Information
File Name:             NHSmail Portal User Guide

Author(s):         Accenture

Version:           2.4

Date Published     10/03/2017

                                                   2
Table of Contents
NHSmail Portal User Guide
.........................................................................................................................................................   1
Document Version Control
.........................................................................................................................................................   2
Using Bookmarks
.........................................................................................................................................................   3
Logging into the NHSmail Portal
.........................................................................................................................................................   5
Profile
.........................................................................................................................................................   7
Security questions and answers
.........................................................................................................................................................   9
               Creating security questions and answers
.........................................................................................................................................................   9
               Updating security questions
.........................................................................................................................................................   11
Passwords
.........................................................................................................................................................   12
               Self-service password reset
.........................................................................................................................................................   12
               Changing your password
.........................................................................................................................................................   15
NHS Directory
.........................................................................................................................................................   17
Shared Mailbox
.........................................................................................................................................................   19
Self-service distribution lists
.........................................................................................................................................................   20
               Creating a static distribution list
.........................................................................................................................................................   20
                              Adding authorised senders to static distribution lists
.........................................................................................................................................................   22
                              Adding recipients to static distribution lists
.........................................................................................................................................................   23
               Editing a static distribution list
.........................................................................................................................................................   24
               Creating a dynamic distribution list
.........................................................................................................................................................   26
                              Setting authorised senders
.........................................................................................................................................................   28
                              Adding recipients to Dynamic Distribution Lists
.........................................................................................................................................................   29
                              Grouping rules
.........................................................................................................................................................   31
                              Viewing Dynamic Distribution List Recipients
.........................................................................................................................................................   32
               Editing a dynamic distribution list
.........................................................................................................................................................   33
               Deleting a static or dynamicdistribution list
.........................................................................................................................................................   35
               Searching for a Distribution List
.........................................................................................................................................................   37
               Advanced Search for Distribution Lists
.........................................................................................................................................................   38
               Using the Column Picker
.........................................................................................................................................................   39
Searching for an entry
.........................................................................................................................................................   40
Finding your LA
.........................................................................................................................................................   41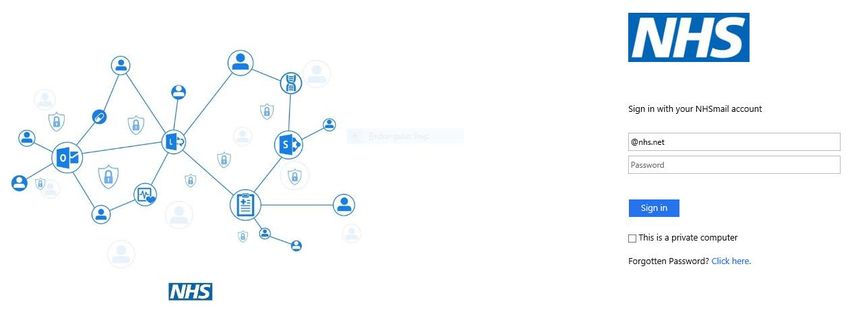
Using Bookmarks                                                                    Using this guide

This guide has been formatted with Bookmarks so you can intuitively navigate around each of the
sections and easily find the content you wish to learn about. Each Bookmark goes to a different
page within the guide.

To use Bookmarks in a guide that you have downloaded and opened in a PDF reader:

  1     Click the Bookmark icon in the toolbar on the left side of the screen

  2     Click on each of the section titles to view the content you wish to open

                                                                                                  3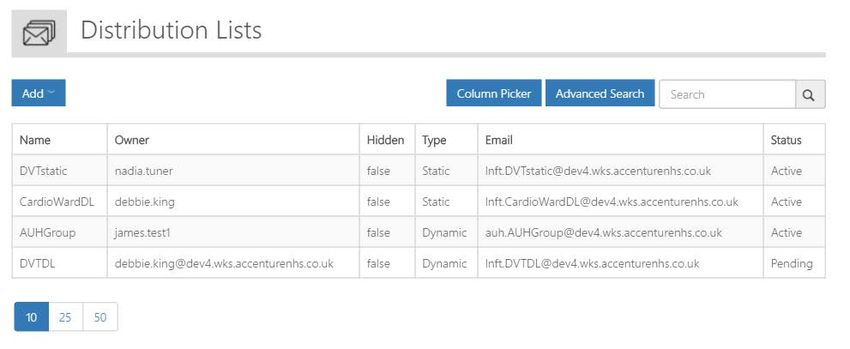
Using Bookmarks                                                                    Using this guide

To use Bookmarks in a guide that you are viewing through a PDF web viewer:

  1     Click the Bookmark icon in the toolbar on the top right side of the screen

  2     Click on each of the section titles to view the content you wish to open

                                                                                                  4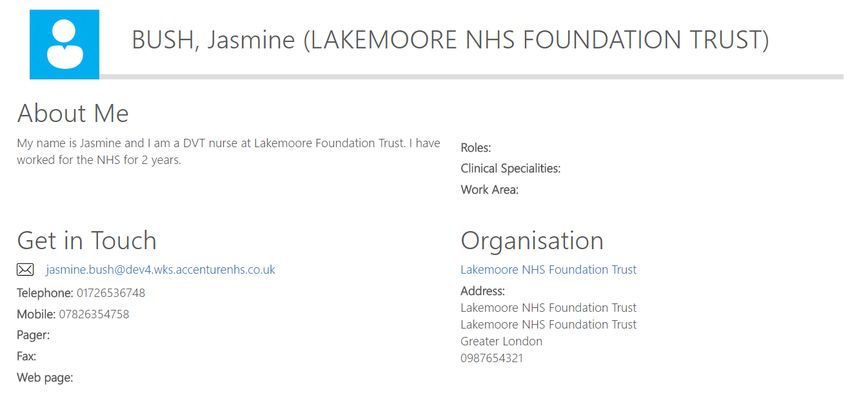
Logging into the NHSmail
 Logging in at www.nhs.net and                                                   Portal

 navigating around the Portal
 You can access the NHSmail Portal by going to www.nhs.net. Here you will have access to self-
 service features to manage your account, such as updating your profile, resetting your password
 and setting your security questions. You can also access the NHS Directory and support pages
 where you can view training and guidance materials. Note: If you are logging into the service for
 the first time then you should refer to the Getting Started Guide

  1      Enter www.nhs.net into your browser window

  2      Click Login at the top right of the page

   3     Enter your email address and password into the appropriate text boxes and click Sign In

You can just type in the first part of your email address (firstname.lastname) as the @nhs.net
part of your email address will auto-populate.

If you have forgotten your password, refer to Resetting your password for more information
If you entered your username and password correctly, you will be taken to the NHSmail portal

                                                                                                   5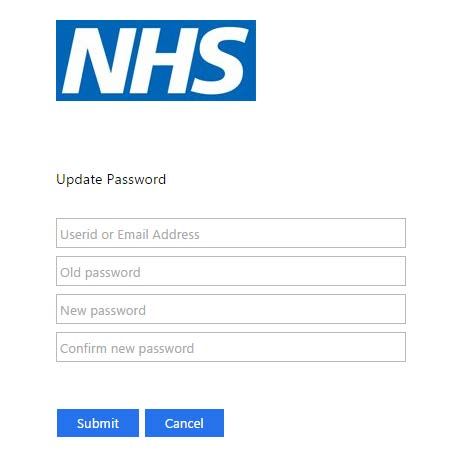
Navigating around the
       Logging in at www.nhs.net and                                                                                                        NHSmail Portal

       navigating around the Portal
       Following logging in at www.nhs.net, you will see the landing page below. The Portal is intuitively
       designed and easy to navigate around. By clicking on each of the buttons on the tool bar at the
       top, you will be directed to different sections of the Portal. Click the Home button at any point to
       return to this landing page

            People Finder: you can click this button to access the                   Help: click here to access training and guidance materials to
          NHSmail Directory where you can search for other users,                       support you whilst using Outlook Web App, Skype for
          external contacts, distribution lists and shared mailboxes                               Business and the NHSmail Portal

                                                               Email: click here to access your Outlook Web App (OWA)
Home: you can click the home button at any point to                              NHSmail email account
   return to the landing page displayed below

                                     Profile: click here to access your profile, set your security
                                     questions and create both static and dynamic distribution                      Logout: click here to log out of the NHSmail Portal
                                                                  lists

                                                                                                                                                                     6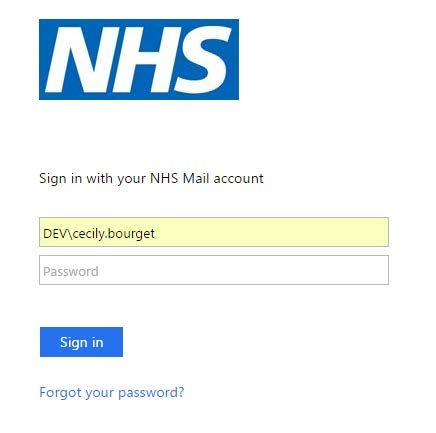
Updating Profile Details                                                        Profile

Your user profile contains contact information that is added from the information provided when
your NHSmail account is created. This information is displayed in the NHS Directory. You can edit
your personal contact details, e.g. if your mobile number changes or if you want to add personal
description for yourself. Any updates you make to your profile will be updated in the Directory
instantly. However, this information may be over-written if your organisation is connector
managed (by a centrally-managed data source). If this is the case, please notify your Local
Administrator if any of your key contact details (e.g. mobile number) change.
To update your personal details:

   1     Click Profile in the navigation bar at the top of the screen

   2     Click on the My Profile tab

   3     Enter your new Telephone, Mobile, Fax or Pager number

The mobile number that you set here will be the number used for authentication purposes in
self-service password resets. You should only use a work mobile that is used for your sole use,
and not shared, or a personal mobile device for this purpose. If you wish to hide a personal
mobile number from being displayed in the NHS Directory click the ‘Hide mobile number from
address book’ option.

                                                                                                  7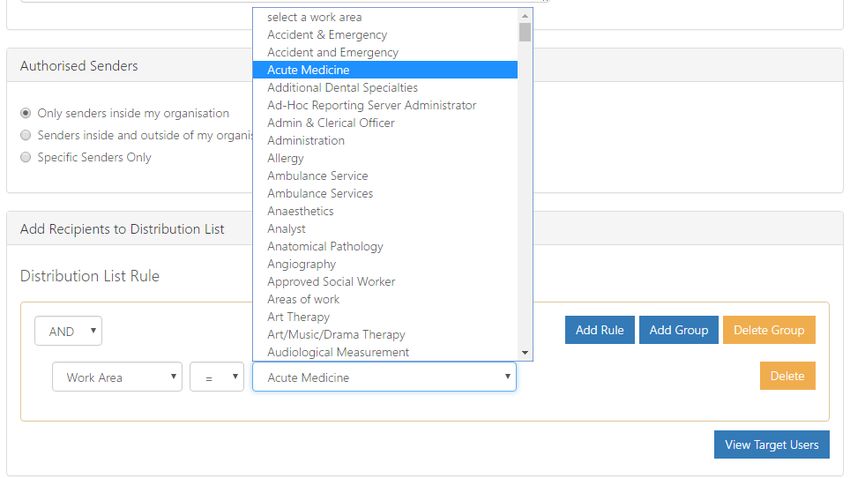
Updating Profile Details                                                      Profile

     4   Enter your Web Page if applicable

This could be your own personal webpage or your organisation’s website

     5    Type a brief description of yourself under Profile

This will show as an About Me section when a user searches for your entry in the Directory. The
character limit within this section is 1000

     6    Click Next at the bottom of the page

You will then click through to the security questions page, where you will have the option to
update your questions and answers if necessary. Refer to the Updating your security questions
section for more information

     7    Click Save at the bottom of the page

The screenshot below demonstrates how other users will see your profile information when they
search for your details in the Directory

         Additional Information
 •   Personal Detail Requirements (telephone, mobile, pager fax)
         • Maximum length is 20 characters, including 8 to 13 digits, and characters +- ()
 •   Profile Requirements
         • Maximum length is 1000 characters
 •   If your organisation is Connector (centrally managed data source) managed, be mindful that
     the connector source will also need to be updated to ensure that any new profile information
     is not over-written by old details stored within the connector
 •   If you would like to update your profile picture this is changed through Outlook Web App.
     More information on this can be found in the Outlook Web App User Guide under Adding and
     deleting a photo on your profile.
                                                                                                8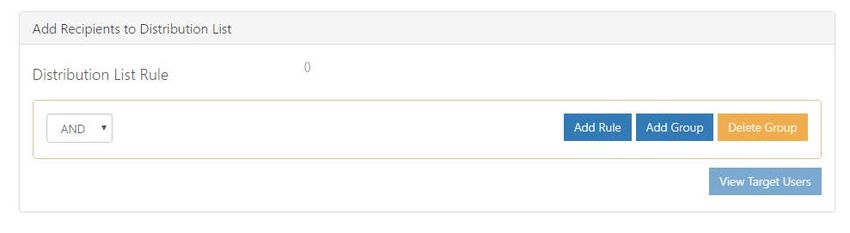
Creating security questions and                                                 Security questions and
                                                                                answers
answers
As a user of NHSmail, you are required to set 3 security questions and answers through the
Portal. The answers to these questions will then be used to check your identity, for example, if
you need to contact your Local Administrator (LA) due to an account lock out or if you wish to use
the self-service password reset. You will never be asked for the whole answer to your security
question, only individual characters from it. You should never share the questions or answers
with anyone as this will compromise the security of your NHSmail account
To create security questions and answers:

  1      Click Profile in the navigation bar at the top of the screen

  2     Select the Security Questions tab at the top of the screen

        Type a question of your choice into the Question textbox and type the correct answer into
  3     the Answer textbox under Security Question 1

Your security questions and answers must satisfy the following criteria:
• Each of the questions/answers must be different
• Each question/answer must be at least 6 characters long
• You cannot use repeating numbers or letters in a question/answer (eg. 111 or aaa)
• A space will count as a character

Examples of security questions could be: your mother’s maiden name, the model of your first car
or the name of your first pet. A green tick will show to the right of the question/ answer when it
fulfils the requirements                                                                        9
Creating security questions and Security questions and
answers
answers
4 Repeat the same process for Security Question 2 and Security Question 3
5 Click Save at the bottom of the page
Warning
Never share the full questions or the answers of your security questions with anyone. You
will only be asked for specific characters by your Local Administrator or the helpdesk
Additional Information
• If you forget the answers to your security questions you should contact your Local
Administrator to find out how you can authenticate yourself
• Once you are re-authenticated, you will need to reset your security questions. Refer to the
Updating Security Questions for more information on how to do this
10Security questions and
Updating security questions answers
You will need to use your security questions and answers when resetting your password for both
self-service password reset or when contacting your Local Administrator. You can update your
security questions at any time through the Portal. You should do this if the answers to the
questions change, you think someone may know the answers to your questions or if you are
having trouble remembering the answers to your current questions
To update your security questions and answers:
1 Click Profile in the navigation bar at the top of the screen
2 Select the Security Questions tab
Edit any question or answer you want by clicking in the appropriate text box and typing the
3 new text
4 Click Save at the bottom of the page
Refer to the Creating Security Questions Quick Reference Guide for more information about
choosing appropriate security questions and answers
Warning
Never share the questions or the answers of your security questions with anyone. You will
only be asked for specific characters by your Local Administrator or the helpdesk
11Self-service password reset Passwords
If you have forgotten your password you will need to use the self-service password reset feature
within the Portal over both an Internet and a N3 connection. To use this, you must know the
answers to your security questions and you must have a mobile number set within the profile
section of your account (note: you must have access to this mobile). If you do not know the
answers to your security questions, or you do not have a mobile phone number associated with
your account, you will need to contact your Local Administrator to reset your password. Note:
you are able to hide your mobile number so that it is not searchable within the NHS Directory –
refer to the Updating Your Profile section for more information.
To use the self-service password reset:
1 Navigate to www.nhs.net
2 Click on Forgot your password?
3 Type your full email address and click Next
Warning
If you do not have a mobile phone associated with your account, you will see the following
error message “No phone number found. Please contact your Local Administrator”
12Self-service password reset Passwords
Enter the appropriate characters of the answers to your security questions into the
4 corresponding box and click Next
Warning
You will never be asked to enter the full answer to your security questions
Once you have correctly answered the security questions, a text message with a new temporary
password will be sent to the mobile number associated with your account
If you do not have a mobile number associated with your account, or you have forgotten the
answers to your security questions you must contact your Local Administrator
5 Check your mobile to get the details of your temporary password
13Self-service password reset Passwords
6 Go to to www.nhs.net
7 Type your email address and your temporary password
Once you log in with your temporary password, you will prompted to reset your password
Additional Information
• You cannot use self-service password reset if you have already locked your account (i.e.
incorrectly put in your password three times). You will need to contact your Local
Administrator to unlock the account before being able to reset your password
14Changing your password Passwords
To keep your account secure you will need to change your password every 90 days. You will be
reminded to change your password via email 10, 7, 5, 2 and 1 day(s) before it expires.
Remember, you must change your password immediately if you think someone else knows what
it is. If your password expires, you will need to contact your Local Administrator. Following a
password change, you should ensure to update your new password on all devices e.g. mobile to
avoid future lock outs
To change your password:
1 Click Profile in the navigation bar at the top of the screen
2 Click Change Password at the top right of the screen
A new window will open within your browser
Enter your email address, your old password. You will need to re-enter your new
3 password twice in the fields provided
Refer to the Additional Information box in this section for information on password requirements
15Changing your password Passwords
4 Click Submit
When your password has been updated you will see the following message
5 Click the cross at the top right of the window to close the window
You will need re-open a new browser, navigate to www.nhs.net and use your new password
when you next log into the portal. Remember to update this new password on all additional
devices e.g. mobile to avoid future lock outs
Additional Information
Password Requirements:
• Password must NOT include your username (pre-fix of your email address)
• It must contain a mix of three out of the following four character types:
• uppercase letters (A-Z)
• lowercase letters (a-z)
• numbers (0-9)
• symbols (!"£$%^&*)
• It must be 8 or more characters long
• It cannot be any of your four previous passwords
• Spaces or commas cannot be used
Password Expiry Notifications
• You will be reminded via email 10, 7, 5, 2 and 1 day(s) before your password expires to change
your password. If you do not change your password you will be locked out of your account
and will need to contact your Local Administrator to get your account re-enabled.
Self-Service Password Reset
• If you have forgotten your password, you can reset it by using the self-service password reset
feature. You will need to know the answers to your security questions and have registered
your mobile number on the portal. Refer to the Self-service Password Reset for more
information.
16Using the NHS Directory NHS Directory
You can use the NHS Directory to search for the details (email, telephone number, pager,
organisation details) of other colleagues who use NHSmail. You will also be able to search for
shared mailboxes, distribution lists and Directory contacts. You may, for example, want to search
the NHS Directory if you are looking for email or telephone details of a specialist in another
hospital for an onward referral
To search for an entry within the NHS directory:
1 Click People Finder in the navigation bar at the top of the screen
2 Enter your search criteria in to the search box and press Enter
3 Click on the account name to view further information
The search will display all the results that match your search criteria
17Using the NHS Directory NHS Directory
After clicking on the account name, you will see the following information
Handy Hint
You should use the NHS Directory to ensure you are contacting the correct person by
looking at their Organisation. This is important when two users have the same name
When searching the NHS Directory for a contact entry, you will be able to tell they are a contact
and not a NHSmail user as it says (Contact) after their name and there is a contact book icon
next to their name as per the screenshot below:
18Managing Shared Mailboxes Shared Mailbox
A shared mailbox (also known as a generic mailbox) is a type of mailbox that can be accessed by a
group of users from the same organisation. The shared mailbox may be used for several reasons
(e.g. a district nursing team may have a shared mailbox for incoming referrals that the entire
team has access to so anyone on duty can read or action the email). If you are the owner of a
shared mailbox, you can add and remove members and owners to the mailbox. To set up or
delete a shared mailbox or change any other setting, contact your Local Administrator.
To manage your shared mailbox:
1 Click Profile in the navigation bar at the top of the screen
2 Click Shared Mailboxes at the top right of the screen
A list of mailboxes that you are an owner of will be listed automatically
3 Click the Display Name of the mailbox you want to manage
4 Click the Add to add Members or Users to the shared mailbox
You can also remove members or users by clicking the red cross next to their email address
5 Type the user’s name into the search box
Refer to the Searching for an Entry section for more information
6 Click Update at the bottom of the page
19Self-service distribution
Creating a static distribution list lists
A static distribution list is used to send an email to more than one person. It consists of recipients
that have been manually added and remains unchanged until you add or remove new recipients.
You can also include recipients external to the NHS. This is different to a dynamic distribution list
which automatically updates recipients based on specific NHS Directory criteria. When you create
a new static distribution list it will be added to the Directory. All distribution lists you create will
need to be approved by your Local Administrator. You will receive an email notification as soon as
the distribution list has been approved and is live
To create a static distribution list:
1 Click Profile in the navigation bar at the top of the screen
2 Click Distribution List at the top right of the screen
Click Add in the top left of the screen and select Static Distribution List from the drop
3 down menu
Your organisation will already be selected from the drop down menu
If you know the organisational unit the distribution list belongs to, click the + box to
4 expand the Organisation Unit list and select a Organisation Unit and click Ok
An organisation unit refers to the department, ward, building or site that are within your
20
organisationSelf-service distribution
Creating a static distribution list lists
5 Type in the Name of the Distribution List
Names must be less than 15 characters and contain no spaces or special characters
The email address will be created automatically, using the organisation’s short code followed by
the name you entered for the distribution list
6 Select Add next to Owning Users to add owners to the distribution list
You can add yourself as an owner by simply ticking “Add Myself As Owner”
7 Type the user’s name into the search box
Refer to the Searching for an Entry section for more information
8 Select the owning user by checking the box to the left of the user’s display name
To add multiple owners, tick the box next to their name
Warning
The owners of the distribution list you create must be inside your organisation
9 When all distribution owners are checked click Select
If you accidently add a user as an owning user, you can remove them by clicking the red cross to
the left of their email address
Select Hide this group from address lists if you would not like the distribution list to
10 display in address lists
21Self-service distribution
Creating a static distribution list lists
11 Enter the Description for the distribution list in the text box
This description will be seen when a user searches the Directory for the distribution list, so please
make the description informative. There is a character limit of 250 including spaces
Adding authorised senders to static distribution lists
You must set who will be authorised to send to the static distribution list you create #
To set authorised senders:
Select whether the authorised senders will be inside your organisation, inside and
1 outside your organisation or select Specific Senders Only
If you select Specific Senders Only you will need to add their email address into the appropriate
box and select Add. Their names will then appear in the Authorised Senders box
Only senders inside my organisation: all users in your organisation will be able to send emails to
the distribution list
Senders inside and outside of my organisation: all users inside and outside your organisation will
be able to send emails to the distribution list
Specific Senders Only: this allows you to specify which users are able to send emails to the
distribution list
Use the search box to find and select authorised senders by checking the box to the left of
2 the user’s display name
Refer to the Searching for an Entry section for more information
3 Click Select at the bottom of the page once all authorised senders have been selected
22Self-service distribution
Creating a static distribution list lists
Adding recipients to static distribution lists
To add a recipient to a static distribution list:
1 Click Add
2 Use the search feature or the navigation features to find the required recipients
Select Recipients for the Distribution List by checking the box to the left of the user’s
3 display name
When a recipient is successfully added to the distribution list their name will appear in the
Members box
4 When all recipients are checked click Select
Check that all details for the distribution list are correct
5 Select Complete at the bottom of the page
The below notification will pop up indicating that the distribution list has been sent for approval
by Local Administrator
Once your Local Administrator has approved or rejected your distribution list, you will receive an
email notification to say whether or not the distribution list is now live
Additional Information
• There is a maximum number of 500 recipients for a static distribution list
• For information on how to Edit a static distribution list, refer to Editing a distribution list
23Self-service distribution
Editing a static distribution list lists
You can update information associated with a static distribution list (e.g. name, owning users,
recipients) registered to your organisation. Once a static distribution list is updated, the changes
will apply to all future emails sent to this list
To edit a static distribution list:
1 Click Profile in the navigation bar at the top of the screen
2 Click Distribution List at the top right of the screen
3 Type the name of the distribution list in the search box
Refer to the Searching for a Distribution List section for more information
4 Click on the Name of the static distribution list to open the Edit Static Distribution List Page
24Self-service distribution
Editing a static distribution list lists
5 Click on the Name of the static distribution list to open the Edit Static Distribution List Page
Although the Edit Distribution List page (shown below) looks slightly different to the Create Static
Distribution List page, the steps to edit a static distribution list are the same as when you create
one (with the exception of Directory Properties). Refer to the Creating a static distribution list for
more information on editing each part of a distribution list
When all editing is complete:
6 Click Update at the bottom of the Edit Distribution List page
Additional Information
• Refer to Create Static Distribution Lists for more information on policies and best practice
25Self-service distribution
Creating a dynamic distribution list lists
Unlike static distribution lists which are set up for a defined set of recipients, dynamic
distribution lists are created from a number of pre-set rules and groups defined by the
distribution list owner. When an email is sent to a dynamic distribution list, it will be delivered to
everyone within the NHS Directory who matches the criteria defined for the group. You should
therefore be mindful of the criteria you set, as this could apply to users outside of your
organisation. There is no maximum number of users that can be included in a dynamic
distribution list. All distribution lists you create will need to be approved by your Local
Administrator. You will receive an email notification as soon as the distribution list has been
approved and is live Dynamic Distribution Lists are currently not
To create a dynamic distribution list: available. Refer to portal.nhs.net/help
1 Click Profile in the navigation bar at the top of the screen
2 Click Distribution List at the top right of the screen
Click Add in the top left of the screen and select Dynamic Distribution List from the drop
3 down menu
Your organisation will already be selected from the drop down menu
If you know the organisational unit the distribution list belongs to, click the + box to
4 expand the Organisation Unit list and select a Organisation Unit and click Ok
An organisation unit refers to the department, ward, building or site that are within your 26
organisationSelf-service distribution
Creating a dynamic distribution list lists
5 Type the Name of the distribution list
The email address will be generated automatically, using your organisation’s short code followed
by the name you entered for the distribution list.
Note: Names must be less than 15 characters and contain no spaces or special characters
To set an owner for the distribution list:
6 Click Add next to Owning User’s
7 Search for the Owning User(s) and click the tick box next to their name and click Select
Note: you can only select one owning user
8 Enter a Description for the Distribution List
Users will see this description when searching for the distribution list in the NHS Directory. There
is a character limit of 250 including spaces
27Self-service distribution
Creating a dynamic distribution list lists
Setting authorised senders
1 Choose the category of authorised senders for this distribution list
Only senders inside my organisation: all users in your organisation will be able to send emails to
the distribution list
Senders inside and outside of my organisation: all users inside and outside your organisation will
be able to send emails to the distribution list
Specific Senders Only: this allows you to specify which users are able to send emails to the
distribution list
If you choose Specific Senders Only:
2 Click Add next to Authorised Senders
3 Tick the names of all the authorised senders you want to add and then click Select
28Self-service distribution
Creating a dynamic distribution list lists
Adding recipients to Dynamic Distribution Lists
Recipients are added to dynamic distribution lists based on a number of rules that can be
grouped together. You can add multiple groupings of rules to distribution lists
To add a new rule:
1 Click Add Rule
2 Select the first condition for the rule using the first drop down list (e.g. Work Area)
3 Select from the drop down whether the condition is ‘equal to’ (=) or ‘not equal to’ (!=)
29Self-service distribution
Creating a dynamic distribution list lists
4 Select the second condition for the rule from the drop down list (e.g. Acute Medicine)
Based on the rule above, all users within the NHS Directory who have the work area of Acute
Medicine within NHS Directory would be added as recipients to the distribution list
To set additional rules within the same group:
5 Click Add Rule and repeat steps 1-4
Select AND from the drop down if multiple rules must apply/ Select OR if at least one rule
6 must be applied
If AND is selected, all subsequent rule must apply to the user in order to be added to the
distribution list. If OR is selected at least one of the subsequent rules need to apply to the user
If you make an error whilst creating a rule you can delete it. To delete a rule:
7 Click Delete next to the rule you want to delete
30Self-service distribution
Creating a dynamic distribution list lists
Grouping rules
Grouping rules allows you to apply multiple rules to determine dynamic distribution list
recipients. You will need to state whether a) all groups of rules need to be true or b) at least one
group of rules needs to be true
To group rules together:
Click Add Group and repeat steps 1-5 from the previous section to set the rules for the
1 second group
In the example above, as the ‘AND’ condition has been set for the first group, recipients would have
to meet ALL the conditions specified to appear on the distribution list. If the OR condition is
selected however, recipients would be selected that meet ANY of the conditions specified within
that group
If you make an error whilst creating a group you can delete it. To delete a group:
1 Click Delete Group next to the group you want to delete
31Self-service distribution
Creating a dynamic distribution list lists
Viewing Dynamic Distribution List Recipients
To view all target users of the distribution group:
1 Click View Target Users at the bottom of the page
Check that all details for the distribution list are correct
2 Select Complete
After selecting Complete, a message will pop up indicating that the request to create a dynamic
distribution list has been sent for approval. Users will receive an e-mail once the list has been
created or rejected.
3 Select OK and Back to return
Additional Information
• Dynamic distribution groups do not have a maximum number of recipients
• For information on how to edit a dynamic distribution list, refer to Editing a distribution list
32Self-service distribution
Editing a dynamic distribution list lists
You can update information associated with a dynamic distribution list (e.g. name, owning users
and membership rules) registered to your organisation. Following an edit to a distribution list,
this will have to be sent for approval to your Local Administrator again. On approval, the
distribution list is updated and the changes will apply to all future emails sent to this list
To edit a dynamic distribution list:
1 Click Profile in the navigation bar at the top of the screen
2 Click Distribution List at the top right of the screen
3 Type the name of the distribution list in the search box
Refer to the Searching for a Distribution List section for more information
4 Click on the Name of the dynamic distribution list to open the Edit Distribution List page
Approved distribution lists will show a status of active. Distribution lists yet to be approved by
your Local Administrator will show a status of pending
33Self-service distribution
Editing a dynamic distribution list lists
Although the Edit Dynamic Distribution List page (shown below) looks slightly different to the
Create Dynamic Distribution List page, the steps to edit a dynamic distribution list are the same
as when you create one (with the exception of Directory Properties). Refer to the Creating a
dynamic distribution list for more information on editing each part of a distribution list
The Edit Dynamic Distribution List page includes a Status box which indicates if the list is active/
inactive, the dates it was created and last updated
When all editing is complete:
5 Click Update at the bottom of the Edit Distribution List page
34Self-service distribution
Deleting a static or dynamic lists
distribution list
You should delete any static or dynamic distribution lists that are no longer required or used.
Once a distribution list has been deleted, you will no longer be able to send emails to this group
of contacts
To delete a static or dynamic distribution list:
Warning
Once a distribution list is deleted it cannot be recovered. Please ensure you have selected
the correct list before following the steps below
1 Click Profile in the navigation bar at the top of the screen
2 Click Distribution List at the top right of the screen
3 Type the distribution list in the search box
Refer to the Searching for a Distribution List section for more information
4 Click the distribution list Name to open the Distribution List Details Page
35Self-service distribution
Deleting a static or dynamic lists
distribution list
5 Click Delete in the Actions Box
6 Click Confirm to verify that you want to delete the distribution list
Additional Information
• You will not be able to re-use the name of a distribution list that has been deleted. So you
must be absolutely sure that the list is no longer needed before deleting it
36Self-service distribution
Searching for a Distribution List lists
If you want to edit (e.g. add or remove members) or delete any distribution lists you manage, you
first need to find that list by using the Search function. You can also search in the distribution
lists you manage, for those that contain the name of specific members. This search feature is the
same for both static and dynamic distribution lists. You will only be able to search for users
within your organisation and Distribution Lists that you have created. If you want to add users to
one of your distribution lists, search for the list first as explained below and then refer to Editing
a Distribution List
To search for an entry:
1 Navigate to the Distribution Lists screen
For more information on creating and editing distribution lists refer to: Creating a static
distribution list, Creating a dynamic distribution list and Editing a distribution list
Type the user or distribution list name in the search box in the top right of the page and
2 click the magnifying glass
You can also use the navigation features at the bottom left of screen to view more users per page
(10, 25, 50) or click the numbers in the bottom central of the screen to move through the
different pages of users
Handy Hint
If you need to narrow your search further, use the advanced search or click Display Name in
the tool bar to sort the list in alphabetical order
Refer to the Advanced Search section for more information on using this feature
Depending on the action you need to complete, you will select your desired entry by either
ticking the box to the left of the name of the target object or double clicking on it
37Self-service distribution
Advanced Search for Distribution Lists lists
When searching for a particular distribution list or the owners of that list, if the Simple Search
feature displays too many Directory entries, you can use the Advanced Search feature to refine
your search using multiple criteria. You can also use the column picker to refine the search. Refer
to the section Using the Column Picker for more information
Note: you will only be able to search for users within your organisation and Distribution Lists that
you have created
To use the Advanced Search feature:
1 Navigate to the Distribution Lists screen
For more information on creating and editing distribution lists refer to: Creating a static
distribution list, Creating a dynamic distribution list and Editing a distribution list
2 Click Advanced Search at the top right of the page
You can search by typing your criteria in the fields that are displayed at the top of this screen. If
you want to change, add or remove fields, refer to Using the Column Picker
Type your search word(s) into the corresponding display field text box (e.g. type Tommy in
3 the Name textbox)
The results of the search will be displayed on the screen. You can search based on more than one
display field at a time
To go back to viewing the full list of users, delete the text from the search display fields(s)
38Self-service distribution
Using the Column Picker lists
The column picker can be used to customise the display fields that you can see when browsing
lists within the Portal. This makes navigating and searching within different lists easier. There is a
column picker on the Distribution List creation screen
To use the column picker:
1 Navigate to the Distribution Lists Screen
For more information on creating and editing distribution lists refer to: Creating a static
distribution list, Creating a dynamic distribution list and Editing a distribution list
2 Click Column Picker at the top right of the page
3 Select the display fields you wish to view by ticking the box to the left of the field name
4 Click OK
Once you have set your display fields, these settings will remain for the next time you log into the
Portal
39Searching for a NHSmail Portal entry Searching for an entry
When performing actions such as adding a user to a distribution list you will need to search for
the entry in the Portal. This search feature is consistent across the user management, contacts
and distribution list screens so it will become a familiar action to complete. The example below is
for finding a user to add to a distribution list.
To search for an entry (e.g. user, contact or distribution list):
1 Navigate to the Distribution Lists screen
Type the user or distribution list name in the search box in the top right of the page and
2 click the magnifying glass
You can also use the navigation features at the bottom left of screen to view more users per page
(10, 25, 50) or click the numbers in the bottom central of the screen to move through the
different pages of users
Handy Hint
If you need to narrow your search further, use the advanced search or click Display Name
in the tool bar to sort the list in alphabetical order
Depending on the action you need to complete, you will select your desired entry by either
ticking the box to the left of the name of the target object or double clicking on it
40Finding your Local Administrator Finding your LA
Local Administrators (LA) are the prime contacts responsible for the administrative duties relating
to your NHSmail account. For example, unlocking your account, setting up shared mailboxes and
authorising distribution lists. You can usually find your LA by contacting your local IT support,
however you can also use the People Finder (NHS Directory) within the NHSmail Portal to find the
names and contact details of the LAs for your organisation
To find the details of your LA:
1 Log into the NHSmail Portal at www.nhs.net
Note: if you are using a secure N3 or SWAN connection to access the Portal, you will not need to
log in to access the People Finder (NHS Directory)
2 Click People Finder in the navigation bar at the top of the screen
3 Type your own name into the search box and press the Enter key
4 Click on your name to open your NHS Directory entry
41Finding your Local Administrator Finding your LA
4 Click on your Organisation's Name
A screen containing the details of your Organisations will load. From this screen you can view a
list of LAs that work at your organisation
To retrieve the contact details of your LA:
5 Click on the name of the LA you wish to contact
View the LA’s email address, telephone, mobile, pager, fax numbers and website under the Get in
Touch section
42You can also read