One Button Studio Setup Guide - V 1.0
←
→
Page content transcription
If your browser does not render page correctly, please read the page content below

V 1.0

        One Button Studio
                    Setup Guide

The Pennsylvania State University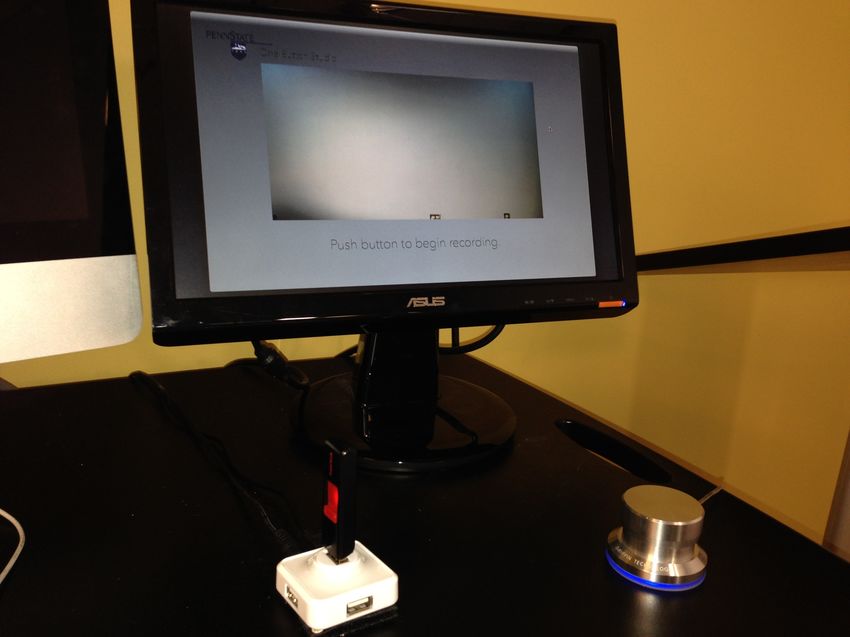
Chapter 1

Overview

The One Button Studio (OBS) is an automated and
simplified video recording studio. The technology
provides a space for users to record video and
presentations with virtually no learning curve.

This book is designed to help you setup your own
OBS.
Section 1

How Does it Work?

                    The core of the One Button Studio is the Mac OS X app found on the Mac App
                    Store. This app automates the process of recording video and audio. To do this,
                    the app will wait for a volume to mount, this process happens from the insertion of
                    a thumb drive or other storage device. It will then send commands to a software
                    package called “Indigo Server.” This is a command to turn on the lights (see setup
                    in Chapter 4). Simultaneously the app will start receiving video and audio streams
                    from an HDMI camera through the “Black Magic h.264 Pro Recorder” which
                    compresses the video and audio stream into the h.264 codec.

                    When the user presses the “PowerMate USB Controller” (the button) the app will
                    then start a countdown and record the video and audio stream to the hard drive of
                    the Mac Mini. When a user presses the button a second time the app will cease
                    recording, it will then flatten the video file into an MP4 file and copy it to the thumb
                    drive. The user will then be informed when the copy is complete to either remove
                    their thumb drive or to press the button again to start another recording. If the user
                    removes their thumb drive the app will then send another command to the “Indigo
                    software” to turn the lights off.

                                                                                                           2
Interactive 1.1 Interactive Technology Map of the One Button Studio

                                                                                                     Insteon Controller
                                                                          Mac OBS App

                Black Magic H.264 Pro
                Recorder

               The Camera
                                                                                  USB Hub

         The Button
                                                                                                          Insteon On/Off Module

         The Microphone

                                                                                            Lights
                                                        USB Thumb Drive

                                                                                                                          3
Section 2

Equipment & Budgets

MINIMUM ITEMS NEEDED TO RUN THE APP        The One Button Studio is designed to be a complete and easy-to-use production
1. Mac Computer and OBS App                studio, but it can be configured in many different ways. The items listed in the left
                                           column are all that are truly necessary to make the app work properly, however, if you
2. Black Magic h.264 Pro Recorder
                                           want lights to operate automatically you will also need Indigo 5 software configured
3. Video Camera with HDMI Live streaming   with the Insteon USB interface Modem and Insteon On/Off Modules that are
4. USB Thumb Drive                         connected to lights.

                                           When we start to look at budgeting for a studio we need to determine what do we
                                           want the studio to be able to do. If you only need to record video without any lighting
                                           with just the on-board camera microphone then you will only need the equipment
                                           listed on the left column.

                                           If you want to add lighting then you will need LED lights and the Insteon devices as
                                           well as the additional Indigo software, how many lights you need depends on the
                                           green screen technology you may or may not choose to use (lighting needs should be
                                           determined by your multimedia specialist). If the ability to record presentations is
                                           needed, then a television or projection system will be necessary. The configuration of
                                           each studio can be very different depending on the needs for that studio. For a
                                           detailed list of the currently recommended hardware visit onebutton.psu.edu/setup

                                                                                                                                     4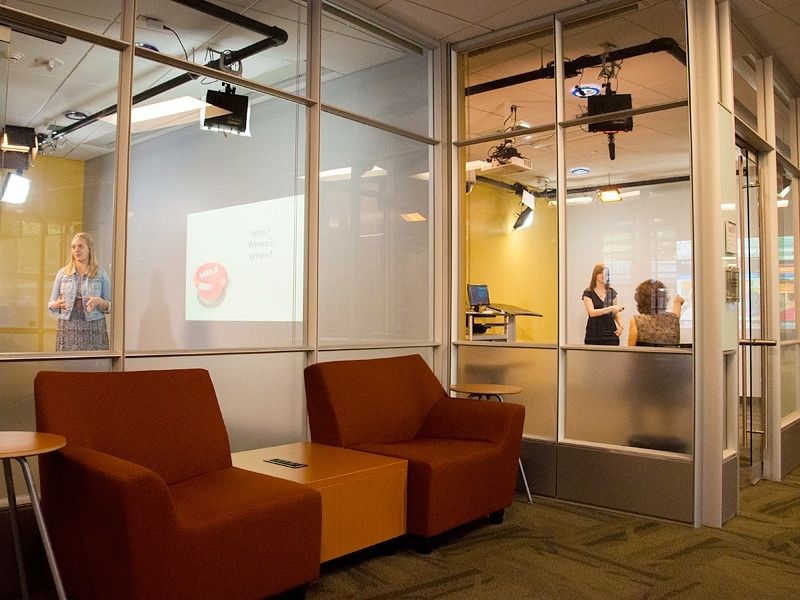
Section 3

Starting with a Team

ROLES                                          The One Button Studio is centered on simplicity, however performing the initial setup
1. Project Manager (Lead)                      required some specific skill sets. For this reason we recommend a team similar, at least
                                               in available skill sets, as listed in the left column. Each skill set or role will be needed for
2. Electrician
                                               very specific purposes as outlined below.
3. Multimedia Specialist (Film/videographer)
                                               1) Project Manager - A project as complicated as building a video studio should have
4. IT Specialist
                                                 one person serving as a project manager to ensure that all members have the
                                                 material and resources needed to accomplish their tasks within the allotted time.

                                               2) Electrician - It is the responsibility of the electrician to ensure that the two required
                                                 electrical circuits and appropriate outlets are added to the studio space and in the
                                                 correct position. Additionally this person(s) may be needed to do final mounting of
                                                 the lights depending on the installation requirements.

                                               3) Multimedia Specialist - It this role’s responsibility to setup the camera appropriately,
                                                 and configure the lights location in a typical 3 point lighting setup, and if needed to
                                                 properly light a green screen. When the lights are in position the electrician can
                                                 record their location and mount them to the ceiling.

                                               4) IT Specialist - This role is needed to properly setup, manage, and configure the Mac
                                                 Mini and the app for proper usage.

                                                                                                                                              5
Chapter 2

The Room

This Chapter will focus entirely on how to prepare a
room to be a One Button Studio, including mounting
hardware and green screen selections.
Section 1

Electrical Circuits

When designing a video studio in the past we would need to               In a typical OBS the lighting circuit has outlets in the ceiling
make sure there were enough electrical circuits so as to not trip        located a foot or so in from each of the four corners of the room
any given circuit. This being necessary because of the heavy             (this can vary). This allows for the maximum configuration of
load caused by incandescent lighting. With the One Button                lighting in the room, again there should be an additional outlet on
Studio we still need to pay attention to the electrical circuits, but    this circuit near the computer kiosk.
for a different reason.

With a fully featured OBS we need the room to have two
electrical circuits in place, one circuit to put all of the LED lights
on and another circuit for the projector and camera, in addition
the computer must have access to an outlet on both circuits.

The computer equipment itself will draw power from the
projector circuit but will also need to have access in close
proximity to the lighting circuit so that the Insteon equipment can
talk across the A/C power lines. This equipment is a variation on
the X10 protocol that uses two way communication, because the
communication happens over the power line we recommend
keeping all of the insteon devices connected to lights on the
same physical electric circuit.

                                                                                                                                             7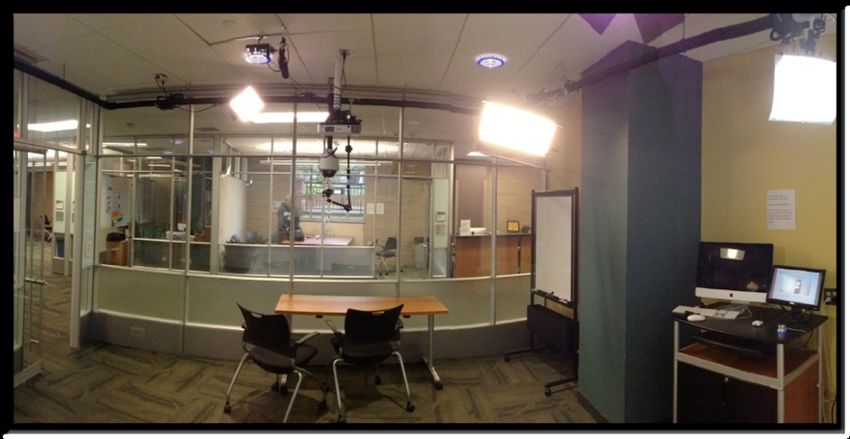
Section 2
Lighting the Studio
THINGS TO CONSIDER If you have expertise on lighting for film or video available to you, here is where
1. Ambient light you might use their help. Lighting can be tricky especially when you have a green
screen as part of your scene. First we will want to consider what overhead lights
2. Color temperature
are currently in the space. Do the overheads need to remain on to use the room?
3. Green Screen Technology
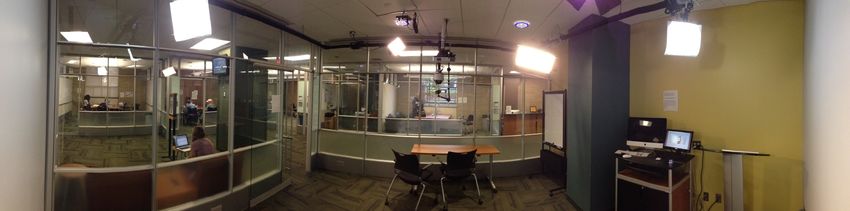
The image on the left shows a studio with glass walls, this means that there is
enough ambient light coming into the room that the overhead lights can remain off,
this effects our next consideration, color temperature. Many rooms will likely have
fluorescent lighting overhead, if this light can remain off then you can use almost
any color temperature with your studio lights that you want. However, if these
lights need to remain on for use of the room then you should be aware that typical
fluorescent bulbs emit a correlated color temperature of around 5000 kelvin. This
means that if you set the color temperature of your studio lights to 3200
(incandescent) then the overhead light will have a green color or cast. If you
choose day light balanced or around 6500 kelvin then the overheads will cast a
magenta colored light. You can use gels to match the lights and then white
balance your camera so the lights work properly together.
Now a typical studio consists of a 3 point lighting setup, if a retro-reflective green
screen is used then these three lights will likely be all that is needed.
8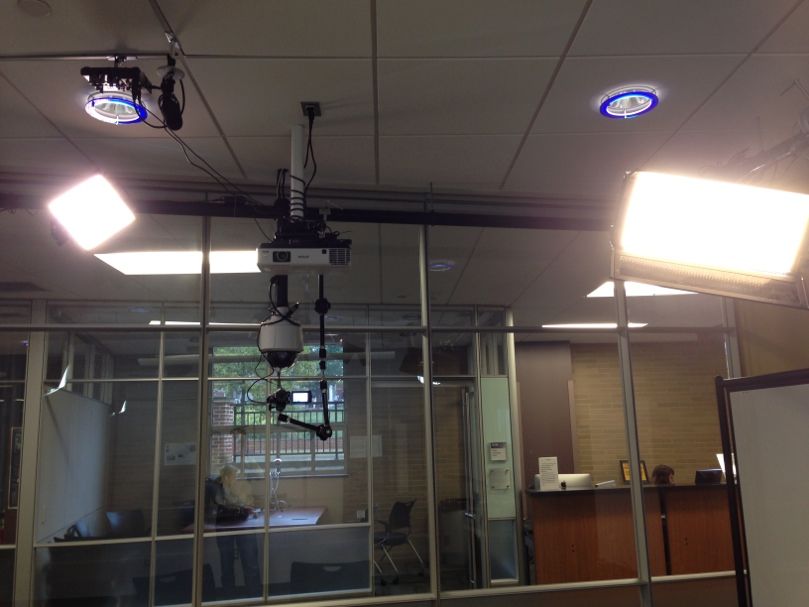
However with a normal green screen you will need additional
lights. In this setup the subject or person should be lit
independent of the screen, and you want to achieve a perfectly
even light across the entirety of the screen itself.

                                                                 9
Section 3
Green Screen Technology
THINGS TO CONSIDER There are a lot of different options to choose from when it comes to green screen. You can use
1. Cost chroma key green paint on a wall, hanging chroma key fabric, a pop-up green screen. Each of
these options will change how you approach the design for the rest of the room, a pop-up
2. Lighting
green screen will be the least costly but will require a manual process of putting up and down
3. Functionality by the users. Chroma key hanging fabric will also either require an automated housing, which
is costly or another manual process by the user of moving a curtain in place. Chroma Key
paint will require that you use a separate screen for projection or a large monitor on a cart for
presentation recordings. All of these options also require that the user stand away from the
green screen, limiting the types of shots that can be done, and also additional independent
lighting to make them key out well.
What we are now recommending is a retro-reflective green screen option with a light-ring. You
can see this in action by a product/vendor called Reflecmedia. With this technology the neutral
grey backdrop, green screen, and projection screen are all rolled into one piece of fabric. With
a simple switch of a button the grey fabric will become a perfect green screen with no
additional lighting needed. With a retro-reflective screen you only need to light the subject and
never the screen itself. There is no longer a manual process of changing backdrops or moving
screens since it is all one piece of fabric. While this technology is expensive much of it can be
offset by not purchasing additional backdrops and by purchasing fewer lights. Watch a demo
of Reflecmedia a retro-reflective green screen.
10Section 4
Projection
PRESENTATION OPTIONS The Projection system you choose will impact both the cost and how finished
1. Large Screen Television videos appear.
2. Projector Using a television is typically the lowest cost option and the image should also
resolve fairly well on camera. The largest downside is that a television or large
monitor can be bulky, the frame will be visible in the shot, and if using a retro-
reflective green screen the screen will need removed to use the large television/
monitor, or vice versa.
Using a projector in the space is ideal for a couple reasons: the screen size can
be easily adjusted to fit the space requirements and when using a retro-reflective
green screen changing backgrounds is no longer necessary. A retro-reflective
backdrop can serve as green screen, neutral backdrop, and projection screen all in
one, provided that the projector is located physically near the camera.
11Section 5
Mounting
EQUIPMENT TO MOUNT There are many ways . Currently for lighting, microphone, and mixer equipment we
1. Lights use scissor clips attached to the drop ceiling grid along with steel safety cables
which are anchored above the drop ceiling.
2. Microphone
3. Mixer We will typically use a wall or ceiling mount for the camera depending on the room.
The projector should be mounted within two feet or closer to the camera if you are
4. Camera
using a retro-reflective background for green screen/presentation screen.
5. Computer equipment
The retro-reflective screen will likely have grommets and for best mounting simple
6. Projector
hooks will keep it flat against the wall. The equipment guide located on the One
7. Screen Button Studio website will list the current hardware we are using for mounting.
12Chapter 3 Setting up the Mac for running the App This chapter covers the necessary steps to setting up the mac mini for running the app.
Section 1
Preparing the Computer
STEPS NEEDED 1) To start we want to create an admin user the automatically logs into the
1. Create an admin user machine, you may consider this a security risk but we do recommend you
remove the keyboard from the One Button Studio computer entirely.
2. Turn screen saver and sleep off
3. Create an energy saver reboot schedule 2-3) In system preferences set computer and display sleep to never, check startup
automatically after power failer. Then create a schedule to reboot every day during
4. Install black magic decklink software
off hours.
5. Install & configure Indigo 5
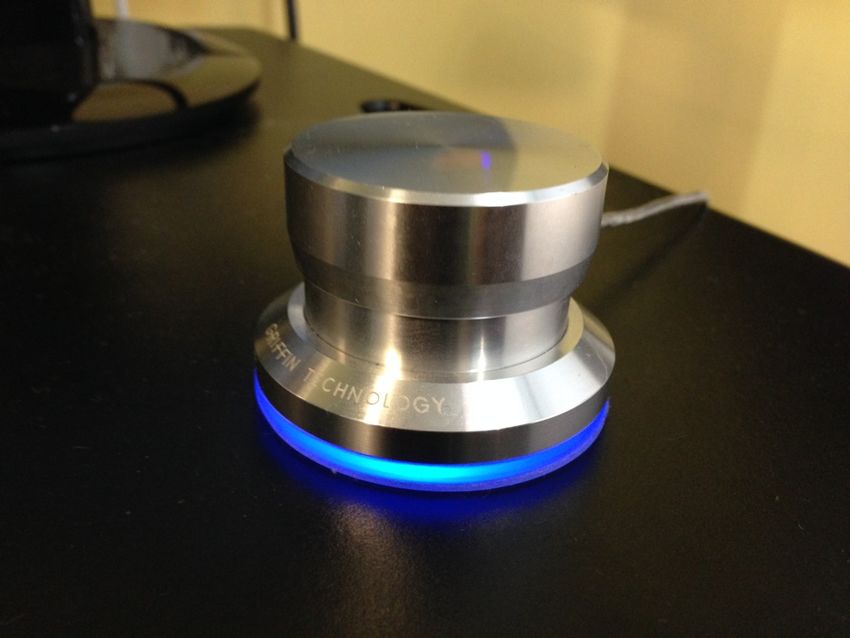
6. Install & configure Griffin Powermate software
Step 2-3 Screencast of energy saver settings
7. Configure the startup settings
8. Run the app and link the applescript
144) Goto The Black Magic Support website then download the Step 4 Downloading the Black Magic
drivers
h.264 pro recorder’s desktop video software
Step 5 Configuring Indigo 5
5) When you purchase Indigo 5 it will come on a cd, if you’re
using a new Mac Mini you won’t have a cd drive. However, you
can download the software from Perceptive Automation’s
website. You will also need to download and update your FTDI
USB drivers which are also found on the web. Once you have
the software installed it will ask for a cd key that is found on the
back of your disc sleeve.
Step 6 Configuring Powermate
6) Install and Configure Griffin Powermate software, the software
can be found on the Griffen Website.
157) Setup Indigo 5, Powermate, and the One Button Studio app to Step 7 Launch Items
start upon boot of the computer.
Step 8 Launching the One Button Studio app
8) Last we will need to launch and test the One Button Studio
app. Including telling the app where to find “Indigo Server” in the
processes (you need to choose “indigo server” and not the indigo
app).
16Chapter 4 Maintenance and Support This chapter will simply list a few known maintenance issues, and some support information.
Section 1

Known Issues

KNOWN ISSUES

1. Physical Pins wear out on the USB hub after hundred
   of video’s, consider keeping extra.

2. The A/C to D/C power supplies on the lights can go
   bad after hundred’s of video’s, consider ordering extra.
   If the lights are discontinued when you go to order
   more you can typically find generic power supplies.

3. Single LED’s on the lights can burn out, this shouldn’t
   be much of a concern as it will take many to effect the
   light output appreciably.

4. Mac’s can not read storage devices that are formatted
   NTFS, all thumb drives should be formatted FAT, if a
   device is mounted that is unwritable due to this or any
   other issue the app will notify the user to seek
   technical support.

                                                              18
Section 2
Support
For support on the One Button Studio consider joining the yammer community. To request access to this community please e-mail
onebutton@psu.edu. Please do not submit support requests directly to the e-mail address. The yammer community is designed to thread
all conversations so that others can benefit from your questions. If you know the answer to someone else’s questions please answer it.
You can also post recommendations to help make this book better by posting them in the yammer network. Thank you.
19Retro-reflective green screen A specialty fabric that uses glass beads to reflect light directly back to it’s source. This fabric coupled with a ring of green LED lights wrapped around the lens of a camera will create a chroma key green screen. Related Glossary Terms Drag related terms here Index Find Term Chapter 2 - Green Screen Technology
You can also read