Set-up Guide UQ mobile User Guide - From Getting Started to Option Settings
←
→
Page content transcription
If your browser does not render page correctly, please read the page content below

UQ mobile User Guide

 Set-up Guide
From Getting Started to Option Settings

                  Vol.1         Ⓒ2018 FUJITV KIDS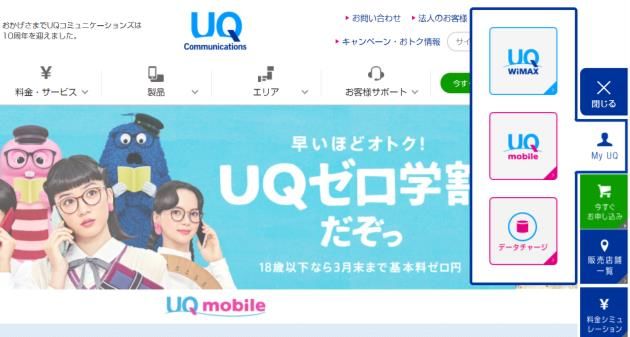
Contents

Introduction
Contract Plan Details, Set-up Items                                       P02
Once you receive your SIM card/Set-up Process                             P03
  Basic Settings:
    1.Initial Settings   (Insert SIM card into smartphone)
      ・Preparing the SIM card                                             P04
      ・Ejecting/Inserting the SIM tray                                    P05
    2.Line Switchover
     ・Line switchover procedures                                          P06
    3.Getting Ready to Connect to the Internet               (APN settings)
      (For au smartphones and select SIM-free smartphone devices only)
      ・How to verify, based on your device type                           P07
    4.Registering Your Account Information (Account Set-up)
      ・Android                                                            P08
      ・iPhone                                                             P09
    5.Verifying Your Phone Number
      ・How to verify, based on your device type                           P10
    6.Setting Up Email
      ・Optional email services (@uqmobile.jp)                             P11
      ・Free email services (Gmail)                                        P12

    7.Importing Your Address Book/Data
      ・Android                                                            P14
      ・iPhone                                                             P17
    8.Setting Up Social Media Apps
      ・Setting up LINE                                                    P21

Check out these useful features:
    9.My Page (my UQ mobile) Guide
     ・my UQ mobile features                                               P22
     ・UQ mobile portal app                                                P23
     ・Using the data-saving mode (setting up the widget)                  P24
     ・How to top up data                                                  P25
     ・How to view/change your bill plan                                   P26
Introduction

 Thank you for choosing UQ mobile.To get started with UQ mobile, check that
 you have everything below required for set-up. Have your device/SIM card
 ready, and check your ID and password from your contract plan documents.

                            Contract Plan Details, Set-up Items
   In-store
     Contract Plan     Original                   Terms and                     SIM Card       Device, Manual, Box
      Information  Application Form             Conditions Sheet
   (Customer Copy)

     Online
                         Email notification
         Email Subject: Registration Confirmation
      【Registration Type】            New Registration
      【Receipt Number】               B001234567
      【Bill Service】                 Dual Plan
      【Bill Plan】                    Pittari Plan S (V)                               *If device was included in purchase

*Please keep saved together with any Contract Plan Details Overview (check sheet) or any special
 campaign agreements provided.

                            Confirming Your ID and Password
■You will need your ID and password when logging into the customer page (my UQ mobile).
 Access the customer page to view your bill and contract plan details. (See p.22 for more details)
■After logging in, set your own user ID and password.

 Those who signed up online should refer to their confirmation email.

  ID(10-digit number) B●●●●●●●●●                                        Password The 4-digit number of your choice,
                                                                                   written on your application form
                                  This is the 10-digit receipt
                                  number (Starting with the
                                  letter B) printed at the very
                                  top of your Contract Plan
                                  Information sheet

         ID                                                                             *Please keep this information
                                                                                        stored in a secure place, as you
                                                                                        will need it for any future support
                                                                         Password       inquiries after set-up.

                                                                                                                      02
Once You Receive Your SIM Card

      Set-up process will vary according to customer plans and devices.
      Check your plan and follow steps for set-up below.

                                                                Smartphone type
                              UQ mobile Smartphones(smartphones
                                                                            For non-UQ mobile smartphones
                                   purchased through UQ mobile)

New Contracts (customers                                                    Set up your APN first.
                             Insert SIM card for instant use.
  who did not use MNP)                                                      To p.07

Customers Switching to UQ    Complete line switchover procedures first.     Complete line switchover procedures
mobile from Other Carriers   To p.06                                        and APN set-up first.To p.06 and To p.07

Customers with Re-issued     Complete line switchover procedures first.
 SIMs or Switching SIMs      To p.06

                                     Set-up Process

                                         Initial Settings                                              To page 04

                                                                                                        * log into
                                                          If carrying over an existing number (with MNP),
                                                          my UQ mobile and complete the line switchover procedures.

                                        Line Switchover                                                To page 06

   Getting Ready to Connect to the Internet (APN settings) To page 07

     Registering Your Account Information (Account Set-up) To page 08

                             Verifying Your Phone Number                                               To page 10

                                       Setting Up Email                                                To page 11

                      Importing Your Address Book/Data                                                 To page 14

                             Setting Up Social Media Apps                                              To page 21

                       Check Out These Useful Features:                                                To page 22

*If customers do not complete line switchover procedure, to prevent the MNP reserved number
 from expiring, the line will automatically be switched over 7 days after the SIM card is posted.

03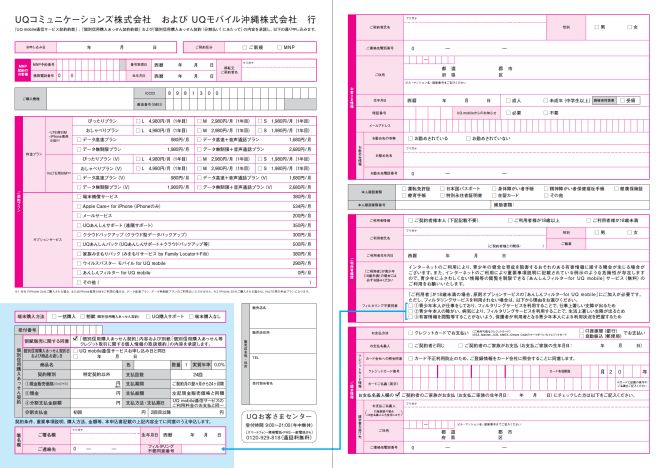
1             Initial Settings
                  (Insert SIM card into smartphone)

   To get started, you must insert the SIM card into your newly purchased or
   existing smartphone. The type of your UQ mobile SIM card will vary according to
   your smartphone device. Check the user manual of your device before inserting
   the SIM card into your smartphone.
*For devices purchased together with contract plan sign-up, procedure may have already been completed.

                             1. Preparing the SIM card
●Check your SIM card.
                                                                                      Multi SIM
        microSIM                                nanoSIM
                                                                                (mini/micro/nano)

            for LTE                                for LTE                              for VoLTE

●Remove SIM card from card mount.

                                                            Remove

    Note             Removing Multi SIM cards (mini/micro/nano)

*The type of SIM card will vary according to your device. Remove SIM card only after checking your
device. If you make a mistake in removing the card, you must submit a SIM card re-issue request.
*Sample Image: for Multi SIM card (nanoSIM)

                                                                                                         04
2. Ejecting the SIM tray

●Please note that steps to eject may vary depending on device.

             Power OFF the device, and unplug                      Removal Tool Accessory
             charger or any other cables.

                                             Power
                                             Button
                                                                           Tray

Open the SIM card slot cover at the bottom of
the device. Hook the pin on the edge of the tray,
and pull out (see illustration on right).                                  *Sample Image: DIGNO L

 *Visit the UQ homepage product support navigation to learn how to set up each compatible device.

                         3. Inserting the SIM card

●Please note that steps to insert may vary depending on device.

                                                       Cutout
As shown in the illustration on the right,
place the SIM card on the tray with the
cutout facing to the left. Insert the tray
straight into the upper slot, and close
the cover.
                                             SIMEdge of the tray
                                                                     UQ mobile Multi IC
                                                                     Card 01 Slot (Upper)

Once you've inserted the SIM card, power
the device on by holding down the power
button until the receiving light turns on.                            microSD Memory
                                                                      Card Slot (Lower)

                                                                           *Sample Image: DIGNO L

               *Note: SIM card must be installed facing the correct direction. Check before inserting.

05
2              Line Switchover

 To begin using UQ mobile, you must switch over from your existing line.
 Log in to your my UQ mobile customer page to begin the switchover
 process.
*For devices purchased together with contract plan sign-up, procedure may have already been completed.

                            Line switchover procedures
1                                                           2

From the UQ mobile homepage menu bar, click                Enter your my UQ mobile ID and password and
"My UQ," then click "UQ mobile."                           click "Log In."
3                                                           4

Click "Account Overview."                                  Click "Line Switchover."

5                                                           6

Click "Complete."                                          After completing switchover procedure, wait
                                                           approximately 30 minutes before using your device.
                                                           *If the "Line Switchover Error" message appears,
                                                           please contact the UQ Customer Center: 0120-977-062

                                                                                                         06
3            Getting Ready to Connect
                   to the Internet (APN settings)
   To access the internet using a UQ mobile smartphone, you must set
   the APN. Follow the steps below to proceed with registration.
  (Access Point Name)
  Applies to: au smartphones and select SIM-free smartphone devices.
 *For more details please check the Device Operation Checklist on the UQ homepage.
 *For devices purchased together with contract plan sign-up, procedure may have already been completed.

               How to verify, based on your device type
Checking compatible devices
Check the UQ homepage for a list of compatible devices and information regarding APN settings.
*If your device is not listed, it may not be compatible for use.
 Link to Device Operation Checklist: http://www.uqwimax.jp/products/mobile/sim/devices/

Set-up Example: Xperia XZ SOV34
                             Note: Make sure that Wi-Fi is turned off before setting access point (APN).

  1                     2                      3                               4                      5

From the home           From Apps, tap the     Tap "More"                      Tap "Mobile           Tap on
screen, tap on"Apps."   "Settings" icon.                                       networks."            "Advanced settings."

  6                      7
4          Registering Your Account
                Information (Account Set-up)

                                            Android

Registering your account information will allow you to access a number
of services. To make the most of your smartphone user experience, follow
the set-up steps below.
E.g., Install apps: Gmail, Google Calendar, YouTube, etc.

Setting up your Google Account                                                            Android

 1                    2                    3                    4                     5

Tap "Settings" and    Tap "Google."       Tap "More options“    Enter your own       Enter your email
tap "Add another                           and then "Create     username, and tap    address and tap
email account."                            account."            "Next."               "Next.”

 6                    7                    8                    9                    10

Enter a password     Tap "YES, I’M IN."   Review terms and     Confirm details and   Tap "NEXT" again to
of your choice.                           conditions and tap   tap "NEXT."           complete the process.
Re-enter password                         "I AGREE."
and tap "Next."

                                                                                                        08
iPhone

 Registering your account information will allow you to access a number
 of services. To make the most of your smartphone user experience,
 follow the set-up steps below.
                                   *To create an Apple ID, you must have an email address.
 E.g., Install apps: iTunes, etc.   For more on setting an email address, see p.11.

  Setting up your Apple ID                                                                           iPhone

Begin by tapping "Settings." Note that not all screens are shown in the steps below.

  1                       2                     3                       4                       5

From the home             Tap "Sign in to     Tap "Don’t have an        Tap "Create           Tap "Use your current
screen, tap "Settings."   your iPhone."       Apple ID or forgot it?"   Apple ID."            email address."

  6                       7                     8                       9                     10

                                                                             Do not operate the device
                                                                             until the next screen appears.

 Enter your current       Set your password    Review the terms         Tap "Agree."          Set-up complete.
 email address and        and tap "Next."      and conditions and
 tap "Next."                                   tap "Agree."

09                                                                                                            08
5 Verifying Your Phone Number
Your phone number will be listed on your application form, but you may
also check your phone number on your smartphone. If you do not know
how to verify your phone number, refer to the steps listed below.
How to verify, based on your device type
Device How to verify your phone number
iPhone 6s Home
Settings
Phone Phone
iPhone SE screen number number
arrows M04 Home Settings
My Phone
User profile
PREMIUM screen number
AQUOS Home Basic Phone
Settings
sense screen functions number
AQUOS L2 Home Basic Settings Profile Phone
AQUOS L screen functions number
Home Device Device Phone
P10 lite Settings Network
screen information status number
P9 lite Home Settings Device Device Phone
PREMIUM screen information status number
Press the
Home center key Dial key Phone
DIGNO Phone on the idle
screen (0=zero) number
screen
DIGNO V Home Basic Phone
Settings Profile
DIGNO L screen functions number
Home Basic Device Device SIM Phone
DIGNO W Settings number
screen functions information status status
ZTE Home Device Device SIM Phone
Settings
BLADE V770 screen information status status number
Home Device Device SIM Phone
ZenFone Settings
screen information status status number
IDOL4 Home Device Device SIM Phone
Settings
SHINE LITE screen information status status number
*For more details, visit the UQ homepage product support navigation and check "Verify Phone Number."
106 Setting Up Email
Customers who applied for the optional email service (@uqmobile.jp
address) should also set up their email app after creating their address.
*Will be pre-installed on select devices.
Optional email services (@uqmobile.jp) (Additional Service Fees)
Recommended Email Settings for CosmoSia
App
About CosmoSia: For further guides
Selected as KDDI's official email carrier app for and videos on set-
up, visit the UQ
its superior quality. CosmoSia allows users to
homepage.
easily send and receive emails in a chat format.
Setting Up Email
*The CosmoSia app is available for download on the Google Play store.
1 2 3
Open the CosmoSia After verifying the license Tap "UQ mobile mail."
app. agreement, tap "AGREE."
4 5
Tap "Allow." Wait until the registration
complete screen appears.
11Free email services (Gmail)
For customers using free email services (@gmail.com addresses),
set up your Gmail app after you have created your address.
Initial Set-up for Android
1 2 3 4 5
From the home Tap "Gmail." Tap "Add email Tap "Google." Enter the address used
screen, tap "Google." address." when going through
settings on p.8 or a Gmail
address of your choice.
6 7 8 9
Enter your password Tap “I Agree". Tap "AGREE" to Your registered
for your Gmail address. finalize initial settings. address will appear.
12Initial Set-up for iPhone
1 2 3 4 5
From the home Tap "Accounts & Tap "Add Account." Tap "Google." Enter the address used
screen, tap "Settings." Passwords." when going through
Settings on p.8 or a Gmail
address of your choice.
6 7 8 9
Enter your password Tap "Save." Tap "Mail." Your Gmail address
created for your Gmail will be added to your
address. mailbox.
137 Importing Your Address
Book/Data
Steps to import your address book and data will vary according to
your OS. Regardless, please ensure you have prepared in advance
before you begin importing.
Android (Importing your address book using an SD card)
1 Back up your address book from your previous device, using a microSD card
To save (back up) your address book, insert your microSD card and power on the device.
You will then follow the steps below to back up your address book.
(E. g., for XPERIA XZ SOV34)
1 2 3 4 5
Your address book
backup is complete.
Tap "Contacts." Tap (menu). Tap "Import/export." Tap "Import from Tap "SAVE."
.vcf file."
*Items you can export may vary depending on your device.
2 Import your address book from the microSD card to your new device
Insert the microSD card containing saved address book into your device and power
the device on.You will then follow the steps below to import your address book.
(E. g., for XPERIA XZ SOV34)
1 2 3 4 5
Address book
transfer is now
complete.
Tap "Contacts." Tap "Menu." Tap "Import/export." Tap "Export to .vcf Tap "Phone contact" to
file." transfer address book.
14Android (Importing your data using an SD card)
1 Back up your data from your previous device to a microSD card
To save (back up) your photos and music, insert your microSD card and power on the device.
You will then follow the steps below to back up your data. (E.g., for DIGNO V)
1 2 3 4 5
From the home Tap "File Commander." Tap "Internal shared Tap the file containing the Tap
screen, tap "Apps." storage." data to transfer, holding
down data to transfer.
*Items you can export
6 7 8 9 may vary depending on
your device type.
Tap (menu). Tap "SD Card." Select and tap Tap (paste) to
Export destination. complete the process.
2 Import your data from the microSD card to your new device
Insert the microSD card containing saved data into your device and power the device on.
You will then follow the steps below to import your data. (E. g., for XPERIA XZ SOV34)
1 2 3 4 5
To the
Next page
From the home screen, Tap "Storage & Tap "the menu." Tap "Advanced." Tap "Storage."
tap "Apps," then select memory."
"Settings."
15Android (Importing your data using an SD card) continued
6 7 8 9 10
Tap "SD Card." Tap “saved_SDdata." Tap the data you Tap the data Tap
wish to save. you wish to transfer.
The above shows
11 12 a pictures folder.
Tap "Upload to Tap "UPLOAD"
Photos." to complete.
16iPhone (Importing your address book/data using a computer)
1 Back up your data from your current smartphone to your computer (iTunes)
1 2 3
Open iTunes. From the "General Preferences" Click "Prevent iPods, iPhones, and iPads
Choose "Edit" from the menu bar, window click on "Devices" at the from syncing automatically," and click
and then click "Preferences." top of the screen. "OK."
4 5 6
After clicking, connect your iPhone
Click on at the bottom of Click on "This computer" and click
to your computer. When prompted
the menu bar. "Back Up Now" to begin back up
with the "Trust This Computer?"
process.
screen, tap "Trust."
7 8
Select "Edit" from the upper left If current date and time is listed under
menu and click on "Preferences." recent backups, then backup is complete.
*Refer to following page on how to transfer saved data.
About iTunes
Connecting your iPhone to a computer installed
Sync with iTunes allows you to sync data such as
address books, music, videos, and apps.
As iTunes is necessary to back up your data,
we recommend installing it on your computer.
172 Transferring your data from your computer (iTunes) to your new smartphone
1 2 3
Open iTunes. From the "General Preferences" Click "Prevent iPods, iPhones, and
Choose "Edit" from the menu bar, window click on "Devices" at the iPads from syncing automatically,“
and then click "Preferences." top of the screen. and click "OK."
4 5 6
After clicking, connect your iPhone
Click on at the bottom of Click on "This computer" and click
to your computer. When prompted
the menu bar. "Restore Backup..." to begin backup
with the "Trust This Computer?"
process.
screen, tap "Trust."
7
Click "Restore" to complete restore
process.
*This setting will also allow you to transfer data such as photos and music.
18iPhone (Importing Your Address Book/Data Using iCloud)
1 Back up your data from your current smartphone to iCloud
1 2 3 4 5
From the home Tap on your device Tap on "iCloud." Choose the items Tap "iCloud Backup."
screen, tap "Settings." profile. you want to save to
iCloud.
6
*Refer to following page on how to transfer saved data.
Tap "Back Up Now"
and data save will
complete.
About iCloud
Sync iCloud saves data online, allowing
you to sync your address book,
music, videos, apps, and other
data to any device you log in to.
192 Transferring your data from iCloud to your new smartphone
1 2 3 4 5
Please be aware that
all data saved on the
device will be deleted.
From the home Tap "General." Tap "Reset." Tap "Erase All Tap "Erase Now."
screen, tap"Settings." Content and Settings."
6 7 8 9 10
*If you are not using Wi-Fi,
tap "Use Cellular Connection."
Once iPhone has Select "English." Select "Japan." Select your desired Connect to your
re-started, press keyboard and tap Wi-Fi network.
the home button. "Next."
11 12 13 14 15
Select "On" or "Off" Tap "Restore from Enter Apple ID Tap "Agree." Select desired backup
for Location iCloud Backup." and password. and backup restore
Services and tap will complete.
"Next."
208 Setting Up Social
Media Apps
To ensure a safe and satisfying UQ mobile user experience, we will introduce
major social media apps and apps to protect children online. Please set up as
necessary.
Setting up LINE
The information listed on this page was verified and written independently by UQ mobile.
LINE is a service provided by LINE Corporation. Specifications of service are subject to
change without notice.
1 2 3
To create using
a phone number
(your current number)
If you did not include
the Voice Call Plan
when signing up,
From Google Play or App select "Login with Enter the UQ mobile phone Review the phone number
Store search for "LINE“ Facebook" number(your current number). displayed (your current
and install. Open LINE Review the Terms of Service number) to make sure
and tap "Sign up." and tap "Verify phone a number." there are no errors and
tap "OK."
4 5 6 7
Confirm and enter the Enter your User Name. On the age verification Tap "Allow."
verification code sent via Adjust the "Add Friends" screen, tap "Don’t verify
SMS and tap "Next." settings as needed, and age."
tap "Register."
Login with Facebook
From the new registration screen, tap
"Login with Facebook." Enter your email
address or phone number registered with
your Facebook account and password, and
tap "Log In." Then follow the instructions on
screen to complete set up.
219 My Page (my UQ mobile) Guide
Access My Page (my UQ mobile) to view your bill and contract plan
details in just a few taps, at any time.
my UQ mobile features
Bill Details Data Charges Voice Call Data Usage
Usage Details Details
On Your
Review your monthly
Charges Review itemized
charges on your
Review monthly data
charges.
Review your monthly
voice call usage details. data usage details.
monthly bill.
*To view usage details, you must be subscribed to this option.
View/Change View/Change View/Change Account
Change Your
On Your Contract Plan Account Billing
Password Overview
Holder Details Information
Contract View contract plan View/change View/change your Change your View your account
Plan details or change your account billing information my UQ mobile details.
your bill plan. holder details. or payment method. login password.
Logging into my UQ mobile
1 2 3 4
タップ
Enter ID and password.
Initial ID: Your 10-digit receipt number
Password: Your 4-digit PIN number
Open the "設定" Tap "My UQ" at Tap "my UQ mobile." Enter my UQ mobile
tab and create your the top of the UQ ID and password.
my UQ mobile ID homepage.
and password.
Log in from the UQ homepage Or scan here
Visit http://www.uqwimax.jp/ to access now!
5 Sample: Review Contract Plan Information
Review your latest (previous month's) charges.
Review your current bill plan or change your bill plan.
Review current month's data usage.
Login complete.
22UQ mobile portal app
The UQ mobile portal app allows you to easily check your data balance
and switch the turbo feature on or off. Download when you are setting
up your phone to make the most of these features.
*Already installed on UQ mobile devices.
*Screens shown below are from versions as of July 2017.
Check Your Switch to
Log in to
UQ mobile Data Top-up Data-Saving
Data Balance my UQ mobile
Portal App Mode
・Purchase additional Use the widget to Use my UQ mobile to
Features Check current month’s
data usage and balance. data. switch on the data- review contract plan
・View your data saving feature. details.
top-up history.
How to Download UQ mobile
・ Android™OS portal app
⇒Download from the Play Store.
・ iPhone(iOS)
⇒Download from the App Store.
UQ mobile portal app display
Check your data balance/
Log in to my UQ mobile
Switch on data-saving features
●Check your data balance/ ●my UQ mobile Features
Switch your data transmission speeds (Review/Change your contract plan details)
(turn turbo feature on or off)
Easily check your
data balance!
Log-in
Check your
data balance Screen
Turbo feature
Switching to
data-saving mode.
Data Top-up (Additional Data
Widget Feature
Purchases/Top-up History)
●Additional Data ●Data Top-up History ●Widget Feature
Purchases
You can purchase You can review your purchase
additional data in history of additional data. *For more on the widget feature,
100MB/500MB bundles. see p.25.
From the home screen,you can
always check your data balance
and switch modes.
23Using the data-saving mode (setting up the widget)
UQ mobile allows you to switch between high-speed mode (high speed transmission)
and data-saving mode (low speed transmission), to keep you from using up too much
data. Data-saving mode will still allow you to browse the internet, so learn to master
switching between modes to make the most of your online experience.
Recommended ① Switch modes using the UQ mobile portal app
■Differences between each mode
★For the Pittari Plan (Right Fit Plan) or Oshaberi Plan (Chat Plan)
Portal app
icon Mode Data Transmission
Data Capacity
Speed
High-speed Max Receiving
Speed Does use
(Turbo On)
225Mbps*
Data-saving Max Receiving Does not
(Turbo Off) Speed
use
300Kbps*
Suitable for using LINE and viewing mainly text websites.
Tap to open For playing videos, etc., we recommend switching to
Tap the bottom Switch between "High-speed."
the portal app. right button to switch. "High-Speed" and
*Maximum receiving speeds will vary according
"Data-Saving"
to type of device used.
★Set up widget to display and operate sections of the app on the home screen.
*Android Turn widget Turbo On (High-speed)
Adding the Widget
・ Press down on an empty part of the home screen.
・ The home screen settings menu will appear.
→ Tap "Widget"
・The "Widget List" will display.
・From the list, select "UQ mobile portal app.
→The widget added will appear on the
home screen. Tap to switch Tap to refresh
② Switch modes using the website
1 2 3 4
タップ
タップ
タップ
タップ
Tap "My UQ" from Tap "UQ mobile Data Enter your ID and Manage the Turbo
the top right of the Top-up Site." password to log in. feature using the on
UQ homepage. and off switch.
24How to top up data
When you have used up all of your data, you can top up data to purchase
additional data. Get familiar with this feature, so you'll know what to do in
case you ever run out of data. *During "More Data" campaigns, you may add extra
data free of charge up to a monthly fixed rate, but must follow the top up data steps yourself.
Checking Your Data Balance *Open the application and select update to view
the latest information.
Your basic data balance, including your rollover
from the previous month.
*Data remaining from your previous month of usage, up to
the basic data capacity, will rollover to the next month.
Ex.) For Data Speed (7GB), 7GB will be the cap.
*Data will be used in the order of: Rollover Data > Basic Data
> Additionally Purchased (Top-up) Data.
Balance of additionally purchased (top-up) data.
Additionally purchased (top-up) data is available
for 90 days.
*Will be updated to reflect the most recent top-up date.
Recommended (Or top up from the website)
① Top up with the UQ mobile portal app For details, visit the UQ homepage.
1 2 3 4 5
Portal app
*Period of validity
icon
will be updated to
reflect the most
recent top-up date.
Tap to open Tap "Top Up Data." Select 100MB or Review the details After purchase is complete, the
500MB. and tap "Confirm." amount of additional data purchased
the portal app.
and period of validity will be displayed.
②Data Top-up History Display
1 2 3 4
Portal app
icon
Tap to open Tap "Data Top-up Tap "All." A list detailing your data
the portal app. History." top-up history will appear.
25How to view/change your bill plan
UQ mobile allows you to change your bill plan according to your usage needs.
Choose the plan best suited for your current needs.
*Possible options may depend on your contracted plan. Review your contracted plan before making
any changes.
Pittari Plan (Right Fit Plan) or Oshaberi Plan (Chat Plan) SIM Card Only Plans
Pittari Plan S Oshaberi Plan S High-speed Data Plan
Pittari Plan M Oshaberi Plan M Unlimited Data Plan
High-speed Data +
Pittari Plan L Oshaberi Plan L Voice Call Plan
Unlimited Data+
Same rate plans can be switched. Voice Call Plan
*Plan changes will not incur penalty fees. *Plan changes will become effective the month following date of application.
*If you will need to change your SIM card (for VoLTE custom and other SIM cards, etc.) contact the Customer Center (see back page).
You can use my UQ mobile to change your bill plan!
1 2 3 4 5
Portal app
icon
Log in to my UQ
mobile through
the portal app
or the website.
Tap "Contract Plan Tap "View/Change Tap "Details" to view Your available bill plan
Tap "Change Plan."
Details" at the top. Contract Plan Details." more on your currently options will appear in
contracted plan. the pull-down menu.
6 7 8 9 10
Check
Select the plan you Make sure that you Check "Agree" and tap Tap "Change." Your bill plan change
would like to switch to. review the Agreement "Next." request is complete.*
and Terms of Use. *Change will be effective from the following month.
26To Contact
UQ Customer Center
TEL 0120-977-062 (Toll-free)
9:00-21:00(365 days a year)
WEB http://www.uqwimax.jp/english/mobile/
UQ Communications Inc./UQ mobile Okinawa Corporation
Note: *Services listed are subject to change without notice. (As of January 2018)You can also read