OPERATING INSTRUCTIONS FOR YOUR LUG-ALL CABLE RATCHET WINCH HOIST - 650 Lincoln Road, Birdsboro, PA 19508 Phone: (877) 658-4255 / Fax: (610) ...
←
→
Page content transcription
If your browser does not render page correctly, please read the page content below
LAC-0108
                                                                          Rev. 5/12

             OPERATING INSTRUCTIONS FOR YOUR
            LUG-ALL ® CABLE RATCHET WINCH HOIST

               650 Lincoln Road, Birdsboro, PA 19508
Phone: (877) 658-4255 / Fax: (610) 286-9661 / Web: www.lug-all.com

            Copyright 2012 © LUG-ALL Corporation. All rights reserved.
Operating Instructions For Your LUG-ALL® Cable Ratchet Winch Hoist / Copyright 2012 © LUG-ALL Corporation. All rights reserved.
TABLE OF CONTENTS SAFETY
SAFETY.........................................................2
YOUR NEW LUG-ALL HOIST....................... 3
Handle Installation................................3
REGULAR LOWERING LUG-ALLS................4 Do not attempt to operate the LUG-ALL until
you carefully read the instructions and
Lifting or Tensioning.............................4 recommendations in this manual.
The LUG-ALL must be properly operated and
Lowering or Backing Off maintained to avoid risk of property damage
or bodily injury.
(requires load of 15 lbs or more)......... 4
Free Release To avoid personal injury or equipment
damage:
(will not operate under load)........... 4-5
• Do not exceed load rating.
RAPID LOWERING LUG-ALLS......................5
• Inspect LUG-ALL before each use for damage,
Lifting or Tensioning.............................5 malfunction or worn parts.
• Do not operate if hoist is damaged or malfunctioning.
Regular Lowering or Backing Off
• Inspect hooks (bent, enlarged opening) and
(requires load of 15 lbs or more)......... 5 latches. Remove hoist from service until damaged
hooks or latches are replaced.
Rapid Lowering Mode • Operate only when hook-to-hook pull is in a
(requires load of 15 lbs or more)..........6 straight line.
• Do not use if the cable has kinks, cuts, broken
Free Release strands, fraying or abrasions. The cable must be
(will not operate under load)...............6 replaced even though damage to the cable
appears minor.
RIGGING.......................................................7 • The cable must be evenly wrapped around the drum
CARE OF THE LUG-ALL CABLE RATCHET for secure hoist operation. Examine the cable to
ensure it is properly seated in the pulley wheel.
WINCH HOIST........................................ 8 • Do not use to lift people, or loads over people.
• Do not leave an unattended load suspended in
DAILY CABLE INSPECTIONS.....................8-9
the air.
TROUBLESHOOTING..............................9-10 • Do not lengthen, or make any substitution for the
LUG-ALL reversible handle.
CABLE HOIST LOAD CHARTS....................10
• Do not remove or obscure warning labels.
CABLE RATCHET WINCH HOIST • Do not use hoist as a load binder.
• Do not snag or pull the cable over edges, as serious
PRE-OPERATIONAL INSTRUCTIONS.... 11
weakening may result.
LIMITED WARRANTY..................Back Cover • Do not use LUG-ALL as a tow line.
• Close latches on hook before using.
• Use only genuine LUG-ALL replacement parts.
2Operating Instructions For Your LUG-ALL® Cable Ratchet Winch Hoist / Copyright 2012 © LUG-ALL Corporation. All rights reserved.
• LUG-ALL hoists must be used in an ambient operating 3) Position the handle so that the three
temperature range. The allowable range to use the holes on the crimped end line up
hoist is -10ºC to +50ºC / 14ºF to 122ºF. with the shafts and handle bolt on
• Due to the possibility of entanglement, it is critical the U-frame.
that long hair, loose fitting clothing, and jewelry
be kept away from working mechanisms on the hoist (SEE FIGURE 1)
at all times.
Entanglement
and crushing
warning.
• Do not place fingers, hands, or any other part of the
body in pawl area during operation of the hoist.
YOUR NEW LUG-ALL HOIST
FIGURE 1
Congratulations, you have just purchased
the best cable ratchet winch hoist
available on the market today. Since 1949 4) Screw the wing nut back onto the
LUG-ALL has been the world’s leading handle bolt and tighten until snug.
manufacturer of cable winch hoists. With
quality and reliability built into every cable (SEE FIGURE 2)
ratchet winch hoist, the LUG-ALL name is
unmatched by the competition. Please be
sure to read through this instruction
manual in its entirety to assure your hoist
is used safely and effectively.
Handle Installation
1) Remove the handle for your LUG-ALL
hoist from the cardboard shield inside
the product box
2) Locate the wing nut on the side of the
U-frame and remove.
FIGURE 2
3Operating Instructions For Your LUG-ALL® Cable Ratchet Winch Hoist / Copyright 2012 © LUG-ALL Corporation. All rights reserved.
REGULAR LOWERING LUG-ALLS Lowering or Backing Off
(requires load of 15 lbs or more)
The regular lowering LUG-ALL has three
modes of operation: 1) Rotate the reverse lever away from the
drum to move the U-frame pawl away
• Lifting or tensioning
from the ratchet teeth (FIGURE 4).
• Lowering or backing off
• Free release 2) Move the handle until the U-frame
pawl and the main frame pawl spring
Lifting or lowering operations are carried engages a ratchet tooth. Additional
out while the hoist is under load (at least handle pressure in the same direction
15 lbs). The position of the reverse lever will release the main frame pawl, once
to either hold the U-frame pawl against or the pawl engages the main spring and
away from the ratchet teeth (under spring forces the main frame pawl to
tension) determines the action. Free disengage.
release quickly unwinds the cable from the
drum. 3) Ease off handle pressure and the load
will lower one ratchet tooth.
Lifting and Tensioning
(SEE FIGURE 4)
1) Rotate the reverse lever toward the
drum to engage the U-frame pawl
against the ratchet teeth.
2) Operate the handle as required to lift
the load or apply the required tension.
(SEE FIGURE 3)
FIGURE 4
DON
HANG
T JA
FREE
R
GE
M HO
IG
LY
TR
IST
Free Release (will not operate under load)
1) Rotate the reverse lever away from the
drum to move the U-frame pawl away
from the ratchet teeth.
FIGURE 3
4Operating Instructions For Your LUG-ALL® Cable Ratchet Winch Hoist / Copyright 2012 © LUG-ALL Corporation. All rights reserved.
2) Press the trigger to hold the main
frame pawl away from the ratchet FIGURE 6
teeth and pull out the cable the
required distance.
(SEE FIGURE 5)
Regular Lowering or Backing Off
(requires load of 15 lbs or more)
1) Rotate the reverse lever away from the
FIGURE 5
drum to move the U-frame pawl away
from the ratchet teeth.
RAPID LOWERING LUG-ALLS 2) Place the rapid lowering switch in the
OFF position.
The rapid lowering LUG-ALL models
operate on the same basic principles as the 3) Move the handle until the U-frame
regular lowering LUG-ALLs but have an pawl engages a ratchet tooth.
additional action - rapid lowering. Additional handle pressure in the
same direction will release the main
frame pawl.
Lifting or Tensioning
4) Ease off handle pressure and the load
1) Rotate the reverse lever toward the
will lower one ratchet tooth.
drum to engage the U-frame pawl
against the ratchet teeth.
(SEE FIGURE 7)
2) Place the rapid lowering switch in the
OFF position.
3) Operate the handle as required to lift
the load or apply the required tension.
(SEE FIGURE 6)
5Operating Instructions For Your LUG-ALL® Cable Ratchet Winch Hoist / Copyright 2012 © LUG-ALL Corporation. All rights reserved.
4) Ease off handle pressure slowly and
FIGURE 7 the load will lower up to four ratchet
teeth on the first stroke and four teeth
thereafter.
(SEE FIGURE 8)
FIGURE 8
DON
HANG
T JA
FREE
R
GE
M
IG
LY
TR
HOIS
T
Rapid Lowering Mode
(requires load of 15lbs or more)
When using the rapid lowering mode,
operators must position themselves in such
a way that they can control the torque of
the handle through the full travel of the
arc, which is four times longer than with
Free Release (will not operate under load)
regular lowering. When first engaging
rapid lowering, the first stroke of the 1) Place the rapid lowering switch in the OFF
position.
handle may lower from one to four
ratchet teeth depending on the cam 2) Rotate the reverse lever away from the
position. Following strokes will lower four drum to move the U-frame pawl away from
ratchet teeth. the ratchet teeth.
1) Rotate the reverse lever away from the 3) Press the trigger to hold the main frame
drum to move the U-frame pawl away pawl away from the ratchet teeth and pull
from the ratchet teeth. out the cable the required distance.
2) Place the rapid lowering switch in the (SEE FIGURE 9)
ON position.
3) Move the handle until the U-frame
pawl engages a ratchet tooth.
Additional handle pressure in the
same direction will release the main
frame pawl.
6Operating Instructions For Your LUG-ALL® Cable Ratchet Winch Hoist / Copyright 2012 © LUG-ALL Corporation. All rights reserved.
FIGURE 9
DON
HANG
T JA
FREE
R
GE
M
IG
LY
TR
HOIS
T
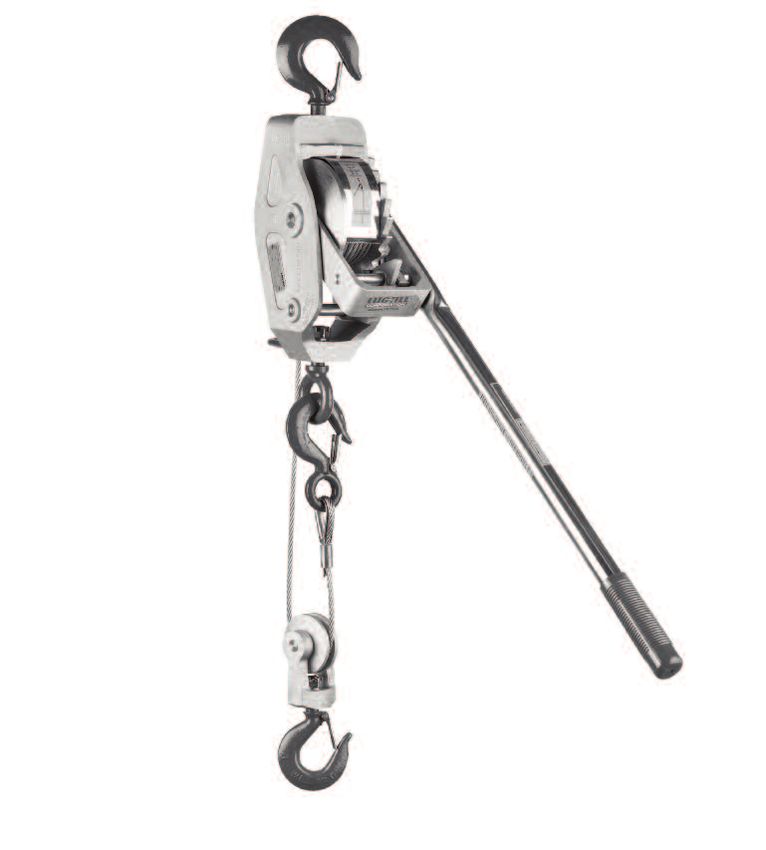
Single Rigged
(1/2 Capacity)
RIGGING
The LUG-ALL cable ratchet winch hoist will
operate in any position: right side up, upside
down or at any angle as a hoist or horizontally
as a winch. The lifting and pulling power of
the winch hoist depends on whether it is
single-line rigged or double-line rigged with
the use of a pulley block. Rig the winch hoist
with double-line for full rated capacity or
single-line for one half-rated capacity and
twice the lifting distance and operating speed.
Always rig the LUG-ALL so that it will hang Alternate Single
freely and be free to move from side-to-side.
If the frame is jammed out of line it is Rigging
subjected to undue stress from uneven loading (1/2 Capacity)
and would not be free to move sideways,
which is necessary to allow even wrapping of
the cable on the drum. Hooks should be
placed so the point of contact is in line with
the center of the shank or eye. When rigging
a LUG-ALL that will be used in rapid lowering
mode it must be done so a full stroke of the
handle is possible. For example, if working
from a ceiling with the LUG-ALL right side up
it would be necessary to use a choker or
extension to lower the LUG-ALL sufficient Double Rigged
distance to allow the handle to travel its full (Full Capacity)
arc, which carries it above the top hook.
7Operating Instructions For Your LUG-ALL® Cable Ratchet Winch Hoist / Copyright 2012 © LUG-ALL Corporation. All rights reserved.
CARE OF THE LUG-ALL CABLE DAILY CABLE INSPECTIONS
RATCHET WINCH HOIST
Your LUG-ALL is designed to provide many
years of satisfactory performance if used
properly. Always hang it freely with a straight
line between the top hook and the load hook
The pictures below illustrate the more obvious
(do not jam against a stationary object). And
types of severely damaged cables. Cables
remember, LUG-ALL hoists are intended for
exhibiting damage of this sort to any degree must
industrial use, not for lifting or supporting be replaced immediately.
human or animal cargo, or lifting over people.
The LUG-ALL is extremely easy to care for. Its
open construction makes it simple to clean
after use in mud, ice, sand or other extreme
conditions. Strip the cable from the drum and
flush the drum with water or steam. A quick
check of the hoist takes only seconds. Years of
life can be added to the hoist by following
these recommendations.
• Do not snag or pull the cable over sharp or
rough edges as this will wear and fray the k
cable. LUG-ALLs are equipped with high quality Drum Crushing and Spiraling
cable, and with reasonable care will give
The badly deteriorated condition of this cable
satisfactory service. clearly indicates that it is unsafe for operation.
• When rewinding the cable on the drum, apply Cable damage of this type is usually caused by
hoist abuse and by repeatedly overloading the
light (10 lbs) tension. This assures even
hoist beyond its rated capacity. A hoist with this
wrapping and will prevent the cable from cable condition should not be used under any
“wedging” the next time it is used under circumstances, and the cable must be replaced
before the hoist can be safely operated.
heavy load.
• Stop pulling when the cable clamp reaches the
cable guide or pulley wheel, or the pulley wheel
reaches the cable guide (depending on rig used),
as continued pulling will damage parts.
• Use a steady, straight pull to operate the
LUG-ALL.
• When operating the LUG-ALL under load, do not k
allow the handle to “fly” as this can cause
Cut Cable
damage to the U-frame.
The condition of this cable indicates that it has
been cut by a sharp object. This is apparent to the
eye because several of the strands appear to be of
equal length. It goes without saying that this cable
must be replaced before the hoist can be safely
operated.
8Operating Instructions For Your LUG-ALL® Cable Ratchet Winch Hoist / Copyright 2012 © LUG-ALL Corporation. All rights reserved.
TROUBLESHOOTING
If your LUG-ALL will not lower or back off
automatically, the following tests can be made:
1) Inspect cable on drum to see that it is not “wedged” or
“jammed”. Test by operating free release. The cable
should pull out freely.
k 2) Examine U-frame pawl spring. With the reverse lever in the
Broken Wires lifting position, the spring should hold the pawl against
The frayed condition of this cable indicates ratchet teeth. In the lowering position, the spring should
broken wires and an unsafe condition. Cable
hold the pawl away from the ratchet teeth.
deficiencies of this type are usually caused by
abrasion. This can easily happen in a hoist 3) Check the button on the side of the U-frame pawl for
operation if the operator allows the cable to excessive wear. Its width should be approximately 1 1/2
come in contact with any other surface. This
times the diameter of the main frame pawl spring. Place
cable is considerably weakened and must be
replaced before the hoist can be safely the reverse lever in the lowering position, move the
operated. U-frame until the pawl button comes in contact with the
spring. If the button is not worn excessively and slips past
the spring, then the U-frame is twisted and the winch-hoist
should be repaired.
4) If the pawl button contacted the main frame pawl spring
and guided the U-frame pawl into the ratchet wheel, then
test the main frame pawl spring for fatigue. With the
reverse lever in the lowering position and the hoist under
light tension, place the handle in the full lowering position
k so that the U-frame pawl engages the ratchet wheel. If the
Kinks main frame pawl does not release, continue to press on the
handle and at the same time press the “trigger”. If the
Kinks can result from improper uncoiling and
unspooling, or they can be formed in hoist “trigger” pressure releases the main frame pawl, but spring
operation. Cable loops can occur in a slack pressure does not, it indicates the spring is fatigued and
line, or in a line under tension. If a loop
should be replaced.
occurs, it should be removed immediately.
Otherwise the loop may be pulled through 5) If, when the above test is made, pressure on the “trigger”
when tension is applied to the line and form a does not release the main frame pawl, test the U-frame
permanently deforming kink. Kinks in a cable
pawl for excessive wear. To test, place an object (knife
are always dangerous as they create unequal
tension in the rope and in the strands. A cable blade, nail, paper clip, etc.) between the U-frame pawl and
with kinks must be replaced before the hoist the tooth it would normally engage for lowering. If it
can be safely operated.
lowers one notch under this test with the unit under light
tension, then the trouble is located. This condition is more
likely to develop after a LUG-ALL has been repaired and a
9Operating Instructions For Your LUG-ALL® Cable Ratchet Winch Hoist / Copyright 2012 © LUG-ALL Corporation. All rights reserved.
new main frame pawl installed but not a new U-frame
CABLE HOIST LOAD CHARTS
pawl. Under normal conditions the two pawls wear evenly
and seldom give any difficulty. The following load charts display single and double
line capacities for LUG-ALL cable ratchet winch
6) Check both U-frame and main frame pawls for “snappy” hoists. Metric capacities shown are exact
spring action. Sluggish action can result from dirt or equivalents of U.S. Domestic Ratings.
corrosion on the shafts and in the shaft holes. Remove
shafts and clean with fine steel wool. Clean the shaft
holes in the pawls. The U-frame and main frame pivot
points are equipped with OILITE bearings. Apply light
oil on all bearing surfaces and reassemble.
7) Check to see that both pawls engage solidly at the base of
the ratchet teeth in both lifting and lowering cycles.
8) If main frame pawl on rapid lowering model does not fully
engage, check the actuating pin and edge of projection on
the rapid lowering assembly that engages the actuating pin
to see if it is bent.
9) The U-frame pawl should align with the ratchet teeth, if it
does not, check to see if the U-frame is twisted from
someone having let go of the handle while handling a load.
10Cable Ratchet Winch Hoist Pre-Operational Inspection
Unit Number: ___________________ Model: ____________________ Date: ____________________
Inspection Result (✓)
Inspection Point
Pass Fail
1) Inspect hooks and latches for deformation, cracks, and
wear. An elongated or bent hook is an indication that the
hoist was overloaded.
2) Check operation of latches. Safety latches on the hooks
should not be defeated by wiring it open or by removal.
3) Inspect cable for kinks, cuts, broken strands, fraying or
abrasions.
4) Check ratchet teeth for gouges, burred edges or other
physical damage.
5) Check for bent or broken metal parts, rounded edges, and
elongated holes.
6) Check metal parts for corrosion.
7) Check pawls and levers for bends, cracks or other damage.
8) Check integrity of springs.
9) Operate U-frame and verify that the U-frame does not rub
against main frame during operation.
10) Test operating functions (lifting, lowering, free release)
of hoist.
NOTE: The cable should be pulled from the drum during inspection. The hoist should be removed from service if any inspection points fail.
11LIMITED WARRANTY
Seller warrants that the LUG-ALL described is free from defects in material and workmanship for a term
of one year from the date of purchase by the original consumer. In the event of a defect, malfunction
or other failure of the LUG-ALL product not caused by unreasonable use, failure to provide reasonable
and necessary maintenance or damage to the product while in the possession of the consumer, the seller
will remedy the defect or failure within 30 days of return to seller at the address specified below. The
remedy will consist solely of repair or replacement of the product at the seller's option. If after a
reasonable number of attempts by the seller to remedy the defect, malfunction or other failure and the
remedy fails of its essential purpose, the consumer is entitled to elect either a refund or a replacement,
without charge.
This warranty does not apply to defects caused by modification, alteration, repair or service of the LUG-
ALL by anyone other than LUG-ALL. The warranty extends to only the original purchaser of the LUG-
ALL.
In order to obtain performance under the warranty, the consumer must deliver the LUG-ALL and all
ancillary parts thereto to LUG-ALL Corporation, 604 Hemlock Road, Morgantown, PA 19543, together
with written explanation of the defect or failure (Telephone: (610)-286-9884; Fax: (610)-286-9661).
Delivery expenses and insurance for warranty service to and from LUG-ALL are the responsibility of the
Buyer. Proof of purchase, such as sales receipt or other documentation is required when requesting
warranty service.
This warranty gives you specific legal rights, and you may also have other rights that vary from state to
state.
In no event shall seller (including its affiliates, subsidiaries, contractors, directors, employees and agents)
be liable for any consequential, incidental, economic, direct, indirect, general or special damages of any
kind, including, without limitation, lost business, lost savings, lost data and lost profits, regardless of the
cause and whether arising in contract (including fundamental breach), tort (including negligence), or
otherwise, even if the seller has been advised of the possibility of such damages. Some states do not
allow the exclusion or limitation of incidental or consequential damages, so the exclusion or limitation
in this paragraph may not apply to you.
Buyer shall notify Seller promptly, and in any event within thirty (30) days of its becoming aware of any
accident or malfunction involving Seller's products that arise out of or relate to any personal injury or
damage to property and shall cooperate fully with Seller in investigating and determining the cause of
such accident or malfunction. To the extent that Buyer fails to give such notice to Seller and provide
such cooperation, Buyer shall be liable to Seller for the consequences of such failure.
Copyright 2012 © LUG-ALL Corporation. All rights reserved.You can also read