Operation Manual 5 in 1 Multifunction Petrol Tool Grass Trimmer/Hedge Trimmer/Pole Mounted Pru- ner/Brush Cutter
←
→
Page content transcription
If your browser does not render page correctly, please read the page content below

Operation Manual

           5 in 1 Multifunction Petrol Tool
  Grass Trimmer/Hedge Trimmer/Pole Mounted Pru-
                   ner/Brush Cutter
                                                   61494

                              Illustration similar, may vary depending on model

Read and follow the operating instructions and safety information before using for the first time.

Technical changes reserved!
Due to further developments, illustrations, functioning steps and technical data can differ insignific -
antly.

Updating the documentation
If you have suggestions for improvement or have found any irregularities, please contact us.
The information contained in this document may alter at any time without previous notice. It is prohib-
ited to copy or spread any parts of this document in any way without prior written allowance. All rights
reserved.
The WilTec Wildanger Technik GmbH cannot be held accountable for any possible mistakes in this
operating manual, nor in the diagrams and figures shown.
Even though, the WilTec Wildanger Technik GmbH has undergone biggest possible efforts to ensure
that the operating manual is complete, faultless and up to date, mistakes cannot be entirely avoided.
If you should find a mistake or wish to make a suggestion for improvement, we look forward to hearing
from you.

Send an e-mail to:

service@wiltec.info

or use our contact form:

https://www.wiltec.de/contacts/

The most recent version of this manual in various languages can be found in our online shop via:

https://www.wiltec.de/docsearch

Our postal address is:

WilTec Wildanger Technik GmbH
Königsbenden 12
52249 Eschweiler
Germany

Do you wish to pick goods up? Our pick-up address is:

WilTec Wildanger Technik GmbH
Königsbenden 28
52249 Eschweiler
Germany

To shorten the waiting time and allow for a rapid on-site transaction, we ask you to call us previously
or placing your order via the webshop.

E-mail: service@wiltec.info
Tel:+49 2403 55592-0
Fax: +49 2403 55592-15

To return orders for exchange, repair or for other purposes, please use the following address. Atten -
tion! To allow for a smooth execution of your complaint or return, it is important to contact our cus -
tomer service team before returning the goods.

Returns Department
WilTec Wildanger Technik GmbH
Königsbenden 28
52249 Eschweiler

E-mail: service@wiltec.info
Tel:+49 2403 55592-0
Fax: +49 2403 55592-15

© by WilTec Wildanger Technik GmbH             Item 61494                                          Page 2
http://www.WilTec.de
http://www.aoyue.eu                                                                            03 2021-1
http://www.teichtip.de
Introduction

Thank you for purchasing this quality product. To minimize the risk of injury we urge that our cli-
ents take some basic safety precautions when using this device. Please read the operation in-
structions carefully and make sure you have understood its content.
Keep these operation instructions safe.

Safety symbols

These instructions show symbols that indicate dangers. The safety symbols and their corresponding
explications must be fully understood. However, just reading the warnings does not reduce any danger
and does not excuse the user from the respect of all safety regulations.

                                      Read the operating instructions and follow all warning and
                                      safety instructions. Before each use, observe relevant sections
                                      in this manual.

                                      Complies with the European regulations applicable to this
                                      product.

                                      Before carrying out maintenance and repair work, switch off
                                      the engine and pull out the spark plug!

                                      Pay attention to the correct dosage when handling fuel and
                                      lubricants!

                                      Protect from rain and moisture!

                                      Risk of burns from hot surfaces and exhaust gases! Do not
                                      touch!

                                      Risk of injury from parts ejected! Always keep a sufficient
                                      safety distance!

                                      Starting the engine will cause sparks. Sparks can ignite flam-
                                      mable substances nearby.

                                      Motors emit carbon monoxide, an odourless, colourless poison
                                      gas. Inhaling carbon monoxide can cause nausea, fainting, or
                                      even death.

© by WilTec Wildanger Technik GmbH           Item 61494                                        Page 3
http://www.WilTec.de
http://www.aoyue.eu                                                                          03 2021-1
http://www.teichtip.de
Do not use the machine in closed or poorly ventilated rooms.
                                      Risk of poisoning!

                                      Do not smoke while using the product and keep it away from
                                      other sources of heat and ignition.

                                      Always wear hearing protection, eye protection and gloves
                                      when using the product.

                                      Always wear protective clothing when using the product.

                                      Always wear non-slip shoes when using the product.

                                      Operate the primer 6 times before use to ensure that there is
                                      sufficient gasoline in the gasoline line.

                                      Wear head protection when using the product!

                                      Throttle valve closed (cold start)

                                      Throttle valve open (operating position)

                                      Danger from electrical overhead lines! Always make sure that
                                      the pole pruner has sufficient distance from near power lines
                                      when it is used. The distance between the machine and
                                      bystanders should be at least 15 m.

These instructions for use are part of the product as they contain important information for the safe
use of the device. They must therefore be kept close to the device and must always be at hand.
Everyone wanting to use, repair or maintain the product must have read and understood the content of
this manual. Keep it in a safe place and ensure that they are handed out with the device when you

© by WilTec Wildanger Technik GmbH            Item 61494                                        Page 4
http://www.WilTec.de
http://www.aoyue.eu                                                                          03 2021-1
http://www.teichtip.de
give it to someone else. The device designed for use in agriculture, forestry and horticulture, must al-
ways be used in accordance with the manufacturer’s instructions, which you will find in these operat-
ing instructions. Improper use or modification of the product can result in damage to the device
and its surroundings as well as very serious injuries for which the manufacturer cannot be
held liable.
Safety precautions
General safety precautions
Read the instructions carefully before use and familiarize yourself with the controls and the
proper use of the device.
This device is not intended for use by children or adolescents, or by persons with reduced
physical, sensory or mental capabilities or lack of experience and knowledge.
Local occupational health and safety regulations to avoid noise pollution can restrict the use of
the device. You should therefore observe the prescribed rest periods.
Keep pets and other people, especially children, away from the work area to avoid distractions
and endanger bystanders. The user is responsible for the people in his work area and for their
property.
Bystanders must keep a safe distance of 15 m while the device is in use.
Major repairs may only be carried out by specialists.
Safety of preparation
Observe the following information when handling fuels, as they are highly flammable.
◦ Only store fuel in the containers provided for it.
◦ Only refuel the device outdoors, do not smoke near the device, and keep it away from
other sources of heat and ignition.
◦ Before each use, check the fuel level and make sure that there is enough fuel. If neces -
sary, add fuel before starting the engine.
◦ Never remove the cover of the fuel tank when the engine is running or the device is still
hot.
◦ With gasoline spilled do not operate the engine under any circumstances. Move the
device away from the area and avoid it until the highly flammable gasoline fumes have
dissipated.
◦ Check the tank cap and the other sealing caps regularly to ensure that they are intact. Do
not use the product if any of the caps are damaged or worn; in this case replace them first.
◦ The multi-function tool is equipped with a four-stroke engine and therefore requires lubric-
ating oil before use.
Visually inspect the device before each use and do not use with parts worn or damaged. Re-
place these parts only as a set and only use identical spare parts of the same quality that have
been approved by the manufacturer.
Do not wear large or loose clothing or jewellery. These can get caught in the starter or other
moving parts.
Make sure that the ventilation openings are not covered or blocked. Under no circumstances
you should insert objects into it.
If the device is used in heat, at high altitudes or in high humidity, the power must be reduced
in order to ensure that the device functions properly and has a long service life.
Safety of operation
Never use the device in closed rooms or with insufficient ventilation. The running engine emits
carbon monoxide, which can cause serious poisoning.
Keep the machine free from oil, dirt and other contaminants. Do not clean it with the engine
running and wait until it has cooled down completely after use. We recommend a damp cloth
for cleaning.
Only set up the device on stable and level surfaces from which it cannot fall.
Make sure that both muffler and air filter are working properly as these parts act as flame re-
© by WilTec Wildanger Technik GmbH Item 61494 Page 5
http://www.WilTec.de
http://www.aoyue.eu 03 2021-1
http://www.teichtip.de
tardants in the event of a misfire.
Avoid touching the exhaust system and other parts that become hot when using, in order to
prevent burns. Pay attention to the warning notices on the product.
Do not modify the device structurally and do not operate it at too high a speed, as this affects
the longevity of the product and means an increased risk of injury.
Check the fuel system of the device regularly for leaks and signs of wear, e. g. porous areas
on hoses, damage to the tank or missing clamps. Also, make sure that all parts are in good
condition before using the device.
Always make sure that your workplace is adequately lit.
Do not pick up the machine with the engine running; only move it to another location when it is
turned off and cooled down.
Always switch off the engine when not in use and before refuelling, cleaning, maintenance and
repair work and let the device cool down first.
Before checking or adjusting the machine, pull the spark plug or ignition wire to prevent acci-
dental start-up.
Do not use the device when you are tired, under the influence of alcohol, drugs or medication.
Observe the locally applicable regulations. These could limit the use or the duration of use of
the multifunction device.
When working with the device, always wear face and ear protection as well as non-slip safety
shoes with steel caps and cut protection gloves. Never operate the device barefoot or with
open, loose or otherwise unsuitable shoes.
When working with the device, always ensure that you have a firm and secure footing.
The device is designed for two-handed operation. Hold the handle firmly with both hands and
never work with just one hand. Always use the shoulder strap when working and never let go
of the device while the engine is running.
Always use the blades and bobbins recommended by the manufacturer.
Regularly inspect the device and check it for damage if it has been dropped or subjected to
impacts.
Stand up straight and take regular breaks so that you no longer put too much strain on your -
self.
Safety of maintaining, cleaning and transporting
Store the device in a dry place and out of the reach of children. Also protect it from rain and
moisture when in use.
Never store the device filled with petrol in surroundings in which escaping vapours could be ig-
nited by sparks or open sources of ignition.
Before storing, wait until the device has cooled down completely.
To reduce the risk of fire, keep the storage area free of easily inflammable materials.
Replace worn or damaged parts, and do not attempt to repair them.
Never use the device without the corresponding protective plates.
If the fuel tank needs to be emptied, do so only outdoors; escaping vapours mean both a fire
and a health hazard.
Clean and maintain the device before storing it. Also make sure that all nuts and bolts are
properly tightened.
Store the blades of the device in a dry place to avoid rust formation; do not use rusty or un -
sharp blades as this will reduce performance and increase the risk of injury.
To be able to transport the device, please note the following:
1. Switch the device off and let it cool down.
2. Remove the spark plug to prevent the device from starting accidentally.
3. Wear cut protection gloves to remove the blade.
4. Only carry the device by the handles. Place it in the vehicle so that it cannot tip over and
the blades cannot injure anyone. With the device tipping over, fuel could leak or people
near the device could be injured.
© by WilTec Wildanger Technik GmbH Item 61494 Page 6
http://www.WilTec.de
http://www.aoyue.eu 03 2021-1
http://www.teichtip.de
Residual dangers and safety precautions

Mechanical residual dangers

    •   Cuts, incisions: String and blade may cause severe incisions. Watch out for persons and an -
        imals not to stay in the work area.
    •   Catching, winding, coiling: Wires and cords may be caught by the blade or the string coil and
        may both damage the machine and cause injury. Remove any foreign objects from the area to
        be mown prior to getting down to work.
    •   Kickback: Strong kickbacks may occur on the blade working thick shrubbery. If the blade gets
        stuck, backlashes may occur in the extension tube. Do not work on thick shrubbery with the
        machine. Cut at sufficient speed or avoid jamming of the blade.

Dangers due to inattention and overestimation

    •   Negligent refusal to put on protective clothing: Refraining from wearing protective clothing can
        lead to very serious injuries. Always wear all required parts of protective clothing.
    •   Distraction, wrong behaviour: A lack of concentration at work can have serious consequences.
        Always be vigilant and focus on your work.

Dangers due to burns

Contact with the exhaust may cause burns. Let the exhaust cool down after the use.

Dangers due to noise

Hearing impairment: Frequent/long work with the brush cutter without ear protectors may result in
hearing impairment. Always wear ear protectors.

Dangers due to excessive heat

    •   Aspiration: Flue gases may be health hazardous. Use the machine only outside.
    •   Fire or explosion: Fuel mix is flammable. Do not smoke and do not handle open fire in the
        course of work and refuelling.

Dangers due to vibrations

Prolonged work with the unit may produce adverse effects on the human organism due to vibrations.
Take regular breaks.

Other dangers

    •   Objects in the work area: Small objects such as stones or pieces of wood can be ejected if
        they come into contact with the device. Make sure that no other people or animals are in the
        work area. Wear suitable protective clothing.
    •   Slips, trips or falls: Falls can lead to very serious injuries. Wear non-slip shoes, make sure you
        stand securely and always stay alert and focused.

© by WilTec Wildanger Technik GmbH              Item 61494                                          Page 7
http://www.WilTec.de
http://www.aoyue.eu                                                                              03 2021-1
http://www.teichtip.de
Parts lists

                                     Figure 1: driving unit
 № Name                                          № Name
  1   Front handle                               10 Fast coupling
  2   Harness loop hope                          11 Throttle lock
  3   Stop switch                                12 Socket spanner
  4   Throttle trigger lock                      13 S5 Allen key (5 mm)
  5   Air filter                                 14 S4 Allen key (4 mm)
  6   Start handle                               15 Open-end wrench
  7   Fuel tank                                  16 Screwdriver
  8   Throttle trigger                           17 Measuring beaker for fuel mixture
  9   Shoulder harness

© by WilTec Wildanger Technik GmbH         Item 61494                                     Page 8
http://www.WilTec.de
http://www.aoyue.eu                                                                     03 2021-1
http://www.teichtip.de
Pole pruner
Figures 2 and 3
№ Name № Name
1 Lock hole 4 Guide bar
2 Oil tank 5 Cutting cover
3 Chain
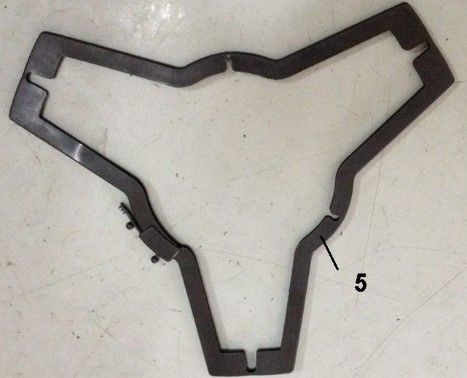
Hedge trimmer
Figures 4 and 5
№ Name № Name
1 Lock hole 4 Cutting unit
2 180° cutting unit adjusting lever 5 Cutting cover
3 Lever lock
© by WilTec Wildanger Technik GmbH Item 61494 Page 9
http://www.WilTec.de
http://www.aoyue.eu 03 2021-1
http://www.teichtip.deGrass trimmer and brush cutter
Figures 6 and 7
№ Name № Name
1 Lock hole 4 Metal blade
2 Guard 5 Cutting cover
3 String coil
Technical specifications
Motor
Motor type Air-cooled 2-stroke 1-cylinder petrol motor
Max. power (㎾) 1.3 (1.76 hp)
Max. rotation speed (rpm) 6500
Fuel tank capacity (ℓ) 1.2
Ignition Capacitor discharging ignition (CDI)
Mixing ratio 1:25 (oil:petrol)
Weight (㎏) 12.5
Brush cutter
Size (㎜) 255×1.4×25.4
Trimmer
Cutting width (㎜) 460
© by WilTec Wildanger Technik GmbH Item 61494 Page 10
http://www.WilTec.de
http://www.aoyue.eu 03 2021-1
http://www.teichtip.dePole/chain saw
Length (㎜) 400
Cutting length (㎜) 300
Chain pitch (inch) ⅜
Drive link width (㎜) 0.050
Hedge trimmer
Cutting length (㎜) 400
Working height (㎜) 2200
Extension pole (㎝) 30
Saw blade teeth (number) 40
Assembly
Assembling the driving unit
Delivered parts/accessories Assembly
Fig. 1-point 1 With the S4 Allen key, fix the
handle to the driving unit using
the 4 bolts and nuts supplied.
Assembling the pole pruner
Caution! The blades are very sharp. Always wear safety gloves when install or remove the blade.
Delivered parts/accessories Assembly
Fig. 2-point 3 1. First loosen the blade nut (1)
Fig. 2-point 4 using the open-end wrench in-
cluded in the scope of delivery
and remove the cover.
2. Dispose the chain and guide bar.
© by WilTec Wildanger Technik GmbH Item 61494 Page 11
http://www.WilTec.de
http://www.aoyue.eu 03 2021-1
http://www.teichtip.de3. Loop the chain around the bar and insert it into the machine.
4. When assembling, pay attention to the running direction of the
chain.
5. Replace the cover and secure it using the blade nut (1). Then
adjust the tension of the chain accordingly.
Assembling the brush cutter
Delivered parts/accessories Assembly
Fig. 6-point 2 1. Dispose all accessories first
Fig. 6-point 4 (pole, guard, metal blade,
4 screws and nuts).
2. Fasten the guard using the 4 screws and nuts. Use the included
S5 hexagon wrench (5) and the open-end wrench.
© by WilTec Wildanger Technik GmbH Item 61494 Page 12
http://www.WilTec.de
http://www.aoyue.eu 03 2021-1
http://www.teichtip.de3. Insert the supplied Allen key (5) into the hole (1) and loosen the
nut with the socket wrench (6) by turning it clockwise.
4. Remove the flange (2), cover (3) and nut (4).
5. Attach the blade to the drive shaft. Then fasten the flange, cover
and nut with the socket wrench (6) and turn it counter-clockwise.
Remove the Allen key again.
Assembling the grass trimmer
Delivered parts/accessories Assembly
Fig. 6-point 2 1. Dispose all accessories (pole,
Fig. 6-point 3 guard, string coil, 4 screws and
nuts).
2. Fasten the guard using the 4 screws and nuts. Use the S5
hexagon wrench (5) and the open-end wrench included in the
scope of delivery.
© by WilTec Wildanger Technik GmbH Item 61494 Page 13
http://www.WilTec.de
http://www.aoyue.eu 03 2021-1
http://www.teichtip.de3. Insert the supplied Allen key (5) into the hole (1) and loosen the
nut with the socket wrench (6) by turning it clockwise.
4. Remove the flange (2), cover (3) and nut (4).
5. Screw the string coil onto the drive shaft thread by turning it
counter-clockwise and then remove the Allen key.
Assembling the extension
Delivered parts/accessories Assembly
Fig. 1: driving unit Installing the extension:
Fig. 2, 3: pole pruner 1. Open the quick coupling by
Fig. 4, 5: hedge trimmer loosening the locking screw (1)
Fig. 6, 7: grass trimmer/brush and remove the metal cover.
cutter 2. Insert the extension into the
opened quick coupling as shown
in the picture until it clicks into
place.
3. Replace the metal cover (3)
and tighten the locking
screw (1).
Removing the extension:
1. Loosen the locking screw (1).
2. Press the metal clip (2) down and pull out the extension.
© by WilTec Wildanger Technik GmbH Item 61494 Page 14
http://www.WilTec.de
http://www.aoyue.eu 03 2021-1
http://www.teichtip.deBefore commissioning the machine
Caution! Before commissioning, check the device to ensure that it is intact. Do not switch the device
on if damage is visible.
Do not operate the device if one of the following points is not affirmed:
Yeah. Go to ... Nay. Go to ...
1. The tool is correctly mounted. 2 7a
2. All switches are working properly. 3 7a
3. The spark plug is tight enough. A loose spark plug can
4 7a
cause sparks and ignite the air-fuel mixture!
4. The handle is clean. 5 7a
5. The tool attachment chosen is securely attached, all moving
6 7a
parts of the machine run without interference or hindrances.
6. You are wearing the protective clothing described in these
instructions and have followed all the necessary precautions 7b 7a
for using the device.
7. a) Do not operate the device.
b) Get to work!
Fuel
Note: Always make sure that neither fuel nor lubricating oil gets into the ground.
The device is has a two-stroke engine and there-
fore requires an unleaded petrol-oil mixture, also
known as a two-stroke mixture.
Only use high-quality two-stroke oil and prepare
a fuel mixture with a mixing ratio of 25:1 (25 parts
petrol, 1 part oil). Make sure that you do not use
two-stroke oil for water-cooled engines or oil for
four-stroke engines.
Poor oil quality and an incorrect oil/fuel ratio with
a too high oil content (more than 2.5 %) can neg-
atively affect both the performance and the ser-
vice life of the device.
Shake the container used for mixing well so that
the oil and fuel mix evenly.
The fuel should have at least 93 octane. We also recommend unleaded petrol, as it leaves
less residue in the engine and on the spark plug and thus increases the service life of the
device.
Never use old or contaminated fuels or fuel mixtures.
In addition, avoid contaminating the tank with oil or water.
When the engine is under high load, knocking noises may occasionally occur. This is not a
cause for concern. However, if these noises occur in the ignition under normal load and with a
constant engine speed, it is advisable to change the fuel quality. If changing the fuel quality
does not result in any improvement, stop using the device and immediately seek advice from a
specialist.
For work at continuously high speeds, a fuel with a higher octane number is recommended.
We recommend using the supplied measuring beaker for the fuel mixture. This will help you to
achieve an optimal mixing ratio. Proceed as follows:
1. First pour fuel into the container until it reaches the “578.92” mark.
© by WilTec Wildanger Technik GmbH Item 61494 Page 15
http://www.WilTec.de
http://www.aoyue.eu 03 2021-1
http://www.teichtip.de2. Now fill up with oil until the liquid is at “600”.
3. Shake the mixture well so that it mixes optimally, and then pour it into the device.
Refuelling
Only refuel the machine in adequately lit areas to avoid spilling fuel.
Refuelling must also not take place near open flames or sources of ignition, as this can ignite
fuel vapours, which can lead to explosions.
Never refuel the device while it is in operation and allow the engine to cool down before
adding fuel.
Follow these steps to refuel the device:
1. Make sure that the engine is switched off and the device has cooled down sufficiently. The
on/off switch must be in the “OFF” position.
2. Check the current level of fuel by carefully removing the fuel filler cap. To do this, turn it
counter-clockwise.
3. Top up with fuel if necessary. Make sure that the tank is only filled up to the neck, as the
fuel expands due to the changing temperature.
4. Carefully tighten the tank cap again in a clockwise direction.
5. Check that the fuel cap is properly seated and tightly closed.
6. Remove any fuel remaining from the tank.
Commissioning
First press the stop switch.
Then put the carburettor lever to the start position
to engage the throttle.
Next, press the injection button 6 times to ensure
that there is sufficient petrol in the petrol lines.
© by WilTec Wildanger Technik GmbH Item 61494 Page 16
http://www.WilTec.de
http://www.aoyue.eu 03 2021-1
http://www.teichtip.de1. Now operate the throttle lock and then the
throttle.
2. Activate the start lever lock and hold the
throttle in the active position.
Now place the device on the floor, make sure that
it stands securely and place one hand between
the handle and the motor to be able to hold the
device. Make sure that no people or body parts
are close to the cutting tool and pull the starter
rope.
Operating instructions
Lubricating the pole pruner
1. Carefully remove the oil tank cap from the pru-
ner (1).
2. Fill the tank with lubricating oil.
Caution: Do not use old or contaminated oil.
Fasten the oil tank cap (1) making sure that no oil
can leak out.
4. Remove oil droplets and other residues from
the housing.
5. Empty the oil container (2) after each use to
ensure the long service life of the device.
Tensioning the chain
Always pay attention to the tension of the chain of the pruner, as an insufficiently tensioned chain in-
creases the play between bar and chain. This unintended free space, together with a high speed, can
cause the chain to jump off the rail, becoming a projectile, which can lead to damage to the device and
its surroundings as well as very serious injuries. In addition, an insufficiently tensioned chain wears out
faster.
© by WilTec Wildanger Technik GmbH Item 61494 Page 17
http://www.WilTec.de
http://www.aoyue.eu 03 2021-1
http://www.teichtip.de1. Before the chain can be tensioned, the blade
nut (1) must be loosened.
2. Turn the adjusting screw clockwise until the
chain rests on the bar but can still be moved eas-
ily (2).
Caution: Make sure that the chain is evenly and
reasonably tight at every point on the bar. A chain
too tight or too loose increases the risk of acci-
dents considerably and can lead to damage to the
device and its surroundings as well as very seri-
ous injuries.
3. The chain should turn freely. If this is not the
case, loosen the adjusting screw (2) by turning it
counter-clockwise.
4. As soon as the chain is optimally tensioned
and rests evenly on the rail, re-tighten the blade
nut. If the blade nut is not tightened, the blade
moves, releasing the chain tension.
Note: New chains tend to get longer. You should
therefore check a new chain after the first few
hours of operation. Let the chain cool down and
be sure to wear safety gloves.
Using the hedge trimmer
The hedge trimmer attachment is not only suitable for hedges, but can also be used to trim
other bushes.
The best cutting performance usually results when the hedge trimmer is brought up to the
hedge at a 15° angle.
To achieve a uniform hedge height, we recommend using a guideline.
Using the grass trimmer/brush cutter
If the metal blade of the brush cutter hits a stone or other hard object, it will cause kickback.
This rapid, jerky backward movement of the device can cause loss of control and serious in-
jury. Therefore, avoid stones and other obstacles.
Do not cut with the device above knee height; do not overestimate yourself.
Hold the head of the brush cutter tool at an angle of approximately 30° to the ground and
move your upper body in a semicircle to achieve the best possible mowing result.
If the cutting performance decreases, the following measure can help:
This device is equipped with an automatic length control of the double string. The cutting strings can
be automatically tracked through light contact between the mower head and the ground. If the string
length should exceed the length intended for the device, the string is automatically cut back to the cor -
rect length by the blade in the protective cover.
Caution! Never touch a hard surface with the mower head, such as an asphalt, stone or hard clay
floor, as this can damage the string coil head beyond repair. Be aware that the severed length of string
© by WilTec Wildanger Technik GmbH Item 61494 Page 18
http://www.WilTec.de
http://www.aoyue.eu 03 2021-1
http://www.teichtip.decan become a projectile due to the coil speed and, if inadequate safety clothing is worn, injuries can
result.
Replacing the cutting string
Hold the mower head removed from the machine
with one hand and loosen the cap with the other
hand by pressing the button (1) on the side of the
mower head and turning the cap clockwise.
Remove the coil.
Remove the remnants of the old string and insert
a new nylon string, which should not be longer
than 2.5 m. Completely unwind the new string be-
fore placing it in the centre of the coil. Make sure
that both ends of the string have the same length.
Attach the string to the slot provided and press it
down.
Roll both ends of the string tightly and neatly onto
the coil, making sure that one end of each is in a
compartment on the coil. Secure the ends in the
brackets provided, making sure the ends are long
enough to thread into the eyelets on the case.
The coil divider should still be visible even with
the string fully rolled up.
© by WilTec Wildanger Technik GmbH Item 61494 Page 19
http://www.WilTec.de
http://www.aoyue.eu 03 2021-1
http://www.teichtip.deThread the two ends into the coil case and rein-
sert the coil.
Make sure that both the spring and washer are in
their original places in the housing before reas-
sembling the protective cap. Press and hold the
button (1) on the side of the mower head again
while tightening the cap by turning it counter-
clockwise.
Before starting the engine, cut off any parts that
protrude beyond the blade in the protective cover
and make sure that the protective cap is properly
and securely in place.
Maintenance
Regular maintenance is particularly important for safe, economical and faultless operation. In the fol-
lowing you will find a maintenance table that should help you to ensure error-free operation and a long
service life of the device.
Caution! Switch off the engine before starting any maintenance work. If individual experiments require
the engine to be running, they may only be carried out outdoors or in well-ventilated rooms, as the ex -
haust gases from the device contain poisonous carbon monoxide. Always use dealer-approved and
high-quality attachments and parts, as a lack of compatibility or quality can lead to damage to the
device and its surroundings as well as to an increased risk of accidents and very serious injuries.
Period
Maintenance type
Before every use Weekly Monthly
Cleaning the body of the machine X
Checking that the throttle and throttle lock are working
X
properly
Checking that the motor switch is working properly X
Making sure the blades do not move when the tool is idle X
Checking that the blades are intact; replace them if there
X
are signs of damage or wear
Checking that the protective cover is intact; replace it if
X
there are signs of damage or wear
Cleaning the air filter; exchange, if necessary X
Checking that all nuts and bolts are tightened X
Ensuring that the device is not leaking oil or fuel X
Checking that the starter and the starter rope are intact X
© by WilTec Wildanger Technik GmbH Item 61494 Page 20
http://www.WilTec.de
http://www.aoyue.eu 03 2021-1
http://www.teichtip.deCleaning the spark plug from the outside; remove the spark
plug to check the electrode gap, set the gap to 0.6– X
0.7 mm; replace the spark plug, if necessary
Cleaning the cooling system X
Cleaning the outside of the carburettor and the area around
X
it
Checking that the flange, cap and nut are correctly fitted
X
and tightened
Checking that the tank is intact X
Checking all connections and cables X
Checking that the coupling, the clutch springs and clutch
drum are worn; if necessary, have these parts replaced by X
an authorized specialist
Replacing the spark plug; make sure it has a cap X
Removing dirt, oil residue, and other debris from the engine
X
and exhaust
Maintenance work to be done Every Every
Monthly/after
regularly Before every 3 months/after 6 months/after
25 operating
use 25 operating 50 operating
Part Type hours
hours hours
Air filter Cleaning X(1)
Checking,
Valve X(2)
cleaning
Fuel tank and
Cleaning X(2)
filter
Lubricant in-
side the gear Refuelling X(1)
box
Blades Checking X X
Checking,
Fuel lines and replacing Every 3 years(2)
if necessary
Notes:
(1) With the device operated in dusty area, this type of maintenance should be done more often.
(2) This type of maintenance should only be carried out by qualified persons.
© by WilTec Wildanger Technik GmbH Item 61494 Page 21
http://www.WilTec.de
http://www.aoyue.eu 03 2021-1
http://www.teichtip.deCleaning the air filter
1. Loosen and remove the screw on the air filter
cover.
2. Remove the filter and wash it in solvent.
3. Squeeze the filter thoroughly to remove any
excess oil, but do not wring it out.
4. Reinstall the air filter.
5. Reattach the air filter cover.
Warning: The use of petrol or flammable solvents can
cause a fire or explosion. Therefore, only use soapy
water or non-flammable solvents. Never operate the
machine without an air filter!
Spark plug
Recommended spark plug type: L7T
To ensure proper engine operation, the spark plug must have a suitable cap and be free of de-
posits.
1. Remove the spark plug cap from the housing.
2. Remove the cap from the spark plug.
3. Clean the area around the spark plug base.
4. Remove the spark plug with the included socket wrench.
5. Visually inspect the spark plug and carefully remove any car-
bon deposits with a wire brush.
6. Look for any discolouration on the spark plug head; it should
be brownish in colour.
7. Check the electrode gap; the permissible distance is between
0.6 and 0.7 mm.
8. Carefully reinsert the spark plug by hand.
9. Once the spark plug is in place, tighten it with the socket
wrench.
10. Reinstall the spark plug cap.
11. Refit and reattach the spark plug cover.
Cleaning
Cleaning the spark plug
1. Remove the plastic cover.
2. Pull off the spark plug cover and loosen the
connector using the socket wrench.
3. If necessary, clean, replace, or readjust the
spark plug.
© by WilTec Wildanger Technik GmbH Item 61494 Page 22
http://www.WilTec.de
http://www.aoyue.eu 03 2021-1
http://www.teichtip.deCleaning the device
Always keep the device clean. Only clean it with a damp, soft cloth and only use mild deter -
gents for cleaning. Do not use water or large amounts of other liquids as this will cause irre-
parable damage.
Make sure that the cleaning agent that you use does not contain benzene, trichloroethylene,
chloride or ammonia, as these substances attack the plastic housing of the device.
Make sure that all entrances and exits for ventilation are always free of dirt and are not
blocked by foreign objects. Cleaning with a soft brush and compressed air is usually sufficient
to ensure sufficient cleanliness.
Always wear gloves and eye protection when cleaning the device.
Emptying the tank
1. Place the device on a flat, stable surface and start the engine to warm it up. Wait a few
minutes and then turn the engine off again.
2. With the device switched off, carefully unscrew and remove the tank cap.
3. Carefully drain the fuel into a container provided for this purpose.
4. Operate the pump several times to drain the fuel that is still in the lines.
5. Close the tank with the tank cap.
Troubleshooting
Problem Condition Cause Solution
Motor stalls, is difficult Fuel does not get to the Fuel filter blocked
to start, or does not carburettor. Clean or replace.
Fuel supply blocked
start at all.
Carburettor problems
Fuel does not get to the Carburettor problems Consult your distributor.
cylinder.
Presence of fuel in ex- Wrong fuel mixing ratio Open throttle valve;
haust clean or replace air fil-
ter; re-adjust carburet-
tor; consult distributor.
No spark Switch in off position Set switch to “on”.
Electric problem
Consult distributor.
Locked switch
Wrong electrode gap Adjust electrode gap to
0,6–0,7 mm.
Electrodes contamin-
ated
Clean or replace.
Electrodes contamin-
ated with fuel
Defective spark plug Replace.
Motor turns, but stalls or Dirty air filter Clean or replace.
does not accelerate Presence of dirt or
Dirty petrol filter Replace.
properly. residues in the fuel
Blocked fuel vent Clean or replace.
Dirty or worn spark plug Fair wear or tear Clean, adjust or re-
place.
© by WilTec Wildanger Technik GmbH Item 61494 Page 23
http://www.WilTec.de
http://www.aoyue.eu 03 2021-1
http://www.teichtip.deWrong adjustment Vibration Re-adjust.
Excessive dirt Prolonged use in dirty Clean.
or dusty places
Plate cracked, contam- Fair wear or tear Replace.
inated or perforated
Motor does not engage. Internal motor problem Consult distributor.
Storing
• Transporting the machine in a car, please empty the fuel tank completely first to avoid the
leakage.
• Store the machine, operating instructions and where necessary the accessories in the original
packaging. Thus you will always have all the information and parts ready to hand.
• Pack the device well or use the original packaging in order to avoid transit damage. Use pro -
tective gloves when handling the blades. Keep the blade protection device on, except when in-
tervening directly on the blade.
• Store the machine in dry and well ventilated surroundings and with the fuel tank empty. Do not
store fuel next to the machine.
Important notice:
The reprint or reproduction, even of excerpts, and any commercial use, even in part of this instructions
manual require the written permission of WilTec Wildanger Technik GmbH.
© by WilTec Wildanger Technik GmbH Item 61494 Page 24
http://www.WilTec.de
http://www.aoyue.eu 03 2021-1
http://www.teichtip.deYou can also read