HORIZON 6 FLEX FA Operator's Manual - HORIZON 6 FLEX FA - Drucker Diagnostics
←
→
Page content transcription
If your browser does not render page correctly, please read the page content below
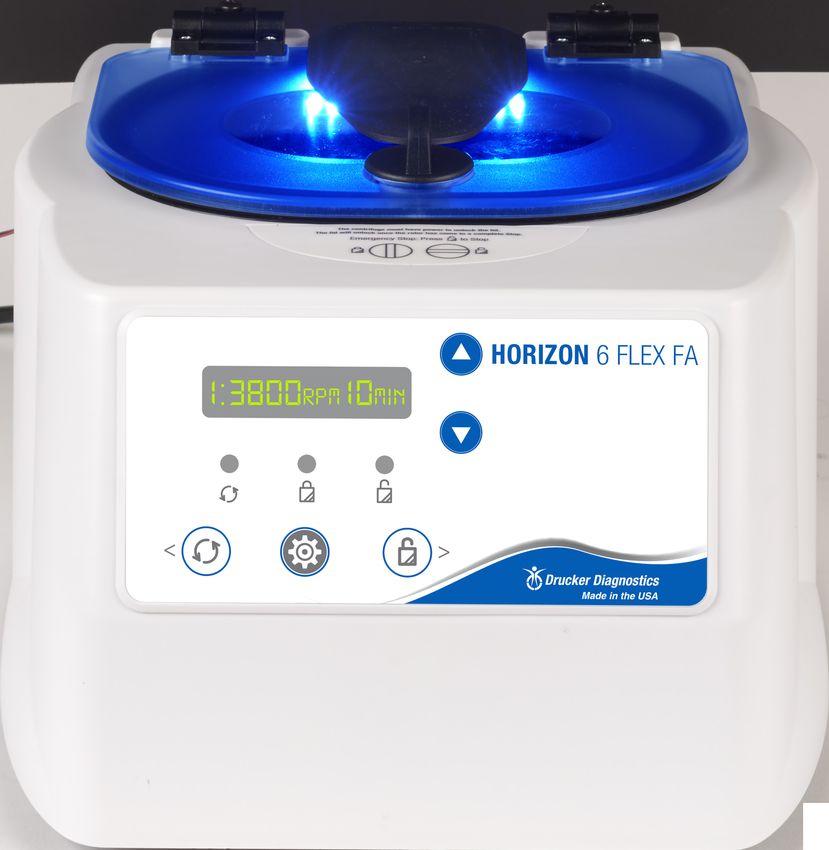
HORIZON 6 FLEX FA

HORIZON 6 FLEX FA
Operator’s Manual

                    PRODUCT FAMILY HORIZON SERIES (HORIZON 6 FLEX, HORIZON 6 FLEX FA)
SETTINGS • CONFIGURACIÓN • PARAMÈTRES • EINSTELLUNGEN • IMPOSTAZIONI • CONFIGURAÇÕES
(EN) For convenience, the first three (3) cycles are preset for common applications and can be reprogrammed to your validated cycles.
(ES) Los primeros 3 ciclos están predeterminados para aplicaciones comunes y pueden reprogramarse con los valores de sus ciclos validados.
(FR) Les 3 premiers cycles sont prédéfinis pour les applications courantes et peuvent être reprogrammés sur vos cycles validés.
(DE) Die ersten 3 Zyklen für häufige Anwendungen voreingestellt und können zu Ihren validierten Zyklen umprogrammiert werden.
(IT) I primi 3 cicli sono preimpostati per applicazioni comuni, ma possono essere riprogrammati con i propri cicli convalidati.
(PT) Os 3 primeiros ciclos estão presentes em aplicações comuns e podem ser reprogramados para seus ciclos validados.
1 - Chemistry 2 - Coag (PPP) 3 - Urine
RPM (TPM|U/min|Giri/min) 3900 @ 10 min 3800 @ 15 min 2200 @ 5 min
75-100 MM (3-10 mL) 1600 g 1500 g 500 g
125 MM (15 mL) 1850 g --- 600 g
SPECIFICATIONS • ESPECIFICACIONES • CARACTÉRISTIQUES • ANFORDERUNGEN • SPECIFICHE • ESPECIFICAÇÕES
CAPACITY (Capacidad|Capacité|Röhrchenkapazität|Capacità|Capacidade) 6 (75-125 mm, 3-15 mL)
12 in x 14 in x 9 in
DIMENSIONS (Dimensiones|Maße|Dimensioni|Dimensões)
(30 cm x 36 cm x 23 cm)
WEIGHT (Peso|Poids|Gewicht|Peso) 12 lbs (5.4 kg)
SOUND LEVEL (Nivel de ruido|Niveau sonore|Lautstärkepegel|Rumorosità|Nível de ruído) 64 dB A
ROTOR RADIUS (Radio|Rayon|Raggio|Raio) 3.75 in (9.5 cm), 4.25 in (11 cm)
CENTRIFUGE MOTOR (Moteur|Motore) ½ H.P. Brushless
CYCLE TIME (Tiempo del ciclo|Durée du cycle|Zykluslaufzeit|Durata ciclo|Tempo de ciclo) 1 – 30 min (+/- 2%)
VOLTAGE (Voltaje|Tension|Spannung|Tensione|Tensão) 95 -253 VAC
FREQUENCY (Frecuencia|Fréquence|Frequenz|Frequenza|Frequência) 50/60 Hz
POWER REQUIREMENT (Energía necesaria|Alimentation|Energiebedarf|Requisiti di alimentazione|
220 Watts
Requisito de potência)
ENVIRONMENTAL RANGE (Rango de temperatura ambiental|Plage de température de
16 – 32° C
fonctionnement|Umgebungsbedingungen|Intervallo temp. ambiente|Faixa ambiental)
MAX G-FORCE (Fuerza g máxima|Force G maximale|Maximale g-Kraft|Forza G massima|Força G
1600 g / 1850 g
máxima)
MAX SPEED (Velocidad máxima|Vitesse maximale|Maximale Beschleunigung|Velocità
3900 RPM
massima|Velocidade máxima)
INTENDED USE
General purpose laboratory Centrifuge intended for safe and rapid density based separation of fluids, including physiologic fluids,
in approved specimen receptacles for qualitative or quantitative test procedures. As a general purpose laboratory centrifuge, it is
designed to also run other approved containers filled with chemicals (non-flammable, non-explosive, non-volatile, and non-highly
reactive only), environmental samples, and other non-human body samples. This device is intended to be operated by properly
trained personnel who have carefully read the operating manual and are familiar with the function of the device.
[Refer to the clinical laboratory method specified by the specimen receptacle manufacturer or established by the medical
technology for the products applications.]Contents
English ...............................................................................................................................................1
Model Description .....................................................................................................................................................2
Features ................................................................................................................................................................2
Warranty ...............................................................................................................................................................2
Initial Setup ................................................................................................................................................................3
Quick Start .................................................................................................................................................................4
Single Cycle Lock ...................................................................................................................................................5
Preset Lock ............................................................................................................................................................5
Setting or Modifying a Cycle ......................................................................................................................................5
Display Cycle Count ...................................................................................................................................................6
Operation...................................................................................................................................................................6
Balancing Loads .........................................................................................................................................................7
Calculating the G-Force .............................................................................................................................................7
Care and Preventative Maintenance .........................................................................................................................8
Cleaning and Disinfection ..........................................................................................................................................8
Troubleshooting.........................................................................................................................................................9
Español ..........................................................................................................................................11
Descripción del Modelo ...........................................................................................................................................12
Funciones ............................................................................................................................................................12
Garantía ..............................................................................................................................................................12
Configuración Inicial ................................................................................................................................................13
Inicio Rápido ............................................................................................................................................................14
Bloqueo de un Solo Ciclo ....................................................................................................................................15
Bloqueo de la configuración predeterminada ....................................................................................................15
Configuración o modificación de un ciclo ................................................................................................................15
Operación ................................................................................................................................................................16
Equilibrio de las Cargas ............................................................................................................................................16
Cuidado y Mantenimiento Preventivo.....................................................................................................................17
Limpieza y Desinfección ...........................................................................................................................................17
Resolución de Problemas ........................................................................................................................................18
Cómo Calcular la Fuerza G .......................................................................................................................................20
03-0-0002-0162 Rev. AFrançais .........................................................................................................................................21
Description du modèle ............................................................................................................................................22
Caractéristiques ..................................................................................................................................................22
Garantie ..............................................................................................................................................................22
Configuration initiale ...............................................................................................................................................23
Démarrage rapide ....................................................................................................................................................24
Verrouillage d’un cycle unique ...........................................................................................................................25
Verrouillage des cycles préprogrammés .............................................................................................................25
Configuration ou modification d’un cycle ...............................................................................................................25
Fonctionnement ......................................................................................................................................................26
Équilibrage des charges ...........................................................................................................................................26
Entretien et maintenance préventive ......................................................................................................................27
Nettoyage et désinfection .......................................................................................................................................27
Dépannage ...............................................................................................................................................................28
Calcul de la force G ..................................................................................................................................................30
Deutsche........................................................................................................................................31
Modellbeschreibung ................................................................................................................................................31
Besonderheiten...................................................................................................................................................32
Garantie ..............................................................................................................................................................32
Inbetriebnahme .......................................................................................................................................................33
Quick-Start ...............................................................................................................................................................34
Sperren eines einzelnen Zyklus ...........................................................................................................................35
Voreingestellte Sperre ........................................................................................................................................35
Einstellen oder Ändern eines Zyklus ........................................................................................................................35
Betrieb .....................................................................................................................................................................36
Gleichmäßiges Beladen ...........................................................................................................................................36
Pflege und vorbeugende Wartung ..........................................................................................................................37
Reinigung und Desinfektion .....................................................................................................................................37
Problembehebung ...................................................................................................................................................38
Berechnung der g-Kraft ...........................................................................................................................................40
Italiano ..........................................................................................................................................41
Descrizione del modello ..........................................................................................................................................41
Caratteristiche ....................................................................................................................................................42Garanzia ..............................................................................................................................................................42
Configurazione iniziale .............................................................................................................................................43
Guida rapida ............................................................................................................................................................44
Blocco singolo .....................................................................................................................................................45
Blocco cicli preimpostati .....................................................................................................................................45
Impostazione o modifica di un ciclo ........................................................................................................................45
Funzionamento ........................................................................................................................................................46
Bilanciamento dei carichi.........................................................................................................................................46
Cura e manutenzione preventiva ............................................................................................................................47
Pulizia e disinfezione................................................................................................................................................47
Risoluzione dei problemi .........................................................................................................................................48
Calcolo della forza G ................................................................................................................................................50
Português ......................................................................................................................................51
Descrição do modelo ...............................................................................................................................................52
Características .....................................................................................................................................................52
Garantia ..............................................................................................................................................................52
Configuração inicial .................................................................................................................................................53
Início rápido .............................................................................................................................................................54
Bloqueio de ciclo único .......................................................................................................................................54
Bloqueio predefinido ..........................................................................................................................................55
Configurar ou modificar um ciclo ............................................................................................................................55
Exibir contagem de ciclos ........................................................................................................................................56
Operação .................................................................................................................................................................56
Balanceamento de cargas ........................................................................................................................................56
Calcular a força G .....................................................................................................................................................60
Cuidados e manutenção preventiva ........................................................................................................................57
Limpeza e desinfecção .............................................................................................................................................57
Resolução de problemas..........................................................................................................................................586 FLEX
English
Operator’s Manual
|1MODEL DESCRIPTION
HORIZON is a versatile line of centrifuges pre-programmed with the most convenient cycle settings for biological
sample processing. Cycle settings can be changed to accommodate custom settings.
FEATURES
o The first three (3) cycles are conveniently pre-set and labeled for your most common applications. Use the default
cycles or customize them as needed.
o If desired, the control panel can be temporarily locked on one cycle for error-free reproducibility.
o Up to 10 cycles can be programmed for time, speed, and braking and labeled with a custom name. Cycles can be
programmed by g-force (RCF) rather than speed to facilitate matching validated cycles and manufacturers IFUs.
o Lid lighting indicates the centrifuge’s status (ready, running, done), informing the operator when tubes are ready
for the analyzer and preventing tubes from being left in the centrifuge longer than necessary (patent pending).
o A traditional audible alert indicates the completion of the cycle. The audible alert can be muted.
o Cool–Flow design prevents overheating of samples by using ambient air to keep specimens at room temperature.
o The tube holders are fiber reinforced for high strength, durability, and years of trouble-free use.
o A clear lid permits safe observation of samples and optical calibration of speed.
o The lid safety system prevents the centrifuge from operating unless the lid is closed and latched.
o The lid safety system only allows entry into the centrifuge after the rotor has completely stopped.
o The high-power brushless motor provides years of operation with no routine maintenance.
WARRANTY
Drucker Diagnostics warranties that this centrifuge is free from defects in workmanship and parts for 2 years.
WARNING: For the safety of both the operator and service personnel, care should be taken when using
this centrifuge if handling substances that are known to be toxic, radioactive or contaminated with
pathogenic microorganisms. Use appropriate personal protection equipment (PPE). When Risk Group II
materials are used, (as identified in the World Health Organization “Laboratory Bio-Safety Manual”), a Bio-
Seal should be employed. In the event that materials of a higher risk group are being used, more than one
level of protection must be provided. The use of flammable or explosive materials as well as those
materials which have a vigorous chemical reaction is prohibited.
Unplug the centrifuge before cleaning or performing maintenance.
WARNING: Inspect centrifuge for cracks or physical damage to cabinet, lid, rotor, or tube holders. Damage
may result in unsafe operation. Discontinue use until repairs have been performed.
This equipment generates, uses, and can radiate radio frequency energy, and if not installed and used in
accordance with this operator manual, may cause interference to radio communications.
|2Operation of this equipment in a residential area may cause interference, in which case the user will be
required to correct the interference at his own expense.
INITIAL SETUP
o Unpack and verify that all the following are included:
• Centrifuge
• Power cord
• Tube holders
• Operating manual
• Product insert
o Setup the centrifuge on flat and level surface. A bench top clearance height of 21” (54 cm) is required to open
the lid.
o The centrifuge should have 6” (15 cm) of clear space around the centrifuge. Proper ventilation is necessary to
prevent the overheating of samples as well as premature failure of the centrifuge. Choose an area which allows
unencumbered air flow, and where the temperature remains between 16°C and 32°C.
o No hazardous material shall be permitted in the clearance envelope during operation.
o The operator time within the envelope shall be limited to the time necessary for loading, unloading, and
centrifuge operation only.
o Plug the line cord into the centrifuge.
o Plug the line cord into an approved electrical outlet.
o Turn on the power switch in the back of the centrifuge.
B E SURE THE ELECTRICAL OUTLET IS ALWAYS ACCESSIBLE AS THE LINE CORD IS THE MEANS OF EMERGENCY
DISCONNECTION !
|3QUICK START
Begins running the cycle displayed on the screen. The lid must be
Start
closed.
Allows access into the rotor chamber by engaging the unlocking
Unlock
mechanism. Entry is only possible when the rotor is stopped.
Pressing the UNLOCK button during operation will terminate the
Stop
run and unlock the lid after the rotor has come to a stop.
Press the up and down buttons next to the screen to select the
Cycle Selection
desired saved cycle.
To ensure repeatability, the centrifuge can be locked either on one cycle (Single Cycle Lock) or restricted to the saved
cycles (Preset Lock). The Single Cycle Lock also prevents making changes to the parameters of the selected cycle.
The Preset Lock allows selection of any saved cycle, but prevents changing the parameters of saved cycles.
|4SINGLE CYCLE LOCK
Select desired cycle. Press and hold the UNLOCK button for 5
Lock on Single Cycle
seconds. Two beeps will confirm that cycle selection is locked.
To re-enable cycle selection, press and hold the UNLOCK button
Cancel Single Cycle
for 5 seconds. Three beeps will confirm that cycle selection is now
Lock
unlocked.
PRESET LOCK
Enter Settings
Press the GEAR button.
Mode
Press and hold the UNLOCK button for 5 seconds. Two beeps will
Lock Saved Cycles
confirm that the Preset Lock is active.
With lid open and while not in Settings mode, press and hold the
Cancel Preset Lock UNLOCK button for 5 seconds until two beeps are heard. Saved
cycles can again be edited or programmed.
SETTING OR MODIFYING A CYCLE
Up to 10 cycles can be named, programmed for time, speed, and braking, and saved in memory.
Press the up and down buttons next to the screen to select the
Cycle Selection
desired cycle.
Enter Programming
Press the GEAR button.
Mode
Navigate between Use the left and right arrow button until the parameter to be
Parameters edited is blinking and underlined.
Change Parameter To change the parameter shown on the display, use the up and
Values down buttons next to the screen.
HORIZON 6 Flex FA only: To display the real g-force (RCF) for the
cycle, the right tube holder must be selected. Universal blue tube
Displaying the holders accommodate 75 and 100 mm tubes. 125 mm tubes
Correct g-force require the orange tube holder. If the tube holder selection in the
program does not match the tube holder used, the RCF number
displayed will not reflect the actual value.
|5Navigate to the cycle name with the left and right arrow. Change
Naming the Cycle the blinking character of the name with the up and down buttons,
then move to the next character with the right arrow. Repeat.
Save and Exit Press the GEAR button. The cycle displayed on the screen will be
Programming Mode automatically saved.
DISPLAY CYCLE COUNT
These actions will display the cycle count.
Enter Settings
Press the GEAR button.
Mode
Navigate to Cycle
Press the left arrow once to access the cycle counter
Counter
Exit Settings Mode Press the GEAR button.
OPERATION
o Place the tubes into the tube holders. Be sure to follow the rules for balanced loads as listed in the next section.
o Close the lid and turn the lid knob clockwise to its complete stop position.
o The digital screen shows the currently selected cycle. To select another cycle, press the UP or DOWN button in
succession until the desired cycle is selected.
o Pushing the START button on the control panel will start the spin cycle.
o When the cycle is completed, the rotor will slow to a complete stop and the lid light will flash.
o The unlocking mechanism will engage for 60 seconds allowing entry into the rotor chamber. To unlock after more
than 60 seconds have elapsed, press the UNLOCK button. The lid will unlock for another 15 seconds.
o Turn the lid knob counterclockwise and open the lid. The lid light will turn off.
|6BALANCING LOADS
Your centrifuge must contain a balanced load to work properly. Spinning balanced loads will extend the life of the
centrifuge and produce better results. Use the following rules when loading the rotor. If an odd number of samples
is to be spun, fill a tube with water to match the weight of the unpaired sample and place it across from this sample.
Opposing tube holders must be equally loaded or empty or loaded with equally weighted samples.
When loading only 3 tubes, they must be of equal weight.
CALCULATING THE G-FORCE
The I.F.U.s of tube manufacturers recommend cycles at a minimum G-Force, which can be calculated if you know
the RPM and the radius. Use the formula below or go to www.druckerdiagnostics.com/g-force-calculator/.
In Centimeters: In Inches:
RCF or G-force = 0.00001118 x RCF or G-force = 0.0000284 x
Rotor Radius (cm) x (RPM)2 Rotor Radius (in) x (RPM)2
|7CARE AND PREVENTATIVE MAINTENANCE
With proper care and maintenance, your centrifuge will provide years of laboratory service. For proper care, the
following steps should be taken:
o Always Spin Balanced Loads: Make certain that you are always spinning a balanced load, as shown in the
previous section. These centrifuges have a unique counter balanced motor mounting design which produces
excellent vibration dampening. However, out–of–balance loads may break glass test tubes and may produce
unsatisfactory separation results. Proper load balancing will improve sample separation and extend the life of
the centrifuge.
o Motor and Electrical Maintenance: The highest quality electrical components have been selected for the
centrifuges and should not need maintenance or servicing for the life of the centrifuge.
o Tube Holder Replacement: It is recommended that the tube holders be replaced after 24 months of use.
Inspect tube holders regularly for cracks. If cracks are discovered, replace immediately.
o Remove Accessories Before Moving: All tube holders, samples, and caps must be removed from the rotor
chamber before transporting or storing the centrifuge to prevent damage and injury.
CLEANING AND DISINFECTION
To prolong the life of the centrifuge, cleaning and disinfection is recommended every six months or whenever there
is a spillage or tube breakage. Contaminants must be removed immediately or corrosion and premature
degradation of components can occur. Before using any cleaning or decontamination methods other than those
recommended by the manufacturer, users should verify with the manufacturer that the proposed method will not
damage the equipment.
o Unplug the centrifuge before cleaning.
o Use appropriate personal protective equipment (PPE).
o Apply cleaning solutions with a towel or cloth. Do not submerge the centrifuge in water or other cleaning
solutions as this will cause damage and void the warranty.
o ONLY isopropyl alcohol or a 10% (5500 PPM) bleach solution should be used to disinfect the centrifuge and its
accessories.
o All surfaces must be dried immediately after cleaning and disinfecting.
TBQ G ERMICIDAL PRODUCTS ARE NOT RECOMMENDED AS THEY MAY CAUSE DAMAGE TO THE
CENTRIFUGE . W IPE OFF THOROUGHLY AFTER USE TO PREVENT VOIDING THE WARRANTY .
o Fully/partially halogenated hydrocarbons, ketones, esters, ethers, benzyls, ethyl benzenes, and all other
chemicals not prescribed by the manufacturer shall not be used as they may cause damage to the rotor chamber,
rotor, tube holders, accessories and centrifuge exterior and void the warranty.
|8TROUBLESHOOTING
NOTE: The latch must be turned completely clockwise to its stop position for the centrifuge to operate.
The centrifuge does not run o Verify that the centrifuge is powered. The screen should be lit.
o If “Lid not closed” message is displayed, make sure the lid latch
is turned completely clockwise to its stop position.
o If the centrifuge still does not run, contact Customer Service.
The rotor does not spin freely o Make sure nothing has fallen into the rotor chamber,
following the procedure above.
o If nothing obstructs the rotor, the rotor may be damaged.
Contact Customer Service for further assistance.
The centrifuge makes a rattling noise o Stop the centrifuge. Open the lid.
when running o Wearing PPE, remove tubes and tube holders/buckets and
look for fallen objects or debris. Carefully reach inside the
rotor chamber with a tool to remove them.
o Inspect the rotor, tube holders or buckets for damage.
o If the tube holders or buckets have any damage, even slight,
safely dispose of them and replace them.
o If the rotor appears damaged, contact Customer Service for
further assistance.
Excessive noise or vibration when the o Verify that all four centrifuge feet are properly seated on a flat
centrifuge is running surface.
o Insure that the load is balanced according to instructions in the
“Balancing Loads” section of this manual.
o Make sure that nothing has fallen into the rotor chamber.
The centrifuge stops and beeps The load is not balanced. Press the UNLOCK button, open the lid,
continuously and balance the load as recommended elsewhere in this manual.
The centrifuge is stuck on one of the
Cycle selection is locked. Press the UNLOCK button for 5 seconds.
settings
The cycle time and speed are not set to Check the setting by following the instructions in the section on
the desired value Changing Cycle Settings. If the preset is not the desired length,
follow the procedure on the same page to change the preset time.
Cycle parameters cannot be changed o If cycle selection is locked on one cycle, press the UNLOCK
button for 5 seconds. Then, press the GEAR button and follow
the instructions elsewhere in this manual.
o If different saved cycles can be selected but not modified, the
centrifuge is in Preset Lock mode. Press the GEAR button, then
the UNLOCK button for 5 seconds. You should now be able to
change cycle parameters.
|9The centrifuge does not unlock after a o Wait until the rotor has come to a complete stop. If the lid knob
run is completed still cannot be rotated, press the UNLOCK button and try again.
o If no LED light is on, the unit is
not powered and the lid will not
unlock by conventional means.
Remove the latch label and use a pen
to manually disengage the locking
mechanism. Pull the mechanism
towards the control panel and then
unlatch and open the lid.
o If the unit is damaged, contact Customer Service for assistance.
The lid does not open o Insure that the lid knob is turned fully counterclockwise.
o If the knob cannot be turned counterclockwise, turn it fully
clockwise, press UNLOCK, and turn counterclockwise.
o If the lid remains locked after this and will not unlock, the
electronics may have been damaged. Contact customer service
for assistance.
Clicking noise during braking gets loud
o Make sure that the screw in the center of the rotor is tight.
Lid does not stay up
o Tighten the center screw on the lid hinge.
Complies with UL61010-1/CSA C22.2 No. 61010-1 and IEC61010-2-020
Protected by U.S. Patents #6,811,531, # 7,422,554, #D718,463, & #D734,489. Other Patents Pending
INSTRUCTIONS FOR DISPOSAL OF WEEE BY USERS IN THE EUROPEAN UNION
This product must not be disposed of with other waste. Instead, it is the user’s responsibility to
dispose of their waste equipment by handing it over to a designated collection point for the
recycling of waste electrical and electronic equipment. The separate collection and recycling of
your waste equipment at the time of disposal will help to conserve natural resources and ensure
that it is recycled in a manner that protects human health and the environment. For more
information about where you can drop off your waste equipment for recycling, please contact
your local city office, waste disposal service, or where you purchased the product.
| 106 FLEX
Español
Manual del operador de centrífuga
| 11DESCRIPCIÓN DEL MODELO
FUNCIONES
o Los primeros tres (3) ciclos tienen una configuración sencilla predeterminada y están etiquetados para las
aplicaciones más comunes. Use los ciclos predeterminados o modifíquelos según sea necesario.
o Si lo desea, puede bloquear temporalmente el panel de control en un ciclo para una reproducibilidad sin errores.
o Pueden programarse hasta 10 ciclos con parámetros de tiempo, velocidad y desaceleración, y pueden etiquetarse
con nombres personalizados. Los ciclos pueden programarse por fuerza g (fuerza centrífuga relativa [FCR]) en
lugar de velocidad para facilitar la concordancia con los ciclos validados y las instrucciones de uso de los
fabricantes.
o Las luces en la cubierta muestran el estado de la centrífuga (lista, en operación, finalizado) e informan al operador
cuando los tubos están listos para el análisis, lo cual evita que estos permanezcan en la centrífuga más tiempo
del necesario (patente pendiente).
o Una alerta sonora tradicional indica la finalización del ciclo. La alerta sonora puede silenciarse.
o El diseño de flujo de aire frío evita que las muestras se sobrecalienten al usar aire del entorno para mantenerlas
a temperatura ambiente.
o Los portatubos están reforzados con fibra para ofrecer gran resistencia, durabilidad y años de uso sin problemas.
o La cubierta transparente permite observar con seguridad las muestras y calibrar de manera óptica la velocidad.
o El sistema de seguridad de la cubierta evita que la centrífuga entre en operación si la cubierta no está cerrada y
asegurada.
o El sistema de seguridad de la cubierta solamente permite el acceso a la centrífuga una vez que el rotor se haya
detenido por completo.
o El motor potente sin escobillas ofrece años de operación sin necesidad de mantenimiento de rutina.
GARANTÍA
Drucker Diagnostics garantiza que esta centrífuga no tendrá defectos de mano de obra ni de piezas durante
2 años.
ADVERTENCIA: Por la seguridad del operador y del personal de servicio, es necesario tener cuidado al usar
esta centrífuga cuando se manipulen sustancias que se sepa que son tóxicas, radioactivas o que estén
contaminadas con microorganismos patógenos. Use el equipo de protección personal (personal protection
equipment, PPE) adecuado. Es necesario emplear un sello biológico cuando se utilicen materiales del grupo
de riesgo II (según se identifican en el "Manual de bioseguridad en el laboratorio" de la Organización
Mundial de la Salud). En caso de que se usen materiales de un grupo de riesgo mayor, debe proporcionarse
más de un nivel de protección. Está prohibido el uso de materiales inflamables o explosivos, así como de
materiales que tengan una reacción bioquímica vigorosa.
Desconecte la centrífuga antes de limpiarla o darle mantenimiento.
ADVERTENCIA: Inspeccione la centrífuga para verificar que no haya grietas ni daños físicos en la cámara,
la cubierta, el rotor y los portatubos. Los daños pueden ocasionar condiciones inseguras de operación.
Detenga el uso hasta que se realicen las reparaciones pertinentes.
| 12El equipo genera, usa y puede radiar energía de radiofrecuencia y, si no se emplea e instala como se indica
en este Manual del operador, puede causar interferencia en las radiocomunicaciones.
La operación de este equipo en un área residencial puede causar interferencia, en cuyo caso el usuario
deberá corregir la interferencia por su propia cuenta.
CONFIGURACIÓN INICIAL
o Desempaque el aparato y verifique que esté incluido todo lo siguiente:
• Centrífuga
• Cable de alimentación
• Portatubos
• Manual de operación
• Inserto del product
o Coloque la centrífuga en una superficie plana y nivelada. Se necesita un espacio libre de 54 cm (21 in) por encima
de la mesa para abrir la cubierta.
o Debe haber un espacio libre de 15 cm (6 in) alrededor de la centrífuga. Es necesario contar con ventilación
apropiada para prevenir el sobrecalentamiento de las muestras, así como las fallas prematuras de la centrífuga.
Elija un área donde el aire fluya sin obstrucciones y la temperatura permanezca entre 16 °C y 32 °C.
o No debe haber ningún material peligroso en el espacio libre alrededor de la centrífuga durante la operación.
o El tiempo que el operador pase dentro del espacio libre alrededor de la centrífuga debe limitarse al tiempo
necesario para cargar, descargar y operar la centrífuga.
o Conecte el cable de alimentación a la centrífuga.
o Conecte el cable de alimentación a un tomacorriente eléctrico aprobado.
o Mueva el interruptor que se encuentra en la parte trasera de la centrífuga a la posición de encendido.
A SEGÚRESE DE QUE EL TOMACORRIENTE ELÉCTRICO SIEMPRE ESTÉ ACCESIBLE , PUES EL CABLE DE
ALIMENTACIÓN ES EL MEDIO DE DESCONEXIÓN EN UNA EMERGENCIA .
| 13INICIO RÁPIDO
Iniciar Empieza a ejecutar el ciclo que se muestra en la pantalla. La cubierta
debe estar cerrada.
Permite acceder a la cámara del rotor al activar el mecanismo de
Desbloquear desbloqueo. Solamente es posible acceder al interior cuando el rotor
está detenido.
Si se presiona el botón de DESBLOQUEAR durante la operación, se
Detener detendrá la ejecución y se desbloqueará la cubierta después de que
se haya detenido el rotor.
Seleccionar un Presionar los botones hacia arriba o hacia abajo que se encuentran
ciclo junto a la pantalla para seleccionar el ciclo almacenado que se
desee.
Para garantizar la reproducibilidad, la centrífuga puede bloquearse en un ciclo (bloqueo de un solo ciclo) o restringirse
a los ciclos almacenados (bloqueo de configuración predeterminada). El bloqueo de un solo ciclo además evita tener
que hacer cambios en los parámetros del ciclo seleccionado. El bloqueo de configuración predeterminada permite
elegir cualquier ciclo almacenado, pero evita que se modifiquen los parámetros de los ciclos almacenados.
| 14BLOQUEO DE UN SOLO CICLO
Seleccione el ciclo que desee. Mantenga presionado el botón de
Bloquear un solo
DESBLOQUEAR durante 5 segundos. Dos tonos confirmarán que
ciclo
la selección de ciclos está bloqueada.
Para reactivar la selección de ciclos, mantenga presionado el
Cancelar el bloqueo
botón de DESBLOQUEAR durante 5 segundos. Tres tonos
de un solo ciclo
confirmarán que la selección de ciclos está desbloqueada.
BLOQUEO DE LA CONFIGURACIÓN PREDETERMINADA
Acceder al modo de
Presione el botón del ENGRANAJE.
configuración
Mantenga presionado el botón de DESBLOQUEAR durante 5
Bloquear los ciclos
segundos. Dos tonos confirmarán que el bloqueo de la
almacenados
configuración predeterminada está activado.
Con la cubierta abierta y fuera del modo de configuración,
Cancelar el bloqueo
mantenga presionado el botón de DESBLOQUEAR durante 5
de la configuración
segundos hasta que se escuchen dos tonos. Los ciclos
predeterminada
almacenados podrán editarse o programarse de nuevo.
CONFIGURACIÓN O MODIFICACIÓN DE UN CICLO
Es posible asignar nombres para un máximo de 10 ciclos y programar sus parámetros de tiempo, velocidad
y desaceleración para almacenarlos en la memoria.
Presionar los botones hacia arriba o hacia abajo que se encuentran
Seleccionar un ciclo
junto a la pantalla para seleccionar el ciclo que se desee.
Acceder al modo de
Presione el botón del ENGRANAJE.
programación
Presione los botones de flecha a la izquierda y flecha a la derecha
Desplazarse entre
hasta que el parámetro que desea modificar esté parpadeando y
parámetros
subrayado.
Para cambiar el parámetro que se muestra en la pantalla, use los
Cambiar valores de
botones hacia arriba y hacia abajo que están al lado de dicha
parámetros
pantalla.
Solo HORIZON 6 Flex FA: Para mostrar la fuerza g real (RCF) del
ciclo, debe seleccionarse el portatubos derecho. Los portatubos
universales de color azul alojan tubos de 75 y 100 mm. Para los
Mostrar la fuerza g tubos de 125 mm es necesario usar el portatubos color naranja. Si
correcta la selección de portatubos en el programa no coincide con el
portatubos utilizado, el número de RCF que se muestra no indicará
el valor real.
| 15Con las flechas a la izquierda y a la derecha, desplácese hasta la
asignación de nombre del ciclo. Cambie el carácter parpadeante
Asignar un nombre
del nombre con los botones con los botones hacia arriba y hacia
al ciclo
abajo, luego avance al siguiente carácter con la flecha a la derecha.
Repita lo anterior.
Guardar y salir del
Presione el botón del ENGRANAJE. El ciclo que se muestra en la
modo de
pantalla se guardará automáticamente.
programación
OPERACIÓN
o Coloque los tubos en los portatubos. Asegúrese de seguir las reglas de cargas equilibradas que se describen en la
siguiente sección.
o Cierre la cubierta y gire la manija de la cubierta en el sentido de las manecillas del reloj hasta la posición de alto total.
o La pantalla digital mostrará el ciclo actual seleccionado. Para elegir otro ciclo, presione el botón hacia ARRIBA o
hacia ABAJO varias veces hasta que se seleccione el ciclo que desee.
o Presione el botón de INICIO en el panel de control para empezar el ciclo de centrifugado.
o Cuando el ciclo finalice, el rotor se desacelerará hasta detenerse por completo y la luz de la cubierta parpadeará.
o El mecanismo de desbloqueo se activará por 60 segundos para permitir el acceso a la cámara del rotor. Para
desbloquear la cubierta después de que hayan transcurrido 60 segundos, presione el botón de DESBLOQUEAR.
La cubierta permanecerá desbloqueada durante otros 15 segundos.
o Gire la manija de la cubierta en el sentido contrario al de las manecillas del reloj y abra la cubierta. La luz de la
cubierta se apagará.
EQUILIBRIO DE LAS CARGAS
La centrífuga debe contener una carga equilibrada para funcionar de manera correcta. Al operar la unidad con
cargas equilibradas, aumentará el ciclo de vida de la centrífuga y obtendrá mejores resultados. Use las siguientes
reglas cuando cargue el rotor. Si va a centrifugar un número impar de muestras, llene un tubo con agua para
equilibrar el peso de la muestra sin pareja y colóquelo en la posición contraria a dicha muestra.
Los portatubos contrapuestos deben tener cargas equivalentes o estar vacíos o cargados con muestras del mismo peso.
Cuando solamente se carguen 3 tubos, estos deben pesar lo mismo.
| 16CUIDADO Y MANTENIMIENTO PREVENTIVO
Con el cuidado y el mantenimiento adecuados, la centrífuga le ofrecerá años de servicio en el laboratorio. Siga estos
pasos para cuidar la unidad de manera adecuada:
o Siempre opere la unidad con cargas equilibradas: Asegúrese de centrifugar siempre cargas equilibradas como
se mostró en la sección anterior. Estas centrífugas tienen un diseño de montaje de motor contraequilibrado
que amortigua las vibraciones de manera excelente. Sin embargo, las cargas desequilibradas pueden romper
los tubos de ensayo de vidrio y producir resultados de separación no satisfactorios. Al equilibrar las cargas de
forma adecuada, se mejora la separación de las muestras y se aumenta el ciclo de vida de la centrífuga.
o Mantenimiento del motor y de los componentes eléctricos: Se seleccionaron los componentes eléctricos de
la más alta calidad para las centrífugas y no deben de necesitar mantenimiento ni servicio durante el ciclo de
vida de la centrífuga.
o Reemplazo del portatubos: Se recomienda reemplazar los portatubos después de 24 meses de uso.
Inspeccione los portatubos de manera regular para verificar que no tengan grietas. Si descubre alguna grieta,
reemplace de inmediato el portatubos.
o Retiro de los accesorios antes de mover la unidad: Es necesario retirar todos los portatubos, las muestras y
las tapas de la cámara del rotor antes de transportar o mover la centrífuga a fin de evitar que ocurran daños y
lesiones.
LIMPIEZA Y DESINFECCIÓN
Para prolongar el ciclo de vida de la centrífuga, se recomienda limpiarla y desinfectarla cada seis meses o cuando
ocurra algún derrame o se rompa un tubo. Los contaminantes deben eliminarse de inmediato; de lo contrario, la
corrosión y degradación prematura pueden dañar la centrífuga. Antes de utilizar cualquier método de limpieza o
descontaminación que no sea recomendado por el fabricante, lo usuarios deberán verificar con el fabricante que
el método propuesto no dañará el equipo.
o Desconecte la centrífuga antes de limpiarla.
o Use el equipo de protección personal (PPE) adecuado.
o Aplique las soluciones de limpieza con una toalla o un paño. No sumerja la centrífuga en agua u otras soluciones
de limpieza, pues eso dañará el equipo y anulará la garantía.
o La centrífuga y sus accesorios pueden desinfectarse SOLAMENTE con alcohol isopropílico o con una solución de
cloro al 10 % (5500 ppm).
o Todas las superficies deben secarse inmediatamente después del procedimiento de limpieza y desinfección.
N O SE RECOMIENDA EL USO DE PRODUCTOS DETERGENTES GERMICIDAS ACUOSOS , YA QUE PUEDEN
DAÑAR LA CENTRÍFUGA . L IMPIE LA UNIDAD POR COMPLETO DESPUÉS DE USARLA PARA EVITAR
ANULAR LA GARANTÍA .
o No pueden usarse hidrocarburos total o parcialmente halogenados, cetonas, ésteres, éteres, sustancias
bencílicas, etil bencenos y demás sustancias químicas que no indique el fabricante, ya que pueden causar daños
en la cámara del rotor, el rotor, los portatubos, los accesorios y la parte exterior de la centrífuga, así como anular
la garantía.
| 17RESOLUCIÓN DE PROBLEMAS
NOTA: Es necesario girar por completo el seguro en el sentido de las manecillas del reloj hasta la posición de alto
para que la centrífuga pueda operar.
La centrífuga no funciona. o Verifique que la centrífuga esté encendida. La pantalla debe
estar encendida.
o Si se muestra el mensaje "cubierta no cerrada", asegúrese de
que el seguro de la cubierta se haya girado por completo hasta
la posición de alto.
o Si aun así la centrífuga no funciona, comuníquese con Servicio al
cliente.
El rotor no gira con libertad. o Asegúrese de que no haya caído nada en la cámara del rotor,
siguiendo el procedimiento que se explicó antes.
o Si no hay nada que obstruya al rotor, es posible que el rotor
esté dañado. Comuníquese con Servicio al cliente si necesita
más ayuda.
La centrífuga hace un ruido de traqueteo o Detenga la centrífuga. Abra la cubierta.
cuando está en operación. o Con el PPE puesto, retire los tubos y los portatubos o las
placas y revise si hay objetos o residuos adentro. Use una
herramienta para retirarlos cuidadosamente del interior de la
cámara del rotor.
o Inspeccione si el rotor, los portatubos o las placas están
dañados.
o Si los portatubos o las placas presentan algún daño, por
mínimo que sea, deséchelos de manera segura y
reemplácelos.
o Si el rotor parece estar dañado, llame a Servicio al cliente
para recibir ayuda.
Hay ruido o vibración excesivos cuando o Verifique que las cuatro patas de la centrífuga estén apoyadas
la centrífuga está en operación. de forma adecuada sobre una superficie plana.
o Asegúrese de que las cargas estén equilibradas según las
instrucciones en la sección "Equilibrio de las cargas" de este
manual.
o Asegúrese de que no haya caído nada adentro de la cámara del
rotor.
La centrífuga se detiene y emite tonos de
La carga no está equilibrada. Presione el botón de DESBLOQUEAR, abra
forma continua.
la cubierta y equilibre la carga como se recomienda en este manual.
La centrífuga se quedó atascada en una La selección de ciclo está bloqueada. Presione el botón de
de las configuraciones. DESBLOQUEAR durante 5 segundos.
| 18Los valores de tiempo y velocidad del Siga las instrucciones en la sección "Configuración o modificación
ciclo no están ajustados en el valor de un ciclo almacenado" para revisar la configuración. Si el
deseado. parámetro predeterminado no tiene el valor que desea, siga el
procedimiento de la misma página para cambiar el tiempo
predeterminado.
No pueden modificarse los parámetros o Si la selección del ciclo está bloqueada en un ciclo, presione el
del ciclo. botón de DESBLOQUEAR durante 5 segundos. Luego, presione el
botón del ENGRANAJE y siga las instrucciones que se encuentran
en otra sección de este manual.
o Si es posible seleccionar diferentes ciclos almacenados, pero no
modificarlos, la centrífuga se encuentra en el modo de bloqueo
de valores predeterminados. Presione el botón del ENGRANAJE,
y después el botón DESBLOQUEAR durante 5 segundos. Ahora
debe poder modificar los parámetros del ciclo.
La centrífuga no se desbloquea tras o Espere hasta que el rotor se haya detenido por completo. Si la
finalizar un ciclo. manija de la cubierta no puede girarse aún, presione el botón de
DESBLOQUEAR e inténtelo de nuevo.
o Si no hay ninguna luz LED
encendida, la unidad no está
conectada y la cubierta no se
desbloqueará con los métodos
convencionales. Retire la etiqueta del
seguro y use un bolígrafo para
desactivar manualmente el
mecanismo de bloqueo. Tire del
mecanismo hacia el panel de control y luego quite el seguro y
abra la cubierta.
o Si la unidad se daña, llame a Servicio al cliente para recibir
ayuda.
La cubierta no se abre. o Asegúrese de que la manija se haya girado por completo en el
sentido contrario al de las manecillas del reloj.
o Si la manija no puede girarse en el sentido contrario al de las
manecillas del reloj, gírela por completo en el sentido de las
manecillas del reloj, presione DESBLOQUEAR y luego gírela en el
sentido contrario al de las manecillas del reloj.
o Si la cubierta sigue bloqueada y no se desbloquea después de
hacer lo anterior, es posible que se hayan dañado los
componentes electrónicos. Comuníquese con Servicio al cliente
para recibir ayuda.
Hay un ruido fuerte de clics durante la o Asegúrese de que el tornillo en el centro del rotor esté bien
desaceleración. apretado.
La cubierta no permanece en posición
o Apriete el tornillo central en la bisagra de la cubierta.
vertical.
| 19CÓMO CALCULAR LA FUERZA G
Las instrucciones de uso de los fabricantes de tubos recomiendan ciclos a una fuerza g mínima, la cual puede
calcularse si se conocen los valores de rpm y el radio. Use la siguiente fórmula o visite
www.druckerdiagnostics.com/g-force-calculator/.
En centímetros: En pulgadas:
FCR o fuerza g = 0.00001118 x FCR o fuerza g = 0.0000284 x
Radio del rotor (cm) x (rpm)2 Radio del rotor (pulgadas) x (rpm)2
Cumple con la norma UL61010-1/CSA C22.2 n.º 61010-1 y la norma n.º IEC61010-2-020.
Producto protegido por las patentes de los Estados Unidos n.º 6,811,531, n.º 7,422,554, n.º D718,463 y n.º D734,489.
Otras patentes pendientes.
INSTRUCCIONES DE DESECHO DE LA DIRECTIVA DE RESIDUOS DE APARATOS ELÉCTRICOS Y ELECTRÓNICOS (WASTE ELECTRICAL
AND ELECTRONIC EQUIPMENT, WEEE) PARA LOS USUARIOS EN LA UNIÓN EUROPEA
Este producto no debe desecharse con otros residuos. El usuario es responsable de desechar el
equipo entregándolo en un punto de recolección designado para el reciclaje de residuos de
aparatos eléctricos y electrónicos. La recolección por separado y el reciclaje del equipo al
momento de desecharlo ayudarán a conservar los recursos naturales y a garantizar que se recicle
de una manera que proteja la salud humana y el ambiente. Para obtener más información sobre
dónde puede entregar el equipo para que se recicle, comuníquese con la oficina local de su
ciudad, o con el servicio de desecho de residuos o el establecimiento donde haya adquirido el
producto.
| 20You can also read