PALM Protocols - DNA handling - Carl Zeiss MicroImaging
←
→
Page content transcription
If your browser does not render page correctly, please read the page content below
PALM
                          PALM P
                               Protocols
                                 ro
                                  oto
                                   toco
                                      cols
                                      co ls - D
                                              DNA
                                               N H
                                               NA Han
                                                  Handling
                                                   an
                                                    ndl
                                                      dlin
                                                        in
                                                        ing
                                                         ng

Carl Zeiss MicroImaging
PALM Protocols – DNA handling

                                                              1
PALM Protocols

DNA handling
Non contact Laser Capture Microdissection

Carl Zeiss MicroImaging – Location Munich – Germany
Content    5   Introduction - Some remarks on DNA
           6   Preparation of slides – Samples on MembraneSlide
           8                         – Samples on glass slides
           8                         – Archived Samples: removing the coverslip
           9   Treatment of slides   – Heat treatment
           9                         – UV treatment
           9                         – Poly-L-Lysine treatment
          10   Mounting samples onto slides
          10      Frozen sections
          10      Formalin Fixed Paraffin Embedded (FFPE) sections
          11      Cytospins
          11      Blood and tissue smear
          12   Staining procedures
          12   Storage
          12        Formalin Fixed Paraffin Embedded (FFPE) sections
          12        Frozen sections – Cresyl Violet
          13                        – Hematoxylin/Eosin (HE)
          13                        – Methyl Green
          13                        – Methylene Blue
          13                        – Toluidine Blue
          13                        – Nuclear Fast Red
          14   Non-contact Laser Capture Microdissection (LCM) Procedure
          14   Tips to improve morphological information
          14         Diffusor CM
          15         AdhesiveCap opaque
          15         Liquid Cover Glass
          16   Collection devices
          16        AdhesiveCap
          16        Other microfuge tubes
          16        AmpliGrid AG480F
          17   Collection procedures
          17        „Dry“ collection (AdhesiveCap)
          18        „Wet” collection (other microfuge tubes)
          19        „Wet“ collection onto Slide48 (AmpliGrid AG480F)
          19   Capture check – looking into the cap to see the lifted samples
          20   Downstream Applications
          20      DNA isolation from FFPE sections
          20      DNA isolation from frozen sections
          21      PCR setup    - Standard PCR (20 μl) in a capillary cycler
          22                   - High volume PCR (50 μl) in a 96-well block cycler
          22                   - Low volume PCR (1 μl) in an Eppendorf
          22                     Mastercycler with In situ Adapter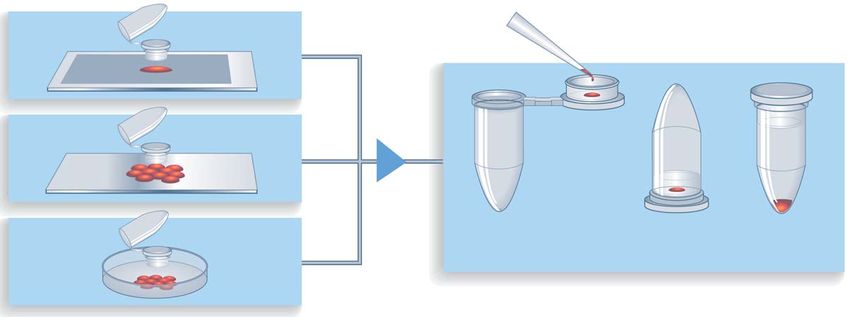
Introduction

Some remarks on DNA

  Human Genome Project has shown new insights to poorly understood biological
  phenomena. As a result of this expansion of genomics into human health applications,
  the field of genomic medicine was born. Genetics is playing an increasingly important
  role in the diagnosis, monitoring, and treatment of diseases.

  Further areas that stand to benefit from these results include biomedical and biological
  research, toxicology, drug design, forensics, animal and plant genetics, and many others.

  In all special fields the methods for molecular testing must be able to determine and
  analyze DNA sequences accurately and rapidly, and whenever possible easy to use,
  highly automated, and minimized.

          Beside these requirements on the molecular genetic method, the step before
                 - generation of a defined sample as source for the analysis -
                                    is of prime importance.

  Non-contact Laser Capture Microdissection (LCM) from Carl Zeiss is state of the art
  for sample preparation.

                                                                                              5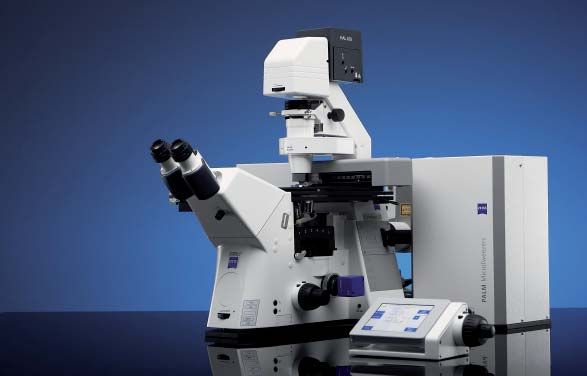
PALM Protocols - DNA Handling

    Preparation of slides
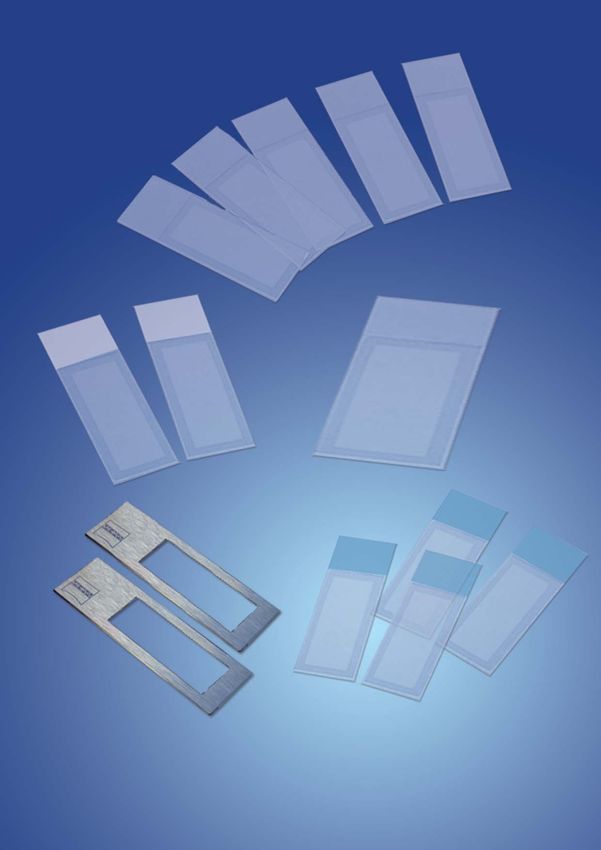
    – Samples on MembraneSlide

                                                                          Regular glass slide (1 mm thick) => 1,
     MembraneSlide is a glass slide covered with a                           thin slide (0.17 mm thick) => dot,
     membrane on one side.                                    DuplexDish and FrameSlide => between dot and 0.
     This membrane is easily cut together with
     the sample and acts as a stabilizing support       Alternatively the PET-membrane can be
     during lifting. Therefore even large areas are     attached to a metal frame (FrameSlide PET).
     lifted by a single laser pulse without affecting   The frame structure of FrameSlide PET is
     the morphological integrity of the tissue.         resistant to microwave treatment or pressure
     Use of MembraneSlide is especially recommen-       cooking. The special bonding is inert and
     ded for isolating single cells or chromosomes      adapted to heat treatment (up to 95°C) so
     as well as live cells or small organisms.          that the membrane does not ruffle during
     Carl Zeiss MicroImaging (CZMI) offers slides       the heating process. If you need further
     (1 mm, 0.17 mm) covered with Polyethylene          information about these slides, please contact:
     Naphthalate (PEN)-membrane or Polyethylene
     Teraphthalate (PET)-membrane.                      E-Mail: palm-labs@zeiss.de

     PEN-membrane is highly absorptive in the           When working with low magnifying objectives
     UV-A range, which facilitates laser cutting.       like 5x or 10x, both regular 1 mm thick glass
     The membrane can be used for all kind of           slides and 0.17 mm glass slides can be used.
     applications.                                      To keep this flexibility for higher magnifications
     MembraneSlide NF (nuclease free) is certified      (20x, 40x or 63x) CZMI recommends using
     to be free of DNase, RNase and human DNA.          long distance objectives.
                                                        With those the working distance can be adap-
     In addition to PEN-MembraneSlide, CZMI also        ted to the different glass slides by moving the
     offers PET-membrane covered slides. These          correction collar on the objective.
     slides are helpful for special processes, i.e.     (see picture above)
     fluorescence applications. Even weak fluores-      Due to the short working distance only 0.17 mm
     cence signals can be detected with PET-slides,     thin cover glass slides can be used with the
     due to the low signal to noise ratio.              100x magnifying objectives.

6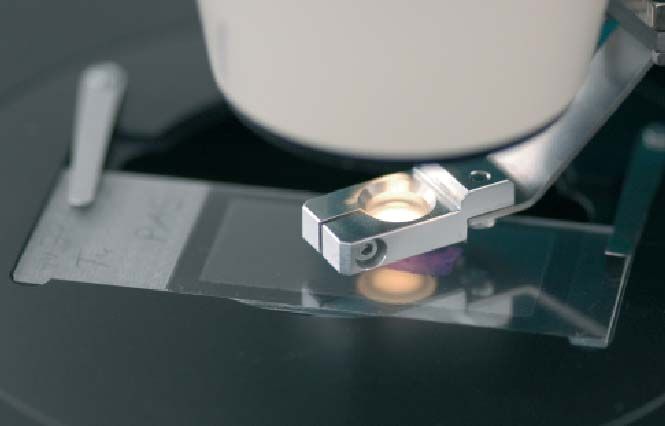
PALM Protocols - DNA Handling

MembraneSlide 1.0 PEN      - Order No. 415101-4401-000 (white)
MembraneSlide 1.0 PEN NF   - Order No. 415101-4401-600 (white)
MembraneSlide 0.17 PEN     - Order No. 415101-4401-500 (uncolored)
MembraneSlide 50x1.0 PEN   - Order No. 415101-4401-005 (doublewidth)
MembraneSlide 1.0 PET      - Order No. 415101-4401-050 (blue)
FrameSlide PET             - Order No. 415101-4401-055 (metal)
                                                                        7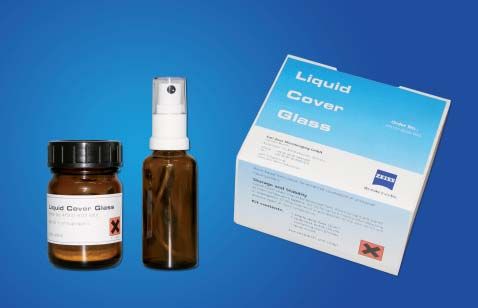
PALM Protocols - DNA Handling

    Preparation of slides                               Archived Samples:
    – Samples on glass slides                           removing the coverslip
     With PALM MicroBeam almost every kind                Depending on the applied mounting
     of biological material can be microdissected         medium (whether it was xylene based or
     and lifted directly from regular glass slides,       water soluble) the whole slide should be
     also see Application Note: „AutoLPC from             completely submerged in the respective
     glass slide result in good quality RNA“.             solvent.
     Even archival sections can be used after
     removing the coverslip and the mounting              1. standing up in a glass jar filled with
     medium.                                                 either pure xylene or warm water
     To facilitate lifting additional adhesive sub-          (30-50°C)
     stances or “Superfrost + charged slides”             2. time needed for the coverslip to swim
     should only be applied when absolutely                  off may range from hours to days
     necessary for the attachment of poorly ad-           3. air-dry the slide
     hering special material (e.g. some brain
     sections or blood vessel rings). In those
     cases higher laser energy is needed for              Note: It is very important NOT to use any
     lifting.                                             force to push off the coverslip because this
                                                          might damage the section! Wait till it falls
                                                          off by itself! The necessary time depends
                                                          on the age of the sample and the dryness
                                                          of the mounting medium.
                                                          Fresh slides (only days old) can be decover-
                                                          slipped much faster.

                                                          From the dry glass slide sample material
                                                          can be lifted directly by “AutoLPC” function
                                                          of PALM RoboSoftware.

8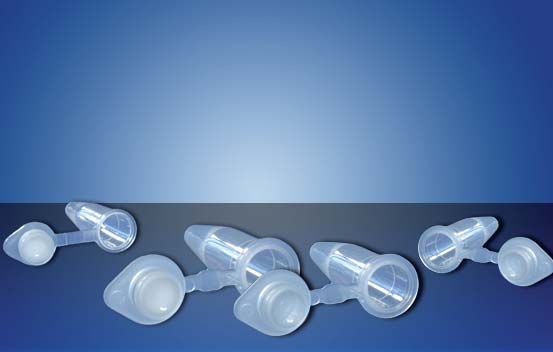
PALM Protocols - DNA Handling

Treatment of slides

   Slides are shipped without any pretreatment.
   To remove nucleases and DNA, MembraneSlides and glass slides can be treated in the same way.

   MembraneSlide NF (nuclease free) is certified to be free of DNase, RNase and human DNA.
   Treatments to remove nucleases and contaminating DNA are therefore not necessary using
   these slides.

Heat treatment                                     Poly-L-Lysine treatment
  To ensure nuclease-free MembraneSlides             Additional coating of the slide with Poly-L-
  (1mm) or glass slides, heat slides at 180°C in     Lysine (0.1% w/v, e.g. SIGMA, #P8920)
  a drying cabinet for 4 hours to completely         only will be necessary for poorly adhering
  inactivate nucleases.                              materials (e.g. brain sections) and should
                                                     be performed after UV treatment.
   Note: The thin (0.17 mm) MembraneSlides           Distribute a drop of the solution on top of
   are not resistant against heat. Use other         the slide.
   treatments to remove nucleases.                   Let air-dry at room temperature for 2-3
                                                     minutes.
                                                     Avoid any leakage of the membrane, as
UV treatment                                         this might result in impairment of Laser
  To overcome the hydrophobic nature of              Capture Microdissection.
  the membrane it is advisable to irradiate
  with UV light at 254 nm for 30 minutes
  (e.g. in a cell culture hood).
  The membrane gets more hydrophilic,
  therefore the sections (paraffin- as well
  as cryosections) adhere better.
  Positive side effects are sterilization and
  destruction of potentially contaminating
  nucleic acids.

                                                                                                    9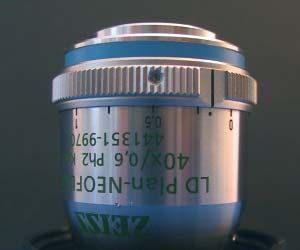
PALM Protocols - DNA Handling

     Mounting samples onto slides

      Frozen sections                                   Formalin Fixed Paraffin
                                                        embedded (FFPE) sections
      Sectioning                                        Sectioning
        Sections are mounted onto MembraneSlides          Floating the section on warm water (40°C)
        the same way as routinely done using glass        as well as hot plate techniques can be
        slides. To allow subsequent cutting and           applied.
        lifting by the laser a coverslip and standard     After mounting the section let the slides dry
        mounting medium must not be applied.              overnight in a drying oven at 56°C to im-
        Freezing media like OCT or similar may be         prove the adhesion of the sections to the
        used but should be kept to a minimum and          membrane. To allow laser cutting and lifting
        have to be removed before laser cutting.          a coverslip and standard mounting medium
                                                          must not be applied.
      Removing the tissue freezing medium                 Archival sections with mounting medium and
        If OCT or another tissue freezing medium          coverslip have to be processed as described
        is used, it is important to remove it before      to remove the coverslip (see page 8).
        Laser Microdissection, because these media
        will interfere with laser efficiency.           Deparaffination
                                                          Paraffin will reduce laser efficiency, some-
        Removing the medium is easily done by             times completely inhibiting cutting and
        dipping the slide 5-6 times in water. If the      lifting. If you are working with unstained
        sections are stained in aqueous solutions,        sections it is therefore very important to
        the supporting substance is normally              remove the paraffin before laser cutting
        removed “automatically” by the water              and lifting. 1 mm MembraneSlides can be
        containing steps.                                 handled like normal glass slides.

                                                          Deparaffination Procedure
                                                          1. Xylene            5 minutes, 2 times
                                                                              (2 minutes minimum)
                                                          2. Ethanol 100%      1 minute
                                                          3. Ethanol 96%       1 minute
                                                          4. Ethanol 70%       1 minute

                                                          Note: The thin (0.17 mm) MembraneSlides
                                                          are not as resistant against organic solvents
                                                          and should only be handled according to a
                                                          minimal procedure. Especially longer treat-
                                                          ment in xylene will resolve the glue holding
                                                          the membrane to the slide.

10
PALM Protocols - DNA Handling
Cytospins Blood and tissue smear
Cytospins can be prepared on glass slides Distribute a drop of (peripheral) blood
or on MembraneSlides. or material of a smear over the slide.
After centrifugation in a cytocentrifuge let Be careful to avoid injuries in the mem-
the cells air-dry at room temperature. brane, which would lead to leakage
Then fix for 2 minutes in 70% ethanol and during fixation or washing steps and
air-dry again before staining. therefore would impair the Laser Capture
Microdissection process.
Let smears air-dry shortly and fix them
for 2 up to 5 minutes in 70% ethanol.
11PALM Protocols - DNA Handling
Staining procedures
For isolation of high quality DNA use freshly prepared, autoclaved solutions.
Formalin Fixed Paraffin Cresyl Violet
Embedded (FFPE) sections
This short staining procedure colors the nu-
After deparaffination (see page 10) continue clei violet and the cytoplasm weak violet.
with the staining procedure of your choice.
Most staining procedures for frozen Staining Procedure
sections can be applied for FFPE sections 1. after fixation (2 min, 70% Ethanol) dip
(for recommendations see ´Frozen sections`). slide for 30 sec into 1% cresyl violet
acetate solution (*)
2. remove excess stain on absorbent surface
Frozen sections
3. dip into 70% Ethanol
Most standard histological stainings 4. dip into 100 % Ethanol
(e.g. HE, Methyl Green, Cresyl Violet, 5. air-dry shortly (1-2 min)
Nuclear Fast Red) are compatible with
subsequent DNA isolation. (*) Dissolve solid cresyl violet acetate
At PALM Laboratories we usually perform (e.g. ALDRICH #86,098-0) at a concen-
the Cresyl Violet or Hematoxylin/Eosin (HE) tration of 1% (w/v) in 50% EtOH at room
staining. temperature with agitation/ stirring for
several hours to overnight.
Filter the staining solution before use to
Storage remove unsolubilized powder. Sometimes
Lot to Lot variations in the purchased cresyl
Stained slides can be used immediately violet powder can lead to weaker staining
or stored. If the slides have to be stored results if the dye content is below 75%.
in a freezer before LCM, the slides should
be frozen in a tightly sealed container Note: In most cases this cresyl violet staining
(e.g. two slides back to back in a 50 ml procedure will be sufficient for cell identifi-
Falcon-tube) to avoid excess condensation cation. If an enhancement of the staining is
of moisture during thawing. desired, a reinforcement by two additional
For rethawing the container should not steps in 50 % ethanol (first, before staining
be opened before it is completely warmed in cresyl violet; second, after the staining in
up again to ambient temperature. cresyl violet) is possible.
Ambion offers the LCM Staining Kit (#1935)
which also contains a cresyl violet dye.
When using this kit we strongly recommend
to omit the final xylene step of the Ambion
instruction manual because xylene makes
the tissue very brittle and reduces the ad-
hesion of the section to the PEN-membrane.
12PALM Protocols - DNA Handling
Hematoxylin/Eosin (HE) Methyl Green
HE-staining is used routinely in most histo- The nuclei are stained dark green, the
logical laboratories. The nuclei are stained cytoplasm light green.
blue, the cytoplasm pink/red.
Staining Procedure
Staining Procedure 1. after fixation (2 min, 70% Ethanol)
dip slide 5-6 times in distilled water
1. after fixation (2 min, 70% Ethanol) dip
slide 5-6 times in distilled water 2. stain 5 minutes in Methyl Green solution
(DAKO, #S1962)
2. stain 1-2 minutes in Mayer’s Hematoxy-
lin solution (e.g. SIGMA, #MHS-32) 3. rinse in distilled water
3. rinse 1-2 min in distilled water or 4. air-dry shortly (1-2 min)
blueing solution
4. stain 10 seconds in Eosin Y Methylene Blue
(e.g. SIGMA, #HT110-2-32)
5. perform a quick increasing ethanol The nuclei are stained dark blue.
series (70%, 96%, 100%) Staining Procedure
6. air-dry shortly (1-2 min)
1. after fixation (2 min, 70% Ethanol)
dip slide 5-6 times in distilled water
Toluidine Blue 2. stain 5-10 min in Methylene Blue solution
(0.05 % in water; SIGMA, #31911-2)
The nuclei are stained dark blue, 3. rinse in distilled water
the cytoplasm lighter blue. 4. air-dry shortly (1-2 min)
Staining Procedure
Nuclear Fast Red
1. after fixation (2 min, 70% Ethanol)
dip slide 5-6 times in distilled water The nuclei are stained dark red,
2. stain 30 seconds in Toluidine Blue solution the cytoplasm lighter red.
(0.1 % in water; SIGMA, #T-0394)
Staining Procedure
3. rinse in distilled water
1. after fixation (2 min, 70% Ethanol)
4. perform a quick increasing ethanol series
dip slide 5-6 times in distilled water
(70%, 96%, 100%)
2. stain 5 to 10 minutes in Nuclear Fast
5. air-dry shortly (1-2 min)
Red solution (DAKO, #S1963)
3. rinse in distilled water
4. air-dry shortly (1-2 min)
13PALM Protocols - DNA Handling
Non-contact Laser Capture Microdissection (LCM) Procedures
Please, additionally have a look into the PALM MicroBeam user manual.
Tips to improve morphological information
For LCM embedding and glass covering of the specimen is inapplicable.
Thus, the rough open surface of the section/material often results in impaired view of
morphology. Diffusor, AdhesiveCap as well as Liquid Cover Glass are comparable to the
coverslip for enhanced visualization.
Diffusor CM
Holders for PALM RoboMover and PALM
CapMover II are equipped with diffusors.
The opaque glass diffuses the incident
microscope light, which smoothens the
harshness of contrast and, depending on
material and staining, even minute details
as nuclei and cell boundaries show up.
Even slight differences in color become
visible. For more details and handling,
please see Diffusor CM product information.
PALM CombiSystem Diffusor CM - Order No. 415101-2100-320
14PALM Protocols - DNA Handling
AdhesiveCap opaque Liquid Cover Glass
The white/opaque filling of AdhesiveCap The polymeric and low viscose Liquid Cover
clearly improves visualization of morpho- Glass completely embeds the tissue and
logical information of the samples due smoothens the rough tissue surface, resul-
to enhanced color balance and contrast, ting in enhanced morphology.
which makes the view comparable to For more details and handling, please see
those of coverslipped tissue sections. Liquid Cover Glass product information.
Two different microfuge tube sizes
(200 μl, 500 μl) with these filled caps
are available from CZMI.
For more details and handling, please
see AdhesiveCap product information.
AdhesiveCap opaque - Order No. 415101-4400-250 (500 μl) Liquid Cover Glass - Order No. 415190-9020-000
AdhesiveCap opaque - Order No. 415101-4400-240 (200 μl)
15PALM Protocols - DNA Handling
Collection devices
AdhesiveCap Other microfuge tubes
The intention of AdhesiveCap is to allow Other commercially available plasticware
LCM (Laser Capture Microdissection) can be used, too.
without applying any capturing liquid (e.g. ABgene #AB-0350; 0.5 ml tubes)
into the caps prior to LCM.
This minimizes nuclease activity.
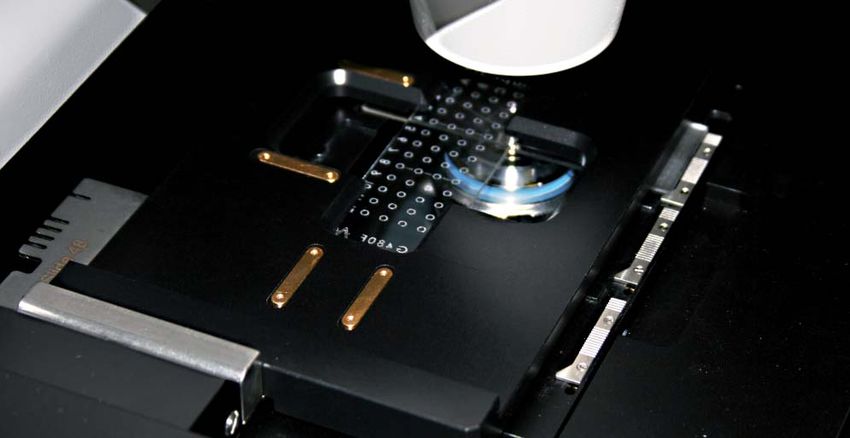
Beside the quick relocation of the lifted AmpliGrid AG480F
samples inside the cap due to instant
immobilization there is no risk of evapo- Using the SlideCollector 48 in conjunction
ration and crystal formation of the buffer with AmpliGrid technology from Advalytix
during extended specimen harvesting. enables working in a higher throughput
For more details and handling, please see LCM (48 samples simultaneously).
also AdhesiveCap product information. The AmpliGrid technology allows DNA
analysis in an extremely low volume (1 μl)
Note: CZMI recommends AdhesiveCap directly on chip.
as a collection device.
Please, see the brochure:
B^XgdY^hhZXi^dc[gdb8VgaOZ^hh
On-Chip Single Cell Analysis
for PALM MicroBeam
8dciZbedgVgniZX]c^fjZh^cbdaZXjaVgW^dad\n]VkZWZ\jc
idhdakZVkVhicjbWZgd[egZk^djhanjcVchlZgZYfjZhi^dch#
=dlZkZg!i]Z^c]ZgZcigZa^VW^a^ind[VcVcVani^XVabZi]dY^h
ValVnha^b^iZYWni]ZfjVa^ind[i]ZVkV^aVWaZhiVgi^c\bViZg^Va#
EJG>IN ADLKDAJB:
E6AB B^Xgd7ZVb [gdb 8Vga OZ^hh ZcVWaZh gZXdkZgn d[ L^i]i]Z6bea^„Dry collection“ procedure
Collection procedures
Please have a look into the PALM MicroBeam user manual.
„Dry“ collection (AdhesiveCap)
Note: CZMI recommends AdhesiveCap as Note: The time necessary for complete
collection device for most experiments. Proteinase K digestion depends on the
kind and the amount of collected material.
1. put the AdhesiveCap into the collector After the Proteinase K digest the QIAamp®
check the right position of the correction DNA Micro Kit #56304 (page 21, step 4)
collar (see page 6) can be attached.
2. perform non-contact LCM of selected cells
3. after LCM add 15 μl lysis buffer to the
sample inside the cap
(QIAamp® DNA Micro Kit #56304)
4. add 10 μl Proteinase K (20 mg/ml ) and
mix by pulse-vortexing for 15 sec
5. place the tube in an “upside down”
position in an incubator at 56°C for
2 - 18 h with occasional agitation
6. centrifuge the tube at full speed for
5 min (Hettich Centrifuge, Universal 32R)
If not going on immediately, store the
samples at -20°C.
17PALM Protocols - DNA Handling
Collection procedures
„Wet“ collection
(other microfuge tubes)
Note: The time necessary for complete
When using “unfilled” routine microfuge Proteinase K digestion depends on the
tubes it is necessary to fill a liquid into kind and the amount of collected material.
the cap to improve the adhesion of the After the Proteinase K digest and the in-
captured cells. activation step the routine downstream
The detergent Igepal CA-630 in the cap- application of choice can be continued with.
turing buffer allows to smear out a small
amount of liquid in the whole cap area. If not going on immediately, store the
Note: All kinds of aqueous solutions will samples at -20 °C.
run dry with extended working time.
Prearrangements - Capturing Buffer Collection Procedure
0.05 M EDTA pH 8.0 20 μl 1. take an autoclaved microfuge tube
1 M Tris pH 8.0 200 μl 2. pipette 3-15 μl of Capturing Buffer
Igepal CA-630 (SIGMA #I-3021) 50 μl without Proteinase K or DNase-free
water in the middle of the cap
(Proteinase K 20 mg/ml) (100 μl)
3. put the cap/tube into the collector
ddH2O fill up to 10 ml
check the right position of the correction
Proteinase K Solution 20 mg/ml collar (see page 6)
(Qiagen #19131)
4. perform non-contact LCM of selected cells
Final Concentration: 20 mM Tris, 0.1 mM 5. centrifuge the tube at full speed for 5 min
EDTA, 0.5% Igepal, 1% Proteinase K (Hettich Centrifuge, Universal 32R)
Always prepare a fresh mixture of 6. add 10-15 μl Capturing Buffer containing
Capturing Buffer and Proteinase K. Proteinase K and mix by pulse-vortexing
for 15 sec
7. incubate the tube at 56°C for 2-18h with
occasional agitation
8. centrifuge the tube at full speed for 5 min
(Hettich Centrifuge, Universal 32R)
9. final heating step at 90°C for 10 min to
inactivate Proteinase K
10. centrifuge the tube at full speed for 5 min
(Hettich Centrifuge, Universal 32R)
18PALM Protocols - DNA Handling
„Wet“ collection onto Capture check – looking into
Slide48 (AmpliGrid AG480F) the cap to see the lifted samples
A preloading of 48 ReactionSites of the To control and document the efficiency of
AmpliGrid with 1 μl liquid (e.g. 1% Glycerol lifting it is possible to have a look into the
in water) enables elongation of the working collection device (e.g. microfuge cap) with
time and increases adhesion of the captured the 5x, 10x, 20x, 40x and 63x objectives.
samples. The LCM process onto 48 reaction
sites can be operated automatically and is By using the software function “go to
controlled by PALM RoboSoftware. checkpoint” the slide is moved out of
Using Slide48 technology, DNA amplification the light path and the objective lifted for
doesn’t require any template transfer and looking inside.
preparation. Analysis (PCR, cycle sequencing)
can be performed on the same reaction site
of the AmpliGrid AG480F (see page 23):
Low volume PCR (1 μl) in a Eppendorf
MasterCycler.
SlideCollector 48
with AmpliGrid AG480F
19PALM Protocols - DNA Handling
Downstream Applications
DNA isolation DNA isolation
from FFPE sections from frozen sections
Deparaffination and staining are done To capture microdissected samples from
according to standard procedures for frozen sections we recommend the use of
slides (please see page 10,12). AdhesiveCap.
For DNA isolation any procedure of choice
Note: Proteinase K digestion step is essential can be used.
for formalin fixed samples.
The time necessary for optimal Proteinase K In our hands the QIAamp® DNA Micro
digestion depends on many factors like Kit (#56304) combined with AdhesiveCap
tissue type, fixation procedure or element results in good yield and quality of DNA.
size of lifted material. An overnight digestion This QIAamp® DNA Micro Kit is designed
(12-18 hours) is a good starting point for for use of small amounts of tissue.
optimization but shorter digestion times The subsequently described protocol is
may be tested as well. To our experience suitable even for single cells.
at least 3 hours digestion should be applied
with any extraction procedure and material.
For subsequent DNA extraction from FFPE Note: Incubating the QIAamp MinElute
sections PALM Laboratories prefer the QIA- Column loaded with water for 5 min at
amp DNA Micro Kit (#56304), please see room temperature before centrifugation
DNA isolation from frozen sections. generally increases DNA yield.
Diluted solutions of nucleic acids (e.g.
dilution series used as standards) should
be stored in aliquots and thawed once
only. We recommend storage of aliquots
in siliconized tubes if possible.
This avoids adsorption of nucleic acids to
the tube walls, which would reduce the
concentration of nucleic acids in solution.
20PALM Protocols - DNA Handling
Applying the components of the QIAamp® Micro Kit for isolation
of genomic DNA from Laser Microdissected tissues:
1. Add 15 μl ATL to the microdissected sample in the AdhesiveCap.
2. Add 10 μl Proteinase K and mix by pulse-vortexing for 15 sec.
3. Place the 0.2 ml tube in an “upside down” position at 56°C in an incubator for 2-18h
with occasional agitation.
Note: The time necessary for complete Proteinase K digestion depends on the kind
and the amount of collected material.
4. Add 25 μl Buffer ATL and 50 μl Buffer AL, close the lid and mix by pulse-vortexing for 15 sec.
To ensure efficient lysis, it is essential that the sample and Buffer AL are thoroughly mixed to
yield a homogeneous solution.
5. Add 50 μl ethanol (96-100%), close the lid, and mix thoroughly by pulse-vortexing for 15 sec.
Incubate for 5 min at room temperature (15-25°C).
If room temperature exceeds 25°C, cool the ethanol on ice before adding to the tube.
6. Briefly centrifuge the 0.2 ml tube to remove drops from the lid.
7. Carefully transfer the entire lysate to the QIAamp MinElute column without wetting the rim,
close the lid, and centrifuge at 6000 x g (e.g. Eppendorg 5415D: 8000 rpm) for 1 min.
Place the QIAamp MinElute Column in a clean 2 ml collection tube, and discard the collection
tube containing the flow-through.
If the lysate has not completely passed through the column after centrifugation, centrifuge
again at a higher speed until the QIAamp MinElute Column is empty.
8. Carefully open the QIAamp MinElute Column and add 500 μl Buffer AW1 without wetting
the rim. Close the lid and centrifuge at 6000 x g (8000 rpm) for 1 min.
Place the QIAamp MinElute Column in a clean 2 ml collection tube, and discard the collection
tube containing flow-through.
9. Repeat step 8.
Note: Contact between the QIAamp MinElute column and the flow-through should be
avoided. Some centrifuge rotors may vibrate upon deceleration, resulting in the
flow-through, which contains ethanol - coming into contact with the QIAamp
MinElute Column. Take care when removing the QIAamp MinElute Column and
collection tube from the rotor, so that flow-through does not come into contact
with the QIAamp MinElute Column.
10. Centrifuge at full speed (20,000 rpm x g; 14,000 rpm) for 3 min to dry the membrane
completely. This step is necessary, since ethanol carryover into the eluate may interfere
with some downstream applications.
11. Place the QIAamp MinElute Column in a clean 1.5 ml microcentrifuge tube (not provided)
and discard the collection tube containing the flow-through. Carefully open the lid of the
QIAamp MinElute Column and apply 20 μl distilled water to the center of the membrane.
Ensure that distilled water is equilibrated to room temperature (15-25°C). Dispense distilled
water onto the center of the membrane to ensure complete elution of bound DNA.
Note: QIAamp MinElute Columns provide flexibility in the choice of elution volume.
Choose a volume according to the requirements of the downstream application.
Remember that the volume of eluate will be up to 5 μl less than volume of elution
solution applied to the column.
12. Close the lid and incubate at room temperature (15-25°) for 1 min. Centrifuge at full speed
(20,000 x g; 14,000 rpm) for 1 min.
21PALM Protocols - DNA Handling
Downstream Applications
PCR setup Standard PCR (20 μl)
in a capillary cycler
Depending on the concentration of the QuantiFast SYBR Green PCR (QIAGEN #204052) in
isolated DNA the suitable setup for the our hands results in exact amplification products.
amplification has to be selected:
PCR Procedure
The standard volume PCR (20 μl) in a 1. Thaw 2x QuantiFast SYBR Green PCR Master
capillary cycler is useful for highly concen- Mix, template DNA, primers, and water.
trated DNA eluates, because the maximal Mix the individual solutions.
input of target DNA in the reaction setup 2. Prepare a reaction mix according to setup.
is limited. Only 30-50% of the eluate can Due to the hot start, it is not necessary to
be analysed. keep samples on ice during reaction setup or
while programming the real-time cycler.
For low concentrated DNA eluates, e.g. Note: We recommend starting with the Mg2+
from a single microdissected cell, the high concentration as provided in 2x QuantiFast SYBR
volume PCR (50 μl) in a 96-well block Green PCR Master Mix.
cycler is recommendable, as 100% of the Reaction Setup
eluate can be used for the reaction setup. 2x QuantiFast SYBR
Green PCR Master Mix 10 μl
The low volume PCR (1 μl) in an Eppen- Primer A (10 μM) 0.5 μl
dorf Mastercycler allows a direct analysis Primer B (10 μM) 0.5 μl
without separate DNA isolation and trans- Template DNA ≤ 100 ng/reaction
fer step. The method offers the advantage distilled water (PCR clean) variable
of the combination of LCM and low volume Total reaction volume 20 μl
PCR on the same slide. 3. Mix the reaction mix thoroughly and dispense
appropriate volumes into PCR capillaries.
4. Add template DNA (≤100 ng/reaction) to the
individual capillaries containing the reaction mix.
5. Program the cycler according to conditions
Capillary Cycler conditions (exemplary)
Step Time Temp. Ramp rate
PCR initial activation 5 min 95°C fast mode
Two-step cycling
denaturation 10 sec 95°C fast mode
combined
annealing/extension 30 sec 60°C fast mode
number of cycles 32
6. Place the PCR capillaries in the cycler and start
the cycling program.
7. Optional: Check the specificity of the PCR
product(s) by agarose gel electrophoresis
22PALM Protocols - DNA Handling
High volume PCR (50 μl) Low volume PCR (1 μl)
in a 96-well block cycler in an Eppendorf Mastercycler
The input of the whole eluate (20 μl) to the DNA amplification and cycle sequencing, for
PCR reaction mix requires an increased total example of a single cell, are possible in an
reaction volume of 50 μl. extremely low volume reaction format (1 μl)
with the Slide48/AmpliGrid technology.
PCR Procedure After lifting the cell onto the chip analysis can
be performed directly on-chip without any
1. Thaw PCR buffer, dNTPs, template DNA,
primers, and water. Mix the individual solu- template preparation.
tions. Keep samples on ice during reaction
setup or while programming the cycler. PCR Procedure
2. Prepare a reaction mix according to setup: 1. Thaw PCR buffer, dNTPs, template DNA,
primers, and water. Mix the individual so-
Reaction Setup
lutions. Keep samples on ice during reaction
10x Buffer 5 μl
setup or while programming the cycler.
dNTP-Mix (2 mM each) 5 μl
Primer A (10 μM) 1 μl 2. Prepare a reaction mix according to setup:
Primer B (10 μM) 1 μl Reaction Setup (see Advalytix protocols *1)
template DNA variable AmpliTaq Gold 0.1 μl
Qiagen HotStarTaq Polymerase 0.5 μl 10x GeneAmp Buffer I with 15mM MgCl2 0.1 μl
distilled water (PCR clean) variable Primer (5 pmol/μl each) 0.1 μl
Total reaction volume 50 μl dNTP-Mix (2.5 μM each) 0.1 μl
3. Mix the reaction mix thoroughly and dispense distilled water (PCR clean) 0.6 μl
appropriate volumes into PCR tubes. Total reaction volume 1.0 μl
4. Add template DNA (≤100 ng/reaction) to 3. Mix the reaction mix and dispense 1 μl to
the PCR tubes containing the reaction mix. each microdissected cell on the reaction
5. Program the cycler according to conditions. site of the AmpliGrid slide.
4. Cover the PCR droplet with 5 μl of sealing
Block Cycler conditions (exemplary)
solution.
Step Time Temp.
denaturation 30 sec 95°C 5. Place the loaded AmpliGrid on the Eppen-
annealing 30 sec 50°C dorf Mastercycler.
extension 30 sec 72°C 6. Program the cycler according to conditions.
number of cycles 35 Eppendorf Mastercycler conditions (example)
6. Place the PCR tubes in the cycler and start Step Time Temp.
the cycling program. PCR initial step 10 min 95°C
7. Optional: Check the specificity of the PCR denaturation 40 sec 94°C
product(s) by agarose gel electrophoresis annealing 30 sec 56°C
extension 30 sec 72°C
number of cycles 32 10 min 72°C
Depending on the experiment a second sub-
sequent nested PCR in a capillary cycler or in
a 96-well block cycler based on the first PCR Depending on the experiment a sequencing
product, and internal primers can be attached. reaction on an Eppendorf Mastercycler with
capillary electrophoresis analysis or a check
of the specificity of the PCR product(s) by gel
electrophoresis can be attached.
*1 Advalytix protocols:
www.advalytix.com/images/download
23PALM Protocols - DNA Handling
Other brochures and protocols
Live cells Chromosomes RNA
Microdissection from Carl Zeiss Microdissection from Carl Zeiss
PALM Protocols - RNA Handling
PALM MicroBeam
PALM User Protocols
Laser Micromanipulation
in Life Sciences
Chromosome Preparation
Carl Zeiss MicroImaging
PALM Protocols – RNA handling
Contact-free manipulation
of live cells
PALM Laboratories
A unique service of Carl Zeiss
1
For questions, comments or protocol requests please contact:
PALM Laboratories
Email: palm-labs@zeiss.de
Service Line: +49 (0) 89 90 9000-900
24PALM Protocols - DNA Handling
25PALM
PALM P
Protocols
roto
rotocols
o -D
DNA
NA Han
Handling
an
nddllin
ng
Carl Zeiss MicroImaging GmbH
Location Munich
Phone: +49 (0) 89 90 9000-800
Fax: +49 (0) 89 90 9000-820
E-Mail: palm-labs@zeiss.de
www.zeiss.de/microdissection
PALM Protocol – DNA handling
November 2008
26You can also read


