ACDelco - Remanufactured Engines & Cylinder Heads. Australian Catalogue Issue 3.
←
→
Page content transcription
If your browser does not render page correctly, please read the page content below
Remanufactured
  ENGINES &
CYLINDER HEADS
        Australian Catalogue Issue 3

     REAL CAR GUYS KNOW    Automotive Parts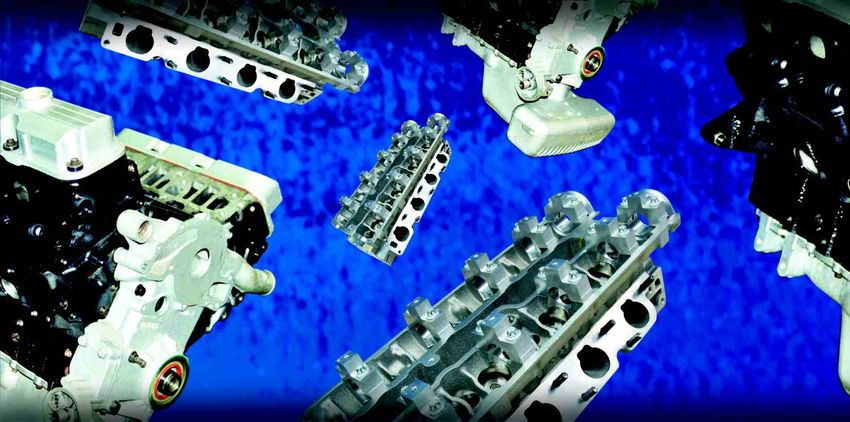
The ACDelco Story
ACDelco is a premium line of automotive parts sold throughout the world for
practically any type of vehicle anywhere in the world...with 70,000 high quality
parts covering over 30 product lines to fit most major auto manufacturers.

The extraordinary expertise in automotive technology gives ACDelco a distinct
advantage over other suppliers.

Our resources enable ACDelco products to meet or exceed the most stringent
original performance standards. When it comes to offering dependable
replacement parts for a wide variety of product line and applications, our coverage
spans the world.

With our 85-year tradition as an industry leader, ACDelco has acquired the
resources, technical advancements and manufacturing processes to outperform
the competition anywhere in the world.

ACDelco’s resources and capabilities put us on the leading edge of automotive
replacement part technology. Consumers and installers can be sure of getting parts
to fit today’s sophisticated automotive systems - with an emphasis on
dependability, availability and quality.

All information contained in this catalogue is based on authoritive information available at the time of publication.
However, while every precaution has been taken in the compilation of this information, we cannot accept
responsibility for inaccuracies in print or specifications.

© 2006 General Motors Corp.
All rights reserved. No part of this publication may be reproduced, stored in any retrieval system or transmitted in
any form or by any means, including but limited to electronic, mechanical, photocopying, recording or otherwise,
without the prior written permission of General Motors Corp. This includes all texts, illustrations, tables and charts.
Issue No: 3
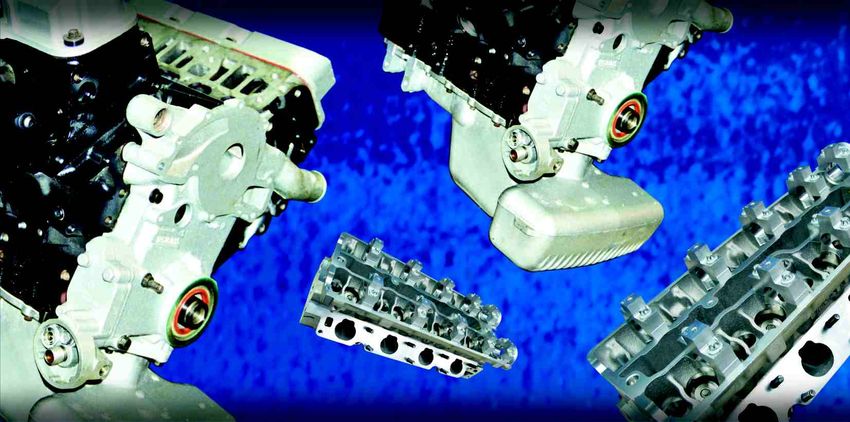
Remanufactured Engines /
Cylinder Heads Contents
Product Information
About ACDelco Remanufactured Engines 3
The Process Behind Our Remanufactured Engines 4
Warranty Information 6
Engines Exchange Policy 8
How to get the most out of your ACDelco Engine 9
Workshop Guide
Installation Guidelines 10
Engine Replacement Instructions 11
Installation Appendices 18
Service Requirements 24
About engine oil 25
Guide To Engine Problems 26
Application Data
Car & Light Commercial Applications 28
Truck & Industrial Applications 64
Numerical Listings
Applications Listed By Engine Part Number 66
Applications Listed By Cylinder Head Part Number 76
Other References
HM Gem Cross References 80
Abbreviations, Notes 85
1
2
About ACDelco
Remanufactured Engines
Background                                                       Components
Repairing damaged engines is becoming an increasingly            • ACDelco remanufactured engines are long motors, come
more difficult, time consuming and expensive task. But now         assembled and include:
ACDelco, a worldwide leader in new and remanufactured            • cylinder block
auto parts makes it easier to get your car moving again with     • crankshaft
its new generation of remanufactured engines.                    • camshaft
                                                                 • conrods
                                                                 • pistons
Features and Benefits                                            • timing components and cover (where applicable)
With a remanufactured engine from ACDelco, there’s no            • cylinder head
need to disassemble your customer’s engine and spend             • rocker components
hours tracking the faults and repairing or rebuilding it. You    • oil pump
remove the old engine, drain the oil and send it us. In          • sump
return, we give you a completely remanufactured engine,          • side covers
ready to drop in and run. An engine that’s been completely       • rocker cover (where applicable)
stripped and rebuilt by specialists. An engine full of the new
components and mandatory improvements to ensure long
life and durability.                                             Product Testing
                                                                 • Every single remanufactured engine is tested under
                                                                   simulated road conditions to ensure they pass the
ACDelco Advantage                                                  ACDelco performance standard.
• Save hours in labour on an engine replacement.
• 12 Month Unlimited Kilometre Warranty on
   Remanufactured Engines, 12 Month / 20,000km on
   Remanufactured Heads.
• National Distribution and Warranty coverage.
• Comprehensive range of makes and models covered by
  the one trusted brand.

Manufacturing Process
• All ACDelco Remanufactured Engines are dismantled and
  remanufactured using state of the art technology.
• Premium quality engine components are used to replace
  all worn, discarded or mandatorily replaced parts
• Engines are rebuilt to exacting standards
• The latest technological updates are built into our
  remanufactured engines meaning your engine may even
  perform better than when originally supplied.

                                                                                                                          3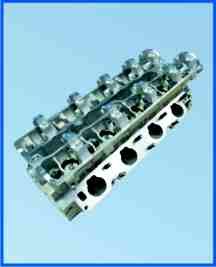
What’s The Process
    Behind Every ACDelco
    Remanufactured
    Engine?

           1. Clean & Assess               2. Machining
           Our first look.                 Exact and precise.
           ACDelco Process:                ACDelco Process:
           • Engines accepted for          • Engine blocks, crankshafts,
           remanufacture by ACDelco are    camshafts and cylinder heads
           completely disassembled.        are remachined using the
           • All parts are chemically      latest technology.
           cleaned.                        • Exacting OEM tolerances are
           • Parts are thoroughly          met everytime or the part is
           inspected.                      discarded
           • Cracked, overworn,
           unserviceable and mandatorily
           replaced components are
           discarded.

4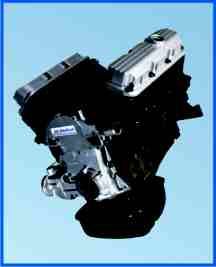
3. New For Old Parts                     4. Reassembled
Discarded components are replaced        By Experienced Hands
by new premium quality parts.            Experienced technicians reassemble
ACDelco Process:                         every remanufactured
• New pistons.                           ACDelco engine with the sort of
• New rings.                             precise fit and finish that only an
• New bearings.                          experienced hand and exact
• New timing chains or gears.            machining can provide.
• New timing chain guides.               ACDelco Process:
• New timing chain tensioners.           • Hand Assembled
• New oil pump components.               • Experienced Tradesmen.
• New engine seals.                      • Precise Fit And Finish.
• New engine gaskets.                    • Assembly Bolt Tensions and
• New engine valves                        Specifications Are Exactly
• New water pump                           Maintained.
• New timing belt on belt drive models
• Valve Seats
• Valve Lifts (most apps)

5. Thorough Testing
Every engine is tested to
ensure it meets ACDelco’s
strict specifications and the
manufacturers original
performance standards.
ACDelco Process:
• Simulators are used to check
  engines against in-vehicle
  operational requirements.
• Detailed checks cover all
  engine functions.
• Passed engines are painted
  and delivered with ACDelco’s
  12 month warranty*.

                                                                               * refer to specific warranty details on page 6.

                                                                                                                                 5
About ACDelco’s
    Remanufactured Engines /
    Cylinder Heads Limited Warranty
    Remanufactured Engines 12 Months /                                The Purchaser’s Obligation:
    Unlimited Warranty                                                • Have the service facility complete and mail the ACDelco
                                                                        Powertrain Registration to ACDelco within ten (10) days of
    Remanufactured Cylinder Heads 12                                    purchase.
    Months / 20,000kms Warranty                                       • Return the engine/vehicle to the original place of
    • Sedans and Station Wagons.                                        purchase/installation. If not possible, contact the ACDelco
    • Commercial Vehicles.                                              Powertrain Centre for assistance at 1300-888-406.
    • MPV’s, Vans, Utilities, or similar.                             • Allow a reasonable period of time for repairs following
    • Taxi Vehicles.                                                    return of the alleged defective engine vehicle to the
    • 4WD’s.                                                            installer’s place of business.
    • Turbo Assisted Passenger Vehicles– original standard            • Provide the GM Dealer, ACDelco Wholesaler or Retailer
      equipment - if turbo is professionally reconditioned /            with the purchaser’s copy of the original repair order or
      renewed.                                                          dated sales receipt and the purchaser’s copy of the
    • Parts & Labour Warranty.                                          powertrain warranty registration.
                                                                      • For technical or other assistance, contact the ACDelco
                                                                        Powertrain Centre at 1300-888-406.
    Authorisation
    • ACDelco, General Motors Corporation, warrants to the
      purchaser for the time periods indicated above, that it will    This Warranty Doesn’t Cover:
      repair or replace, at its option, using new or                  • Damage due to improper installation, negligence,
      remanufactured parts, any ACDelco Remanufactured                  alteration, accident or any use related to racing or
      Engine that fails due to a defect in material or                  competition.
      workmanship.                                                    • Towing, rental vehicles, loss of time, inconvenience, loss
    • ACDelco also reserves the right to refund the money               of use or other economic loss.
      originally paid by the purchaser for the covered engine         • ACDelco engines installed in applications not approved by
      and related labour to install.                                    ACDelco. Approved applications are contained in the
                                                                        ACDelco Remanufactured Engine Catalogue.
                                                                      • Installations in class “A” motor homes or in marine
    Limited Warranty                                                    applications.
    • This warranty covers the cost of parts and labour and           • Installations in vehicles where the odometer is non-
      begins on the date of purchase.                                   functional or the mileage reading has been altered.
    • Gaskets installed at the time of remanufacture at our           • Damage caused by lack of proper maintenance as
      facility are covered under this warranty.                         described in the vehicle’s original maintenance schedule,
    • Gasket sets packaged with the remanufactured engine are           failure to follow maintenance schedule intervals or failure
      warranted against defects in material and workmanship;            to use or maintain proper types and levels of fluids, fuel,
      however, leaks or other installation related failures are the     oil and lubricants recommended in the maintenance
      responsibility of the installer.                                  schedule.
    • The authorised ACDelco Wholesaler or Retailer who               • Proof of proper maintenance is the owner’s responsibility.
      initially sold/installed the engine assembly may perform          Keep all receipts and be prepared to make them available
      the repairs or sublet it to an independent service facility.      if questions arise about maintenance.
    • This warranty is transferable to subsequent owners
      provided the original owner properly registered the
      required warranty information with ACDelco at the time
      of original purchase.

6
Warranty Return Procedures
If the installed ACDelco Engine / Cylinder Head does not        • Returned engine will be analysed for root cause of alleged
operate properly, follow these steps:                             defect(s) to verify warranty coverage.
                                                                • ACDelco reserves the right to deny a warranty claim due
1. Gather Information                                             to improper installation, negligence, alteration or accident.
Gather the following information prior to calling the
ACDelco Powertrain Centre at 1300-888-406                       5. Claims
• ACDelco engine serial number.                                 Provide all invoices for parts and labour to the ACDelco
• ACDelco engine / cylinder head part number.                   engine supplier, notating each document with the assigned
• Vehicle Make / Model / Year / Registration No. / VIN.         claim number.
• Original proof of purchase / Invoice No.                      • All defective engines or components must be returned at
• Date original ACDelco engine / cylinder head was                owners expense for inspection within 7 days of repair
  installed.                                                      being effected, otherwise, the claim will not be accepted.
• Km at time of installation and current Kms.                   • Payment of sublet labour for work carried out will be
• Name & phone number of ACDelco remanufactured                   calculated at manufacturers standard time and will be paid
  engine supplier (The dealer, authorised ACDelco                 directly to the customer at the ruling applicable Warranty
  Wholesaler or Retailer who initially sold the engine            rate.
  assembly).                                                    • Unless you have ACDelco’s prior consent, never supply an
• Installation date.                                              engine or component as “NO CHARGE” to a customer
• Engine symptoms.                                                before a claim has been accepted.

2. Communication                                                6. Reimbursement
The ACDelco Powertrain Centre will:                             Warranty parts MUST be returned for vendor claims before
• Request the above information.                                any payment can be made. If parts are misplaced or lost a
• Assess information provided.                                  warranty claim will not be accepted.
• Recommend appropriate action.                                 • Authorised warranty reimbursement will be paid directly
• Recommend/authorise repair or replacement.                      to the ACDelco engine supplier.
• Provide claim authorisation number (if applicable).           • Subsequent reimbursement to the installer/purchaser will
• Provide shipping instructions for return of engine (if          be made by the ACDelco engine supplier.
  applicable).                                                  • All parts will be invoiced at cost plus tax.
                                                                • All documentation should be forwarded to the ACDelco
3. Authorisation                                                  Engine Centre with claim number clearly shown.
If engine repair/replacement is authorised by the ACDelco
Powertrain Centre, ACDelco may provide an engine or parts       Please Note
to installer for warranty work.                                 • With business vehicles, another engine may be supplied
• If engine / cylinder head is to be replaced, installer must     and charged to the customer pending the result of
  provide the ACDelco engine supplier with claim number to        dismantled inspection. If claim is accepted, a full credit
  procure replacement engine / cylinder head.                     will be processed.
• If engine is to be repaired, installer must provide repair    • Under no circumstances will payment for oil, oil filters,
  invoices for compensation to the ACDelco engine supplier.       phone calls, towing fees, freight, loss of profit, and
                                                                  demurrage arising out of a claim, be accepted.

4. Returns
Return replaced engine or parts to ACDelco engine supplier,
                                                                Serial Number & Part Number Locations
or to a location designated by the ACDelco Powertrain           To find the Remanufactured Engine’s Serial Number and
Centre.                                                         Part Number (also known as Model Number), locate the
• Replaced engine must be returned with fluids drained and      ACDelco Engine Tag located on the ACDelco Engine. These
  packed for shipment using shipping container from the         two numbers are needed prior to calling the ACDelco
  ACDelco engine.                                               Powertrain Centre in order to open a warranty claim.

                                                                                                                                  7
Exchange Policy
    Credit Requirements                                              Damaged Core Policy
    Your deposit will be credited when an exchanged engine /         Penalty charges apply to the refund of the deposit for
    cylinder head meets the following requirements:                  exchange engine / cylinder head as follows:
    1. Is free of any external visual damage to the engine,          • 80% of Deposit Value, if...
       eg. no hole in block.                                           - exchanged engine / cylinder head is not identical to the
    2. The engine / cylinder head returned is identical to the           unit supplied and described on the purchase invoice.
       engine sold and is fully assembled with a legible engine        - exchanged engine / cylinder head is damaged beyond
       number.                                                           normal repair, eg. hole in block, cracked or broken
    3. There are no visible signs of an attempted repair being           crankshaft.
       previously performed, eg. the cylinder head has not been      • 50% of Deposit Value, if...
       removed previously.                                             - exchanged engine / cylinder head has broken gearbox
    4. All similar parts supplied with ACDelco remanufactured            lug or similar damage.
       engine / cylinder head must be on the old exchanged           • 10% of Deposit Value, if...
       engine / cylinder head. A cost charge will be debited for       - exchanged engine has damage to sump or timing cover
       missing parts.                                                    and/or
    5. The old exchanged engine / cylinder head must be                - exchanged engine / cylinder head is incomplete, ie:
       identical to the make and model of the remanufactured             missing components which were supplied with
       engine purchased. The deposit will not be refunded until          ACDelco’s remanufactured engine (eg. rocker cover or
       it is established by inspection that the old engine /             side plates, etc).
       cylinder head is the same make, model, capacity and/or
       construction.                                                 Please note
    6. The old engine / cylinder head being exchanged must be        Above conditions are subject to change without notice.
       assembled and complete within the cover or crate that
       the ACDelco Engines unit was supplied in and must be
       free from visible external damage. The sump oil must be       Stock Returns
       removed.                                                      Units authorised for return to ACDelco may be subject to a
    7. The old engine / cylinder head being exchanged must be        15% penalty charge to cover the costs of inspection and/or
       received within fourteen days of date of purchase of the      transit damage unless the reason for return is an error by
       ACDelco remanufactured engine / cylinder head.                ACDelco.

    Engine / Cylinder Head Return Inspection Lawful Registration
    It is critical that careful inspection occurs on all “deposit” Requirement
    engine / cylinder head returns to confirm that the unit is the   Vehicle owners must advise the relevant vehicle registration
    correct model in exchange for the ACDelco remanufactured         authority of their change in engine number. Failing to do so
    unit – and that it is suitable for remanufacture, otherwise      could result in prosecution.
    penalties may be applied. A recommended inspection
    procedure is detailed later in this catalogue (see page 21)
    and should be followed.

8
How To Get The Best Out Of
Your ACDelco Remanufactured
Engine / Cylinder Head
Engine Fluids Coolants and Corrosion
Lubricants and coolants are the lifeblood of an engine and Modern engine and cooling systems have a far greater mix
only premium products should be used in ACDelco’s of different metals, which promotes corrosion. Todays
remanufactured engines. Using low priced oils and coolants engines are also working harder under more difficult
is false economy and ultimately will cost money instead of conditions, developing more heat which also contributes to
saving it. corrosion. Many rust corrosion inhibitors have been taken
off the market due to poor performance but unfortunately
Engine Oil many low price, poor performers can still be purchased.
Engine oil lubricates engine components by acting as a Avoid at all cost. Unmanaged corrosion can destroy
barrier between the internal metal parts. It also cools by cylinder heads, engine blocks, water pumps, thermostat
carrying away heat from the hotter parts of the engine. It housings, timing covers, cylinder liners, radiators and
must protect parts from corrosion and keep the engine welsh plugs in less than three months. Corrosion is almost
clean by carrying wear particles, dirt and dust in impossible to stop, but it can be controlled by using only
suspension to the filtration system. And assist with good the best products which exceed the Australian Standard.
fuel economy. Some oils do this better than others because Complete fill products are best - no water is added.
the additives used in the different oils can vary greatly, as Concentrates may be used as a second option, but should
does pricing. There are still oils in the market place with be mixed with demineralised (soft) water to very exact
specifications that are decades old and priced accordingly. concentrations and never topped up with plain water. It is
important to note that the concentration is critical - too little
or too much can be more damaging than plain water in
ACDelco’s Oils Are Preferable some circumstances.
To get the most out of your remanufactured engine, only
premium “five star” quality oils should be used.
Use ACDelco Fluids and Protect Your
Check Your Application Investment
Valve train components are very susceptible to problems As distributors and resellers of ACDelco’s remanufactured
from inadequate lubrication. LPG engines should use a engines / cylinder heads, only use and promote lubricants
specific LPG oil. or coolants of premium quality such as ACDelco to protect
your engine and reputation.
Oil’s cheap, engines aren’t
Many engine failures can be directly traced to inadequate
lubrication, so please remember: oil is cheap, engines are
not.
9Installation Guidelines
Why Replaced Engines Fail Required Methods to
And How To Prevent It Pre-Lube an ACDelco Engine
Happening To You Procedures for Mechanical
Distributor Applications
Replaced engines can fail for the following reasons... • Fill the crankcase with an A.P.I/S.A.E. certified engine
1. Contamination oil. Refer to the owner’s manual for recommended
• To prevent failure: Never use surface conditioning volume, seasonal viscosity, and grade.
disks, i.e., Scotch Brite Discs, Scat Pads, Roloc-Bristle • Insert an oil pump priming tool or an old distributor
Brush Discs, etc. shaft in place of the distributor.
• Always replace oil cooler if prior engine failed or if • Rotate the oil pump priming tool or distributor shaft
bearing failure is suspected. with a drill at 200 to 500 RPM for two additional
minutes after pressure builds up in the engine to
ensure that critical remote areas are sufficiently
2. Transferring Old Problems(s) To New lubricated.
• The distributor method is preferred because it also
Engine verifies the operation of the oil pump, pick up
• Qualify the performance and cleanliness of all tube/screen and allows for extended oil re-circulation
components and systems, i.e., ignition, cooling, fuel & and filtration.
EGR.
Pressurised Engine Pre-Lube
3. Overheating
• Flush or replace radiator. Procedure
• Verify water pump is performing at peak efficiency or • A pre-lube provides pressurised oil to the engine. It
replace it. reduces the chance of bearing damage which occurs
• After coolant fill, purge all air from the engine block. due to lack of lubrication or oil dilution.
• A pressurised engine pre-lube is highly effective on
non-distributor drive systems, as well as mechanical
distributor drive systems.
Guidelines For Installing An
ACDelco Engine
• Read the engine installation instructions provided with
each engine prior to removal of existing engine.
• Surface conditioning discs contain destructive
abrasives and should not be used to clean gasket
sealing surfaces or any transferred parts.
• Properly pre-lube engine (see Pre-Lube Guidelines).
• Thoroughly clean transferred parts (see detailed Engine
Replacement instructions for specific component
concerns).
• Contact 1300-888-406 for any questions.
Pre-Lubrication Guidelines
• If engine components do not receive proper
lubrication, they will scuff and/or seize.
10REMANUFACTURED ENGINES / CYLINDER HEADS
- WORKSHOP GUIDE -
Installation Guidelines
timing components, overhaul gasket set, all bearings
Getting Started and seals, torque-to-yield fasteners, hydraulic / Roller
• It is highly recommended that you read these Lifters and water pumps on applicable applications.
installation instructions and the applicable service
manual for your specific application before you begin
the installation process. Attention!
• By preparing ahead you will minimise the time needed The Installer must identify and repair any problem(s)
to complete the installation. More importantly, you will that may have caused the original engine to need
greatly increase the likelihood of a successful replacing.
installation and extend the longevity of this engine.
• As you read these instructions, pay particular attention If the root cause of engine failure is not corrected,
to the recommended tools, additional parts & subsequent engines may fail & are not covered by the
specifications you will need to know before you begin. ACDelco warranty.
• Even seasoned technicians can make mistakes or take
risky short cuts. Please take the time to do it right Root cause failure(s) are often found outside the base
because with ACDelco “The Right Way is the Only Way” engine itself & therefore the attaching components &
systems must be assessed & replaced as needed during
the installation process.
Introduction
• ACDelco Remanufactured Engines are put through a Diagnoses related to the proper fit & function of the
rigorous process of cleaning, inspection and machining following items or systems include:
in order to ensure the exceptional quality and traditional • Fuel, Lubrication, Cooling, (including thermostat and
value you have come to expect from ACDelco. radiator cap),
• To keep that exceptional quality, the engine must be • IGNITION TIMING (set the dwell and ignition timing,
installed properly with great attention to even the check mechanical, vacuum advance and total ignition
smallest detail. advance),
• The purpose of this guide is to give you an overview of • INDUCTION, EXHAUST (including plugged catalytic
how to properly replace the old engine for an ACDelco converters),
Remanufactured Engine. • E.F.E. VALVE, E.G.R., VACUUM and ELECTRICAL are
MANDATORY.
Long Block Assembly Warning!
Your ACDelco Remanufactured Engine is a long block When cleaning gasket sealing surfaces on the ACDelco
assembly with the applicable parts: engine and/or when cleaning parts being transferred
Remanufactured: from the failed engine, the use of SURFACE
• Engine block, crankshaft, head(s), camshaft, CONDITIONING DISCS, which contain aggressive
connecting rods, rocker arms, & roller lifters. abrasives such as ALUMINIUM OXIDE, can cause
Reclaimed and Revalidated: immediate bearing failure.
• Push rods, valve springs, non torque-to-yield
THE USE OF SURFACE CONDITIONING DISCS IS
fasteners, balance shafts.
STRICTLY FORBIDDEN and CAN VOID THE WARRANTY.
New or Reclaimed and Revalidated:
• Oil pan, rocker arm/valve cover(s), front cover, and Some products known to contain abrasives are i.e.
fasteners for tinware. Some valve covers may have to SCOTCH BRITE ABRASIVE DISCS, ROLOC BRISTLE
be exchanged). DISCS, SCAT PADS.
• Please note that certain ACDelco engines do not have
these components and therefore will require transfer of Acceptable methods of removing gasket material from
these parts from the engine being removed. transferred components are:
New: 1. Hand Scrapers
• Pistons, piston rings, flat lifters, freeze plugs, galley 2. Aerosol Gasket Remover
plugs, valves, valve seats, valve stem seals, dowel pins,
11Installation Guidelines
Engine Oil Cooler A. Intake Manifold
If the engine being replaced has failed, the Engine Oil 1. Inspect the intake manifold’s machined surfaces for
Cooler must be replaced and the oil lines and oil filter flatness using a straight edge. If the manifold is
adaptor must be removed and thoroughly flushed or warped or the machined sealing surfaces are
replaced. damaged, it may not seal properly, thus, allowing
coolant, oil and other contaminants to enter the
Please note: the oil filter adaptor may be incorporated in combustion chambers or crankcase.
the engine block, attached to the engine block or located 2. Check for cavitational erosion or pitting.
in a remote location. 3. Check for obstructions in the internal EGR or exhaust
crossover passages, in addition, look for cracks at the
bolt holes and sensor mounting holes.
Engine Updates 4. Always clean the intake manifold before it is placed
This engine has been remanufactured subsequent to the on the new engine (by removing the baffle if so
model year of the vehicle, and as such may incorporate equipped) and thoroughly clean the EGR passages.
design refinements not included in the original service Any foreign material left in the intake manifold can be
information. reintroduced into the replacement engine. This
material can cause immediate piston and bearing
For example, engines may incorporate design damage or failure. Foreign material reintroduced or
refinements contained in more current model year(s). introduced, i.e., a loose bolt dropped into engine, are
NOT covered by the ACDelco warranty
If future service is necessary for this ACDelco engine, 5. Do not use hostile blasting media i.e., sand, glass
call the ACDelco POWERTRAIN CENTRE at 1300-888- beads, steel shot or any type of hard media due to its
406, for proper service parts and service procedures propensity to contaminate the engine. In addition, Do
necessary to accommodate any refinements not use surface conditioning discs, these types of
incorporated in the ACDelco engine. cleaning media are associated with engine bearing
failures.
Before Installing an ACDelco B. Flywheel / Flex Plate / Ring Gear
Engine: 1. Check the flywheel for flatness using a dial indicator;
refer to manufacturer’s published information
Verify that the engine is correct for the application, refer
regarding exact specifications. Check for damaged or
to the appropriate Vehicle Chassis Service Manual for
worn teeth on the flex plate ring gear or flywheel.
proper repair procedures and specifications, if not
Replace if worn or damaged.
covered in this installation guide (eg. Fastener torque,
2. Inspect the mounting holes and the torque converter
torque sequencing, ignition timing, and air purge during
or pressure plate mounting holes for cracks or wear.
coolant fill).
Inspect the clutch contact surfaces for heat cracking
and discolouration. As with the components listed
Transferable Components above, if cracks are found, replace the plate with a
Take out the old engine, mount it on an engine stand, new plate.
and carefully remove those components that are 3. The crankshaft pilot bushing must be transferred or
expected to be transferred to the ACDelco engine. replaced as required. A pilot bushing does not come
with the ACDelco engine.
The following is a list of parts that need to be qualified
prior to transfer and what to look for when inspecting
them for wear and or damage. If they are damaged or
were probable causes of the original engine failure, they
should be replaced.
12REMANUFACTURED ENGINES / CYLINDER HEADS
- WORKSHOP GUIDE -
Installation Guidelines
C. Pressure Plate/ Release Bearing burrs. If these conditions are found, replace.
4. The distributor/oil pump drive should be free of nicks,
/Clutch Disc burrs and chipped teeth. If any of these conditions are
1. Inspect the clutch contact surface for heat checking or present, replace the distributor.
cracks & the release fingers for wear & even height.
2. Check the release bearing for facial wear and smooth
rotation and the pressure plate for flatness. G. Other Transferable components
3. The clutch disc will need to be inspected for oil • Mechanical fuel pump - On high mileage vehicles with
contamination and excessive wear such as heat the original OEM FUEL PUMP, it is recommended that
cracking of friction material, worn friction material, the fuel pump be replaced.
loose rivets, and broken springs. If any of these • Harmonic Balancer - Many times, the harmonic
conditions exist, replace the pressure plate, release balancer’s sealing surface has worn grooves from the
bearing and/or clutch disc. front cover crankshaft seal. The balancer must be
repaired or replaced to prevent a leak in the front cover
D. Exhaust Manifold(s) seal.
1. Inspect the exhaust manifold(s) flanges for flatness • All pulleys and other brackets should be inspected for
and for carbon ‘witness’ marks. Witness marks may alignment and physical integrity.
indicate a leak has occurred. If leaking is indicated or • Cleaning Components
if the exhaust manifold(s) sealing surfaces are not flat, • Clean all of the components thoroughly, making sure
replace it with a new or qualified manifold. that all the old gasket material is properly removed.
2. Check the manifold(s) for cracks and shrinkage • Acceptable methods of removing gasket material from
especially at the external EGR connections, the transferred components are:
exhaust pipe flanges, and the manifold’s mounting 1. Hand Scrapers
flanges. Compare the mounting hole spacing on 2. Aerosol Gasket Remover
individual runners to the new cylinder head for • Don't Use Surface Conditioning Discs
exhaust manifold shrinkage. If there is excessive • Do not use surface conditioning discs on any surfaces
shrinkage, it will hinder or prohibit its installation, that will be exposed to oil, coolant, or fuel in your
therefore, replace it with a new or qualified exhaust replacement engine.
manifold. • Any component that can not be cleaned or repaired to
acceptable working order or is not within the
E. Water Pump manufacturer’s specifications, should be replaced with
1. It is highly recommended that the water pump be a properly functioning service part.
replaced when installing an ACDelco engine. If the old • When cleaning aluminium components, be particularly
water pump is reused, qualify it by checking for careful not to nick or gouge the sealing surfaces.
impeller looseness, front seal leakage and for smooth • Component Re-use
bearing feel. Water pumps exhibiting any sign of wear • As a general rule, the re-use of transferred parts
should be replaced. should be minimised.
• The greater the number of components replaced rather
than re-used, the greater likelihood of a successful
F. Distributor installation and long term satisfaction with the choice
1. On engines that contain a distributor ignition system, to repower with an ACDelco engine.
it is critical that time be spent assessing any parts • While the engine is out of the vehicle, take advantage
associated with the distributor and related of the accessibility of the components and replace as
components. The reuse of unqualified or failed many worn parts as possible. Parts transferred from
distributor parts can negatively affect the engine the original engine may be beyond their design life or
timing, performance and driveability. may be performing marginally at best. Questionable
2. The drive gear should be checked for honed teeth, the parts re-used will hinder the performance of the
shaft should rotate freely and have no side play. The ACDelco engine. If they are not replaced, it may lead to
body and block seals should be free from distortion customer dissatisfaction and cost more in time and
and cuts. Replace seal if necessary. money than replacing them up-front.
3. The cap/rotor should be free of corrosion, cracks and
13Installation Guidelines
• Mandatory Replacements To begin, have the replacement ACDelco engine
Components that should be considered automatic mounted on an engine stand. Position it so that the
replacements are as follows: intake valley is on top.
• Thermostat.
• PCV valve and crankcase breather filter. 1. Install the dampener using a
• Spark plugs and spark plug wires. dampener installation tool.
• Filters: oil, air, fuel, transmission. • Be sure to visually inspect the alignment of the
• Hoses. dampener before proceeding.
• Belts. • To prevent an oil leak, add RTV sealant in the
• EGR Valve. dampener key slot to seal the key to the key way.
• Oxygen Sensors.
2. Install the water pump.
• Check Other Components • When using the old pump, be sure to inspect the front
Other components may need to be replaced in order for shaft seal for leakage, the bearings for smooth bearing
the ACDelco engine to function to its full potential. feel, and the impellers for looseness and wear.
Check the working condition of components such as the: • Coat the bolts that enter the water jackets with RTV
• Starter motor. sealant.
• Cooling fan motor. • Apply RTV sealant to the front cover and block joint.
• Battery.
• Battery cables. 3. Pre-lube the engine before
• Fuel injectors. continuing.
• Fill the crankcase with an A.P.I. certified engine oil.
Refer to the owner’s manual for recommended volume,
Flushing The Cooling System seasonal viscosity, and grade.
If the old engine is still running, flush the cooling system
• The easiest and most efficient way to pre-lube the
before exchanging engines.
engine (if working on an engine with a mechanical
distributor), is with a hand-held drill via the distributor
If the engine is not running, remove the radiator and
shaft oil pump interface.
have it professionally flushed or replace it with a new
• If the engine does not have a distributor driven oil
radiator.
pump, use a pressurised engine pre-luber. This will
work on all applications.
The cooling system enables heat to be transferred from
• See pre-lubing instructions later in this section for
the engine. Corrosion, improper coolant to water ratios
detailed procedure.
& old coolant can hinder the transfer of heat.
4. Install selected gaskets & seals
Overheating can cause engine damage or failure. Refer • Once the engine is pre-lubed, install the intake
to the service manual for the specific instructions for manifold side gaskets and the end seals on the block
flushing the vehicle’s cooling system. and cylinder heads, placing RTV sealant at the corners.
Warning! Any exposed Block and Head Sealing
For basic instructions on flushing the cooling system, Surfaces on the ACDelco engine DO NOT require any
refer to the section later in this guide describing flushing cleaning (i.e. Surface Conditioning Pads). The black
procedures. colour of the surface is normal and is a result of the
remanufacturing process and not paint over spray. It
does not have a detrimental effect on the engine.
Engine Installation Outline
The following is an outline of the steps involved in
installing an engine.
They are provided as a general order in which the
components should be transferred from the take-out
engine and on to the ACDelco engine.
14REMANUFACTURED ENGINES / CYLINDER HEADS
- WORKSHOP GUIDE -
Installation Guidelines
5. Install the intake manifold 12. Install flywheel and clutch
• Install the intake manifold making sure to torque to • Install the flywheel and clutch components
spec the bolts in the proper sequence. 13. Remove from stand
• Refer to the service manual for that vehicle and • Remove the engine from the engine stand
application for the specific sequence.
• As a rule of thumb, tighten the bolts from the inside 14. Install engine
out, alternating sides and crisscrossing front to back. • Install the engine in the vehicle
• If the intake manifold does not seal properly to the 15. Reconnect engine.
heads, water, oil and other contaminants can enter the • Reconnect transmission, exhaust system and any
combustion chambers and therefore can cause other component disconnected when removing the
considerable damage. original engine.
6. Install the valve cover(s).
• If valve cover(s) are removed to facilitate intake
manifold installation, be sure to re-torque to spec those
fasteners in the proper sequence.
• As with the intake manifold, the valve covers need to
seal properly to avoid damage to the engine.
• Refer to the applicable service manual for specific
sequence and torque values.
7. Set the static ignition timing.
• After the valve covers have been replaced on the
remanufactured engine, set the static ignition timing.
• Refer to the service manual for the proper procedure.
8. Install exhaust manifold
• After setting the timing, install the exhaust manifold
9. Install fuel pump & fuel lines
• Install the fuel pump and fuel lines being sure of the
proper routing for the fuel lines.
10. Install the vacuum hoses.
• Install the vacuum hoses.
• Check hoses for cracks or damage.
• Replace them with new as necessary.
11. Install other components:
Install all other components (if applicable):
• Front end brackets
• Crankshaft pulley
• Water pump pulley
• Air conditioning compressor
• Air pump
• Alternator (generator)
• Power steering pump
• All sensors that were removed from the original engine
• Engine mounts (engine to frame) inspect for worn,
cracked, loose or damaged mounts replacing with new
as necessary
• External EGR components
15Installation Guidelines
About LPG Use Before Initial Start Up
Agents selling reconditioned engines have the Before the initial start-up:
responsibility to establish whether the engine will be
used for LPG fuel.
1. Make sure of the following
The following information is critical: • Make sure the battery is fully charged.
• Make sure the engine has been full and properly pre-
lubed, the oil is at its proper level, and the engine is
1. Oil consumption pressurised completely.
• Oil consumption will in some cases be higher for an • Pressure check the cooling system, pressure should
engine running on LPG. The cooling effect of the not exceed 20 psi (138 KPA).
vaporising petrol is absent from the inlet valve and this • Check hoses.
combined with slightly higher combustion • Check cylinder heads.
temperatures obtained with LPG can make the inlet • Check freeze plugs.
valve run hotter, hence oil in the inlet guide region • Radiator - Check the core, transmission oil cooler, and
tends to flow more easily down the guide, despite there the drain cock.
being the normal sealing arrangements. • Radiator cap - be sure it is the correct cap for your
2. Valve seat wear application and it maintains pressure. (New cap
• As LPG doesn’t have the same lubrication properties recommended).
found in petrol, it can have the unfortunate side effect 2. Check the routing
of causing rapid valve seat wear, especially if the Check the routing of various other components such as:
engine is subjected to hard work or prolonged high • Belts - check the tension and adjust them accordingly,
speed driving where exhaust valve temperatures are if needed.
high. Therefore, the use of a high quality valve seat • Electrical harnesses - Check the ignition wiring and
insert, as used in ACDelco engines, is essential. firing order, the harnesses and wires to the alternator
3. Bearing corrosion (generator), cooling fan, starter, sensors and the
• Another area that can reduce the engine’s life is the carburettor (if applicable).
bearings which in some cases may suffer from a • Intake system - check the ducts, filters and vacuum
corrosive effect if the lubricating oil is left in the sump hoses for proper placement and condition.
for too long. • PCV system - check the hoses and clamps for proper
4. Dual fuel vehicles placement and condition.
• It is strongly recommended that where an LPG engine • Fuel lines - check for proper placement and condition.
is installed in a dual fuel vehicle, that it is run-in on Replace if necessary.
petrol for a minimum of 10,000 kilometres, prior to • Refer to the Vehicle Emissions Control information
changing to LPG constant use. label for the proper hose routings.
About Diesel Engines
• Check injector pump timing marks and remark if
necessary.
• Replace or overhaul injector pump and injectors.
• Set injector pump timing with dial indicator, pulse
timing light and/or spill timing.
16REMANUFACTURED ENGINES / CYLINDER HEADS
- WORKSHOP GUIDE -
Installation Guidelines
After Initial Start Up 5. Set dynamic ignition timing
• Dynamic Ignition Timing should be set at this time, if
1. Check for fluid leaks applicable.
Check for fluid leaks in the following areas: • Incorrect timing is a cause of engine failure. Be sure to
• The entire fuel system. check vehicle’s timing is correct.
• Valve/Camshaft cover gasket(s). • To verify specifications or procedures used in
• Cylinder head gasket(s). adjusting the timing and the idle speed, check the
• Oil Filter. manufacturer’s published information. Also, refer to
• Oil level indicator (dipstick) tube. the Vehicle Emission Control Information label for
• Oil pressure sending unit. specifications.
• Cup plugs or pipe plugs at the end of the oil passages.
• Oil pan gaskets.
6. Check the engine vacuum.
• Oil pan front and rear end seals. To do this:
• Crankshaft front and rear seals. • Install a vacuum gauge at the intake manifold.
• Side bolts. • The vacuum gauge should read steady at
Note: If any oil leaks are found, but the source of the approximately 18 in Hg at idle or above depending on
leak is not detectable, use the“Black light& dye kit”or the altitude.
the“Pressure method”to pinpoint the source of the • A low vacuum reading may indicate a restricted
leak. exhaust system.
• A fluctuating vacuum may indicate internal engine
2. Check fluid levels & conditions concerns.
Check for fluid levels and conditions of the following:
• Engine Oil.
7. Check other items:
• Check for factory recommended pressure (see manual) • Check belt tension if applicable.
at operational temperature. • Check component routing.
• Verify oil level is at the manufacturer’s recommended
amount.
• Engine coolant.
• Make sure the thermostat is functioning properly.
• Be sure the coolant is flowing freely through the
system and all air has been purged from the system.
3. Check fluid levels, colour & smell
Check the following fluids for level, colour and smell. If
any are found to be darker in colour or smell burnt, drain
and flush before refilling.
• Transmission fluid.
• Power steering fluid.
• Brake fluid.
4. With the engine running, listen for
noises such as:
• Abnormal noises.
• Detonation.
• Exhaust leaks.
• Vacuum leaks.
• Tapping / Knocking.
• Loose or broken attaching components.
• Drive belts.
17Appendix
Pre-Lubing the Engine A. Distributor Method
One of the most crucial steps in installing a new The most common method of pre-lubing an engine is
remanufactured engine is to pre-lube the new engine with a mechanical distributor. If this is possible with the
before the initial start-up. particular engine application being replaced, use the
procedure as follows:
If the engine components do not receive proper 1. It is recommended to fill the oil filter provided from
lubrication, the engine bearings will be damaged or an Engine Oil Supplement (E.O.S.), Pour the
seize. remainder over the camshaft if exposed or in the oil
fill port to ensure that these areas are well lubricated.
There are two preferred ways to pre-lube an engine. With E.O.S. is a highly effective engine break in compound
each method, it is very important not to overfill the specifically designed to reduce scuffing during the
engine with oil. Only use the manufacturer’s initial break-in. Fill the crankcase with an A.P.I.
recommended amount for that application. certified engine oil. Refer to the owner’s manual for
recommended volume, seasonal viscosity and grade.
2. Insert an oil pump priming tool or an old distributor
shaft in place of the distributor.
3. Rotate the oil pump priming tool or distributor shaft
with a drill at 200 to 500 RPM for two additional
minutes after pressure builds up in the engine. This is
to flush any debris from the engine without placing a
load on the bearings while maximum clearances are
present and to ensure that critical remote areas are
sufficiently lubricated.
• Be sure to check in either the service manual for the
engine/vehicle or the intake manifold for the
direction of the distributor; either clockwise or
counter-clockwise.
• The oil has built up enough pressure in the engine
when the oil flows freely over all the rocker arms.
• The distributor method is preferred because it also
verifies the operation of the oil pump, pick up
tube/screen and allows for extended oil re-
circulation and filtration.
B. Pressurised Engine Pre-Luber
Method
Another method of pre-lubing the new remanufactured
engine is to use a pressurised engine pre-luber.
These types of pre-lubers provide pressurised oil to the
engine. It also reduces the chance of bearing damage,
which occurs due to lack of lubrication or oil dilution.
Because there are so many engine oil prelubers on the
market today, follow the manufacturer’s instructions for
use.
18REMANUFACTURED ENGINES / CYLINDER HEADS
- WORKSHOP GUIDE -
Appendix
A common method of flushing the cooling system,
Flushing the Cooling System which does not require any special tools or equipment,
Flushing the cooling system is probably one of the most is simply to flush the system with a garden hose as
important, yet one of the most overlooked procedures follows:
when installing a remanufactured engine.
It is important to rid the system of corrosion and other
1. Remove the radiator cap
contaminants to ensure that the new engine has the • Remove the radiator cap from the radiator by slowly
proper heat transfer characteristics. Otherwise, the turning it counter-clockwise.
engine will overheat which may cause considerable • When all the pressure (indicated by the hissing sound)
damage. is released you may remove the cap.
• Do not take the cap off quickly. Since the coolant
In addition to flushing the system, take the time to verify mixture is under pressure, it could splash up and
the reliability and overall quality of the entire system cause injury if the pressure is released to quickly.
including the radiator and hoses. 2. Open cylinder block drain valves
• Open the cylinder block drain valves, making sure to
Besides checking the water pump, flush the radiator have the proper drainage containers to drain the
thoroughly and check for blockages. coolant into for proper disposal.
• Do not dump the coolant down the drains.
Also, replace or inspect hoses and check for cracks, rips, 3. Place hose inside the radiator
brittleness and soft spots.
• Place a garden hose inside the radiator and let the
Because the engine is newly machined and the water circulate while the engine is running. This will
components are not fully broken in, the engine will run effectively flush the cooling system provided that there
hotter. are no blockages in the system.
4. Check overall system is working
Therefore, make sure that the entire cooling system is in • Be sure to check the overall system to ensure it is in
very good working order so that the excess heat can be proper working condition.
properly transferred and taken away from vital engine
parts. 5. Add cooling system tabs
• Add cooling system tabs if provided loose with engine
Flush the system before pulling out the old engine, (if not provided, tabs were installed internally at the
provided the old engine is still running. factory).
• Cooling system tabs aid in sealing porosity in
If this is not the case, remove the radiator and have it aluminium and remove silicates from the water pump
professionally flushed or replace it. shaft that form from the coolant. This extends water
pump shaft seal life.
Before flushing the system, check with the service
manual for that specific make and model of vehicle to
determine if the system has any unique features, and
which procedure is recommended for flushing the
system.
Some models feature air bleed vents similar to those on
a brake system.
They are used for basically the same function: to bleed
air bubbles out of the system.
Because air pockets can cause the engine to overheat, it
is very important that all air is out of the cooling system
before the vehicle is driven.
19Appendix
Other considerations
Installing an engine properly requires a great amount of
attention to details in order for the engine to function
properly and continue to function properly.
Below are some things to check before returning the
vehicle to normal service:
1. Is the Timing Set?
• Refer to the vehicle manufacturer’s instructions for
procedures and specifications.
2. Are bolts & fasteners torqued?
• Are all the bolts and fasteners torqued to the
manufacturer’s specifications and in the recommended
sequence according to the service manual?
3. Replacements check
• Have the spark plugs, spark plug wires, fuel filters, air
filters and hoses been replaced to ensure maximum
performance and reliability?
4. Breaking-in
• Has the customer/driver been informed of the
recommended ‘break-in’ period and procedures for this
ACDelco engine (see After Installation Guidelines)?
5. Test drive
• Has the vehicle been test driven for a minimum of
50km of combined city and highway driving, not
exceeding 80kph or using any fast throttle responses?
6. Maintenance Schedule
• Has the manufacturer’s recommended maintenance
schedule been relayed to the customer/driver
emphasising that this is a remanufactured engine and
will need to be serviced as a new engine?
7. Maintenance Schedule
• Has the customer/driver been informed to have the first
filter and oil change between 500 and 800 km?
20REMANUFACTURED ENGINES / CYLINDER HEADS
- WORKSHOP GUIDE -
Appendix
Engine Return Inspection
Procedures
It is critical that careful inspection occurs on all
“deposit” engine returns to confirm that the unit is the
correct model in exchange for the ACDelco
remanufactured unit – and that it is suitable for
remanufacture, otherwise penalties may be applied.
A recommended inspection procedure is detailed below
which should be followed:
1. Check Engine Number
• Check to ensure that it has not been altered, damaged
or erased. Engines affected in this manner will not be
acceptable for return.
2. Check Engine Model
• Check to ensure that the engine for return is the same
as the ACDelco Engines remanufactured unit.
3. Check Damage
• Check the return engine for damage to rocker cover,
sump, timing cover, and broken lugs on block.
• Also for cracks and other visible damage to block and
cylinder head. Check that the crankshaft will rotate a full
360 degrees.
4. Drain Oil
• The oil from sump must be drained.
5. Assemble to Stand
• The return engine must be assembled to the engine
stand and must be equipped with the lifting chain.
21Appendix
Help for difficult to identify Mazda
• Refer to casting number of block and/or engine
engines number stamping to establish correct capacity.
Specific attention should be given to the following
engines which are known to present difficulties in Engine Model Capacity
identifying their correct engine capacity. F2 2200cc
F8 1800cc
FE 2000cc
Ford MA 2000cc
- Ford Laser 1300cc and 1500cc NA 1600cc
• The 1300cc model is identified with ”E3” stamping on TC 1300cc
rear of block. UC 1400cc
• A 1300cc worn engine should not be exchanged in lieu VC 1800cc
of a 1500cc which has its engine number identification
“E5”.
Mitsubishi
- Ford Cortina and Escort O.H.V. (1300cc and 1600cc) • Refer to casting number on block and/or engine
• Correct capacity identification can be established by number stamping to establish correct capacity.
measuring distance from head gasket to oil pan gasket,
and by measuring distance from top of block to water Engine Model Capacity
pump: Sigma M3 or 4G51 1850cc
Head Gasket to Oil Pan Gasket Measurements Sigma M4 or 4G52 2000cc
• 1300cc, 7&1/4 inch (approx.184mm) Sigma M5 or 4G54 2600cc
• 1600cc, 8&5/16 inch (approx. 211mm)
Top of Block to Water Pump Measurements - Mitsubishi Express/Nimbus
• 1300cc, 3/4 inch (approx.19mm) Imported motors with a G32B engine number prefix are
• 1600cc, 1&7/8 inch (approx. 47mm) not acceptable for return or credit. All Australian engines
have engine no. prefix 4G. For example:
- Ford 6 Cylinder and V8 Long Motors
• Measure with probe through spark plug hole. Piston to Engine Model Capacity
be a bottom – dead centre. Measurement to be from 4G12 1400cc
edge of piston to top of spark plug hole. 4G32 1600cc
200 CI = 51/4 inch (approx. 140mm) 4G37 1755cc
302 CI = 6 inch (approx. 153mm) 4G62 1800cc
250 CI = 53/4 inch (approx. 146mm) 4G63 2000cc
351 CI = 61/2 inch (approx. 165mm)
Holden
- 6 Cylinder and V8
• Refer to casting number on block to establish correct
capacity.
22REMANUFACTURED ENGINES / CYLINDER HEADS
- WORKSHOP GUIDE -
Appendix
After Installation Please note
After installation, fill in the ACDelco Warranty • The Installation Facility is responsible for completing
Registration form... the Powertrain Warranty Registration Form.
1. Complete Vehicle Owner To extend the life of the
Information
• Name and Address. ACDelco Engine:
• ACDelco recommends the first oil and filter change be
2. Complete Vehicle Information performed between 500-800km of driving.
• Vehicle Make/Model/Year (eg: Holden, Commodore VX, • Use of ACDelco Oil Filters are recommended.
1999).
• Kilometres on odometer at time of installation.
• VIN Number. The First 800 Kms
3. Complete Product Information During the first 800kms, the vehicle.
• Purchase/Installation Date. • Should not be driven over 90 Km/h.
• Serial Number & Part Number from installed engine. • Should not be driven for extended periods at any
single speed.
4. Complete Installation Facility • Should not tow a trailer or carry heavy loads.
Information • Driver should always vary speeds.
• ACDelco Engine Supplier Name. • Driver should not accelerate rapidly.
• Installation Facility Name & Address.
23Remanufactured Engine Service Requirements
Preventative Maintenance 10,000 Kilometre/6 Month Service
(whichever occurs first)
Schedule 1. Change engine oil.
After 800 kilometres and then every 5,000 kilometres or 2. Change oil filter.
3 months (whichever occurs first), thereafter ensure that 3. Check ignition timing, distributor operation and
the following is undertaken: advance.
4. Pressure test and check cooling system and fan belt.
800 Kilometre Service 5. Adjust tappet settings (where applicable).
1. Change engine oil to recommended grade, not friction 6. Tighten all external screws and bolts.
modified oil and ensure oil level is correct. 7. Ensure that all pollution control/breathing equipment
2. Change oil filter. conforms to manufacturer’s specifications and
3. Retension cylinder head bolts after initial warm up. service air cleaner.
Cast iron heads hot. Alloy heads cold if hot 8. Check fuel system for correct operation. Includes
specification not available. Adjust tappets where diesel and E.F.I. applications.
applicable. Both operations to manufacturer’s 9. Test coolant concentration and rectify any signs of
specifications except Magna/Sigma. stray current and/or incorrect mixture strength of
4. Check ignition setting. coolant.
5. Check fuel mixtures. 10. Change coolant if not long life specification.
6. Check cooling system with analyser. 11. Check radiator airflow, thermostat, thermatic or
7. Tighten all external screws and bolts. viscous fan.
8. Check and note oil pressure:
Service Costs
At idle_____________________________ • All service costs are the owners expense.
At 2,000 rpm_______________________
Manufacturers Recommendations
• Carry out further maintenance of the engine in
5,000 Kilometre/3 Month Service accordance with manufacturer’s recommendations.
(whichever occurs first) • Failure to carry out servicing will render the warranty
1. Change engine oil. null and void.
2. Pressure test and check cooling system and fan belt.
3. Check radiator airflow, thermostat, thermatic or Please Note:
viscous fan. • Oil level must be checked at manufacturer’s
recommended intervals, ie: at each fuel stop.
• Coolant levels should be checked cold weekly.
24You can also read