RecoMedia User Manual - Presentation made easy
←
→
Page content transcription
If your browser does not render page correctly, please read the page content below
KN-5YHW

            User Manual

RecoMedia

Presentation made easy
    Thank you for purchasing this product.
 To receive latest update, please visit website
              www.recomedia.co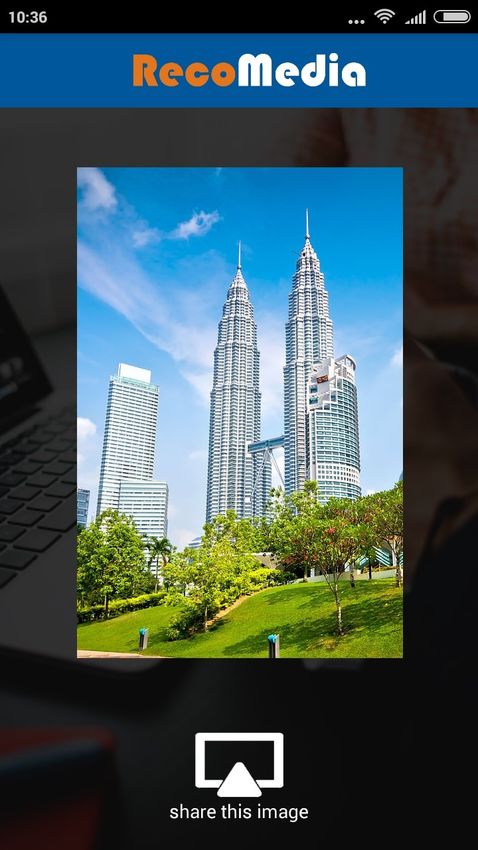
FEATURES

FEATURES

Wireless Presentation
RecoMedia provides two modes of operation. The first mode allows presenter to
project desktop content by pressing “show” button. The second mode allows a mod-
erator to synchronise all presentations.

HDMI/VGA Output
You can connect either the HDMI or VGA port to a projector.

Recommendation of optimal screen resolution
Presenter will be recommended with optimal screen resolution which best matches
the projector resolution for clear presentation quality

Dual Band WiFi
Presenter can connect to RecoMedia at 2.4 GHz or 5 GHz WiFi.

USB Host Support
You can connect and make presentation from USB flash drive.

Web Viewer
Participants can view the current presentation using any device which supports web
browser. Each presentation screen can be saved onto their device for offline view-
ing.

Mobile Client
Users can also share photos, PDF documents and videos from smartphone or tablet
device installed with RecoMedia mobile app.

Session Control
You can perform Session Control by setting up WiFi password. Only users with WiFi
password can join the presentation session.

                                         2
SAFETY INFORMATION
SAFETY INFORMATION
SAFETY WARNINGS
TO REDUCE THE RISK OF ELECTIRC SHOCK, DO NOT REMOVE THE COVER (OR BACK).
NO USER-SERVICEABLE PARTS ARE INSIDE. REFER SERVICING TO QUALIFIED SERVICE
PERSONNEL.
This symbol indicates “dangerous volt-
CAUTION age” inside the product that presents a
risk of electric shock or personal injury.
RISK OF ELECTRIC SHOCK
This symbol indicates important instruc-
tions accompanying the product.
WARNING : To reduce the risk of fire or electric shock, do not expose this appliance
to rain or moisture.
CAUTION: TO PREVENT ELECTRIC SHOCK, MATCH WIDE BLABE OF PLUG TO WIDE
SLOT, FULLY INSERT.
This apparatus shall always be connected to a AC outlet with a protective
grounding connection.
To disconnect the apparatus from the main socket, the plug must be pulled out
from the main socket.
CAUTION
Do not expose this apparatus to dripping or splashing. Do not put objects filled
with liquids on the apparatus.
To turn this apparatus off completely , you must pull the power plug out of the
wall socket.
3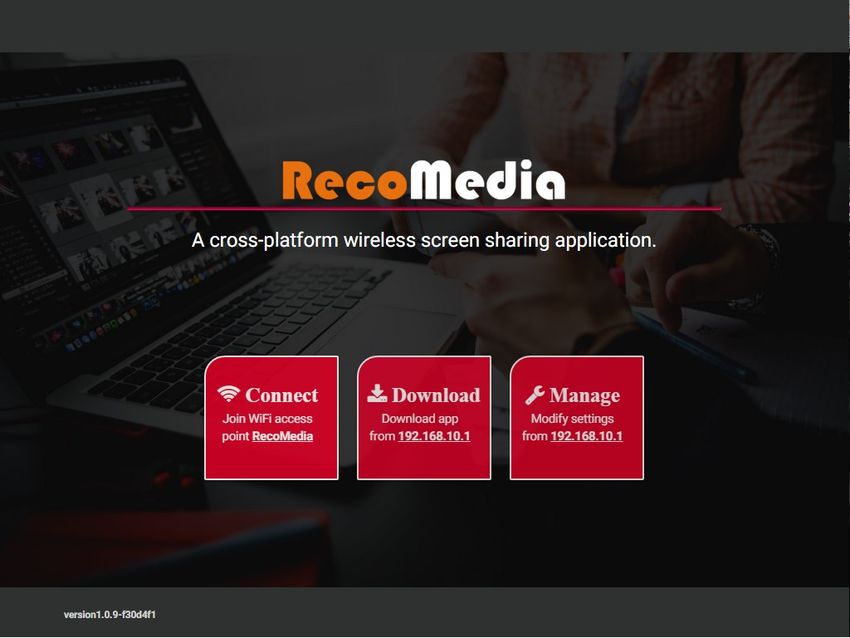
SAFETY INFORMATION

PRECAUTIONS
Ensure that the AC power supply complies with the power requirement printed on
the label located at the back of the unit. This product can be installed by wall-
mounting or placed horizontally on a suitable base, with enough space around it for
ventilation (10~15 cm). Make sure that the unit is not covered blocking air flow for
ventilation. Do not put the unit on projector or other equipment which may become
hot. This product is designed for continuous use. To fully turn off the unit, by press-
ing the power button and disconnect the AC plug from the wall outlet. Unplug the
unit if you intended to leave it unused for a long period of time.

During thunderstorms, disconnect the AC plug from the wall outlet. Voltage peaks
due to lightning could damage the unit.

Do not expose the unit to direct sunlight or other heat sources. This could lead to
overheating and cause the unit to malfunction.

Protect the product from moisture and excess heat or equipment creating strong
magnetic or electric fields. Disconnect the AC plug from the wall outlet if the unit
malfunctions. This product is not intended for industrial use. Condensation may oc-
cur if the product has been stored in cold temperatures. If transporting the unit in
winter, wait approximately 2 hours until the unit has reached room temperature
before using.

The battery used with this product contains chemicals that are harmful to the envi-
ronment. Do not dispose of the battery in the general household trash. Do not ex-
pose the battery to excess heat, direct sunlight, or fire. Do not short circuit, disas-
semble, or overheat the battery. Danger of explosion if the battery is replaced incor-
rectly. Replace only with the same or equivalent type.

                                           4
CONTENTS

CONTENTS

2 FEATURES                     13 MOBILE APP
                               13 MOBILE APP INSTALLATION
3 SAFETY INFORMATION           14 STARTING MOBILE APP
3 SAFETY WARNING               15 SHARING IMAGES
4 PRECAUTIONS                  16 SHARING VIDEOS
                               17 SHARING PDF DOCUMENTS
6 GETTING STARTED
                               18 CONFIGURATION
7 DESCRIPTIONS
7 FRONT PANEL                  19 CONTENT MANAGEMENT
7 BACK PANEL                   20 UPLOAD FILES
                               21 DELETE FILES
8 CONNECT To PROJECTOR         22 DOWNLOAD FILES

9 STARTING UP                  23 TROUBLESHOOTING

10 SOFTWARE INSTALLATION       24 PRODUCT SPECIFICATIONS

11 CONDUCT PRESENTATION        24 CONTACT
11 FREE AND EASY MODE
12 MODERATED MODE

                           5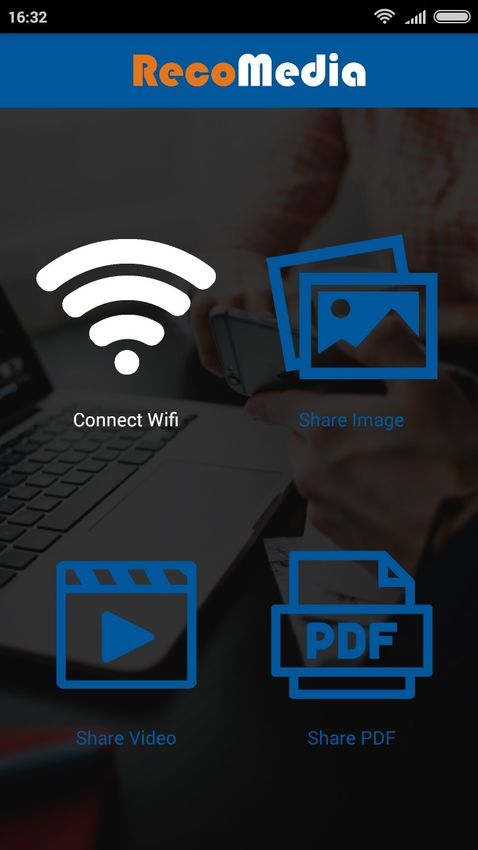
GETTING STARTED
GETTING STARTED
BEFORE READING THE USER’S MANUAL
Note the following terms before reading the user manual.
Icons used in this manual
Icon Term Definition
Indicates a situation where a function does not operate or setting may
Caution be cancelled.
Indicates tips or instructions on the page that help you operate a
Note function.
Safety Instructions and Troubleshooting
1) Be sure to familiarise yourself with the Safety Instructions before using this prod-
uct. (See page 2)
2) If a problem occurs, check Troubleshooting. (See page 14)
Copyright
©2016 EV-Dynamic Sdn. Bhd.
All right reserved; no part of this user’s manual may be reproduced or copied with-
out the prior written permission of EV-Dynamic Sdn. Bhd.
WHAT’S INCLUDED
Check for the supplied accessories shown below.
User Manual Power Cord Antenna DC Adapter
The appearance of the accessories may differ slightly from the illus-
tration above.
6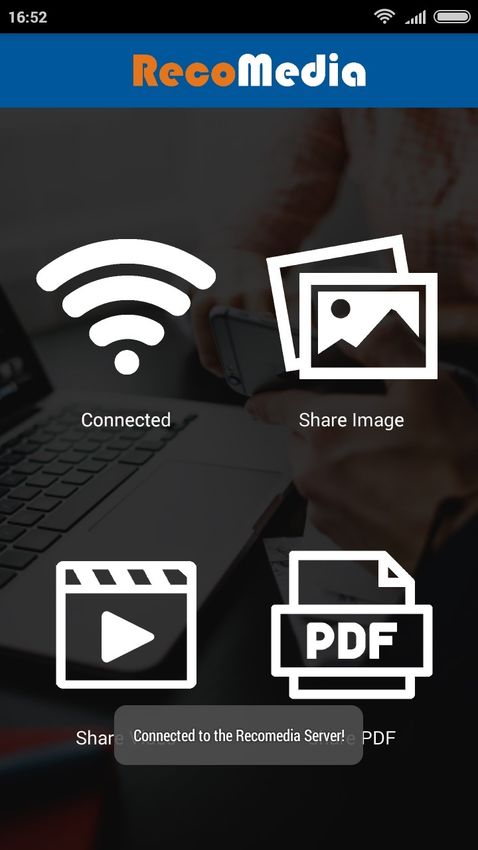
DESCRIPTIONS

DESCRIPTIONS
FRONT PANEL

    Power Button                          USB Port

BACK PANEL

   Audio In/Out    LAN   HDMI       VGA      DC In

                                7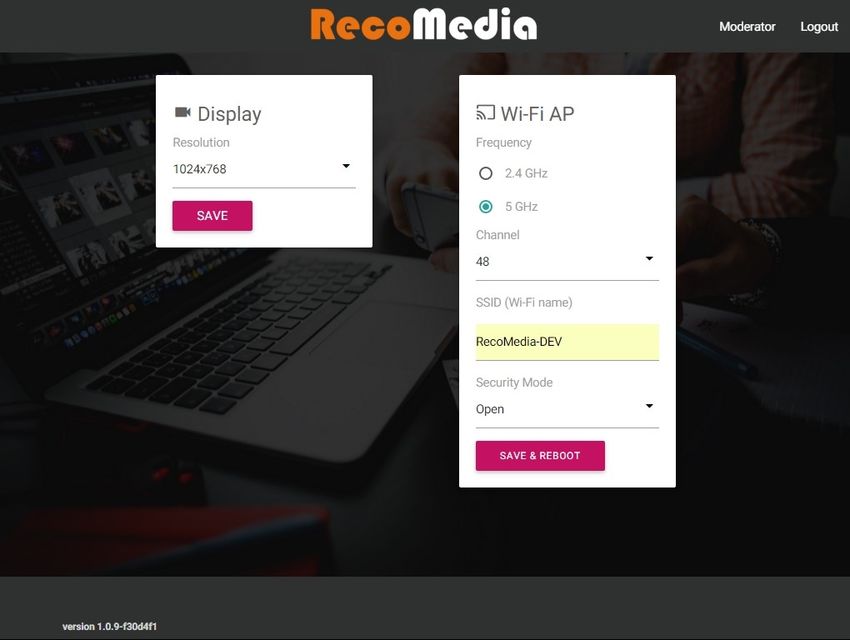
CONNECT PROJECTOR

CONNECT TO PROJECTOR
Please follow below steps:
1. Plug in power jack to DC in;
2. Connect video output to projector using HDMI or VGA port;
3. Plug in RJ 45 cable to LAN port to provide internet access (optional);
4. Connect Audio Out to existing audio system (optional).

      Connect to          Connect to        Connect to      Connect to
      audio system        network           projector       DC Adapter

               Before connecting to projector please power off the unit and projec-
               tor, pull the plug out from wall outlet.

                                           8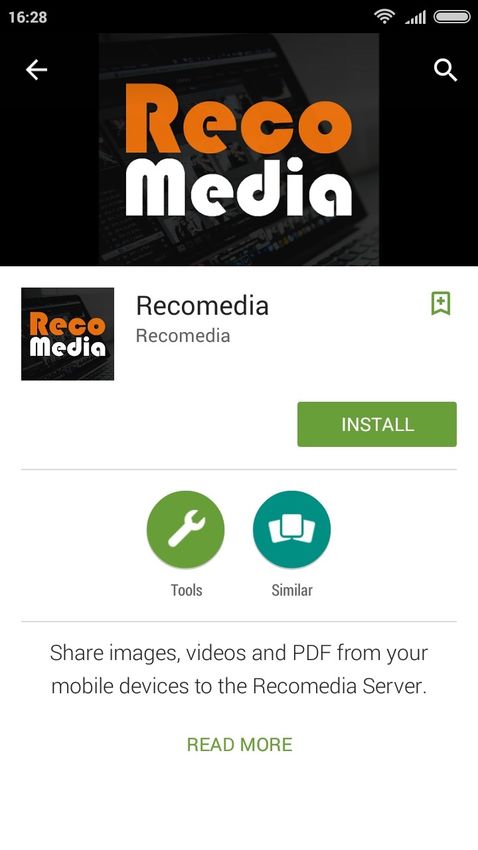
STARTING UP

STARTING UP
The unit can be powered up by pressing Power Button located at the front panel.
The start up process may take around 1 minute. When the following screen is
showed then the unit is ready to use.

                                         9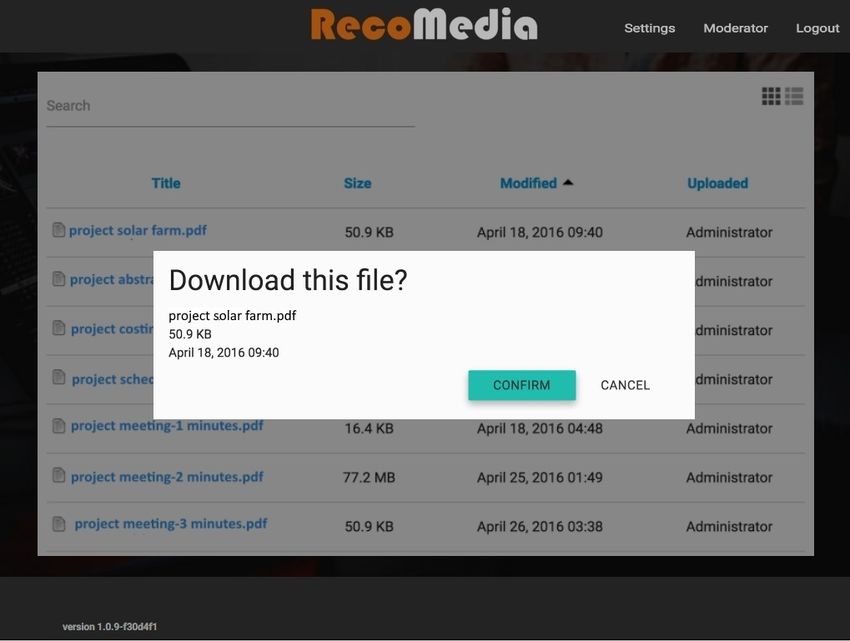
SOFTWARE INSTALLATION

SOFTWARE INSTALLATION
RecoMedia software is needed before a PC/MAC can use the unit to perform
presentation wirelessly.
Please follow steps below for software installation:
1. Ensure that the computer is connected wirelessly to RecoMedia.
2. Launch your web browser and enter the IP address 192.168.10.1 .
3. Then the screen below will be displayed.
4. Click the “DOWNLOAD” button to download your software. The software is com-
   patible with Windows 7 and above, and Mac OS X computers.
5. Once the downloading is completed, run the program to install RecoMedia soft-
   ware.
6. Once installed, RecoMedia icon will appear on desktop.

                                       10
CONDUCT PRESENTATION
CONDUCT PRESENTATION
There are two modes available for making presentation:
Free and easy mode
Moderated mode
FREE AND EASY MODE
In this mode, the presenter can make presentation by clicking play button.
To run Free and Easy mode, please follow steps below:
1. Double click on RecoMedia icon to run RecoMedia software. Once RecoMedia
software is activated you will see the following interface.
2. Click the play button to start sharing content. The status changes from
“Connected to RecoMedia” to “Streaming”.
3. Click the stop button to stop sharing content.
11MAKING PRESENTATION
MODERATED MODE
In Moderated mode, presenters can be scheduled to make presentation by the ad-
ministrator.
To run Moderated mode, please follow the steps below:
1. Launch your web browser and enter the IP address 192.168.10.1.
2. Click the “SETTINGS” button on the screen.
3. Enter admin username and password to login (default: username: admin; pass-
word: admin123).
4. All active users along with their streaming status are listed in the “Registered
Senders” section as shown in figure below.
5. You can start or stop a content sharing session by clicking on a particular pre-
senter icon.
12MOBILE APP
MOBILE APP
MOBILE APP INSTALLATION
1. Launch your Google Play app on your Android mobile phone.
2. Search for RecoMedia.
3. Click on “INSTALL” for installing RecoMedia app.
or
1. Install directly from this url https://play.google.com/store/apps/details?
id=com.evd.recomedia&hl=en
This app supports both the mobile phone and tablet running
Android 4.4 (KitKat) and above.
13MOBILE APP
STARTING MOBILE APP
After installation, RecoMedia mobile app is ready to use.
1. Launch your RecoMedia mobile app by clicking RecoMedia icon.
2. RecoMedia screen as figure below will be showed .
3. Click the Connect WiFi button to open the WiFi Setting.
4. Select and connect to the access point of RecoMedia.
5. Once connected , you can start sharing image, video and PDF files.
Once connected to RecoMedia,
buttons will change to white colour.
14MOBILE APP
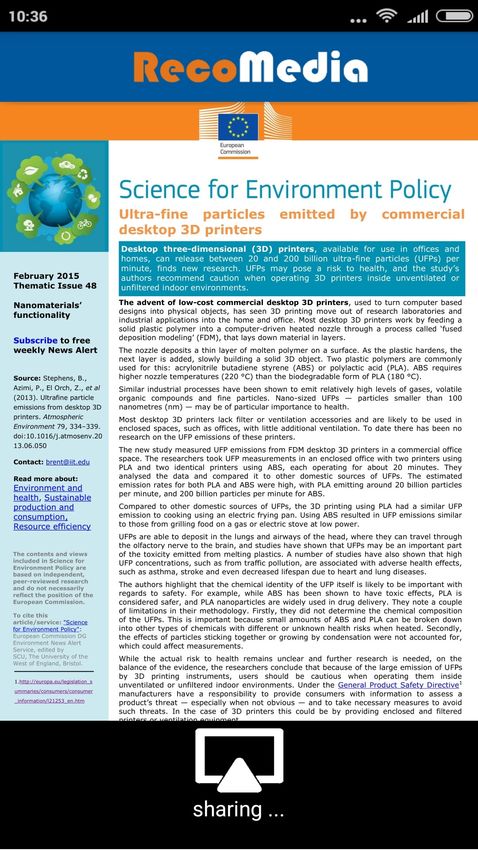
SHARING IMAGES
To share images please follow below steps:
1. Click the “Share Image” button on the screen.
2. Select an images from mobile phone gallery.
3. Click the “Share this image” button
4. To stop sharing, either click the “share” button again, or press the Back button
on your devices.
The image quality shown by the projector might be different from
original source. As the projector might not be able to support HD.
15MOBILE APP
SHARING VIDEOS
To share videos please follow below steps:
1. Click the “Share Video” button on the screen.
2. Select a video from mobile phone gallery.
3. Click the “share this video” button.
4. To stop sharing, either click the “share” button again, or press the Back button
on your devices.
Please make sure that Audio Out is connected to speaker.
16MOBILE APP
SHARING PDF DOCUMENTS
To share PDF documents please follow below steps:
1. Click the “Share PDF” button on the screen.
2. Select a PDF file from mobile phone gallery.
3. Click the “Share this PDF” button
4. To stop sharing, either click the “share” button again, or press the Back button
on your devices.
Microsoft PowerPoint, Excel, and Word documents can be saved as
PDF format and present with RecoMedia.
17CONFIGURATION
CONFIGURATION
1. Launch your web browser and enter the IP address of 192.168.10.1.
2. Click the “SETTINGS” button on the screen.
3. Enter admin username and password to login (default: username: admin; pass-
word: admin123) as shown/ in Figure 11.
4. Click the “Settings” button located on the top right corner.
5. The RecoMedia setting page shall appear as figure below .
6. Perform either the Display or WiFi configuration:
Change the WiFi AP settings such as the frequency band, channel num-
ber, SSID name and encryption mode.
Change the Resolution of the display device connected to the RecoMedia
wireless media box
It is strongly recommended to select a less congested WiFi channel.
18CONTENT MANAGEMENT
CONTENT MANAGEMENT
RecoMedia allows files such as teaching note, presentation slides, meeting minutes,
drawing, etc. to be stored and shared. To upload contents to RecoMedia , please
follow the steps below:
1. Launch your web browser and enter the IP address 192.168.10.1.
2. Click the “SETTINGS” button on the screen.
3. Enter admin username and password to login (default: username: admin; pass-
word: admin123).
4. Click the “Document” button located on the top right corner.
5. Document Manager page shall appear as figure below.
6. Click the and button to show the documents in Grid or List mode respec-
tively.
19CONTENT MANAGEMENT
UPLOAD FILES
1. Click the “Browse” button the choose the file from your computer to be upload-
ed to the RecoMedia.
2. Click the “Upload” button and wait till the uploading process completed.
Only 1 GB of storage space is available.
20CONTENT MANAGEMENT
DELETE FILES
1. Click the “Delete” button to remove any document from the RecoMedia .
2. A dialog will appear for your confirmation before the document is removed.
3. Click “CONFIRM” button to delete the file.
Once the document is removed, it is impossible to recover from
RecoMedia.
21CONTENT MANAGEMENT
DOWNLOAD FILES
1. Launch your web browser and enter the IP address of 192.168.10.1
2. Click the “DOCUMENT” button on the screen.
3. The RecoMedia Document Download page shall appear as figure below.
4. Select files and click “CONFIRM” button to download.
22TROUBLESHOOTING
TROUBLESHOOTING
Before requesting for service, please check the following.
The unit will not turn on.
Please make sure that the power supply is connected. If the problem persists
please disconnect all power source and wait for 5 minutes before restarting
the unit.
A function does not work when the button is pressed.
Please disconnect all power source and restart the unit.
The projector is not showing presentation content.
Please make sure that the project is connected to RecoMedia according to
instruction provided in page 8.
Please make sure that the presenter is connected to RecoMedia according to
instruction provided in page 11.
Error message “Failed to connect” or “Cannot locate controller”
Please make sure you have connected to the right WiFi AP with name as
shown on the welcome page.
Please ensure you have not changed the IP address and port number of the
Controller. The values should be:
Controller IP address: 192.168.10.1
Controller port number: 2222
Cannot see RecoMedia WiFi AP from the list of WiFi AP.
RecoMedia WiFi AP is most probably running at 5GHz frequency band while
your computer WiFi is operating at 2.4GHz.
Use a newer computer which supports 5GHz
Go to the Section on Using Admin Mode to configure the RecoMedia wireless
media box to operate at 2.4GHz. Restart the unit and you should be able to
see RecoMedia WiFi AP.
23PRODUCT SPECIFICATIONS
Processor 2.16 GHz Dual Core CPU
Memory 2GB RAM
IEEE 802.11 a/b/g/n 2.4GHz/5GHz wireless network
Network
IEEE 80.2.3 100/1000 Mbps Ethernet
Microsoft Windows 7, 8 and 10
Operating System
Mac OS X 10.10 Yosemite
Google Chrome 43 (Recommended)
Opera 35
Browser
Internet Explorer 11
Safari 8.0.8 (downloading RecoMedia app)
IP Configuration Automatic: DHCP; Manual: Static IP Address
Management Web-based configuration
Support Output VGA: 800 x 600; 1024 x 768; 1280 x 800
Resolution HDMI: 1280 x 720; 1920 x 1080
Power DC 12V 3A
VGA, HDMI, RJ-45, USB x 5, Power Jack, Audio In,
Interfaces
Audio Out, Power Button
Mechanical Dimension: 133(W) x 125 (D) x 40(H) mm
Designed and fabricated by:
EV-Dynamic Sdn. Bhd. (747882-U)
No 1, Jalan Putra Mahkota 7/8D, Putra Point Business Centre,
Putra Heights, 47650 Subang Jaya.
Email: info@recomedia.co
Website: www.recomedia.co
Tel: +603-51914390 Fax:+603-51914391
24You can also read