Remote Support Appliance Interface (/appliance)
←
→
Page content transcription
If your browser does not render page correctly, please read the page content below
Remote Support
                               Appliance Interface (/appliance)

©2003-2019 BeyondTrust Corporation. All Rights Reserved. Other trademarks identified on this page are owned by their respective owners. BeyondTrust Corporation is not a chartered bank or trust company,   TC:6/5/2019
or depository institution. It is not authorized to accept deposits or trust accounts and is not licensed or regulated by any state or federal banking authority.
REMOTE SUPPORT
APPLIANCE INTERFACE (/APPLIANCE)
Table of Contents
Secure Remote Access Appliance Overview 3
Secure Remote Access Appliance Web Interface 6
Log into the Appliance Administrative Interface 7
Status 8
Basics: View Appliance Details 8
Health: View Virtual Appliance Health Details 9
Users: Change Password and Username, Add User 10
Networking 11
IP Configuration: Configure IP Address and Network Settings 11
Static Routes: Set Up Static Routes for Network Communication 15
SNMP: Enable Simple Network Management Protocol 16
Storage 17
Status: Disk space and Hard Drive Status 17
Encryption: Configure KMIP Server and Encrypt Session Data 19
Security 21
Certificates: Create and Manage SSL Certificates 21
SSL/TLS Configuration: Choose SSL Ciphers and Versions 27
Appliance Administration: Restrict Accounts, Networks, and Ports, Set Up Syslog, Enable
Login Agreement, Reset Admin Account 28
Email Configuration: Configure Appliance to Send Email Alerts 30
Updates: Check for Update Availability and Install Software 32
Support 34
Utilities: Debug Network Problems 34
Advanced Support: Contact BeyondTrust Technical Support 35
Secure Remote Access Appliance Comparison 36
SALES: www.beyondtrust.com/contact SUPPORT: www.beyondtrust.com/support DOCUMENTATION: www.beyondtrust.com/docs 2
©2003-2019 BeyondTrust Corporation. All Rights Reserved. Other trademarks identified on this page are owned by their respective owners. BeyondTrust Corporation is not a chartered bank or trust company, or TC: 6/5/2019
depository institution. It is not authorized to accept deposits or trust accounts and is not licensed or regulated by any state or federal banking authority.REMOTE SUPPORT
APPLIANCE INTERFACE (/APPLIANCE)
Secure Remote Access Appliance Overview
BeyondTrust was the first to introduce an appliance-based approach to remote support. Our patented deployment model - the Secure
Remote Access Appliance - is a highly secure option for deploying remote support.
The Secure Remote Access Appliance, whether physical or virtual, resides at your facility or data center, under your security
measures. This deployment model offers more control over security, giving you a safe way to integrate remote support with identity
management and making it easy to export reporting data and videos for a complete audit trail.
SALES: www.beyondtrust.com/contact SUPPORT: www.beyondtrust.com/support DOCUMENTATION: www.beyondtrust.com/docs 3
©2003-2019 BeyondTrust Corporation. All Rights Reserved. Other trademarks identified on this page are owned by their respective owners. BeyondTrust Corporation is not a chartered bank or trust company, TC: 6/5/2019
or depository institution. It is not authorized to accept deposits or trust accounts and is not licensed or regulated by any state or federal banking authority.REMOTE SUPPORT
APPLIANCE INTERFACE (/APPLIANCE)
Anatomy of the Secure Remote Access Appliance
The Secure Remote Access Appliance uses two administrative web interfaces
to isolate hardware administration from user management, /appliance and
/login.
Pictured: The BeyondTrust B300 Appliance
Appliance Administration User Administration
Web Interface /appliance Web Interface /login
Used for: Used for:
l Installing and configuring hardware l Managing users and workflows
l Upgrading BeyondTrust software l Reporting on support activity
l Creating and using integrations
Resource Resource
The Secure Remote Access Appliance The BeyondTrust Administrative Guide
Administration Guide
SALES: www.beyondtrust.com/contact SUPPORT: www.beyondtrust.com/support DOCUMENTATION: www.beyondtrust.com/docs 4
©2003-2019 BeyondTrust Corporation. All Rights Reserved. Other trademarks identified on this page are owned by their respective owners. BeyondTrust Corporation is not a chartered bank or trust company, TC: 6/5/2019
or depository institution. It is not authorized to accept deposits or trust accounts and is not licensed or regulated by any state or federal banking authority.REMOTE SUPPORT
APPLIANCE INTERFACE (/APPLIANCE)
Using this Guide
For security reasons, BeyondTrust has separated administration of the appliance from user administration.
Accordingly, this guide focuses exclusively on administration of the Secure Remote Access Appliance. Information on user
administration (the /login web interface) can be found in the BeyondTrust Admin Interface.
SALES: www.beyondtrust.com/contact SUPPORT: www.beyondtrust.com/support DOCUMENTATION: www.beyondtrust.com/docs 5
©2003-2019 BeyondTrust Corporation. All Rights Reserved. Other trademarks identified on this page are owned by their respective owners. BeyondTrust Corporation is not a chartered bank or trust company, TC: 6/5/2019
or depository institution. It is not authorized to accept deposits or trust accounts and is not licensed or regulated by any state or federal banking authority.REMOTE SUPPORT
APPLIANCE INTERFACE (/APPLIANCE)
Secure Remote Access Appliance Web Interface
This guide is designed to help you administer the Secure Remote Access Appliance through its /appliance web interface. The
appliance serves as the central point of administration and management for your BeyondTrust sites.
Use this guide only after an administrator has performed the initial setup and configuration of the Secure Remote Access Appliance
as detailed in the Secure Remote Access Appliance Hardware Installation Guide at www.beyondtrust.com/docs/remote-
support/getting-started/deployment/hardware. Once BeyondTrust is properly installed, you can begin supporting customers
immediately. Should you need any assistance, please contact BeyondTrust Technical Support at
https://www.BeyondTrust.com/support.
SALES: www.beyondtrust.com/contact SUPPORT: www.beyondtrust.com/support DOCUMENTATION: www.beyondtrust.com/docs 6
©2003-2019 BeyondTrust Corporation. All Rights Reserved. Other trademarks identified on this page are owned by their respective owners. BeyondTrust Corporation is not a chartered bank or trust company, TC: 6/5/2019
or depository institution. It is not authorized to accept deposits or trust accounts and is not licensed or regulated by any state or federal banking authority.REMOTE SUPPORT
APPLIANCE INTERFACE (/APPLIANCE)
Log into the Appliance Administrative Interface
After installation of the appliance, log into the Secure Remote Access
Appliance administrative interface by going to your appliance’s public
URL followed by /appliance (e.g., http://support.example.com/appliance).
Default Username: admin
Default Password: password
You are prompted to change the administrative password the first time
you log in.1
You may restrict access to the login screen by enabling a prerequisite
login agreement that must be confirmed before the login screen is
displayed. If you wish to enable the prerequisite login agreement, see
"Appliance Administration: Restrict Accounts, Networks, and Ports, Set
Up Syslog, Enable Login Agreement, Reset Admin Account" on page 28
Note: For security purposes, the administrative username and
password for the /appliance interface are distinct from those
used for the /login interface and should be managed
separately.
1Passwords must be at least 8 characters in length and include each of the following: an uppercase letter, a lowercase letter, a
number and a special symbol.
SALES: www.beyondtrust.com/contact SUPPORT: www.beyondtrust.com/support DOCUMENTATION: www.beyondtrust.com/docs 7
©2003-2019 BeyondTrust Corporation. All Rights Reserved. Other trademarks identified on this page are owned by their respective owners. BeyondTrust Corporation is not a chartered bank or trust company, TC: 6/5/2019
or depository institution. It is not authorized to accept deposits or trust accounts and is not licensed or regulated by any state or federal banking authority.REMOTE SUPPORT
APPLIANCE INTERFACE (/APPLIANCE)
Status
Basics: View Appliance Details
The Basics page gives you information about your Secure Remote
Access Appliance and allows you to monitor your system. You can also
set your local time to any valid global time zone. The system time is
displayed in UTC by default.
In nearly all scenarios, this setting can be left unchanged. BeyondTrust
discourages multiple sites on one appliance. However, if your setup
requires more than one site responding to one IP address, select a
default site to respond should someone enter the IP address directly
rather than the domain name. If more than one DNS entry directs to this IP address and you select No Default, an error message
appears if someone tries to access your site by entering the IP address.
From this page, you can also reboot or shut down your Secure Remote
Access Appliance. Although rebooting your appliance is not required,
you may want to make a monthly reboot part of your regular
maintenance. You do not need physical access to the appliance in order
to perform this reboot.
Please do not do the following unless instructed to do so by
BeyondTrust Technical Support: Clicking the Reset Appliance to
Factory Defaults button reverts your Secure Remote Access Appliance
to its factory state. This completely removes all data, configuration
settings, sites, and certificates from your appliance. Once the appliance is reset, it also powers itself off.
SALES: www.beyondtrust.com/contact SUPPORT: www.beyondtrust.com/support DOCUMENTATION: www.beyondtrust.com/docs 8
©2003-2019 BeyondTrust Corporation. All Rights Reserved. Other trademarks identified on this page are owned by their respective owners. BeyondTrust Corporation is not a chartered bank or trust company, TC: 6/5/2019
or depository institution. It is not authorized to accept deposits or trust accounts and is not licensed or regulated by any state or federal banking authority.REMOTE SUPPORT
APPLIANCE INTERFACE (/APPLIANCE)
Health: View Virtual Appliance Health Details
Note: The Health tab is visible only for sites supported by a virtual appliance or cloud appliance.
The Health page allows you to monitor the state of your virtual or cloud appliance. It displays information pertaining to how many
CPUs are in use as well as the amount of memory and storage being used. View the Status and Notes columns for suggestions on
how to improve the health of your appliance.
SALES: www.beyondtrust.com/contact SUPPORT: www.beyondtrust.com/support DOCUMENTATION: www.beyondtrust.com/docs 9
©2003-2019 BeyondTrust Corporation. All Rights Reserved. Other trademarks identified on this page are owned by their respective owners. BeyondTrust Corporation is not a chartered bank or trust company, TC: 6/5/2019
or depository institution. It is not authorized to accept deposits or trust accounts and is not licensed or regulated by any state or federal banking authority.REMOTE SUPPORT
APPLIANCE INTERFACE (/APPLIANCE)
Users: Change Password and Username, Add User
Here, you can add, edit or delete administrative users for the /appliance
interface. You can also change an administrator's username, display
name,or password. BeyondTrust recommends changing your password
regularly to insure protection against unauthorized access.
See "Appliance Administration: Restrict Accounts, Networks, and Ports,
Set Up Syslog, Enable Login Agreement, Reset Admin Account" on page
28 to set account restriction rules including password expiry and history.
Note: You must have at least one user account defined. The
Secure Remote Access Appliance comes with one account
predefined, the admin account. You can keep just the admin
account, create additional accounts, or replace the admin
account.
SALES: www.beyondtrust.com/contact SUPPORT: www.beyondtrust.com/support DOCUMENTATION: www.beyondtrust.com/docs 10
©2003-2019 BeyondTrust Corporation. All Rights Reserved. Other trademarks identified on this page are owned by their respective owners. BeyondTrust Corporation is not a chartered bank or trust company, TC: 6/5/2019
or depository institution. It is not authorized to accept deposits or trust accounts and is not licensed or regulated by any state or federal banking authority.REMOTE SUPPORT
APPLIANCE INTERFACE (/APPLIANCE)
Networking
IP Configuration: Configure IP Address and Network Settings
Companies with advanced network configurations can configure multiple IP addresses on the appliance’s ethernet ports. Using
multiple ports can enhance security or enable connections over non-standard networks. For example, if employees are restricted
from accessing the internet but need to provide off-network support, using one port for your internal private network and another for
the public internet allows users worldwide to access systems without breaching your network security policies.
NIC teaming combines your system's physical network interface controllers (NICs) into a single logical interface. NIC teaming
operates in "Active-Backup" mode. One of the NICs is used to carry all network traffic. If the link on that NIC is lost for any reason, the
other NIC becomes active. Before activating NIC teaming, please ensure that both NICs are connected to the same network segment
(subnet) and that you have IP addresses configured on only one of the existing NICs.
Note: If you are using a virtual or cloud appliance environment, the Enable NIC Teaming option is not available.
Although multiple IP addresses can be assigned to each NIC, do not
configure either NIC such that it has an IP address that is in the same
subnet as an IP address on the other NIC. In this scenario, packet loss
occurs with packets originating from the IP on the NIC that does not have
the default gateway. Consider the following example configuration:
l eth0 is configured with the default gateway of 192.168.1.1
l eth0 is assigned with 192.168.1.5
l eth1 is assigned with 192.168.1.10
l Both eth0 and eth1 are connected to the same subnet switch
Given this configuration, traffic from both NICs are sent to the default gateway (192.168.1.1) regardless of which NIC received traffic.
Switches configured with dynamic ARP send packets randomly to either eth0 (192.168.1.5) or eth1 (192.168.1.10), not both. When
eth0 receives these packets from the switch destined for eth1, eth0 drops the packets. Some switches are configured with static ARP.
These switches drop all packets received from eth1 since this NIC does not have the default gateway and is not present in the static
ARP table of the gateway. If you wish to configure redundant NICs on the same subnet, use NIC teaming.
By default, Dynamic Host Configuration Protocol (DHCP) is enabled for your appliance. DHCP is a network protocol that uses a
DHCP server to control the distribution of network parameters, such as IP addresses, allowing systems to automatically request these
parameters. This reduces the need to manually configure settings. In this case, when checked, an IP address is obtained from the
DHCP server and is removed from the pool of available IP addresses.
Note: To learn more about DHCP, please see What is DHCP? at https://technet.microsoft.com/en-us/library/.
SALES: www.beyondtrust.com/contact SUPPORT: www.beyondtrust.com/support DOCUMENTATION: www.beyondtrust.com/docs 11
©2003-2019 BeyondTrust Corporation. All Rights Reserved. Other trademarks identified on this page are owned by their respective owners. BeyondTrust Corporation is not a chartered bank or trust company, TC: 6/5/2019
or depository institution. It is not authorized to accept deposits or trust accounts and is not licensed or regulated by any state or federal banking authority.REMOTE SUPPORT
APPLIANCE INTERFACE (/APPLIANCE)
Click Show Details to view and verify transmission and reception
statistics for each ethernet port on the appliance.
Under the Global Network Configuration section, configure the
hostname for your Secure Remote Access Appliance.
Note: The hostname field does not need to meet any technical requirements. It does not affect what hostname client
software or remote users connect to. (To make these changes , see /login > Status > Information > Client Software Is
Built to Attempt. If the hostname attempted by the client software needs to change, notify BeyondTrust Technical Support
of the needed changes so that Support can build a software update.) The hostname field exists primarily to help you
distinguish between multiple Secure Remote Access Appliances. It is also used as the local server identifier when making
SMTP connections to send email alerts. This is useful if the SMTP Relay Server specified at /appliance > Security >
Email Configuration is locked down. In this case, the configured hostname might have to match the reverse-DNS lookup
of the appliance's IP address.
Assign a default gateway, selecting which ethernet port to use. Enter an IP address for one or more DNS servers. If DHCP is enabled,
the DHCP lease provides you with a default gateway as well as a listing of DNS servers in order of preference. Any statically
configured DNS servers listed in the Custom DNS Servers field are attempted to be reached first, followed by DNS servers received
from DHCP. In the event that these local DNS servers are unavailable, the Fallback to OpenDNS Servers option enables the Secure
Remote Access Appliance to use publicly available DNS servers from OpenDNS. For more information about OpenDNS, visit
www.opendns.com.
Allow your appliance to respond to pings if you wish to be able to test if the host is functioning. Set the hostname or IP address for a
Network Time Protocol (NTP) server with which you wish your Secure Remote Access Appliance to synchronize.
SALES: www.beyondtrust.com/contact SUPPORT: www.beyondtrust.com/support DOCUMENTATION: www.beyondtrust.com/docs 12
©2003-2019 BeyondTrust Corporation. All Rights Reserved. Other trademarks identified on this page are owned by their respective owners. BeyondTrust Corporation is not a chartered bank or trust company, TC: 6/5/2019
or depository institution. It is not authorized to accept deposits or trust accounts and is not licensed or regulated by any state or federal banking authority.REMOTE SUPPORT
APPLIANCE INTERFACE (/APPLIANCE)
Two settings are available in the Port Number Settings area: Server
Listen Ports and Default URL Ports. When configuring these, keep in
mind that connections made to valid ports may be rejected by network
restrictions set in /appliance > Security > Appliance Administration and
in /login > Management > Security. The opposite is also true:
connections made to invalid ports are rejected even if such connections
satisfy network restrictions.
The Server Listen Ports section allows you to configure ports for the
appliance to listen on. You may specify up to 15 comma-separated ports
for HTTP and 15 comma-separated ports for HTTPS. Each port may appear only once in any field, and it may appear in only one field,
not both. The appliance responds to HTTP connections made to any of the ports listed in the HTTP field, and the appliance responds
to HTTPS connections made to any of the ports in the HTTPS field. You cannot change the built-in listen ports (80 and 443) except by
contacting BeyondTrust Support and updating the appliance.
To access the appliance on a given port using a browser requires that you enter the port in the URL of the browser (e.g.,
support.example.com:8200). Clients downloaded from the appliance attempt connections to the ports listed on the /login > Status >
Information page under Client Software Is Built to Attempt. These ports are not configurable from /login or /appliance. To change
them, you must contact BeyondTrust Support and have a new update built for your appliance. Once installed, the update sets the
Attempt ports as specified by BeyondTrust Support in the parameters of the update.
Default URL Ports are used when generating URLs that point back to the appliance, such as session keys generated from the
representative console. When the default ports are blocked on the network (or can be expected to fail for any other reason), you can
change the default URL ports to have generated URLs spawn with the ports that you specify. Whatever ports you enter should also
be listed in the Server Listen Ports; otherwise, the default ports are not connected. For example, if you enter 8080 in the Default
URL Port field, make sure 8080 is also in the HTTP or HTTPS Listen Port field. Unlike the listen port fields, you cannot enter more
than one port in either of the URL port fields. You cannot enter the same port in both fields.
When adding or editing an IP address, choose whether that IP should be
enabled or disabled. Select the network port on which you would like this
IP to function. The IP Address field sets an address to which your
appliance can respond, while Subnet Mask enables BeyondTrust to
communicate with other devices.
When editing an IP address that is on the same subnet as another IP
address for this appliance, choose if this IP address should be Primary.
When this box is checked, the appliance designates this IP address to be
the primary or originating IP address for the subnet. This helps, for
example, to ensure that any network traffic originating from the appliance on that subnet matches and complies with defined firewall
rules.
From Access Type, you can restrict access over this IP to the public site or customer client. Use Allow Both to allow access for both
the public site and customer client.
Note: To restrict access to the /login interface, set network restrictions under /login > Management > Security. To restrict
access to the /appliance interface, set network restrictions under /appliance > Security > Appliance Administration.
When viewing the management IP address1, the Telnet Server
dropdown provides three settings: Full, Simplified and Disabled, as
detailed below. These settings change the menu options of the telnet
1Do not delete or modify the management IP address.
SALES: www.beyondtrust.com/contact SUPPORT: www.beyondtrust.com/support DOCUMENTATION: www.beyondtrust.com/docs 13
©2003-2019 BeyondTrust Corporation. All Rights Reserved. Other trademarks identified on this page are owned by their respective owners. BeyondTrust Corporation is not a chartered bank or trust company, TC: 6/5/2019
or depository institution. It is not authorized to accept deposits or trust accounts and is not licensed or regulated by any state or federal banking authority.REMOTE SUPPORT
APPLIANCE INTERFACE (/APPLIANCE)
server that is available only on this private IP and that can be used in emergency recovery situations. Since the telnet feature is
specifically tied to the built-in private IP, it does not appear under any other configured IP addresses.
Setting Function
Full Enables the telnet server with full functionality
Simplified Allows four options: View FIPS Error, Reset to Factory Defaults, Shutdown, and Reboot
Disabled Completely disables the telnet server
SALES: www.beyondtrust.com/contact SUPPORT: www.beyondtrust.com/support DOCUMENTATION: www.beyondtrust.com/docs 14
©2003-2019 BeyondTrust Corporation. All Rights Reserved. Other trademarks identified on this page are owned by their respective owners. BeyondTrust Corporation is not a chartered bank or trust company, TC: 6/5/2019
or depository institution. It is not authorized to accept deposits or trust accounts and is not licensed or regulated by any state or federal banking authority.REMOTE SUPPORT
APPLIANCE INTERFACE (/APPLIANCE)
Static Routes: Set Up Static Routes for Network Communication
Should a situation exist in which two networks are unable to talk to each other, you can establish a static route so that an
administrator with a computer on one network can connect through the Secure Remote Access Appliance to a computer on the other
network, provided that the appliance is in a place where both networks can communicate with it individually.
Only advanced administrators should attempt to set up static routes.
SALES: www.beyondtrust.com/contact SUPPORT: www.beyondtrust.com/support DOCUMENTATION: www.beyondtrust.com/docs 15
©2003-2019 BeyondTrust Corporation. All Rights Reserved. Other trademarks identified on this page are owned by their respective owners. BeyondTrust Corporation is not a chartered bank or trust company, TC: 6/5/2019
or depository institution. It is not authorized to accept deposits or trust accounts and is not licensed or regulated by any state or federal banking authority.REMOTE SUPPORT
APPLIANCE INTERFACE (/APPLIANCE)
SNMP: Enable Simple Network Management Protocol
The Secure Remote Access Appliance supports Simple Network Management Protocol (SNMP)1 monitoring for network, hard drive
(s), memory, and CPU statistics. This allows tools that collect availability and other statistics via the SNMP protocol to query the
Secure Remote Access Appliance for monitoring purposes.
To enable SNMP for this appliance, check Enable SNMPv2. This enables a SNMPv2 server to respond to SNMP queries. Enter a
value for the System Location, the Read-Only Community Name, and the IP Restrictions, or IP addresses that are allowed to query
this appliance using SNMP. Note that if no IP addresses are entered, all hosts are granted access.
1Simple Network Management Protocol (SNMP) is an Internet-standard protocol used for monitoring and managing networked
devices (see Simple Network Management Protocol).
SALES: www.beyondtrust.com/contact SUPPORT: www.beyondtrust.com/support DOCUMENTATION: www.beyondtrust.com/docs 16
©2003-2019 BeyondTrust Corporation. All Rights Reserved. Other trademarks identified on this page are owned by their respective owners. BeyondTrust Corporation is not a chartered bank or trust company, TC: 6/5/2019
or depository institution. It is not authorized to accept deposits or trust accounts and is not licensed or regulated by any state or federal banking authority.REMOTE SUPPORT
APPLIANCE INTERFACE (/APPLIANCE)
Storage
Status: Disk space and Hard Drive Status
The Status page displays the percentage of your Secure Remote Access
Appliance's hard drive space that is in use.
If you enable all recording features on your access sites (session and
remote shell recordings) or if your overall session count is high, it is
common to see a higher amount of disk usage. Note that disk usage of
85-95% is NOT a cause for alarm. If the hard drive should become low on disk space, the appliance is configured to automatically
purge the oldest session data and recycle that disk space for new session data.
Specific to the BeyondTrust B300 Appliance
The B300 uses a Redundant Array of Independent Disks to back up your
data. RAID 6 is used to allow the appliance to lose up to 2 of its 4 drives
without any data loss. In the event of a failure, remove the corrupted drive
and contact BeyondTrust for a return maintenance authorization and
repair or replacement drive. When you replace the damaged drive, the
appliance automatically rebuilds the RAID using the new drive. You do
not need to power off the appliance when replacing drives.
Specific to the BeyondTrust B400 Appliance
The B400 has two sets of logical Redundant Array of Independent Disks
(RAID) disks. This RAID configuration includes eight physical disk drives
configured into two logical RAID drives: A RAID 1 configuration that is
logical disk 0, and a RAID 6 configuration that is logical disk 1.
If one of the RAID 1 or RAID 6 physical drives fails, no performance
impact or data loss occurs. However, second drive failure in the RAID 6
configuration degrades performance, although it does not cause data
loss.
Hardware Failure Notification (B300 and B400 Only)
The LEDs on your appliance also indicate your hard drives’ status.
Normally, the LEDs will blink to indicate disk activity. Should a hard drive
fail, the LED will turn red, and an audible alarm will warn you of the
failure. To turn off the alarm before the system is restored, click the
Silence Alarm button on this web interface.
SALES: www.beyondtrust.com/contact SUPPORT: www.beyondtrust.com/support DOCUMENTATION: www.beyondtrust.com/docs 17
©2003-2019 BeyondTrust Corporation. All Rights Reserved. Other trademarks identified on this page are owned by their respective owners. BeyondTrust Corporation is not a chartered bank or trust company, TC: 6/5/2019
or depository institution. It is not authorized to accept deposits or trust accounts and is not licensed or regulated by any state or federal banking authority.REMOTE SUPPORT
APPLIANCE INTERFACE (/APPLIANCE)
Note: The Silence Alarm button will be available regardless of whether or not an alarm is sounding at the time. The
button cannot be used as an indicator of whether or not an alarm is active at any particular moment.
Note: To verify whether an alarm is sounding, check the Health Status located immediately above the Silence Alarm
button. If there is an alarm sounding in the same room as the Secure Remote Access Appliance and you want to eliminate
the appliance as the source, click the Silence Alarm button a few times to cancel any and all possible alarms which might
be active.
SALES: www.beyondtrust.com/contact SUPPORT: www.beyondtrust.com/support DOCUMENTATION: www.beyondtrust.com/docs 18
©2003-2019 BeyondTrust Corporation. All Rights Reserved. Other trademarks identified on this page are owned by their respective owners. BeyondTrust Corporation is not a chartered bank or trust company, TC: 6/5/2019
or depository institution. It is not authorized to accept deposits or trust accounts and is not licensed or regulated by any state or federal banking authority.REMOTE SUPPORT
APPLIANCE INTERFACE (/APPLIANCE)
Encryption: Configure KMIP Server and Encrypt Session Data
The Encryption section allows you to encrypt session data stored on your Secure Remote Access Appliance. To use the data at rest
encryption feature to encrypt your session data, a Key Management Interoperability Protocol (KMIP) server must be available within
your environment to store the encryption keys needed to encrypt and decrypt the disks on your Secure Remote Access Appliance.
When first encrypting your data, you are limited to 4GB or less of data; however, after the initial encryption, this 4GB limit no longer
applies.
Note: If you have more than 4GB of data to initially encrypt, please contact BeyondTrust Technical Support at
beyondtrust.com/docs/index.htm#support.
In the Storage :: KMIP Server section, enter the hostname for your external KMIP server and the port through which the server must
be accessed. Upload a valid, CA-signed certificate which is presented by the KMIP server to verify its identity to the Secure Remote
Access Appliance, as well as a client certificate, which is used to authenticate the Secure Remote Access Appliance to the
KMIP server.
Enter a passphrase, username, and password to assist with authentication to the KMIP server. Click Save and Test Changes to save
and verify the connection between the Secure Remote Access Appliance and the KMIP server.
If a connection is established between the KMIP server and the appliance, the Encrypt button becomes available in the Storage ::
Encryption section. If the KMIP server is not configured appropriately or if the data has not been previously encrypted, the Encrypt
option is not available and instead reads as Not Encrypted.
SALES: www.beyondtrust.com/contact SUPPORT: www.beyondtrust.com/support DOCUMENTATION: www.beyondtrust.com/docs 19
©2003-2019 BeyondTrust Corporation. All Rights Reserved. Other trademarks identified on this page are owned by their respective owners. BeyondTrust Corporation is not a chartered bank or trust company, TC: 6/5/2019
or depository institution. It is not authorized to accept deposits or trust accounts and is not licensed or regulated by any state or federal banking authority.REMOTE SUPPORT
APPLIANCE INTERFACE (/APPLIANCE)
When the Encrypt button is clicked, the appliance starts the process of backing up the session data and generating an encryption
key to store on the KMIP server. Once the encryption key is stored, the data is encrypted and a backup is restored.
For more information, please see the Data at Rest Encryption Whitepaper at www.beyondtrust.com/docs/remote-support/how-to/data-
at-rest-encryption/index.
SALES: www.beyondtrust.com/contact SUPPORT: www.beyondtrust.com/support DOCUMENTATION: www.beyondtrust.com/docs 20
©2003-2019 BeyondTrust Corporation. All Rights Reserved. Other trademarks identified on this page are owned by their respective owners. BeyondTrust Corporation is not a chartered bank or trust company, TC: 6/5/2019
or depository institution. It is not authorized to accept deposits or trust accounts and is not licensed or regulated by any state or federal banking authority.REMOTE SUPPORT
APPLIANCE INTERFACE (/APPLIANCE)
Security
Certificates: Create and Manage SSL Certificates
Manage SSL certificates, creating self-signed certificates and certificate requests, and importing certificates signed by a certificate
authority.
Certificate Installation
The Secure Remote Access Appliance comes with a self-signed certificate pre-installed. However, to effectively use your Secure
Remote Access Appliance, you also need to create a self-signed certificate at minimum, preferably requesting and uploading a
certificate signed by a certificate authority. In addition to the CA certificate request feature, BeyondTrust includes functionality for
obtaining and automatically renewing its own TLS certificates from the open Certificate Authority Let's Encrypt.
Let's Encrypt
Let's Encrypt issues signed certificates which are valid for 90 days, yet have the capability of automatically renewing themselves
indefinitely. In order to request a Let's Encrypt certificate, or to renew one in the future, you must meet the following requirements:
l The DNS for the hostname you are requesting must resolve to the appliance.
l The appliance must be able to reach Let's Encrypt on TCP 443.
l Let's Encrypt must be able to reach the appliance on TCP 80.
For more information, please see letsencrypt.org.
To implement a Let's Encrypt certificate, In the Security :: Let's
Encrypt™ Certificates section:
l Enter the fully qualified domain name (FQDN) of the appliance in
the Hostname field.
l Use the dropdown to choose the certificate key type.
l Click Request.
As long as the above requirements are met, this results in a certificate that will automatically renew every 90 days once the validity
check with Let's Encrypt has completed.
Note: The appliance starts the certificate renewal process 30 days before the certificate is due to expire and requires the
same process as the original request process does. If it has been unsuccessful 25 days prior to expiry, the appliance
sends daily admin email alerts (if email notifications are enabled). The status will show the certificate in an error state.
SALES: www.beyondtrust.com/contact SUPPORT: www.beyondtrust.com/support DOCUMENTATION: www.beyondtrust.com/docs 21
©2003-2019 BeyondTrust Corporation. All Rights Reserved. Other trademarks identified on this page are owned by their respective owners. BeyondTrust Corporation is not a chartered bank or trust company, TC: 6/5/2019
or depository institution. It is not authorized to accept deposits or trust accounts and is not licensed or regulated by any state or federal banking authority.REMOTE SUPPORT
APPLIANCE INTERFACE (/APPLIANCE)
IMPORTANT!
Because DNS can apply only to one appliance at a time, and because an appliance must be assigned the DNS hostname for
which it makes a certificate request or renewal request, we recommend that you avoid use of Let's Encrypt certificates for failover
appliance pairs.
Other CA-Issued Certificates
To create a self-signed certificate or a certificate request from another
issuer, locate the Security :: Other Certificates section and click
Create. In Certificate Friendly Name, enter a name used to identify this
certificate. From the Key dropdown, choose to create a new key or select
an existing key. Enter the remaining information pertaining to your
organization.
Note:
If the certificate being requested is a replacement, you should select the existing key of the certificate being replaced.
If the certificate being requested is a re-key, you should select New Key for the certificate.
For a re-key, all information on the Security :: Certificates :: New Certificate section should be the same as the
certificate for which re-key is being requested. A new certificate friendly name should be used so that it is be easy to
identify the certificate in the Security :: Certificates section.
Required information for the re-key can be obtained by clicking on the earlier certificate from the list displayed in the
Security :: Certificates section.
For a new key or re-key certificate, the steps to import are the same.
Other CA-Issued Certificates
To create a certificate request:
l Locate the Security :: Other Certificates section and click
Create.
l In Certificate Friendly Name, enter a name you will use to
identify this certificate.
l From the Key dropdown, choose the Existing Key of your
*.bomgarcloud.com certificate.
l Enter the remaining information pertaining to your organization.
l In the Name (Common Name) field, enter a descriptive title for
your BeyondTrust site.
SALES: www.beyondtrust.com/contact SUPPORT: www.beyondtrust.com/support DOCUMENTATION: www.beyondtrust.com/docs 22
©2003-2019 BeyondTrust Corporation. All Rights Reserved. Other trademarks identified on this page are owned by their respective owners. BeyondTrust Corporation is not a chartered bank or trust company, TC: 6/5/2019
or depository institution. It is not authorized to accept deposits or trust accounts and is not licensed or regulated by any state or federal banking authority.REMOTE SUPPORT
APPLIANCE INTERFACE (/APPLIANCE)
l In the Subject Alternative Names section, enter your BeyondTrust site hostname and click Add. Add a SAN for each DNS
name or IP address to be protected by this SSL certificate.
Note: DNS addresses can be entered as fully qualified domain names, such as access.example.com, or as wildcard
domain names, such as *.example.com. A wildcard domain name covers multiple subdomains, such as
access.example.com, and so forth.
If you intend to obtain a signed certificate from a certificate authority, click Create Certificate Request to create a certificate signing
request (CSR). Otherwise, click Create Self-Signed Certificate.
To use a CA-signed certificate, contact a certificate authority of your
choice and purchase a new certificate from them using the CSR you
created in BeyondTrust. Once the purchase is complete, the CA will send
you one or more new certificate files, each of which you must install on
the Secure Remote Access Appliance.
To upload certificates and/or private keys, click Import. Browse to the first
file and upload it. Repeat this for each certificate sent by your CA. Often, a CA will not sent their root certificate, which must be
installed on your Secure Remote Access Appliance. If the root is missing, a warning appears beneath your new certificate: "The
certificate chain appears to be missing one or more certificate authorities and does not appear to terminate in a self-signed
certificate".
To download the root certificate for your appliance certificate, check the information sent from your CA for a link to the appropriate
root. If there is none, contact the CA to obtain it. If this is impractical, search their website for their root certificate store. This contains
all the root certificates of the CA, and all major CAs publish their root store online.
Usually, the easiest way to find the correct root for your certificate is to open the certificate file on your local machine and inspect its
"Certification Path" or "Certificate Hierarchy". The root of this hierarchy or path is typically shown at the top of the tree. Locate this root
certificate on the root store of your CA's online root store. Once done, download it from the CA's root store and import it to your Secure
Remote Access Appliance as described above.
If the intermediate and/or root certificates are different from those currently in-use (or if a self-signed certificate was in-use), please
request an update from BeyondTrust Technical Support. BeyondTrust Technical Support will need a copy of the new certificate and
its intermediate and root certificates.
Certificates
View a table of SSL certificates available on your appliance.
For connections that do not supply a Server Name Indication (SNI) or supply an incorrect SNI, select a default SSL certificate from the
list to provide for these connections by clicking the button under the Default column. The default SSL certificate cannot be a self-
signed certificate nor the default Secure Remote Access Appliance certificate provided for initial installation.
Note: To learn more about SNI, please see Server Name
Indication at https://cio.gov/sni/.
SALES: www.beyondtrust.com/contact SUPPORT: www.beyondtrust.com/support DOCUMENTATION: www.beyondtrust.com/docs 23
©2003-2019 BeyondTrust Corporation. All Rights Reserved. Other trademarks identified on this page are owned by their respective owners. BeyondTrust Corporation is not a chartered bank or trust company, TC: 6/5/2019
or depository institution. It is not authorized to accept deposits or trust accounts and is not licensed or regulated by any state or federal banking authority.REMOTE SUPPORT
APPLIANCE INTERFACE (/APPLIANCE)
To export one or more certificates, check the box for each desired certificate, select Export from the
dropdown at the top of the table, and then click Apply.
If you are exporting only one certificate, you immediately can choose to
include the certificate, the private key (optionally secured by a
passphrase), and/or the certificate chain, depending upon each item’s
availability. Click Export to start the download.
If you are exporting multiple certificates, you will have the option to export
each certificate individually or in a single PKCS#7 file.
When selecting to export multiple certificates as one file, click Continue
to start the download. With this option, only the actual certificate files will
be exported, without any private keys or certificate chains.
To include private keys and/or certificate chains in the export, select
individual export and click Continue to view all selected certificates. For
each listing, choose to include the certificate, the private key (optionally
secured by a passphrase), and/or the certificate chain, depending upon
each item’s availability. Click Export to start the download.
Note: The private key should never,or rarely, be exported from
an appliance. If it is stolen, an attacker could easily compromise
the BeyondTrust site which generated the key. If it does need to
be exported, be sure to assign a strong password to the private
key.
To delete one or more certificates, check the box for each desired certificate, select Delete from the
dropdown at the top of the table, and then click Apply.
Note: Under normal circumstances, a certificate should never
be deleted unless it has already been successfully replaced by
a working substitute.
SALES: www.beyondtrust.com/contact SUPPORT: www.beyondtrust.com/support DOCUMENTATION: www.beyondtrust.com/docs 24
©2003-2019 BeyondTrust Corporation. All Rights Reserved. Other trademarks identified on this page are owned by their respective owners. BeyondTrust Corporation is not a chartered bank or trust company, TC: 6/5/2019
or depository institution. It is not authorized to accept deposits or trust accounts and is not licensed or regulated by any state or federal banking authority.REMOTE SUPPORT
APPLIANCE INTERFACE (/APPLIANCE)
To confirm accuracy, review the certificates you wish to delete, and then
click Delete.
Certificate Requests
View a table of pending requests for third-party-signed certificates. Click
a certificate request name to view details.
The detail view also provides the request data you will give your
preferred certificate authority when requesting a signed certificate.
Note: If you are renewing a certificate, use the same certificate
Request Data that was used for the original certificate.
To delete one or more certificate requests, check the box for each desired request, select Delete from
the dropdown at the top of the table, and then click Apply.
To confirm accuracy, review the certificate requests you wish to delete,
and then click Delete.
SALES: www.beyondtrust.com/contact SUPPORT: www.beyondtrust.com/support DOCUMENTATION: www.beyondtrust.com/docs 25
©2003-2019 BeyondTrust Corporation. All Rights Reserved. Other trademarks identified on this page are owned by their respective owners. BeyondTrust Corporation is not a chartered bank or trust company, TC: 6/5/2019
or depository institution. It is not authorized to accept deposits or trust accounts and is not licensed or regulated by any state or federal banking authority.REMOTE SUPPORT
APPLIANCE INTERFACE (/APPLIANCE)
Keys
View a table of private keys associated with certificates and certificate
requests on your appliance. Click a linked certificate name or request
name to view details about that associated item.
To delete one or more private keys, check the box for each desired key, select Delete from the
dropdown at the top of the table, and then click Apply.
To confirm accuracy, review the private keys you wish to delete, and then
click Delete.
SALES: www.beyondtrust.com/contact SUPPORT: www.beyondtrust.com/support DOCUMENTATION: www.beyondtrust.com/docs 26
©2003-2019 BeyondTrust Corporation. All Rights Reserved. Other trademarks identified on this page are owned by their respective owners. BeyondTrust Corporation is not a chartered bank or trust company, TC: 6/5/2019
or depository institution. It is not authorized to accept deposits or trust accounts and is not licensed or regulated by any state or federal banking authority.REMOTE SUPPORT
APPLIANCE INTERFACE (/APPLIANCE)
SSL/TLS Configuration: Choose SSL Ciphers and Versions
Choose if TLSv1.1, TLSv1, and/or SSLv3 should be enabled or disabled.
For optimum security, the BeyondTrust web interface always defaults to
TLSv1.2 before switching to TLSv1.1, TLS1.0, or SSLv3.
However, some older browsers may not support TLSv1.2. If you disable
one or more of the older security protocols, and intend to access your
administrative interface from an older browser which does not support
the security protocols you have enabled, BeyondTrust will not allow you
to log in. Enabling TLSv1.1, TLSv1.0, and SSLv3 allows you to connect
to your web interface from any computer, regardless of browser version.
Note that this setting primarily affects connections to the web interface of
your Secure Remote Access Appliance. The support tunnel between
your computer and your customer's computer defaults to using TLSv1.2
regardless of any other security protocols you have enabled.
Select which Ciphersuites should be enabled or disabled on your
appliance. Drag and drop Ciphersuites to change the order of
preference. Note that changes to Ciphersuites do not take effect until the
Save button is clicked.
SALES: www.beyondtrust.com/contact SUPPORT: www.beyondtrust.com/support DOCUMENTATION: www.beyondtrust.com/docs 27
©2003-2019 BeyondTrust Corporation. All Rights Reserved. Other trademarks identified on this page are owned by their respective owners. BeyondTrust Corporation is not a chartered bank or trust company, TC: 6/5/2019
or depository institution. It is not authorized to accept deposits or trust accounts and is not licensed or regulated by any state or federal banking authority.REMOTE SUPPORT
APPLIANCE INTERFACE (/APPLIANCE)
Appliance Administration: Restrict Accounts, Networks, and Ports, Set Up Syslog,
Enable Login Agreement, Reset Admin Account
Manage access to /appliance administrative interface accounts by setting
how many failed logins are allowed. Set how long an account is locked
out after passing the failed login limit. Also, set the number of days a
password may be used before expiration and restrict reuse of previously
used passwords.
You can restrict access to your appliance’s administrative interface by
setting network addresses that are or are not allowed and by selecting
the ports through which this interface will be accessible.
In the Accepted Addresses field, define IP addresses or networks that
will always be granted access to /appliance. In Rejected Addresses,
define IP addresses or networks that will always be denied access to
/appliance. Use the Default Action dropdown to determine whether to
accept or to reject IP addresses and networks not listed in either of the
above fields. In the case of overlap, the most specific match takes
precedence.
If, for example, you want to allow access to 10.10.0.0/16 but reject access
to 10.10.16.0/24 and reject access from anywhere else, you would enter
10.10.0.0/16 in the Accepted Addresses field, enter 10.10.16.0/24 in
the Rejected Addresses field, and set the Default Action to Reject.
The Secure Remote Access Appliance can be configured to run a STUN
service on UDP port 3478 to help facilitate peer-to-peer connections
between BeyondTrust clients. Check the Enable local STUN Service
box to use this functionality.
You can configure your appliance to send log messages to up to ten
syslog servers. Enter the hostname or IP address of the syslog host
server receiving system messages from this appliance in the Remote
Syslog Server field. Select the message format for the event notification
messages. Choose from the standards specification RFC 5424, one of
the legacy BSD formats, or Syslog over TLS. Syslog over TLS defaults
to using TCP port 6514. All other formats default to using UDP 514.
However, the defaults can be changed. Secure Remote Access Appliance logs are sent using the local0 facility.
Note: For Cloud deployments, ports are always static to the default ports. For Cloud-specific settings, please see
Appliance Administration: Set Syslog over TLS at https://www.beyondtrust.com/docs/remote-support/getting-
started/deployment/cloud/syslog-over-tls.htm.
SALES: www.beyondtrust.com/contact SUPPORT: www.beyondtrust.com/support DOCUMENTATION: www.beyondtrust.com/docs 28
©2003-2019 BeyondTrust Corporation. All Rights Reserved. Other trademarks identified on this page are owned by their respective owners. BeyondTrust Corporation is not a chartered bank or trust company, TC: 6/5/2019
or depository institution. It is not authorized to accept deposits or trust accounts and is not licensed or regulated by any state or federal banking authority.REMOTE SUPPORT
APPLIANCE INTERFACE (/APPLIANCE)
Note: When changing or adding a syslog server, an alert is emailed to the administrator's email address. The
administrator's information is configured at Security > Email Configuration > Security :: Admin Contact.
For a detailed syslog message reference, see the Syslog Message Reference Guide at Syslog Message Reference Guide at
www.beyondtrust.com/docs/remote-support/how-to/integrations/syslog/index.
You can enable a login agreement that users must accept before
accessing the /appliance administrative interface. The configurable
agreement allows you to specify restrictions and internal policy rules
before users are allowed to log in.
You can choose to select Reset Admin Account, which will restore a
site’s administrative username and password to the default should the
login be forgotten or need to be replaced.
SALES: www.beyondtrust.com/contact SUPPORT: www.beyondtrust.com/support DOCUMENTATION: www.beyondtrust.com/docs 29
©2003-2019 BeyondTrust Corporation. All Rights Reserved. Other trademarks identified on this page are owned by their respective owners. BeyondTrust Corporation is not a chartered bank or trust company, TC: 6/5/2019
or depository institution. It is not authorized to accept deposits or trust accounts and is not licensed or regulated by any state or federal banking authority.REMOTE SUPPORT
APPLIANCE INTERFACE (/APPLIANCE)
Email Configuration: Configure Appliance to Send Email Alerts
Configure your SMTP relay server and set one or more administrative contacts so that your Secure Remote Access Appliance can
send you automatic email notifications.
SALES: www.beyondtrust.com/contact SUPPORT: www.beyondtrust.com/support DOCUMENTATION: www.beyondtrust.com/docs 30
©2003-2019 BeyondTrust Corporation. All Rights Reserved. Other trademarks identified on this page are owned by their respective owners. BeyondTrust Corporation is not a chartered bank or trust company, TC: 6/5/2019
or depository institution. It is not authorized to accept deposits or trust accounts and is not licensed or regulated by any state or federal banking authority.REMOTE SUPPORT
APPLIANCE INTERFACE (/APPLIANCE)
After entering the email addresses for the administrator contacts, save your settings and send a test email to ensure everything works
correctly.
Emails are sent for the following events:
l Syslog Server has been Changed - A user on /appliance has changed the syslog server parameter.
l RAID Event - One or more RAID logical drives is not in Optimum state (Degraded or Partially Degraded).
l SSL Certificate Expiration Notice - An in-use SSL certificate (include either end-entity certificates or any CA certificate in the
chain) will expire in 90 days or less.
SALES: www.beyondtrust.com/contact SUPPORT: www.beyondtrust.com/support DOCUMENTATION: www.beyondtrust.com/docs 31
©2003-2019 BeyondTrust Corporation. All Rights Reserved. Other trademarks identified on this page are owned by their respective owners. BeyondTrust Corporation is not a chartered bank or trust company, TC: 6/5/2019
or depository institution. It is not authorized to accept deposits or trust accounts and is not licensed or regulated by any state or federal banking authority.REMOTE SUPPORT
APPLIANCE INTERFACE (/APPLIANCE)
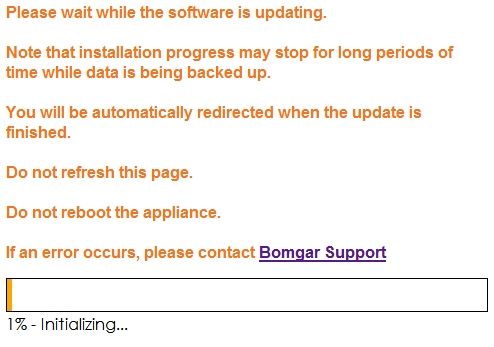
Updates: Check for Update Availability and Install Software
The appliance periodically checks for critical updates and emails the
admin contact person when updates are available. You can select if you
want the updates to install automatically and use the dropdown menu to
select a time for the installation.
Updates requiring an appliance reboot or the interruption of services are
excluded from the automatic update process unless you check the box to include them.
BeyondTrust will continue to notify you of the latest builds as they
become available. Whenever you receive notification that new update
packages have been built for your appliance, clicking the Check for
Updates button will locate the packages and make them available for
you to install.
If multiple software packages have been built for your appliance, each
one will be listed separately in the list of available updates. Your new
software is automatically downloaded and installed when you click the
appropriate Install This Update button.
If no update packages or patches are available for your Secure Remote
Access Appliance, a message stating "No updates available" is
displayed. If an update is available but an error occurred when
distributing the update to your appliance, an additional message is displayed, such as "An error occurred building your update.
Please visit beyondtrust.com/docs/index.htm#support for more information."
It is not mandatory to use this Check for Updates feature. If your
appliance is not internet-facing or if your organization's security policy
does not allow for automatic update functionality, you can manually
check for updates. Click the Appliance Download Key link to generate a
unique appliance key, and then, from a non-restricted system, submit that
key to BeyondTrust's update server at https://update.bomgar.com.
Download any available updates to a removable storage device and
then transfer those updates to a system from which you can manage your
appliance.
After downloading a software package, browse to the file from the
Manual Installation section, and then click the Update Software button
to complete the installation.
Note: Please be prepared to install software updates directly
after download. Once an update has been downloaded, it will
no longer appear in your list of available updates. Should you
need to redownload a software update, contact BeyondTrust
Technical Support.
SALES: www.beyondtrust.com/contact SUPPORT: www.beyondtrust.com/support DOCUMENTATION: www.beyondtrust.com/docs 32
©2003-2019 BeyondTrust Corporation. All Rights Reserved. Other trademarks identified on this page are owned by their respective owners. BeyondTrust Corporation is not a chartered bank or trust company, TC: 6/5/2019
or depository institution. It is not authorized to accept deposits or trust accounts and is not licensed or regulated by any state or federal banking authority.You can also read