RICHTEXTBOX FOR UWP COMPONENTONE - GRAPECITY
←
→
Page content transcription
If your browser does not render page correctly, please read the page content below
ComponentOne

RichTextBox for UWP
GrapeCity US

GrapeCity
201 South Highland Avenue, Suite 301
Pittsburgh, PA 15206
Tel: 1.800.858.2739 | 412.681.4343
Fax: 412.681.4384
Website: https://www.grapecity.com/en/
E-mail: us.sales@grapecity.com

Trademarks

The ComponentOne product name is a trademark and ComponentOne is a registered trademark of GrapeCity, Inc. All
other trademarks used herein are the properties of their respective owners.

Warranty

ComponentOne warrants that the media on which the software is delivered is free from defects in material and
workmanship, assuming normal use, for a period of 90 days from the date of purchase. If a defect occurs during this
time, you may return the defective media to ComponentOne, along with a dated proof of purchase, and
ComponentOne will replace it at no charge. After 90 days, you can obtain a replacement for the defective media by
sending it and a check for $2 5 (to cover postage and handling) to ComponentOne.
Except for the express warranty of the original media on which the software is delivered is set forth here,
ComponentOne makes no other warranties, express or implied. Every attempt has been made to ensure that the
information contained in this manual is correct as of the time it was written. ComponentOne is not responsible for any
errors or omissions. ComponentOne’s liability is limited to the amount you paid for the product. ComponentOne is
not liable for any special, consequential, or other damages for any reason.

Copying and Distribution

While you are welcome to make backup copies of the software for your own use and protection, you are not
permitted to make copies for the use of anyone else. We put a lot of time and effort into creating this product, and we
appreciate your support in seeing that it is used by licensed users only.
RichTextBox for UWP                                                   1

Table of Contents
       RichTextBox for UWP                                            3
           Help with UWP Edition                                      3

       RichTextBox for UWP Assemblies and Controls                    4
       Key Features                                                   5
       RichTextBox for UWP Quick Start                                6
           Step 1 of 3: Creating a Universal Windows Application      6
           Step 2 of 3: Customizing the RichTextBox                  6-7

           Step 3 of 3: Running the Application                      7-8
       Working with RichTextBox for UWP                               9
           Main Concepts and Features                                 9
             Accessing Layout Information                           9-11
             Copying, Cutting, and Pasting Text                    11-12
             Hyperlinks                                            12-14
             Hit Testing                                           14-15
             Printing                                              15-16

             Spell Checking                                          16
               Adding Spell Checking                               16-17
             Localization                                          17-18
           Setting and Formatting Content                            18
             Text Content                                          18-19

             Html Content                                          19-20
             Setting Rtf Content                                   20-21
             HtmlFilter Customization                              21-23
             Overriding Styles                                     23-27
             Saving and Loading HTML                               27-28
           Working with C1RichTextBoxMenu                            28
           Menus and Commands                                        28
             Creating Custom Command Bars                            28
               Clipboard Functions                                 28-29
               Alignment Functions                                   29
               Font Functions                                      29-30

               Formatting Functions                                30-31
               Select Text Function                                31-32
               Document History Functions                            32

Copyright © 2019 GrapeCity, Inc. All rights reserved.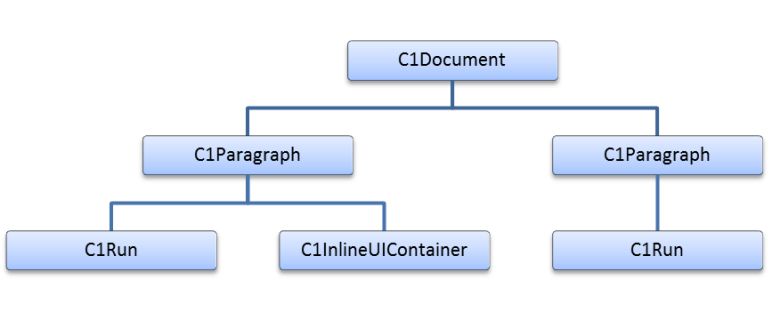
RichTextBox for UWP                                                               2
             Using the AppBar                                                  32-34

       Working with C1Document Object                                            35

           Defining C1RichTextBox.Document Elements                              35
             The C1TextElement Class                                           35-36

             Other C1RichTextBox.Documents Elements                              36
           Creating Documents and Reports                                      36-42
           Implementing Split Views                                            42-43
           Using the C1Document Class                                          43-44

           Understanding C1TextPointer                                         44-48

       Supported Elements                                                        49
           HTML Elements                                                       49-51
           HTML Attributes                                                     51-56
           CSS Properties                                                      56-60
           CSS Selectors                                                       60-61
       Tutorials                                                                 62
           Creating an AppBar Application                                        62

             Step 1 of 5: Creating the Application                             62-64
             Step 2 of 5: Adding Resource Files and General Application Code   64-78
             Step 3 of 5: Adding General Application Code                      78-79
             Step 4 of 5: Adding Code for the BottomAppBar                     79-85
             Step 5 of 5: Running the Application                              85-86
           Printing C1RichTextBox Contents                                       86

             Step 1 of 4: Setting Up the Application                           86-87
             Step 2 of 4: Adding Resource Files and Code                       87-89
             Step 3 of 4: Adding Application Code                              89-93
             Step 4 of 4: Running the Application                              93-94

Copyright © 2019 GrapeCity, Inc. All rights reserved.
RichTextBox for UWP 3 RichTextBox for UWP Display and edit formatted text as HTML documents with RichTextBox for UWP. The C1RichTextBox control supports basic HTML formatting, CSS, lists, hyperlinks, tables, images, and more. Use the control to display HTML content from the Web or use it as a rich text editor. Help with UWP Edition Getting Started For information on installing ComponentOne Studio UWP Edition, licensing, technical support, namespaces and creating a project with the control, please visit Getting Started with ComponentOne Studio UWP Edition. Copyright © 2019 GrapeCity, Inc. All rights reserved.
RichTextBox for UWP                                                                                                   4

RichTextBox for UWP Assemblies and Controls
Add powerful rich text editing and viewing to your mobile apps. RichTextBox for UWP Edition supports common
formatting tags, automatic line wrapping, HTML and RTF import/export, table support, images, annotations, and more.
The following table displays the assemblies and main classes included in them along with the descriptions:

C1.UWP.RichTextBox.dll                                    C1RichTextBox
Control used to view and edit C1Document documents. The control can import and export HTML, and supports rich
formatting including fonts, foreground and background colors, borders, paragraph alignment, images, hyperlinks,
lists, arbitrary UIElement objects, and more.

C1.UWP.RichTextBox.dll                                    C1Document
Class that represents documents as a hierarchical list of elements that represent document components such as
paragraphs, lists, images, and so on. The object model exposed by the C1Document object is similar to the one used
in the WPF FlowDocument class and in the HTML DOM.

C1.UWP.RichTextBox.AppBar.dll                             C1ApplicationBarToggleButton
Base class for ApplicationBar toggle buttons which includes built-in tools to create a simple command bar
supporting Bold, Italic, Underline, Undo, Redo, Increase Font Size, Decrease Font Size, Center Align, Right Align, Left
Align, and Justify commands.

C1.UWP.RichTextBox.Menu.dll                               C1RichTextBoxMenu

Control that acts as a complete radial context menu. It allows you to edit and format text that includes different
fonts, decorations, sizes, colors, and other basic HTML and RTF style attributes supported by CSS and inline markup.

C1.UWP.RichTextBox.PdfFilter.dll                          PDFFilter
Class that allows you to export the RichTextBox content to PDF file.

Copyright © 2019 GrapeCity, Inc. All rights reserved.
RichTextBox for UWP                                                                                                   5

RichTextBox for UWP Key Features
RichTextBox for UWP allows you to create customized, rich applications. Make the most of RichTextBox for UWP
by taking advantage of the following key features:

       Load, Display, and Save HTML Documents

       The C1RichTextBox control supports displaying and editing rich text formatted as HTML. Load existing HTML
       content into the C1RichTextBox control, edit the document, and then save it back as HTML or plain text.

       Mouse and Touch Support

       Select text and move the input caret easily by either mouse or touch input. The text selection is modeled after
       the native TextBox behavior so it's familiar and easy to accomplish on a touch device.

       Rich Formatting

       Edit and format text containing multiple fonts, decorations, sizes, colors, and other basic HTML style attributes
       supported by CSS and inline markup.

       Clipboard Support

       The C1RichTextBox control fully supports the clipboard for both plain and rich text through the keyboard
       (CTRL+C, CTRL+V, CTRL+X) and UI commands for touch displays. Implement cut/copy/paste commands within
       your AppBar or any other way imaginable.

       Built-in AppBar Tools

       The AppBar library includes built-in tools that you can use with the C1RichTextBox control to speed up
       command creation for common editing features like text formatting and document history. The built-in tools
       support the following commands: Bold, Italic, Underline, Undo, Redo, Increase Font Size, Decrease Font Size,
       Center Align, Right Align, Left Align, and Justify.

       Hyperlinks: Insert and Navigate

       The C1RichTextBox control supports inserting and navigating hyperlinks. When the user clicks a hyperlink
       the RequestNavigate event is fired on the control and you can handle what happens from there.

       Insert Tables and Images

       The C1RichTextBox control supports inserting images from the Web or from the users machine. You can also
       insert tables. The Beta version has limited editing support for tables and images.

       Undo/Redo Support

       The C1RichTextBox control keeps track of all document history, so users have the ability to easily undo and
       redo changes. By default, keyboard commands (CTRL+Z/CTRL+Y) perform these actions.

Copyright © 2019 GrapeCity, Inc. All rights reserved.
RichTextBox for UWP 6
RichTextBox for UWP Quick Start
In this quick start you'll create a Universal Windows application in Visual Studio, add the C1RichTextBox control to
the application, add code to customize the application, and run the application to view possible run-time interactions.
Step 1 of 3: Creating a Universal Windows Application
In this step you'll create a new Universal Windows application, set the application up, and add the C1RichTextBox
control to the application. After completing this step, you should have a mostly functional Rich Text editor.
Complete the following steps:
1. In Visual Studio select File | New | Project.
2. In the New Project dialog box, select Templates | Visual C# | Windows | Universal. From the templates list,
select Blank App (Universal Windows). Enter a Name and click OK to create your project.
3. Right-click the project name in the Solution Explorer and select Add Reference.
4. In the Reference Manager dialog box, expand Universal Windows and select Extensions; you should see the
UWP assemblies in the center pane. Select C1.UWP.RichTextBox.
5. Open MainPage.xaml if it isn't already open, and add the following markup within the tag:
XAML Markup
xmlns:RichTextBox="using:C1.Xaml.RichTextBox"
This adds references to the required assembly to the project.
6. In the XAML window of the project, place the cursor between the
tags and click once.
7. Add the following markup within the tags to add the C1RichTextBox control. Note that this markup
gives the control a name:
XAML Markup
8. Place your cursor beneath the markup for the C1RichTextBox control you just added. Locate
the C1RichTextBoxMenu control in the Visual Studio Toolbox and double-click to add it to your application.
9. Edit the C1RichTextBoxMenu markup so that it resembles the following sample. This will give the
C1RichTextBoxMenu a name and bind it to the C1RichTextBox control:
XAML Markup
What You've Accomplished
If you run the application, you'll see an almost fully functional C1RichTextBox application. You can enter and edit text
in the C1RichTextBox control. In the next step you'll customize the application further.
Step 2 of 3: Customizing the RichTextBox
Copyright © 2019 GrapeCity, Inc. All rights reserved.RichTextBox for UWP 7
In the previous step you created a new Universal Windows application, set the application up, and added the control
to the application. In this step you'll customize the application further.
Complete the following steps:
1. In the Solution Explorer, right-click the MainPage.xaml file and select View Code to open the code file.
2. In the Code Editor, add the following code to import the following namespaces:
Visual Basic
Imports C1.Xaml.RichTextBox
C#
using C1.Xaml.RichTextBox;
3. Add the following code to the MainPage constructor:
Visual Basic
Me.C1RTB.FontSize = 24
Me.C1RTB.Text = "Hello World! Welcome to the most complete rich text editor
available for UWP Edition. Load, edit, and save formatted text as HTML or RTF
documents with RichTextBox for UWP Edition. The C1RichTextBox
control provides rich formatting, automatic line wrapping, HTML and RTF
import/export, table support, images, annotations, and more."
C#
this.C1RTB.FontSize = 24;
this.C1RTB.Text = "Hello World! Welcome to the most complete rich text editor
available for UWP Edition. Load, edit, and save formatted text as HTML or RTF
documents with RichTextBox for UWP Edition. The C1RichTextBox
control provides rich formatting, automatic line wrapping, HTML and RTF
import/export, table support, images, annotations, and more.";
This code adds content to the C1RichTextBox control.
What You've Accomplished
In this step you added content to your C1RichTextBox application, now all that's left is to run it. In the next step you'll
run the application and view some of the run-time interactions possible with the C1RichTextBox control.
Step 3 of 3: Running the Application
In the previous steps you created a new Universal Windows application, added the C1RichTextBox control, and
customized the application. All that's left now is to run the application and view some possible run-time interactions.
Complete the following steps:
1. In the menu select Debug | Start Debugging to run the application.
2. Tap inside the C1RichTextBox control. The on-screen keyboard will appear allowing you to enter text.
3. Enter text inside the C1RichTextBox using the on-screen keyboard.
4. Select a word, for example "Welcome". Notice that the word is highlighted and selected. To change you
selection, you can select and drag the handles that appear on either side of the selected word. For example,
select part of the next sentence:
What You've Accomplished
Congratulations, you've completed this Quick Start! You learned a bit about using the C1RichTextBox control. In this
Copyright © 2019 GrapeCity, Inc. All rights reserved.RichTextBox for UWP 8 tutorial you created a new application, added the C1RichTextBox control, and viewed some possible run-time interactions. Copyright © 2019 GrapeCity, Inc. All rights reserved.
RichTextBox for UWP                                                                                                  9

Working with RichTextBox for UWP
The most complete rich text editor available for UWP Edition, load, edit, and save formatted text as HTML or RTF
documents with RichTextBox for UWP. The C1RichTextBox control provides rich formatting, automatic line wrapping,
HTML and RTF import/export, table support, images, annotations, and more.
The C1.UWP.RichTextBox assembly contains two main objects: the C1RichTextBox control and the C1Document
object.
C1RichTextBox is a powerful text editor that allows you to display and edit formatted text. C1RichTextBox supports
all the usual formatting options, including fonts, background and foreground colors, lists, hyperlinks, images, borders,
and so on. C1RichTextBox also supports loading and saving documents in HTML format.
C1Document is the class that represents the contents of a C1RichTextBox. It is analogous to the FlowDocument class
in WPF. As in WPF, a C1Document is composed of stacked elements (C1Block objects) which in turn are composed of
inline elements (C1Run objects).
Many applications may deal only with the C1RichTextBox control, which provides a simple linear view of the
document. Other applications may choose to use the rich object model provided by the C1Document class to create
and manage documents directly, with full access to the document structure.

Main Concepts and Features

Accessing Layout Information
When C1RichTextBox creates the C1Document layout, it creates a parallel tree composed of C1TextElementView
objects. For each C1TextElement in the C1Document tree, there is at least one C1TextElementView that is tasked with
its layout and drawing.
Take this C1Document tree as an example:

Its corresponding view tree will look like the following:

Copyright © 2019 GrapeCity, Inc. All rights reserved.
RichTextBox for UWP                                                                                              10

Each C1TextElementView provides some basic layout information for its corresponding C1TextElement:
C1TextElementView.Origin: this is the origin of the view in document coordinates.
C1TextElementView.DesiredSize: this is the desired size of the view from the last time it was measured.
Multiple C1TextElementViews can be composed to handle layout and drawing for out C1TextElement. When this is
done, the C1TextElementView.Content property contains the inner most C1TextElementView in the composition. The
content view’s children correspond to the C1TextElementView.Children collection of the associated C1TextElement.
View composition is used in C1BoxView to handle margin, padding and border for its C1TextElementView.Content
view. This means that the origin of each C1BoxView is outside the margin, padding and border box, while the origin of
its C1TextElementView.Content is inside.
C1FlowView takes care of flowing boxes and text into lines. Each line is represented by a C1Line object. Note that
a C1Line object not only contains single lines of text, but may also contain an entire paragraph. Each C1FlowView
contains a list of C1Line, which are always vertically stacked. In turn, each C1Line is composed of C1LineFragments,
which are horizontally stacked. C1LineFragments have a reference to the child element whose origin matches the
position of the fragment.
For example, the following code counts the lines in a C1RichTextBox:

Visual Basic
Private Function CountLines(rtb As C1RichTextBox) As Integer
    Dim root = rtb.ViewManager.GetView(rtb.Document)
    Return CountLines(root)
End Function
Private Function CountLines(view As C1TextElementView) As Integer
    Dim count As Integer = 0
    Dim flow = TryCast(view, C1FlowView)
    If flow IsNot Nothing Then
        For Each line As var In flow.Lines

Copyright © 2019 GrapeCity, Inc. All rights reserved.
RichTextBox for UWP 11
If TypeOf line.Fragments.First().Element Is C1Inline Then
count += 1
End If
Next
End If
For Each child As var In view.Children
count += CountLines(child)
Next
Return count
End Function
C#
int CountLines(C1RichTextBox rtb)
{
var root = rtb.ViewManager.GetView(rtb.Document);
return CountLines(root);
}
int CountLines(C1TextElementView view)
{
int count = 0;
var flow = view as C1FlowView;
if (flow != null)
{
foreach (var line in flow.Lines)
{
if (line.Fragments.First().Element is C1Inline)
{
++count;
}
}
}
foreach (var child in view.Children)
{
count += CountLines(child);
}
return count;
}
At first, the root view is obtained. That's the same as the view associated to root element,
so C1RichTextViewManager.GetView is used to get the view of rtb.Document. After that, the view tree is traversed
counting the lines in each C1FlowView found. Note that you only count the lines with C1Inline elements; otherwise
you would also count paragraphs and other container blocks.
Copying, Cutting, and Pasting Text
The C1RichTextBox control fully supports the clipboard for both plain and rich text through the keyboard (CTRL+C,
CTRL+V, CTRL+X) and UI commands for touch displays. Implement cut/copy/paste commands within your AppBar or
any other way imaginable. Use the ClipboardMode property to indicate if you want to copy, cut, or paste plain text or
rich text.
You can see the code within button_Click events:
Copyright © 2019 GrapeCity, Inc. All rights reserved.RichTextBox for UWP 12
The code above allows you to quickly and easily implement copy/cut/paste commands.
C#
private void btnCopy_Click(object sender, Windows.UI.Xaml.RoutedEventArgs e)
{
rtb.ClipboardCopy();
}
private void btnCut_Click(object sender, Windows.UI.Xaml.RoutedEventArgs e)
{
rtb.ClipboardCopy();
}
private void btnPaste_Click(object sender, Windows.UI.Xaml.RoutedEventArgs e)
{
rtb.ClipboardPaste();
}
}
Hyperlinks
The C1RichTextBox supports hyperlinks. As in regular HTML documents, this feature allows you to make certain parts
of the document active. When the user clicks them, the application receives a notification and takes some action.
The code below shows how you can create a hyperlink:
Visual Basic
Public Sub New()
InitializeComponent()
' Set text
rtb.Text = "This is some text with a hyperlink in it."
' Create hyperlink
Dim pos As Integer = rtb.Text.IndexOf("hyperlink")
rtb.[Select](pos, 9)
Dim uri = New Uri("http://www.grapecity.com", UriKind.Absolute)
rtb.Selection.MakeHyperlink(uri)
' Handle navigation requests
rtb.NavigationMode = NavigationMode.Always
AddHandler _rtb.RequestNavigate, AddressOf _rtb_RequestNavigate
End Sub
C#
public MainPage()
{
InitializeComponent();
// Set text
rtb.Text = "This is some text with a hyperlink in it.";
// Create hyperlink
int pos = rtb.Text.IndexOf("hyperlink");
rtb.Select(pos, 9);
var uri = new Uri("http://www.grapecity.com", UriKind.Absolute);
rtb.Selection.MakeHyperlink(uri);
Copyright © 2019 GrapeCity, Inc. All rights reserved.RichTextBox for UWP 13
// Handle navigation requests
rtb.NavigationMode = C1.Xaml.RichTextBox.NavigationMode.Always;
rtb.RequestNavigate += rtb_RequestNavigate;
}
The code starts by assigning some text to the C1RichTextBox. Next, it selects the word "hyperlink" and calls
the EditExtensions.MakeHyperlink method to make it a hyperlink. The parameter is a URI that is assigned to the new
hyperlink's C1Hyperlink.NavigateUri property.
Then, the code sets the C1RichTextBox.NavigationMode property to determine how the C1RichTextBox should
handle the mouse over hyperlinks. The default behavior is moving the mouse over a hyperlink, and tapping fires
the C1RichTextBox.RequestNavigate event. This allows users to edit the hyperlink text as they would edit regular text.
The C1RichTextBox.RequestNavigate event handler is responsible for handling the hyperlink navigation.
Note that hyperlink actions are not restricted to URI navigation. You could define a set of custom URI actions to be
used as commands within your application. The custom URIs would be parsed and handled by the
C1RichTextBox.RequestNavigate handler. For example, the code below uses hyperlinks to show message boxes:
Visual Basic
Public Sub New()
InitializeComponent()
' Set text
rtb.Text = "This is some text with a hyperlink in it."
' Create hyperlink
Dim pos As Integer = _rtb.Text.IndexOf("hyperlink")
rtb.[Select](pos, 9)
Dim uri = New Uri("msgbox:Thanks for clicking!")
rtb.Selection.MakeHyperlink(uri)
' Handle navigation requests
rtb.NavigationMode = NavigationMode.Always
AddHandler rtb.RequestNavigate, AddressOf _rtb_RequestNavigate
End Sub
Private Sub rtb_RequestNavigate(sender As Object, e As RequestNavigateEventArgs)
Dim uri As Uri = e.Hyperlink.NavigateUri
If uri.Scheme = "msgbox" Then
MessageBox.Show(uri.LocalPath)
End If
End Sub
C#
public MainPage()
{
this.InitializeComponent();
// Set text
rtb.Text = "This is some text with a hyperlink in it.";
// Create hyperlink
int pos = rtb.Text.IndexOf("hyperlink");
rtb.Select(pos, 9);
var uri = new Uri("http://www.grapecity.com", UriKind.Absolute);
rtb.Selection.MakeHyperlink(uri);
// Handle navigation requests
rtb.NavigationMode = C1.Xaml.RichTextBox.NavigationMode.Always;
Copyright © 2019 GrapeCity, Inc. All rights reserved.RichTextBox for UWP 14
rtb.RequestNavigate += rtb_RequestNavigate;
}
private async void rtb_RequestNavigate(object sender,
RequestNavigateEventArgs e)
{
var md = new MessageDialog("The document is requesting to navigate to " +
e.Hyperlink.NavigateUri, "Navigate");
md.Commands.Add(new UICommand("OK", (UICommandInvokedHandler) =>
{
Windows.System.Launcher.LaunchUriAsync(e.Hyperlink.NavigateUri);
}));
md.Commands.Add(new UICommand("Cancel", (UICommandInvokedHandler) =>
{
rtb.Select(e.Hyperlink.ContentStart.TextOffset,
e.Hyperlink.ContentRange.Text.Length);
}));
await md.ShowAsync();
}
The C1RichTextBox.RequestNavigate handler uses the URI members to parse the command and argument. You
could use this technique to create documents with embedded menus for example.
Note that the MakeHyperlink method is just a quick and easy way to turn an existing part of a document into a
hyperlink. You can also create hyperlinks by adding C1Hyperlink elements to C1Document objects. This is described in
later sections.
Hit Testing
The C1RichTextBox supports hyperlinks, which provide a standard mechanism for implementing user interactivity. In
some cases, you may want to go beyond that and provide additional, custom mouse interactions. For example, you
may want to apply some custom formatting or show a context menu when the user clicks an element.
To enable these scenarios, the C1RichTextBox exposes ElementTapped events and
a C1RichTextBox.GetPositionFromPoint method.
If all you need to know is the element that triggered the mouse event, you can get it from the source parameter in the
event handler. If you need more detailed information (the specific word that was clicked within the element for
example), then you need the C1RichTextBox.GetPositionFromPoint method. C1RichTextBox.GetPositionFromPoint
takes a point in client coordinates and returns a C1TextPosition object that expresses the position in document
coordinates.
The C1TextPosition object has two main properties: Element and Offset. The Element property represents an
element within the document; Offset is a character index (if the element is a C1Run) or the index of the child element
at the given point.
For example, the code below creates a C1RichTextBox and attaches a handler to the C1RichTextBox.RightTapped
event:
C#
public sealed partial class MainPage : Page
{
C1RichTextBox rtb;
public MainPage()
{
Copyright © 2019 GrapeCity, Inc. All rights reserved.RichTextBox for UWP 15
this.InitializeComponent();
// Create a C1RichTextBox and add it to the page
rtb = new C1RichTextBox();
LayoutRoot.Children.Add(rtb);
// Attach event handler
rtb.RightTapped += rtb_RightTapped;
}
If you wanted to toggle the C1TextElement.FontWeight value of a single word, then you would need to determine
which character was clicked and expand the selection to the whole word. This is where
the C1RichTextBox.GetPositionFromPoint method becomes necessary. Here is a version of the event handler that
accomplishes that:
C#
void rtb_RightTapped(object sender, RightTappedRoutedEventArgs e)
{
// Get position in control coordinates
var pt = e.GetPosition(rtb);
// Get text pointer at position
var pointer = rtb.GetPositionFromPoint(pt);
// Check that the pointer is pointing to a C1Run
var run = pointer.Element as C1Run;
if (run != null)
{
// Get the word within the C1Run
var text = run.Text;
var start = pointer.Offset;
var end = pointer.Offset;
while (start > 0 && char.IsLetterOrDigit(text, start - 1))
start--;
while (end < text.Length - 1 && char.IsLetterOrDigit(text, end + 1))
end++;
// Toggle the bold property for the run that was clicked
var word = new C1TextRange(pointer.Element, start, end - start + 1);
word.FontWeight = word.FontWeight.HasValue && word.FontWeight.Value.Weight ==
FontWeights.Bold.Weight
? FontWeights.Normal
: FontWeights.Bold;
}
}
}
}
Notice that the C1TextElement.FontWeight property returns a nullable value. If the range contains a mix of values for
this attribute, the property returns null. The code used to toggle the C1TextElement.FontWeight property is the same
we used earlier when implementing the formatting toolbar.
The GetPositionFromPoint method allows you to get a C1TextPosition object from a point on the screen.
The GetRectFromPosition method performs the reverse operation, returning a Rect that represents the screen
position of a C1TextPosition object. This is useful in situations where you want to present a UI element near a specific
portion of a document.
Copyright © 2019 GrapeCity, Inc. All rights reserved.RichTextBox for UWP 16
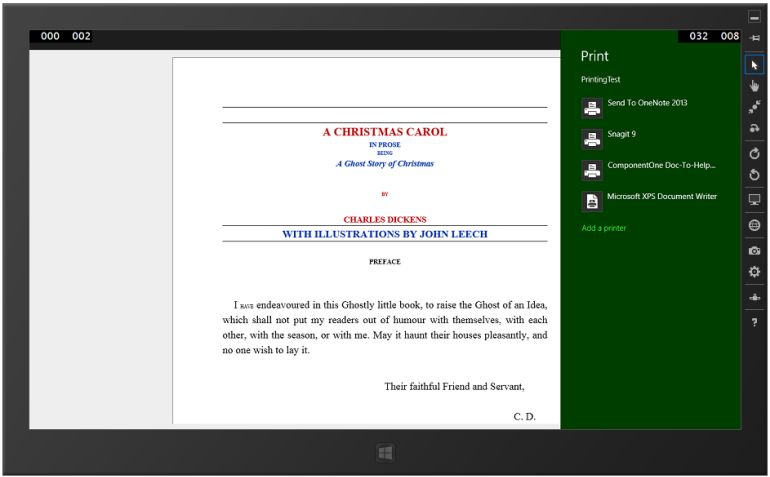
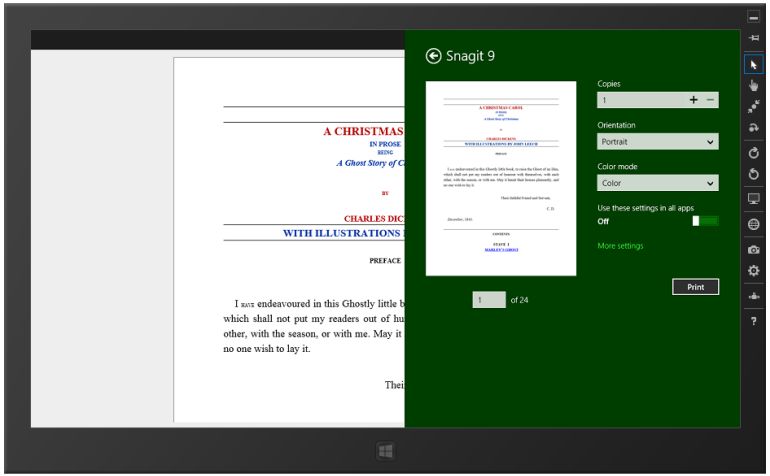
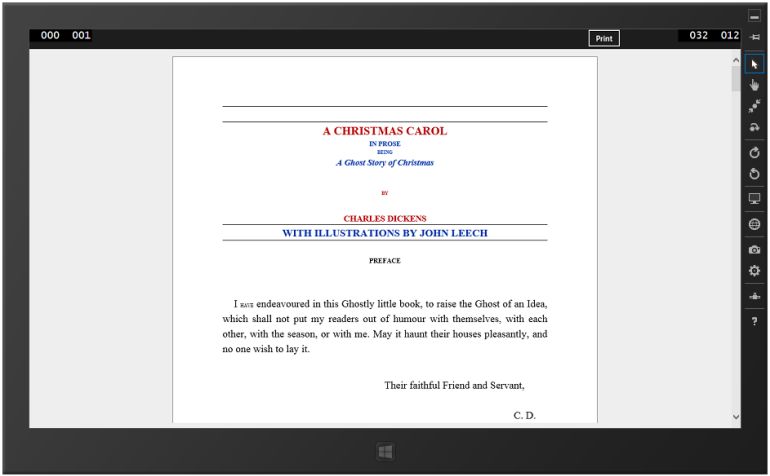
Printing
C1RichTextBox for UWP supports printing through standard Windows printing techniques. The control also supports
paged layout, so users can see how the document will look when printed.
For more information on printing in C1RichTextBox, please see the Printing C1RichTextBox Contents topic.
A Printing sample was installed on your machine in the ComponentOne Samples folder.
Spell Checking
RichTextBox for UWP supports as-you-type spell checking with a wavy, red underline that highlights misspelled
words.
The end-user may right-click the mistake in the document to see a menu with options that include selecting one of
the correction suggestions. Users can also choose to ignore the misspelled word or to add it to the dictionary.
Spell checking is done using the C1SpellChecker component, which is included in ComponentOne Studio UWP
Edition.
There are 4 steps for adding spell-checking to your application.
1. Declare a new C1SpellChecker control.
2. Assign C1SpellChecker to the SpellChecker property of your C1RichTextBox control.
3. Obtain the stream for your resource file.
4. Load the MainDictionary of your choice.
To add spell-checking to your application, see the Adding Spell Checking Task-Based Help topic.
Dictionary Support
RichTextBox for UWP supports 22 different, customizable dictionaries.
Adding Spell Checking
In this topic you'll add spell-checking to your application. This topic assumes you have added a C1RichTextBox
control and a C1RichTextBoxMenu control to your page.
In this help topic, you'll use an English dictionary resource. If you wish to use a different dictionary, you may choose
any from the 22 supported dictionaries.
The main steps for adding spell-checking are to declare a new C1SpellChecker, load the Main Dictionary of your
choice, and to assign C1SpellChecker to the SpellChecker property of your C1RichTextBox.
1. Edit the C1RichTextBox and C1RichTextBoxMenu controls to reflect the following:
XAML Markup
2. In the Solution Explorer, right-click your application's name and select Add | New Folder. Name the folder
Resources.
3. In the Solution Explorer, right-click the Resources folder and select Add | Existing Item. The Add Existing
Item dialog box will appear.
4. In the Add Existing Item dialog box locate the C1Spell_en-US.dct file included in the RichTextBoxSamples
Copyright © 2019 GrapeCity, Inc. All rights reserved.RichTextBox for UWP 17
sample folder.
This is a US English dictionary file – if you add another file, instead, you can adapt the steps below with the
appropriate code.
5. In the Properties window, set the C1Spell_en-US.dct file's Build Action to Embedded Resource.
6. Right-click your MainPage.xaml page and select View Code from the context menu.
7. Add the following import statements to the top of the page:
C#
using C1.Xaml.SpellChecker;
using C1.Xaml.RichTextBox;
8. Set the Text property in the MainPage() constructor:
C#
rtb.Text = @"Some facts about Mark Twain (spelling errors intentional ;-) A
steambat pilot neded a vast knowldege of the ever-chaging river to be able to
stop at any of the hundreds of ports and wood-lots along the river banks. Twain
meticulosly studied 2,000 miles (3,200 km) of the Mississipi for more than two
years before he received his steamboat pilot license in 1859.";
9. Declare a new C1SpellChecker:
C#
var spell = new C1SpellChecker();
10. Assign C1SpellChecker to the SpellChecker property of your C1RichTextBox control:
C#
rtb.SpellChecker = spell;
11. Obtain the stream to your resource file. Make sure you insert your application name where indicated:
C#
Assembly asm = typeof(MainPage).GetTypeInfo().Assembly;
Stream stream =
asm.GetManifestResourceStream("YourApplicationName.Resources.C1Spell_en-
US.dct");
12. Load the MainDictionary of your choice:
C#
spell.MainDictionary.Load(stream);
What You've Accomplished
In this topic, you added text to your C1RichTextBox control, and then added some code to handle spell-checking.
Localization
Copyright © 2019 GrapeCity, Inc. All rights reserved.RichTextBox for UWP 18
Localizing strings can be done easily with just a bit of code and the built-in localization files. If the language needed is
not one that is included, you can create your own localization resource file.
Note: The file extension for a UWP Edition Resource file is .resw.
Follow these steps:
1. Add a resource file to your application:
1. Right-click or tap your application name and select Add | New Item.
2. In the Add New Item dialog box, select Resource File (.resw).
3. Name your resource file so the name reflects the following format:
[Windows Apps Assembly Name].Resources.[C1 Control].resw
4. Select Add to add your file.
5. When your file opens, add or edit the strings to reflect the changes you need to make.
2. Select the resource file your just added and change the Build Action to PRIResource in the Properties window.
3. Run your sample and see the changes you made to the resource strings. In the following images, only the text
for the "Paste" function was changed:
Setting and Formatting Content
The C1RichTextBox control allows you to create, load, or save different types of content. The following topics
describe the types of content that can be specified in the C1RichTextBox, creating hyperlinks in the control, spell
checking, and performing some editing tasks.
Text Content
Copyright © 2019 GrapeCity, Inc. All rights reserved.RichTextBox for UWP 19
The content of the C1RichTextBox can be specified in two ways, using the C1RichTextBox.Text property or
the C1RichTextBox.Html property. The C1RichTextBox.Text property is used to assign and retrieve the control content
as plain text. There are a few different ways to set the text content.
At Design Time
To set the C1RichTextBox.Text property, complete the following steps:
1. Click the C1RichTextBox control once to select it.
2. Navigate to the Properties window, and enter text, for example "Hello World!", in the text box next to the
C1RichTextBox.Text property.
This will set the C1RichTextBox.Text property to the value you chose.
In XAML
For example, to set the C1RichTextBox.Text property add Text="Hello World!" to the
tag so that it appears similar to the following:
XAML Markup
In Code
For example, to set the C1RichTextBox.Text property add the following code to your project:
Visual Basic
Me.C1RichTextBox1.Text = "Hello World!"
C#
this.c1RichTextBox1.Text = "Hello World!";
The C1RichTextBox also exposes a C1RichTextBox.TextWrapping property that specifies whether the control should
wrap long lines or whether it should keep the lines together and provide a horizontal scrollbar instead.
Visual Basic
Me.C1RichTextBox1.TextWrapping = TextWrapping.NoWrap
C#
this.c1RichTextBox1.TextWrapping = TextWrapping.NoWrap;
The code above sets the C1RichTextBox control so that text content will not wrap in the control and will appear in a
continuous line.
Html Content
The C1RichTextBox.Html property is used to assign and retrieve formatted text as HTML. When the Html property is
set, the Html document is converted to a C1Document that, when displayed, resembles the Html content as much as
possible. The original structure and styles are not kept.
Copyright © 2019 GrapeCity, Inc. All rights reserved.RichTextBox for UWP 20
When the Html property is read, or exported, an Html document is generated from the current C1Document. There
are two ways that html can be generated, with a stylesheet or with inline styles. You can use the GetHtml method,
passing HtmlEncoding.Inline as the second parameter, to generate Html with inline style.
The HTML text needs to be encoded in the XAML file, so, for example, instead of for bold, tags are encoded as
;.
At Design Time
To set the C1RichTextBox.Html property, complete the following steps:
1. Click the C1RichTextBox control once to select it.
2. Navigate to the Properties window, and enter text, for example Hello World", in the text box next
to the C1RichTextBox.Html property.
This will set the C1RichTextBox.Html property to the value you chose.
In XAML
For example, to set the C1RichTextBox.Html property add Html="Hello World!" to the
tag so that it appears similar to the following:
XAML Markup
In Code
For example, to set the C1RichTextBox.Html property add the following code to your project:
Visual Basic
Me.C1RichTextBox1.Html = "Hello World!"
C#
this.c1RichTextBox1.Html = "Hello World!"
Setting Rtf Content
You can read, edit, and display rich text formatted documents using the C1RichTextBox control. To set RTF content in
the C1RichTextBox control, you must use a separate RtfFilter class. This class allows you to convert RTF to a
Document that the control can understand.
The RtfFilter includes support for images, fonts, tables, and most formatting supported by Microsoft WordPad. You
can also use the control to convert RTF to HTML and vice versa, since the C1RichTextBox control also supports reading
and writing HTML.
To load an RTF string into a C1RichTextBox control, call the ConvertToDocument method from the RtfFilter class:
C#
string rtf = @"{\rtf1\ansi\ansicpg1252\deff0\deflang1033{\fonttbl{\f0\fnil\fcharset0
Calibri;}}
{\*\generator Msftedit
Copyright © 2019 GrapeCity, Inc. All rights reserved.RichTextBox for UWP 21
5.41.21.2510;}\viewkind4\uc1\pard\sa200\sl276\slmult1\lang9\f0\fs22 some rtf
content\par
}";
C1RichTextBox1.Document = new RtfFilter().ConvertToDocument(rtf);
To output the content of C1RichTextBox as RTF, call the ConvertFromDocument method.
C#
string rtf = new RtfFilter().ConvertFromDocument(c1RichTextBox1.Document);
HtmlFilter Customization
HtmlFilter is the component in C1RichTextBox that transforms HTML strings to C1Documents and back. It's also
capable of transforming to and from an intermediate representation of an HTML document called C1HtmlDocument.
When transforming between C1HtmlDocument and C1Document, several events are fired allowing customization of
each node that is transformed. These events are:
HtmlFilter.ConvertingHtmlNode
This event is fired just before an HTML node is transformed. If marked as handled by the event handler then
HtmlFilter assumes the node was transformed and skips it.
HtmlFilter.ConvertedHtmlNode
This event is fired after a node was transformed. It can be used to make minor changes to the transformation
result.
HtmlFilter.ConvertingTextElement
This event is fired just before a C1TextElement is transformed. If marked as handled by the event handler then
HtmlFilter assumes the element was transformed and skips it.
HtmlFilter.ConvertedTextElement
This event is fired after a C1TextElement is transformed. It can be used to make minor changes to the
transformation result.
As an example, you can see how the HtmlFilterCustomization sample adds support for GIF images using
C1.Xaml.Imaging. It uses both HtmlFilter.ConvertingHtmlNode and HtmlFilter.ConvertingTextElement events.
HtmlFilter.ConvertinHtmlNode
Here is the HtmlFilter.ConvertingHtmlNode event handler:
Visual Basic
Private Sub HtmlFilter_ConvertingHtmlNode(sender As Object, e As
ConvertingHtmlNodeEventArgs)
Dim htmlElement = TryCast(e.HtmlNode, C1HtmlElement)
If htmlElement IsNot Nothing AndAlso htmlElement.Name = "img" Then
Dim src As String
If htmlElement.Attributes.TryGetValue("src", src) Then
Dim uri = New Uri("/HtmlFilterCustomization;component/" & src,
UriKind.Relative)
Copyright © 2019 GrapeCity, Inc. All rights reserved.RichTextBox for UWP 22
Dim resource = Application.GetResourceStream(uri)
If resource IsNot Nothing Then
Dim imageSource = New C1Bitmap(resource.Stream).ImageSource
Dim image = New Image() With { _
Key .Source = imageSource _
}
SetImageSource(image, src)
e.Parent.Children.Add(New C1InlineUIContainer() With { _
Key .Child = image _
})
e.Handled = True
End If
End If
End If
End Sub
C#
void HtmlFilter_ConvertingHtmlNode(object sender, ConvertingHtmlNodeEventArgs e)
{
var htmlElement = e.HtmlNode as C1HtmlElement;
if (htmlElement != null && htmlElement.Name == "img")
{
string src;
if (htmlElement.Attributes.TryGetValue("src", out src))
{
var uri = new Uri("/HtmlFilterCustomization;component/" + src,
UriKind.Relative);
var resource = Application.GetResourceStream(uri);
if(resource != null)
{
var imageSource = new C1Bitmap(resource.Stream).ImageSource;
var image = new Image { Source = imageSource };
SetImageSource(image, src);
e.Parent.Children.Add(new C1InlineUIContainer { Child = image });
e.Handled = true;
}
}
}
}
The first thing the event handler does is cast e.HtmlNode to C1HtmlElement. There are two types that inherit
from C1HtmlNode: C1HtmlElement, which represents an HTML element like , and C1HtmlText, which
represents a text node.
Once the C1HtmlNode object has been cast to C1HtmlElement, it's possible to check the tag name, and access its
attributes. This is done to see if the element is in fact an IMG tag, and to obtain the SRC attribute. The rest of the code
takes care of creating the appropriate element, which is then added to e.Parent. Note that the SRC value is saved as
an attached property, to be accessed when exporting.
Once the transformation is done, the handler can set e.Handled to True in order to prevent HtmlFilter from
transforming this C1HtmlNode.
Copyright © 2019 GrapeCity, Inc. All rights reserved.RichTextBox for UWP 23
HtmlFilter.ConvertingTextElement
The HtmlFilter.ConvertingTextElement event handler looks like the following:
Visual Basic
Private Sub HtmlFilter_ConvertingTextElement(sender As Object, e As
ConvertingTextElementEventArgs)
Dim inlineContainer = TryCast(e.TextElement, C1InlineUIContainer)
If inlineContainer IsNot Nothing Then
Dim src = GetImageSource(inlineContainer.Child)
If src IsNot Nothing Then
Dim element = New C1HtmlElement("img")
element.Attributes("src") = src
e.Parent.Add(element)
e.Handled = True
End If
End If
End Sub
C#
void HtmlFilter_ConvertingTextElement(object sender, ConvertingTextElementEventArgs
e)
{
var inlineContainer = e.TextElement as C1InlineUIContainer;
if (inlineContainer != null)
{
var src = GetImageSource(inlineContainer.Child);
if (src != null)
{
var element = new C1HtmlElement("img");
element.Attributes["src"] = src;
e.Parent.Add(element);
e.Handled = true;
}
}
}
This is pretty similar to the other handler, only it transforms a C1TextElement to a C1HtmlElement. Note that the SRC
value is recovered from the attached property, and a C1HtmlElement is created with that attribute. As before, the
new element is added to e.Parent, and the event is marked as Handled.
Overriding Styles
There are two different ways you can apply changes to your C1RichTextBox document. You can modify parts of an
underlying document using C1TextRange, or you can modify only the view and not the underlying document. A good
example of modifying the view and not the document is highlighting a selection with different foreground and
background colors. The style change doesn't belong to the document itself; it belongs to the current view. You can
Copyright © 2019 GrapeCity, Inc. All rights reserved.RichTextBox for UWP 24
also see this in syntax coloring and as-you-type spell-checking.
You can see this behavior in action in the SyntaxHighlight sample, installed on your machine.
The C1RichTextBox control supports these scenarios with the StyleOverrides property. This property contains a
collection of objects that specify ranges and style modifications to be applied to the view only. This approach has two
advantages over applying style modifications to C1TextRange objects:
The style overrides are not applied to the document, and therefore are not applied when you save a document
as HTML (you would not normally want the current selection and spelling error indicators to be persisted to a
file).
Because the changes are not added to the document, and only affect the part that is currently visible, this
approach is much more efficient than changing C1TextRange objects directly.
The limitation of this approach is that the style changes cannot involve style elements that affect the document flow.
You can use style overrides to change the background, foreground, and to underline parts of the document. But you
cannot change the font size or style, for example, since that would affect the document flow.
The code examples in the following text are taken from the SyntaxHighlight sample.
In demonstrating the use of style overrides, first, we need to declare a C1RangeStyleCollection object, a
C1RichTextBox object, and a C1RichTextBoxMenu object. We'll also initialize the styles used to color the document,
and create a Page_Loaded event. Within that event, we will add the C1RangeStyleCollection to the control's
StyleOverrides collection.
C#
public sealed partial class SyntaxHighlight : UserControl
{
C1RichTextBox _rtb;
C1RichTextBoxMenu _menu;
C1RangeStyleCollection _rangeStyles = new
C1RangeStyleCollection();
// initialize regular expression used to parse HTML
string tagPattern =
@"";
// initialize styles used to color the document
C1TextElementStyle brDarkBlue = new C1TextElementStyle
{
{ C1TextElement.ForegroundProperty, new
SolidColorBrush(Color.FromArgb(255, 0, 0, 180)) }
};
C1TextElementStyle brDarkRed = new C1TextElementStyle
{
{ C1TextElement.ForegroundProperty, new
SolidColorBrush(Color.FromArgb(255, 180, 0, 0)) }
};
C1TextElementStyle brLightRed = new C1TextElementStyle
{
{ C1TextElement.ForegroundProperty, new
SolidColorBrush(Colors.Red) }
};
public SyntaxHighlight()
Copyright © 2019 GrapeCity, Inc. All rights reserved.RichTextBox for UWP 25
{
InitializeComponent();
Loaded += SyntaxHighlight_Loaded;
}
void SyntaxHighlight_Loaded(object sender, RoutedEventArgs e)
{
if (_rtb == null)
{
_rtb = new C1RichTextBox
{
ReturnMode = ReturnMode.SoftLineBreak,
TextWrapping = TextWrapping.NoWrap,
IsReadOnly = false,
Document = new C1Document
{
Background = new SolidColorBrush(Colors.White),
FontFamily = new FontFamily("Courier New"),
FontSize = 16,
Blocks =
{
new C1Paragraph
{
Children =
{
new C1Run
{
Text = GetStringResource("w3c.htm")
},
},
}
}
},
StyleOverrides = { _rangeStyles }
};
if (_menu == null)
{
_menu = new C1RichTextBoxMenu();
}
LayoutRoot.Children.Add(_rtb);
_menu.RichTextBox = _rtb;
LayoutRoot.Children.Add(_menu);
_rtb.TextChanged += tb_TextChanged;
UpdateSyntaxColoring(_rtb.Document.ContentRange);
}
}
Next, we'll set the TextChanged event. In this event, you will detect any changes in the document and trigger the
UpdateSyntaxColoring method.
C#
void tb_TextChanged(object sender, C1TextChangedEventArgs e)
Copyright © 2019 GrapeCity, Inc. All rights reserved.RichTextBox for UWP 26
{
var start = e.Range.Start.Enumerate(LogicalDirection.Backward)
.FirstOrDefault(p => p.Symbol.Equals('\n'));
if (start != null)
{
start = start.GetPositionAtOffset(1);
}
var end = e.Range.End.Enumerate().FirstOrDefault(p =>
p.Symbol.Equals('\n'));
var doc = e.Range.Start.Element.Root;
UpdateSyntaxColoring(new C1TextRange(start ?? doc.ContentStart, end ??
doc.ContentEnd));
}
The UpdateSyntaxColoring method applies formatting to the view by selecting an entire tag and coloring it.
C#
// perform syntax coloring
void UpdateSyntaxColoring(C1TextRange range)
{
// remove old coloring
_rangeStyles.RemoveRange(range);
var input = range.Text;
// highlight the matches
foreach (Match m in Regex.Matches(input, tagPattern))
{
// select whole tag, make it dark blue
_rangeStyles.Add(new
C1RangeStyle(GetRangeAtTextOffset(range.Start, m), brDarkBlue));
// select tag name, make it dark red
var tagName = m.Groups["tagName"];
_rangeStyles.Add(new
C1RangeStyle(GetRangeAtTextOffset(range.Start, tagName), brDarkRed));
// select attribute names, make them light red
var attGroup = m.Groups["attName"];
if (attGroup != null)
{
var atts = attGroup.Captures;
for (int i = 0; i < atts.Count; i++)
{
var att = atts[i];
_rangeStyles.Add(new
C1RangeStyle(GetRangeAtTextOffset(range.Start, att), brLightRed));
}
}
}
}
Copyright © 2019 GrapeCity, Inc. All rights reserved.RichTextBox for UWP 27
The last two methods get the start and end of the C1TextRange with an offset, and then get the resource file attached
to the sample:
C#
C1TextRange GetRangeAtTextOffset(C1TextPointer pos, Capture capture)
{
var start = pos.GetPositionAtOffset(capture.Index,
C1TextRange.TextTagFilter);
var end = start.GetPositionAtOffset(capture.Length,
C1TextRange.TextTagFilter);
return new C1TextRange(start, end);
}
// utility
static string GetStringResource(string resourceName)
{
Assembly asm = typeof(SyntaxHighlight).GetTypeInfo().Assembly;
Stream stream =
asm.GetManifestResourceStream(String.Format("RichTextBoxSamples.Resources.{0}",
resourceName));
using (var sr = new StreamReader(stream))
{
return sr.ReadToEnd();
}
}
}
}
In general, the method outlined in this topic will provide excellent performance, thousands of times faster than
applying changes directly to the underlying document.
Saving and Loading HTML
To preserve the formatting of your C1RichTextBox control while persisting the contents of the control, use
the C1RichTextBox.Html property.
The C1RichTextBox.Html property gets or sets the formatted content of a C1RichTextBox as an HTML string. The
HTML filter built into the C1RichTextBox is fairly rich. It supports CSS styles, images, hyperlinks, lists, and so on. But
the filter does not support all HTML; it is limited to features supported by the C1RichTextBox control itself. For
example, the current version of C1RichTextBox does not support tables. Still, you can use the C1RichTextBox.Html
property to display simple HTML documents.
If you type "Hello world." into a C1RichTextBox, the C1RichTextBox.Html property will return the following markup:
XAML Markup
.c0 { font-family:Portable User Interface;font-size:9pt; }
.c1 { margin-bottom:7.5pt; }
Copyright © 2019 GrapeCity, Inc. All rights reserved.RichTextBox for UWP 28 Hello world. Note that the C1RichTextBox.Html property is just a filter between HTML and the internal C1Document class. Any information in the HTML stream that is not supported by the C1RichTextBox (for example, comments and meta information) is discarded, and will not be preserved when you save the HTML document later. Working with C1RichTextBoxMenu The C1RichTextBoxMenu acts as a complete radial context menu, allowing you to edit and format text containing multiple fonts, decorations, sizes, colors, and other basic HTML and RTF style attributes supported by CSS and inline markup. Adding a C1RichTextBoxMenu to your application is simple. Once you've added a C1RichTextBox control to your application and given it a name, you can add a C1RichTextBoxMenu and bind it to the C1RichTextBox control using the RichTextBox property: XAML For more information on using the C1RichTextBoxMenu assembly, you can see the DemoRichTextBox sample installed in the ComponentOne samples folder. C1RichTextBox Menus and Commands RichTextBox for UWP allows you to customize both the AppBar and the Menu. These flexible tools allow you to give users complete text-editing capabilities on-demand, freeing up valuable RichTextBox real estate. Creating Custom Command Bars You can create your own custom toolbar, context menu, or pop-up controls that apply formatting and functionality to the C1RichTextBox control. The following section describes the code necessary to perform the most basic formatting commands. It does not include code for setting up an AppBar application. For a complete sample that covers more functions like inserting tables, hyperlinks, and images. The following code snippets assume the name of the C1RichTextBox control on your page is rtb. Clipboard Functions The following code snippets demonstrate the code used for clipboard functions: Copy C# rtb.ClipboardCopy(); Copyright © 2019 GrapeCity, Inc. All rights reserved.
RichTextBox for UWP                                                         29

Paste

C#
if (!rtb.IsReadOnly)
{
    rtb.ClipboardPaste();
}

Cut

C#
if (rtb.IsReadOnly)
    rtb.ClipboardCopy();
else
{
    rtb.ClipboardCut();
}

Alignment Functions
The following code snippets demonstrate the code used for aligning text:
Align Left

C#
rtb.Selection.TextAlignment = C1TextAlignment.Left;

Align Center

C#
rtb.Selection.TextAlignment = C1TextAlignment.Center;

Align Right

C#
rtb.Selection.TextAlignment = C1TextAlignment.Right;

Justify

C#
rtb.Selection.TextAlignment = C1TextAlignment.Justify;

Font Functions
The following code snippets demonstrate the code used for font functions:
Font Family

Copyright © 2019 GrapeCity, Inc. All rights reserved.
RichTextBox for UWP 30
C#
rtb.Selection.FontFamily = new FontFamily("Arial");
Font Size
C#
rtb.Selection.TrimRuns();
foreach (var run in rtb.Selection.Runs)
{
run.FontSize = size;
}
Formatting Functions
The following code snippets demonstrate the code used for formatting functions:
Foreground Color
C#
rtb.Selection.Foreground = new SolidColorBrush(Colors.Red);
Highlight (background) color
C#
rtb.Selection.InlineBackground = new SolidColorBrush(Colors.Yellow);
Toggle Bold
C#
if (rtb.Selection.FontWeight != null && rtb.Selection.FontWeight.Value.Weight ==
FontWeights.Bold.Weight)
{
rtb.Selection.FontWeight = FontWeights.Normal;
}
else
{
rtb.Selection.FontWeight = FontWeights.Bold;
}
Toggle Italic
C#
if (rtb.Selection.FontStyle != null && rtb.Selection.FontStyle == FontStyle.Italic)
{
rtb.Selection.FontStyle = FontStyle.Normal;
Copyright © 2019 GrapeCity, Inc. All rights reserved.RichTextBox for UWP 31
}
else
{
rtb.Selection.FontStyle = FontStyle.Italic;
}
Toggle Underline
C#
var range = rtb.Selection;
var collection = new C1TextDecorationCollection();
if (range.TextDecorations == null)
{
collection.Add(C1TextDecorations.Underline[0]);
}
else if (!range.TextDecorations.Contains(C1TextDecorations.Underline[0]))
{
foreach (var decoration in range.TextDecorations)
collection.Add(decoration);
collection.Add(C1TextDecorations.Underline[0]);
}
else
{
foreach (var decoration in range.TextDecorations)
collection.Add(decoration);
collection.Remove(C1TextDecorations.Underline[0]);
if (collection.Count == 0)
collection = null;
}
range.TextDecorations = collection;
Clear Formatting
C#
rtb.Selection.InlineBackground = null;
rtb.Selection.Foreground = rtb.Foreground;
rtb.Selection.FontWeight = FontWeights.Normal;
rtb.Selection.FontStyle = FontStyle.Normal;
rtb.Selection.TextDecorations = null;
Select Text Function
The following code snippet demonstrates the code used to select text:
Select All
C#
Copyright © 2019 GrapeCity, Inc. All rights reserved.RichTextBox for UWP 32
rtb.SelectAll();
Document History Functions
The following snippets demonstrates the code used to create document history functions:
Undo
C#
if (rtb.DocumentHistory.CanUndo)
{
rtb.DocumentHistory.Undo();
}
Redo
C#
if (rtb.DocumentHistory.CanRedo)
{
rtb.DocumentHistory.Redo();
}
Using the AppBar
The C1.Xaml.RichTextBox.AppBar library includes built-in tools that you can use to create a simple command bar. The
built-in tools support the following commands: Bold, Italic, Underline, Undo, Redo, Increase Font Size, Decrease Font
Size, Center Align, Right Align, Left Align, and Justify. There is no visible application bar control; however, you can add
the C1 Tools included in the assembly to the application bar.
For a full example of implementing the AppBar assembly in your application, please see the Creating an AppBar
Application tutorial. You can also see the AppBarDemo sample that was installed in the ComponentOne samples
folder:
C:\Users\YourUserName\Documents\ComponentOne Samples\WinRT XAML
Phone\C1.Xaml.RichTextBox\CS\RichTextBoxSamples
To use the C1 Tools in the AppBar assembly, your markup should resemble the following. Place it after the closing
tag:
XAML
Note that the AppBar can be set to appear at the top of the page as well, using the following markup:
XAML
Copyright © 2019 GrapeCity, Inc. All rights reserved.RichTextBox for UWP 33
The C1 Tools you wish to use will be placed within a StackPanel control between the tags:
XAML
If you wish to use a set of general Button controls, you can do that as well:
XAML
Since the general Button controls have click events, you'll have to add the following code to handle the click events:
C#
#region Clipboard
private void btnCopy_Click(object sender, Windows.UI.Xaml.RoutedEventArgs e)
{
rtb.ClipboardCopy();
}
private void btnCut_Click(object sender, Windows.UI.Xaml.RoutedEventArgs e)
{
if (rtb.IsReadOnly)
rtb.ClipboardCopy();
else
rtb.ClipboardCut();
}
private void btnPaste_Click(object sender, Windows.UI.Xaml.RoutedEventArgs e)
{
if (!rtb.IsReadOnly)
{
rtb.ClipboardPaste();
}
}
Copyright © 2019 GrapeCity, Inc. All rights reserved.You can also read