FASTVIEWER SERVER SOLUTION INSTALLATION & CONFIGURATION - MANUAL
←
→
Page content transcription
If your browser does not render page correctly, please read the page content below

FastViewer Server Solution
Installation & Configuration
Manual
Copyright © FastViewer GmbH 06/2019
Schwesterhausgasse 11, 92318 Neumarkt/Germany
All rights reserved.
The information provided in this document contains merely general descriptions or
characteristics of performance which in case of actual use do not always apply as
described or which may change as a result of further development of the products.
An obligation to provide the respective characteristics shall only exist if expressly agreed in
the terms of contract.
Availability and technical specifications are subject to change without notice.

www.fastviewer.com
Contents

Contents

History of Changes . . . . . . . . . . . . . . . . . . . . . . . . . . . . . . . . . . . . . . . . . . . . . . . . . . . . . . . . . . . . . . . . . . . . . . . 1
1 About this Manual . . . . . . . . . . . . . . . . . . . . . . . . . . . . . . . . . . . . . . . . . . . . . . . . . . . . . . . . . . . . . . . . . . . . . .          1
1.1 Legal Notices . . . . . . . . . . . . . . . . . . . . . . . . . . . . . . . . . . . . . . . . . . . . . . . . . . . . . . . . . . . . . . . . . . . . . . . . .      1
1.2 Technical Assistance . . . . . . . . . . . . . . . . . . . . . . . . . . . . . . . . . . . . . . . . . . . . . . . . . . . . . . . . . . . . . . . . . . .           1
1.3 Who should read this Manual? . . . . . . . . . . . . . . . . . . . . . . . . . . . . . . . . . . . . . . . . . . . . . . . . . . . . . . . . . . .                   1
1.4 Manual Contents . . . . . . . . . . . . . . . . . . . . . . . . . . . . . . . . . . . . . . . . . . . . . . . . . . . . . . . . . . . . . . . . . . . . . .          2
1.5 Representation Conventions . . . . . . . . . . . . . . . . . . . . . . . . . . . . . . . . . . . . . . . . . . . . . . . . . . . . . . . . . . . . .                 2
   1.5.1 Notations and Formats . . . . . . . . . . . . . . . . . . . . . . . . . . . . . . . . . . . . . . . . . . . . . . . . . . . . . . . . . . . . . .               2
   1.5.2 Hints . . . . . . . . . . . . . . . . . . . . . . . . . . . . . . . . . . . . . . . . . . . . . . . . . . . . . . . . . . . . . . . . . . . . . . . . . . . .   3
   1.5.3 Figures . . . . . . . . . . . . . . . . . . . . . . . . . . . . . . . . . . . . . . . . . . . . . . . . . . . . . . . . . . . . . . . . . . . . . . . . . .     3
1.6 Acronyms . . . . . . . . . . . . . . . . . . . . . . . . . . . . . . . . . . . . . . . . . . . . . . . . . . . . . . . . . . . . . . . . . . . . . . . . . . . .     4
1.7 System Requirements for the FastViewer Clients . . . . . . . . . . . . . . . . . . . . . . . . . . . . . . . . . . . . . . . . . . . . .                             4
   1.7.1 System Requirements for Windows Clients . . . . . . . . . . . . . . . . . . . . . . . . . . . . . . . . . . . . . . . . . . . . . .                             4
   1.7.2 System Requirements for Apple OS X Clients . . . . . . . . . . . . . . . . . . . . . . . . . . . . . . . . . . . . . . . . . . . .                              5
   1.7.3 System Requirements for FastViewer WebClient. . . . . . . . . . . . . . . . . . . . . . . . . . . . . . . . . . . . . . . . . .                                 5
   1.7.4 System Requirements for Mobile Devices with Android or Apple iOS . . . . . . . . . . . . . . . . . . . . . . . . . .                                            5
2 FastViewer - the Web Conferencing Solution . . . . . . . . . . . . . . . . . . . . . . . . . . . . . . . . . . . . . . . . . . . . . . . 6
3 Minimum Installation Requirements . . . . . . . . . . . . . . . . . . . . . . . . . . . . . . . . . . . . . . . . . . . . . . . . . . . . . . . 7
4 Installing the FastViewer Server . . . . . . . . . . . . . . . . . . . . . . . . . . . . . . . . . . . . . . . . . . . . . . . . . . . . . . . . . . 9
4.1 Diagram for Hosted Version. . . . . . . . . . . . . . . . . . . . . . . . . . . . . . . . . . . . . . . . . . . . . . . . . . . . . . . . . . . . . . 9
4.2 Download the Installation File for the Server Installation . . . . . . . . . . . . . . . . . . . . . . . . . . . . . . . . . . . . . . 10
4.3 FastViewer Server Setup . . . . . . . . . . . . . . . . . . . . . . . . . . . . . . . . . . . . . . . . . . . . . . . . . . . . . . . . . . . . . . . 13
4.4 Adaption of settings.ini . . . . . . . . . . . . . . . . . . . . . . . . . . . . . . . . . . . . . . . . . . . . . . . . . . . . . . . . . . . . . . . . . 17
4.5 Configuration of the server list and Activation of the FastViewer Server . . . . . . . . . . . . . . . . . . . . . . . . . . . 27
4.6 Check the accessibilty of FastViewer Server and service configuration . . . . . . . . . . . . . . . . . . . . . . . . . . . 31
4.7 Download Master and Client Module . . . . . . . . . . . . . . . . . . . . . . . . . . . . . . . . . . . . . . . . . . . . . . . . . . . . . . 33
4.8 Perform an Update of the FastViewer Server . . . . . . . . . . . . . . . . . . . . . . . . . . . . . . . . . . . . . . . . . . . . . . . 40
4.9 Usage of Webcollaboration Apps. . . . . . . . . . . . . . . . . . . . . . . . . . . . . . . . . . . . . . . . . . . . . . . . . . . . . . . . . 40
4.10 Activation of the SMS Authentification . . . . . . . . . . . . . . . . . . . . . . . . . . . . . . . . . . . . . . . . . . . . . . . . . . . . 41
4.11 Outlook Plugin Configuration on the FastViewer Server . . . . . . . . . . . . . . . . . . . . . . . . . . . . . . . . . . . . . . 42
5 Installing of the FastViewer WebClient Server. . . . . . . . . . . . . . . . . . . . . . . . . . . . . . . . . . . . . . . . . . . . . . 44
5.1 Install required Role Services and Features . . . . . . . . . . . . . . . . . . . . . . . . . . . . . . . . . . . . . . . . . . . . . . . . 44
5.2 Configuring Installation Requirements for the Integrated Deployment Scenario . . . . . . . . . . . . . . . . . . . . . 49
   5.2.1 Preparations for an Installation with DNS-Name / one IP-address of the WebConference and Web Client
           server . . . . . . . . . . . . . . . . . . . . . . . . . . . . . . . . . . . . . . . . . . . . . . . . . . . . . . . . . . . . . . . . . . . . . . . . . 49
5.3 Install an integrated Deployment Scenario . . . . . . . . . . . . . . . . . . . . . . . . . . . . . . . . . . . . . . . . . . . . . . . . . 50
   5.3.1 Configure an integrated Scenario on IIS. . . . . . . . . . . . . . . . . . . . . . . . . . . . . . . . . . . . . . . . . . . . . . . . 54
5.4 Install a distributed Deployment Scenario . . . . . . . . . . . . . . . . . . . . . . . . . . . . . . . . . . . . . . . . . . . . . . . . . . 58
   5.4.1 Configure a distributed Scenario on IIS . . . . . . . . . . . . . . . . . . . . . . . . . . . . . . . . . . . . . . . . . . . . . . . . 63
5.5 Configuration options of the WebClient Administrator . . . . . . . . . . . . . . . . . . . . . . . . . . . . . . . . . . . . . . . . . 66
5.6 Automatical Client selection - Functions of the SmartLoader . . . . . . . . . . . . . . . . . . . . . . . . . . . . . . . . . . . 77
   5.6.1 Configuration of the SmartLoader. . . . . . . . . . . . . . . . . . . . . . . . . . . . . . . . . . . . . . . . . . . . . . . . . . . . . 79
6 Activating the https support . . . . . . . . . . . . . . . . . . . . . . . . . . . . . . . . . . . . . . . . . . . . . . . . . . . . . . . . . . . . 80
6.1 Add a SSL Certificate. . . . . . . . . . . . . . . . . . . . . . . . . . . . . . . . . . . . . . . . . . . . . . . . . . . . . . . . . . . . . . . . . . 80

FastViewer GmbH, 06/2019
FastViewer V3.2 Server Solution, Installation and Configuration, Manual                                                                                                  3
Contents

6.2   Activation of the https Support of the FastViewer Server . . . . . . . . . . . . . . . . . . . . . . . . . . . . . . . . . . . . . . . 81
6.3   Activation of the https Support in the Internet Information Server (IIS) . . . . . . . . . . . . . . . . . . . . . . . . . . . . . 82
6.4   Configure the FastViewer Server for the https Connection via a WebClient. . . . . . . . . . . . . . . . . . . . . . . . . 83
6.5   Steps for exclusive usage of https . . . . . . . . . . . . . . . . . . . . . . . . . . . . . . . . . . . . . . . . . . . . . . . . . . . . . . . . 84
7 Administrative Tools . . . . . . . . . . . . . . . . . . . . . . . . . . . . . . . . . . . . . . . . . . . . . . . . . . . . . . . . . . . . . . . . . . . 86
7.1 Certificate Installer . . . . . . . . . . . . . . . . . . . . . . . . . . . . . . . . . . . . . . . . . . . . . . . . . . . . . . . . . . . . . . . . . . . . 86
7.2 Server Admin . . . . . . . . . . . . . . . . . . . . . . . . . . . . . . . . . . . . . . . . . . . . . . . . . . . . . . . . . . . . . . . . . . . . . . . . 87
7.3 Log Viewer . . . . . . . . . . . . . . . . . . . . . . . . . . . . . . . . . . . . . . . . . . . . . . . . . . . . . . . . . . . . . . . . . . . . . . . . . . 88
Index . . . . . . . . . . . . . . . . . . . . . . . . . . . . . . . . . . . . . . . . . . . . . . . . . . . . . . . . . . . . . . . . . . . . . . . . . . . . . . . . . . . 1

                                                                                                                     FastViewer GmbH, 06/2019
4                                                                        FastViewer V3.2 Server Solution, Installation and Configuration, Manual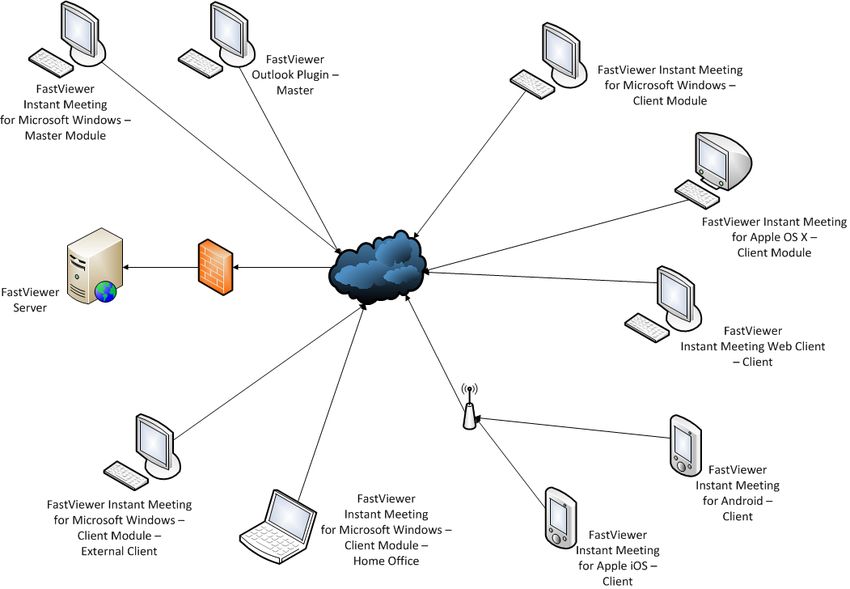
FV_BookHistory.fm
                                                                                                       History of Changes

History of Changes                                                                                                      0

 Date         Changes                                                                                     Reason
 2012-05-31   New feature: Using a secure https connection for the OpenScape Web Collaboration Web CQ00211323
              Client.
 2012-06-18   Revision: Revised description of the integrated deployment scenario, the installation of the CQ00213051
              OpenScape Web Collaboration server and the OpenScape Web Client on a server with
              one IP address.
 2012-10-17   Missing work steps added to the description of how to provide the Master and Client         CQ00226912
              module.
 2012-11-02   Added: Description of how to configure the profile for providing the master and client      FRN5331
              module for UTF-8 languages.
 2012-11-14   Review
 2012-11-16   Added: Description of the Hosted solution.                                                  Review
 2013-01-29   Added: Description of the SmartLoader.                                                      FRN6305
 2013-01-31   Added: Description of an update installation of the OpenScape Web Collaboration Server Review
              and the OpenScape Web Collaboration Web Client.
 2013-07-03   New note: The Server name for the client module link input field is displayed only if a user CQ00242663
              has previously requested the license for the OpenScape Web Collaboration server.
 2013-07-03   Correction and more information: The downloaded files for the Mac modules are called    CQ00242663
              FastMaster.zip and FastClient.zip. They must not be unpacked after they have been added
              to the Web Collaboration server directory.
 2013-07-05   New note: When using the IP address instead of the FQDN, the IP address of existing web CQ00265570
              conferences is not updated after an IP address modification. Consequently, such
              conferences cannot be started anymore.
 2013-11-08   Chapter about installing the Microsoft Outlook Plug-in for planning web conferences         Review
              transferred from the operating instructions into this manual.
 2014-04-16   Optionally support of AV4UC (Trend Micro) antivirus program.                                FRN 5650
 2015-03-05   Remove point 6 from Chapter 4.3                                                             Info from
                                                                                                          FastViewer
 2015-04-01   correction in Chapter 3 overtaken from German document
 2015-04-24   correction in Chapter 9 overtaken from German document
 2015-05-15   minor corrections
 2015-05-25   minor corrections
 2016-05-10   redesign                                                                                    review
 2016-08-10   rework and updated screenshots                                                              review
 2017-03-02   small changes                                                                               review
 2017-10-03   small changes                                                                               review
 2018-02-23   adaption of the server requirements                                                         review
 2018-03-06   adaption of the session IDs split                                                           review
 2019-06-06   small changes                                                                               review

FastViewer GmbH, 06/2019
FastViewer V3.2 Server Solution, Installation and Configuration, Manual                                                 1
History of Changes

                                                                 FastViewer GmbH, 06/2019
2                    FastViewer V3.2 Server Solution, Installation and Configuration, Manual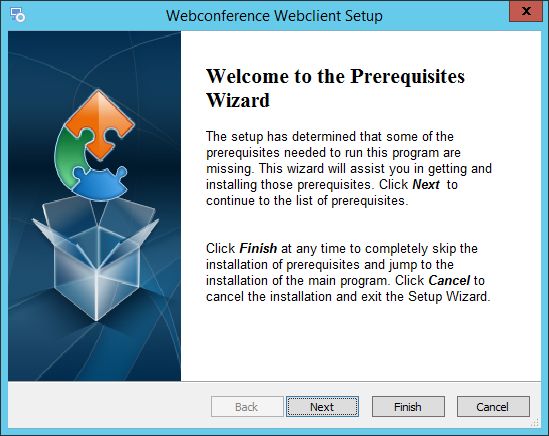
About this Manual
                                                                                                         Legal Notices

1 About this Manual
                                   This manual describes how to install, configure and upgrade an FastViewer
                                   system as independent web conferencing solution.

1.1 Legal Notices
                                   FastViewer GmbH assumes no liability for any damage, loss or destruction of
                                   software, data or programs resulting from the use of FastViewer.
                                   The software and hardware designations used in this manual are mostly regis-
                                   tered trademarks and thus subject to the relevant provisions of copyright law. The
                                   documentation, as well as extracts from it, may be neither transmitted nor repro-
                                   duced by any mechanical or electronic means, photocopying or any other means
                                   without express permission in writing. All company names cited in examples and
                                   data are fictitious. Any similarities are therefore purely coincidental.
                                   The information contained in this document is based on the current software
                                   version used at press time. This may be changed at any time without notice and
                                   represents no commitment on the part of the seller. The descriptions herein do not
                                   guarantee the availability of any described features in a legal sense.
                                   FastViewer has exercised the utmost care while preparing this guide, but does not
                                   warrant the completeness or accuracy of the information in it and disclaims all
                                   liabilities for any technical or printing error.
                                   As far as possible, this document is gender neutral. In cases where the masculine
                                   form of address is used, this is done solely for simplicity, and the feminine form is
                                   always implicitly included.
                                   If you have corrections or suggestions, please send us an e-mail.
                                   Thank you for your efforts.
                                   More information on the FastViewer products can be found in the Internet at
                                   www.fastviewer.com
                                   © Copyright FastViewer GmbH

1.2 Technical Assistance
                                   If you require help with a technical problem, please contact our hotline:
                                   Phone: +49 (9181) 509 56 -28
                                   E-Mail: support@FastViewer.com

1.3 Who should read this Manual?
                                   This manual addresses persons who install, configure and manage an
                                   FastViewer solution as independent web conferencing system.

FastViewer GmbH, 06/2019
FastViewer V3.2 Server Solution, Installation and Configuration, Manual                                                1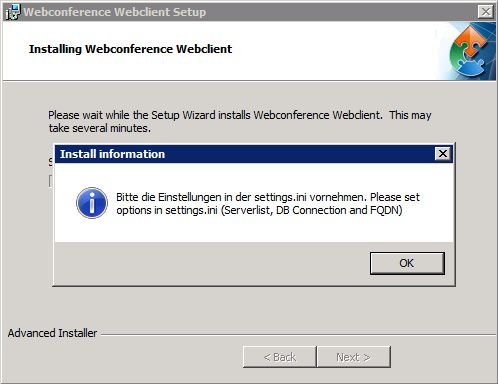
About this Manual
Manual Contents

1.4 Manual Contents
                      This manual describes how to install and correctly configure FastViewer.
                      It is structured as follows:

                      Chapter 1: About this Manual
                      This chapter contains information about the structure and use of this user guide
                      as well as a list of all acronyms used.

                      Chapter 2: FastViewer - the Web Conferencing Solution
                      This chapter provides an overview of the FastViewer solution.

                      Chapter 3: Installation Requirements
                      This chapter comprises the hardware and software requirements for installing all
                      associated components.

                      Chapter 4: Setting up the FastViewer Server
                      This chapter describes the WebFastViewer server installation.

                      Chapter 5: Installing FastViewer Web Client
                      This chapter describes the installation of FastViewer Web Client, required for the
                      web-based access to web conferences.

                      Chapter 6: Activation of the https support
                      This chapter describes the activation of the https support. Also the procedure to
                      exclusive communication is described in this section

                      Chapter 7: Administrative Tools
                      In this chapter you find the administrative tools you can use for connecting SSL
                      certificates, analyzing errors, and maintaining FastViewer.

1.5 Representation Conventions
                      To highlight information in this manual we use the following mark-ups and repre-
                      sentations.

1.5.1 Notations and Formats
                      The following format conventions apply in the manual on hand:

                                                                                   FastViewer GmbH, 06/2019
2                                      FastViewer V3.2 Server Solution, Installation and Configuration, Manual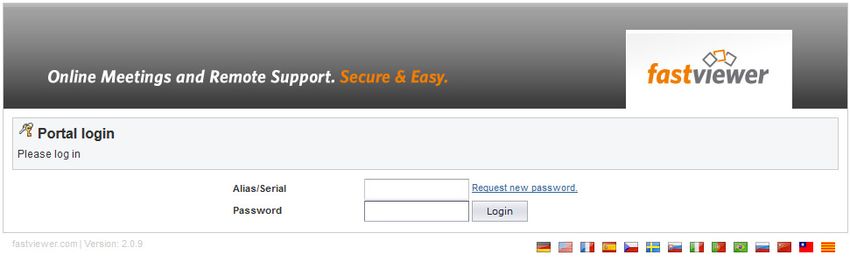
About this Manual
                                                                                                 Representation Conventions

Purpose                                        Representation               Example
Product and company names                      Italic                       Fastviewer
Special highlighting                           Bold                         Name must not be deleted.
GUI elements                                   Bold                         Click on OK.
Menu sequence                                  >                            File > Exit
Cross reference                                Italic                       You find further information in the Configura-
                                                                            tion and Administration manual.
Path and file names                            Fixed-width font, for example c:\Programs\... or example.txt
                                               Courier
Specifications that may have an individual     Italic in pointed brackets   Specify your  and  for
content such as variables.                                                  logging on to the system.
System in- and output                          Fixed-width font, for example Command not found.
                                               Courier
Hotkey                                         Bold                         [Ctrl]+[Alt]+[Esc]

1.5.2 Hints
                                   Type of Notes
                                   In this manual, we denote critical hints and supplementing information in the
                                   following way.

                                             NOTICE: Denotes hints that contain information worth knowing
                                             or useful tips.

                                             IMPORTANT: Denotes critical hints that contain high-priority
                                             information. Please definitely read such hints and follow given
                                             instructions to avoid malfunctions, loss of data or damage to
                                             devices.

1.5.3 Figures
                                   This manual displays all input windows important for operation and configuration.
                                   Depending on the operating system, the browser used, the screen resolution, the
                                   configurations of your PC or your selection of the interface style, the appearance
                                   of such windows may vary. However, this does not affect the described function-
                                   ality.

FastViewer GmbH, 06/2019
FastViewer V3.2 Server Solution, Installation and Configuration, Manual                                                      3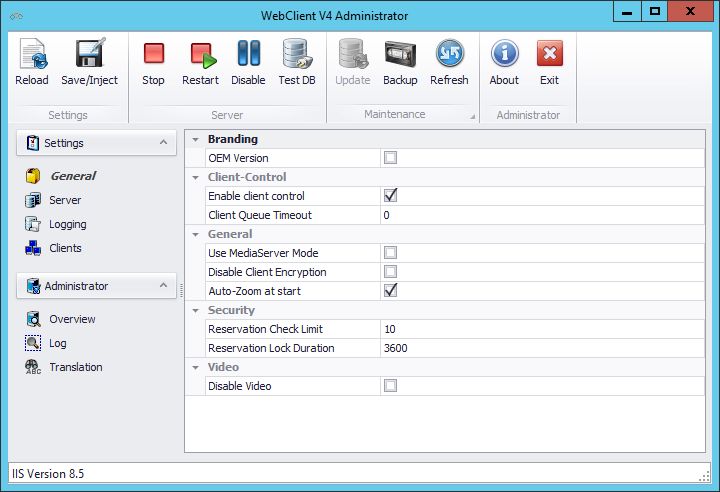
About this Manual
Acronyms

1.6 Acronyms
                    Table: Acronyms used

                    Acronym            Meaning
                    CLA                Customer License Agent
                    CLM                Customer License Management
                    DMZ                Demilitarized Zone
                    FQDN               Fully Qualified Domain Name
                    IIS                Internet Information Services
                    OEM                Original Equipment Manufacturer
                    WCF                Windows Communication Foundation

1.7 System Requirements for the FastViewer Clients
                    Hardware and software requirements for using FastViewer.

                    In the following chapters you find the system requirements for:
                    •     Clients based on Microsoft Windows operating systems
                    •     Clients based on Apple operating systems OS X
                    •     Web browsers usable as a client
                    •     Mobile devices usable as a client

1.7.1 System Requirements for Windows Clients
                    The following system requirements apply for operating the master module
                    FastMaster.exe and the client module FastClient.exe of FastViewer:

                    Operating system                             Since Windows Vista
                                                                 Server Systems since Windows Server
                                                                 2008
                                                                 Maintenance from
                                                                 Windows 7 onwards
                                                                 Server Systems since Windows Server
                                                                 2012 R2
                    System requirement                           Internet access
                    Recommended system requirement               Internet access with DSL 2000 kbit/s

                                                                                 FastViewer GmbH, 06/2019
4                                    FastViewer V3.2 Server Solution, Installation and Configuration, Manual
About this Manual
System Requirements for the FastViewer Clients
1.7.2 System Requirements for Apple OS X Clients
The following system requirements apply for operating the master module
FastMaster.app and the client module FastClient.app of FastViewer:
Operating system Apple Mac OS X 10.10 (Yosemite)
or newer
System requirement Internet access
Recommended system requirement Internet access with DSL 2000 kbit/s
1.7.3 System Requirements for FastViewer WebClient
You can use the following web browsers for FastViewer WebClient:
Webbrowser (Java) Internet Explorer version 8 and higher
Mozilla Firefox
Google Chrome version 24 and higher
Safari
Opera
System requirement Internet access
Recommended system requirement Internet access with DSL 2000 kbit/s
1.7.4 System Requirements for Mobile Devices with Android or Apple iOS
Operation on mobile devices requires the following:
Mobile operating system min. iOS 8 or later
min. Android 4.1 or later
FastViewer GmbH, 06/2019
FastViewer V3.2 Server Solution, Installation and Configuration, Manual 5FastViewer - the Web Conferencing Solution
System Requirements for the FastViewer Clients
2 FastViewer - the Web Conferencing Solution
FastViewer is a web conferencing solution that, owing to its scalability, high
security and reliability, enables comprehensive multi-media collaboration. It is
suitable for companies of all sizes and offers the option to stage web conferences
with up to 100 participants.
FastViewer recognizes the operating system's language automatically. Secure
transmission of all session data is ensured by a 256-bit AES encryption.
FastViewer GmbH, 06/2019
6 FastViewer V3.2 Server Solution, Installation and Configuration, ManualMinimum Installation Requirements
System Requirements for the FastViewer Clients
3 Minimum Installation Requirements
In the following we list the hardware and software requirements that the system
to host FastViewer must comply with.
Minimum requirements for the installation for setting up the FastViewer
server for up to 100 simultaneous users
• Xeon processor with at least 2,5GHz clock frequency
• At least 4 GB RAM (recommended: 8 GB)
• At least 30GB free harddisk memory
• 1Gbit network board
• Operating systems:
– Microsoft Windows Server 2012 R2, Standard Edition
– Microsoft Windows Server 2016, Standard Edition
• Database:
– Microsoft SQL Server 2008 Express Edition (is included) or newer
• Bandwidth requirement
Bandwidth consumption per FastViewer session depends on the connection
type:
– Connections with desktop sharing
Such connections require an average of 15kbit/s per participant.
– Connections with video streaming
Depending on the image quality settings in the GUI, up to 300 kbit/s are
required per user.
– Voice connections
Connections with voice transmission require an average of 20kbit/s per
user.
• The FastViewer server is found in a DMZ (Demilitarized Zone). The server
requires an IP address or alternatively a DNS host entry pointing to the corre-
sponding IP address.
NOTICE: When configuring the FastViewer server, prefer the fully
qualified domain name (FQDN) to the IP address. If you use for
example the IP address and it is changed, existing web confer-
ences are not updated to the new IP address and cannot be
started anymore.
• Port releases
In order to guarantee the WebConfence to be reachable via LAN or Internet,
the following ports must be opened in a firewall and must not be used exclu-
sively by another program or service:
– HTTP port: 80
– HTTPS port: 443 (Only if a certificate is used)
FastViewer GmbH, 06/2019
FastViewer V3.2 Server Solution, Installation and Configuration, Manual 7Minimum Installation Requirements
System Requirements for the FastViewer Clients
– TCP port: 5000
Port 5000 ensures sessions on highest performance level.
This port must be opened when video functions are used (sending /
receiving WebCam pictures).
NOTICE: The usage of the certificate Installer for linkage of an
SSL-certificate requires .NET Framework 3.5.
NOTICE: The HTTP-Protocol is being used to check the
available servers at module start. When using your own
FastViewer Server solution this check can be done via HTTPS
instead of HTTP, the port number can be free selected (e.g.
HTTPS 321). Thus it is possible to restrict the used protocols and
the required ports to be opened in order to guarantee the own
security standards. A description of the single configuration steps
can be found in chapter 6.5 Steps for exclusive usage of https.
• You can install the FastViewer server in a VMware ESX(i) 4.x and 5.x
environment.
Requirements for setting up FastViewer WebClient
• Operating systems:
– Microsoft Windows Server 2012 R2, Standard Edition
– Microsoft Windows Server 2016, Standard Edition
– Microsoft Windows Server 2019
• Microsoft .NET Framework 3.5 SP1 is installed on the system.
• Webserver (IIS) is installed on the system
• Supported web browsers - all web browsers with JavaScript support, for
example:
– Internet Explorer from version 8
– Mozilla Firefox
– Apple Safari
– Google Chrome
– Opera
• You can install the FastViewer server in a VMware ESX(i) 5.x and 6.x
environment.
FastViewer GmbH, 06/2019
8 FastViewer V3.2 Server Solution, Installation and Configuration, ManualInstalling the FastViewer Server
Diagram for Hosted Version
4 Installing the FastViewer Server
This chapter describes the preparation steps you need to take to set up the
FastViewer server module and illustrates the setup process.
You can download the software to be installed fast and conveniently from the
customer portal, or it is provided to you on a data carrier.
You reach the FastViewer customer portal via the following link:
https://portal.fastviewer.com
In there you can log on to the portal with your alias name or serial number and the
associated password.
The customer portal provides the following functions:
• Displaying and editing private data related to the purchased license.
• Performing program settings for configuring the master and client module.
• Downloading and viewing various documents and documentation on the
product.
• Downloading all modules of the product FastViewer to provide them for the
installation:
– The master module for Microsoft Windows or Mac operating systems
– The client module for Microsoft Windows or Mac operating systems
– The WebCollaboration modules.
– The setup directory for the FastViewer Outlook Plugin.
– The setup for the FastViewer server.
– The update files for the FastViewer server.
– The setup for the FastViewer WebClient.
• Displaying information about all currently installed Secure Advisor clients as
well as all active connections.
4.1 Diagram for Hosted Version
Description and configuration of the Hosted Version for FastViewer.
The Hosted Version (cloud solution) is another option for a customer deployment
to use features provided via the FastViewer. The following diagram illustrates how
such a deployment scenario looks like:
FastViewer GmbH, 06/2019
FastViewer V3.2 Server Solution, Installation and Configuration, Manual 9Installing the FastViewer Server
Download the Installation File for the Server Installation
If there is no individual FastViewer server license for an on-site installation of an
FastViewer server, web conference sessions are automatically staged via a
hosted server infrastructure. This infrastructure is distributed globally and
designed highly redundantly for secure operation.
All you need to do is logging on to the FastViewer customer portal with the basic
license and downloading the corresponding master and client modules.
Before you download the moderator and client modules you may customize them
via the configuration settings in the portal.
4.2 Download the Installation File for the Server Installation
Downloading the installation file for the server installation.
To download the installation file for the server installation and to provide it for the
installation proceed as follows:
Step by Step
1) Invoke the following internet page:
https://portal.fastviewer.com
The page on which you can enter the account data to download the
components for FastViewer opens.
FastViewer GmbH, 06/2019
10 FastViewer V3.2 Server Solution, Installation and Configuration, ManualInstalling the FastViewer Server
Download the Installation File for the Server Installation
2) To log on for the first time, enter your license number for accessing this web
portal under Alias/Serial.
3) Specify your password for accessing this web portal under Password.
4) Click on the Login button.
The start page of the customer portal opens.
5) Click on the Switch to expert mode button in the menu bar.
You see your account data as well as the status of your license.
FastViewer GmbH, 06/2019
FastViewer V3.2 Server Solution, Installation and Configuration, Manual 11Installing the FastViewer Server
Download the Installation File for the Server Installation
6) Click on the Download button.
The following page is displayed:
FastViewer GmbH, 06/2019
12 FastViewer V3.2 Server Solution, Installation and Configuration, ManualInstalling the FastViewer Server
FastViewer Server Setup
7) Expand the displayed list with a click on the small triangle bottom left of Type:
Own server solution.
8) Click on the Download link next to Download Server Setup.
A file download dialog opens.
9) Click on OK in the file download dialog.
Downloading the ServerSetupV32.zip file starts.
Downloading the installation file for the FastViewer server is now complete.
4.3 FastViewer Server Setup
The following is a step-by-step guide through the setup process. Depending on
the purchased license, various editions with different features and functions are
available to you after the installation.
Execute the following setup steps:
FastViewer GmbH, 06/2019
FastViewer V3.2 Server Solution, Installation and Configuration, Manual 13Installing the FastViewer Server
FastViewer Server Setup
Step by Step
1) Extract the downloaded file ServerSetupV32.zip in the desired folder on
the FastViewer computer.
2) Execute the setup.exe file.
NOTICE: Be sure to execute the file with administrator privileges.
Depending on the operating system, you may then have to right-
click the file and select Run as Administrator.
3) Click on Next.
4) The opened dialog lists all required applications that are not present on the
system, for example:
• .NET Framework 4.0
• Various Windows Installers
FastViewer GmbH, 06/2019
14 FastViewer V3.2 Server Solution, Installation and Configuration, ManualInstalling the FastViewer Server
FastViewer Server Setup
• Microsoft SQL Server 2008 Express SP2
5) Click on Next.
When the required software is installed, the dialog closes and the FastViewer
server setup starts automatically.
6) Click on Next.
FastViewer GmbH, 06/2019
FastViewer V3.2 Server Solution, Installation and Configuration, Manual 15Installing the FastViewer Server
FastViewer Server Setup
7) Use the default-set destination folder for the installation or select one via the
Browse... button.
8) Then click on Install.
The application is being installed.
9) When the setup is finished, click on Finish.
FastViewer GmbH, 06/2019
16 FastViewer V3.2 Server Solution, Installation and Configuration, ManualInstalling the FastViewer Server
Adaption of settings.ini
The setup process is successfully accomplished. The dialog closes. The
Webconferenceserver service starts automatically after the installation.
4.4 Adaption of settings.ini
After you have installed the FastViewer server, execute the following steps to
configure it:
NOTICE: If you want to offer participants the possibility to partic-
ipate via browser in sessions, then a WebClient Server is
required.
Step by Step
1) Open the settings.ini file in the setup folder of the FastViewer server in
an editor.
By default, this file is found under the path:
C:\Program Files (x86)\WebConferenceServer
2) Search the following line:
ExternalAddress=Change2YourServer
3) Replace value Change2YourServer with the external, fully qualified domain
name (FQDN) of the FastViewer server.
ExternalAddress=webconf1.example.com
4) Search the following line:
;ClientURLBase=http://Change2YourServer/client/
fastclient_i_%1.exe
FastViewer GmbH, 06/2019
FastViewer V3.2 Server Solution, Installation and Configuration, Manual 17Installing the FastViewer Server
Adaption of settings.ini
5) Replace value Change2YourServer in both lines with the external, fully
qualified domain name (FQDN) of the FastViewer server computer. For
example:
;ClientURLBase=http://webconf1.example.com/client/fastclient_i_%1.exe
and for the possibly configured second URL:
WebclientURLBase=http://10.1.101.2:8080/joinclient.aspx?inv=%1
6) Remove the semicolon (;) at the beginning of the line.
As a result, the line and thus also the parameter you have defined become
valid.
7) Rename the Servername parameter optionally.
NOTICE: You are free to choose any name for the Servername
parameter. The specified name is displayed at the call of the DNS
Name / IP Address via the browser.
8) Creation of the listeners: If the server should be available via two DNS names
(this is the case if the FastViewer WebClient is operated on the same server,
but should be reachable also with another DNS Name) perform the following
settings:
NOTICE: If this is not the case, you must not change the defaults.
9) Search the following lines:
listen1="http://*/"
listen2="https://*/"
Replace the asteriks (*) with the DNS Name under which the FastViewer is
reachable, e.g.
listen1="http://webconf1.example.com/"
listen2="https://webconf1.example.com/"
10) Supplement the list points by:
listen3="http://localhost"
11) Save your changes and close the settings.ini file.
12) Terminate the Webconference server service via Windows Server Manager.
13) Start the Webconference server service.
The settings.ini file may look like this:
; Name of server (for database connection entries)
ServerName=WEBCONF1
; SQL Connection string, the password for user sa is encrypted, so it cannot be used for
login in an interactive SQL manager session
FastViewer GmbH, 06/2019
18 FastViewer V3.2 Server Solution, Installation and Configuration, ManualInstalling the FastViewer Server
Adaption of settings.ini
SQLConnectionString="Data Source=(local)\fastviewer;Initial Catalog=fastviewer;Persist
Security Info=True;User ID=sa;Password="
; Session ID Start value for that server
SessionIDStart=100000
; Session ID End value for that server
SessionIDEnd=999999
ExternalAddress=10.1.101.2
XMLRPCsecure=true (insert when using the Outlook add-in)
XMLRPCsecureFQDN= (insert when using the Outlook add-in; please enter
the FQDN of the FastViewer server for host.yourdomain.com).
[Logging]
; The setting value is the limit at which a log message is logged.
; 0=Info, 1=Uncritical, 2=Warning, 3=Important, 4=Critical, 5=Disabled
;All=0 ; this overwrites all others, if less
;Connection=2
;PacketManager=2
;DatabaseManager=2
;General=2
;License=2
;MessageProtocol=2
;SessionManager=2
;XmlProtocol=2
; Log file path and logfilename
;LogFilePath="tunnelserver.log"
;MaxLogFileSizeMB=100
; How many logfiles should exist before overwritten
;RotationNumberOfFiles=3
[HttpListenURLs]
; This section contains a list of URLs where the HTTP Service should listen (Hostheader).
; This is required not only for HTTP downloads but also for normal HTTP communication!
; SSL Listenings should also be added here.
listen1="http://*/"
listen2="https://*/"
[ConnectionManager]
FastViewer GmbH, 06/2019
FastViewer V3.2 Server Solution, Installation and Configuration, Manual 19Installing the FastViewer Server
Adaption of settings.ini
RootURLreply=
[SessionManager]
ClientURLBase=http://10.1.101.2/client/fastclient_i_%1.exe
WebclientURLBase=http://10.1.101.2:8080/joinclient.aspx?inv=%1
; You can use SingleURL=true only if the webclient is installed, then all XMLRPC answers are
with the webclient URL.
SingleURL=false
[DatabaseManager]
;BackupPath="c:\sqlbackup"
;BackupHourUTC=1
You must activate the FastViewer server after its configuration.
To authenticate the FastViewer server to the SQL database, the "mixed mode"
can be used. Thus, a registration via AD account is possible. Access is always via
the connection string entered in the settings.ini.
Login with username / password:
SQLConnectionString=“Data Source=db.yourdomain.com;Initial Catalog=fastviewer;Per-
sist Security Info=True;User ID=sa;Password=xxxxxxx”
integrated login with security:
SQLConnectionString=“Data Source=db.yourdomain.com;Initial Catalog=fast-
viewer;Integrated Security=SSPI”
In this case, the FastViewer service must run under an ActiveDirectory account
that is also authorized for the database. It is identical with the user who runs the
Logviewer.
Description of the possible settings.ini parameters:
FastViewer GmbH, 06/2019
20 FastViewer V3.2 Server Solution, Installation and Configuration, ManualInstalling the FastViewer Server
Adaption of settings.ini
Section Parameter name Description
[General] Servername = "WEBCONF1" Name of the Server
– is displayed at call
of the page http://
localhost/admin.
SQLConnectionString = "Data The Connection-
Source=(local)\fastviewerInitial Cata- String contains infor-
log=fastviewerIntegrated Security=True" mation about
Database connec-
tion with which the
Server can connect
to the Database.
SessionIDStart = 100000 SessionIDEnd = Start and End of
999999 range from the
server administrated
Session IDs. (Rele-
vant if you use sev-
eral servers)
ExternalAddress = "http://FQDN/" FQDN (Fully Quali-
fied Domain Name)
or IP under which
the server is reach-
able internally and
externally. If there is
only an explicitly
internal soltution,
then it is sufficient
that the server is
reachable only inter-
nally.
UpdateURL = "http://update1.fast- From this URL the
viewer.com/download/" AutoUpdates and
RE Updates are
downloaded. Please
consider that a sub-
directory must exist
with the respective
version name (e.g.
3.20.0039) and it
must contain the
update-files. The
update-files can be
obtained from the
personal Fast-
Viewer portal.
XMLRPCSecure = false Activates the Lis-
tener for the XMLR-
PCSecure Interface.
This requires SSL
and thus a SSL Cer-
tificate!
FastViewer GmbH, 06/2019
FastViewer V3.2 Server Solution, Installation and Configuration, Manual 21Installing the FastViewer Server
Adaption of settings.ini
Section Parameter name Description
XMLRPCSecurePort = 5100 Defines the Port
5100 for the Lis-
tener of the XMLR-
PCSecure interface.
XMLRPCSecureFQDN = "localhost" Defines the FQDN
(Fully Qualified
Domain Name) for
the XMLRPCSecure
interface.
LogVerboseLevel = 10 A general Logging-
level, from which the
standard value of the
„[Logging]All“ param-
eter is calculated.
[Logging] All = 2 Increments equally
the LoggingLevel for
all sections. (Possi-
ble values 0 to 5)
The less the Loggin-
gLevel the more
detailed is the Log-
ging.
?Connection = 2PacketManager = Here the specific
2DatabaseManager = 2General = 2License Logginglevel for sep-
= 2MessageProtocol = 2SessionManager = arate sections can
2XmlProtocol = 2XmlRpc = 2Services = 2 be adapted.
LogFilePath = "tunnelserver.log" Name of the Logfile.
MaxLogFileSizeMB = 100 Maximum size
(specified in MB) of
the log file before it
is rotated. With rota-
tion a new log file is
created.
RotationNumberOfFiles = 3 Maximum Number of
rotation files before
the oldest logfile will
be overwritten.
SyslogServer = ""SyslogPort = 514 Here the Name and
Port of a Syslog
server can be
defined to which the
Syslog messages
will be sent.
[HttpListenURLs] Listen = "http://*/" List of the Listeners
(List) which should be initi-
ated by the Server.
Default: http-Listener
/ Standardport 80 /
0.0.0.0
FastViewer GmbH, 06/2019
22 FastViewer V3.2 Server Solution, Installation and Configuration, ManualInstalling the FastViewer Server
Adaption of settings.ini
Section Parameter name Description
[ConnectionMan- RootURLReply = "fastViewer WebConfer- Here the Response
ager] ence Server" for a "common" http
Request, like e.g. via
a Browser can be
specified.
DirectListenIP = "" Here an IP can be
entered on which the
DirectListener is
established. if
empty: 0.0.0.0
DirectPort = 5000 Here the Port for the
Direct-Listener is
established.
[SessionManager] ClientURLBase = "http://join.fast- Download-Link to
viewer.com?inv=%1" the Server.
WebClientURLBase = "http://ExternalAd- Download-Link to
dress/client/fv_i_%1.exe" the Webclient.
SingleURL = false If activated, the
server responds with
the WebClientURL,
also even when the
ClientURL is
requested.
FileboardPath = ".\fileboard\" The folder in which
the copied files to
the fileboard are
stored.
RecordPath = ".\recordings\" The folder in which
at Serverside-
recording the rcord-
ings are stored.
AlwaysAllowDowngrade = false Start mit older Ver-
sion allowed?
(Downgrade)
KeepAliveIntervalSeconds = 5 Interval in which the
KeepAlive NOOP
Packages are sent.
!Attention! Changes
can cause problems
with the Firewall.
[DatabaseManager] BackupPath = ""BackupHourUTC = -1 Path and UTC time
for the automatically
Database backups
PerformUpdate = false If activated, the
server is permitted to
update the Database
if required. Default:
false
FastViewer GmbH, 06/2019
FastViewer V3.2 Server Solution, Installation and Configuration, Manual 23Installing the FastViewer Server
Adaption of settings.ini
Section Parameter name Description
SetMemoryLimitMB = 512 Database Snapshot
Size. If an own data-
base is used and the
usage of this param-
eter causes errors
then this value must
be set to 0.
CleanupDeletedHourUTC = hh:mm Time for the data-
base clean up. (For
deletion marked data
records will be
removed)
DBSyncIntervalSeconds = 3 Interval in which the
Database of the
servers is synchro-
nized.
BackupPath="c:\sqlbackup" MaxDBLogReten-
tionDays=80 (Num-
BackupHourUTC=1
ber of days after
MaxDBLogRetentionDays=80 which a log entry
should be deleted)
CleanupDeletedHourUTC=2
CleanupDeleted-
HourUTC=2 (Time
when the deletion
should be done
daily.)
[AdminIPList] (List) Allow = "127.0.0.1" Here you can specify
the IPs from which
the Admin-HTML-
page can be
accessed. 127.0.0.1
will be added
always.
[HttpServer] CustomizedClientDownload = true Each child license
can have in the
defined folder an
adapted .exe for
invitations
(licensenum-
ber.exe) This
parameter can be
used exclusively for
ASP servers.
FastViewer GmbH, 06/2019
24 FastViewer V3.2 Server Solution, Installation and Configuration, ManualInstalling the FastViewer Server
Adaption of settings.ini
Section Parameter name Description
CustomizedClientPath = "clients\" Here you specify the
folder in which the
Child FastCli-
ents.exe files will be
stored. This parame-
ter can be used
exclusively for ASP
servers.
[HttpServerPaths] /update/ = ".\update\" Links the update
(List) folder with the vir-
tual folder /update/
/client/ = ".\fastclient.exe" Links the FastCli-
ent.exe with the
virtual folder /client/
/old/ = ".\oldversion.exe" Links the oldver-
sion.exe with vir-
tual folder /old/. The
oldversion.exe
prints an information
when the used ver-
sion is an old ver-
sion. (Relevant if the
"MinVersion-Param-
eter“ is set. Refer to
parameter descrip-
tion)
[RemoteManager] AutoupdateREExeName = "FastRemoteUp- Definition of the
date.exe" Name for the
Remoted Update
file.
AutoRemoveDoubleEntries = false At activation this
function removes
automatically dupli-
cate Remote ser-
vice entries.
AutoRemoveDoubleEntriesHourUTC = 1 time for the removal
of duplicate Remote
service entries.
AutoupdateTimespanSeconds = 10 Interval between the
Updates of single
Remote services,
when several are
updated simultane-
ously !Attention! A
too low value can
severe affect the
server performance.
[PortMapper] Enabled = false Block PortMapper on
the server.
FastViewer GmbH, 06/2019
FastViewer V3.2 Server Solution, Installation and Configuration, Manual 25Installing the FastViewer Server
Adaption of settings.ini
Section Parameter name Description
[Security] AllowRunningInfo = true Is it allowed to
retrieve status infor-
mation?
AllowPostAspLicense = false If activated then from
the ASP service a
created license via
the ASP interface
can be transmitted to
the server.
AllowClientUpload = false If activated then a
FastClient.exe
can be copied to the
server via a created
license over the ASP
interface.
[UserManager] MacMinVersion = "" Here a minimum
Mac module version
can be defined. If it
is attempted to start
with an older ver-
sion an according
message is dis-
played. (see also
parameter /old/ =
".\oldversion.exe").
MinVersion = "" Here a minimum
Windows module
version can be
defined. If it is
attempted to start
with an older ver-
sion an according
message is dis-
played. (see also
parameter /old/ =
".\oldversion.exe").
SMSUrl = "https://sms.fastviewer.com:9710/ The URL over which
http/send-message?user- the SMS Service is
name=admin&pass- controlled.
word=%p%&to=%mobile%&message-
type=sms.automatic&message=%mes-
sage%"
SMSPassword = "xxxxxxxx" The password for
the SMS Service.
SMSAuthKeyLength = 5 Length of the
authentication key
which will be sent
per SMS.
FastViewer GmbH, 06/2019
26 FastViewer V3.2 Server Solution, Installation and Configuration, ManualInstalling the FastViewer Server
Configuration of the server list and Activation of the FastViewer Server
4.5 Configuration of the server list and Activation of the FastViewer Server
Proceed as follows to activate the FastViewer server:
Step by Step
1) Create in the installation directory (C:\Program Files (x86)\WebConference-
Server) a new folder and name it update.
2) Add a new text file with the name serverlist.txt to the folder.
3) Define the range of the possible session numbers for your Server (by default
100000-999999) and enter the external full qualified domain name (FQDN) or
the IP-addresse of Servers, which you have specified already in "settings.ini"
e.g.: 100000-999999:webconf1.example.com With the splitting of the
numbers from 100000 to 999999, e.g. 100000-499999 and 500000-999999,
more servers can be specified.:
:
A sample for the text file could look like this:
100000-299999:10.1.101.2
300000-599999:10.1.101.3
600000-999999:10.1.101.4
This file will be created by default in the following path:
C:\Program Files (x86)\WebConferenceServer\update
the Server list is accessible via https://Servername/update/
serverlist.txt.
4) Click on Start > All Programs > Webconference Server V3 and select the
Server Manager option from the displayed list.
The Activation Wizard opens.
5) Click on Activate Server and click in the following window on the Use
Serverlist URL tab.
The following dialog opens:
FastViewer GmbH, 06/2019
FastViewer V3.2 Server Solution, Installation and Configuration, Manual 27Installing the FastViewer Server
Configuration of the server list and Activation of the FastViewer Server
6) Specify in the Dialog windos the link to the Server list and click on Validate
url in order to verify the specified link. (http://YOURSERVER/update/
serverlist.txt)
7) Click on Next.
In the dialog now open you need to decide whether or not to set up a
connection to the internet.
8) Click on Yes.
The following dialog opens:
9) Enter your License number.
10) Click on Activate.
• If you have an internet connection, your release code is automatically
entered in the respective field after a short waiting period. A message
informs you about the successful activation of your FastViewer server.
• However, if you do not have an internet connection or a proxy in use, click
on the link Create Unlock File.
FastViewer GmbH, 06/2019
28 FastViewer V3.2 Server Solution, Installation and Configuration, ManualInstalling the FastViewer Server
Configuration of the server list and Activation of the FastViewer Server
Send the created unlock file by e-mail to:
helpdesk@fastviewer.com
You receive the release code within the next 24 hours also by e-mail.
After you have received the file with the release code (for example
ServerAdmin.fvk), enter the storage location in the Activation File
input field.
After you have clicked on the Activate button you are informed about the
activation status of your FastViewer server by a corresponding message.
NOTICE: In case the message "no more activations available" is
displayed, then call the support in order to enable activations
again.
11) Close the message about the activation status of your FastViewer server with
a click on OK.
The following dialog opens:
In this dialog you need to import the purchased license after successfully
activating the FastViewer server.
12) Select one of the following options:
FastViewer GmbH, 06/2019
FastViewer V3.2 Server Solution, Installation and Configuration, Manual 29Installing the FastViewer Server
Check the accessibilty of FastViewer Server and service configuration
• Use Download
Activate this option if you have an internet connection. In this case the file
with the release code is automatically downloaded from the activation
server.
• Use Local File
Activate this option if you do not have an internet access but received the
file with the release code by e-mail. Then click on the search icon ... for
specifying the storage location for the file with the release code.
13) Click on the Start Import button.
You are informed about the import status by the following dialog, for example.
14) Click on Exit.
The dialog closes and the Server Management Wizard is shut down.
15) Close the Webconference server service via the Windows Server Manager.
16) Start the Webconference server service.
4.6 Check the accessibilty of FastViewer Server and service configuration
The following steps serve for checking the functionality of the installed and
activated FastViewer server.
Step by Step
1) Open the following ports in your internal firewall (if active) for the connections
to the FastViewer server:
• TCP 5000
• HTTP 80
• HTTPS 443
FastViewer GmbH, 06/2019
30 FastViewer V3.2 Server Solution, Installation and Configuration, ManualInstalling the FastViewer Server
Check the accessibilty of FastViewer Server and service configuration
2) If the FastViewer server shall also be used by external persons, open in your
external firewall the following ports for the connections to the FastViewer
server:
• TCP 5000
• HTTP 80
• HTTPS 443
3) Enter the following link in a web browser on the FastViewer computer.
http://localhost/admin
This enables you to check the server functionality and monitor the server
service at a later date. Please note that you can invoke monitoring only
directly at the server for security reasons.
The following web page is displayed for example in the web browser:
4) Start a web browser on a workstation in your network and move to the
following link:
http://
You see a web page with the following content:
fastviewer Webconference Server
IMPORTANT: If you do not, please check your firewall settings.
Finally, you must perform settings in the restore options of the Webconfer-
enceserver service that concern the case of a service error.
5) Open the dialog that displays local services via Start > Administrative Tools
> Services.
FastViewer GmbH, 06/2019
FastViewer V3.2 Server Solution, Installation and Configuration, Manual 31Installing the FastViewer Server
Download Master and Client Module
6) Open the context menu with a rightclick on the Webconferenceserver
service.
7) Select Properties from the context menu.
The following dialog opens:
It contains the pre-set values for the combo boxes First failure, Second
failure and Subsequent failures.
8) Set the Restart the Service option for all three fields.
9) Click on Apply.
Your settings are saved and will be used.
10) Click on OK.
The settings dialog closes.
4.7 Download Master and Client Module
Providing application files for the master and client module.
This section illustrates the steps you need to take after the server activation in the
customer portal to enable using the master and client module for the FastViewer.
To download the application files for the master and client module (for Microsoft
Windows or the Mac version in each case) from the FastViewer portal and store
them on the server, proceed as follows:
FastViewer GmbH, 06/2019
32 FastViewer V3.2 Server Solution, Installation and Configuration, ManualInstalling the FastViewer Server
Download Master and Client Module
Step by Step
1) In case you are already logged in the portal, please log out.
Invoke the following internet page:
https://portal.fastviewer.com
The web page with the input form for logging on to the portal opens.
2) To log on for the first time, enter your license number for accessing this web
portal under Alias/Serial.
3) Specify your password for accessing this web portal under Password.
4) Click on the Login button.
The start page of the customer portal opens.
FastViewer GmbH, 06/2019
FastViewer V3.2 Server Solution, Installation and Configuration, Manual 33Installing the FastViewer Server
Download Master and Client Module
5) Click on the Switch to expert mode.
You see your account data as well as the status of your license.
FastViewer GmbH, 06/2019
34 FastViewer V3.2 Server Solution, Installation and Configuration, ManualInstalling the FastViewer Server
Download Master and Client Module
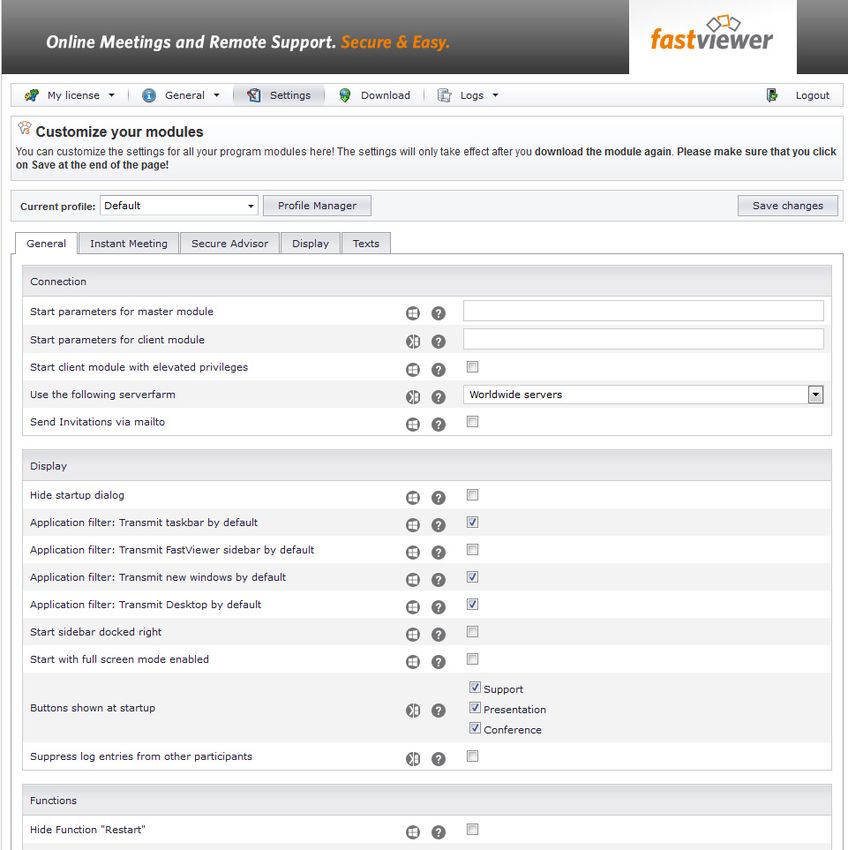
6) Position the mousepointer on the Settings. (eventually Settings V3)
A selection list opens.
7) Select the Functions option from this list.
The following page is displayed:
FastViewer GmbH, 06/2019
FastViewer V3.2 Server Solution, Installation and Configuration, Manual 35Installing the FastViewer Server
Download Master and Client Module
8) To configure the client modules, select an already created profile from the
combo box next to Chosen Profile or specify a new profile via the Profile
Manager.
If you use an existing profile, continue downloading the client modules with
step 13. Otherwise...
9) Access the tabs General, Client Module, Support, Presentation,
Conference, and Remote to create a new profile. You can then use this
profile to adjust the master and client module settings to the characteristics of
your company.
FastViewer GmbH, 06/2019
36 FastViewer V3.2 Server Solution, Installation and Configuration, ManualInstalling the FastViewer Server
Download Master and Client Module
IMPORTANT: You cannot change the configuration of the
Default profile. If you try to save changes to the default profile, an
error message will appear.
a) To create a new profile, click on the Profile Manager button.
The Profile Manager dialog opens:
b) Click on the New profile button.
The following dialog opens:
c) Enter the desired profile name in the input line.
d) Click on the Save button.
The new profile has been integrated in the profiles list and is displayed as
current profile.
e) Click on the (x) icon in the top-right corner of the caption bar.
The Profile Manager dialog closes.
10) Click on download in order to check if the licence has been linked to the
server. In this case the configured server list is displayed red framed.
11) Perform other changes to the profile settings optionally.
NOTICE: Between the parameters and the area in which the
settings are performed you find a round icon with a question mark.
If you position the mouse pointer on the question mark icon, you
see a description of this parameter.
NOTICE: When you perform the profile settings for user
languages that can only be represented in UTF-8 (e. g. Russian,
FastViewer GmbH, 06/2019
FastViewer V3.2 Server Solution, Installation and Configuration, Manual 37Installing the FastViewer Server
Download Master and Client Module
Chinese, etc.), you need to select under Switch to: > Texts >
General the Send invitations via mailto option.
In addition, you need to set the international options in
Microsoft Outlook and in the Internet Explorer to UTF-8 for such
languages if this has not been done yet:
Internet Explorer: Internet Options > "Advanced" tab > Interna-
tionalUse > UTF-8 for mailto links.
Microsoft Outlook 2010: File > Options > Advanced > Interna-
tional options > Allow UTF-8 support for the mailto protocol.
Microsoft Outlook 2007: Tools > Options > Mail Format > Inter-
national options > Enable UTF-8 support for mailto protocol.
12) Click on the Save changes button.
A message informs you about the successful adoption of your changes.
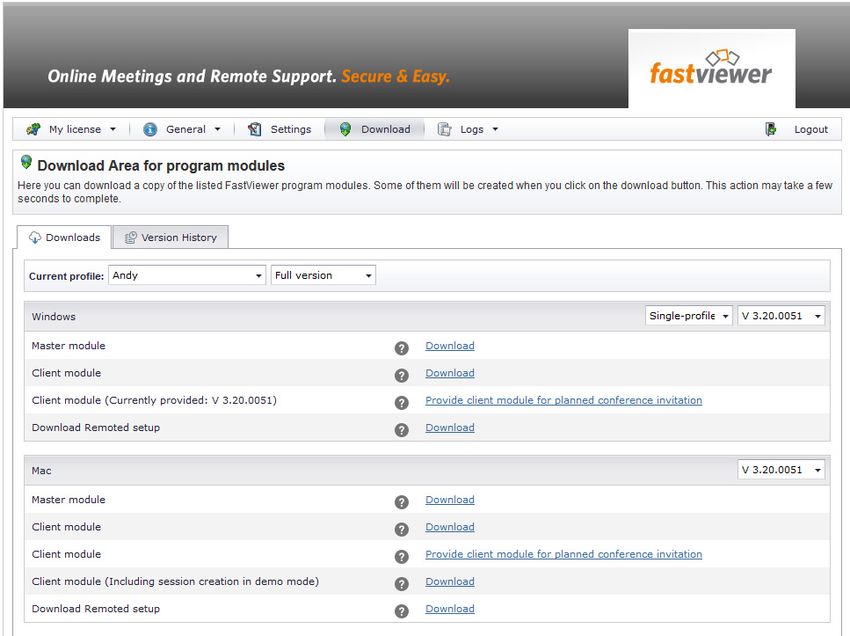
13) Click on the Download button.
14) Specify by selection for which operating system type (Windows V3 or Mac
Version) you want to provide the module files.
NOTICE: You find the combo box for making your selection next
to the display of the active profile and the application type full
version/demo version.
The following page is displayed of downloading the Windows-specific
modules:
FastViewer GmbH, 06/2019
38 FastViewer V3.2 Server Solution, Installation and Configuration, ManualInstalling the FastViewer Server
Download Master and Client Module
15) Click on the Download link next to Master module.
A file download dialog opens.
16) Click on OK in the file download dialog.
Downloading the FastMaster.exe file starts.
17) Click on the Download link next to Client module.
A file download dialog opens.
18) Click on OK in the file download dialog.
Downloading the FastClient.exe file starts.
19) Repeat this procedure as of step 14 for the Mac-specific modules you may
require.
20) Switch to the directory in which the two files were stored after the file
download.
21) Copy the file FastClient.exe for Windows and, if required, the archive file
FastClient.app.zip for Mac to the directory C:\Program Files
(x86)\WebConferenceServer of the FastViewer server.
FastViewer GmbH, 06/2019
FastViewer V3.2 Server Solution, Installation and Configuration, Manual 39Installing the FastViewer Server
Perform an Update of the FastViewer Server
NOTICE: The archive files FastMaster.app.zip and
FastClient.app.zip to be applied on Mac systems must not be
unpacked after they have been copied to the WebConference-
Server directory.
Providing the application files is now complete.
4.8 Perform an Update of the FastViewer Server
Execute the following steps to update the FastViewer server to a new version:
Step by Step
1) Start your web browser and enter the address of the FastViewer portal:
https://portal.fastviewer.com
2) Log on to the FastViewer portal with your license number and your password.
3) Download the current update file (Download Server-Update) for the
FastViewer server from the portal.
Switch to expert mode > Tab: Download > Own Server Solution >
Download: Download Server-Update.
The ServerUpdate32.zip file is downloaded.
4) Unpack this archive file.
5) Close the Webconferenceserver service.
Start > Administrative Tools > Services
6) Back up the setup directory, default path:
C:\Program Files (x86)\WebConferenceServer
7) Copy the unpacked files from the archive and paste them into the setup
directory.
8) Restart the service.
Updating the FastViewer server is now complete.
4.9 Usage of Webcollaboration Apps
Perform the following steps, in order to enable the usage of Webcollaboration
Apps in connection with WebCollaboration Server.
FastViewer GmbH, 06/2019
40 FastViewer V3.2 Server Solution, Installation and Configuration, ManualInstalling the FastViewer Server
Activation of the SMS Authentification
Step by Step
1) Ensure, that the latest version of the Webcollaboration Server is installed.
(Version 3.1.5829.27126 or newer)
2) It must be ensured, that in the installation directory (e.g. C:\Program
Files(x86)\WebConferenceServer) of the Setup a subdirectory with the name
content does exist. This directory contains the file appredirect.html which
enusres that the App is started when the invitation link is used.
3) In the directory content also the file conninfo.xml must exist. This file contains
the server lists configuration. The file is available via the personal portal under
Download > Own server solution > Download ConnectionInfo-XML. This file
is required so that the mobile Applications can communicate with the Server.
4) the Creation is completed.
Important notes:
Participation in a Webcollaboration session: The required settings (the path to the
Webcollaboration server) to the App are automatically transmitted to the partici-
pants, but only in case they use the invite functions in order to start a session.
Start of a Webcollaboration session: a start of the session via the App is exclu-
sively possible if the respective license number, a user name and the related
password are stored in the App. In Case that no user does exist or has been
created the License number can be taken as user name and the license password
can be taken as password. Furthermore the function alternative server must be
enabled and the DNS name of the Webcollaboration server is stored.
4.10 Activation of the SMS Authentification
The SMS authentification is an extended security function. In order to use the
SMS authentification from FastViewer you need first a SMS-Provider for your
country or for the countries you want to use this service. The SMS-Provider
provides your login data to a SMS-service. This login data is stored as follows on
the FastViewer Server.
Step by Step
1) Add to the Settings.ini under „UserManager“ the following entry:
SMSUrl=http://your.smsservice.com/xxxxxxxx
2) "If your SMS Provider requires a password, it can be added with the following
entry: SMSPassword=xxxx
Important notes: The exact structure of the URL for the SMS Service needs to be
asked by the repective SMS provider, since the structure on the manufacturer.
FastViewer provides the following parameters in order to fill the URL with
information:
FastViewer GmbH, 06/2019
FastViewer V3.2 Server Solution, Installation and Configuration, Manual 41You can also read