SEESAR BEGINNER'S GUIDE VERSION 11 - HEPHAESTUS - BIOSOLVEIT
←
→
Page content transcription
If your browser does not render page correctly, please read the page content below
SeeSAR Beginner’s Guide
 Version 11 - Hephaestus
1. Basics

To begin, let’s start with a new project.

                                            BioSolveIT © 2021   1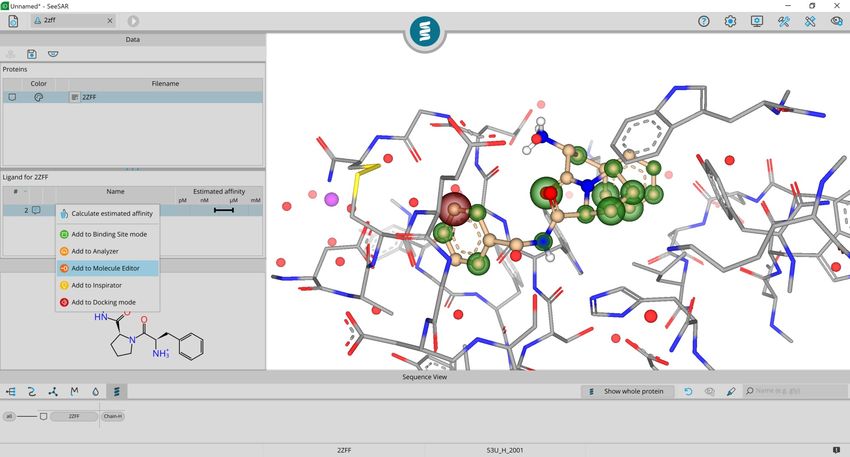
Type a pdb code in the search box and press enter to
                      download a protein directly from the pdb. For this
                      guide we will use 2zff as example.

Note: you can also load
your protein from a file, via
the file menu button.

                                                                             BioSolveIT © 2021   2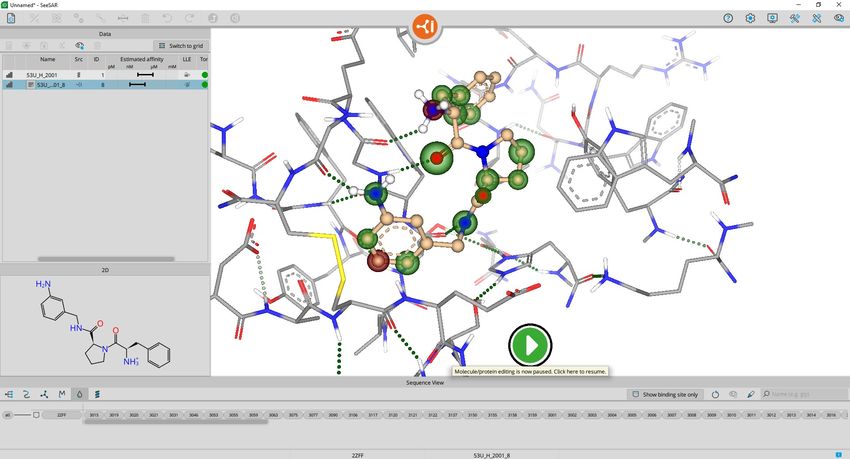
2.

          The protein is loaded and all molecules,
          buffers, co-factors etc will be listed.
1.

          Please (1.) select the ligand or chose to
          not extract a ligand and (2.) press the
          “Apply” button.

          Note: if you are not sure what name
          contains which molecule, click on the
          name and have a look at the 2D
          structure below.

                                                      BioSolveIT © 2021   3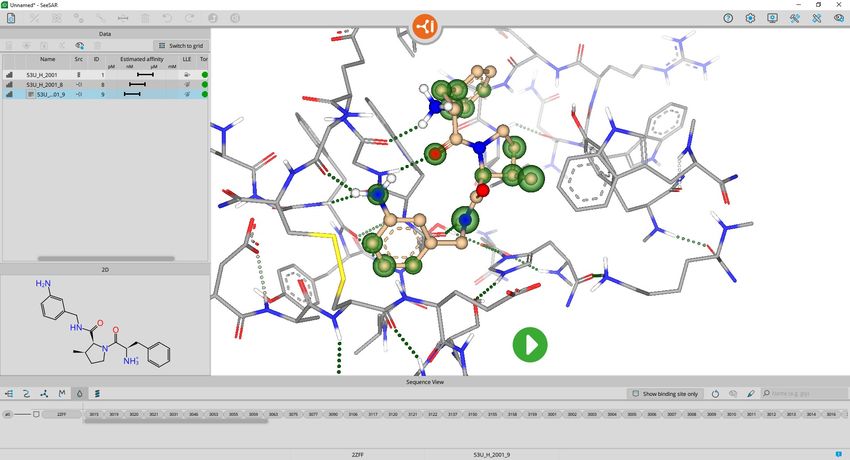
After ligand selection, all residues within a 6.5 Angstrom radius
around it are automatically selected and presented in the model.

                                                     BioSolveIT © 2021   4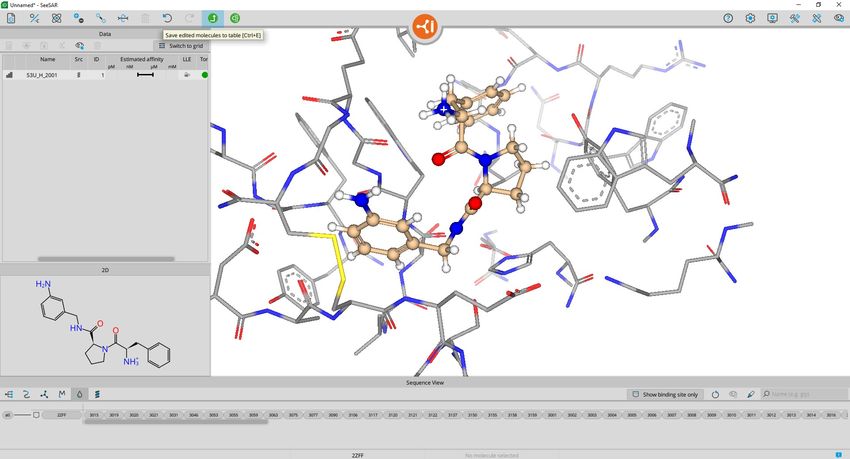
3D-viewer:
- right-click to rotate
- mouse-wheel to zoom
- middle-click to shift
Tables
- drag rim to re-size
- click entries to select
BioSolveIT © 2021 5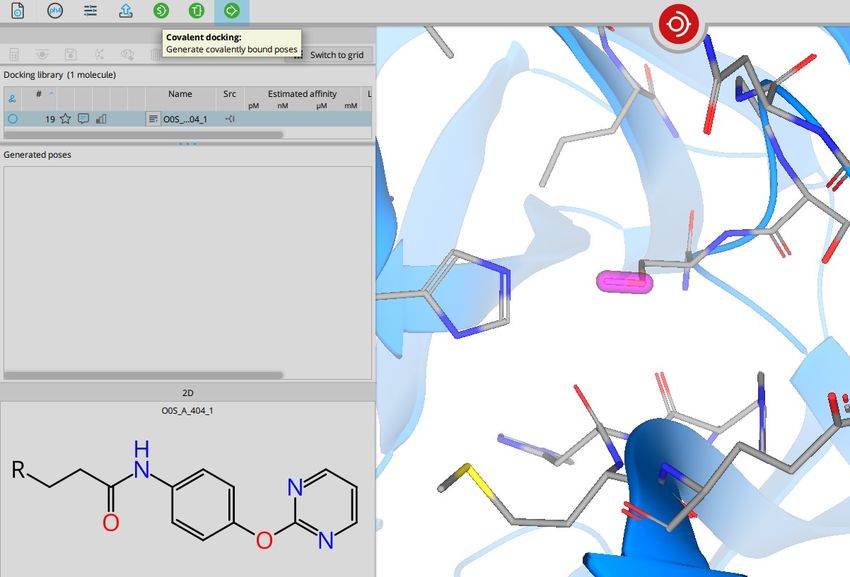
Adjust background color

Change the table layout

  Switch between dark
    and light theme

    Adjust label size

Switch to color blindness
          mode

If you want to customize the layout of SeeSAR, click on
the ‘appearance’ button in the top right toolbar. For this
guide will use the light one, but please feel free to use
whatever you prefer!

                                                  BioSolveIT © 2021   6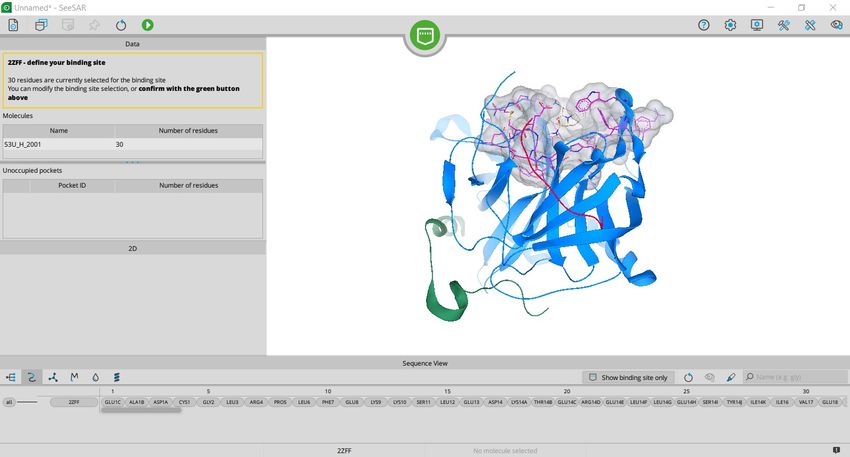
Note that you are in the Protein mode.
The mode switch button shows in which
mode you are and allows you to change
the mode as well. Hover over it so see
your options.

                                         BioSolveIT © 2021   7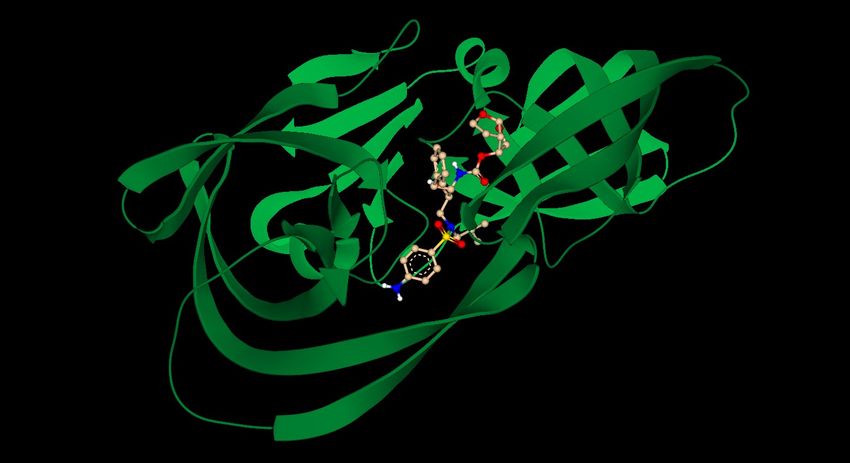
In the Proteins mode    The Analyzer mode is for
you can load and        filtering molecule sets, hit
superpose proteins.     triaging etc.

The Binding Site        The Molecule Editor
mode sets the           mode is for designing
reference pocket.       new molecules in 3D.

The Protein Editor      The Inspirator mode
mode is for editing     helps you to generate
side chains, deleting   new ideas.
waters or buffers, or
search for similar      In the Docking mode you
binding sites.          can generate poses for
                        new molecules.

                               BioSolveIT © 2021   8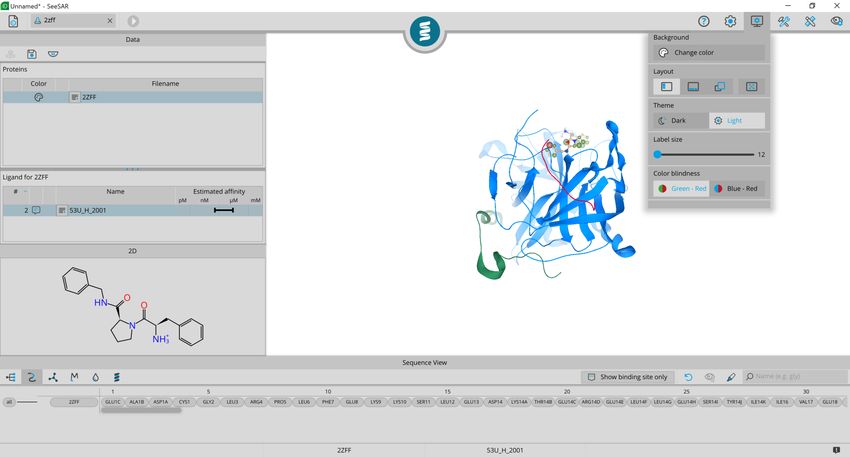
As the 3D view can easily get busy,
let’s customize the visualization.

                                      BioSolveIT © 2021   9
The view controls let you toggle on/off:
Individual
ligands metals waters
amino acids
backbone
complete
proteins
Let’s hide the secondary structure, by clicking on the “Chain-H” button in the
backbone tab. Upon clicking it turns grey (deactivated)
Note: all buttons are clickable, so that you can hide all parts of one protein in
one click (useful with several proteins).
BioSolveIT © 2021 10If you want to add or remove individual amino acids
after the automatic selection of residues for the binding
site, right click your ligand and add it to Binding Site
mode.
BioSolveIT © 2021 11You are now in the Binding Site mode.
Residues already
included in the
binding site are
highlighted in pink.
BioSolveIT © 2021 12Here you can search for
unoccupied binding pockets.
BioSolveIT © 2021 132.
Unoccupied pockets are listed and
presented with their respective color in 3D.
You can add or remove binding pockets and
residues in 3D with the key combination ctrl
+ right left click.
To display all residues toggle the residue
selection in the visualization bar (1.)
Once you are finished confirm your
selection (2.)
1.
BioSolveIT © 2021 141.
2.
Go back to the Protein mode to inspect the
binding mode of the ligand inside the binding
site.
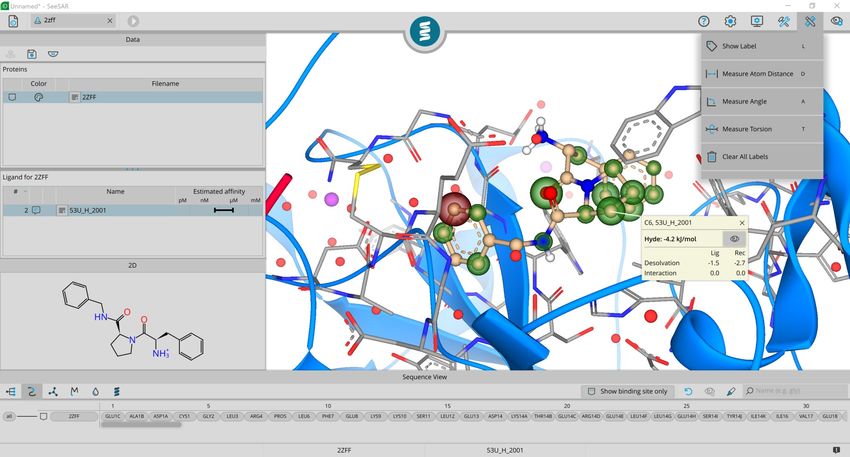
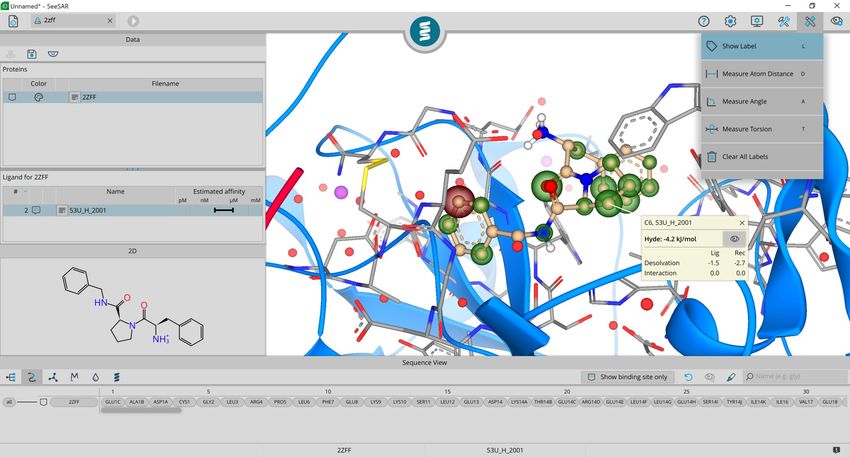
The colored coronas depict the contributions of
each atom to the estimated binding affinity. Red
means unfavorable contribution, green a
favorable contribution and the bigger the 3.
sphere is, the stronger is the effect. No sphere
means that such atom is not estimated to have
a significant impact on the binding affinity. To
find out more about each corona activate the
label function and click on one atom.
Note: You can use the shortcut key ‘L’ + left
click to label your atoms.
BioSolveIT © 2021 15Check-out the other
analysis options!
1.
BioSolveIT © 2021 16Add to Molecule Editor is accessible
with a right-click on the table entry.
This copies the molecule into the
mode and automatically switches to
that mode.
BioSolveIT © 2021 17The editor-menu will appear on the top left. There you can:
add atoms change adjust remove store the new molecule to the table
or rings charge torsion atoms after a template-based docking
change change ReCore parts undo/ store the current
atom type bond type of molecule redo molecule to the table
To edit a molecule ALWAYS:
1. select (atoms or bonds)
2. modify (using the function of choice from above)
Note that many editor functions have shortcut-keys.
E.g. select a bond and type 1, 2 or, 3 on the keyboard,
or select an atom and type the element (C, N, O, …).
BioSolveIT © 2021 18As an exercise, we add an
amino group to the ring by
selecting the Hydrogen in meta-
position and changing its
element type to “N”.
Note: During editing you see all
Hydrogens but no estimated
affinity and no coronas. To see
them, 1st add the edited ligand
to the table (with the green
button) and 2nd select the new
entry in the table!
BioSolveIT © 2021 19If you click on the molecule entry
you see the estimated affinity and
related coronas, but only polar
Hydrogens. The editor menu is
locked now.
To continue editing, click on the
‘Resume’ button in the center!
BioSolveIT © 2021 20Now let’s add a methyl group to the 5-
membered ring. Again storing this in
the table, we see a further increased
affinity estimate.
if you are running out of ideas: try the
Inspirator mode. To get your molecule
there select it with the checkbox at
the front of every row and add it to
the Inspirator mode. It will help you to
replace parts of the molecule, further
grow the molecule or merge
molecules.
BioSolveIT © 2021 212. Adding own molecules
If you want to add your own molecules to a SeeSAR-session: use e.g. your favorite drawing
tool and save the molecules as sdf-, smiles-, or mol2-file. Switch to the Docking mode in
SeeSAR and add your molecules via the load button or copy/paste them to the input library
field.
Loaded molecules may not yet
be placed in the binding site
(the information icon tells you
upon mouse-over).
If your molecules were docked
using another program you can
load them straight into the
Analyzer mode.
BioSolveIT © 2021 223-Amine-derivative:
Alternatively, copy/paste (ctrl +
1) N[C@H](CC1=CC=CC=C1)C(=O)N1CCC[C@H]1C(=O)NCC1=CC=CC(N)=C1
c/ctrl + v) your molecules (as
smiles or sdf) here. 3-Hydroxy-derivative:
For example, copy the three 2) N[C@H](CC1=CC=CC=C1)C(=O)N1CCC[C@H]1C(=O)NCC1=CC=CC(O)=C1
molecules on the right in 3-Methyl-derivative:
there, and change their 3) CC1=CC(CNC(=O)[C@@H]2CCCN2C(=O)[C@H](N)CC2=CC=CC=C2)=CC=C1
names:
Now you can start the docking by pressing
the Generate Poses button!
BioSolveIT © 2021 23At most 10 poses per molecule are
2.
generate this way, as we have left the
docking settings on default.
To get the estimated affinities, (1.)
select all docking solutions with the
checkmark in the first column and (2.)
press the thumbs-up button under the
1.
calculator at the top of the table!
Note: You may restrict the HYDE-
calculation to a pre-selected set of
checked molecules.
BioSolveIT © 2021 24Now the estimated affinities appear as a range on the logarithmic (!) scale.
Clicking on a column header sorts according to this value.
To inspect multiple poses in
1. 2. comparison, (1.) toggle the permanent
visibility by marking a molecule as
reference. Now it will appear in purple
color and stay visible as you select
other molecules.
You can add more physico-chemical
and ADME-properties as well as
pharmacological parameters to your
table with a click on the table button
(2.).
BioSolveIT © 2021 25By now you have a lot of interesting values and possibly many molecules.
You may want to:
• apply some (pharmacophore) filters? Copy the
molecules of interest to the Analyzer mode
and use the filter panel on the right side of
the table.
• grow your molecule? Add it to the Inspirator
and use the growing functionality.
• generate pictures for a report or publication?
You can do this under the ‘utilities’ button in
the upper right toolbar.
• save your session, to continue working a
different time, by clicking Save Project As…
BioSolveIT © 2021 263. Covalent docking
You can perform covalent
docking at any PDB protein
structure. PDB files that contain
a covalent ligand provide this
information upon loading within
the info icon.
The linking point is represented
as R in the 2D structure.
BioSolveIT © 2021 27If no covalent linking point of
the structure is defined, you
can introduce it in the Protein
Editor Mode.
Select the atom of the target
residue (e.g. cys, lys, ser) which
will be replaced with the ligand.
Export the modified protein
back to the Protein Mode. Be
sure, that your target residue is
part of the binding site.
BioSolveIT © 2021 28During covalent docking,
your ligand is docked in it’s
bound state. Therefore,
your structure has to
include a linking point R
and take into account any
transformations that occur
at the covalent warhead.
You can introduce a linker
by selecting an atom and
transform it into a linker.
You can introduce a linker
atom to your SMILES string In this example we have transformed an acrylamide warhead to
with [R*] its bound form to prepare the ligand for covalent docking.
BioSolveIT © 2021 29Once you have your target
residue defined and your
ligand prepared you can
covalently dock in the
Docking Mode.
You can adjust your
docking setting similar to
conventional docking.
If you have selected
several residues as
potential targets you can
switch between them by
clicking on the anchor
point.
BioSolveIT © 2021 30Last but not least:
at any time find help within SeeSAR here!
BioSolveIT © 2021 31Now we wish you happy SeeSAR-ing!
BioSolveIT © 2021 32You can also read