Segmented Bowl Making Presentation - by Jay Helland (Polychromatic Stave-Type Bowl Making) - The Hands-On ...
←
→
Page content transcription
If your browser does not render page correctly, please read the page content below
Segmented Bowl Making
    Presentation
 (Polychromatic Stave-Type Bowl Making)
                 by
             Jay Helland
More Woodworker than Wood Turner
George “Sonnie” Sharrar
About Your Safety
• Working with wood is inherently dangerous! Improper
  use of hand and power tools can lead to permanent
  injury or even death.
• Don’t ignore the proper safety rules that come with your
  power tools.
• Don’t try to perform operations you learn here (or
  elsewhere) unless you’re certain they are safe for you.
• For your own safety, use guards and methods of work so
  that you can enjoy this craft for many years.
• The author of this material is not responsible for injuries
  relating to the procedures demonstrated or illustrated in
  this document.
The Four L’s Axiom of life: To Live, To Love, To Learn and to
      Leave a Legacy are exemplified in the following poem.

Things men have made with
  wakened hands, and put
  soft life into
Are awake through years with
  transferred touch and go on
  glowing
For long years
And for this reason, some old
  thing are lovely
Warm still with the life of
  forgotten men who made
  them.

D.H. Lawrence
   1885-1930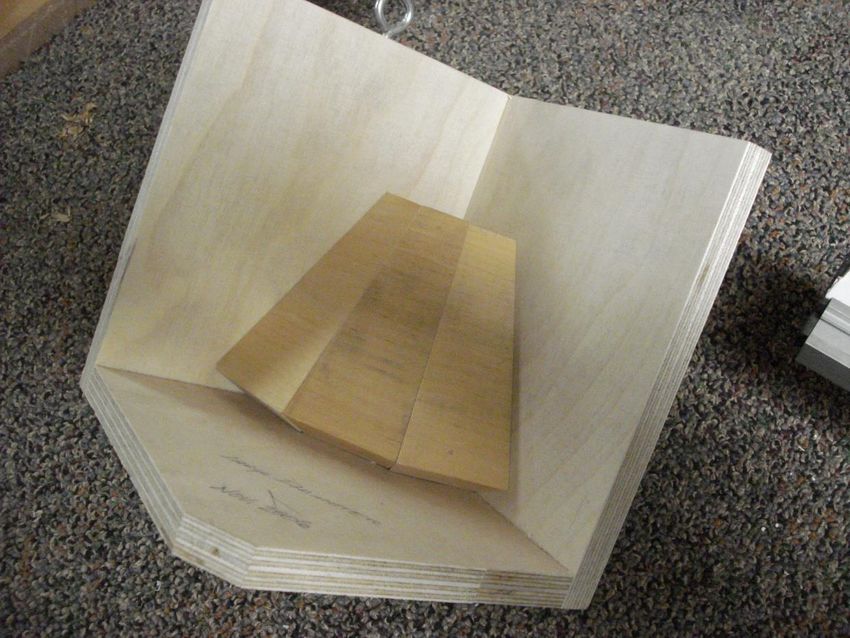
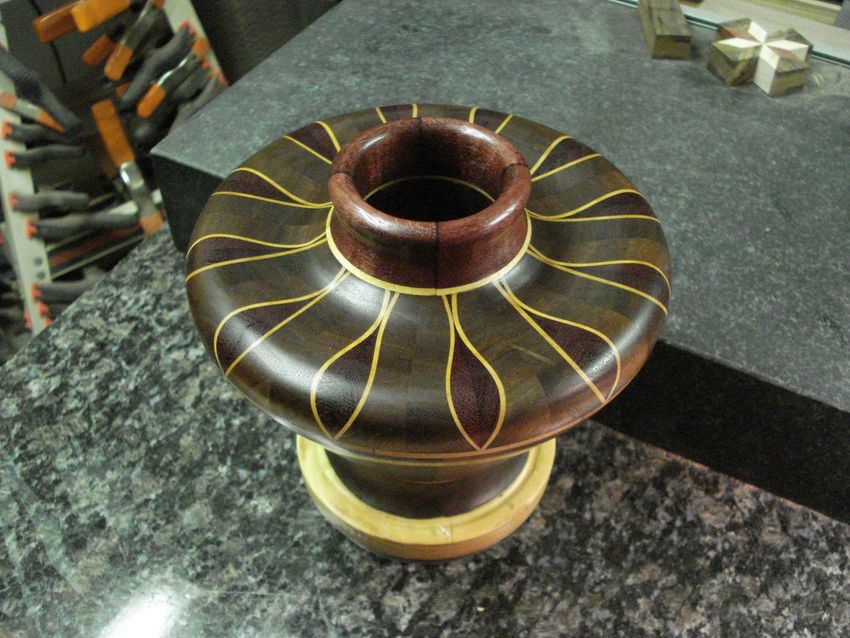
Three Main Parts of a Segmented Bowl

                                               #1 Bowl Body
#2 Bowl Base

#3 Top Decorative Ring

Bowl Segments                                          Medallion

Accent Strips
                Granite Surface Plate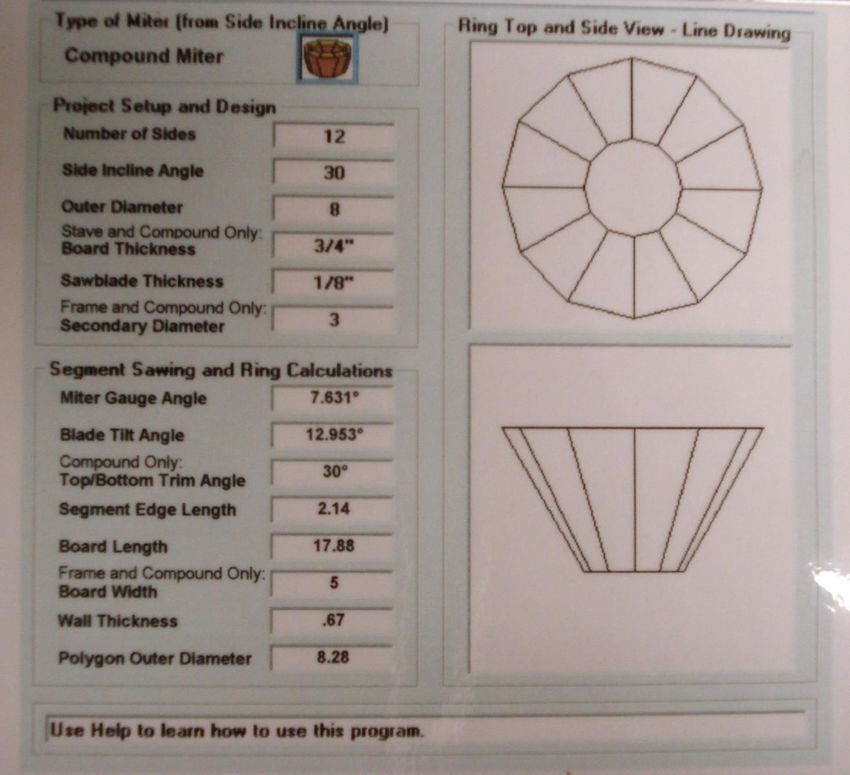
Stave-Type Segmented Bowl Making Process
Objectives: The woodworker will know or be able to:
1. Design a stave-type segmented bowl. (see movie clip)
2. Calculate the length and width of the bowl’s individual
segments using computer generated program.
3. Set-up the table saw sled used to cut the individual
segments. (see movie clip)
4. Cut accent veneer used between the individual
segments. (see movie clip)
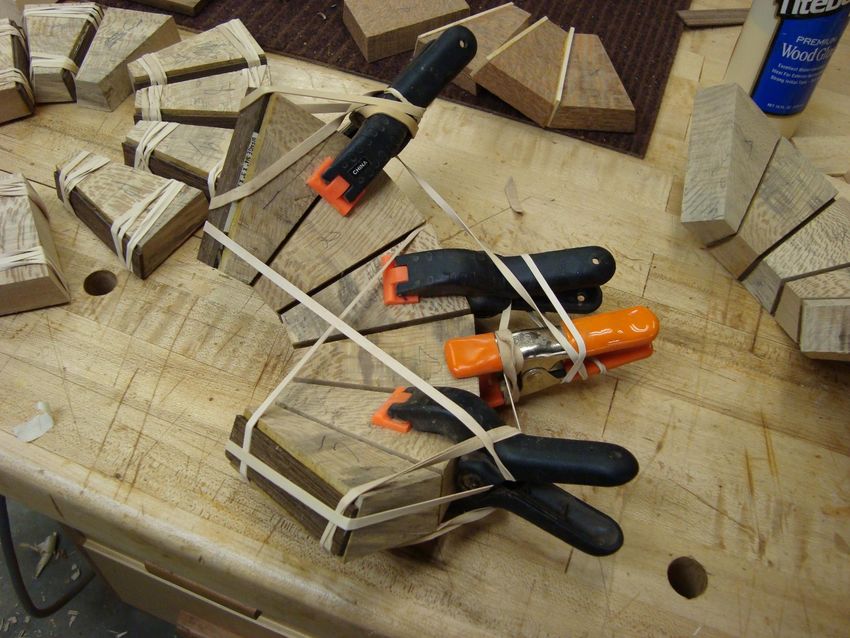
5. Glue individual segments together. (see movie clip)
6. Sand bowl halves on disc sander. (see movie clip)
7. Glue bowl halves together.
8. Use drill pres to mill top and bottom of bowl parallel to
each other.
9. Construct and assemble the top decorative ring and bowl
base.
10. Attach the top and base to the bowl body.
11. Turn the bowl round and cut mortise for tenon of base.
(see movie clip)
12. Cut out individual pieces of wood used to form the star
pattern for the bowl base. (see movie clip)
13. Turn bowl’s inside profile.
14. Glue decorative ring to bowl body.
15. Finish turn bowl and sand.
16. Reverse chuck bowl to turn the bottom and sand.
17. Apply finish the bowl.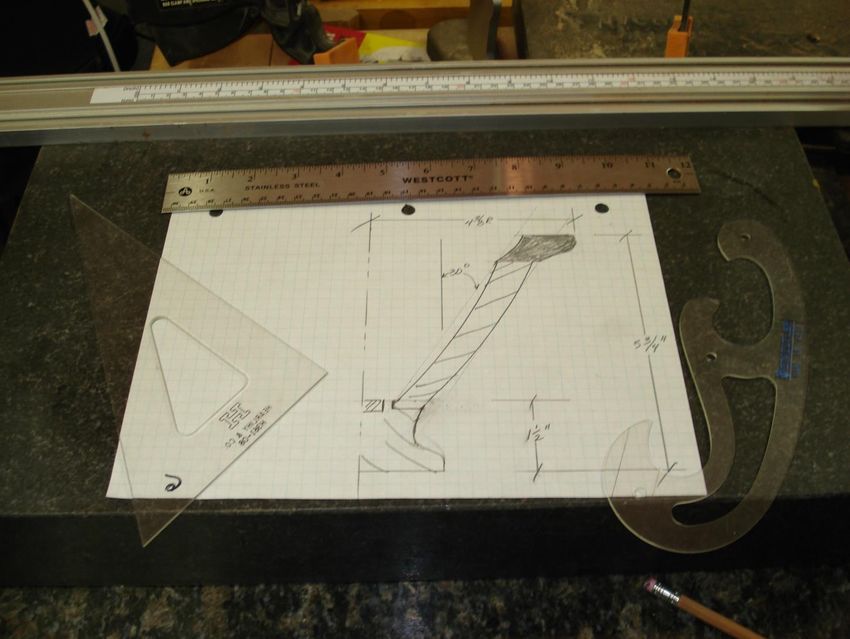
Segmented Bowl Making Process
            (Tools, Equipment, Materials, Jigs and Fixtures needed)
•   Table saw
•   Drill Press
•   Wagner Safe-T-Planer
•   Wood Lathe and face plates
•   Band Saw
•   Granite Surface Plate (or a
    smooth surface for alignment of
    segments when gluing)
•   Clamp-On Straight Edge
•   Segment-Cutting Table Saw Sled
•   12” Disc Sander
•   Table Saw Veneer Wood Cutting
    Jig
•   Abrasive Paper
•   Finish
•   Depth Gage

                                       Begin with the end in mind!
                                  Stephen Covey: 7 Habits of Highly Effective People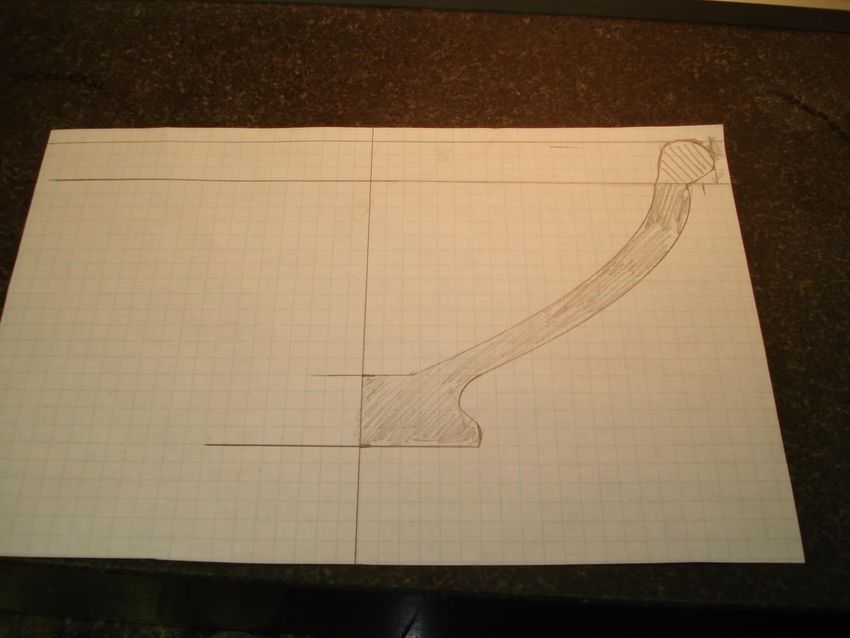
Designing Stave-Type Segmented Bowls
1. Determine rough dimensions of bowl (major and minor diameters and overall height).
2. Fold a graph paper in half and draw profile and then cut out with scissors.
3. Determine angle of bowl side measuring from the vertical centerline to the inside angle.
4. Using the Kevin Neely’s Compound Angle Computer Program or WoodturnerPro to
calculate the dimensions of the individual bowl segments.

            Centerline

          Baseline

                                         Thickness of Segments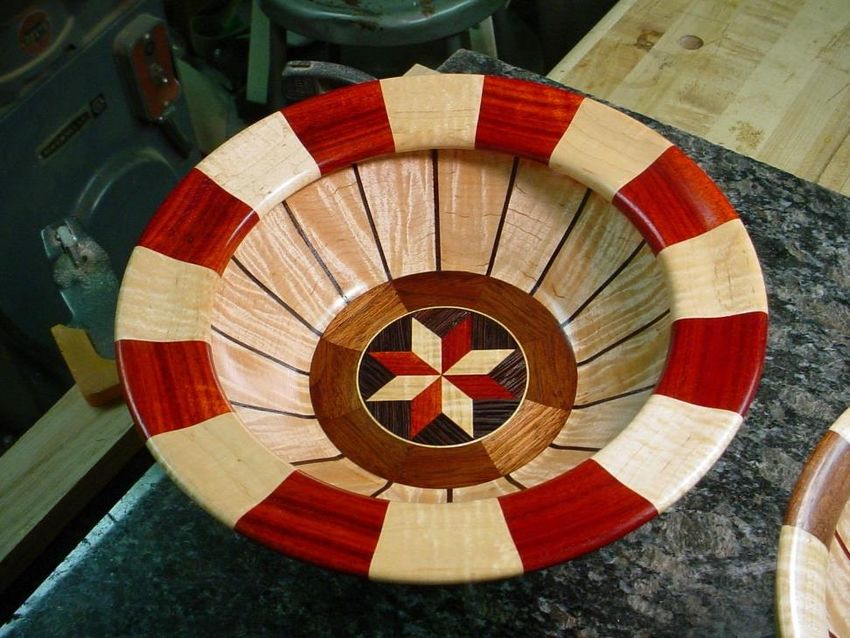
Designing a Stave-Type Segmented Bowl
Drawing Methods: Freehand or Use Drafting tools, AutoCAD, or other Drafting Programs to Assist in
                                      the Design Phase.
 Where can design ideas originate?: Books, the Internet, American Indian Pottery and other local
                                          craftsman.
Kevin Neelley’s Computer Generated Table Saw Miter Angles www.turnededwood.com or email: kevin@turnedwood.com
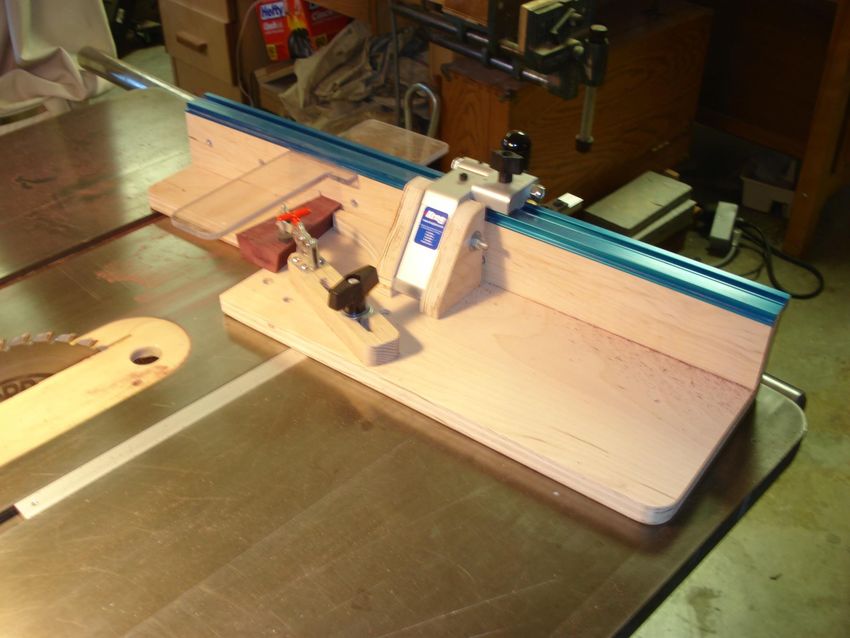
Table Saw Compound Angle Cutting Sled
                 Modifications © to a Kreg Miter Jig (Designer: Jay Helland)

Segment Hold Down Clamp                                     Flip stop

                     4”

                  6”
                                                          2 ¾”

                            24”                                  8”
                                              16”

     A digital “Tilt Box”               Measures to 1/10 degree
      can be used for
    setting blade angle
Checking Angles of Segments
Quarter-Bowl Angle Gauge
No Gaps
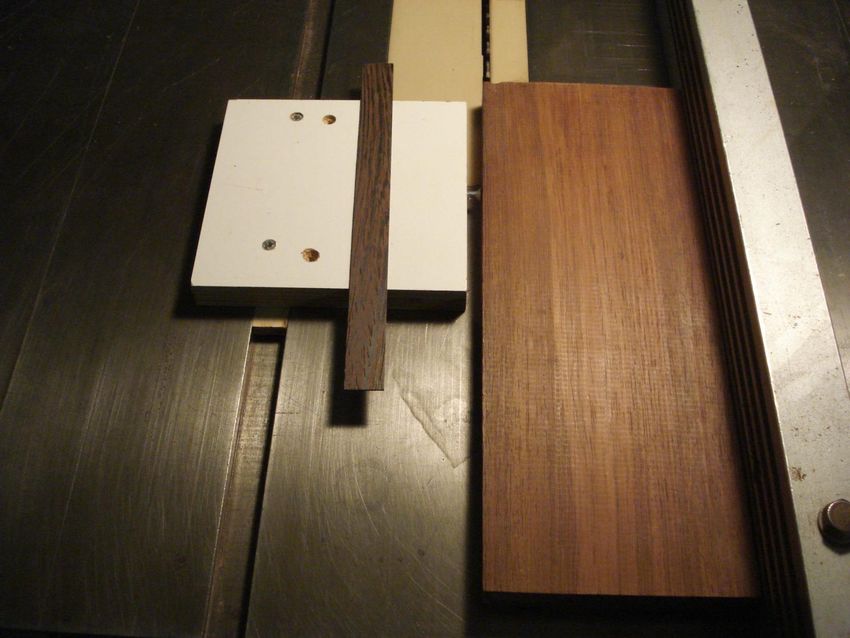
Confirming the Inclusive Angle of ¼ of the VesselCutting Uniform Thickness Accent Strips or Veneer
Distance between Adjustment Screw Head and Outside of Saw Blade Determines the Thickness of
Veneer.
Adjustment ScrewGluing Accent Strips
Bowl Halves ready for sanding on the disc sander. Mark the
ends of the bowl halves with pencil before sanding to provide visual assurance
                       that the halves are sanded flat.

                                                      Mark end with pencil.
Sanding Bowl Halves (click on screen to start video and outside border to stop video) ©
After milling the bottom of the bowl; turn the bowl over
 and mill the top edge so that they are parallel to each
                         other.

          Edge Before Milling
                                      After Milling:
                                      Top Flattened
Draw a Circle the Size of the Bowl’s Large Diameter
Small glue dots about 1/8” to ¼” diameter is all that is needed to glue the

                      bowl to a wooden face plate.
Glue Bowl to Face Plate (10 lbs. of Weight)
Turning Outside of Bowl
This step involves cutting the base flat and then cutting a mortise to receive the tenon cut
 on the base. Use a depth gage or a small adjustable square to check 90 angle between
                                the mortise and the bottom.

                                                                      Tenon on Bowl Base
8 Point Star Layout
Star Medallion Construction Method. Individual pieces
               are cut on the band saw.
Steps For Proper Alignment and Gluing of Bowl Base to Faceplate
Registering or aligning the base on the wooden face plate so that Align the Base on the Face Plate After
it can be glued on center for future turning. Applying Glue
#1 Registration Mark #3
Headstock of Lathe
Live Dead Center
Apply Pressure While Glue Cures
Four or Five 1/8” diameter glue dots will
secure the base to the face plate. Allow
glue to cure before turning.
#4
#2Forming the Tenon on Base
The Segmented Bowl Making Continued:
Process: Gluing and Clamping the Decorative Ring to the Bowl Body
Bowl with top decorative ring is attached to faceplate and mounted
                             in lathe.
Reverse Chucking of Bowl
Purpose: To finish turn the bottom for appearance and so that it won’t
wobble on a flat surface.
Shop-Made Chuck
“ONEWAY” Jumbo ChuckSegmented Bowls
by
Jay S. HellandGeorge “Sonnie” Sharrar
and
Jay S. Helland
Tribute To Sonnie Sharrar
Sonnie Sharrar was my segmented bowl
making mentor. He shared his knowledge
with anyone interested in learning how to
design and construct bowls. In addition,
Sonnie had many friends who also freely
shared their knowledge and expressed
themselves through the medium of wood.
Ruth and Sonnie were married for 64 years
and their home was always a welcome place
to visit.
JSH Sonnie Sharrar and Kevin NeeleyResources • www.turnedwood.com Kevin’s Woodturning • The Art of Segmented Wood Turning by Malcolm Tibbetts • Woodturning with Ray Allen by Dale Nish • Jay Helland H: 525-7193 • Beal Tool Company (Tilt Box & Vernier Protractor) Newark Ohio
Band Saw Sled Measurements

2”

                                          1 3/8”

                       4” Radius

          13 ½”

         Baltic Birch Plywood Base is 14”x14’”
This multi-media educational presentation or its contents shall not
be sold or copied without the written permission from
Jay S. Helland.
Jay S. Helland is not responsible for injuries relating to the
procedures demonstrated or illustrated in this presentation.
Woodworking can be hazardous to your health!
DO NOT ATTEMPT WOODWORKING PROCEDURES OR
PROCESSES THAT YOU DO NOT FEEL
COMFORTABLE DOING!
Bibliography
Seven Habits of Highly Effective People by Stephen Covey, 1989
End of PresentationYou can also read